If you use this template/starter project in any capacity; I'd love to hear about your experience with it. Whether you continued with it or decided not to (I really want to hear why you made your decision).
- Phaser-CE 2.11.1 (npm module, no having to download the library separately...)
- TypeScript + TSLint
- 3 States (Boot, Preloader, Title) showing transition between states and where some things should be done and how a TypeScript state looks
- Google Web Font loader
- Webpack
- Separate Development and Distribution builds
- Live server (builds and reloads the browser on changes)
- No hassle asset management requiring no code, on your part, to load and parse assets
- Assets are required and hashed via webpack, you can now guarantee that when you push an update, everyone will get the new files and not cached ones
- Assets class created automatically allowing you to access all the assets and their frames and sprites (in the case of Atlases and Audiosprites) in a compiler validating way!
- Setting up the game size and scaling through a script that does it all for you
- Automatic template background
- Sets up the size the game so that it is scaled only when absolutely necessary
- Refer to src/utils/utils.ts for an explanation on the background_template and the sizing/scaling style
- Landscape and Portrait support
- Clean up generateAssetsClass.js
- Get Custom/Local Web Fonts hashed by Webpack (to avoid cache issues)
- If anyone has experience webpacking font-face in css style web fonts and loading said fonts via webfontloader, let me know as I was having some trouble getting the font-face src to use the hashed assets.
- Multiple resolution asset loader (@2x, @3x, etc...)
- Yeoman Generator
- Optional Analytics integration
- Optional Cordova integration for iOS and Android builds
- assets/ – This is where your assets that are processed when building goes
- assets_raw/ – This folder is NOT processed at all and is merely an organizational folder (I use it for things like my individual images that get compiled into a spritesheet, individual sounds that get compiled into an audiosprite, etc...)
- dist/ – This is where the built game will go
- node_modules/ – This is where the node modules required for the game will be put with npm install
- scripts/ – This is where node scripts go
- src/ – This is where all the games code goes
- templates/ – This is where the html template that gets built by Webpack goes
- .gitignore – List of files and folders that are ignored by git
- .npmrc – List of some project wide npm settings
- electron-main.js – Entry point and application life controller for electron builds
- package.json – Node config for the project
- README.md – This is the README displayed ont he GitHub page
- README_HEADER.png – This is just the header image for the GitHub README
- tsconfig.json – List of some TypeScript settings
- tslint.json – List of some TypeScript Linting rules
- webpack.dev.config.js – Webpack config for the DEV build
- webpack.dist.config.js – Webpack config for the DIST build
To use this you’ll need to install a few things before you have a working copy of the project. But once you have node.js installed it only takes a few seconds and a couple commands to get going.
GIT Installation Instructions and Links
Download the latest zip/tar.gz from GitHub Releases, extract it to where you want your project to be.
If you want a clean project ready for you to just start your own game and not have to worry about cleaning up the examples and samples from the v1.11.0 release, just download the v1.11.0-fresh release instead.
Navigate into your workspace directory.
Run:
git clone https://github.com/rroylance/phaser-ce-npm-webpack-typescript-starter-project.git
If you want a clean project ready for you to just start your own game and not have to worry about cleaning up the examples and samples from the master branch, just pull the 'fresh-start' branch instead of master.
NodeJS Installation Instructions and Links
Navigate to the cloned repo’s directory.
Run:
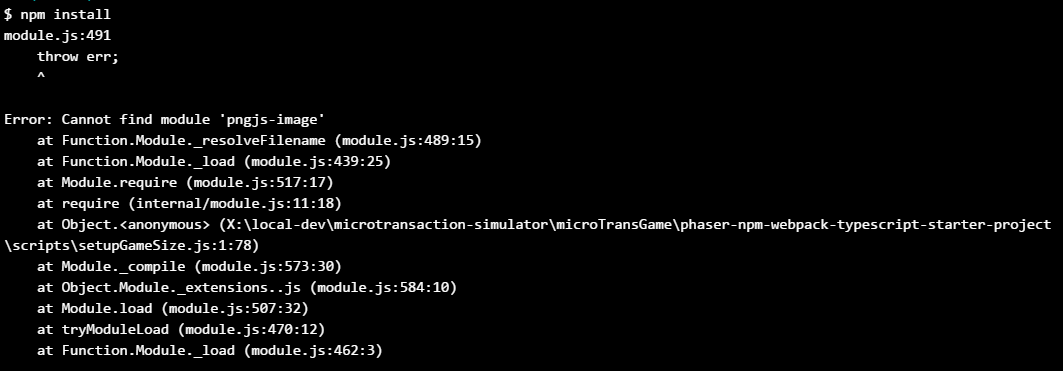
npm install
Run to use the dev build while developing:
npm run server:dev
Run to use the dist build while developing
npm run server:dist
The only real reason I can think of to use the dist server is if the minification process is breaking something in your game and you need to test using the minified version, or something you excluded with the DEBUG flag shouldn't have been excluded.
This will run a server that serves your built game straight to the browser and will be built and reloaded automatically anytime a change is detected.
Run:
npm run build:dev
This will build the game with a few caveats;
- A compile time flag, DEBUG, set to true; allowing you to include or not include certain code depending on if it's DEBUG build or not.
- The resulting game.js will not be minified
Run:
npm run build:dist
This will build the game with a few caveats;
- The compile time flag, DEBUG, set to false; allowing you to include or not include certain code depending on if it's DEBUG build or not.
- The resulting game.min.js will be minified
This project will manage your assets for you! All you need to do is drop your assets in assets/ (subdirectories do not matter) and run (you need to run this manually if you change assets while the server is running, otherwise it's run automatically when running a build);
npm run assets
or (if your dev GOOGLE_WEB_FONTS is different from your dist);
npm run assets:dev
src/assets.ts will be generated which contains sections for all your asset types (the generator is smart enough to distinguish what assets are what !) and classes for every asset, it will also generate an enum containing every frame and sprite in Atlases and AudioSprites respectively!
No need to remember keys, frames, or sprites anymore; which means no more typos resulting in asset not found errors. Just use, for example, Assets.Images.ImagesBackgroundTemplate.getName() or Assets.Audiosprites.AudiospritesSfx.Sprites.Laser1. This also allows the compiler to warn you if you are trying to use an asset that doesn't exist!
The preloader will use this class to load everything, you don't have to do anything in code to get your assets loading and available (except for any assets you need for your loading screen...)!
Currently supports the following (if you need a new extension or find an issue with one of your assets not exporting correctly, just let me know);
- Images:
- bmp, gif, jpg, jpeg, png, webp
- Spritesheets:
- bmp, gif, jpg, jpeg, png, webp
- [frameWidth, frameHeight, frameMax, margin, spacing] - frameWidth & frameHeight are required.
- Example: spritesheet.[100, 100].png
- Atlases:
- bmp, gif, jpg, jpeg, png, webp
- json (the loader figures out if it's a JSONArray or JSONHash, no need to remember or care), xml
- Audio:
- aac, ac3, caf, flac, m4a, mp3, mp4, ogg, wav, webm
- Audiosprites:
- aac, ac3, caf, flac, m4a, mp3, mp4, ogg, wav, webm
- json
- Local Fonts:
- eot, otf, svg, ttf, woff, woff2
- css
- Bitmap Font:
- bmp, gif, jpg, jpeg, png, webp
- xml, fnt
- JSON:
- json
- Tilemap JSON:
- json
- XML:
- xml
- Text:
- txt
- Scripts:
- js
- Shaders:
- frag
Which version of the audio to load is defined in the webpack.dev.config.js and webpack.dist.config.js under the DefinePlugin 'SOUND_EXTENSIONS_PREFERENCE' section;
- Currently I set the order to: webm, ogg, m4a, mp3, aac, ac3, caf, flac, mp4, wav
- The loader will load the audio using this as the preference; the first supported file that is found is used using the order of this list as most preferred to least preferred
Note: This is automatically run after running npm install, however you may want to run it again (if you deleted the background.png and want it back, or if you want to change the game size from the default).
Run:
npm run setupGameSize
This will run a script that will generate a template background showing the safe and decoration area of your game when it is sized or scaled for different devices as well as updating a couple global values in the webpack configs so that the game knows about the new size when built.
If you do not want the default 800 x 500 with this scaling style, run the following and all will be updated.
DO NOT MODIFY THE (DEFAULT or MAX)_GAME_(WIDTH or HEIGHT) OR SCALE_MODE PLUGINS DEFINED IN THE WEBPACK CONFIGS, OR THIS WILL NOT WORK;
Run the following for descriptions and default values for all possible options;
npm run setupGameSize -- -h
Run the following specifying some or all of the options;
npm run setupGameSize -- --width [whatever width you want] --height [whatever height you want] --aspect-ratio [If you want a different default aspect ratio] --scale-mode [one of the Phaser Scale Modes] [--no-png]
The '--' after setupGameSize is not a mistake; it is required to pass arguments along to the script.
You can either provide the width and height (defaults 800 and 500 respectively) and as long as they result in an aspect ratio of what's set in the script or by --aspect-ratio, or you can provide the width or height and the one you didn't provide will be calculated for you using the aspect ratio of what's set in the script or by --aspect-ratio.
Provide --aspect-ratio to change the desired aspect ratio (default 1.6 or 16:10). The script checks to make sure the width and height match the aspect ratio so you get warned early about an incorrect dimension (maximum precision of 3 decimal places).
Providing --scale-mode will set this.game.scale.scaleMode to the corresponding Phaser.ScaleManager.SCALE_MODE (default USER_SCALE).
If you do not want the background to be created just add the flag --no-png (not putting this will let the background generate).
Add your desired Google Web Fonts to the webpack.dev.config.js and/or webpack.dist.config.js in the DefinePlugin 'GOOGLE_WEB_FONTS' section and they will then be loaded and available via Assets.GoogleWebFonts.
Add your desired Custom/Local Web Fonts to your assets folder and they will then be loaded and available via Assets.CustomWebFonts
- The various font files, and the css MUST share the same name
- One CSS file per font
I recommend one of the following generators for generating your font files;
Drop the .js file (or .min.js) of the plugin in the assets/script folder.
Your script(s) will be loaded in the Preloader state with the AssetUtils.Loader.loadAllAssets call.
If you want the typescript support, you need to drop the .d.ts file somewhere (not in assets) and add it to the files array in tsconfig.json.
Here is an example of how to include your plugin in a state:
export default class MyState extends Phaser.State {

    myPlugin: Phaser.Plugin.MyPlugin;

    public preload(): void {
        this.myPlugin = new Phaser.Plugin.MyPlugin(this.game);
        this.game.plugins.add(this.myPlugin as any);
    }
}
Note that I am not, currently, actively using this. So if you do, I'd appreciate if you could pass any changes you make or anything you need out of it. Although I'm not using it, I will still support it as best I can.
You can test your game via Electron by running;
npm run electron:dev
or
npm run electron:dist
To build the dev or dist version of your game, respectively, and then open up your game in an Electron instance.
Note that I am not, currently, actively using this. So if you do, I'd appreciate if you could pass any changes you make or anything you need out of it. Although I'm not using it, I will still support it as best I can.
You can package your game for Windows (win32 ia32/x64), OSX (darwin ia32/x64), Mac App Store (mas ia32/x64), Linux (linux ia32/x64/armv7l) using the following script;
npm run electron:pack:dev
or
npm run electron:pack:dist
To package the dev or dist version of your game, respectively, for the current platform you are on. You can provide many options to build specific platforms, for specific architectures, provide an icon, etc.
Refer to the API Documentation for a full list and details; I'm using it kind of oddly in that I'm using the API from the command line and not the command line version... to provide options appaend ' -- ' to the npm run command and then also append '--' to the option name and then either put the value after a space or '=', either way. Examples;
npm run electron:pack:dist -- --platform win32 --arch=ia32 //32 bit Windows exe
npm run electron:pack:dist -- --platform win32,darwin --arch=ia32,x64 //32 and 64 bit Windows exe and OSX app
All builds will be in the builds/ folder in appropriately named folders.
Note that building for Windows from a non windows device requires a little bit of extra setup; refer to Building Windows apps from non-Windows platforms.
Also note that for OSX / MAS target bundles: the .app bundle can only be signed when building on a host OSX platform.
If you have any issues please let me know via GitHub Issues!
If you have any requests or suggestion for the project please let me know via GitHub Issues!
If you would like to have some of your code included; whether a new feature, a cleaned up feature, a bugfix, or whatever. Please open up a Pull Request!
Author: Enzo Testa
Github Repo: https://github.com/Shrakka/DoublePong
Description: This is Enzo's first game! Well done double pong demo.
Author: Jonathan Grangien
Github Repo: https://github.com/codingInSpace/CoffeeConundrum
Description: Cool little SHMUP. Code looks well done and nice and clean and well thought out. Nice job Jonathan!
Author: ProfitWarning
Github Repo: https://github.com/ProfitWarning/p0ng
Description: Nice 2-player pong clone.
Author: Róbert Girhiny
Github Repo: https://github.com/robcaa/great-run
Description: Nice Dora The Explorer themed platformer/runner for kids.
 Game: Take Back the Colors
Author: j3soon
Github Repo: https://github.com/j3soon/TakeBackTheColors
Description: 2D platformer game with swinging ability.
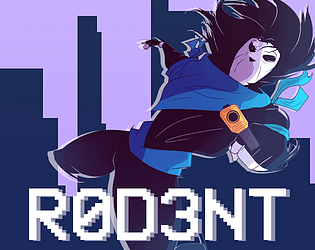
Author: tuskat
Github Repo: https://github.com/tuskat/R0d3nt
Description: Futur1st1c P3st C0ntr0l

![dependabot[bot] avatar](https://avatars.githubusercontent.com/in/29110?v=4 "dependabot[bot]")


