xiongyibo / cut Goto Github PK
View Code? Open in Web Editor NEWcut
cut

[
如果create-react-app有一个包含TypeScript的选项,这将会使你得到:React + TypeScript的完美起点。
React Redux Webpack Enzyme Jest
](https://github.com/Microsoft/TypeScript-React-Starter#typescript-react-starter)
[
Angular团队建议在所有的Angular项目中使用TypeScript。查看教程开始使用。
Angular Protractor Jasmine Karma Rollup Uglify TSLint
](https://angular.io/docs/ts/latest/quickstart.html)
[
查看这个使用Express + MongoDB + TypeScript的新手项目,以了解为什么说TypeScript和Node.js是完美的组合。
Node.js Express Pug Jest TSLint MongoDB Travis CI
](https://github.com/Microsoft/TypeScript-Node-Starter#typescript-node-starter)
[
在已有使用Babel 7及更高版本的项目中利用TypeScript进行类型检查。
Babel
](https://github.com/Microsoft/TypeScript-Babel-Starter#readme)
[
React Native将JavaScript带到移动设备,TypeScript将生产力持续保持。
React Native Enzyme Jest
](https://github.com/Microsoft/TypeScript-React-Native-Starter#typescript-react-native-starter)
[
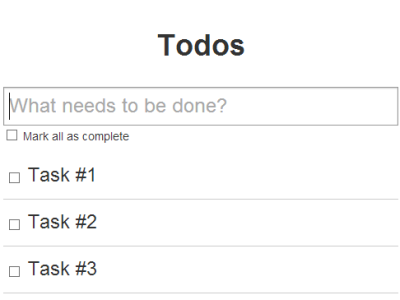
查看这个使用Vue.js和TypeScript的TodoMVC应用。
Vue.js Webpack
](https://github.com/Microsoft/TypeScript-Vue-Starter#typescript-vue-starter)
[
此入门指南将让你快速在Visual Studio中使用ASP.NET Core和TypeScript.
ASP.NET Gulp Angular
](https://www.tslang.cn/docs/handbook/asp-net-core.html)
[
Glimmer是来自Ember生态的轻量级组件库,支持TypeScript开箱即用。
Glimmer
](https://glimmerjs.com/guides/installing)
[
从此入门指南开始使用TypeScript构建微信小程序。立刻尝试!
WeChat Node.js Express EJS
](https://github.com/Microsoft/TypeScript-WeChat-Starter#%E5%BC%80%E5%A7%8B%E4%B9%8B%E5%89%8D)
[
Dojo 2是由Dojo工具包进化而来的,并且完全使用了TypeScript重写。快速起步!
Dojo 2 Intern
](https://dojo.io/tutorials/002_creating_an_application/)
[
Knockout是一个MVVM模式的JavaScript框架,结合TypeScript一起使用非常棒。点击查看快速入门指南。
Knockout
](https://github.com/Microsoft/TypeScript-Knockout-Starter#typescript-knockout-starter)
[
已经有代码库了?查看该指南以了解转换为TypeScript的逐步演示。
](https://github.com/Microsoft/TypeScript-React-Conversion-Guide#typescript-react-conversion-guide)
[
军舰战争、光线追踪器等更多的社区贡献案例可以在这里找到。
传统的JavaScript程序使用函数和基于原型的继承来创建可重用的组件,但对于熟悉使用面向对象方式的程序员来讲就有些棘手,因为他们用的是基于类的继承并且对象是由类构建出来的。 从ECMAScript 2015,也就是ECMAScript 6开始,JavaScript程序员将能够使用基于类的面向对象的方式。 使用TypeScript,我们允许开发者现在就使用这些特性,并且编译后的JavaScript可以在所有主流浏览器和平台上运行,而不需要等到下个JavaScript版本。
下面看一个使用类的例子:
class Greeter {
    greeting: string;
    constructor(message: string) {
        this.greeting = message;
    }
    greet() {
        return "Hello, " + this.greeting;
    }
}

let greeter = new Greeter("world");
如果你使用过C#或Java,你会对这种语法非常熟悉。 我们声明一个 Greeter类。这个类有3个成员:一个叫做 greeting的属性,一个构造函数和一个 greet方法。
你会注意到,我们在引用任何一个类成员的时候都用了 this。 它表示我们访问的是类的成员。
最后一行,我们使用 new构造了 Greeter类的一个实例。 它会调用之前定义的构造函数,创建一个 Greeter类型的新对象,并执行构造函数初始化它。
在TypeScript里,我们可以使用常用的面向对象模式。 基于类的程序设计中一种最基本的模式是允许使用继承来扩展现有的类。
看下面的例子:
class Animal {
    move(distanceInMeters: number = 0) {
        console.log(`Animal moved ${distanceInMeters}m.`);
    }
}

class Dog extends Animal {
    bark() {
        console.log('Woof! Woof!');
    }
}

const dog = new Dog();
dog.bark();
dog.move(10);
dog.bark();
这个例子展示了最基本的继承:类从基类中继承了属性和方法。 这里, Dog是一个 派生类,它派生自 Animal 基类,通过 extends关键字。 派生类通常被称作 子类,基类通常被称作 超类。
因为 Dog继承了 Animal的功能,因此我们可以创建一个 Dog的实例,它能够 bark()和 move()。
下面我们来看个更加复杂的例子。
class Animal {
    name: string;
    constructor(theName: string) { this.name = theName; }
    move(distanceInMeters: number = 0) {
        console.log(`${this.name} moved ${distanceInMeters}m.`);
    }
}

class Snake extends Animal {
    constructor(name: string) { super(name); }
    move(distanceInMeters = 5) {
        console.log("Slithering...");
        super.move(distanceInMeters);
    }
}

class Horse extends Animal {
    constructor(name: string) { super(name); }
    move(distanceInMeters = 45) {
        console.log("Galloping...");
        super.move(distanceInMeters);
    }
}

let sam = new Snake("Sammy the Python");
let tom: Animal = new Horse("Tommy the Palomino");

sam.move();
tom.move(34);
这个例子展示了一些上面没有提到的特性。 这一次,我们使用 extends关键字创建了 Animal的两个子类: Horse和 Snake。
与前一个例子的不同点是,派生类包含了一个构造函数,它 _必须_调用 super(),它会执行基类的构造函数。 而且,在构造函数里访问 this的属性之前,我们 _一定_要调用 super()。 这个是TypeScript强制执行的一条重要规则。
这个例子演示了如何在子类里可以重写父类的方法。 Snake类和 Horse类都创建了 move方法,它们重写了从 Animal继承来的 move方法,使得 move方法根据不同的类而具有不同的功能。 注意,即使 tom被声明为 Animal类型,但因为它的值是 Horse,调用 tom.move(34)时,它会调用 Horse里重写的方法:
Slithering...
Sammy the Python moved 5m.
Galloping...
Tommy the Palomino moved 34m.
public在上面的例子里,我们可以自由的访问程序里定义的成员。 如果你对其它语言中的类比较了解,就会注意到我们在之前的代码里并没有使用 public来做修饰;例如,C#要求必须明确地使用 public指定成员是可见的。 在TypeScript里,成员都默认为 public。
你也可以明确的将一个成员标记成 public。 我们可以用下面的方式来重写上面的 Animal类:
class Animal {
    public name: string;
    public constructor(theName: string) { this.name = theName; }
    public move(distanceInMeters: number) {
        console.log(`${this.name} moved ${distanceInMeters}m.`);
    }
}
private当成员被标记成 private时,它就不能在声明它的类的外部访问。比如:
class Animal {
    private name: string;
    constructor(theName: string) { this.name = theName; }
}

new Animal("Cat").name;
TypeScript使用的是结构性类型系统。 当我们比较两种不同的类型时,并不在乎它们从何处而来,如果所有成员的类型都是兼容的,我们就认为它们的类型是兼容的。
然而,当我们比较带有 private或 protected成员的类型的时候,情况就不同了。 如果其中一个类型里包含一个 private成员,那么只有当另外一个类型中也存在这样一个 private成员, 并且它们都是来自同一处声明时,我们才认为这两个类型是兼容的。 对于 protected成员也使用这个规则。
下面来看一个例子,更好地说明了这一点:
class Animal {
    private name: string;
    constructor(theName: string) { this.name = theName; }
}

class Rhino extends Animal {
    constructor() { super("Rhino"); }
}

class Employee {
    private name: string;
    constructor(theName: string) { this.name = theName; }
}

let animal = new Animal("Goat");
let rhino = new Rhino();
let employee = new Employee("Bob");

animal = rhino;
animal = employee;
这个例子中有 Animal和 Rhino两个类, Rhino是 Animal类的子类。 还有一个 Employee类,其类型看上去与 Animal是相同的。 我们创建了几个这些类的实例,并相互赋值来看看会发生什么。 因为 Animal和 Rhino共享了来自 Animal里的私有成员定义 private name: string,因此它们是兼容的。 然而 Employee却不是这样。当把 Employee赋值给 Animal的时候,得到一个错误,说它们的类型不兼容。 尽管 Employee里也有一个私有成员 name,但它明显不是 Animal里面定义的那个。
protectedprotected修饰符与 private修饰符的行为很相似,但有一点不同, protected成员在派生类中仍然可以访问。例如:
class Person {
    protected name: string;
    constructor(name: string) { this.name = name; }
}

class Employee extends Person {
    private department: string;

    constructor(name: string, department: string) {
        super(name)
        this.department = department;
    }

    public getElevatorPitch() {
        return `Hello, my name is ${this.name} and I work in ${this.department}.`;
    }
}

let howard = new Employee("Howard", "Sales");
console.log(howard.getElevatorPitch());
console.log(howard.name);
注意,我们不能在 Person类外使用 name,但是我们仍然可以通过 Employee类的实例方法访问,因为 Employee是由 Person派生而来的。
构造函数也可以被标记成 protected。 这意味着这个类不能在包含它的类外被实例化,但是能被继承。比如,
class Person {
    protected name: string;
    protected constructor(theName: string) { this.name = theName; }
}


class Employee extends Person {
    private department: string;

    constructor(name: string, department: string) {
        super(name);
        this.department = department;
    }

    public getElevatorPitch() {
        return `Hello, my name is ${this.name} and I work in ${this.department}.`;
    }
}

let howard = new Employee("Howard", "Sales");
let john = new Person("John");
你可以使用 readonly关键字将属性设置为只读的。 只读属性必须在声明时或构造函数里被初始化。
class Octopus {
    readonly name: string;
    readonly numberOfLegs: number = 8;
    constructor (theName: string) {
        this.name = theName;
    }
}
let dad = new Octopus("Man with the 8 strong legs");
dad.name = "Man with the 3-piece suit";
在上面的例子中,我们必须在Octopus类里定义一个只读成员 name和一个参数为 theName的构造函数,并且立刻将 theName的值赋给 name,这种情况经常会遇到。 _参数属性_可以方便地让我们在一个地方定义并初始化一个成员。 下面的例子是对之前 Octopus类的修改版,使用了参数属性:
class Octopus {
    readonly numberOfLegs: number = 8;
    constructor(readonly name: string) {
    }
}
注意看我们是如何舍弃了 theName,仅在构造函数里使用 readonly name: string参数来创建和初始化 name成员。 我们把声明和赋值合并至一处。
参数属性通过给构造函数参数前面添加一个访问限定符来声明。 使用 private限定一个参数属性会声明并初始化一个私有成员;对于 public和 protected来说也是一样。
TypeScript支持通过getters/setters来截取对对象成员的访问。 它能帮助你有效的控制对对象成员的访问。
下面来看如何把一个简单的类改写成使用 get和 set。 首先,我们从一个没有使用存取器的例子开始。
class Employee {
    fullName: string;
}

let employee = new Employee();
employee.fullName = "Bob Smith";
if (employee.fullName) {
    console.log(employee.fullName);
}
我们可以随意的设置 fullName,这是非常方便的,但是这也可能会带来麻烦。
下面这个版本里,我们先检查用户密码是否正确,然后再允许其修改员工信息。 我们把对 fullName的直接访问改成了可以检查密码的 set方法。 我们也加了一个 get方法,让上面的例子仍然可以工作。
let passcode = "secret passcode";

class Employee {
    private _fullName: string;

    get fullName(): string {
        return this._fullName;
    }

    set fullName(newName: string) {
        if (passcode && passcode == "secret passcode") {
            this._fullName = newName;
        }
        else {
            console.log("Error: Unauthorized update of employee!");
        }
    }
}

let employee = new Employee();
employee.fullName = "Bob Smith";
if (employee.fullName) {
    alert(employee.fullName);
}
我们可以修改一下密码,来验证一下存取器是否是工作的。当密码不对时,会提示我们没有权限去修改员工。
对于存取器有下面几点需要注意的:
首先,存取器要求你将编译器设置为输出ECMAScript 5或更高。 不支持降级到ECMAScript 3。 其次,只带有 get不带有 set的存取器自动被推断为 readonly。 这在从代码生成 .d.ts文件时是有帮助的,因为利用这个属性的用户会看到不允许够改变它的值。
到目前为止,我们只讨论了类的实例成员,那些仅当类被实例化的时候才会被初始化的属性。 我们也可以创建类的静态成员,这些属性存在于类本身上面而不是类的实例上。 在这个例子里,我们使用 static定义 origin,因为它是所有网格都会用到的属性。 每个实例想要访问这个属性的时候,都要在 origin前面加上类名。 如同在实例属性上使用 this.前缀来访问属性一样,这里我们使用 Grid.来访问静态属性。
class Grid {
    static origin = {x: 0, y: 0};
    calculateDistanceFromOrigin(point: {x: number; y: number;}) {
        let xDist = (point.x - Grid.origin.x);
        let yDist = (point.y - Grid.origin.y);
        return Math.sqrt(xDist * xDist + yDist * yDist) / this.scale;
    }
    constructor (public scale: number) { }
}

let grid1 = new Grid(1.0);
let grid2 = new Grid(5.0);

console.log(grid1.calculateDistanceFromOrigin({x: 10, y: 10}));
console.log(grid2.calculateDistanceFromOrigin({x: 10, y: 10}));
抽象类做为其它派生类的基类使用。 它们一般不会直接被实例化。 不同于接口,抽象类可以包含成员的实现细节。 abstract关键字是用于定义抽象类和在抽象类内部定义抽象方法。
abstract class Animal {
    abstract makeSound(): void;
    move(): void {
        console.log('roaming the earch...');
    }
}
抽象类中的抽象方法不包含具体实现并且必须在派生类中实现。 抽象方法的语法与接口方法相似。 两者都是定义方法签名但不包含方法体。 然而,抽象方法必须包含 abstract关键字并且可以包含访问修饰符。
abstract class Department {

    constructor(public name: string) {
    }

    printName(): void {
        console.log('Department name: ' + this.name);
    }

    abstract printMeeting(): void;
}

class AccountingDepartment extends Department {

    constructor() {
        super('Accounting and Auditing');
    }

    printMeeting(): void {
        console.log('The Accounting Department meets each Monday at 10am.');
    }

    generateReports(): void {
        console.log('Generating accounting reports...');
    }
}

let department: Department;
department = new Department();
department = new AccountingDepartment();
department.printName();
department.printMeeting();
department.generateReports();
当你在TypeScript里声明了一个类的时候,实际上同时声明了很多东西。 首先就是类的 _实例_的类型。
class Greeter {
    greeting: string;
    constructor(message: string) {
        this.greeting = message;
    }
    greet() {
        return "Hello, " + this.greeting;
    }
}

let greeter: Greeter;
greeter = new Greeter("world");
console.log(greeter.greet());
这里,我们写了 let greeter: Greeter,意思是 Greeter类的实例的类型是 Greeter。 这对于用过其它面向对象语言的程序员来讲已经是老习惯了。
我们也创建了一个叫做 _构造函数_的值。 这个函数会在我们使用 new创建类实例的时候被调用。 下面我们来看看,上面的代码被编译成JavaScript后是什么样子的:
let Greeter = (function () {
    function Greeter(message) {
        this.greeting = message;
    }
    Greeter.prototype.greet = function () {
        return "Hello, " + this.greeting;
    };
    return Greeter;
})();

let greeter;
greeter = new Greeter("world");
console.log(greeter.greet());
上面的代码里, let Greeter将被赋值为构造函数。 当我们调用 new并执行了这个函数后,便会得到一个类的实例。 这个构造函数也包含了类的所有静态属性。 换个角度说,我们可以认为类具有 _实例部分_与 _静态部分_这两个部分。
让我们稍微改写一下这个例子,看看它们之间的区别:
class Greeter {
    static standardGreeting = "Hello, there";
    greeting: string;
    greet() {
        if (this.greeting) {
            return "Hello, " + this.greeting;
        }
        else {
            return Greeter.standardGreeting;
        }
    }
}

let greeter1: Greeter;
greeter1 = new Greeter();
console.log(greeter1.greet());

let greeterMaker: typeof Greeter = Greeter;
greeterMaker.standardGreeting = "Hey there!";

let greeter2: Greeter = new greeterMaker();
console.log(greeter2.greet());
这个例子里, greeter1与之前看到的一样。 我们实例化 Greeter类,并使用这个对象。 与我们之前看到的一样。
再之后,我们直接使用类。 我们创建了一个叫做 greeterMaker的变量。 这个变量保存了这个类或者说保存了类构造函数。 然后我们使用 typeof Greeter,意思是取Greeter类的类型,而不是实例的类型。 或者更确切的说,"告诉我 Greeter标识符的类型",也就是构造函数的类型。 这个类型包含了类的所有静态成员和构造函数。 之后,就和前面一样,我们在 greeterMaker上使用 new,创建 Greeter的实例。
如上一节里所讲的,类定义会创建两个东西:类的实例类型和一个构造函数。 因为类可以创建出类型,所以你能够在允许使用接口的地方使用类。
class Point {
    x: number;
    y: number;
}

interface Point3d extends Point {
    z: number;
}

let point3d: Point3d = {x: 1, y: 2, z: 3};
初级教程 - 《Redux-saga 中文文档》 - 书栈网(BookStack.CN)
阅读 487 扫码阅读 分享给好友 更新 2018-02-17 09:56:57
本教程尝试用一种易于接受的方式(希望如此)来介绍 redux-saga。
我们将使用 Redux 仓库那个很小的计数器例子作为我们的入门教程。
这个应用比较简单,但是非常适合用来演示说明 redux-saga 的基本概念,不至于迷失在过多的细节里。
在我们开始前,需要先 clone 这个仓库:
https://github.com/yelouafi/redux-saga-beginner-tutorial
此教程最终的代码位于 sagas 分支
然后在命令行输入:
复制代码
cd redux-saga-beginner-tutorialnpm install接着启动应用:
复制代码
npm start我们先从最简单的用例开始:2 个按钮 增加(Increment) 和 减少(Decrement) 计数。之后我们将介绍异步调用。
不出意外的话,你应该能看到 2 个按钮 Increment 和 Decrement,以及按钮下方 Counter : 0 的文字。
如果你在运行这个应用的时候遇到问题,可随时在这个教程的仓库上创建 issue
https://github.com/yelouafi/redux-saga-beginner-tutorial/issues
接下来将创建我们的第一个 Saga。按照传统,我们将编写一个 Sagas 版本的 ‘Hello, world’。
创建一个 sagas.js 的文件,然后添加以下代码片段:
复制代码
export function* helloSaga() {console.log('Hello Sagas!');}所以并没有什么吓人的东西,只是一个很普通的功能(好吧,除了 *)。这段代码的作用是打印一句问候消息到控制台。
为了运行我们的 Saga,我们需要:
helloSaga)我们修改一下 main.js:
复制代码
// ...
import { createStore, applyMiddleware } from 'redux'
import createSagaMiddleware from 'redux-saga'
//...
import { helloSaga } from './sagas'
const store = createStore(
reducer,
applyMiddleware(createSagaMiddleware(helloSaga))
)
// rest unchanged
首先我们引入 ./sagas 模块中的 Saga。然后使用 redux-saga 模块的 createSagaMiddleware 工厂函数来创建一个 Saga middleware。
createSagaMiddleware 接受 Sagas 列表,这些 Sagas 将会通过创建的 middleware 被立即执行。
到目前为止,我们的 Saga 并没做什么特别的事情。它只是打印了一条消息,然后退出。
现在我们来添加一些更接近原始计数器例子的东西。为了演示异步调用,我们将添加另外一个按钮,用于点击后 1 秒增加计数。
首先,我们需要提供一个额外的回调 onIncrementAsync。
复制代码
const Counter = ({ value, onIncrement, onDecrement, onIncrementAsync }) =><div>...{' '}<button onClick={onIncrementAsync}>Increment after 1 second</button><hr /><div>Clicked: {value} times</div></div>接下来我们需要使 onIncrementAsync 与 Store action 联系起来。
修改 main.js 模块:
复制代码
function render() {ReactDOM.render(<Counter...onIncrementAsync={() => action('INCREMENT_ASYNC')}/>,document.getElementById('root'))}注意,与 redux-thunk 不同,上面组件发起的是一个普通对象格式的 action。
现在我们将介绍另一种执行异步调用的 Saga。我们的用例如下:
在每个
INCREMENT_ASYNCaction 发起后,我们需要启动一个做以下事情的任务:
- 等待 1 秒,然后增加计数
添加以下代码到 sagas.js 模块:
复制代码
import { takeEvery } from 'redux-saga'
import { put } from 'redux-saga/effects'
// 一个工具函数:返回一个 Promise,这个 Promise 将在 1 秒后 resolve
export const delay = ms => new Promise(resolve => setTimeout(resolve, ms))
// Our worker Saga: 将异步执行 increment 任务
export function* incrementAsync() {
yield delay(1000)
yield put({ type: 'INCREMENT' })
}
// Our watcher Saga: 在每个 INCREMENT_ASYNC action 调用后,派生一个新的 incrementAsync 任务
export function* watchIncrementAsync() {
yield* takeEvery('INCREMENT_ASYNC', incrementAsync)
}
好吧,该解释一下了。首先我们创建一个工具函数 delay,用于返回一个延迟 1 秒再 resolve 的 Promise。
我们将使用这个函数去 阻塞 Generator。
Sagas 被实现为 Generator 函数,它 yield 对象到 redux-saga middleware。
被 yield 的对象都是一类指令,指令可被 middleware 解释执行。当 middleware 取得一个 yield 后的 Promise,middleware 会暂停 Saga,直到 Promise 完成。
在上面的例子中,incrementAsync 这个 Saga 会暂停直到 delay 返回的 Promise 被 resolve,这个 Promise 将在 1 秒后 resolve。
一旦 Promise 被 resolve,middleware 会恢复 Saga 去执行下一个语句(更准确地说是执行下面所有的语句,直到下一个 yield)。
在我们的情况里,下一个语句是另一个 yield 后的对象:调用 put({type: 'INCREMENT'}) 的结果。
意思是 Saga 指示 middleware 发起一个 INCREMENT 的 action。
put 就是我们所说的一个调用 Effect 的例子。Effect 是一些简单 Javascript 对象,对象包含了要被 middleware 执行的指令。
当 middleware 拿到一个被 Saga yield 后的 Effect,它会暂停 Saga,直到 Effect 执行完成,然后 Saga 会再次被恢复。
总结一下,incrementAsync Saga 通过 delay(1000) 延迟了 1 秒钟,然后发起了一个 INCREMENT 的 action。
接下来,我们创建了另一个 Saga watchIncrementAsync。这个 Saga 将监听所有发起的 INCREMENT_ASYNC action,并在每次 action 被匹配时派生一个新的 incrementAsync 任务。
为了实现这个目的,我们使用一个辅助函数 takeEvery 来执行以上的处理过程。
在我们开始这个应用之前,我们需要将 watchIncrementAsync 这个 Saga 连接至 Store:
复制代码
//...
import { helloSaga, watchIncrementAsync } from './sagas'
const store = createStore(
reducer,
applyMiddleware(createSagaMiddleware(helloSaga, watchIncrementAsync))
)
//...
注意我们不需要连接 incrementAsync 这个 Saga,因为它会在每次 INCREMENT_ASYNC action 发起时被 watchIncrementAsync 动态启动。
我们希望测试 incrementAsync Saga,以此保证它执行期望的任务。
创建另一个文件 saga.spec.js:
复制代码
import test from 'tape';
import { incrementAsync } from './sagas'
test('incrementAsync Saga test', (assert) => {
const gen = incrementAsync()
// now what ?
});
由于 incrementAsync 是一个 Generator 函数,当我们在 middleware 之外运行它,每次调用 generator 的 next,你将得到一个以下结构的对象:
复制代码
gen.next() // => { done: boolean, value: any }value 字段包含 yield 后的表达式,即 yield 后面那个表达式的结果。done 字段指示 generator 是结束了,还是有更多的 yield 表达式。
在 incrementAsync 的例子中,generator 连续 yield 了两个值:
yield delay(1000)yield put({type: 'INCREMENT'})所以,如果我们连续 3 次调用 generator 的 next 方法,我们会得到以下结果:
复制代码
gen.next() // => { done: false, value: <result of calling delay(1000)> }gen.next() // => { done: false, value: <result of calling put({type: 'INCREMENT'})> }gen.next() // => { done: true, value: undefined }前两次调用返回了 yield 表达式的结果。第三次调用由于没有更多的 yield 了,所以 done 字段被设置为 true。
并且由于 incrementAsync Generator 未返回任何东西(没有 return 语句),所以 value 字段被设置为 undefined。
所以现在,为了测试 incrementAsync 里面的逻辑,我们需要对返回的 Generator 进行简单地迭代并检查 Generator yield 后的值。
复制代码
import test from 'tape';
import { incrementAsync } from '../src/sagas'
test('incrementAsync Saga test', (assert) => {
const gen = incrementAsync()
assert.deepEqual(
gen.next().value,
{ done: false, value: ??? },
'incrementAsync should return a Promise that will resolve after 1 second'
)
});
问题是我们如何测试 delay 的返回值?我们不能在 Promise 之间做简单的相等测试。如果 delay 返回的是一个 普通(normal) 的值,
事情将会变得很简单。
好吧,redux-saga 提供了一种方式,让上面的语句变得可能。与在 incrementAsync 中直接调用 delay(1000) 不同,我们叫它 间接(indirectly
复制代码
//...
import { put, call } from 'redux-saga/effects'
export const delay = ms => new Promise(resolve => setTimeout(resolve, ms))
export function* incrementAsync() {
// use the call Effect
yield call(delay, 1000)
yield put({ type: 'INCREMENT' })
}
我们现在做的是 yield call(delay, 1000) 而不是 yield delay(1000),所以有何不同?
在 yield delay(1000) 的情况下,yield 后的表达式 delay(1000) 在被传递给 next 的调用者之前就被执行了(当运行我们的代码时,调用者可能是 middleware。
也有可能是运行 Generator 函数并对返回的 Generator 进行迭代的测试代码)。所以调用者得到的是一个 Promise,像在以上的测试代码里一样。
在 yield call(delay, 1000) 的情况下,yield 后的表达式 call(delay, 1000) 被传递给 next 的调用者。call 就像 put,
返回一个指示 middleware 以给定参数调用给定的函数的 Effect。
复制代码
put({type: 'INCREMENT'}) // => { PUT: {type: 'INCREMENT'} }call(delay, 1000) // => { CALL: {fn: delay, args: [1000]}}这里发生的情况是:middleware 检查每个 yield Effect 的类型,然后决定如何实现那个 Effect。如果 Effect 类型是 PUT 那 middleware 会发起一个 action 到 Store。
如果 Effect 类型是 CALL 那么它会调用给定的函数。
这种把 Effect 创建和 Effect 执行之间分开的做法,使得我们以一种令人惊讶的简单方法去测试 Generator 成为可能。
复制代码
import test from 'tape';
import { put, call } from 'redux-saga/effects'
import { incrementAsync, delay } from './sagas'
test('incrementAsync Saga test', (assert) => {
const gen = incrementAsync()
assert.deepEqual(
gen.next().value,
call(delay, 1000),
'incrementAsync Saga must call delay(1000)'
)
assert.deepEqual(
gen.next().value,
put({type: 'INCREMENT'}),
'incrementAsync Saga must dispatch an INCREMENT action'
)
assert.deepEqual(
gen.next(),
{ done: true, value: undefined },
'incrementAsync Saga must be done'
)
assert.end()
});
由于 put 和 call 返回文本对象,所以我们可以在测试代码中重复使用同样的函数。为了测试 incrementAsync 的逻辑,
我们可以简单地遍历 generator 并对它的值做 deepEqual 测试。
为了运行上面的测试代码,我们需要输入:
复制代码
npm test测试结果会显示在控制面板上。
上一篇:介绍
下一篇:Saga 的背景
![]()
![]()
![]()
暂无相关搜索结果!
本文档使用 书栈(BookStack.CN) 构建
×
取消分享
×
手机扫一扫,轻松掌上读
关闭
×
请下载您需要的格式的文档,随时随地,享受汲取知识的乐趣!
关闭窗口
×
关闭
×
阅读进度: 0.00% ( 0/0 ) 重置阅读进度
关闭
什么是turndown,A library that converts HTML to Markdown
Convert HTML into Markdown with JavaScript.
npm:
npm install turndown
Browser:
<script src="https://unpkg.com/turndown/dist/turndown.js"></script>
For usage with RequireJS, UMD versions are located in lib/turndown.umd.js (for Node.js) and lib/turndown.browser.umd.js for browser usage. These files are generated when the npm package is published. To generate them manually, clone this repo and run npm run build.
// For Node.js
var TurndownService = require('turndown')

var turndownService = new TurndownService()
var markdown = turndownService.turndown('<h1>Hello world!</h1>')
Turndown also accepts DOM nodes as input (either element nodes, document nodes, or document fragment nodes):
var markdown = turndownService.turndown(document.getElementById('content'))
Options can be passed in to the constructor on instantiation. For example:
var turndownService = new TurndownService({ option: 'value' })
Option
Valid values
Default
headingStyle
setext or atx
setext
hr
Any Thematic break
* * *
bulletListMarker
-, +, or *
*
codeBlockStyle
indented or fenced
indented
fence
or `~~~` |
emDelimiter
_ or *
_
strongDelimiter
** or __
**
linkStyle
inlined or referenced
inlined
linkReferenceStyle
full, collapsed, or shortcut
full
Option
Valid values
Default
blankReplacement
rule replacement function
See Special Rules below
keepReplacement
rule replacement function
See Special Rules below
defaultReplacement
rule replacement function
See Special Rules below
addRule(key, rule)The key parameter is a unique name for the rule for easy reference. Example:
turndownService.addRule('strikethrough', {
  filter: ['del', 's', 'strike'],
  replacement: function (content) {
    return '~' + content + '~'
  }
})
addRule returns the TurndownService instance for chaining.
See Extending with Rules below.
keep(filter)Determines which elements are to be kept and rendered as HTML. By default, Turndown does not keep any elements. The filter parameter works like a rule filter (see section on filters belows). Example:
turndownService.keep(['del', 'ins'])
turndownService.turndown('<p>Hello <del>world</del><ins>World</ins></p>') // 'Hello <del>world</del><ins>World</ins>'
This will render <del> and <ins> elements as HTML when converted.
keep can be called multiple times, with the newly added keep filters taking precedence over older ones. Keep filters will be overridden by the standard CommonMark rules and any added rules. To keep elements that are normally handled by those rules, add a rule with the desired behaviour.
keep returns the TurndownService instance for chaining.
remove(filter)Determines which elements are to be removed altogether i.e. converted to an empty string. By default, Turndown does not remove any elements. The filter parameter works like a rule filter (see section on filters belows). Example:
turndownService.remove('del')
turndownService.turndown('<p>Hello <del>world</del><ins>World</ins></p>') // 'Hello World'
This will remove <del> elements (and contents).
remove can be called multiple times, with the newly added remove filters taking precedence over older ones. Remove filters will be overridden by the keep filters, standard CommonMark rules, and any added rules. To remove elements that are normally handled by those rules, add a rule with the desired behaviour.
remove returns the TurndownService instance for chaining.
use(plugin|array)Use a plugin, or an array of plugins. Example:
// Import plugins from turndown-plugin-gfm
var turndownPluginGfm = require('turndown-plugin-gfm')
var gfm = turndownPluginGfm.gfm
var tables = turndownPluginGfm.tables
var strikethrough = turndownPluginGfm.strikethrough

// Use the gfm plugin
turndownService.use(gfm)

// Use the table and strikethrough plugins only
turndownService.use([tables, strikethrough])
use returns the TurndownService instance for chaining.
See Plugins below.
Turndown can be extended by adding rules. A rule is a plain JavaScript object with filter and replacement properties. For example, the rule for converting <p> elements is as follows:
{
  filter: 'p',
  replacement: function (content) {
    return '\n\n' + content + '\n\n'
  }
}
The filter selects <p> elements, and the replacement function returns the <p> contents separated by two new lines.
filter String|Array|FunctionThe filter property determines whether or not an element should be replaced with the rule’s replacement. DOM nodes can be selected simply using a tag name or an array of tag names:
filter: 'p' will select <p> elementsfilter: ['em', 'i'] will select <em> or <i> elementsAlternatively, the filter can be a function that returns a boolean depending on whether a given node should be replaced. The function is passed a DOM node as well as the TurndownService options. For example, the following rule selects <a> elements (with an href) when the linkStyle option is inlined:
filter: function (node, options) {
  return (
    options.linkStyle === 'inlined' &&
    node.nodeName === 'A' &&
    node.getAttribute('href')
  )
}
replacement FunctionThe replacement function determines how an element should be converted. It should return the Markdown string for a given node. The function is passed the node’s content, the node itself, and the TurndownService options.
The following rule shows how <em> elements are converted:
rules.emphasis = {
  filter: ['em', 'i'],

  replacement: function (content, node, options) {
    return options.emDelimiter + content + options.emDelimiter
  }
}
Blank rule determines how to handle blank elements. It overrides every rule (even those added via addRule). A node is blank if it only contains whitespace, and it’s not an <a>, <td>,<th> or a void element. Its behaviour can be customised using the blankReplacement option.
Keep rules determine how to handle the elements that should not be converted, i.e. rendered as HTML in the Markdown output. By default, no elements are kept. Block-level elements will be separated from surrounding content by blank lines. Its behaviour can be customised using the keepReplacement option.
Remove rules determine which elements to remove altogether. By default, no elements are removed.
Default rule handles nodes which are not recognised by any other rule. By default, it outputs the node’s text content (separated by blank lines if it is a block-level element). Its behaviour can be customised with the defaultReplacement option.
Turndown iterates over the set of rules, and picks the first one that matches the filter. The following list describes the order of precedence:
The plugin API provides a convenient way for developers to apply multiple extensions. A plugin is just a function that is called with the TurndownService instance.
Turndown uses backslashes (\) to escape Markdown characters in the HTML input. This ensures that these characters are not interpreted as Markdown when the output is compiled back to HTML. For example, the contents of <h1>1\. Hello world</h1> needs to be escaped to 1\. Hello world, otherwise it will be interpreted as a list item rather than a heading.
To avoid the complexity and the performance implications of parsing the content of every HTML element as Markdown, Turndown uses a group of regular expressions to escape potential Markdown syntax. As a result, the escaping rules can be quite aggressive.
TurndownService.prototype.escapeIf you are confident in doing so, you may want to customise the escaping behaviour to suit your needs. This can be done by overriding TurndownService.prototype.escape. escape takes the text of each HTML element and should return a version with the Markdown characters escaped.
Note: text in code elements is never passed toescape.
turndown is copyright © 2017+ Dom Christie and released under the MIT license.
yuque-web-clipper/index.ts at master · yuquewebclipper/yuque-web-clipper

In this repository All GitHub ↵
Jump to ↵
No suggested jump to results
In this repository All GitHub ↵
Jump to ↵
In this repository All GitHub ↵
Jump to ↵
New repository Import repository New gist New organization
This repository
Set your status

### Edit status


Could not update your status, please try again.

80 remaining

#### Suggestions:

🌴

On vacation

🤒

Out sick

🏠

Working from home

🎯

Focusing

 Busy

When others mention you, assign you, or request your review, GitHub will let them know that you have limited availability.

Set status Clear status

[Your profile](/Xiongyibo) [Your repositories](/Xiongyibo?tab=repositories) [Your projects](/Xiongyibo?tab=projects) [Your stars](/Xiongyibo?tab=stars) [Your gists](https://gist.github.com/)

[Help](https://help.github.com) [Settings](/settings/profile)

 Sign out
Sign out
Watch
Notifications
Not watching Be notified only when participating or @mentioned. Watch
Releases only Be notified of new releases, and when participating or @mentioned. Unwatch releases
Watching Be notified of all conversations. Unwatch
Ignoring Never be notified. Stop ignoring
  Unstar  [71](/yuquewebclipper/yuque-web-clipper/stargazers)

  Star  [71](/yuquewebclipper/yuque-web-clipper/stargazers)
Fork
[7](/yuquewebclipper/yuque-web-clipper/network/members)
Code Issues 7 Pull requests 0 Projects 0 Wiki Insights
Branch: master
Find file Copy path
yuque-web-clipper/src/const/index.ts
98ff056 8 days ago

re #7")
1 contributor### Users who have contributed to this file
22 lines (21 sloc) 374 Bytes
export const backendServices: {
[key: string]: {
icon: string;
home: string;
api: string;
name: string;
};
} = {
yuque: {
icon: 'yuque',
home: 'https://www.yuque.com',
api: 'https://www.yuque.com/api/v2/',
name: '语雀'
},
github: {
icon: 'github',
home: 'https://www.github.com',
api: 'https://api.github.com/',
name: 'Github'
}
};
Go
You can’t perform that action at this time.
You signed in with another tab or window. Reload to refresh your session. You signed out in another tab or window. Reload to refresh your session.
Press h to open a hovercard with more details.
详解 Vue & Vuex 实践翻译自Vue + Vuex — Getting started,承接自2017 Vue.js 2快速入门指南,从属于Web 前端入门与工程实践。
随着应用复杂度的增加,我们需要考虑如何进行应用的状态管理,将业务逻辑与界面交互相剥离,详细讨论参考笔者的2016-我的前端之路:工具化与工程化。Vue 为我们提供了方便的组件内状态管理的机制,下面这个例子就是常见的获取列表数据然后渲染到界面中:
import axios from 'axios'
export default {
  name: 'projects',
  data: function () {
    return {
      projects: []
    }
  },
  methods: {
    loadProjects: function () {
      axios.get('/secured/projects').then((response) => {
        this.projects = response.data
      }, (err) => {
        console.log(err)
      })
    }
  },
  mounted: function () {
    this.loadProjects()
  }
}
</script>
在 template 中我们可以方便的访问项目列表并且进行过滤、排序等操作,不过如果我们在另一个列表中也需要来展示相同的数据信息,继续按照这种方式实现的话我们不得不重新加载一遍数据。更麻烦的是如果用户在本地修改了某个列表数据,那么如何同步两个组件中的列表信息会是个头疼的问题。Vue 官方推荐使用Vuex,类似于 Redux 的集中式状态管理工具来辅助解决这个问题。
根据 Vuex 文档中的描述,Vuex 是适用于 Vue.js 应用的状态管理库,为应用中的所有组件提供集中式的状态存储与操作,保证了所有状态以可预测的方式进行修改。
Vuex 中 Store 的模板化定义如下:
import Vue from 'vue'
import Vuex from 'vuex'
Vue.use(Vuex)
const store = new Vuex.Store({
  state: {
  },
  actions: {
  },
  mutations: {
  },
  getters: {
  },
  modules: {

  }
})
export default store
上述代码中包含了定义 Vuex Store 时关键的 5 个属性:
state: state 定义了应用状态的数据结构,同样可以在这里设置默认的初始状态。
state: {
projects: [],
userProfile: {}
}
actions:Actions 即是定义提交触发更改信息的描述,常见的例子有从服务端获取数据,在数据获取完成后会调用store.commit()来调用更改 Store 中的状态。可以在组件中使用dispatch来发出 Actions。
actions: {
LOAD_PROJECT_LIST: function ({ commit }) {
axios.get('/secured/projects').then((response) => {
commit('SET_PROJECT_LIST', { list: response.data })
}, (err) => {
console.log(err)
})
}
}
mutations: 调用 mutations 是唯一允许更新应用状态的地方。
mutations: {
SET_PROJECT_LIST: (state, { list }) => {
state.projects = list
}
}
getters: Getters 允许组件从 Store 中获取数据,譬如我们可以从 Store 中的 projectList 中筛选出已完成的项目列表:
getters: {
completedProjects: state => {
return state.projects.filter(project => project.completed).length
}
}
modules: modules 对象允许将单一的 Store 拆分为多个 Store 的同时保存在单一的状态树中。随着应用复杂度的增加,这种拆分能够更好地组织代码,更多细节参考这里。
在理解了 Vuex 的基础概念之后,我们会创建一个真正的应用来熟悉整个使用流程。该应用承接自这个博客,在准备好基础项目之后,我们需要将 vuex 引入项目中:
该步骤完成之后,我们需要在 src 目录下创建名为 store 的目录来存放状态管理相关代码,首先创建 index.js:
import Vue from 'vue'
import Vuex from 'vuex'
import axios from 'axios'
Vue.use(Vuex)
const store = new Vuex.Store({
  state: {

  },
  actions: {

  },
  mutations: {

  },
  getters: {

  }
})
export default store
然后在 main.js 文件中我们需要将该 Store 实例添加到构造的 Vue 实例中:
import store from './store'
/* eslint-disable no-new */
new Vue({
  template: `
  <div>
    <navbar />
    <section class="section">
      <div class="container is-fluid">
        <router-view></router-view>
      </div>
    </section>
  </div>
  `,
  router,
  store,
  components: {
    navbar
  }
}).$mount('#app')
然后,我们需要去完善 Store 定义:
import Vue from 'vue'
import Vuex from 'vuex'
import axios from 'axios'
Vue.use(Vuex)
const store = new Vuex.Store({
  state: {
    projects: []
  },
  actions: {
    LOAD_PROJECT_LIST: function ({ commit }) {
      axios.get('/secured/projects').then((response) => {
        commit('SET_PROJECT_LIST', { list: response.data })
      }, (err) => {
        console.log(err)
      })
    }
  },
  mutations: {
    SET_PROJECT_LIST: (state, { list }) => {
      state.projects = list
    }
  },
  getters: {
    openProjects: state => {
      return state.projects.filter(project => !project.completed)
    }
  }
})
export default store
在本项目中,我们将原本存放在组件内的项目数组移动到 Store 中,并且将所有关于状态的改变都通过 Action 进行而不是直接修改:
// /src/components/projectList.vue
<template lang="html">
  <div class="">
    <table class="table">
      <thead>
        <tr>
          <th>Project Name</th>
          <th>Assigned To</th>
          <th>Priority</th>
          <th>Completed</th>
        </tr>
      </thead>
      <tbody>
        <tr v-for="item in projects">
          <td>{{item.name}}</td>
          <td>{{item.assignedTo}}</td>
          <td>{{item.priority}}</td>
          <td><i v-if="item.completed" class="fa fa-check"></i></td>
        </tr>
      </tbody>
    </table>
  </div>
</template>
<script>
import { mapState } from 'vuex'
export default {
  name: 'projectList',
  computed: mapState([
    'projects'
  ])
}
</script>
<style lang="css">
</style>
这个模板还是十分直观,我们通过computed对象来访问 Store 中的状态信息。值得一提的是这里的mapState函数,这里用的是简写,完整的话可以直接访问 Store 对象:
computed: {
  projects () {
    return this.$store.state.projects
  }
}
mapState 是 Vuex 提供的简化数据访问的辅助函数。我们视线回到 project.vue 容器组件,在该组件中调用this.$store.dispatch('LOAD_PROJECT_LIST)来触发从服务端中加载项目列表:
<template lang="html">
  <div id="projects">
    <div class="columns">
      <div class="column is-half">
        <div class="notification">
          Project List
        </div>
        <project-list />
      </div>
    </div>
  </div>
</template>
<script>
import projectList from '../components/projectList'
export default {
  name: 'projects',
  components: {
    projectList
  },
  mounted: function () {
    this.$store.dispatch('LOAD_PROJECT_LIST')
  }
}
</script>
当我们启动应用时,Vuex 状态管理容器会自动在数据获取之后渲染整个项目列表。现在我们需要添加新的 Action 与 Mutation 来创建新的项目:
// under actions:
ADD_NEW_PROJECT: function ({ commit }) {
  axios.post('/secured/projects').then((response) => {
    commit('ADD_PROJECT', { project: response.data })
  }, (err) => {
    console.log(err)
  })
}
// under mutations:
ADD_PROJECT: (state, { project }) => {
  state.projects.push(project)
}
然后我们创建一个简单的用于添加新的项目的组件 addProject.vue:
<template lang="html">
  <button type="button" class="button" @click="addProject()">Add New Project</button>
</template>
<script>
export default {
  name: 'addProject',
  methods: {
    addProject () {
      this.$store.dispatch('ADD_NEW_PROJECT')
    }
  }
}
</script>
该组件会派发某个 Action 来添加组件,我们需要将该组件引入到 projects.vue 中:
<template lang="html">
  <div id="projects">
    <div class="columns">
      <div class="column is-half">
        <div class="notification">
          Project List
        </div>
        <project-list />
        <add-project />
      </div>
    </div>
  </div>
</template>
<script>
import projectList from '../components/projectList'
import addProject from '../components/addProject'
export default {
  name: 'projects',
  components: {
    projectList,
    addProject
  },
  mounted: function () {
    this.$store.dispatch('LOAD_PROJECT_LIST')
  }
}
</script>
重新运行下该应用会看到服务端返回的创建成功的提示,现在我们添加另一个功能,就是允许用户将某个项目设置为已完成。我们现在添加新的组件 completeToggle.vue:
<template lang="html">
  <button type="button" class="button"  @click="toggle(item)">
    <i class="fa fa-undo" v-if="item.completed"></i>
    <i class="fa fa-check-circle" v-else></i>
  </button>
</template>
<script>
export default {
  name: 'completeToggle',
  props: ['item'],
  methods: {
    toggle (item) {
      this.$store.dispatch('TOGGLE_COMPLETED', { item: item })
    }
  }
}
</script>
该组件会展示一个用于切换项目是否完成的按钮,我们通过 Props 传入具体的项目信息然后通过触发 TOGGLE_COMPLETED Action 来使服务端进行相对应的更新与相应:
// actions
TOGGLE_COMPLETED: function ({ commit, state }, { item }) {
  axios.put('/secured/projects/' + item.id, item).then((response) => {
    commit('UPDATE_PROJECT', { item: response.data })
  }, (err) => {
    console.log(err)
  })
}
// mutations
UPDATE_PROJECT: (state, { item }) => {
  let idx = state.projects.map(p => p.id).indexOf(item.id)
  state.projects.splice(idx, 1, item)
}
UPDATE_PROJECT 会触发项目列表移除对应的项目并且将服务端返回的数据重新添加到数组中:
app.put('/secured/projects/:id', function (req, res) {
  let project = data.filter(function (p) { return p.id == req.params.id })
  if (project.length > 0) {
    project[0].completed = !project[0].completed
    res.status(201).json(project[0])
  } else {
    res.sendStatus(404)
  }
})
最后一步就是将 completeToggle 组件引入到 projectList 组件中,然后将其添加到列表中:
// new column in table
<td><complete-toggle :item="item" /></td>
// be sure import and add to the components object
现在我们的应用已经具备了基本的特性,这里我们再度回顾下文首的讨论,为什么我们需要大费周章的引入外部状态管理,将业务逻辑切分到组件外。譬如这里我们需要另一个组件来展示项目的统计信息,譬如项目的总数或者已完成项目的数目。我们肯定要避免重复地从服务端抓取数据,而是所谓的 Single Source Of Truth。这里我们添加新的 projectStatus.vue 组件来展示项目的统计信息:
<template lang="html">
  <article class="message">
    <div class="message-header">
      <p>Project Status:</p>
    </div>
    <div class="message-body">
      <div class="control">
        <span class="tag is-info">Number of projects: {{projectCount}}</span>
      </div>
      <div class="control">
        <span class="tag is-success">Completed: {{completedProjects}}</span>
      </div>
    </div>
  </article>
</template>
<script>
import { mapGetters } from 'vuex'
export default {
  name: 'projectStatus',
  computed: {
    ...mapGetters([
      'completedProjects',
      'projectCount'
    ])
  }
}
</script>
该组件会展示项目的总数与已完成项目的总数,上面我们使用了maoGetters辅助函数来减少冗余代码:
getters: {
  completedProjects: state => {
    return state.projects.filter(project =>project.completed).length
  },
  projectCount: state => {
    return state.projects.length
  }
}
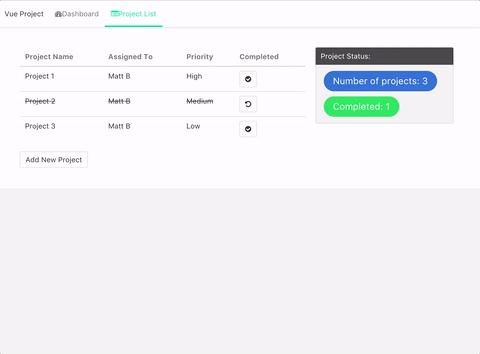
最后我们将该统计信息添加到项目列表中,效果图示如下:
本帖最后由 superxinxin 于 2019-1-23 01:03 编辑
apppic.png (0 Bytes, 下载次数: 81)
下载附件 保存到相册
2019-1-4 10:10 上传
在线安装美区“上网”APP
可在线安装**:Q****uantumult **Shadowrocket FastSocks
在线安装地址:
不要登录ICLOUD!!!不要登录ICLOUD!!!不要登录ICLOUD!!!
美区ID一:****(可安装小火箭 Quantumult FastSocks )
帐号
密码
Yeswall5566778899
美区ID二:(可安装 小火箭 Potatso 2 FastSocks )
帐号
密码
登录地址二查看
**小火箭教程:
**http://1ss.us/jc
http://onego.fun/jc
免费节-点分享:
什么是turndown,A library that converts HTML to Markdown
Convert HTML into Markdown with JavaScript.
npm:
npm install turndown
Browser:
<script src="https://unpkg.com/turndown/dist/turndown.js"></script>
For usage with RequireJS, UMD versions are located in lib/turndown.umd.js (for Node.js) and lib/turndown.browser.umd.js for browser usage. These files are generated when the npm package is published. To generate them manually, clone this repo and run npm run build.
// For Node.js
var TurndownService = require('turndown')

var turndownService = new TurndownService()
var markdown = turndownService.turndown('<h1>Hello world!</h1>')
Turndown also accepts DOM nodes as input (either element nodes, document nodes, or document fragment nodes):
var markdown = turndownService.turndown(document.getElementById('content'))
Options can be passed in to the constructor on instantiation. For example:
var turndownService = new TurndownService({ option: 'value' })
Option
Valid values
Default
headingStyle
setext or atx
setext
hr
Any Thematic break
* * *
bulletListMarker
-, +, or *
*
codeBlockStyle
indented or fenced
indented
fence
or `~~~` |
emDelimiter
_ or *
_
strongDelimiter
** or __
**
linkStyle
inlined or referenced
inlined
linkReferenceStyle
full, collapsed, or shortcut
full
Option
Valid values
Default
blankReplacement
rule replacement function
See Special Rules below
keepReplacement
rule replacement function
See Special Rules below
defaultReplacement
rule replacement function
See Special Rules below
addRule(key, rule)The key parameter is a unique name for the rule for easy reference. Example:
turndownService.addRule('strikethrough', {
  filter: ['del', 's', 'strike'],
  replacement: function (content) {
    return '~' + content + '~'
  }
})
addRule returns the TurndownService instance for chaining.
See Extending with Rules below.
keep(filter)Determines which elements are to be kept and rendered as HTML. By default, Turndown does not keep any elements. The filter parameter works like a rule filter (see section on filters belows). Example:
turndownService.keep(['del', 'ins'])
turndownService.turndown('<p>Hello <del>world</del><ins>World</ins></p>') // 'Hello <del>world</del><ins>World</ins>'
This will render <del> and <ins> elements as HTML when converted.
keep can be called multiple times, with the newly added keep filters taking precedence over older ones. Keep filters will be overridden by the standard CommonMark rules and any added rules. To keep elements that are normally handled by those rules, add a rule with the desired behaviour.
keep returns the TurndownService instance for chaining.
remove(filter)Determines which elements are to be removed altogether i.e. converted to an empty string. By default, Turndown does not remove any elements. The filter parameter works like a rule filter (see section on filters belows). Example:
turndownService.remove('del')
turndownService.turndown('<p>Hello <del>world</del><ins>World</ins></p>') // 'Hello World'
This will remove <del> elements (and contents).
remove can be called multiple times, with the newly added remove filters taking precedence over older ones. Remove filters will be overridden by the keep filters, standard CommonMark rules, and any added rules. To remove elements that are normally handled by those rules, add a rule with the desired behaviour.
remove returns the TurndownService instance for chaining.
use(plugin|array)Use a plugin, or an array of plugins. Example:
// Import plugins from turndown-plugin-gfm
var turndownPluginGfm = require('turndown-plugin-gfm')
var gfm = turndownPluginGfm.gfm
var tables = turndownPluginGfm.tables
var strikethrough = turndownPluginGfm.strikethrough

// Use the gfm plugin
turndownService.use(gfm)

// Use the table and strikethrough plugins only
turndownService.use([tables, strikethrough])
use returns the TurndownService instance for chaining.
See Plugins below.
Turndown can be extended by adding rules. A rule is a plain JavaScript object with filter and replacement properties. For example, the rule for converting <p> elements is as follows:
{
  filter: 'p',
  replacement: function (content) {
    return '\n\n' + content + '\n\n'
  }
}
The filter selects <p> elements, and the replacement function returns the <p> contents separated by two new lines.
filter String|Array|FunctionThe filter property determines whether or not an element should be replaced with the rule’s replacement. DOM nodes can be selected simply using a tag name or an array of tag names:
filter: 'p' will select <p> elementsfilter: ['em', 'i'] will select <em> or <i> elementsAlternatively, the filter can be a function that returns a boolean depending on whether a given node should be replaced. The function is passed a DOM node as well as the TurndownService options. For example, the following rule selects <a> elements (with an href) when the linkStyle option is inlined:
filter: function (node, options) {
  return (
    options.linkStyle === 'inlined' &&
    node.nodeName === 'A' &&
    node.getAttribute('href')
  )
}
replacement FunctionThe replacement function determines how an element should be converted. It should return the Markdown string for a given node. The function is passed the node’s content, the node itself, and the TurndownService options.
The following rule shows how <em> elements are converted:
rules.emphasis = {
  filter: ['em', 'i'],

  replacement: function (content, node, options) {
    return options.emDelimiter + content + options.emDelimiter
  }
}
Blank rule determines how to handle blank elements. It overrides every rule (even those added via addRule). A node is blank if it only contains whitespace, and it’s not an <a>, <td>,<th> or a void element. Its behaviour can be customised using the blankReplacement option.
Keep rules determine how to handle the elements that should not be converted, i.e. rendered as HTML in the Markdown output. By default, no elements are kept. Block-level elements will be separated from surrounding content by blank lines. Its behaviour can be customised using the keepReplacement option.
Remove rules determine which elements to remove altogether. By default, no elements are removed.
Default rule handles nodes which are not recognised by any other rule. By default, it outputs the node’s text content (separated by blank lines if it is a block-level element). Its behaviour can be customised with the defaultReplacement option.
Turndown iterates over the set of rules, and picks the first one that matches the filter. The following list describes the order of precedence:
The plugin API provides a convenient way for developers to apply multiple extensions. A plugin is just a function that is called with the TurndownService instance.
Turndown uses backslashes (\) to escape Markdown characters in the HTML input. This ensures that these characters are not interpreted as Markdown when the output is compiled back to HTML. For example, the contents of <h1>1\. Hello world</h1> needs to be escaped to 1\. Hello world, otherwise it will be interpreted as a list item rather than a heading.
To avoid the complexity and the performance implications of parsing the content of every HTML element as Markdown, Turndown uses a group of regular expressions to escape potential Markdown syntax. As a result, the escaping rules can be quite aggressive.
TurndownService.prototype.escapeIf you are confident in doing so, you may want to customise the escaping behaviour to suit your needs. This can be done by overriding TurndownService.prototype.escape. escape takes the text of each HTML element and should return a version with the Markdown characters escaped.
Note: text in code elements is never passed toescape.
turndown is copyright © 2017+ Dom Christie and released under the MIT license.
详解 Vue & Vuex 实践 - 知乎
首发于某熊的技术之路
关注专栏写文章
王下邀月熊
116 人赞了该文章
详解 Vue & Vuex 实践翻译自Vue + Vuex — Getting started,承接自2017 Vue.js 2快速入门指南,从属于Web 前端入门与工程实践。
随着应用复杂度的增加,我们需要考虑如何进行应用的状态管理,将业务逻辑与界面交互相剥离,详细讨论参考笔者的2016-我的前端之路:工具化与工程化。Vue 为我们提供了方便的组件内状态管理的机制,下面这个例子就是常见的获取列表数据然后渲染到界面中:
import axios from 'axios'
export default {
  name: 'projects',
  data: function () {
    return {
      projects: []
    }
  },
  methods: {
    loadProjects: function () {
      axios.get('/secured/projects').then((response) => {
        this.projects = response.data
      }, (err) => {
        console.log(err)
      })
    }
  },
  mounted: function () {
    this.loadProjects()
  }
}
</script>
在 template 中我们可以方便的访问项目列表并且进行过滤、排序等操作,不过如果我们在另一个列表中也需要来展示相同的数据信息,继续按照这种方式实现的话我们不得不重新加载一遍数据。更麻烦的是如果用户在本地修改了某个列表数据,那么如何同步两个组件中的列表信息会是个头疼的问题。Vue 官方推荐使用Vuex,类似于 Redux 的集中式状态管理工具来辅助解决这个问题。
根据 Vuex 文档中的描述,Vuex 是适用于 Vue.js 应用的状态管理库,为应用中的所有组件提供集中式的状态存储与操作,保证了所有状态以可预测的方式进行修改。
Vuex 中 Store 的模板化定义如下:
import Vue from 'vue'
import Vuex from 'vuex'
Vue.use(Vuex)
const store = new Vuex.Store({
  state: {
  },
  actions: {
  },
  mutations: {
  },
  getters: {
  },
  modules: {

  }
})
export default store
上述代码中包含了定义 Vuex Store 时关键的 5 个属性:
state: state 定义了应用状态的数据结构,同样可以在这里设置默认的初始状态。
state: {
projects: [],
userProfile: {}
}
actions:Actions 即是定义提交触发更改信息的描述,常见的例子有从服务端获取数据,在数据获取完成后会调用store.commit()来调用更改 Store 中的状态。可以在组件中使用dispatch来发出 Actions。
actions: {
LOAD_PROJECT_LIST: function ({ commit }) {
axios.get('/secured/projects').then((response) => {
commit('SET_PROJECT_LIST', { list: response.data })
}, (err) => {
console.log(err)
})
}
}
mutations: 调用 mutations 是唯一允许更新应用状态的地方。
mutations: {
SET_PROJECT_LIST: (state, { list }) => {
state.projects = list
}
}
getters: Getters 允许组件从 Store 中获取数据,譬如我们可以从 Store 中的 projectList 中筛选出已完成的项目列表:
getters: {
completedProjects: state => {
return state.projects.filter(project => project.completed).length
}
}
modules: modules 对象允许将单一的 Store 拆分为多个 Store 的同时保存在单一的状态树中。随着应用复杂度的增加,这种拆分能够更好地组织代码,更多细节参考这里。
在理解了 Vuex 的基础概念之后,我们会创建一个真正的应用来熟悉整个使用流程。该应用承接自这个博客,在准备好基础项目之后,我们需要将 vuex 引入项目中:
$ yarn add vuex
该步骤完成之后,我们需要在 src 目录下创建名为 store 的目录来存放状态管理相关代码,首先创建 index.js:
import Vue from 'vue'
import Vuex from 'vuex'
import axios from 'axios'
Vue.use(Vuex)
const store = new Vuex.Store({
  state: {

  },
  actions: {

  },
  mutations: {

  },
  getters: {

  }
})
export default store
然后在 main.js 文件中我们需要将该 Store 实例添加到构造的 Vue 实例中:
import store from './store'
/* eslint-disable no-new */
new Vue({
  template: `
  <div>
    <navbar />
    <section class="section">
      <div class="container is-fluid">
        <router-view></router-view>
      </div>
    </section>
  </div>
  `,
  router,
  store,
  components: {
    navbar
  }
}).$mount('#app')
然后,我们需要去完善 Store 定义:
import Vue from 'vue'
import Vuex from 'vuex'
import axios from 'axios'
Vue.use(Vuex)
const store = new Vuex.Store({
  state: {
    projects: []
  },
  actions: {
    LOAD_PROJECT_LIST: function ({ commit }) {
      axios.get('/secured/projects').then((response) => {
        commit('SET_PROJECT_LIST', { list: response.data })
      }, (err) => {
        console.log(err)
      })
    }
  },
  mutations: {
    SET_PROJECT_LIST: (state, { list }) => {
      state.projects = list
    }
  },
  getters: {
    openProjects: state => {
      return state.projects.filter(project => !project.completed)
    }
  }
})
export default store
在本项目中,我们将原本存放在组件内的项目数组移动到 Store 中,并且将所有关于状态的改变都通过 Action 进行而不是直接修改:
// /src/components/projectList.vue
<template lang="html">
  <div class="">
    <table class="table">
      <thead>
        <tr>
          <th>Project Name</th>
          <th>Assigned To</th>
          <th>Priority</th>
          <th>Completed</th>
        </tr>
      </thead>
      <tbody>
        <tr v-for="item in projects">
          <td>{{item.name}}</td>
          <td>{{item.assignedTo}}</td>
          <td>{{item.priority}}</td>
          <td><i v-if="item.completed" class="fa fa-check"></i></td>
        </tr>
      </tbody>
    </table>
  </div>
</template>
<script>
import { mapState } from 'vuex'
export default {
  name: 'projectList',
  computed: mapState([
    'projects'
  ])
}
</script>
<style lang="css">
</style>
这个模板还是十分直观,我们通过computed对象来访问 Store 中的状态信息。值得一提的是这里的mapState函数,这里用的是简写,完整的话可以直接访问 Store 对象:
computed: {
  projects () {
    return this.$store.state.projects
  }
}
mapState 是 Vuex 提供的简化数据访问的辅助函数。我们视线回到 project.vue 容器组件,在该组件中调用this.$store.dispatch('LOAD_PROJECT_LIST)来触发从服务端中加载项目列表:
<template lang="html">
  <div id="projects">
    <div class="columns">
      <div class="column is-half">
        <div class="notification">
          Project List
        </div>
        <project-list />
      </div>
    </div>
  </div>
</template>
<script>
import projectList from '../components/projectList'
export default {
  name: 'projects',
  components: {
    projectList
  },
  mounted: function () {
    this.$store.dispatch('LOAD_PROJECT_LIST')
  }
}
</script>
当我们启动应用时,Vuex 状态管理容器会自动在数据获取之后渲染整个项目列表。现在我们需要添加新的 Action 与 Mutation 来创建新的项目:
// under actions:
ADD_NEW_PROJECT: function ({ commit }) {
  axios.post('/secured/projects').then((response) => {
    commit('ADD_PROJECT', { project: response.data })
  }, (err) => {
    console.log(err)
  })
}
// under mutations:
ADD_PROJECT: (state, { project }) => {
  state.projects.push(project)
}
然后我们创建一个简单的用于添加新的项目的组件 addProject.vue:
<template lang="html">
  <button type="button" class="button" @click="addProject()">Add New Project</button>
</template>
<script>
export default {
  name: 'addProject',
  methods: {
    addProject () {
      this.$store.dispatch('ADD_NEW_PROJECT')
    }
  }
}
</script>
该组件会派发某个 Action 来添加组件,我们需要将该组件引入到 projects.vue 中:
<template lang="html">
  <div id="projects">
    <div class="columns">
      <div class="column is-half">
        <div class="notification">
          Project List
        </div>
        <project-list />
        <add-project />
      </div>
    </div>
  </div>
</template>
<script>
import projectList from '../components/projectList'
import addProject from '../components/addProject'
export default {
  name: 'projects',
  components: {
    projectList,
    addProject
  },
  mounted: function () {
    this.$store.dispatch('LOAD_PROJECT_LIST')
  }
}
</script>
重新运行下该应用会看到服务端返回的创建成功的提示,现在我们添加另一个功能,就是允许用户将某个项目设置为已完成。我们现在添加新的组件 completeToggle.vue:
<template lang="html">
  <button type="button" class="button"  @click="toggle(item)">
    <i class="fa fa-undo" v-if="item.completed"></i>
    <i class="fa fa-check-circle" v-else></i>
  </button>
</template>
<script>
export default {
  name: 'completeToggle',
  props: ['item'],
  methods: {
    toggle (item) {
      this.$store.dispatch('TOGGLE_COMPLETED', { item: item })
    }
  }
}
</script>
该组件会展示一个用于切换项目是否完成的按钮,我们通过 Props 传入具体的项目信息然后通过触发 TOGGLE_COMPLETED Action 来使服务端进行相对应的更新与相应:
// actions
TOGGLE_COMPLETED: function ({ commit, state }, { item }) {
  axios.put('/secured/projects/' + item.id, item).then((response) => {
    commit('UPDATE_PROJECT', { item: response.data })
  }, (err) => {
    console.log(err)
  })
}
// mutations
UPDATE_PROJECT: (state, { item }) => {
  let idx = state.projects.map(p => p.id).indexOf(item.id)
  state.projects.splice(idx, 1, item)
}
UPDATE_PROJECT 会触发项目列表移除对应的项目并且将服务端返回的数据重新添加到数组中:
app.put('/secured/projects/:id', function (req, res) {
  let project = data.filter(function (p) { return p.id == req.params.id })
  if (project.length > 0) {
    project[0].completed = !project[0].completed
    res.status(201).json(project[0])
  } else {
    res.sendStatus(404)
  }
})
最后一步就是将 completeToggle 组件引入到 projectList 组件中,然后将其添加到列表中:
// new column in table
<td><complete-toggle :item="item" /></td>
// be sure import and add to the components object
现在我们的应用已经具备了基本的特性,这里我们再度回顾下文首的讨论,为什么我们需要大费周章的引入外部状态管理,将业务逻辑切分到组件外。譬如这里我们需要另一个组件来展示项目的统计信息,譬如项目的总数或者已完成项目的数目。我们肯定要避免重复地从服务端抓取数据,而是所谓的 Single Source Of Truth。这里我们添加新的 projectStatus.vue 组件来展示项目的统计信息:
<template lang="html">
  <article class="message">
    <div class="message-header">
      <p>Project Status:</p>
    </div>
    <div class="message-body">
      <div class="control">
        <span class="tag is-info">Number of projects: {{projectCount}}</span>
      </div>
      <div class="control">
        <span class="tag is-success">Completed: {{completedProjects}}</span>
      </div>
    </div>
  </article>
</template>
<script>
import { mapGetters } from 'vuex'
export default {
  name: 'projectStatus',
  computed: {
    ...mapGetters([
      'completedProjects',
      'projectCount'
    ])
  }
}
</script>
该组件会展示项目的总数与已完成项目的总数,上面我们使用了maoGetters辅助函数来减少冗余代码:
getters: {
  completedProjects: state => {
    return state.projects.filter(project =>project.completed).length
  },
  projectCount: state => {
    return state.projects.length
  }
}
最后我们将该统计信息添加到项目列表中,效果图示如下:
发布于 2017-01-29
[
Vue.js
](//www.zhihu.com/topic/20022242)
[
Vuex
](//www.zhihu.com/topic/20044614)
赞同 11623 条评论
分享
收藏
[
](/wxyyxc1992)
[
某熊的技术之路
让知识在它该在的地方
[
林鑫
](https://zhuanlan.zhihu.com/p/25586613)[
最近项目组在使用vue框架,ui组件库使用element-ui,我也好好学习了一遍。封装了一下表格的分页组件给项目组使用,个人觉得封装得相当不错,使用也简单满足绝大部分场景,特分享给大家:) …
晓风轻
](https://zhuanlan.zhihu.com/p/31638307)[
气势的信心
](https://zhuanlan.zhihu.com/p/29429149)[
Teren
](https://zhuanlan.zhihu.com/p/24536535)
切换为时间排序
写下你的评论...
发布
yeatszhang2 年前
最近科普入门性质的文章较多啊~
赞回复踩举报
王下邀月熊 (作者) 回复yeatszhang2 年前
是哒,好歹要对得起这个新年
赞回复踩举报

写得很清晰,看了官网的文档,感觉一头雾水,看了你这篇文章,感觉变清晰了
赞回复踩举报
Deboy2 年前
得益于 vue2.x + vuex2.x 更为便捷的API,更容易上手和理解了,1.0的即使看懂了 API ,也有种难以下手的感觉
赞回复踩举报
YeaseonZhang2 年前
提个小建议,代码没有语法高亮
1回复踩举报
Archer2 年前
有没有源码学习?
1回复踩举报
lbca2 年前
不错!
赞回复踩举报
可以 的
赞回复踩举报
蓝月萧枫1 年前
问个问题,使用vuex的页面中,如何处理页面列表搜索的问题?
比如页面要做个快速匹配列表项的功能,列表内容映射自vuex中的state,这里列表内容只向服务器请求一次,vuex是不推荐直接在组中改变state值的,而列表的值响应匹配到的值,对于这样你是怎么解决呢?
我说下我的方法:我一般是请求获得列表数据后复制一份在state.originData ,列表绑定的是state.data 然后匹配操作在ations中用state.originData数据来操作,然后触发mutations更新state.data来达到目的,但是总感觉有点麻烦,也不知道这样合理不合理
1回复踩举报
dongdong1 年前
对于刚接触vuex的人来说,简单易懂,好文章
赞回复踩举报
maoGetters -> mapGetters
1回复踩举报
一笑1 年前
作者好,看了你的文章,感觉收获很多。不过在自己尝试开发的过程中遇到一个问题,当页面渲染一个20 * 30,页面上大部分表格单元都要绑定事件来显示tooltip的时候,在路由跳转的时候就会变得很慢,这是什么原因呢?事件绑定过多?有没有什么解决的办法?
赞回复踩举报
弗洛伊德-凯1 年前
dispatch 在2.0下还可以用吗
赞回复踩举报
LowLoop1 年前
简单明了+1.
赞回复踩举报
姜真1 年前
作者有一个地方好像写错了,计算属性那里不能用mapState,mapState返回的是一个对象,是把全局的 state 和 getters 映射到当前组件的 computed 计算属性中,因此v-for不能迭代出来,应该用mapGetters。我也是学习作者的文章,结果在这里卡了好久,已经从服务器拿到数据,但就是显示不出来,研究了好久才发现是这个问题,希望可以帮后面的同学少走点弯路
2回复踩举报
你好,你的解释是我在这里看到最好的,我想问下,你从服务拿数据应该是在以node做服务,我能参考下你之前写的源码吗
赞回复踩举报
丁一1 年前
在vuex理处理局部数据应该是不合适的,全局vuex和局部数据能否有和谐统一的方式进行处理?
赞回复踩举报
黑糖冬瓜露1 年前
我NG和RN,现在学Vue,看完整篇感觉写的非常好,赞一个!
赞回复踩举报
诗酒趁年华1 年前
谢谢楼主无私分享
赞回复踩举报
xiaoy11 个月前
真的想看看你的源码是如何写的
赞回复踩举报
xiaoy11 个月前
好急呀,急得看源码,你这边的node处理是写在哪里的,看的人真的很急
赞回复踩举报
芒果11 个月前
分享个vuex 2的教程 Vuex2入门与提高_vue.js教程_汇智网)
赞回复踩举报
12下一页
想来知乎工作?请发送邮件到 [email protected]
传统的JavaScript程序使用函数和基于原型的继承来创建可重用的组件,但对于熟悉使用面向对象方式的程序员来讲就有些棘手,因为他们用的是基于类的继承并且对象是由类构建出来的。 从ECMAScript 2015,也就是ECMAScript 6开始,JavaScript程序员将能够使用基于类的面向对象的方式。 使用TypeScript,我们允许开发者现在就使用这些特性,并且编译后的JavaScript可以在所有主流浏览器和平台上运行,而不需要等到下个JavaScript版本。
下面看一个使用类的例子:
class Greeter {
    greeting: string;
    constructor(message: string) {
        this.greeting = message;
    }
    greet() {
        return "Hello, " + this.greeting;
    }
}

let greeter = new Greeter("world");
如果你使用过C#或Java,你会对这种语法非常熟悉。 我们声明一个 Greeter类。这个类有3个成员:一个叫做 greeting的属性,一个构造函数和一个 greet方法。
你会注意到,我们在引用任何一个类成员的时候都用了 this。 它表示我们访问的是类的成员。
最后一行,我们使用 new构造了 Greeter类的一个实例。 它会调用之前定义的构造函数,创建一个 Greeter类型的新对象,并执行构造函数初始化它。
在TypeScript里,我们可以使用常用的面向对象模式。 基于类的程序设计中一种最基本的模式是允许使用继承来扩展现有的类。
看下面的例子:
class Animal {
    move(distanceInMeters: number = 0) {
        console.log(`Animal moved ${distanceInMeters}m.`);
    }
}

class Dog extends Animal {
    bark() {
        console.log('Woof! Woof!');
    }
}

const dog = new Dog();
dog.bark();
dog.move(10);
dog.bark();
这个例子展示了最基本的继承:类从基类中继承了属性和方法。 这里, Dog是一个 派生类,它派生自 Animal 基类,通过 extends关键字。 派生类通常被称作 子类,基类通常被称作 超类。
因为 Dog继承了 Animal的功能,因此我们可以创建一个 Dog的实例,它能够 bark()和 move()。
下面我们来看个更加复杂的例子。
class Animal {
    name: string;
    constructor(theName: string) { this.name = theName; }
    move(distanceInMeters: number = 0) {
        console.log(`${this.name} moved ${distanceInMeters}m.`);
    }
}

class Snake extends Animal {
    constructor(name: string) { super(name); }
    move(distanceInMeters = 5) {
        console.log("Slithering...");
        super.move(distanceInMeters);
    }
}

class Horse extends Animal {
    constructor(name: string) { super(name); }
    move(distanceInMeters = 45) {
        console.log("Galloping...");
        super.move(distanceInMeters);
    }
}

let sam = new Snake("Sammy the Python");
let tom: Animal = new Horse("Tommy the Palomino");

sam.move();
tom.move(34);
这个例子展示了一些上面没有提到的特性。 这一次,我们使用 extends关键字创建了 Animal的两个子类: Horse和 Snake。
与前一个例子的不同点是,派生类包含了一个构造函数,它 _必须_调用 super(),它会执行基类的构造函数。 而且,在构造函数里访问 this的属性之前,我们 _一定_要调用 super()。 这个是TypeScript强制执行的一条重要规则。
这个例子演示了如何在子类里可以重写父类的方法。 Snake类和 Horse类都创建了 move方法,它们重写了从 Animal继承来的 move方法,使得 move方法根据不同的类而具有不同的功能。 注意,即使 tom被声明为 Animal类型,但因为它的值是 Horse,调用 tom.move(34)时,它会调用 Horse里重写的方法:
Slithering...
Sammy the Python moved 5m.
Galloping...
Tommy the Palomino moved 34m.
public在上面的例子里,我们可以自由的访问程序里定义的成员。 如果你对其它语言中的类比较了解,就会注意到我们在之前的代码里并没有使用 public来做修饰;例如,C#要求必须明确地使用 public指定成员是可见的。 在TypeScript里,成员都默认为 public。
你也可以明确的将一个成员标记成 public。 我们可以用下面的方式来重写上面的 Animal类:
class Animal {
    public name: string;
    public constructor(theName: string) { this.name = theName; }
    public move(distanceInMeters: number) {
        console.log(`${this.name} moved ${distanceInMeters}m.`);
    }
}
private当成员被标记成 private时,它就不能在声明它的类的外部访问。比如:
class Animal {
    private name: string;
    constructor(theName: string) { this.name = theName; }
}

new Animal("Cat").name;
TypeScript使用的是结构性类型系统。 当我们比较两种不同的类型时,并不在乎它们从何处而来,如果所有成员的类型都是兼容的,我们就认为它们的类型是兼容的。
然而,当我们比较带有 private或 protected成员的类型的时候,情况就不同了。 如果其中一个类型里包含一个 private成员,那么只有当另外一个类型中也存在这样一个 private成员, 并且它们都是来自同一处声明时,我们才认为这两个类型是兼容的。 对于 protected成员也使用这个规则。
下面来看一个例子,更好地说明了这一点:
class Animal {
    private name: string;
    constructor(theName: string) { this.name = theName; }
}

class Rhino extends Animal {
    constructor() { super("Rhino"); }
}

class Employee {
    private name: string;
    constructor(theName: string) { this.name = theName; }
}

let animal = new Animal("Goat");
let rhino = new Rhino();
let employee = new Employee("Bob");

animal = rhino;
animal = employee;
这个例子中有 Animal和 Rhino两个类, Rhino是 Animal类的子类。 还有一个 Employee类,其类型看上去与 Animal是相同的。 我们创建了几个这些类的实例,并相互赋值来看看会发生什么。 因为 Animal和 Rhino共享了来自 Animal里的私有成员定义 private name: string,因此它们是兼容的。 然而 Employee却不是这样。当把 Employee赋值给 Animal的时候,得到一个错误,说它们的类型不兼容。 尽管 Employee里也有一个私有成员 name,但它明显不是 Animal里面定义的那个。
protectedprotected修饰符与 private修饰符的行为很相似,但有一点不同, protected成员在派生类中仍然可以访问。例如:
class Person {
    protected name: string;
    constructor(name: string) { this.name = name; }
}

class Employee extends Person {
    private department: string;

    constructor(name: string, department: string) {
        super(name)
        this.department = department;
    }

    public getElevatorPitch() {
        return `Hello, my name is ${this.name} and I work in ${this.department}.`;
    }
}

let howard = new Employee("Howard", "Sales");
console.log(howard.getElevatorPitch());
console.log(howard.name);
注意,我们不能在 Person类外使用 name,但是我们仍然可以通过 Employee类的实例方法访问,因为 Employee是由 Person派生而来的。
构造函数也可以被标记成 protected。 这意味着这个类不能在包含它的类外被实例化,但是能被继承。比如,
class Person {
    protected name: string;
    protected constructor(theName: string) { this.name = theName; }
}


class Employee extends Person {
    private department: string;

    constructor(name: string, department: string) {
        super(name);
        this.department = department;
    }

    public getElevatorPitch() {
        return `Hello, my name is ${this.name} and I work in ${this.department}.`;
    }
}

let howard = new Employee("Howard", "Sales");
let john = new Person("John");
你可以使用 readonly关键字将属性设置为只读的。 只读属性必须在声明时或构造函数里被初始化。
class Octopus {
    readonly name: string;
    readonly numberOfLegs: number = 8;
    constructor (theName: string) {
        this.name = theName;
    }
}
let dad = new Octopus("Man with the 8 strong legs");
dad.name = "Man with the 3-piece suit";
在上面的例子中,我们必须在Octopus类里定义一个只读成员 name和一个参数为 theName的构造函数,并且立刻将 theName的值赋给 name,这种情况经常会遇到。 _参数属性_可以方便地让我们在一个地方定义并初始化一个成员。 下面的例子是对之前 Octopus类的修改版,使用了参数属性:
class Octopus {
    readonly numberOfLegs: number = 8;
    constructor(readonly name: string) {
    }
}
注意看我们是如何舍弃了 theName,仅在构造函数里使用 readonly name: string参数来创建和初始化 name成员。 我们把声明和赋值合并至一处。
参数属性通过给构造函数参数前面添加一个访问限定符来声明。 使用 private限定一个参数属性会声明并初始化一个私有成员;对于 public和 protected来说也是一样。
TypeScript支持通过getters/setters来截取对对象成员的访问。 它能帮助你有效的控制对对象成员的访问。
下面来看如何把一个简单的类改写成使用 get和 set。 首先,我们从一个没有使用存取器的例子开始。
class Employee {
    fullName: string;
}

let employee = new Employee();
employee.fullName = "Bob Smith";
if (employee.fullName) {
    console.log(employee.fullName);
}
我们可以随意的设置 fullName,这是非常方便的,但是这也可能会带来麻烦。
下面这个版本里,我们先检查用户密码是否正确,然后再允许其修改员工信息。 我们把对 fullName的直接访问改成了可以检查密码的 set方法。 我们也加了一个 get方法,让上面的例子仍然可以工作。
let passcode = "secret passcode";

class Employee {
    private _fullName: string;

    get fullName(): string {
        return this._fullName;
    }

    set fullName(newName: string) {
        if (passcode && passcode == "secret passcode") {
            this._fullName = newName;
        }
        else {
            console.log("Error: Unauthorized update of employee!");
        }
    }
}

let employee = new Employee();
employee.fullName = "Bob Smith";
if (employee.fullName) {
    alert(employee.fullName);
}
我们可以修改一下密码,来验证一下存取器是否是工作的。当密码不对时,会提示我们没有权限去修改员工。
对于存取器有下面几点需要注意的:
首先,存取器要求你将编译器设置为输出ECMAScript 5或更高。 不支持降级到ECMAScript 3。 其次,只带有 get不带有 set的存取器自动被推断为 readonly。 这在从代码生成 .d.ts文件时是有帮助的,因为利用这个属性的用户会看到不允许够改变它的值。
到目前为止,我们只讨论了类的实例成员,那些仅当类被实例化的时候才会被初始化的属性。 我们也可以创建类的静态成员,这些属性存在于类本身上面而不是类的实例上。 在这个例子里,我们使用 static定义 origin,因为它是所有网格都会用到的属性。 每个实例想要访问这个属性的时候,都要在 origin前面加上类名。 如同在实例属性上使用 this.前缀来访问属性一样,这里我们使用 Grid.来访问静态属性。
class Grid {
    static origin = {x: 0, y: 0};
    calculateDistanceFromOrigin(point: {x: number; y: number;}) {
        let xDist = (point.x - Grid.origin.x);
        let yDist = (point.y - Grid.origin.y);
        return Math.sqrt(xDist * xDist + yDist * yDist) / this.scale;
    }
    constructor (public scale: number) { }
}

let grid1 = new Grid(1.0);
let grid2 = new Grid(5.0);

console.log(grid1.calculateDistanceFromOrigin({x: 10, y: 10}));
console.log(grid2.calculateDistanceFromOrigin({x: 10, y: 10}));
抽象类做为其它派生类的基类使用。 它们一般不会直接被实例化。 不同于接口,抽象类可以包含成员的实现细节。 abstract关键字是用于定义抽象类和在抽象类内部定义抽象方法。
abstract class Animal {
    abstract makeSound(): void;
    move(): void {
        console.log('roaming the earch...');
    }
}
抽象类中的抽象方法不包含具体实现并且必须在派生类中实现。 抽象方法的语法与接口方法相似。 两者都是定义方法签名但不包含方法体。 然而,抽象方法必须包含 abstract关键字并且可以包含访问修饰符。
abstract class Department {

    constructor(public name: string) {
    }

    printName(): void {
        console.log('Department name: ' + this.name);
    }

    abstract printMeeting(): void;
}

class AccountingDepartment extends Department {

    constructor() {
        super('Accounting and Auditing');
    }

    printMeeting(): void {
        console.log('The Accounting Department meets each Monday at 10am.');
    }

    generateReports(): void {
        console.log('Generating accounting reports...');
    }
}

let department: Department;
department = new Department();
department = new AccountingDepartment();
department.printName();
department.printMeeting();
department.generateReports();
当你在TypeScript里声明了一个类的时候,实际上同时声明了很多东西。 首先就是类的 _实例_的类型。
class Greeter {
    greeting: string;
    constructor(message: string) {
        this.greeting = message;
    }
    greet() {
        return "Hello, " + this.greeting;
    }
}

let greeter: Greeter;
greeter = new Greeter("world");
console.log(greeter.greet());
这里,我们写了 let greeter: Greeter,意思是 Greeter类的实例的类型是 Greeter。 这对于用过其它面向对象语言的程序员来讲已经是老习惯了。
我们也创建了一个叫做 _构造函数_的值。 这个函数会在我们使用 new创建类实例的时候被调用。 下面我们来看看,上面的代码被编译成JavaScript后是什么样子的:
let Greeter = (function () {
    function Greeter(message) {
        this.greeting = message;
    }
    Greeter.prototype.greet = function () {
        return "Hello, " + this.greeting;
    };
    return Greeter;
})();

let greeter;
greeter = new Greeter("world");
console.log(greeter.greet());
上面的代码里, let Greeter将被赋值为构造函数。 当我们调用 new并执行了这个函数后,便会得到一个类的实例。 这个构造函数也包含了类的所有静态属性。 换个角度说,我们可以认为类具有 _实例部分_与 _静态部分_这两个部分。
让我们稍微改写一下这个例子,看看它们之间的区别:
class Greeter {
    static standardGreeting = "Hello, there";
    greeting: string;
    greet() {
        if (this.greeting) {
            return "Hello, " + this.greeting;
        }
        else {
            return Greeter.standardGreeting;
        }
    }
}

let greeter1: Greeter;
greeter1 = new Greeter();
console.log(greeter1.greet());

let greeterMaker: typeof Greeter = Greeter;
greeterMaker.standardGreeting = "Hey there!";

let greeter2: Greeter = new greeterMaker();
console.log(greeter2.greet());
这个例子里, greeter1与之前看到的一样。 我们实例化 Greeter类,并使用这个对象。 与我们之前看到的一样。
再之后,我们直接使用类。 我们创建了一个叫做 greeterMaker的变量。 这个变量保存了这个类或者说保存了类构造函数。 然后我们使用 typeof Greeter,意思是取Greeter类的类型,而不是实例的类型。 或者更确切的说,"告诉我 Greeter标识符的类型",也就是构造函数的类型。 这个类型包含了类的所有静态成员和构造函数。 之后,就和前面一样,我们在 greeterMaker上使用 new,创建 Greeter的实例。
如上一节里所讲的,类定义会创建两个东西:类的实例类型和一个构造函数。 因为类可以创建出类型,所以你能够在允许使用接口的地方使用类。
class Point {
    x: number;
    y: number;
}

interface Point3d extends Point {
    z: number;
}

let point3d: Point3d = {x: 1, y: 2, z: 3};
百度经验:jingyan.baidu.com
在linux服务器上下载安装工具或linux服务器上的应用需要与外部系统通讯,需要访问外部网络。访问外部网络一般通过域名或ip地址来访问,但有时候会发现只能访问ip地址的网络,访问域名会报错,unknown host
百度经验:jingyan.baidu.com
百度经验:jingyan.baidu.com
1
首先使用xshell这类工具连接上linux服务器,然后输入ping www.baidu.com,测试下服务器是否可以访问域名,提示ping: unknow host,表示识别不了域名
2
为了验证ip是可以访问的,可以通过网络工具查询到www.baidu.com 对于的ip地址
3
再次换做ip来测试,输入ping xxx,从截图上可以看出,这次换成ip地址之后,网络正常可以ping通,表示访问网络正常
4
下面就来介绍下如何解决上面只能访问ip不能访问域名的问题。这个是因为linux服务器没有配置DNS域名服务器地址导致的,linux系统里会有/etc/resolv.conf这个配置文件,是DNS客户机配置文件,用于设置DNS服务器的IP地址及DNS域名的。配置的域名服务器地址从什么地方可以知道呢,可以在百度上搜索DNS域名服务器列表,选择一个linux服务器地区最近的DNS服务器,也可以选择一个比较稳定的DNS服务器地址来配置
5
vi /etc/resolv.conf,编辑resolv.conf,里面填入"nameserver xxx",然后保存退出
6
上面配置完成之后,再次输入ping www.baidu.com来测试域名是否可以访问了,从测试结果上可以看出,这次已经可以正常的访问域名地址。到此配置完成,问题解决了。
END
百度经验:jingyan.baidu.com
经验内容仅供参考,如果您需解决具体问题(尤其法律、医学等领域),建议您详细咨询相关领域专业人士。
举报_作者声明:_本篇经验系本人依照真实经历原创,未经许可,谢绝转载。
export const backendServices: {
[key: string]: {
icon: string;
home: string;
api: string;
name: string;
};
} = {
yuque: {
icon: 'yuque',
home: 'https://www.yuque.com',
api: 'https://www.yuque.com/api/v2/',
name: '语雀'
},
github: {
icon: 'github',
home: 'https://www.github.com',
api: 'https://api.github.com/',
name: 'Github'
}
};
Press h to open a hovercard with more details.
类 · TypeScript中文网 · TypeScript——JavaScript的超集

Toggle navigation ![]()
TypeScript 3.1 现已发布。立即下载我们的最新版本!
传统的JavaScript程序使用函数和基于原型的继承来创建可重用的组件,但对于熟悉使用面向对象方式的程序员来讲就有些棘手,因为他们用的是基于类的继承并且对象是由类构建出来的。 从ECMAScript 2015,也就是ECMAScript 6开始,JavaScript程序员将能够使用基于类的面向对象的方式。 使用TypeScript,我们允许开发者现在就使用这些特性,并且编译后的JavaScript可以在所有主流浏览器和平台上运行,而不需要等到下个JavaScript版本。
下面看一个使用类的例子:
 `class Greeter {
greeting: string;
constructor(message: string) {
this.greeting = message;
}
greet() {
return "Hello, " + this.greeting;
}
}
let greeter = new Greeter("world");`
如果你使用过C#或Java,你会对这种语法非常熟悉。 我们声明一个 Greeter类。这个类有3个成员:一个叫做 greeting的属性,一个构造函数和一个 greet方法。
你会注意到,我们在引用任何一个类成员的时候都用了 this。 它表示我们访问的是类的成员。
最后一行,我们使用 new构造了 Greeter类的一个实例。 它会调用之前定义的构造函数,创建一个 Greeter类型的新对象,并执行构造函数初始化它。
在TypeScript里,我们可以使用常用的面向对象模式。 基于类的程序设计中一种最基本的模式是允许使用继承来扩展现有的类。
看下面的例子:
``class Animal {
move(distanceInMeters: number = 0) {
console.log(Animal moved ${distanceInMeters}m.);
}
}
class Dog extends Animal {
bark() {
console.log('Woof! Woof!');
}
}
const dog = new Dog();
dog.bark();
dog.move(10);
dog.bark();``
这个例子展示了最基本的继承:类从基类中继承了属性和方法。 这里, Dog是一个 派生类,它派生自 Animal 基类,通过 extends关键字。 派生类通常被称作 子类,基类通常被称作 超类。
因为 Dog继承了 Animal的功能,因此我们可以创建一个 Dog的实例,它能够 bark()和 move()。
下面我们来看个更加复杂的例子。
``class Animal {
name: string;
constructor(theName: string) { this.name = theName; }
move(distanceInMeters: number = 0) {
console.log(${this.name} moved ${distanceInMeters}m.);
}
}
class Snake extends Animal {
constructor(name: string) { super(name); }
move(distanceInMeters = 5) {
console.log("Slithering...");
super.move(distanceInMeters);
}
}
class Horse extends Animal {
constructor(name: string) { super(name); }
move(distanceInMeters = 45) {
console.log("Galloping...");
super.move(distanceInMeters);
}
}
let sam = new Snake("Sammy the Python");
let tom: Animal = new Horse("Tommy the Palomino");
sam.move();
tom.move(34);``
这个例子展示了一些上面没有提到的特性。 这一次,我们使用 extends关键字创建了 Animal的两个子类: Horse和 Snake。
与前一个例子的不同点是,派生类包含了一个构造函数,它 _必须_调用 super(),它会执行基类的构造函数。 而且,在构造函数里访问 this的属性之前,我们 _一定_要调用 super()。 这个是TypeScript强制执行的一条重要规则。
这个例子演示了如何在子类里可以重写父类的方法。 Snake类和 Horse类都创建了 move方法,它们重写了从 Animal继承来的 move方法,使得 move方法根据不同的类而具有不同的功能。 注意,即使 tom被声明为 Animal类型,但因为它的值是 Horse,调用 tom.move(34)时,它会调用 Horse里重写的方法:
Slithering... Sammy the Python moved 5m. Galloping... Tommy the Palomino moved 34m.
public在上面的例子里,我们可以自由的访问程序里定义的成员。 如果你对其它语言中的类比较了解,就会注意到我们在之前的代码里并没有使用 public来做修饰;例如,C#要求必须明确地使用 public指定成员是可见的。 在TypeScript里,成员都默认为 public。
你也可以明确的将一个成员标记成 public。 我们可以用下面的方式来重写上面的 Animal类:
class Animal { public name: string; public constructor(theName: string) { this.name = theName; } public move(distanceInMeters: number) { console.log(`${this.name} moved ${distanceInMeters}m.`); } }
private当成员被标记成 private时,它就不能在声明它的类的外部访问。比如:
`class Animal {
private name: string;
constructor(theName: string) { this.name = theName; }
}
new Animal("Cat").name; // 错误: 'name' 是私有的.`
TypeScript使用的是结构性类型系统。 当我们比较两种不同的类型时,并不在乎它们从何处而来,如果所有成员的类型都是兼容的,我们就认为它们的类型是兼容的。
然而,当我们比较带有 private或 protected成员的类型的时候,情况就不同了。 如果其中一个类型里包含一个 private成员,那么只有当另外一个类型中也存在这样一个 private成员, 并且它们都是来自同一处声明时,我们才认为这两个类型是兼容的。 对于 protected成员也使用这个规则。
下面来看一个例子,更好地说明了这一点:
`class Animal {
private name: string;
constructor(theName: string) { this.name = theName; }
}
class Rhino extends Animal {
constructor() { super("Rhino"); }
}
class Employee {
private name: string;
constructor(theName: string) { this.name = theName; }
}
let animal = new Animal("Goat");
let rhino = new Rhino();
let employee = new Employee("Bob");
animal = rhino;
animal = employee; // 错误: Animal 与 Employee 不兼容.`
这个例子中有 Animal和 Rhino两个类, Rhino是 Animal类的子类。 还有一个 Employee类,其类型看上去与 Animal是相同的。 我们创建了几个这些类的实例,并相互赋值来看看会发生什么。 因为 Animal和 Rhino共享了来自 Animal里的私有成员定义 private name: string,因此它们是兼容的。 然而 Employee却不是这样。当把 Employee赋值给 Animal的时候,得到一个错误,说它们的类型不兼容。 尽管 Employee里也有一个私有成员 name,但它明显不是 Animal里面定义的那个。
protectedprotected修饰符与 private修饰符的行为很相似,但有一点不同, protected成员在派生类中仍然可以访问。例如:
``class Person {
protected name: string;
constructor(name: string) { this.name = name; }
}
class Employee extends Person {
private department: string;
constructor(name: string, department: string) {
    super(name)
    this.department = department;
}

public getElevatorPitch() {
    return `Hello, my name is ${this.name} and I work in ${this.department}.`;
}
}
let howard = new Employee("Howard", "Sales");
console.log(howard.getElevatorPitch());
console.log(howard.name); // 错误``
注意,我们不能在 Person类外使用 name,但是我们仍然可以通过 Employee类的实例方法访问,因为 Employee是由 Person派生而来的。
构造函数也可以被标记成 protected。 这意味着这个类不能在包含它的类外被实例化,但是能被继承。比如,
``class Person {
protected name: string;
protected constructor(theName: string) { this.name = theName; }
}
// Employee 能够继承 Person
class Employee extends Person {
private department: string;
constructor(name: string, department: string) {
    super(name);
    this.department = department;
}

public getElevatorPitch() {
    return `Hello, my name is ${this.name} and I work in ${this.department}.`;
}
}
let howard = new Employee("Howard", "Sales");
let john = new Person("John"); // 错误: 'Person' 的构造函数是被保护的.``
你可以使用 readonly关键字将属性设置为只读的。 只读属性必须在声明时或构造函数里被初始化。
class Octopus { readonly name: string; readonly numberOfLegs: number = 8; constructor (theName: string) { this.name = theName; } } let dad = new Octopus("Man with the 8 strong legs"); dad.name = "Man with the 3-piece suit"; // 错误! name 是只读的.
在上面的例子中,我们必须在Octopus类里定义一个只读成员 name和一个参数为 theName的构造函数,并且立刻将 theName的值赋给 name,这种情况经常会遇到。 _参数属性_可以方便地让我们在一个地方定义并初始化一个成员。 下面的例子是对之前 Octopus类的修改版,使用了参数属性:
class Octopus { readonly numberOfLegs: number = 8; constructor(readonly name: string) { } }
注意看我们是如何舍弃了 theName,仅在构造函数里使用 readonly name: string参数来创建和初始化 name成员。 我们把声明和赋值合并至一处。
参数属性通过给构造函数参数前面添加一个访问限定符来声明。 使用 private限定一个参数属性会声明并初始化一个私有成员;对于 public和 protected来说也是一样。
TypeScript支持通过getters/setters来截取对对象成员的访问。 它能帮助你有效的控制对对象成员的访问。
下面来看如何把一个简单的类改写成使用 get和 set。 首先,我们从一个没有使用存取器的例子开始。
`class Employee {
fullName: string;
}
let employee = new Employee();
employee.fullName = "Bob Smith";
if (employee.fullName) {
console.log(employee.fullName);
}`
我们可以随意的设置 fullName,这是非常方便的,但是这也可能会带来麻烦。
下面这个版本里,我们先检查用户密码是否正确,然后再允许其修改员工信息。 我们把对 fullName的直接访问改成了可以检查密码的 set方法。 我们也加了一个 get方法,让上面的例子仍然可以工作。
`let passcode = "secret passcode";
class Employee {
private _fullName: string;
get fullName(): string {
    return this._fullName;
}

set fullName(newName: string) {
    if (passcode && passcode == "secret passcode") {
        this._fullName = newName;
    }
    else {
        console.log("Error: Unauthorized update of employee!");
    }
}
}
let employee = new Employee();
employee.fullName = "Bob Smith";
if (employee.fullName) {
alert(employee.fullName);
}`
我们可以修改一下密码,来验证一下存取器是否是工作的。当密码不对时,会提示我们没有权限去修改员工。
对于存取器有下面几点需要注意的:
首先,存取器要求你将编译器设置为输出ECMAScript 5或更高。 不支持降级到ECMAScript 3。 其次,只带有 get不带有 set的存取器自动被推断为 readonly。 这在从代码生成 .d.ts文件时是有帮助的,因为利用这个属性的用户会看到不允许够改变它的值。
到目前为止,我们只讨论了类的实例成员,那些仅当类被实例化的时候才会被初始化的属性。 我们也可以创建类的静态成员,这些属性存在于类本身上面而不是类的实例上。 在这个例子里,我们使用 static定义 origin,因为它是所有网格都会用到的属性。 每个实例想要访问这个属性的时候,都要在 origin前面加上类名。 如同在实例属性上使用 this.前缀来访问属性一样,这里我们使用 Grid.来访问静态属性。
`class Grid {
static origin = {x: 0, y: 0};
calculateDistanceFromOrigin(point: {x: number; y: number;}) {
let xDist = (point.x - Grid.origin.x);
let yDist = (point.y - Grid.origin.y);
return Math.sqrt(xDist * xDist + yDist * yDist) / this.scale;
}
constructor (public scale: number) { }
}
let grid1 = new Grid(1.0); // 1x scale
let grid2 = new Grid(5.0); // 5x scale
console.log(grid1.calculateDistanceFromOrigin({x: 10, y: 10}));
console.log(grid2.calculateDistanceFromOrigin({x: 10, y: 10}));`
抽象类做为其它派生类的基类使用。 它们一般不会直接被实例化。 不同于接口,抽象类可以包含成员的实现细节。 abstract关键字是用于定义抽象类和在抽象类内部定义抽象方法。
abstract class Animal { abstract makeSound(): void; move(): void { console.log('roaming the earch...'); } }
抽象类中的抽象方法不包含具体实现并且必须在派生类中实现。 抽象方法的语法与接口方法相似。 两者都是定义方法签名但不包含方法体。 然而,抽象方法必须包含 abstract关键字并且可以包含访问修饰符。
`abstract class Department {
constructor(public name: string) {
}

printName(): void {
    console.log('Department name: ' + this.name);
}

abstract printMeeting(): void; // 必须在派生类中实现
}
class AccountingDepartment extends Department {
constructor() {
    super('Accounting and Auditing'); // 在派生类的构造函数中必须调用 super()
}

printMeeting(): void {
    console.log('The Accounting Department meets each Monday at 10am.');
}

generateReports(): void {
    console.log('Generating accounting reports...');
}
}
let department: Department; // 允许创建一个对抽象类型的引用
department = new Department(); // 错误: 不能创建一个抽象类的实例
department = new AccountingDepartment(); // 允许对一个抽象子类进行实例化和赋值
department.printName();
department.printMeeting();
department.generateReports(); // 错误: 方法在声明的抽象类中不存在`
当你在TypeScript里声明了一个类的时候,实际上同时声明了很多东西。 首先就是类的 _实例_的类型。
`class Greeter {
greeting: string;
constructor(message: string) {
this.greeting = message;
}
greet() {
return "Hello, " + this.greeting;
}
}
let greeter: Greeter;
greeter = new Greeter("world");
console.log(greeter.greet());`
这里,我们写了 let greeter: Greeter,意思是 Greeter类的实例的类型是 Greeter。 这对于用过其它面向对象语言的程序员来讲已经是老习惯了。
我们也创建了一个叫做 _构造函数_的值。 这个函数会在我们使用 new创建类实例的时候被调用。 下面我们来看看,上面的代码被编译成JavaScript后是什么样子的:
`let Greeter = (function () {
function Greeter(message) {
this.greeting = message;
}
Greeter.prototype.greet = function () {
return "Hello, " + this.greeting;
};
return Greeter;
})();
let greeter;
greeter = new Greeter("world");
console.log(greeter.greet());`
上面的代码里, let Greeter将被赋值为构造函数。 当我们调用 new并执行了这个函数后,便会得到一个类的实例。 这个构造函数也包含了类的所有静态属性。 换个角度说,我们可以认为类具有 _实例部分_与 _静态部分_这两个部分。
让我们稍微改写一下这个例子,看看它们之间的区别:
`class Greeter {
static standardGreeting = "Hello, there";
greeting: string;
greet() {
if (this.greeting) {
return "Hello, " + this.greeting;
}
else {
return Greeter.standardGreeting;
}
}
}
let greeter1: Greeter;
greeter1 = new Greeter();
console.log(greeter1.greet());
let greeterMaker: typeof Greeter = Greeter;
greeterMaker.standardGreeting = "Hey there!";
let greeter2: Greeter = new greeterMaker();
console.log(greeter2.greet());`
这个例子里, greeter1与之前看到的一样。 我们实例化 Greeter类,并使用这个对象。 与我们之前看到的一样。
再之后,我们直接使用类。 我们创建了一个叫做 greeterMaker的变量。 这个变量保存了这个类或者说保存了类构造函数。 然后我们使用 typeof Greeter,意思是取Greeter类的类型,而不是实例的类型。 或者更确切的说,"告诉我 Greeter标识符的类型",也就是构造函数的类型。 这个类型包含了类的所有静态成员和构造函数。 之后,就和前面一样,我们在 greeterMaker上使用 new,创建 Greeter的实例。
如上一节里所讲的,类定义会创建两个东西:类的实例类型和一个构造函数。 因为类可以创建出类型,所以你能够在允许使用接口的地方使用类。
`class Point {
x: number;
y: number;
}
interface Point3d extends Point {
z: number;
}
let point3d: Point3d = {x: 1, y: 2, z: 3};`
制作 于北京
![]()
©2012-2018 Microsoft
推动TypeScript语言在**的发展
保持和TypeScript官网基本一致
© 京ICP备15040086号-2
传统的JavaScript程序使用函数和基于原型的继承来创建可重用的组件,但对于熟悉使用面向对象方式的程序员来讲就有些棘手,因为他们用的是基于类的继承并且对象是由类构建出来的。 从ECMAScript 2015,也就是ECMAScript 6开始,JavaScript程序员将能够使用基于类的面向对象的方式。 使用TypeScript,我们允许开发者现在就使用这些特性,并且编译后的JavaScript可以在所有主流浏览器和平台上运行,而不需要等到下个JavaScript版本。
下面看一个使用类的例子:
class Greeter {
    greeting: string;
    constructor(message: string) {
        this.greeting = message;
    }
    greet() {
        return "Hello, " + this.greeting;
    }
}

let greeter = new Greeter("world");
如果你使用过C#或Java,你会对这种语法非常熟悉。 我们声明一个 Greeter类。这个类有3个成员:一个叫做 greeting的属性,一个构造函数和一个 greet方法。
你会注意到,我们在引用任何一个类成员的时候都用了 this。 它表示我们访问的是类的成员。
最后一行,我们使用 new构造了 Greeter类的一个实例。 它会调用之前定义的构造函数,创建一个 Greeter类型的新对象,并执行构造函数初始化它。
在TypeScript里,我们可以使用常用的面向对象模式。 基于类的程序设计中一种最基本的模式是允许使用继承来扩展现有的类。
看下面的例子:
class Animal {
    move(distanceInMeters: number = 0) {
        console.log(`Animal moved ${distanceInMeters}m.`);
    }
}

class Dog extends Animal {
    bark() {
        console.log('Woof! Woof!');
    }
}

const dog = new Dog();
dog.bark();
dog.move(10);
dog.bark();
这个例子展示了最基本的继承:类从基类中继承了属性和方法。 这里, Dog是一个 派生类,它派生自 Animal 基类,通过 extends关键字。 派生类通常被称作 子类,基类通常被称作 超类。
因为 Dog继承了 Animal的功能,因此我们可以创建一个 Dog的实例,它能够 bark()和 move()。
下面我们来看个更加复杂的例子。
class Animal {
    name: string;
    constructor(theName: string) { this.name = theName; }
    move(distanceInMeters: number = 0) {
        console.log(`${this.name} moved ${distanceInMeters}m.`);
    }
}

class Snake extends Animal {
    constructor(name: string) { super(name); }
    move(distanceInMeters = 5) {
        console.log("Slithering...");
        super.move(distanceInMeters);
    }
}

class Horse extends Animal {
    constructor(name: string) { super(name); }
    move(distanceInMeters = 45) {
        console.log("Galloping...");
        super.move(distanceInMeters);
    }
}

let sam = new Snake("Sammy the Python");
let tom: Animal = new Horse("Tommy the Palomino");

sam.move();
tom.move(34);
这个例子展示了一些上面没有提到的特性。 这一次,我们使用 extends关键字创建了 Animal的两个子类: Horse和 Snake。
与前一个例子的不同点是,派生类包含了一个构造函数,它 _必须_调用 super(),它会执行基类的构造函数。 而且,在构造函数里访问 this的属性之前,我们 _一定_要调用 super()。 这个是TypeScript强制执行的一条重要规则。
这个例子演示了如何在子类里可以重写父类的方法。 Snake类和 Horse类都创建了 move方法,它们重写了从 Animal继承来的 move方法,使得 move方法根据不同的类而具有不同的功能。 注意,即使 tom被声明为 Animal类型,但因为它的值是 Horse,调用 tom.move(34)时,它会调用 Horse里重写的方法:
Slithering...
Sammy the Python moved 5m.
Galloping...
Tommy the Palomino moved 34m.
public在上面的例子里,我们可以自由的访问程序里定义的成员。 如果你对其它语言中的类比较了解,就会注意到我们在之前的代码里并没有使用 public来做修饰;例如,C#要求必须明确地使用 public指定成员是可见的。 在TypeScript里,成员都默认为 public。
你也可以明确的将一个成员标记成 public。 我们可以用下面的方式来重写上面的 Animal类:
class Animal {
    public name: string;
    public constructor(theName: string) { this.name = theName; }
    public move(distanceInMeters: number) {
        console.log(`${this.name} moved ${distanceInMeters}m.`);
    }
}
private当成员被标记成 private时,它就不能在声明它的类的外部访问。比如:
class Animal {
    private name: string;
    constructor(theName: string) { this.name = theName; }
}

new Animal("Cat").name;
TypeScript使用的是结构性类型系统。 当我们比较两种不同的类型时,并不在乎它们从何处而来,如果所有成员的类型都是兼容的,我们就认为它们的类型是兼容的。
然而,当我们比较带有 private或 protected成员的类型的时候,情况就不同了。 如果其中一个类型里包含一个 private成员,那么只有当另外一个类型中也存在这样一个 private成员, 并且它们都是来自同一处声明时,我们才认为这两个类型是兼容的。 对于 protected成员也使用这个规则。
下面来看一个例子,更好地说明了这一点:
class Animal {
    private name: string;
    constructor(theName: string) { this.name = theName; }
}

class Rhino extends Animal {
    constructor() { super("Rhino"); }
}

class Employee {
    private name: string;
    constructor(theName: string) { this.name = theName; }
}

let animal = new Animal("Goat");
let rhino = new Rhino();
let employee = new Employee("Bob");

animal = rhino;
animal = employee;
这个例子中有 Animal和 Rhino两个类, Rhino是 Animal类的子类。 还有一个 Employee类,其类型看上去与 Animal是相同的。 我们创建了几个这些类的实例,并相互赋值来看看会发生什么。 因为 Animal和 Rhino共享了来自 Animal里的私有成员定义 private name: string,因此它们是兼容的。 然而 Employee却不是这样。当把 Employee赋值给 Animal的时候,得到一个错误,说它们的类型不兼容。 尽管 Employee里也有一个私有成员 name,但它明显不是 Animal里面定义的那个。
protectedprotected修饰符与 private修饰符的行为很相似,但有一点不同, protected成员在派生类中仍然可以访问。例如:
class Person {
    protected name: string;
    constructor(name: string) { this.name = name; }
}

class Employee extends Person {
    private department: string;

    constructor(name: string, department: string) {
        super(name)
        this.department = department;
    }

    public getElevatorPitch() {
        return `Hello, my name is ${this.name} and I work in ${this.department}.`;
    }
}

let howard = new Employee("Howard", "Sales");
console.log(howard.getElevatorPitch());
console.log(howard.name);
注意,我们不能在 Person类外使用 name,但是我们仍然可以通过 Employee类的实例方法访问,因为 Employee是由 Person派生而来的。
构造函数也可以被标记成 protected。 这意味着这个类不能在包含它的类外被实例化,但是能被继承。比如,
class Person {
    protected name: string;
    protected constructor(theName: string) { this.name = theName; }
}


class Employee extends Person {
    private department: string;

    constructor(name: string, department: string) {
        super(name);
        this.department = department;
    }

    public getElevatorPitch() {
        return `Hello, my name is ${this.name} and I work in ${this.department}.`;
    }
}

let howard = new Employee("Howard", "Sales");
let john = new Person("John");
你可以使用 readonly关键字将属性设置为只读的。 只读属性必须在声明时或构造函数里被初始化。
class Octopus {
    readonly name: string;
    readonly numberOfLegs: number = 8;
    constructor (theName: string) {
        this.name = theName;
    }
}
let dad = new Octopus("Man with the 8 strong legs");
dad.name = "Man with the 3-piece suit";
在上面的例子中,我们必须在Octopus类里定义一个只读成员 name和一个参数为 theName的构造函数,并且立刻将 theName的值赋给 name,这种情况经常会遇到。 _参数属性_可以方便地让我们在一个地方定义并初始化一个成员。 下面的例子是对之前 Octopus类的修改版,使用了参数属性:
class Octopus {
    readonly numberOfLegs: number = 8;
    constructor(readonly name: string) {
    }
}
注意看我们是如何舍弃了 theName,仅在构造函数里使用 readonly name: string参数来创建和初始化 name成员。 我们把声明和赋值合并至一处。
参数属性通过给构造函数参数前面添加一个访问限定符来声明。 使用 private限定一个参数属性会声明并初始化一个私有成员;对于 public和 protected来说也是一样。
TypeScript支持通过getters/setters来截取对对象成员的访问。 它能帮助你有效的控制对对象成员的访问。
下面来看如何把一个简单的类改写成使用 get和 set。 首先,我们从一个没有使用存取器的例子开始。
class Employee {
    fullName: string;
}

let employee = new Employee();
employee.fullName = "Bob Smith";
if (employee.fullName) {
    console.log(employee.fullName);
}
我们可以随意的设置 fullName,这是非常方便的,但是这也可能会带来麻烦。
下面这个版本里,我们先检查用户密码是否正确,然后再允许其修改员工信息。 我们把对 fullName的直接访问改成了可以检查密码的 set方法。 我们也加了一个 get方法,让上面的例子仍然可以工作。
let passcode = "secret passcode";

class Employee {
    private _fullName: string;

    get fullName(): string {
        return this._fullName;
    }

    set fullName(newName: string) {
        if (passcode && passcode == "secret passcode") {
            this._fullName = newName;
        }
        else {
            console.log("Error: Unauthorized update of employee!");
        }
    }
}

let employee = new Employee();
employee.fullName = "Bob Smith";
if (employee.fullName) {
    alert(employee.fullName);
}
我们可以修改一下密码,来验证一下存取器是否是工作的。当密码不对时,会提示我们没有权限去修改员工。
对于存取器有下面几点需要注意的:
首先,存取器要求你将编译器设置为输出ECMAScript 5或更高。 不支持降级到ECMAScript 3。 其次,只带有 get不带有 set的存取器自动被推断为 readonly。 这在从代码生成 .d.ts文件时是有帮助的,因为利用这个属性的用户会看到不允许够改变它的值。
到目前为止,我们只讨论了类的实例成员,那些仅当类被实例化的时候才会被初始化的属性。 我们也可以创建类的静态成员,这些属性存在于类本身上面而不是类的实例上。 在这个例子里,我们使用 static定义 origin,因为它是所有网格都会用到的属性。 每个实例想要访问这个属性的时候,都要在 origin前面加上类名。 如同在实例属性上使用 this.前缀来访问属性一样,这里我们使用 Grid.来访问静态属性。
class Grid {
    static origin = {x: 0, y: 0};
    calculateDistanceFromOrigin(point: {x: number; y: number;}) {
        let xDist = (point.x - Grid.origin.x);
        let yDist = (point.y - Grid.origin.y);
        return Math.sqrt(xDist * xDist + yDist * yDist) / this.scale;
    }
    constructor (public scale: number) { }
}

let grid1 = new Grid(1.0);
let grid2 = new Grid(5.0);

console.log(grid1.calculateDistanceFromOrigin({x: 10, y: 10}));
console.log(grid2.calculateDistanceFromOrigin({x: 10, y: 10}));
抽象类做为其它派生类的基类使用。 它们一般不会直接被实例化。 不同于接口,抽象类可以包含成员的实现细节。 abstract关键字是用于定义抽象类和在抽象类内部定义抽象方法。
abstract class Animal {
    abstract makeSound(): void;
    move(): void {
        console.log('roaming the earch...');
    }
}
抽象类中的抽象方法不包含具体实现并且必须在派生类中实现。 抽象方法的语法与接口方法相似。 两者都是定义方法签名但不包含方法体。 然而,抽象方法必须包含 abstract关键字并且可以包含访问修饰符。
abstract class Department {

    constructor(public name: string) {
    }

    printName(): void {
        console.log('Department name: ' + this.name);
    }

    abstract printMeeting(): void;
}

class AccountingDepartment extends Department {

    constructor() {
        super('Accounting and Auditing');
    }

    printMeeting(): void {
        console.log('The Accounting Department meets each Monday at 10am.');
    }

    generateReports(): void {
        console.log('Generating accounting reports...');
    }
}

let department: Department;
department = new Department();
department = new AccountingDepartment();
department.printName();
department.printMeeting();
department.generateReports();
当你在TypeScript里声明了一个类的时候,实际上同时声明了很多东西。 首先就是类的 _实例_的类型。
class Greeter {
    greeting: string;
    constructor(message: string) {
        this.greeting = message;
    }
    greet() {
        return "Hello, " + this.greeting;
    }
}

let greeter: Greeter;
greeter = new Greeter("world");
console.log(greeter.greet());
这里,我们写了 let greeter: Greeter,意思是 Greeter类的实例的类型是 Greeter。 这对于用过其它面向对象语言的程序员来讲已经是老习惯了。
我们也创建了一个叫做 _构造函数_的值。 这个函数会在我们使用 new创建类实例的时候被调用。 下面我们来看看,上面的代码被编译成JavaScript后是什么样子的:
let Greeter = (function () {
    function Greeter(message) {
        this.greeting = message;
    }
    Greeter.prototype.greet = function () {
        return "Hello, " + this.greeting;
    };
    return Greeter;
})();

let greeter;
greeter = new Greeter("world");
console.log(greeter.greet());
上面的代码里, let Greeter将被赋值为构造函数。 当我们调用 new并执行了这个函数后,便会得到一个类的实例。 这个构造函数也包含了类的所有静态属性。 换个角度说,我们可以认为类具有 _实例部分_与 _静态部分_这两个部分。
让我们稍微改写一下这个例子,看看它们之间的区别:
class Greeter {
    static standardGreeting = "Hello, there";
    greeting: string;
    greet() {
        if (this.greeting) {
            return "Hello, " + this.greeting;
        }
        else {
            return Greeter.standardGreeting;
        }
    }
}

let greeter1: Greeter;
greeter1 = new Greeter();
console.log(greeter1.greet());

let greeterMaker: typeof Greeter = Greeter;
greeterMaker.standardGreeting = "Hey there!";

let greeter2: Greeter = new greeterMaker();
console.log(greeter2.greet());
这个例子里, greeter1与之前看到的一样。 我们实例化 Greeter类,并使用这个对象。 与我们之前看到的一样。
再之后,我们直接使用类。 我们创建了一个叫做 greeterMaker的变量。 这个变量保存了这个类或者说保存了类构造函数。 然后我们使用 typeof Greeter,意思是取Greeter类的类型,而不是实例的类型。 或者更确切的说,"告诉我 Greeter标识符的类型",也就是构造函数的类型。 这个类型包含了类的所有静态成员和构造函数。 之后,就和前面一样,我们在 greeterMaker上使用 new,创建 Greeter的实例。
如上一节里所讲的,类定义会创建两个东西:类的实例类型和一个构造函数。 因为类可以创建出类型,所以你能够在允许使用接口的地方使用类。
class Point {
    x: number;
    y: number;
}

interface Point3d extends Point {
    z: number;
}

let point3d: Point3d = {x: 1, y: 2, z: 3};
A declarative, efficient, and flexible JavaScript library for building user interfaces.
🖖 Vue.js is a progressive, incrementally-adoptable JavaScript framework for building UI on the web.
TypeScript is a superset of JavaScript that compiles to clean JavaScript output.
An Open Source Machine Learning Framework for Everyone
The Web framework for perfectionists with deadlines.
A PHP framework for web artisans
Bring data to life with SVG, Canvas and HTML. 📊📈🎉
JavaScript (JS) is a lightweight interpreted programming language with first-class functions.
Some thing interesting about web. New door for the world.
A server is a program made to process requests and deliver data to clients.
Machine learning is a way of modeling and interpreting data that allows a piece of software to respond intelligently.
Some thing interesting about visualization, use data art
Some thing interesting about game, make everyone happy.
We are working to build community through open source technology. NB: members must have two-factor auth.
Open source projects and samples from Microsoft.
Google ❤️ Open Source for everyone.
Alibaba Open Source for everyone
Data-Driven Documents codes.
China tencent open source team.