![]()
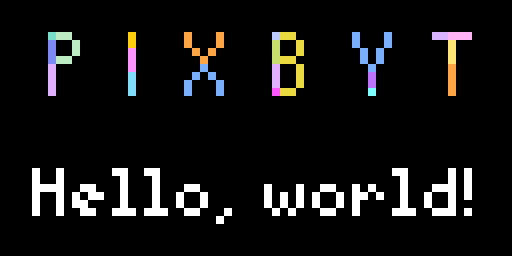
Pixbyt is a self-hosted Tidbyt app server for advanced apps
that aren't supported by the official community app server
that you can access through Tidbyt's mobile app.
![]()
 crossword |
 jeopardy |
 common-misconceptions |
 owen-wilson-facts |
 plex |
 apple-tv |
 letterboxd |
 parcelapp |
 homebridge-unifi |
 guess-the-flag |
 ffmpeg |
 revolution |
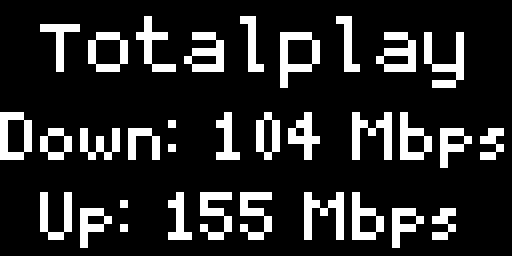 speedtest |
 hello-world |
Your next Tidbyt app | |
Your Tidbyt does not run apps directly; it depends on a server to periodically run apps and push the resulting images to the device. When you install a community app through Tidbyt's mobile app, the app runs on Tidbyt's official app server. For security reasons, there are a ton of limitations on what these apps are allowed to do, which means some awesome app ideas are impossible to implement.
Apps running on Pixbyt have none of these limitations:
- Run Python scripts and packages, not just Starlark applets
- Reach local network resources, not just the public internet
- Work with complex APIs, not just simple REST HTTP requests
- Read local files, like images or JSON
- Organize your source code across multiple files
Pixbyt lets you realize your wildest Tidbyt dreams by making it easy to:
- build advanced Tidbyt apps,
- install advanced apps built by the community,
- manage app configurations and schedules,
- package apps together in a Docker image, and
- launch the app server using Docker Compose.
Pixbyt's advanced features are enabled by tap-pixlet, an unofficial Tidbyt app runner that extends Pixlet (the official Tidbyt app development framework) with an unofficial standard library named Pixlib, similar to how Starlib is the unofficial standard library for Starlark (the Python-like language Tidbyt apps are written in).
Pixlib comes with functions like
file.read,
file.exec,
font.height, and
html.unescape,
helpful constants like
const.WIDTH,
const.HEIGHT, and
const.FPS, and
overloads load to support local files.
Pixbyt uses
tap-pixlet to run apps,
target-tidbyt and target-webp to push the resulting images to your Tidbyt or WebP image files,
Airflow to run apps on a schedule, and
Meltano to tie these components together.
Pixbyt also includes resources to package your apps into a Docker image (locally or automatically on GitHub Actions) and launch it using Docker Compose.
This repo defines a Pixbyt app server with a single hello-world app that shows off some of its advanced features.
It automatically builds a ghcr.io/douwem/pixbyt:main Docker image that can be launched using Docker Compose to render the app to a Tidbyt device every hour.
If you want to very quickly see Pixbyt in action and already have Docker running, you can clone this repo, copy .env.sample to .env, and run docker compose run -e TAP_PIXLET_MAGNIFICATION=8 pixbyt run hello-world--webp to render the app to an image at output/hello-world/<timestamp>.webp.
If you want to see the app on your Tidbyt, follow step 2 below to configure it and then run docker compose run -e TAP_PIXLET_BACKGROUND=false pixbyt run hello-world.
If you've got a little bit more time, or if you're ready to start using apps other than hello-world, follow the steps below to build your own Pixbyt app server using this repo as a template:
-
Click the green "Use this template" button at the top of this page, choose "Create a new repository", and create a new (private) repo.
-
Clone your new repository and enter the new directory:
git clone [email protected]:<username>/pixbyt.git
cd pixbyt
-
Create your own
.envconfiguration file from the sample:cp .env.sample .env
-
Update
.envwith your configuration:TZ: Find your "TZ" timezone identifier. This is used by many apps that show the (relative) date and time.TIDBYT_DEVICE_ID: Find your Device ID in the Tidbyt mobile app under Settings > General > Get API Key.TIDBYT_TOKEN: Find your API Token the Tidbyt mobile app under Settings > General > Get API Key.HELLO_WORLD_NAME: This is used by thehello-worldexample app. Optionally, replaceworldwith your own name.
The most important files in your Pixbyt repo (and likely the only ones you'll want to edit) are the following, which define the apps, their configuration, and their schedules:
pixbyt
├─ apps.yml                 # Schedules
├─ .env                     # Configuration
└─ apps
   └─ <app>                 # One directory for each app
      ├─ <app>.star         # Main Starlark applet
      ├─ pixbyt.yml         # Pixbyt metadata
      ├─ requirements.txt   # Optional: Python packages (one `pip install` argument per line)
      ├─ apt-packages.txt   # Optional: APT packages (one `apt-get install` argument per line)
      ├─ *.py               # Optional: Python scripts to run using `file.exec`
      ├─ *.star             # Optional: Starlark files to load using `load`
      └─ *                  # Optional: Files to read using `file.read`
Out of the box, Pixbyt comes with a single hello-world app that shows off some of its advanced features and can be used as an example to build your own.
If you're just trying out Pixbyt and don't yet have another app in mind yet that you'd like to run, you can keep hello-world and skip ahead to step 4 to build and launch the app server.
If you don't want hello-world on your Tidbyt, you can disable it by removing its entry from apps.yml (and .env), but DO NOT remove the apps/hello-world directory as the GitHub Actions workflow that builds the Docker image uses it to test if the image works.
-
Add the app's repo as a submodule under
apps, and enter the new directory:git submodule add https://github.com/<username>/<repository>.git apps/<app>
For example, to install
crossword:git submodule add https://github.com/DouweM/tidbyt-crossword.git apps/crossword
Note that in this case, the repo is called
tidbyt-crossword, but the app directory needs to be calledcrossword. -
Skip ahead to step 3.2 to configure the app.
-
Create a new directory for your app under
apps, and enter the new directory:cd apps mkdir <app> cd <app>
-
Create the main applet at
apps/<app>/<app>.star.Any standard Pixlet applet is supported, as well as all Pixlib features.
Note that the app directory and file names need to match.
Optionally, your app directory can also contain:
*.pyscripts to run usingfile.exec*.starfiles to load usingload- arbitrary files to read using
file.read - Python packages in
requirements.txt(onepip installargument per line) - APT packages in
apt-packages.txt(oneapt-get installargument per line)
-
Create the Pixbyt metadata file at
apps/<app>/pixbyt.yml:jobs: - name: <app> tasks: - tap-pixlet--<app> target-tidbyt - name: <app>--webp tasks: - tap-pixlet--<app> target-webp plugins: extractors: - name: tap-pixlet--<app> inherit_from: tap-pixlet # TODO: If your app does not have a `requirements.txt` defining Python packages, delete the following line: pip_url: git+https://github.com/DouweM/tap-pixlet.git -r apps/<app>/requirements.txt config: path: apps/<app> # TODO: If your app does not require configuration, delete the following lines: app_config: # TODO: For any key your app reads from `config`, add an entry mapping the lowercase key to an uppercase environment variable, e.g. `name: $HELLO_WORLD_NAME`: <key>: $<APP>_<KEY>
- Replace
<app>with the name of your app - Follow the
TODOinstructions.
- Replace
-
Add the app's update schedule to
apps.ymlunderschedules::schedules: # ... - name: <app> interval: '<cron schedule expression>' job: <app>
-
Replace
<app>with the name of the app. -
Replace
<cron schedule expression>with an appropriate cron schedule expression:- Clocks should use
* * * * *to update every minute, so that the displayed time is always as fresh as possible. - Apps that display a random entry from a list can use
*/5 * * * *to update every 5 minutes, so that a fresh entry is shown on every app rotation. - Apps that show the latest data from some API can use
*/15 * * * *to update every 15 minutes, or something else appropriate for your data source and the expected data freshness. - Apps that will always generate the same image can use
0 0 * * *to update every day at midnight, just to be sure.
(A recommended schedule is typically documented in the app's
README.) - Clocks should use
For example:
schedules:
- name: hello-world
  interval: '0 * * * *' # On the hour
  job: hello-world
-
-
If the app requires configuration, update
.env:For any config key the app defines under
app_config:in itspixbyt.ymlfile, add a value for the uppercase environment variable:<APP>_<KEY>="<value>"
(The exact keys are typically documented in the app's
README.)For example:
HELLO_WORLD_NAME="world"
Note that you'll need to do this each time your apps, their schedules, or their configurations change.
-
Ensure Docker is installed.
-
Build a Docker image containing Pixbyt and your apps:
docker compose build
-
Edit
docker-compose.yml:- Under
x-remote-image:, replace<username>with your GitHub username - Under
pixbyt:, comment out<<: *local-imageand uncomment<<: *remote-imageon the next line
- Under
-
Commit your changes:
git add -A git commit -m "Set up my Pixbyt" -
Push your repo up to GitHub:
git push origin main
This will automatically trigger a GitHub Actions workflow to build a Docker image containing Pixbyt and your apps.
-
Ensure Docker is installed.
-
If you chose to build your Docker image using GitHub Actions in the previous step, authenticate with the GitHub Container Registry.
-
Launch Pixbyt using Docker Compose:
docker compose up --pull --build -d
Your Pixbyt app server is now running, and your apps will update on schedule! You can find logs for your apps under logs/<app>/.
During app development or debugging, you will not want to build the entire Docker image each time your apps, their schedules, or their configurations change, nor will you want to run the entire app server.
Instead, you can directly render a specific app to a WebP image file or your Tidbyt, and quickly iterate on your app based on what you see in the logs and the output image.
The quickest way to start developing is using GitHub Codespaces, which will automatically install the necessary dependencies and launch you into a web-based VS Code editor.
If you've already created your own repo using this template repo:
- Click the "
<>Code" button at the top of the page - Choose "Codespaces" > "Create codespace on main"
If you haven't created a new repo from this template yet:
- Click the green "Use this template" button at the top of this page
- Choose "Open in a codespace"
-
Install Pixlet:
-
On macOS:
brew install tidbyt/tidbyt/pixlet
-
-
Install Meltano:
-
With
pip:pip install meltano
-
-
Manually install any APT packages defined in your apps'
apt-packages.txtfiles. -
Install
tap-pixlet,target-tidbyt, andtarget-webpusing Meltano:meltano install
If you've already built a Docker image and want to test the apps inside it without making changes to them, you can use the docker compose commands below.
The image will be created at output/<app>/<timestamp>.webp.
The exact path is also printed in the command output.
meltano run <app>--webp

# Using Docker image:
docker compose run pixbyt run <app>--webp
For example:
meltano run hello-world--webp

# Using Docker image:
docker compose run pixbyt run hello-world--webpTAP_PIXLET_MAGNIFICATION=8 meltano run <app>--webp
# Using Docker image:
docker compose run -e TAP_PIXLET_MAGNIFICATION=8 pixbyt run <app>--webpFor example:
TAP_PIXLET_MAGNIFICATION=8 meltano run hello-world--webp

# Using Docker image:
docker compose run -e TAP_PIXLET_MAGNIFICATION=8 pixbyt run hello-world--webpThe app will immediately show up on your Tidbyt. This is useful during development.
TAP_PIXLET_BACKGROUND=false meltano run <app>

# Using Docker image:
docker compose run -e TAP_PIXLET_BACKGROUND=false pixbyt run <app>
For example:
TAP_PIXLET_BACKGROUND=false meltano run hello-world

# Using Docker image:
docker compose run -e TAP_PIXLET_BACKGROUND=false pixbyt run hello-worldThe app will be added to the Tidbyt app rotation. This is useful when you're running this command on a schedule, to make sure that the app will be up to date the next time it comes up in the app rotation.
meltano run <app>

# Using Docker image:
docker compose run pixbyt run <app>
For example:
meltano run hello-world

# Using Docker image:
docker compose run pixbyt run hello-worldChanges to an app's source files are automatically picked up, but changes to APT and Python package dependencies aren't.
If an app defines Python packages in its requirements.txt file, you'll need to manually do a clean install of the app's Meltano plugin every time it changes:
meltano install --clean extractor tap-pixlet--<app>For example:
meltano install --clean extractor tap-pixlet--hello-worldIf an app defines APT packages in its apt-packages.txt file, you'll need to manually install them every time they change.