Giter Club home page Giter Club logo

ch552-usb-knob's Introduction

CH552E USB Knob - Rotary Encoder with USB Interface

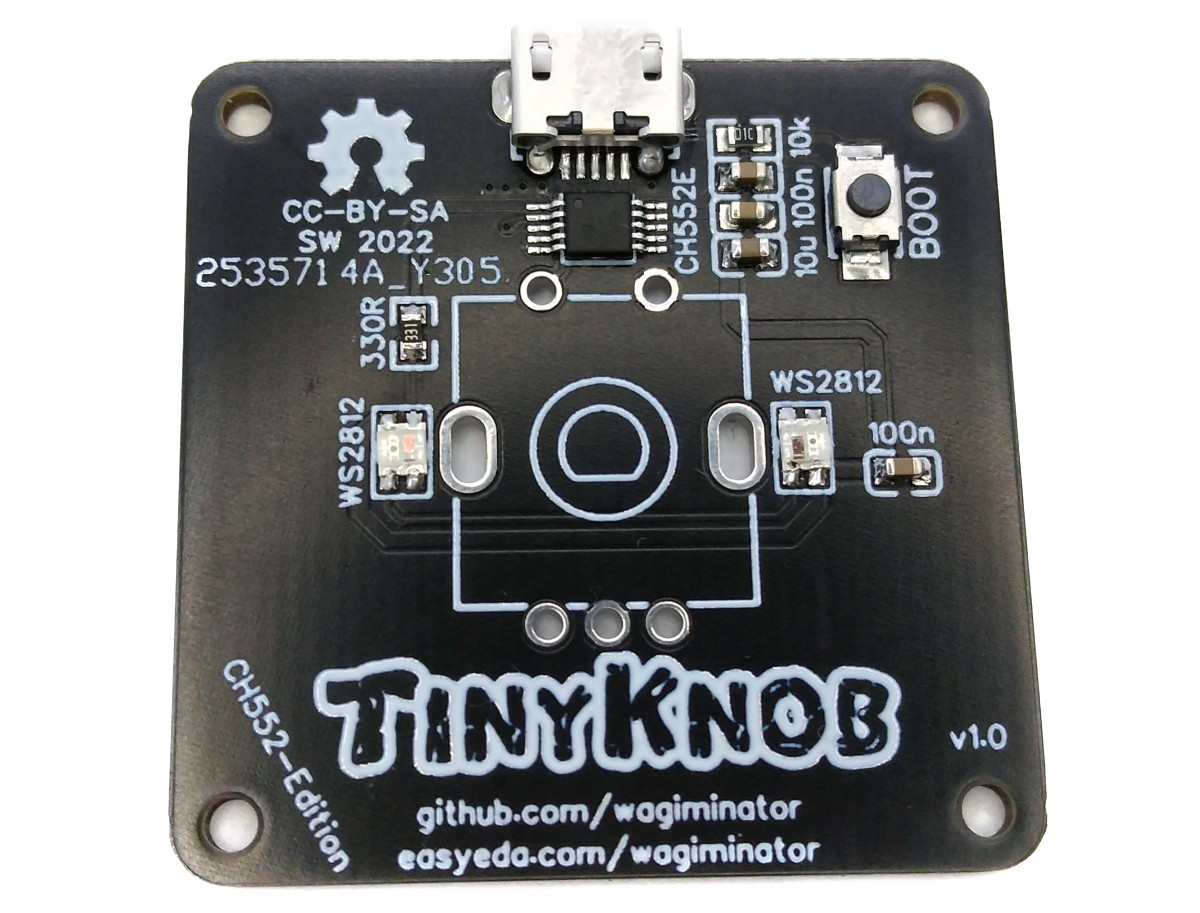
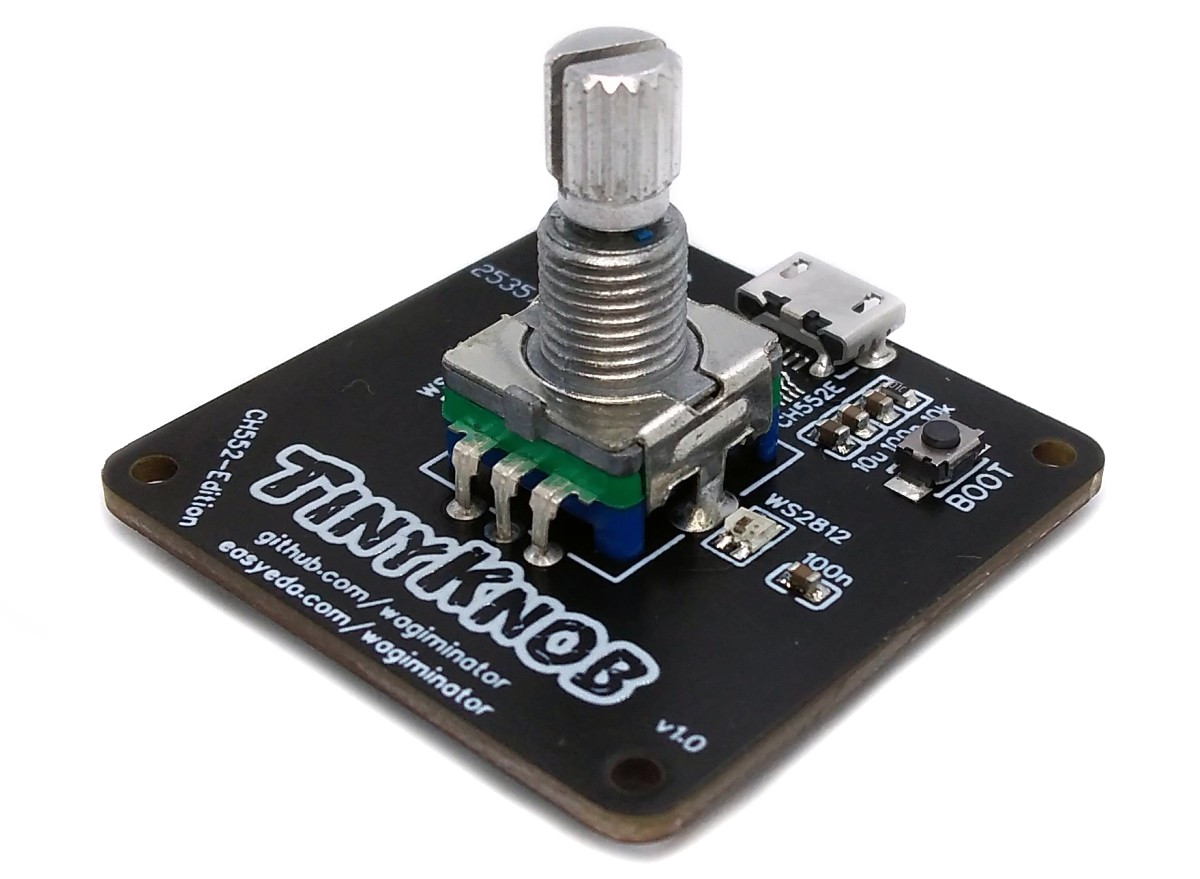
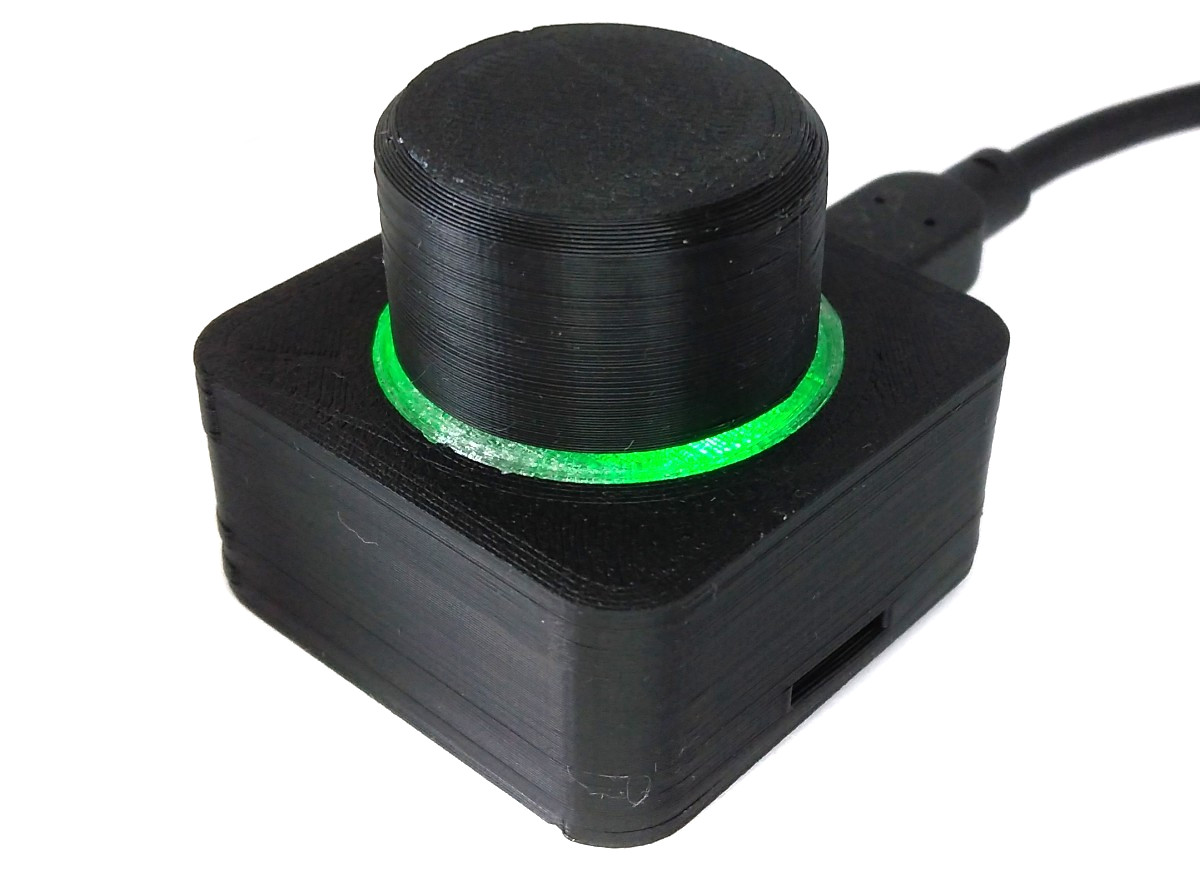
The USB Knob is a versatile device that combines the functionality of a rotary encoder with the convenience of a USB interface. It is based on either the CH552E or CH554E microcontroller and is equipped with addressable LEDs, commonly known as NeoPixels. The unique combination of these components makes the USB Knob an ideal choice for a wide range of applications, including volume control for PCs.

One of the standout features of the USB Knob is that it requires no driver installation, making it incredibly easy to use. The device acts as a USB human interface device (HID), meaning that it can be recognized and utilized by most computers without the need for additional software.

USB_Knob_pic1.jpg

Hardware

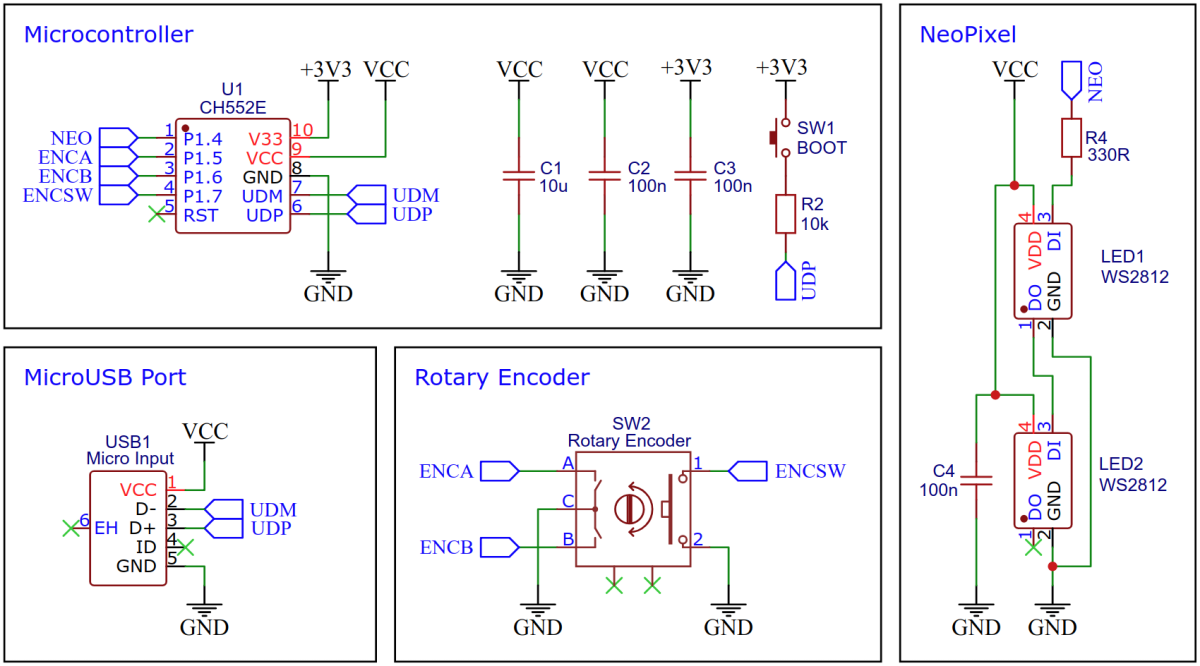
Schematic

USB_Knob_wiring.png

CH552E 8-bit USB Device Microcontroller

The CH552E is a low-cost, enhanced E8051 core microcontroller compatible with the MCS51 instruction set. It has an integrated USB 2.0 controller with full-speed data transfer (12 Mbit/s) and supports up to 64 byte data packets with integrated FIFO and direct memory access (DMA). The CH552E has a factory built-in bootloader so firmware can be uploaded directly via USB without the need for an additional programming device.

Building Instructions

  1. Take the Gerber files and send them to a PCB manufacturer of your choosing. They will use these files to create the circuit board for your device.
  2. Once you have the PCB, you can start soldering the components onto it. Use the BOM (bill of materials) and schematic as a guide to make sure everything is connected correctly.
  3. Upload the firmware by following the instructions in the next section (see below).
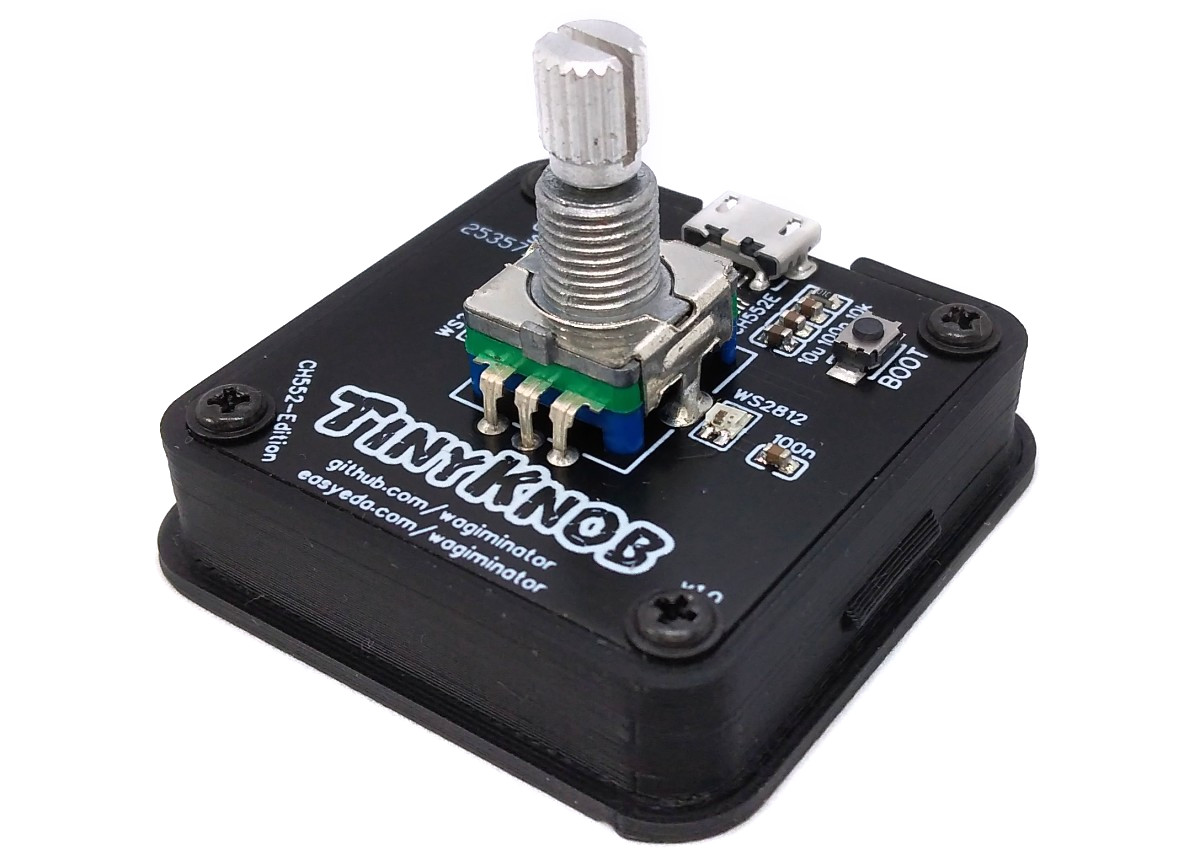
  4. To create the case for your device, use the STL files with your 3D printer. Make sure to use transparent filament for the ring.
  5. After printing, secure the PCB to the bottom of the case using four self-tapping M2x5mm screws.
  6. Next, glue the ring from the bottom into the circular recess in the top of the case.
  7. Finally, assemble the case. Place the knob onto the rotary encoder. Your device is now ready to use!

USB_Knob_pic2.jpg USB_Knob_pic4.jpg

Software

Firmware Versions

Volume Knob

This firmware enables the USB Knob to control the volume of your computer. By turning the knob, you can increase or decrease the volume, while pressing the knob will mute or unmute the sound. The device is recognized as a USB HID consumer multimedia keyboard and should work immediately without the need for any driver installation.

Mouse Wheel Knob

This firmware is designed to transform the USB Knob into a mouse wheel. By rotating the knob, it emulates the movement of a mouse wheel, allowing users to scroll up and down web pages, among other things. Pressing the knob is equivalent to clicking on the mouse wheel or the middle mouse button. The device registers as a USB HID mouse on the computer and should work immediately without the need for driver installation.

Custom Knob

This firmware is perfect for customizing it according to your own preferences. It allows for the free mapping of USB HID actions to USB Knob events. The firmware is structured and commented in such a way that it should be possible to make adjustments even with basic programming skills. It is designed as a USB HID composite device that combines a keyboard, a mouse, and a game controller.

Compiling and Installing Firmware

Preparing the CH55x Bootloader

Installing Drivers for the CH55x Bootloader

On Linux you do not need to install a driver. However, by default Linux will not expose enough permission to upload your code with the USB bootloader. In order to fix this, open a terminal and run the following commands:

echo 'SUBSYSTEM=="usb", ATTR{idVendor}=="4348", ATTR{idProduct}=="55e0", MODE="666"' | sudo tee /etc/udev/rules.d/99-ch55x.rules
sudo service udev restart

For Windows, you need the CH372 driver (recommended). Alternatively, you can also use the Zadig Tool to install the correct driver. Here, click "Options" and "List All Devices" to select the USB module, and then install the libusb-win32 driver. To do this, the board must be connected and the CH55x must be in bootloader mode.

Entering CH55x Bootloader Mode

A brand new chip starts automatically in bootloader mode as soon as it is connected to the PC via USB. Once firmware has been uploaded, the bootloader must be started manually for new uploads. To do this, the board must first be disconnected from the USB port and all voltage sources. Now press the BOOT button and keep it pressed while reconnecting the board to the USB port of your PC. The chip now starts again in bootloader mode, the BOOT button can be released and new firmware can be uploaded within the next couple of seconds.

Once the USB Knob firmware is installed, the bootloader can also be entered by holding down the rotary encoder switch while connecting the device to the USB port. In this way, the case does not have to be opened when new firmware is to be installed. The NeoPixels will then light up white as long as the device is in bootloader mode (approx. 10 seconds).

Compiling and Uploading using the makefile

Installing SDCC Toolchain for CH55x

Install the SDCC Compiler. In order for the programming tool to work, Python3 must be installed on your system. To do this, follow these instructions. In addition pyusb must be installed. On Linux (Debian-based), all of this can be done with the following commands:

sudo apt install build-essential sdcc python3 python3-pip
sudo pip install pyusb

Compiling and Uploading Firmware

  • Open a terminal.
  • Navigate to the folder with the makefile.
  • Connect the board and make sure the CH55x is in bootloader mode.
  • Run make flash to compile and upload the firmware.
  • If you don't want to compile the firmware yourself, you can also upload the precompiled binary. To do this, just run python3 ./tools/chprog.py firmware.bin.

Compiling and Uploading using the Arduino IDE

Installing the Arduino IDE and CH55xduino

Install the Arduino IDE if you haven't already. Install the CH55xduino package by following the instructions on the website.

Compiling and Uploading Firmware

  • Open the .ino file in the Arduino IDE.
  • Go to Tools -> Board -> CH55x Boards and select CH552 Board.
  • Go to Tools and choose the following board options:
    • Clock Source: 16 MHz (internal)
    • Upload Method: USB
    • USB Settings: USER CODE /w 266B USB RAM
  • Connect the board and make sure the CH55x is in bootloader mode.
  • Click Upload.

References, Links and Notes

  1. EasyEDA Design Files
  2. CH551/552 Datasheet
  3. SDCC Compiler
  4. ATtiny85 TinyKnob
  5. CH552E MacroPad mini
  6. CH552G MacroPad plus

USB_Knob_pic3.jpg

License

license.png

This work is licensed under Creative Commons Attribution-ShareAlike 3.0 Unported License. (http://creativecommons.org/licenses/by-sa/3.0/)

ch552-usb-knob's People

Contributors

wagiminator avatar

Stargazers

 avatar  avatar  avatar  avatar  avatar  avatar  avatar  avatar  avatar  avatar  avatar  avatar  avatar  avatar  avatar  avatar  avatar  avatar  avatar  avatar  avatar  avatar  avatar  avatar  avatar  avatar  avatar  avatar  avatar  avatar  avatar  avatar  avatar  avatar  avatar  avatar  avatar  avatar  avatar  avatar  avatar  avatar  avatar  avatar  avatar  avatar  avatar  avatar  avatar  avatar  avatar  avatar  avatar  avatar  avatar  avatar  avatar  avatar  avatar  avatar  avatar  avatar  avatar  avatar  avatar  avatar  avatar  avatar  avatar  avatar  avatar  avatar  avatar  avatar  avatar  avatar  avatar  avatar  avatar  avatar  avatar  avatar  avatar  avatar  avatar  avatar  avatar  avatar  avatar  avatar  avatar  avatar  avatar  avatar  avatar  avatar  avatar  avatar  avatar  avatar

Watchers

 avatar  avatar  avatar  avatar  avatar

ch552-usb-knob's Issues

How to program the knob to do anything I want?

Hello! We ordered about 8 of these boards of our class. So far, we have soldered 2 of these boards and made them work. I looked at the github files and there are only two available codes for the knob, one that scrolls and other one code that controls the volume. I wanted to edit the code so it can do anything I want like horizontally scrolling a page, or switching tabs on a browser. Can you please guide me on how to program the knob do it can do anything I want.

Custom Knob code making the USB knob unrecognizable by Windows

Hello! I was trying out your custom knob code that you uploaded recently on Arduino IDE. I uploaded the code to the ch552 without any changes as the comments said it was a volume control knob. The code uploaded fine at first but the USB Knob became unrecognizable by windows. I kept getting pop-ups/notification on the side that Windows could not recognize the USB. I reuploaded the original volume control code and everything was fine back again. Are there any steps that I am missing that I need to do before uploading the code. Please help me fix this issue!
Thank you!

Help with CH552G and CH552E projects

Hello. I recently have built your macro pad mini, knob, and macro pad plus. So on the mini it accepts the firmware but nothing works but when the 3rd key is pushed it goes into boot loader mode. On the knob the firmware flashes and it appears to be working but in windows it keeps saying device is not recognized and disappears and reappears multiple times. Lastly, on the macro pad plus it is stuck in a boot loop, rebooting every second. Please reply because i want to get these to start working. Thank you a lot, Samuel

Not working in Windows

I finished up two of them tonight for my kids. Works great on my PC in Debian, does not work in Windows. On my younger son's laptop it keeps playing the new hardware detected sound and does not work. I have that sound disabled on my PC so I can't hear it, but advanced mode in Zadig I can see it refreshing all the time. Any idea what could cause this?

tempest

can You add video from arcade tempest game with this knob?

LED Question

I'm in the process of printing my second enclosure for these, is it possible to have the Neo Pixels show green if unmuted and red if muted? They are for my kids and anything to make it easier to see that they are muted/unmuted.

Volume lowering without turning knob

When I turn the knob to lower or raise my volume I have to turn it by 2 "notches" to get to the next number which is fine. If I only turn the knob one notch it will raise or lower the volume but it seems to get "stuck" wherein the volume continues to lower one number at a time without the knob turning.

Recommend Projects

  • React photo React

    A declarative, efficient, and flexible JavaScript library for building user interfaces.

  • Vue.js photo Vue.js

    ๐Ÿ–– Vue.js is a progressive, incrementally-adoptable JavaScript framework for building UI on the web.

  • Typescript photo Typescript

    TypeScript is a superset of JavaScript that compiles to clean JavaScript output.

  • TensorFlow photo TensorFlow

    An Open Source Machine Learning Framework for Everyone

  • Django photo Django

    The Web framework for perfectionists with deadlines.

  • D3 photo D3

    Bring data to life with SVG, Canvas and HTML. ๐Ÿ“Š๐Ÿ“ˆ๐ŸŽ‰

Recommend Topics

  • javascript

    JavaScript (JS) is a lightweight interpreted programming language with first-class functions.

  • web

    Some thing interesting about web. New door for the world.

  • server

    A server is a program made to process requests and deliver data to clients.

  • Machine learning

    Machine learning is a way of modeling and interpreting data that allows a piece of software to respond intelligently.

  • Game

    Some thing interesting about game, make everyone happy.

Recommend Org

  • Facebook photo Facebook

    We are working to build community through open source technology. NB: members must have two-factor auth.

  • Microsoft photo Microsoft

    Open source projects and samples from Microsoft.

  • Google photo Google

    Google โค๏ธ Open Source for everyone.

  • D3 photo D3

    Data-Driven Documents codes.