
Django-Crowdfunding is a web application built with Django framework for crowdfunding campaigns. Users can create, edit, and delete their own campaigns, and others can donate to these campaigns with payment integration using Razorpay. The application also supports login via Google using allauth for authentication. Email notifications are sent for campaign updates and donations.
Live Preview: http://django-crowdfunding.varad13.tech/
- Payments are not enabled as this is just meant to be a preview. For emulating a successful payment, please use UPI id success@razorpay
- Payouts can be added later whenever RazorpayX is released for everyone
-
Login via Google using allauth
-
Campaign creation, editing, and deletion
-
Campaign donation with payment integration using Razorpay
-
Email notifications for campaign updates and donations
-
Email verification for non Google accounts
To get started with Django-Crowdfunding, follow these instructions:
-
Python 3.7 or higher
-
Virtual environment (recommended)
-
Google API keys for Google OAuth
-
Go to the Google Cloud Console at https://console.cloud.google.com/.
-
Create a new project or select an existing project.
-
In the left sidebar, click on "Credentials".
-
Click on "Create credentials" and select "OAuth client ID".
-
Choose "Web application" as the application type.
-
Enter a name for your OAuth client ID and click "Create".
-
Under "Authorized redirect URIs", add the callback URL for your Django app. For example:
http://localhost:8000/accounts/google/login/callback/for local development. Make sure to update this URL with the appropriate domain name or IP address when hosting your app. -
Under "Authorized JavaScript origins", add the domain or IP address where your app will be hosted.
-
Click "Save" to create the OAuth client ID.
-
In the "Consent screen" tab, configure the consent screen for your app. You can add the "email" scope to access the user's email address during authentication.
-
Click "Save" to save the consent screen settings.
-
You will be provided with a client ID and client secret. Update your Django admin with these values in the "Social Applications" section as mentioned in the README.
You can refer to the following link for more details: Google Cloud Console Documentation
-
Go to the Razorpay Dashboard at https://razorpay.com/docs/.
-
Log in to your Razorpay account or sign up for a new account.
-
In the Dashboard, go to the "Settings" tab in the left sidebar.
-
Click on "API Keys" under "App Settings".
-
You will find your "Key ID" and "Key Secret". Update your secret.py file with these values for
RAZOR_KEY_IDandRAZOR_KEY_SECRET. -
Click "Save" to save the API keys.
You can refer to the following link for more details: Razorpay Documentation
- Clone the repository:
git clone https://github.com/Varad-13/crowdfunding-django.git
- Navigate to the project directory:
cd crowdfunding-django - Create a virtual environment (optional but recommended):
python3 -m venv venv source venv/bin/activate - Install the dependencies from requirements.txt:
pip install -r requirements.txt
- Add necessary content to cf/secret.py:
SECRET_KEY = ''  # Add your Django secret key here
EMAIL_HOST_USER = ''  # Add your email host username here
EMAIL_HOST_PASSWORD = ""  # Add your email host password here
RAZOR_KEY_ID = ""  # Add your Razorpay API key ID here
RAZOR_KEY_SECRET = ""  # Add your Razorpay API key secret here
- Make and apply the database migrations:
python manage.py makemigrations
python manage.py migrate
- Create a superuser for Django admin:
python manage.py createsuperuser
- Add your Google API keys to the Django admin:
-
Log in to Django admin at
http://localhost:8000/admin/(or the URL where you have hosted the app). -
Go to "Social Applications" under "Social Accounts".
-
Click "Add Social Application" and fill in the details for your Google API keys.
- Run the development server:
python manage.py runserver
- Access the application in your web browser at
http://localhost:8000/(or the URL where you have hosted the app).
Contributions to Django-Crowdfunding are welcome! If you find any issues or have any suggestions, please feel free to open an issue or submit a pull request.
- Responsive Design

- Homepage

- Post with only thumbnail

- Post with thumbnail and video

- Creating/Editing Post

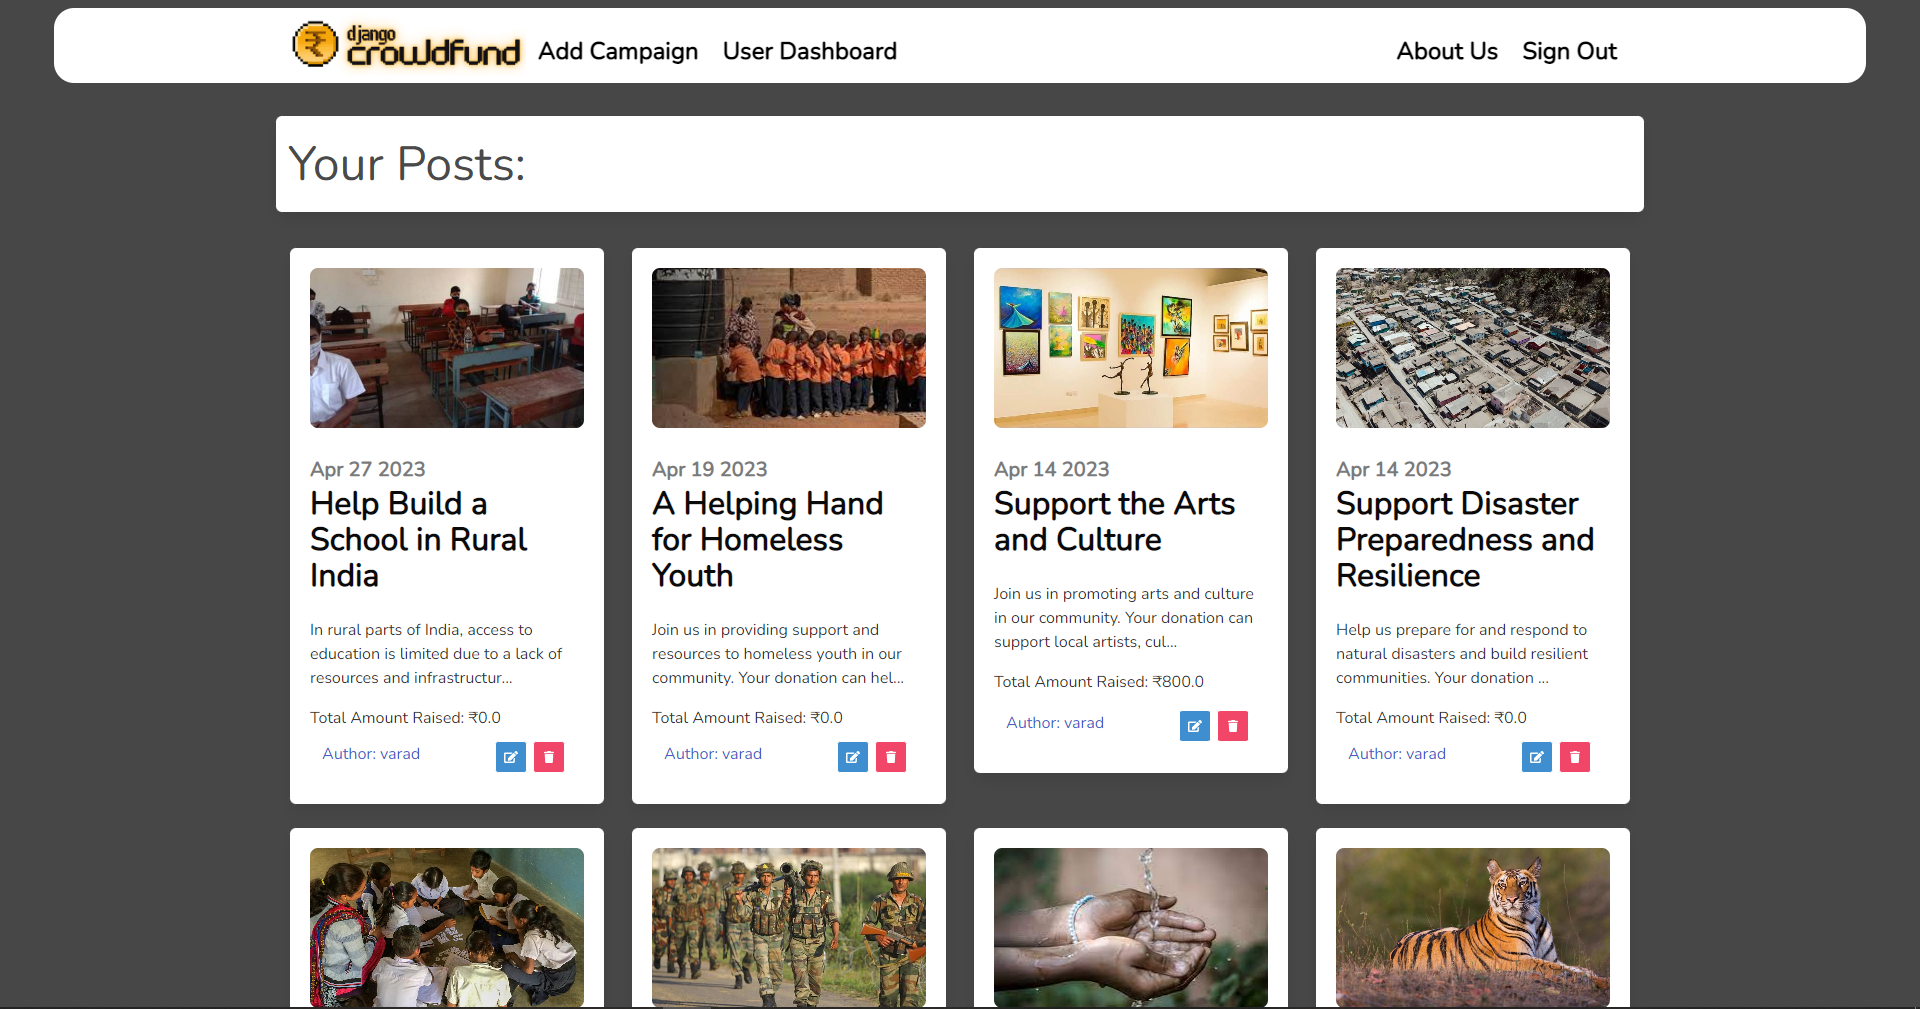
- User Dashboard
- Razorpay

Django-Crowdfunding is open source and available under the GNU General Public License.
