Giter Club home page Giter Club logo

ujjalzaman / doctor-appointment Goto Github PK

View Code? Open in Web Editor NEW
222.0 4.0 148.0 25.82 MB

A doctor appointment can be obtained by a patient through this website.

Home Page: https://doctoroncall-bd.netlify.app/

doctor-appointment-management doctor react project react-full-project reactjs apppointment ujjal full-stack mern-project admin-dashboard bootstrap bootstrap4 expressjs javascript appointment-scheduling doctor-appointment-booking full-stack-react-project

doctor-appointment's Introduction

Doctor Appointment - Full Stack Appointment Website

For purchases or inquiries, please contact us here.

Contact: https://quber.com.au/#contact

Installation video

YouTube    

Preview    Live Preview

To Setup Project Follow project_setup.txt documentation

About The Project

The DoctorOnCall System facilitates patients in scheduling appointments with preferred doctors or Emergency Appointments set up via an online platform. Developed using the React, Nodejs, and Prisma stack, it offers a professional website with dynamic functionalities. Key features include dynamic home, Email Notification, Filtering doctors, Setting up appointments and patients/doctors dashboards, secure user login with validation mechanisms, appointment scheduling with access to doctor details, patient appointment management, doctor selection, and overall industries level code splitting followed.

What Features Will You Find Here:

  • Dynamic Homepage: Conveniently gathers essential information on a single page.
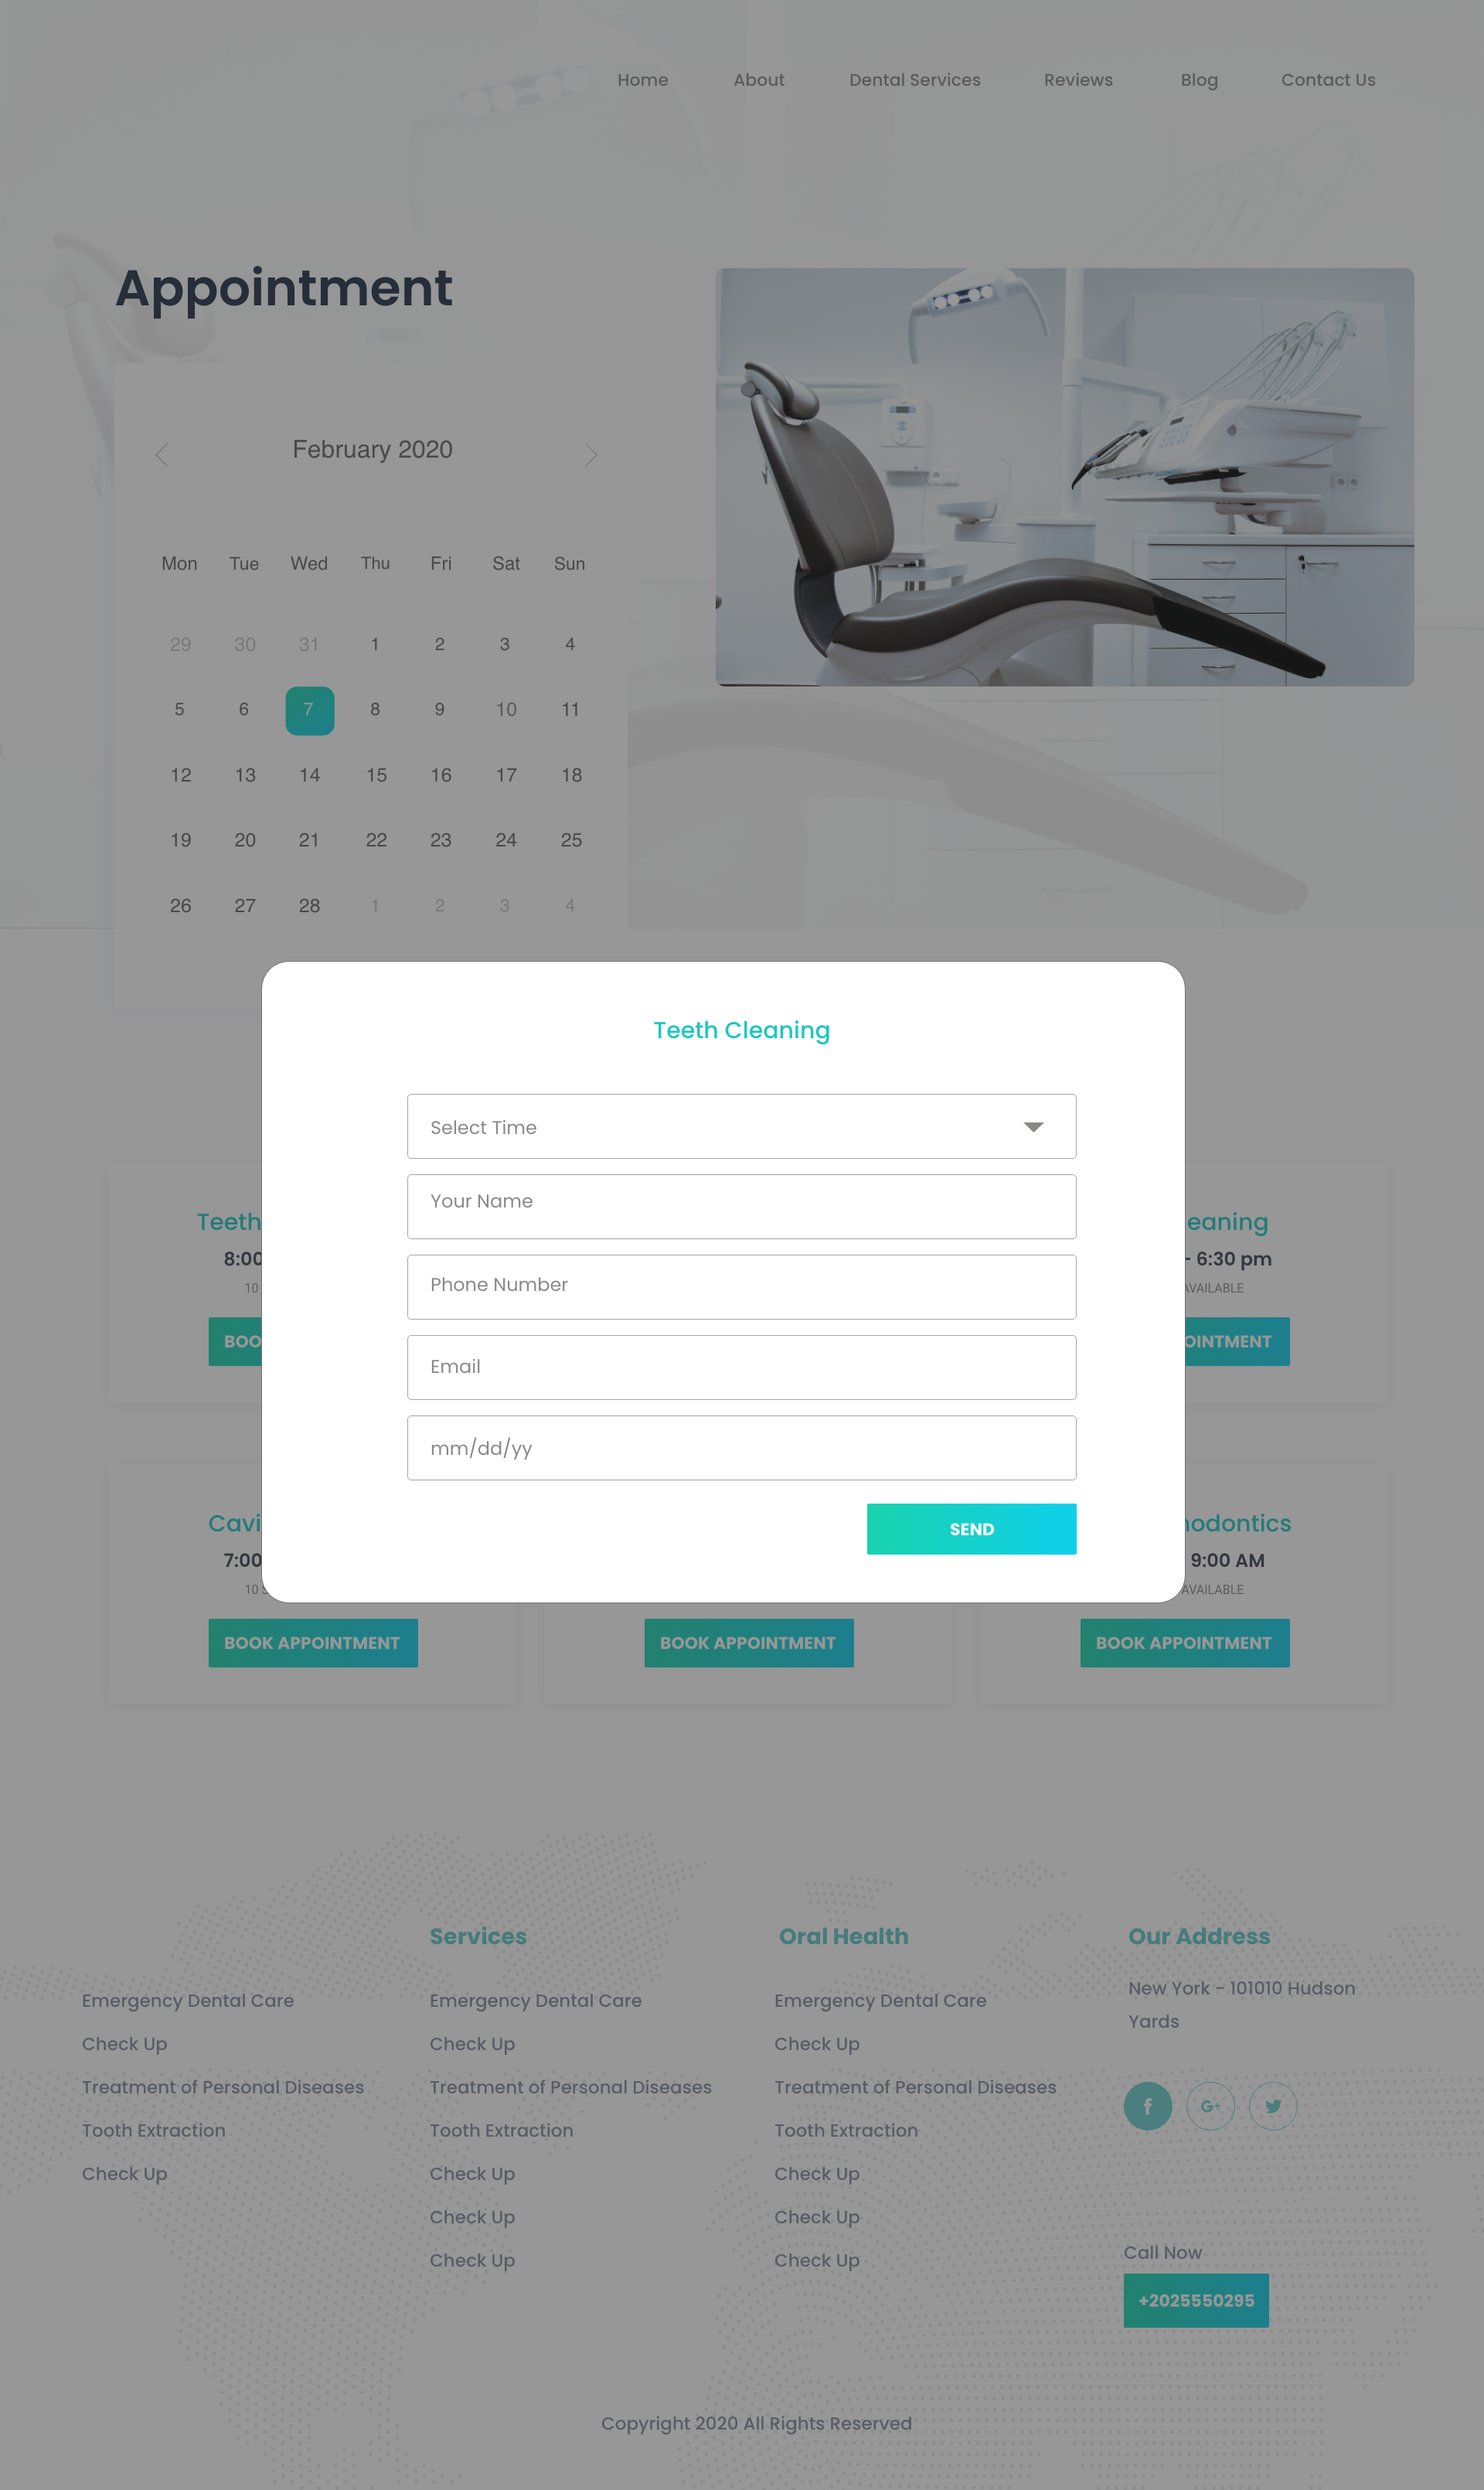
  • Easy Appointment Setup: Seamlessly schedule appointments with doctors, featuring selectable available dates and time ranges.
  • Dynamic Appointment Management: Flexible time and date range selection for appointments.
  • Doctor Selection: Patients can choose their preferred doctor for appointments.
  • Industry-standard Code Quality: Utilization of top-notch code conventions, code splitting, and TypeScript in backend development.
  • Email Notifications: Automated email notifications for appointment setup and invoicing.
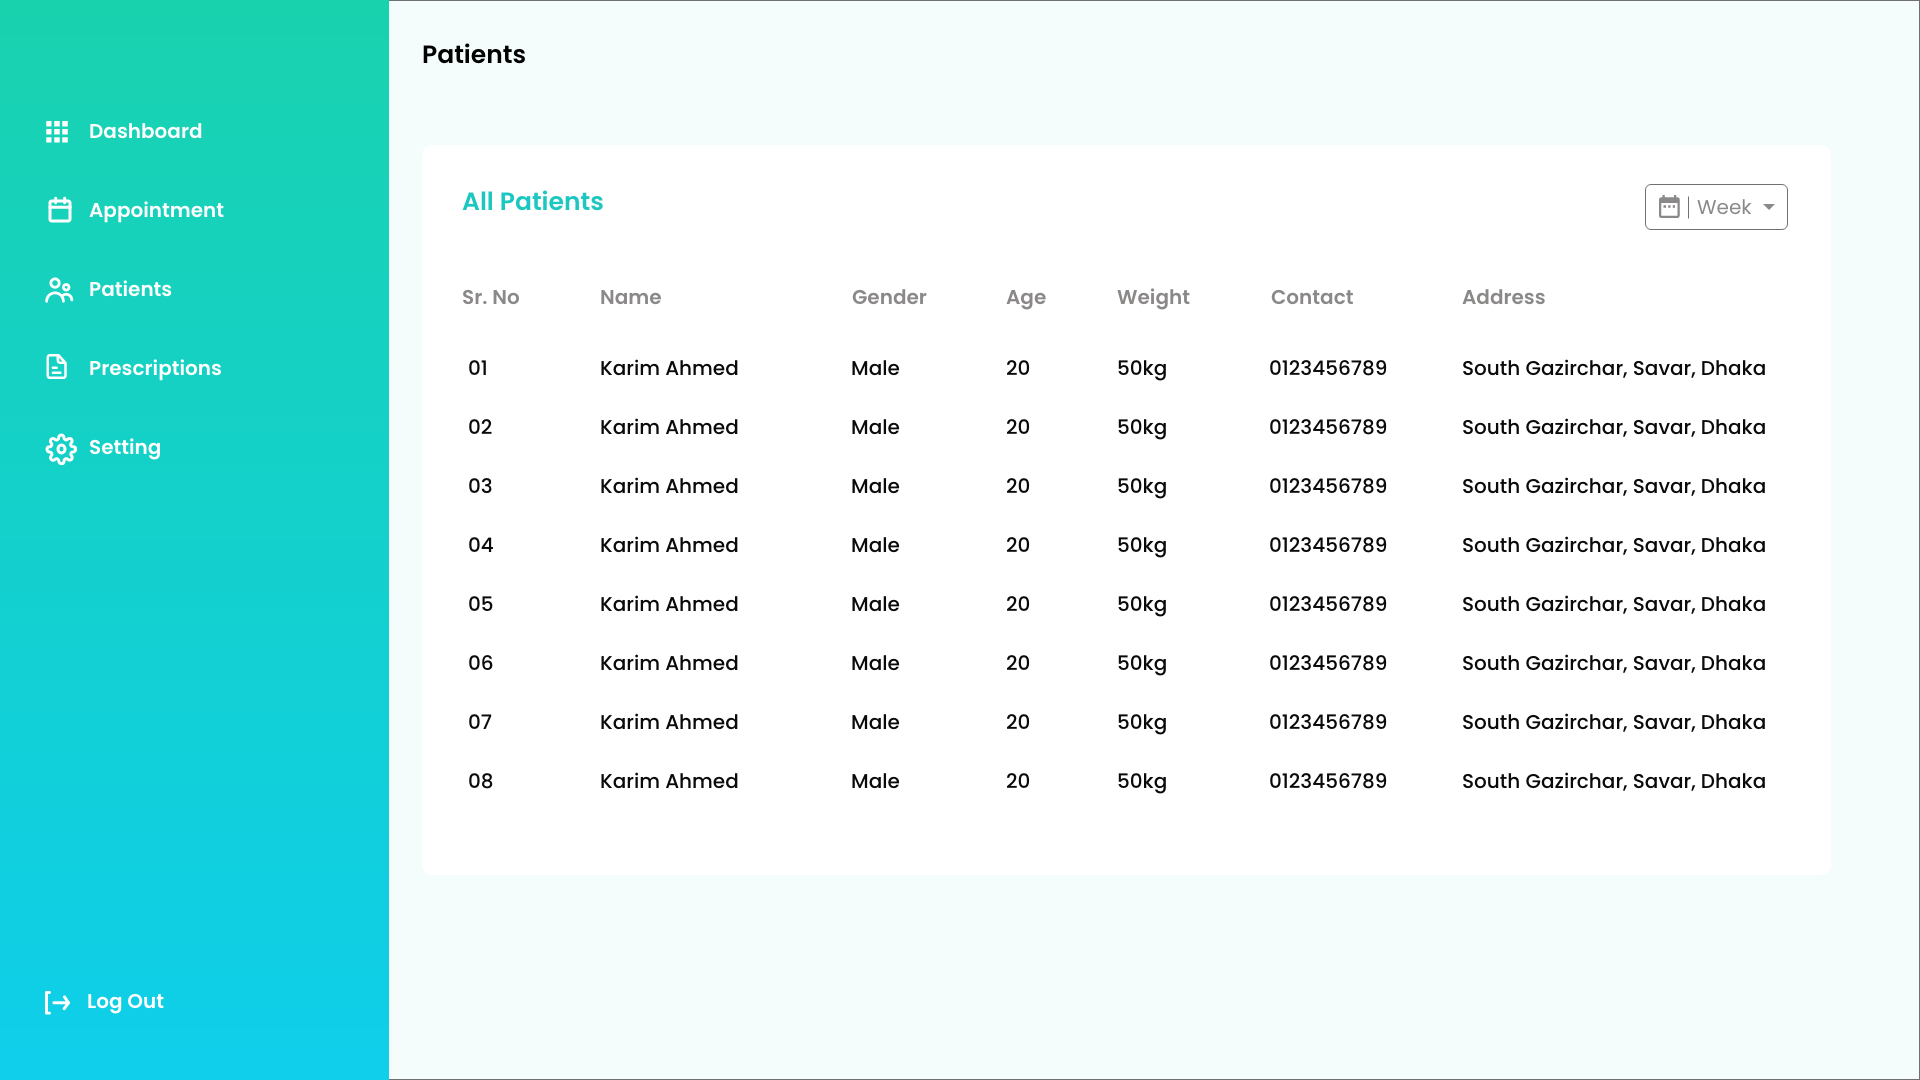
  • Doctor Dashboard: Dynamic dashboard for doctors to access patient information and provide online treatment with customizable prescriptions.
  • Patient Dashboard: Patients can track their treatment progress, view medications, prescriptions, and appointment details from a dynamic dashboard.
  • Appointment Tracking: Track appointment status using a unique tracking ID directly from the homepage.
  • Dynamic Prescription and Invoice Generation: Customized prescriptions and invoices tailored to each appointment.
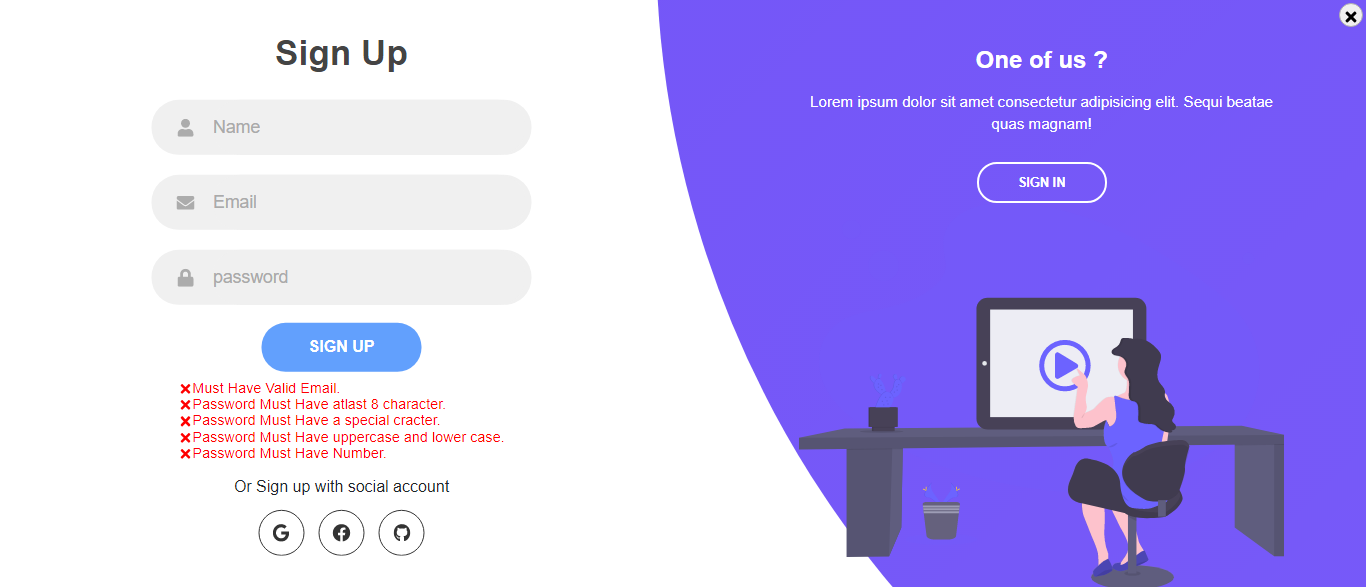
  • User Authentication: Dynamic authentication system allowing user sign-in, sign-up, password recovery, and email verification (for doctors).
  • Dynamic Doctor Filtering: Advanced filtering options for doctors and appointment scheduling, along with blogging and service features.
  • Ongoing Development: Continued enhancements with an evolving admin system.
  • Best Practices: Adherence to industry best practices, ensuring reusable and maintainable code.

Getting Started

To begin using the DoctorOnCall System, follow these simple steps:

Prerequisites

Before getting started with the DoctorOnCall System, ensure that you have the following prerequisites installed and set up:

  • Install Node.js (globally)
    npm install npm@latest -g
  • Prisma CLI: If you're planning to work on the backend part, you'll need to have Prisma CLI installed globally. You can install it using npm:
     npm install -g prisma
  • TypeScript (optional): TypeScript is used in the backend, ensure that you have TypeScript installed globally. You can install it using npm:
     npm install -g typescript

Installation

To begin using the DoctorOnCall System, follow these simple steps:

The front-end and Backend code are in the same directory, with the Backend API located at the ./api directory

# Setup Documentation

## Clone The Project
git clone https://github.com/Ujjalzaman/Doctor-Appointment.git

### Install Frontend
cd Doctor-Appointment
- npm install
- npm start

### Install Backend
cd api
- npm install

### Setup Database
1. Rename .env.example to .env (remove .example).
2. Create a PostgreSQL Database (Railway if you don't have one installed locally):
   - Create an account at https://railway.app/.
   - Navigate to the New Section > Database > Add PostgreSQL.
   - Select your created database and go to the Variables tab.
   - Copy DATABASE_PUBLIC_URL.
   - Paste the database URL into the .env file.

### Install Prisma
- npm install -g prisma
- npx prisma generate
- npx prisma migrate dev

### Setup Google App Password (For Email Notification)
1. Go to Google Account settings at https://myaccount.google.com/security?hl=en.
2. Navigate to Security > 2-Step Verification.
3. Scroll to the bottom of the page and find App passwords.
4. Select your project name and copy the generated password.
5. Paste the app password into .env as EMAIL_PASS.

### Setup Cloudinary to Upload Image
1. Create a Cloudinary Account at https://cloudinary.com/.
2. Login to your Cloudinary Account and copy all the credentials (e.g., Cloud name, API key, API secret).
3. Paste those credentials into the .env file.

### Start Backend
npm run dev

Happy coding! 🚀

Note: Please note that these are general instructions for setting up an Express API, and the specific implementation details may vary depending on your project's requirements. Before starting, make sure to read the project's documentation or readme file to obtain any specific instructions or requirements.

This system offers a comprehensive and dynamic platform for managing doctor appointments, treatments, and patient interactions while maintaining high standards of code quality and user experience.

What Technology Are Using In This Project

Frontend Technology Stack:

  • React: A JavaScript library for building user interfaces, offering a component-based architecture for creating interactive UIs.
  • Redux Toolkit: A state management library for React applications, providing predictable state management with a single source of truth.
  • Ant Design: A UI library for React applications, offering a set of customizable and pre-designed components.
  • React Hook Form: A library for managing form state and validation in React applications, providing a simple and intuitive API.
  • Axios: A promise-based HTTP client for making HTTP requests, used for interacting with backend APIs.

Back-End:

  • Express.js: A web application framework for Node.js, used for building robust APIs and web applications
  • TypeScript: A superset of JavaScript that adds static typing, enhancing code quality and maintainability.
  • Prisma: A modern database toolkit for Node.js and TypeScript, used for database access and management.

Project Screenshot

DoctorOnCall OverView

Contributing:

  1. Fork the repository by clicking the "Fork" button on the top right corner of the project's GitHub page. This will create a copy of the project in your own GitHub account.

  2. Clone the forked repository to your local machine by running the command git clone https://github.com/your-username/online-doctor-appointment.git in your terminal.

  3. Install the project's dependencies by running npm install or yarn install in the project's root directory. Create a new branch for your changes by running the command git checkout -b branch-name, where branch-name is a descriptive name for your branch. Make your desired changes to the code.

  4. Test your changes locally by running npm start or yarn start and accessing the project in your web browser at http://localhost:3000 or another specified URL.

  5. Add and commit your changes to your local repository by running the command git add . followed by git commit -m "Your commit message here"

  6. Push your changes to your forked repository by running the command git push origin branch-name

  7. Create a pull request (PR) by navigating to your forked repository on GitHub and clicking the "New pull request" button. Make sure that the base branch is set to the original project's branch that you want to contribute to, and the head branch is set to your forked repository's branch that contains your changes.

  8. Write a descriptive title and message for your pull request, explaining the changes you made and why they should be merged. Wait for the project's maintainers to review your pull request and provide feedback. You may be asked to make further changes or address any issues before your changes are merged.

  9. Once your pull request is approved and merged, your changes will become part of the project. Congratulations, you have successfully contributed to the project!

Thank you for considering this project. If you have any questions, please do not hesitate to contact me.

Contact Me

Quber: https://quber.com.au/

doctor-appointment's People

Contributors

ujjalzaman avatar

Stargazers

 avatar  avatar  avatar  avatar  avatar  avatar  avatar  avatar  avatar  avatar  avatar  avatar  avatar  avatar  avatar  avatar  avatar  avatar  avatar  avatar  avatar  avatar  avatar  avatar  avatar  avatar  avatar  avatar  avatar  avatar  avatar  avatar  avatar  avatar  avatar  avatar  avatar  avatar  avatar  avatar  avatar  avatar  avatar  avatar  avatar  avatar  avatar  avatar  avatar  avatar  avatar  avatar  avatar  avatar  avatar  avatar  avatar  avatar  avatar  avatar  avatar  avatar  avatar  avatar  avatar  avatar  avatar  avatar  avatar  avatar  avatar  avatar  avatar  avatar  avatar  avatar  avatar  avatar  avatar  avatar  avatar  avatar  avatar  avatar  avatar  avatar  avatar  avatar  avatar  avatar  avatar  avatar  avatar  avatar  avatar  avatar  avatar  avatar  avatar  avatar

Watchers

 avatar  avatar  avatar  avatar

doctor-appointment's Issues

Create Doctor availablity backend and all the required fields

Doctor Availability:

  • Create Doctor Availability: /api/v1/doctor-availability/create (POST) – (ACCESS – admin)
  • Delete Doctor Availability: /api/v1/doctor-availability/:id (DELETE) – (ACCESS – admin)
  • Update Doctor Availability: /api/v1/doctor-availability/:id (PATCH) – (ACCESS – admin)
  • View Doctor Availability: /api/v1/doctor-availability/ (GET) – (ACCESS – admin, patient, doctor)
  • Search, Filter, and Pagination Doctor Availability: /api/v1/doctor-availability/?searchTerm="search"&sortBy="name"&page="10" (POST) – (ACCESS – Doctor, admin)

Patient Appointment API Backend

Appointment:
Create Appointment: /api/v1/appointment/create (POST) – (ACCESS – admin, patient)
Delete Appointment: /api/v1/appointment/:id (DELETE) – (ACCESS – admin)
Update Appointment: /api/v1/appointment/:id (PATCH) – (ACCESS – admin)
View Appointment: /api/v1/appointment/ (GET) – (ACCESS – admin, patient, doctor)
Search, Filter, and Pagination Appointment: /api/v1/appointment/?searchTerm="search"&sortBy="name"&page="10" (GET)

Implmentent Authentication System - Register,Login,Token System Login as well

Authentication:
User login: /api/v1/auth/user/login (POST)
User Register: /api/v1/auth/user/register (POST) (ONLY PATIENT)
User Logout: /api/v1/auth/user/logout (POST)
User refresh-token: /api/v1/auth/user/refresh-token (POST)
Admin Login: /api/v1/auth/admin/login (POST)
Admin Logout: /api/v1/auth/admin/logout (POST)
Admin refresh-token: /api/v1/auth/admin/refresh-token (POST)

Update README.md

Hello Ujjalzaman, the project code is looking amazing. I want to ask you to update the readme file as it's not well explained on how to setup the project.

Implement Madical Department and all the required functionality

Department of Doctor:

  • Create Department: /api/v1/department/create (POST) – (ACCESS – admin)
  • Delete Department: /api/v1/department/:id (DELETE) – (ACCESS – admin)
  • Update Department: /api/v1/department/:id (PATCH) – (ACCESS – admin)
  • View Department: /api/v1/department/ (GET) – (ACCESS – admin, patient, doctor)
  • Search, Filter, and Pagination Department: /api/v1/department/?searchTerm="search"&sortBy="name"&page="10" (GET)

Slice folder missing

Firstly, thanks to create such amazing things but it has few things missing due to that we are not able to carry forward which is as below:

Can you please upload full source on master branch as it is not having slice folder under redux. and due to that we are not able to check also your backend is not working on env which you have mentioned and your netlify also not login.

Can you please help with complete source and working.

Regards,
Urvish

Admin Issue

Where to login to admin I didn't find any admin login section where to change or set credentials for admin.
And there’s no admin database in primsa.schema .

Implement Disease Categories and All the required functionality

Disease Categories:

  • Create Disease: /api/v1/disease/create (POST) – (ACCESS – admin)
  • Delete Disease: /api/v1/disease/:id (DELETE) – (ACCESS – admin)
  • Update Disease: /api/v1/disease/:id (PATCH) – (ACCESS – admin)
  • View Disease: /api/v1/disease/ (GET) – (ACCESS – admin, patient, doctor)
  • Search, Filter, and Pagination Disease: /api/v1/disease/?searchTerm="search"&sortBy="name"&page="10" (GET)

Create Admin Model - Related All the Routes and services

Admin:

  • Admin Login Form (Admin Portal): Implement a login page where the admin can enter their credentials to access the admin portal.
  • Create Admin (Only super admin does): Allow the super admin to create new admin accounts with unique login credentials.
  • Admin Can Create Doctor Account: Provide a form for the admin to create doctor accounts with necessary details such as name, specialization, contact information, etc.
  • Admin Can Create Patient Account: Enable the admin to create patient accounts by entering their details, including name, contact information, etc.
  • Admin Can See List of Patients: Display a list of all registered patients for the admin to view.
  • Admin Can See List of Doctors: Show a list of all registered doctors for the admin to view.
  • Admin Can Delete and Update Accounts (Doctor, Patient): Allow the admin to delete or update doctor and patient accounts as needed.
  • Admin Can Update Own Account: Provide an option for the admin to update their own account information.
  • Admin Can Create Doctor Availability: Enable the admin to set the availability schedule for each doctor.
  • Admin Can Set Appointment: Allow the admin to schedule appointments for patients, assigning a specific doctor and time slot
  • Admin Can Change User and Doctor Status (Active/Inactive): Provide an option for the admin to change the status of users and doctors, making them active or inactive.

Routes

  • Create Admin (Super Admin): /api/v1/admin/create (POST)
  • Create Doctor Account: /api/v1/admin/doctors/create (POST)
  • Delete Account (Doctor or Patient): /api/v1/admin/accounts/{accountID} (DELETE)
  • Update Account (Doctor or Patient): /api/v1/admin/accounts/{accountID} (PUT/PATCH)
  • Update Admin Account: /api/v1/admin/me (PUT/PATCH)
  • Create Doctor Availability: /api/v1/admin/doctors/{doctorID}/availability/create (POST)
  • Set Appointment: /api/v1/admin/appointments/create (POST)
  • Change User Status (Doctor or Patient): /api/v1/admin/accounts/{accountID}/status (PUT/PATCH)

Recommend Projects

  • React photo React

    A declarative, efficient, and flexible JavaScript library for building user interfaces.

  • Vue.js photo Vue.js

    🖖 Vue.js is a progressive, incrementally-adoptable JavaScript framework for building UI on the web.

  • Typescript photo Typescript

    TypeScript is a superset of JavaScript that compiles to clean JavaScript output.

  • TensorFlow photo TensorFlow

    An Open Source Machine Learning Framework for Everyone

  • Django photo Django

    The Web framework for perfectionists with deadlines.

  • D3 photo D3

    Bring data to life with SVG, Canvas and HTML. 📊📈🎉

Recommend Topics

  • javascript

    JavaScript (JS) is a lightweight interpreted programming language with first-class functions.

  • web

    Some thing interesting about web. New door for the world.

  • server

    A server is a program made to process requests and deliver data to clients.

  • Machine learning

    Machine learning is a way of modeling and interpreting data that allows a piece of software to respond intelligently.

  • Game

    Some thing interesting about game, make everyone happy.

Recommend Org

  • Facebook photo Facebook

    We are working to build community through open source technology. NB: members must have two-factor auth.

  • Microsoft photo Microsoft

    Open source projects and samples from Microsoft.

  • Google photo Google

    Google ❤️ Open Source for everyone.

  • D3 photo D3

    Data-Driven Documents codes.