
You're sections headers will be used to reference location of destination.
Data collection app for the Pacific Northwest Permanent Sample Plot Program.
http://pnwpsp.forestry.oregonstate.edu/
- ODK-X
- JavaScript
- HTML
- CSS
- Java Run Time Environment https://java.com/en/download/
- Node.js https://nodejs.org/en/
- Grunt
npm install -g grunt-cli - Android Studio https://developer.android.com/studio
- Android Debug Bridge (ADB) https://developer.android.com/studio/releases/platform-tools
- ODK-X app designer https://github.com/odk-x/app-designer/releases/tag/2.1.6
You will need to install the following apps on your Android Device.
- OI File Manager
- ODK-X tables
- ODK-X services
https://docs.odk-x.org/basics-install/
If you do not have a physical device you can use the Android Studio Emulator.
- Open Android Studio and press configure on the bottom right of the screen.


-
Download project
git clone https://github.com/poliakosOSU/OSU_Capstone_MAFE.git -
Transfer files from app project repo to app-designer
Copy the config file from
OSU_Capstone_MAFE/odk_app/and replace the config file in
app-designer-2.1.6/app/ -
Enable Developer options on your Android Device
-
Connect Android Device to computer
-
Open your terminal and navigate to the root of the app-designer directory and run the following command
grunt adbpush
- On your Android Device, open the previously installed ODK-X tables app
- In the top right corner select the Preferences tab
- Press the Reset Configuration Button
- Go back to the home menu of the application, you can now use the app.
- Connect the Android device to OSU's VPN following their setup instructions.
- In ODK Services go to settings and enable user restrictions with "password" as the admin password in the next screen. (Temporary password for testing.)
- Go to the new "Manage ability to change server settings" screen and enable "unsafe/unsecure Authentication".
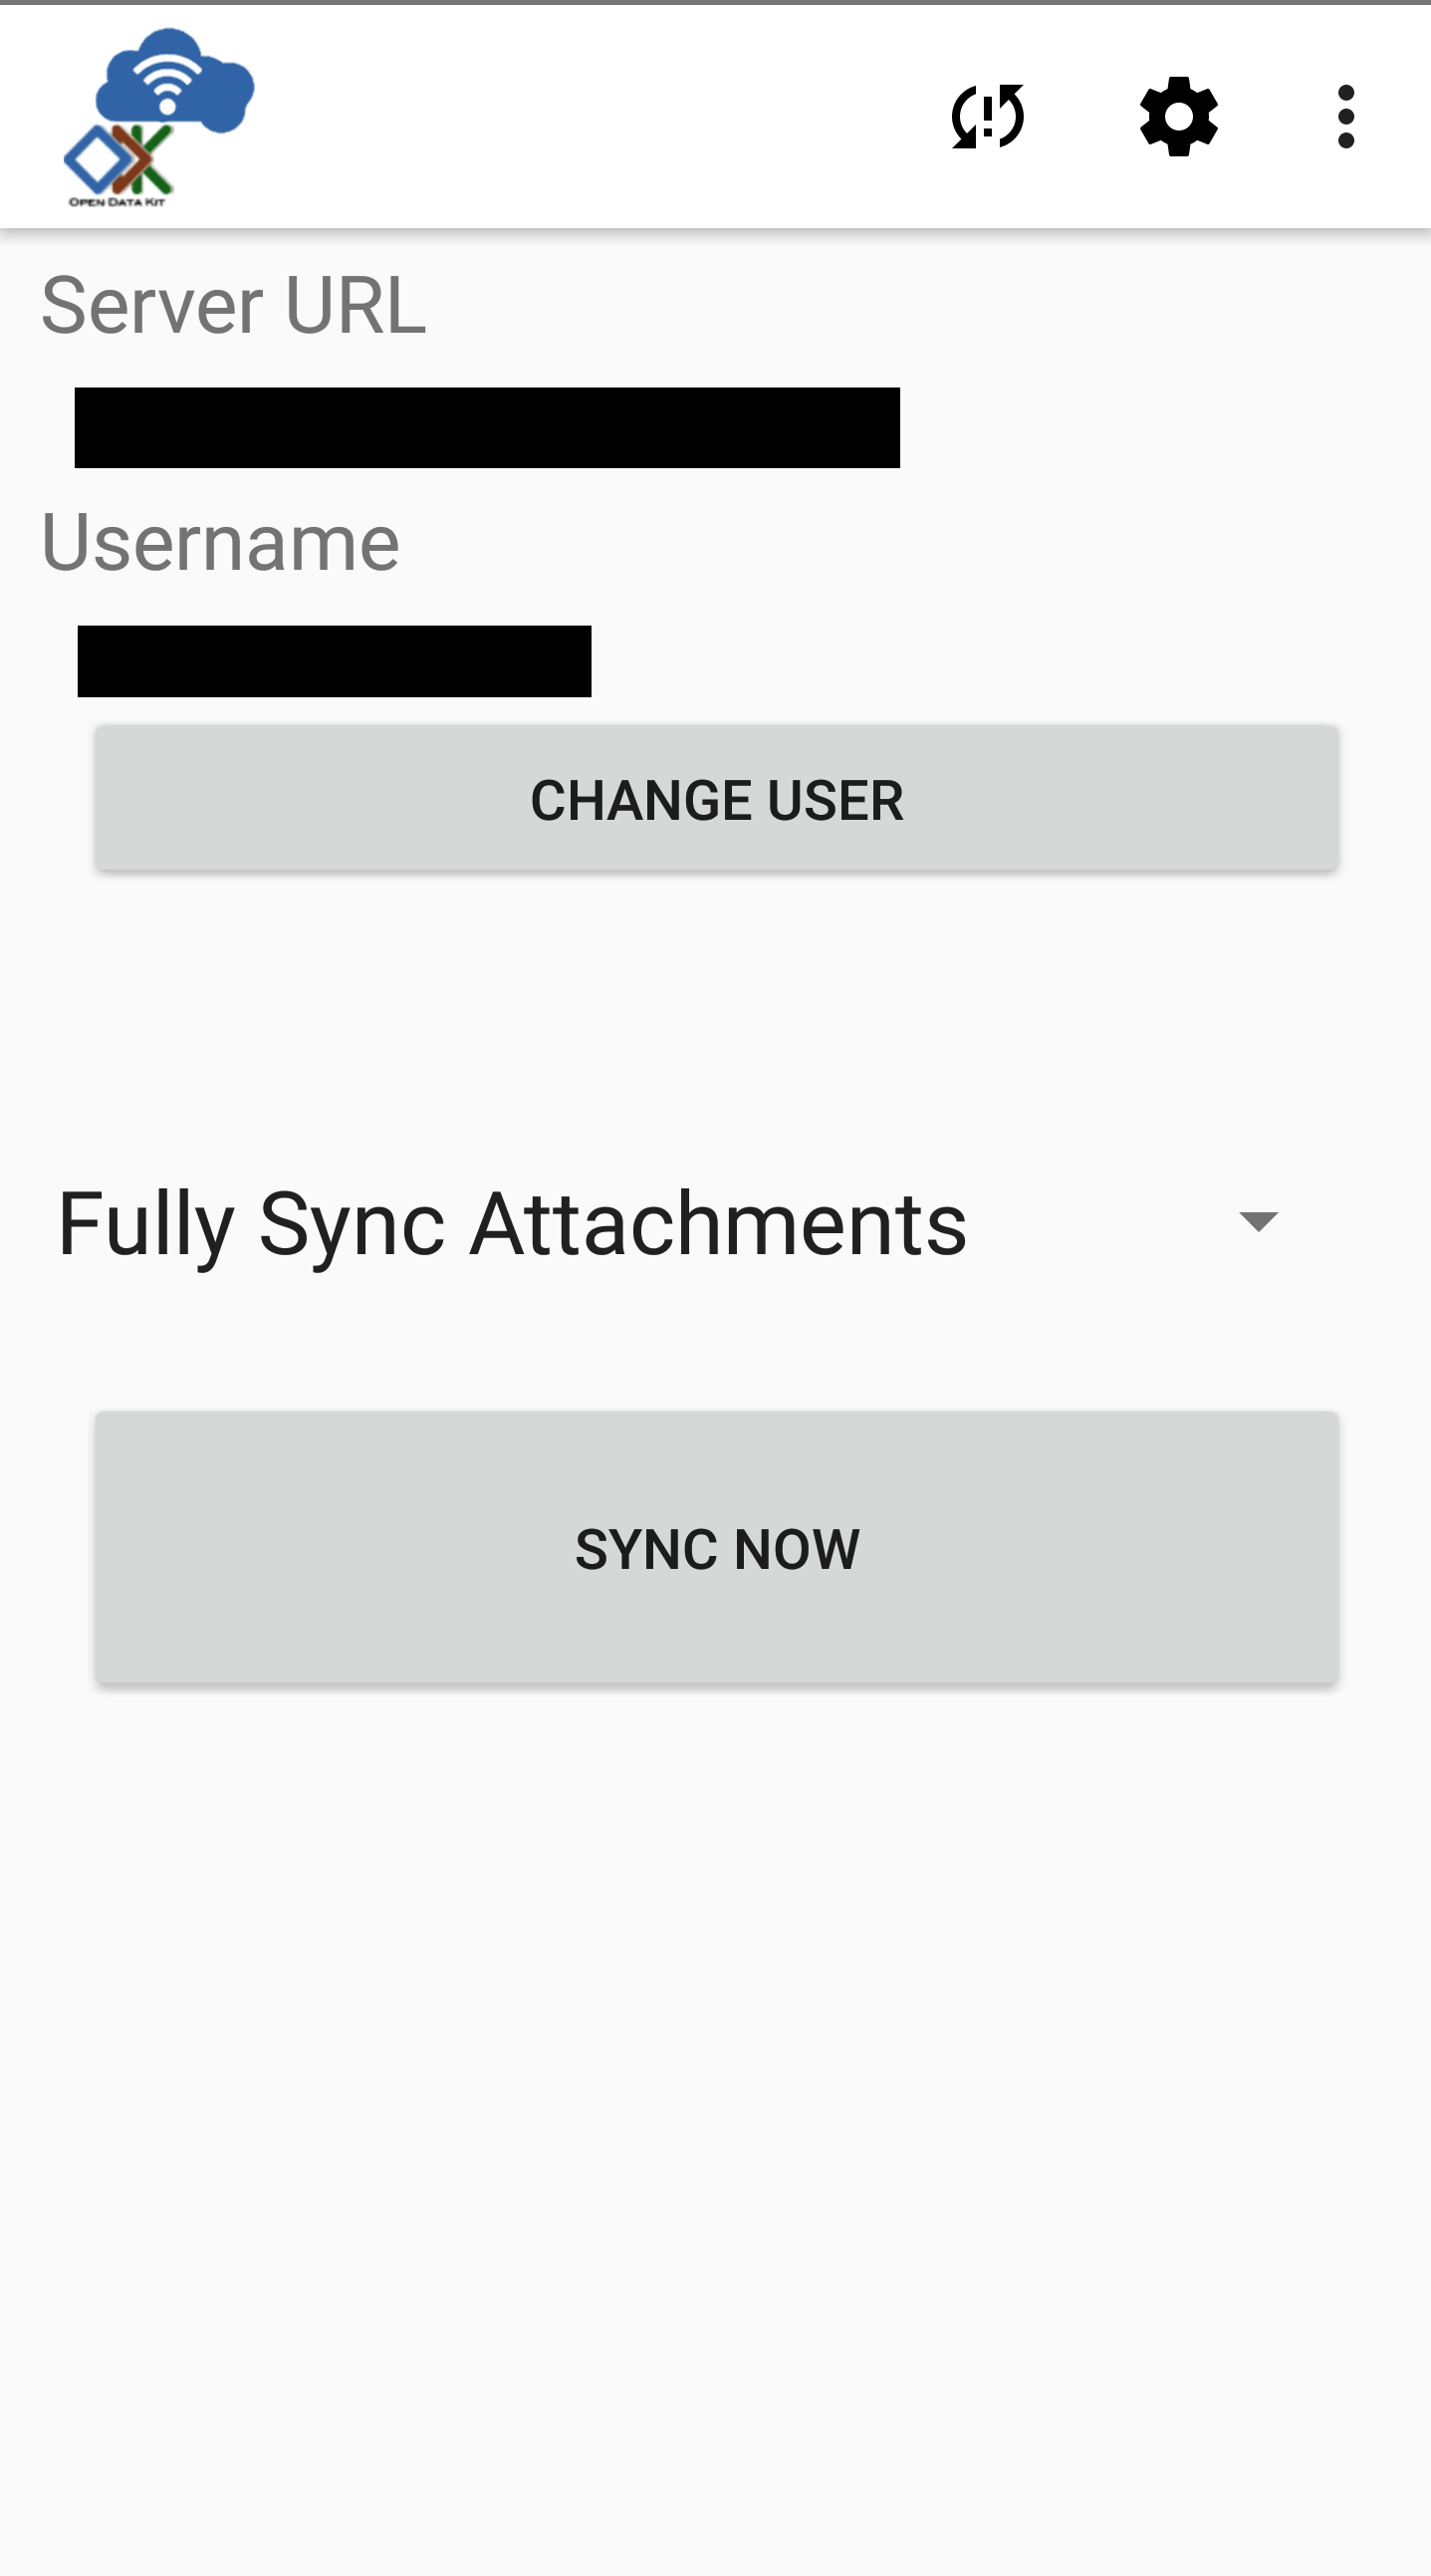
- In "server settings" set the server url to http://field.forestry.oregonstate.edu/
- Get to the sync screen and click change user. (Easiest way to get there is by clicking the icon of two arrows in a circle from the top bar in the landing page in Tables.)
- Use "guest" and "password" as the username and password then click authenticate.
- After having created some records through Tables you should now be able to click the big "sync now" button and have those records synced to the remote server.
MIT License
Copyright (c) [2020] [Sergei Poliakov and Joseph Landreville]
Permission is hereby granted, free of charge, to any person obtaining a copy of this software and associated documentation files (the "Software"), to deal in the Software without restriction, including without limitation the rights to use, copy, modify, merge, publish, distribute, sublicense, and/or sell copies of the Software, and to permit persons to whom the Software is furnished to do so, subject to the following conditions:
The above copyright notice and this permission notice shall be included in all copies or substantial portions of the Software.
THE SOFTWARE IS PROVIDED "AS IS", WITHOUT WARRANTY OF ANY KIND, EXPRESS OR IMPLIED, INCLUDING BUT NOT LIMITED TO THE WARRANTIES OF MERCHANTABILITY, FITNESS FOR A PARTICULAR PURPOSE AND NONINFRINGEMENT. IN NO EVENT SHALL THE AUTHORS OR COPYRIGHT HOLDERS BE LIABLE FOR ANY CLAIM, DAMAGES OR OTHER LIABILITY, WHETHER IN AN ACTION OF CONTRACT, TORT OR OTHERWISE, ARISING FROM, OUT OF OR IN CONNECTION WITH THE SOFTWARE OR THE USE OR OTHER DEALINGS IN THE SOFTWARE.
- Sergei Poliakov
- Joseph Landreville

