onegraph-blog's People
Contributors


Stargazers


Watchers


Forkers
isabella232onegraph-blog's Issues
Accessing GraphQL extensions using the JavaScript react-apollo client
OneGraph offers an easy and consistent GraphQL interface to dozens of both fun and critical APIs. As we’ve built our integrations and infrastructure, we’ve become deeply familiar with so many of the opportunities to push incidental complexity down into the platform. That way developers get to focus on the far more interesting challenges. But when we’re building OneGraph itself, we often want to know how well we’re doing - for example, given how powerful GraphQL is, and how much data a developer can pull out with a single query, we wanted to know:
What level of optimizations are we making for a given query over the simple, direct REST alternative a developer would write?
At OneGraph, we implement quite a few clever batching and caching strategies, tailored for the services that our users are querying or mutating against. These strategies involve years of experience working with APIs of all shapes, combined with a deep understanding of the underlying APIs we’re interacting with.
Here's an example query that shows how effective it can be!
How we’re able to optimize query execution against REST apis
To take one example in particular, the Trello API has a very powerful batching feature in their API, where with a single call you can retrieve several resources.
The batch endpoint allows you to make multiple GET requests to the Trello API in a single request. By batching GET requests together, you can reduce the volume of calls you are making to the API and more easily stay within your API rate limit. The batch endpoint can not be called recursively; requests containing the batch url will be ignored. [from Trello’s (slick) API docs]
API-specific optimizations: Batching
To make use of Trello’s specific batch api, you hit the batch REST API endpoint with a list of other REST urls you want to retrieve. Because of GraphQL’s declarative nature, OneGraph’s is able to walk a developer’s query at execution time and determine the optimum strategy - if we see that a board is queried for, and then all of its cards, and then the comments for those cards, we can build that up into a single API call, rather than the several hundred calls it would be with a naive implementation. We also make sure to only make a request for a given resource one time, even if the query recursively refers to it.
API-agnostic optimizations: resource de-duping
Recursive references to the same resource are quite common actually! Take for example a query into Trello that traverses board->lists→cards→board. The first board reference might pull out information that’s best displayed (and therefore accessed) at the top of the UI, but we might want to have some different fields from the board when rendering the cards. This gives the GraphQL consumer additional power to specify where in the response they want those fields (and therefore reduce the effort to reshape the data in code after getting the response). But a naive implementation may end up hitting the same endpoint dozens (or even hundreds!) of times.
API-agnostic optimizations: per-request caching
Batch queries on Trello are still limited to 10 routes, and it’s very likely that we’ll need more than that to complete a full query for our users. So after completing the first call to the batch api, we store the results in a local in-memory cache to be used only for that query. That cache will keep track of the result from each route. As we build up any future calls to Trello resources, we check our cache to see if we already have it in memory, thus further reducing upstream calls.
Additional benefit: Per-request consistency
We automatically parallelize the execution of any query on OneGraph to the maximum degree possible by the dependencies in the graph and the rate the upstream API can handle. But a large query across many services may take a second or two to complete - and those several seconds are a chance for some data to change in upstream resources.
One overlooked benefit to per-request caching is that any resource that’s referenced multiple times in one query will appear consistent, which really helps reduce some bugs when it comes to rendering.
Putting it all together: Great for the user, Great for the developer, Great for The API
This is wonderful for the end user because it reduces total time fetching resources, meaning speedier apps and lower battery usage.
For developers it’s wonderful because it reduces their chance of getting rate-limited as well as the chance of inconsistencies in resources inside a single query
And it’s wonderful for the API-provider because it gives them a much more cohesive view of their users’ needs (what data is requested and used together) while also reducing the load on their servers as much as possible.
Prior art
The challenges and techniques we outlined above are spiritually similar to Facebook's DataLoader
Continuously measuring the wins
For our end-users, it’s possible to get a sense of how effective our strategies are for any given query. When you add show_metrics=true to the requests url, we’ll include the results alongside data and errors under the extensions key.
https://serve.onegraph.com/dynamic?app_id=${appId}
becomes
https://serve.onegraph.com/dynamic?app_id=${appId}&show_metrics=true
That’s it! To compare, take this Trello query:
query whatIsSpolskyWorkingOn {
  trello {
    member(username: "spolsky") {
      fullName
      boards {
        nodes {
          name
          cards {
            nodes {
              name
              list {
                name
                board {
                  name
                }
                cards {
                  totalCount
                }
              }
            }
          }
        }
      }
    }
  }
}
The results with metrics will look something like
{
  "data": "...",
  "extensions": {
      "metrics": {
          "api": {
              "avoidedRequestCount": 149,
              "requestCount": 5,
              "totalRequestMs": 1384,
              "byHost": {
                  "api.trello.com": {
                      "requestCount": 5,
                      "totalRequestMs": 1384
                  }
              }
          }
      }
  }
}
We even use this to power our GraphiQL instance’s reporting:

5 API requests instead of 154! That level of optimization feels great to see, and even better when it comes with no additional effort 😊
Try it out with this query for yourself!
Reporting our optimization performance to the end developer
Following our GraphiQL Explorer open source release, we have an upcoming app built on top of OneGraph and several APIs that have become very useful for us internally. We wanted to communicate to both us and the end user how effective our strategies were so that we can find even more opportunities to improve!
Our app is built using a rather nice set of tools, including Zeit’s next.js and react-apollo. The challenge however, is that react-apollo doesn’t provide a great way to communicate the extensions of individual GraphQL responses to React components.
There isn’t a great way for
react-apolloto communicate the results of individual API calls to components
This makes sense because of Apollo’s caching implementation, where components never access response data directly, but instead access a normalized cache of data that has been populated by the responses. The implementation is really rather interesting to read through and understand, and points to some of the potential strengths of GraphQL’s design to push down complexities into the system in the future. But it means we need to find a nice way to access extensions data on our own.
Custom ApolloLink
Our approach used Apollo’s equivalent of middleware to intercept the response data as it’s returned from the server, but before it’s inserted into the cache and the components re-rendered. We use a bit of mutable state to track each request and its result, and the use that state to render the metrics inside the app. Now on each request we can include notes about how effective our strategies are!
The many, varied uses of extensions
In our case we want to understand how effective our optimizations are inside of the OneGraph service, but there are many other use-cases for extension data! One great example is passing tracing data the resolution time of individual fields to show a waterfall view of a query’s performance - hugely useful for understanding what data slows down your rendering, and telling you how to split up an app’s data dependencies to speed things up.

Tradeoffs of a Custom ApolloLink Solution
This solved a number of challenges that come with Apollo’s caching design, but it present several tradeoffs. First, it involves diving a bit deeper into the implementation details of Apollo, and in general it’s best to be able to shield the developers who are consuming your GraphQL API from the boilerplate to connect to services. And second, the implementation is non-deterministic, and means that there can be some slight race conditions between the data that’s rendered and the data that’s in the metrics cache. In our case, the extensions are extremely useful, but ancillary information, so we felt the tradeoff was acceptable, but you’ll have to make the call for your own app, of course.
Source code and example
Check out the source code for our example to see how you can access extension data in your react-apollo app and make your developer’s lives better today!
{"source":"blog","publishedDate":1549008000000,"url":"https://www.onegraph.com/blog/2019/02/01/Accessing_GraphQL_extensions_using_the_JavaScript_react-apollo_client.html"}
GraphiQL Explorer 2.0: A power-user release!
At OneGraph, when we first released our GraphiQL Explorer to visually build GraphQL queries, we didn’t expect it spread across the GraphQL landscape so quickly: it’s been incorporated into Hasura, PostGraphile, the Apollo Client devtools, and recently it’s even landed in the default distribution for Gatsby! It’s been gratifying to see our investment in open tooling spread to such wide usage and bring delight to so many GraphQL users, beginner and expert alike.
Our initial release was just the beginning though, and today we’re pushing a new version with a visual overhaul and a whole slew of features for the more advanced users. Let’s take a quick tour of some of the new features:
Visual Polish
First out of the gate is a visual update. We’ve changed the selection fields for objects into arrows (like a file-system directory), and scalar fields into fixed-sized checkboxes. This should reduce much of the vertical/horizontal jumping with expanding fields, leading to a more “solid” experience.

Try this query in the new OneGraphiQL!
Multi-operation support
GraphiQL Explorer users can add multiple queries/mutations/subscriptions and edit them independently. Build up full documents incredibly quickly! Here’s me building a GraphQL document that’s a pretty decent Spotify player in ~30 seconds.

Try this terrific multi-operation query in the new OneGraphiQL
Query/Mutation/Subscription naming
Naming operations in GraphQL can be incredibly powerful, but it’s not an easily discoverable feature for newcomers. To address that, the explorer now teaches newcomers
1. That it’s possible to name operations and
2. The correct syntax on how to name operations
Also, it’s handy for advanced users as well!

Default names for new operations
A minor but important bit of polish that comes along with renaming support is default names - we always generate a name of the form My<OperationKind><Count>. No untitled.txt here!

Select-all-subfields
This is an advanced feature and can be potentially misused, but it’s been requested over and over again. So by popular demand, we’re adding this in a not-easily-discovered way: By holding option/alt while clicking on an object field, every subfield will automatically be selected. Be careful with this, you can easily end up over-fetching more data than you need!

Execute operation from the Explorer
An ergonomic improvement for keyboard accessibility - run the query from any input in the explorer without moving the mouse to click the “play” button. This uses the same key-binding (command-enter) that GraphiQL uses by default, so no learning necessary here.

Try the npm query in the new OneGraphiQL
Jump-to-operation-definition in Explorer
Along with the multi-operation support comes potentially long documents. Sometimes while scrolling through the query in the document editor, you want to see what fields are available - so we’ve changed the DOM structure of the explorer to make a focus-definition command much easier to implement (see the onegraphiql-example repo for instructions how)

Fragment support
And finally, fragment support. This is another advanced use-case as fragments aren’t used too much by newcomers, but for experienced developers, being able to explore a fragment this way is a blast.

Try this Stripe Refunds query in the new OneGraphiQL
The best way to explore APIs and create applications
The new explorer pairs so well with our GraphiQL Code Exporter that we’re able to build complex applications in under five minutes - see what the combination looks like in practice!
https://youtu.be/9bwrmkS7T-s?t=56
Future work
We’ve added a whole lot of features and polish with today’s release, but we still have plenty of ideas left. If you’re interested in contributing to GraphQL tooling that helps the whole community, jump into our repo and we’ll work alongside you!
1. Theming support
We made a bit of progress extracting the styling out from hard-coded style objects, but full theming support still isn’t implemented yet. Check out the great beginner task if you’d like to tackle this - as I mentioned before, we’re happy to help guide you, and it’d help projects like Altair and Hasura embed the explorer much more easily.
2. Automatic variable injection
When filling in an argument in the explorer with a value that started with $ (e.g. $login ), the explorer would reflect on the type of the input field (e.g. String!) and automatically insert it as a variable in the operation. This would significantly speed up making “production” queries, and would partially reduce some of the fiddly work learning the variable syntax for newcomers.

3. Breadth-first field-search
Another trickier feature would be a graph-wide, breadth-first, async search for when you know that there’s a field “with a name or description like something", but you’re not sure where in the API it is, or how to navigate to it.
The explorer is the perfect interface to allow quick searching for matching fields - and once you’ve found them, click on the desired field to select it, and have the entire ancestor chain automatically added as well! This would speed up both new comers searching through an API as well as so many daily tasks for experienced GraphQL developers.

Try it out!
You can try out the live version to query data from APIs like Stripe, Spotify, npm, GitHub, and more in OneGraph with an account, or with our public OneGraphiQL instance. There’s also an example repo that shows how to incorporate OneGraph’s GraphiQL explorer in your own GraphiQL instance.
Upgrading from the previous version
For users already on the old version, simply swapping the version number in your package.json for "graphiql-explorer": "^0.4.2" should bring many of the new features listed above. Some of the optional features, like running a query from inside the explorer or jump-to-definition, will require a bit more code, but it should be copy/paste-able directly from the example.
Special thanks
Many thanks to Alexey Rodionov who’s been helping out with mockups and idea suggestions for the explorer.
Thanks to Juho Vepsäläinen, Stepan Parunashvili, and Benjie for reviewing this post and an early version of the new release and offering great suggestions for improvement.
{"source":"blog","publishedDate":1559199600000,"url":"https://www.onegraph.com/blog/2019/05/30/GraphiQL_Explorer_2_0_A_Power_User_Release.html"}
Filling in the GraphQL pipeline: Ready-to-use code generation
For our OneGraph users, we want to shorten the time from idea → production-ready execution as much as possible. We’ve invested heavily in our explorer tooling to make the very first stage of integrating with an API joyous, so that today a developer can go from zero-knowledge of the data an API has - and even zero-knowledge of GraphQL itself - to exploring and retrieving data instantly.
Today’s release reduces the time from exploring, to running fully-working-code. In particular, with the OneGraph Code Exporter, as you build up your working queries inside of GraphiQL, we’ll build up the corresponding code for you to use automatically. You can use the code immediately - with no alteration - in your apps directly.

You can also check out a video preview of the new GraphiQL Code Exporter
We’ve been testing the exporter feature with our users for awhile now, and it’s already been put to great use by people like Kyle Matthews, the creator of Gatsby.js, as he wrote about in his post Building a Slack bot to help handle large numbers of PRs!
Let’s talk about why this is the tooling our community needs now.
The GraphQL pipeline as part of the app development life-cycle
The lifecycle for a developer using GraphQL follows a very common pattern:
10 Learn syntax and semantics
20 Discover what data is available
30 Build queries to select desired data
40 Embed working queries into an app (on the frontend or the backend)
50 Confirm that the query data matches up with the desired data and the code works
60 GOTO 20

OneGraph’s GraphiQL Explorer focused on helping discovery and building, and made it lots of fun to see real data coming out of our upstream APIs with so little effort. Still, for so many users (especially those new to GraphQL) embedding is a daunting task.
Today we’re tackling this gap in the GraphQL pipeline.
Extending GraphiQL Again
Just like our explorer, the OneGraph Code Exporter is an open-source component designed to extend the fantastic community-standard tool, GraphiQL.
GraphiQL is an exploratory tool that’s great for building up and testing queries, seeing the types of each individual field, being able to search through a schema for a field name or type, and even read the docs inline.
GraphiQL is a core component of OneGraph’s data explorer, and is the very first experience many of our users have with GraphQL at all.
Bridging The Gap
The GraphQL experience from early exploration to immediate results is exhilarating and well-paved at this point, but after your developers have built a working query, what’s next? To actually use those queries, they’ll need to setup their client-side connection, handle the fetching logic, the loading and errors state, and so on.
That’s painful in two critical ways: For experienced developers, there’s a lot of repeated typing - find a previous working query, copy it, paste it into a new module, replace the query with the one you’ve just built (don’t forget to update the variables and operationId!). It’s quite a bit of overhead for each query!
Perhaps even more importantly however, for new users it’s the equivalent of running into a brick wall. They were flowing along, exploring data, seeing results, and now… how do they turn this example into a real app?
Code Exporter
Today, to help fill in the missing gaps, we’re open-sourcing another contribution for the wider GraphQL community - our graphiql-code-exporter! It generates ready-to-run code snippets from your GraphiQL queries, as you build them. The feedback is instantaneous!
It ships with two example snippets, one for react-apollo and another for simple fetch (both client and server-side usage).

Customizable for your team and your developers
But more than the explorer, the OneGraph Code Exporter is meant to be customized by your team with your own patterns. By writing your own snippet function, you’ll ensure two critical points:
- Smooth developer experience with your GraphQL service throughout the full app development lifecycle, joyous from start to finish
- Well-baked patterns will be used consistently throughout your app, preventing edge cases from building up
Of course, it’s open source and hosted on GitHub. Feel free to dig in, contribute new snippets, and most important: share it so everyone can enjoy it! We’d love to see snippets for alternative clients like Grafoo and languages like Ruby!
Automations that increase user competency1
A guiding principle in the tooling OneGraph builds is that automation doubles a chance to teach. For example, with our GraphiQL Explorer, people can gradually learn the syntax for complex GraphQL queries through a simple visual selection. And now with the code exporter, we have a chance to teach users some nifty features as well. Consider this simple query:
{
  rss {
    rss2Feed(url: "https://www.heavybit.com/category/library/podcasts/jamstack-radio/feed") {
      title
      description
      items {
        title
        description
        link
      }
    }
  }
}
The query does work as-is, but there are a few ways it could be improved - for instance, the query could be named so that its performance over time can be monitored. We still want to generate code that’ll work without any user intervention:
const operationsDoc = `
  # Consider giving this query a unique, descriptive
  # name in your application as a best practice
  # see https://stackoverflow.com/a/52542928/610345 for more information
  query unnamedQuery1 {
    rss {
      rss2Feed(url: "https://www.heavybit.com/category/library/podcasts/jamstack-radio/feed") {
        title
        description
        items {
          title
          description
          link
        }
      }
    }
  }
`;
But note how in the generated code, we take the opportunity to do two things:
- Give a user-readable note that it’s possible and advantageous if they give the query a unique name
- Automatically insert
unnamedQuery1to show an example of the syntax for naming queries
So if the user is in a hurry, they can copy/paste the (full) example and it’ll work straight-away, but there are bread-crumbs left for how to improve for later, when they have more time and want to dive deeper.
How it works
Under the hood, the code exporter monitors the current GraphiQL document (all of the queries, mutations, and fragments). Each time the document is updated, the code exporter is passed the new query, parses it using the community standard graphql-js, and re-renders. graphql-js packs awesome compiler tools that transform query documents from strings into data-structures with all the metadata we need to build great, responsive developer tooling. Once we have the data-structure, we can easily pick out different operations, grab their name, and figure out if they’re a query , a mutation, or a subscription.
Code libraries and styles are unique, and different operations change how you code your app - how your service handles client authentication (a header with a bearer token? JWT? Maybe cookie-based?), how you use variables, multiple operation names, etc.
With all that in mind, a snippet is a JavaScript object that defines two things:
- A data structure of list of options (rendered as checkboxes) that the user can select, e.g. whether to include comments, include boilerplate setup, or if the user intends to run the snippet to server-side, or in the browser.
- A function that receives all the user inputs from #1, and also the query name, body, variables, etc.
That’s enough to get ready-to-user snippets for most languages we’ve added so far. For example, a fetch snippet implementation is able to include comments, setup, and include a polyfill in order to run server-side since Node doesn’t implement fetch natively.
Let’s see exactly how this snippet is implemented so that you can see how quickly you can customize the GraphiQL experience for your developers.
An Example Snippet
Apart from a function definition and UI requirements, a snippet also defines a snippet name (fetch or react-apollo-hooks), and the name of the programming language (JavaScript or Python) so that similar snippets are grouped together and output code is highlighted properly (using the built-in highlighting of code-mirror).
Check out one of my favorite, the bash/curl example - showing how you can use GraphQL directly from the command-line!
Contribute Your General Snippets
You can contribute snippets for your own preferred language or library in two ways: If it’s a snippet that can be used generally, feel free to submit it to the GraphiQL Code Exporter repository directly.
Contribute Your OneGraph Snippets
The second way to contribute is to submit snippets that are specific to a service. In OneGraph’s case, we’d love to have your snippets showing users how to use OneGraph in all languages and frameworks! Simply submit your OneGraph snippets to the OneGraph GraphiQL Exporter repository to help others go from exploring to production on OneGraph seamlessly - I personally can’t wait to see snippets for using OneGraph in Rust (wasm GraphQL?! what what?), Elm, and Elixir!
Other services will similarly benefit - Gatsby, Hasura, PostGraphile, AppSync, SourceGraph, and others!
Try it out for yourself!
We hope you love the exporter as much as we do! It’ll supercharge your developer experience, accelerate time to market, and reduce one-off bugs in your applications, especially for GraphQL newcomers. Check out the example repository to see how to add it to your GraphiQL instance!
A special thanks
The OneGraph Code Exporter was requested by one of our earliest users, Sebastian Bensusan while integrating OneGraph with an isomorphic Clojure(Script** app. We haven’t added ClojureScript yet, and we’d love for the community to pick up the mantle!
Also, the bulk of the work was originally done by Robin Frischmann who explored the idea and language implementations deeply to find a model that that balanced flexibility, correctness, and developer-friendliness - thank you Robin!
Another approach
The guild has also been working on this with https://graphql-code-generator.com - we're hoping to combine efforts at some point in the future!
{"source":"blog","publishedDate":1556866800000,"url":"https://www.onegraph.com/blog/2019/05/03_Filling_in_the_GraphQL_Pipeline_Ready_to_use_code_generation.html"}
Footnotes
-
This phrase came to us courtesy of https://twitter.com/TobyFee/status/1103486816651423745 - it's such a succinct way to describe our approach! Thank you Toby! ↩
Introducing AuthGuardian: The simplest Auth yet!

AuthGuardian is a free service by OneGraph that lets you handle two simple - but powerful - cases:
- Add third-party sign-in to your client-side app. Allow users to sign into your React, Vue, Angular, etc. apps with GitHub, Twitch, Twitter, and so on and get their email, follower count, organizations, etc., all without a server
- Secure your server-side APIs, like your Hasura, Netlify, express.js, or Apollo servers using visually configured rules
After visually configuring all of your auth rules in the GUI, any time you ask the user to log into any service, all of your auth rules will fire, and AuthGuardian will build a JWT with your exact requirements, based on the user's data
For a quick lightning talk showing off the power of AuthGuardian, see our talk at GraphQL Asia 2020
https://youtu.be/g8pyzqXAMjE?t=147
If you're curious about why we're able to support AuthGuardian as a free service, see our pricing notes below
A Quick Client-Side Example: Open-Source Swag Store
If you were building a swag store as a JAMstack app (like Gatsby has done) to reward contributors to your open-source project. For anyone who has starred your repository, you'll offer them a 5% discount. For anyone who has committed to your repository, you'll give them a 10% discount.

For your UI, you'll need your user to sign into GitHub, and you'll need three rules:
- If the user is logged into GitHub, populate our JWT with their GitHub login and email
- If the user has starred our repository, set their discount to 5% (0.05)
- If the user has contributed to our repository, set their discount to 10% (0.1)
Let's see what that would look like in the AuthGuardian GUI!
Rule 1: Basic GitHub login information: username and email
If the user is logged into GitHub, populate our JWT with their GitHub login and email

And our preview of what the JWT would look like after asking a user to log into GitHub:

As you can see, the rule reads naturally!
Rule 2: 5% discount for starring our repository
If the user has starred our repository, set their discount to 5% (0.05)

And again, a preview of what the JWT would look like if they were logged into GitHub and had starred our repository:

Because the rule reads so naturally, it becomes easy to audit our auth rules
Rule 3: 10% discount for contributing to our open-source project
If the user has contributed to our repository, set their discount to 10% (0.1)

And a final preview of what our user's JWT will look like with all three rules running if they've contributed to our repository:

Done in under 2 minutes!
Secure your GraphQL or REST servers
AuthGuardian has packages that allow you to apply field-level authorization rules for Apollo servers. Let's say you have a bunch of Egghead pro tips that are most useful for Egghead.io Pro members, and you want to make sure that your API only allows access to those tips to authorized pro Eggheads.
You'll add the onegraph-apollo-server-auth to your package and follow the setup, and then your schema definition is simply:
directive @hasRole(oneOf: [String!]) on QUERY | FIELD_DEFINITION

type Query {
  tips: [EggheadProTips]
}

type EggheadProTips {
  id: String!
  name: String!
  coolEggheadSecrets: [String!] @hasRole(oneOf: ["eggheader"])
}
And given these rules on AuthGuardian (that can work alongside the rules for the client - one JWT will work with multiple services!)

And the resulting JWT:

That's it, your Apollo server is setup with authorization!
Eject to plain GraphQL and JavaScript if your app needs
As we expand OneGraph, AuthGuardian will naturally pick up new data sources and
effects. But you may bump up against a case where you need more functionality than
the GUI can provide.
For that, we provide an exporter function that will generate a single GraphQL
query along with a snippet of JavaScript that together will - if run on every
user login - produce the same JWT that AuthGuardian would have. This allows
you to take control of producing JWTs with additional data source or libraries
if you need to.
AuthGuardian Produces Secure JWTs
Every JWT generated by AuthGuardian is signed with a key, so tampering with the
contents is impossible. After verifying the JWT payload and signature, you can
always trust the contents of the JSON in your application, API, or service.
Pricing
We're releasing AuthGuardian for free for apps of all sizes!
How? OneGraph joins together dozens of APIs in a single
GraphQL service that you can hit directly from the browser or mobile
application. That means we've implemented - and maintain - auth across all of
these services as well.
After seeing developers struggle to specify and audit fairly simple rules, we
built out AuthGuardian as a light-weight addition on top of OneGraph's
underlying structure - for which we have existing customers and revenue streams.
That means we don't need to charge for access to AuthGuardian.
Try it out!
Try out AuthGuardian in React, Vue, Angular, or Svelte app, or your backend API
today by creating a new app on OneGraph
{"source":"blog","publishedDate":1593586800000,"url":"https://www.onegraph.com/blog/2020/07/01/Introducing-AuthGuardian-The-Simplest-Auth-Yet.html"}
Casual (App) Friday: SpotDJ
Building products makes me happy. From interacting with our customers and partners, to sitting down and writing about our work, I’m lucky OneGraph offers the chance to traverse the gamut of the product stack. One of my favorite parts of OneGraph however is how we’re constantly flooded with new app ideas.
Some small, others quite a bit larger, but sometimes the apps are just the right-size: our goldilocks apps. They don’t have to do much, just be a fun, casual app that exercises our imaginations a bit so that we can do a deep dive for their own sake. The perfect apps to play around with on Friday.
Today we’re releasing one of those apps, SpotDJ! [source]

SpotDJ: A Collaborative Spotify DJ Experience
SpotDJ really is for Fridays, where you want to relax a bit more with your colleagues or friends. When you first visit the SpotDJ page and log into Spotify, you’ll become a DJ. SpotDJ will show you what song you’re currently listening to on Spotify, and offer you a link to share for others to join your DJ room.
For your followers who join you in the room, SpotDJ takes control of their Spotify player to synchronize it with yours - anything you listen to on Spotify, your followers will hear! And if you scrub through the song, they’ll scrub along with you, all through the magic of the internet.
To be office DJ for today, go to SpotDJ to grab your sharing link, and spread it far and wide for anyone you want to give the change to bask in your musical
It’s a really simple idea, but there’s just something about simultaneously listening to the same music as others, even over remote distances, that makes me happy. And it’s a great way to learn things about your friends and colleagues you didn’t know before!

How We Built SpotDJ
We were talking to our friends at ReasonTown about GraphQL, ideas started flowing, and since we can build apps so quickly on top of OneGraph, we decided to launch an app written entirely in ReasonML (it only seemed appropriate) to go along with one of their episodes. And thus, SpotDJ was born!
SpotDJ is built on top of Spotify, which is a wonderful service with an impressive API underlying it. It started from a small experiment, where I saw how our GraphQL Spotify integration and tooling came together, and a basic-but-complete music player UI materialized out of nothing. I played with the API visually using our explorer (as we talked about before), and wound up controlling every aspect of the player programmatically. It was a giddy feeling, like when I first wrote QBasic and was able to PUT pixels to the screen - I knew there was something powerful here1.
Want to play with Spotify control? Try out these mutations to play a song, pause your player, skip to the next, and set the volume!
With our beta Spotify integration in place, we can control every aspect of our Spotify players programmatically. Now we could set up a server for users to visit, and the server could take care of shuffling messages between the DJ and the listeners. But I’m obsessed with making app building as instantaneous as possible, and I knew we could take it further. This is a casual, fun app for people to listen to and to hack on - setting up servers is work! Instead, let’s just have the browsers pass messages between themselves, and if a user is in listener mode, their browser can choose to keep the Spotify instance in sync with the DJ.
It’s a cutting edge group of technology:
- GraphQL and OneGraph for querying and controlling Spotify without setting up a server
- ReasonML compiling down to some really efficient JavaScript
- WebRTC for peer-to-peer communication between browser instances
- Spring-based animation alongside css-animations with 3d transforms for a fluid, fun overall aesthetic
Create your own SpotDJ app on OneGraph to avoid the rush!
SpotDJ is just meant to be a fun example of a useful app you can put together quickly with OneGraph while focusing on the more interesting challenges - be it refining animation or synchronizing browsers without a server.
All queries in the default production instance are sharing a single Spotify OAuth client id, and will likely get rate limited at the most popular times. But that's ok, because SpotDJ is meant to be cloned and hacked on!
It's easy to set up your own for you and your friends though, and we really encourage you to try it out!
- Simply create an app on OneGraph
- Visit the Spotify Developer Portal and create a new Spotify app to get your own
client_id/client_secret - Add your new Spotify OAuth client information into the OneGraph dashboard for you app under
Custom OAuth Credentials - Add
http://localhost:8000to theCORS Originssection
View the app at http://localhost:8000. Running in this environment provides hot reloading and support for routing; just edit and save the file and the browser will automatically refresh.
SpotDJ is an open-source labor of love, come hack with us!
Take a look at the issues on the GitHub repository tagged with spotdj for ways you can help contribute to SpotDJ - it's a great way to learn GraphQL, Reason, CSS-in-js, or even some fun animation techniques!
Special Thanks
A special thanks to Yuki Li, who built nearly the entire app, with obvious love and care. Yuki dove fearlessly into the dark parts of BuckleScript bindings, and tried a dozen different animation techniques to make the coverflow-like approach work.
And to Xavier Cazalot (who built another great text-to-blogging app on top of OneGraph), whose mentorship on designing and implementing the animations, and the overall aesthetic brought SpotDJ to life.
ReasonTown hosts Murphy Randle and Jared Forsyth for having me on their podcast to talk about OneGraph and building large production systems in Reason!
{"source":"blog","publishedDate":1550217600000,"url":"https://www.onegraph.com/blog/2019/02/15/Casual_app_Friday_SpotDJ.html"}
Footnotes
-
Our Spotify integration is still in beta, and we’ll follow up with some notes on the thought and care that went into making it as joyous as possible for new users, but based on our early user testing, it’s good stuff (assuming “boom!” is a good thing, of course). ↩
Introducing OneGraph
We’re Sean and Daniel, founders of OneGraph (https://www.onegraph.com). We wrap existing public APIs in GraphQL to make building integrations much faster.
At different startups over the years, both of us had to integrate our products into dozens of others services, like GitHub, Salesforce, Stripe, Marketo, Clearbit, etc. By their nature, each integration was a unique snowflake, where we had to:
- Read their docs
- The docs are often under-specified, and sometimes just incorrect. A fun example is Twitter’s timeline api example - They omit a complete list of fields, their types, description, and nullability, and their example JSON doesn’t even parse if you copy/paste it into the console!
- Figure out how they structure their API
- Figure out how they handle authentication (query params, headers, body?)
- Handle their specific OAuth flow
But that was the status quo, we knew it was painful, but we’d suck it up and just do it. What was the alternative, anyway?
Then GraphQL came along, “a query language for your API”
GraphQL gives us a way to access all of these APIs in a uniform way, with great tooling, and really fast. We can just specify what data we want from the APIs, and have the execution engine figure out how to handle the API-specific interactions, and deal with things like rate limiting and flakey services.
One other thing we realized along the way is that there is no explicit graph connecting the world’s data. We have a graph for documents (WWW), and for people (Facebook/LinkedIn/etc.), but the connections between Hacker News, GitHub, Twitter, and Salesforce are all implicit. When you make a call to Stripe to get a customer’s data, and from that data pull out the Intercom user id, and then make a call to intercom, you are imperatively traversing the graph.
Again, GraphQL solves this case for us by letting us specify connections inline, so we can query and join across all of these services in a single, declarative query.
{
  ## Retrieve a YouTube video by its id
  youTubeVideo(id: "YX40hbAHx3s") {
    snippet {
      # Pull out the title
      title
      # Jump to the channel the video was uploaded to
      uploadChannel {
        snippet {
          # Get the title of the channel
          title
        }
        # Find all of the Twitter accounts associated with the YouTube channel
        twitterLinks {
          # Retrieve the first 5 tweets for each account
          twitter(first: 5) {
            tweets {
              # For each tweet, pull out the text body
              text
            }
          }
        }
      }
    }
  }
}
(You can see the full result of the query or play with it yourself)
Finally, while we don’t attempt to normalize the data model at all (a GitHub user is different from a Twitter user, and we don’t try to create a “super user” type), we do normalize the interface by which you get the data, so we can build really useful tools like the GraphiQL Explorer - you can literally click your way through to a working API query!
As a fun aside, the backend is built in ReasonML with some code generation built in Clojure, which has been useful for keeping the structure of the graph as the number of services we’ve supported has grown. We’ll also open source the GraphiQL explorer soon, which is written in Reason and Bucklescript.
We initially thought OneGraph would be useful for back-end developers doing integrations into their product, but we’ve found we have a pretty even split between people using us on the backend, and people using us purely from the frontend with no server. It’s pretty cool to see frontend developers able to access services that would have been too much work to interact with before.
Some customer cases that rely on OneGraph today:
- A fire-tracking drone company uses us to control YouTube live streaming + get the elevation data along the route to a fire
- Customers embed us in their dashboard, one is pulling out all of the Zendesk activity related to a customer for their support team
- A company building omni-search across all your SaaS apps (e.g. Google Docs, Zendesk, Salesforce, Gmail, etc.), sped up both implementing their integrations and their overall performance drastically
- OneProfile is an open-source demo app we’ve been working on that’s a bit like Rapportive-anywhere, letting you look up a user by their twitter/hn/github/etc. handle, and find all of their related content
We’d love your feedback on OneGraph:
- Try to use OneGraph? What did you like? What are the pain points?
- What integrations that would improve your product today are you holding off on because the API is too much work? We should support these
- Where do you see a smart GraphQL service helping you the most in your architecture? We want to make these use cases easier
{"source":"blog","publishedDate":1531897200000,"url":"https://www.onegraph.com/blog/2018/07/18/OneGraph.html"}
New OneGraph course available on egghead.io: Refactor a React application using urql and OneGraph
Today's guest blog post is by Ian Jones, an egghead.io instructor and early OneGraph adopter. It's part of a brand new course (we strongly recommend you check it out, it's high quality!), "React Real-Time Messaging with GraphQL using urql and OneGraph"
I'm going to show you how to integrate a React component that uses GraphQL to fetch data from Github. We are working from an existing application so we will go through the process of refactoring the code to handle new functionality.
Specifically, we are working on a chat application that I built in my egghead course React real-time messaging with graphql using urql and onegraph. At the end of the course, we have a single chat feed that will update in real-time when new messages come in. Heres what the app looks like:

In this post, we are going to implement the ability to choose from multiple conversations. The application has hard coded values we need to refactor so we can accept props from a parent component. Controlling our components through props gives us the ability to dynamically switch what conversation the user is viewing.
Course Summary
We learned how to use urql's useQuery React hook to fetch data about the comments on a specific Github issue. We us OneGraph as a backend. OneGraph has provided has an auth package that we build into our app with React Context.
urql requires a little bit of set up. We create an urql Client that we put into React context so our query hooks can use them. We then set up onegraph-auth and pass the authentication headers we get from the onegraph-auth package to our urql client. This way we can fetch Github queries which require an authenticate user.
We need a way for our chat app to send messages. GraphQL mutations handle this for us. With mutations, we can create comments on a specific github issue.
Finally, we implement a subscription client in urql. This enables the useSubscription hook and allows us to see new messages without refreshing the browser!
We are using Github as our backend database to store our messages. We use OneGraph as our GraphQL server for our urql client to send queries to. OneGraph will then take care of sending queries to Github and fetching the responses we ask for.
Set up the code
We will be working from code in this Github repository. You can clone the project with this:
git clone [email protected]:theianjones/egghead-graphql-subscriptions.git
# or
git clone https://github.com/theianjones/egghead-graphql-subscriptions.git
cd egghead-graphql-subscriptions
When the repository is cloned, you'll want to work out of the 20-commentHistory directory.
cd 20-commentHistoryNow you'll need to install package dependencies:
yarn
# or
npm install
Build the Issue Query in the graphiql editor
First, we need to navigate to OneGraph. Log in. Now select an existing app or create a new one.
Head over to the data explorer tab. This is where OneGraph's GraphiQL editor lives. We're going to build out our query to get all of the issues associated with the egghead-graphql-subscriptions github repo.
Heres what our GraphQL query will look like:
query IssueList(
  $name: String = "egghead-graphql-subscriptions" // these are GraphQL Query parameters
  $owner: String = "theianjones"                  // this is how we can pass variables to our GraphQL query
) {
  gitHub {
    repository(name: $name, owner: $owner) {     // this is the part of the query that needs the variables we declared
      id                                         // We grab the id of the repository for urql to do better caching
      issues(
        first: 10
        orderBy: { field: CREATED_AT, direction: DESC } // we can order our query be a specific field
      ) {
        edges {
          cursor                 // cursors allow you to paginate your query results
          node {
            id
            title
            comments(last: 1) {  // we want the last comment to display under our issue title
              totalCount
              nodes {
                id
                bodyText
              }
            }
          }
        }
      }
    }
  }
}
Pro tip: when you hover over the $name and $owner you can have the editor paramiterize the query for you:

Before you run the query, you are going to have to authorize your editor with GitHub. To do this, click the Authentication drop down and select "Log in with GitHub"

When you run the query, you should get some data back!
Now that we have a query, it's time to generate our code. OneGraph has a code snippet generation tool that will create the react and urql code for us 🤯 You'll notice there's quite a few options to choose from so if you want to quickly try out Apollo or even ReasonML with GraphQL, you can!
Click "Code Exporter". Now, in the two drop downs, select JavaScript in the first and react-urql in the second. Click the copy button to grab all the code that the exporter generated for us.

Integrate OneGraph generated snippet
We are going to create an IssueList component. Create a file in our components directory: src/components/IssueList.js.
touch src/components/IssueList.jsPaste the snippet we generated in the last step. You'll notice theres urql client code that we already have present in src/index.js so we can go ahead and delete all of that code.
Heres what we have left:
import React from "react";
import { useQuery } from 'urql'

const ISSUE_LIST = `
  query IssueQuery($name: String = "egghead-graphql-subscriptions", $owner: String = "theianjones") {
    gitHub {
      repository(owner: $owner, name: $name) {
        id
        issues(first: 10, orderBy: {field: CREATED_AT, direction: DESC}) {
          edges {
            cursor
            node {
              id
              number
              title
              comments(last: 1) {
                totalCount
                nodes {
                  id
                  bodyText
                }
              }
            }
          }
        }
      }
    }
  }
`;

const IssueList = (props) => {
  const [{ data, fetching, error }, reexecuteQuery] = useQuery({
      query: ISSUE_LIST,
      variables: {"name": props.name, "owner": props.owner}});

    if (fetching) return <pre>Loading...</pre>;

    const dataEl = data ? <pre>{JSON.stringify(data, null, 2)}</pre> : null;
    const errorEl = error ? (
      <div className="error-box">
        Error in IssueQuery. <br />
        {error.message && error.message.startsWith('[Network]') ? <span>Make sure <strong>{window.location.origin}</strong> is in your CORS origins on the <a href={`https://www.onegraph.com/dashboard/app/${APP_ID}?add-cors-origin=${window.location.origin}`}>OneGraph dashboard for your app</a>.</span> : null}
        <pre>
          {JSON.stringify(error, null, 2)}
        </pre>
      </div>
    ) : null;

    const needsLoginService = auth.findMissingAuthServices(error)[0];

    return (
      <div>
        {dataEl}
        {errorEl}
        <br />
        <button
          onClick={async () => {
            if (!needsLoginService) {
              reexecuteQuery({requestPolicy: 'cache-and-network'});
            } else {
              await auth.login(needsLoginService);
              const loginSuccess = await auth.isLoggedIn(needsLoginService);
              if (loginSuccess) {
                console.log("Successfully logged into " + needsLoginService);
                reexecuteQuery({requestPolicy: 'cache-and-network'});
              } else {
                console.log("The user did not grant auth to " + needsLoginService);
              }
            }
          }}>
            {needsLoginService ? `Log in to ${needsLoginService}` : 'Run query: IssueQuery'}
          </button>
        </div>
      );
};
First, we need to add export default IssueList at the bottom of the file. To get things rendering, lets import APP_ID and auth from ../utils/auth
import {APP_ID, auth} from '../utils/auth'Now we can import our IssueList component in src/App.js. Add it right above the div:
//...
+import IssueList from './components/IssueList'

function App() {
  const {login, status} = React.useContext(AuthContext)

  if (!status || !status.github) {
    return (
      <div>
        <h1>Log in to github</h1>
        <p>In order to see your profile, you'll have to log in with Github.</p>
        <button onClick={() => login('github')}>Log in with Github</button>
      </div>
    )
  }

  return (
    <div className="App">
      <header className="App-header">
+        <IssueList/>
        <div style={{minWidth: 400}}>
          <Comments />
          <Input />
        </div>
      </header>
    </div>
  )
}
//...
The result isn't pretty, but we have the data we need to start rendering JSX!
Display JSON Data In a List
In the previous section, we were displaying the raw json in the ui. This is great to make sure everything is working but most people would be confused if we left JSON on the screen like that. Lets render some JSX 🤩
Back in our IssueList component, we can see the structure of our data that we will need to map over: data.gitHub.repository.issues.edges.
Lets create a view component that takes each issue node, and renders it as an li:
const IssueListItem = ({issue}) => (
  <li key={issue.id}>
    <h3>{issue.title}</h3>
    <p>{issue.comments.nodes[0].bodyText}</p>
    <hr/>
  </li>
)
Then we can change the dataEl variable to be a ul that maps the issues as its children:
-const dataEl = data ? <pre>{JSON.stringify(data, null, 2)}</pre> : null;
+const dataEl = data ? (
+    <ul>
+      {data.gitHub.repository.issues.edges.map(({node}) => (
+        <IssueListItem issue={node} />
+      ))}
+    </ul>
+  ) : null
Notice that we are destructuring node off in the map function.
Style Issue List
First we are going to remove the defualt padding ul's have:
const dataEl = data ? (
-   <ul>
+   <ul style={{padding: 0}}>
     {data.gitHub.repository.issues.edges.map(({node}) => (
       <IssueListItem issue={node} key={node.id} />
     ))}
   </ul>
) : null
Next we want to add some styles to our IssueListItem component. We want the title of the issue to stand out. We have the first message of our issue as well so we should dim it but make it visible.
<li
  key={issue.id}
  style={{
    paddingLeft: 3,
    paddingRight: 3,
    listStyle: 'none',
    textAlign: 'justify',
  }}
>
  <h3 style={{marginBottom: 0, marginTop: 10, fontSize: 24}}>
    {issue.title}
  </h3>
  <p
    style={{
      marginTop: 5,
      marginBottom: 10,
      fontSize: 16,
      fontWeight: 400,
      opacity: 0.8,
      color: 'rgb(102, 102, 106)',
    }}
  >
   {issue.comments.nodes[0].bodyText}
  </p>
  <hr />
</li>
It would be nice to have the background color change when we hover over a list item. We dont want to pull in a whole css library to do this, so lets make a useHover hook to keep track of that state.
const useHover = (styles) => {
  const [hover, setHover] = React.useState(false)

  const onMouseEnter = () => {
    setHover(true)
  }

  const onMouseLeave = () => {
    setHover(false)
  }

  const hoverStyle = hover
    ? {
        transition: 'all .2s ease-in-out',
        ...styles,
      }
    : {
        transition: 'all .2s ease-in-out',
      }

  return [hoverStyle, {onMouseEnter, onMouseLeave}]
}
With this hook, you pass in the styles you want applied when the mouse is over our element. We put in a transition to make the hover a little nicer.
Now we can get the hover styles and the props we need to apply to our list items by destructuring the return array.
const IssueListItem = ({issue}) => {
+  const [hoverStyle, hoverProps] = useHover({
+    background: 'rgb(67, 67, 67)',
+    cursor: 'pointer',
+  })
  return (
    <li
      key={issue.id}
+      {...hoverProps}
      style={{
        paddingLeft: 3,
        paddingRight: 3,
        listStyle: 'none',
        textAlign: 'justify',
+        ...hoverStyle,
      }}
    >
We apply the styles that are returned to the style prop on our li. Then we take the hoverProps object that contains the onMouse events and we add those functions to our li as well. Last thing we'll do in this component is remove the run query button.
//...
<div>
  {dataEl}
  {errorEl}
  <br />
- <button
-   onClick={async () => {
-     if (!needsLoginService) {
-       reexecuteQuery({requestPolicy: 'cache-and-network'});
-     } else {
-       await auth.login(needsLoginService);
-       const loginSuccess = await auth.isLoggedIn(needsLoginService);
-       if (loginSuccess) {
-         console.log("Successfully logged into " + needsLoginService);
-         reexecuteQuery({requestPolicy: 'cache-and-network'});
-       } else {
-         console.log("The user did not grant auth to " + needsLoginService);
-       }
-     }
-   }}>
-     {needsLoginService ? `Log in to ${needsLoginService}` : 'Run query: IssueQuery'}
-   </button>
</div>
Now, we can head over to src/App.js and get the message list rendering on the side.
- <div className="App">
-   <header className="App-header">
<div
+   style={{
+     display: 'flex',
+     flexDirector: 'column',
+     background: '#181d1f',
+     minHeight: '100vh',
+     fontSize: 'calc(10px + 2vmin)',
+     color: 'white',
+     padding: 10,
+   }}
 >
   <IssueList />
- <div style={{minWidth: 400}}>
+ <div style={{marginLeft: 20, maxWidth: 600, minWidth: 400}}>
     <Comments />
     <Input />
   </div>
</div>
- </header>
- </div>
Since we've made some changes to how our widths and heights are working in this component, we need to adjust the styles in <Comments/> and <Input/>.
We need to adjust the ul in <Comments/>:
<ul
  style={{
    display: 'flex',
    flexDirection: 'column',
    overflow: 'hidden',
    overflowY: 'scroll',
+   maxHeight: '90vh',
-   maxHeight: 560,
-   width: 400,
    margin: 0,
  }}
>
And in <Input/> we need to adjust the button styles.
<button
 type="submit"
 style={{
   position: 'absolute',
-    right: '-30px',
+    right: '-10px'
   top: '2px',
   borderRadius: 100,
   background: '#0B55DB',
   color: 'white',
   border: 'none',
   padding: 3,
   width: 23,
   fontWeight: 900,
   fontSize: 16,
  }}
>
Switch Conversations on Selection
We have 2 conversations to choose from: "Discuss GraphQL" and "egghead chat". We want to auto select the first conversation that loads in the list. Based on this conversation, we want to load the whole chat history for that conversation.
What this tells me is that we need to add a onLoaded prop to the IssueList component so that we can store the issue ids in our app component.
In our src/App.js component, lets add a hook to hold our issue ids.
function App() {
  const {login, status} = React.useContext(AuthContext)
+  const [issueNumbers, setIssueNumbers] = React.useState([])
// ...
We are going to initialize the state to an empty array. Now we need to pass an onLoaded prop to our <IssueList/> component. This will be a function that takes the result of our query and plucks the issue ids off of the result.
+const handleIssueListLoaded = ({githHub: {repository: issues}}) => {
+  const issueNumber = issues.edges.map(({node: issue})=> issue.number)
+  setIssueNumbers(issueNumberss)
+}

return (
  <div
    style={{
      display: 'flex',
      flexDirector: 'column',
      background: '#181d1f',
      minHeight: '100vh',
      fontSize: 'calc(10px + 2vmin)',
      color: 'white',
      padding: 10,
    }}
  >
+    <IssueList onLoaded={handleIssueListLoaded} />
-    <IssueList />
We need to tell our <Comments/> and <Input/> components what the currentIssueNumber is. Let's create another React.useState hook:
function App() {
  const {login, status} = React.useContext(AuthContext)
  const [issueNumbers, setIssueNumbers] = React.useState([])
+ const [currentIssueNumber, setCurrentIssueNumber] = React.useState()
It doesn't need an initial value because we dont know what issue number will come back.
First, lets protect our jsx from invalid renders. We need to make sure that currentIssueNumber is set before we render <Comments/> and <Input/>.
return (
  <div
    style={{
      display: 'flex',
      flexDirector: 'column',
      background: '#181d1f',
      minHeight: '100vh',
      fontSize: 'calc(10px + 2vmin)',
      color: 'white',
      padding: 10,
    }}
  >
    <IssueList onLoaded={handleIssueListLoaded}/>
+   {currentIssueNumber && (
      <div style={{marginLeft: 20, maxWidth: 600, minWidth: 400}}>
        <Comments />
        <Input />
      </div>
+   )}
  </div>
)
Now, when the issue list loads, we have an issue number that we can set:
const handleIssueListLoaded = (data) => {
  const issues = data?.gitHub.repository.issues
  const issueNumbers = issues.edges.map(({node: issue})=> issue.number)
  setIssueNumbers(issueNumbers)
  if(issueNumbers.length > 0){
    setCurrentIssueNumber(issueNumbers[0])
  }
}
We make sure that there are more than 0 issues before setting the current one. We can pass the current issueNumber down into our components.
return (
  <div
    style={{
      display: 'flex',
      flexDirector: 'column',
      background: '#181d1f',
      minHeight: '100vh',
      fontSize: 'calc(10px + 2vmin)',
      color: 'white',
      padding: 10,
    }}
  >
    <IssueList onLoaded={handleIssueListLoaded}/>
    {currentIssueNumber && (
      <div style={{marginLeft: 20, maxWidth: 600, minWidth: 400}}>
+        <Comments issueNumber={currentIssueNumber} />
-        <Comments />
         <Input />
      </div>
    )}
  </div>
)
Lets head over to src/components/CommentsSubscription.js to update our hook thats fetching our comments data.
+function CommentsSubscription({issueNumber}) {
-function CommentsSubscription() {

 const handleSubscription = (comments = [], commentEvent) => {
    if (!commentEvent) {
      return comments
    }
    return [...comments, commentEvent.github.issueCommentEvent.comment]
  }

  const [pauseCommentsHistory, setPauseCommentsHistory] = React.useState(false)

+ const commentsHistory = useCommentsHistory({pause: pauseCommentsHistory, issueNumber})
- const commentsHistory = useCommentsHistory({pause: pauseCommentsHistory})
You can see that we are destructuring the issueNumber from the props and passing this variable to our useCommentsHistory hook. This is the hook that loads the existing comments for the chat. We have to modify it to make sure it's not hard coded anymore.
const useCommentsHistory = (options) => {
+  const {pause = false, issueNumber} = options
-  const {pause = false} = options
   const [result] = useQuery({
    query: COMMENTS_QUERY,
    variables: {
      repoOwner: 'theianjones',
      repoName: 'egghead-graphql-subscriptions',
+     issueNumber,
-     issueNumber: 2
    },
    pause,
  })
Now when you load the page, the conversation should be rendering! Lets head back up to our src/App.js to update our <Input /> component. Our input mutation need the subjectId which is not the issue number. This means that we need more than the currentIssueNumber and issueNumbers.
Lets refactor our code to set the current issue:
function App() {
  const {login, status} = React.useContext(AuthContext)
+ const [issues, setIssues] = React.useState([])
- const [issueNumbers, setIssueNumbers] = React.useState([])
+ const [currentIssue, setCurrentIssue] = React.useState()
- const [currentIssueNumber, setCurrentIssueNumber] = React.useState()
  if (!status || !status.github) {
    return (
      <div>
        <h1>Log in to github</h1>
        <p>In order to see your profile, you'll have to log in with Github.</p>
        <button onClick={() => login('github')}>Log in with Github</button>
      </div>
    )
  }

  const handleIssueListLoaded = (data) => {
-   const issues = data?.gitHub.repository.issues
-   const issueNumbers = issues.edges.map(({node: issue}) => issue.number)
-   if(issueNumbers.length > 0){
-     setCurrentIssueNumber(issueNumbers[0])
-    }
+    const issues = data?.gitHub.repository.issues.edges.map(e => e.node)
+    setIssues(issues)
+    setCurrentIssue(issues[0])
  }
We need to keep track of the whole issue because our two components need different data off of each. This is a good thing to keep in mind when you are designing your state in your components. Lets update our view now:
return (
  <div
    style={{
      display: 'flex',
      flexDirector: 'column',
      background: '#181d1f',
      minHeight: '100vh',
      fontSize: 'calc(10px + 2vmin)',
      color: 'white',
      padding: 10,
    }}
  >
    <IssueList onLoaded={handleIssueListLoaded}/>
    {currentIssue && (
      <div style={{marginLeft: 20, maxWidth: 600, minWidth: 400}}>
        <Comments issueNumber={currentIssue.number} />
+       <Input subjectId={currentIssue.id} />
-       <Input />
      </div>
    )}
  </div>
)
Now we can update our Input component:
function NewCommentInput({subjectId}) {
  const [mutationResult, executeMutation] = useMutation(NEW_COMMENT_MUTATION)
  const handleSubmit = (body) => {
+   executeMutation({subjectId, body})
-   executeMutation({subjectId: 'MDU6SXNzdWU2OTQ1MjE0ODM=', body})
 }


  return <Input onSubmit={handleSubmit} />
}
And finally, we can add an onClick handler to update what current issue we are viewing! Inside of src/App.js:
return (
  <div
    style={{
      display: 'flex',
      flexDirector: 'column',
      background: '#181d1f',
      minHeight: '100vh',
      fontSize: 'calc(10px + 2vmin)',
      color: 'white',
      padding: 10,
    }}
  >
+   <IssueList onLoaded={handleIssueListLoaded} onClick={setCurrentIssue} />
-   <IssueList onLoaded={handleIssueListLoaded} />
    {currentIssue && (
      <div style={{marginLeft: 20, maxWidth: 600, minWidth: 400}}>
        <Comments issueNumber={currentIssue.number} />
        <Input subjectId={currentIssue.id} />
      </div>
    )}
  </div>
)
When you test the UI out, you will notice that nothing is changing. Thats because we are pausing our urql query in Comments. We can force a render when the currentIssue changes by adding a key prop to each of the components:
return (
  <div
    style={{
      display: 'flex',
      flexDirector: 'column',
      background: '#181d1f',
      minHeight: '100vh',
      fontSize: 'calc(10px + 2vmin)',
      color: 'white',
      padding: 10,
    }}
  >
    <IssueList onLoaded={handleIssueListLoaded} onItemClick={(i) => console.log('click') || setCurrentIssue(i)} />
    {currentIssue && (
      <div style={{marginLeft: 20, maxWidth: 600, minWidth: 400}}>
+       <Comments issueNumber={currentIssue.number} key={currentIssue.number} />
+       <Input subjectId={currentIssue.id} key={currentIssue.id} />
-       <Comments issueNumber={currentIssue.number} />
-       <Input subjectId={currentIssue.id} />
      </div>
    )}
  </div>
)
This adds the functionality for switching conversations. If you go over to github and create a new issue, when you reload, you'll see it show up!
How OneGraph onboards users who are new to GraphQL
It's our first post of the year, and we’re opening with a new year's gift! We're open-sourcing our new GraphiQL explorer, which is the best way to explore any API today.
GraphQL: A nascent and growing technology and ecosystem
But first, let's talk a bit about GraphQL: it’s a production-ready query language that allows clients to declaratively specify the data they need in a way that best fits their product needs. The first stable release was in October 2016, which at two years old is pretty young for this kind of tech. Its popularity has grown rapidly and a strong ecosystem has started to take root, with services like Gatsby, Hasura, AWS AppSync, and of course, OneGraph.
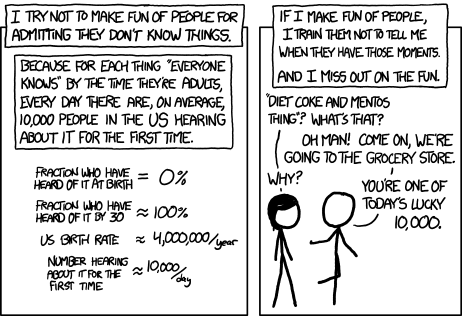
We see a lot of newcomers to GraphQL at OneGraph. Many of them aren't aware that OneGraph is powered by GraphQL - they come to OneGraph looking for easy and consistent access to the services that power their business. Services like Gmail, Intercom, Twilio, Slack, etc. Given GraphQL is still a novel technology, many of them will see it for the first time - and that means they're one of the lucky 10,0001!
We’ve invested deeply into making the first experience for the lucky 10,000 really special, both for OneGraph users, and for the wider GraphQL ecosystem as well.
GraphQL’s on-boarding problem
There’s a ton of value in GraphQL, and we’re obviously huge fans.
We’re also in a unique position because we see so many newcomers to GraphQL, and we get to do a deep dive on the things that trip them up. The biggest initial show-stopper that we found surprising (especially as GraphQL experts) is the overwhelming nature of the GraphQL syntax. We’ve stood over the shoulder of our users as they see a GraphQL query the first time, and that’s given us a visceral empathy for the fear it can inspire in the beginning: the nested structures, the not-quite-JSON-object fields, the lack of familiar docs. There’s a learning curve that many experts don’t appreciate.
Not only do GraphQL users have to learn an entirely new way of thinking, but also the syntax to represent that new way of thinking - both at the same time! And to add to that, it’s possible to end up with queries that look right, but the server won’t be able to execute successfully.
It’s a challenge that anyone who’s used GraphQL for a while finds suspicious: “It’s so easy! The query is JSON without the values. You know JSON, this is even easier!”
But because we’re exposed to lots of new-comers to GraphQL, we knew we had to search hard to find a way to show beginners how easy it really is.
GraphiQL: An integrated GraphQL development environment
One of the great things about GraphQL is the wonderful tooling that’s grown up around it, like GraphiQL. It’s a GraphQL exploratory tool that’s great for building up and testing queries, seeing the types of each individual field, being able to search through a schema for a field name or type, and even read the docs inline. It’s a core component of OneGraph’s data explorer.
Most of the efforts in GraphQL tooling have focused on the intermediate-to-advanced cases, meaning we have a big opportunity to help newcomers to the ecosystem.

Specifically, can we build tooling that allows a new user to easily discover the connection between the data they want to get and the query they need to write?
Introducing the OneGraph GraphiQL Explorer
Why we built the Explorer
OneGraph's GraphiQL explorer is a way to explore and build GraphQL queries, and can be included in any GraphiQL instance as a simple React component.
We built the explorer with a user story in mind:
Betty is full-stack developer who’s seen a few snippets of GraphQL, but has never written a query herself, and isn’t sure learning the syntax will be worth it.
She’s been put in charge of building an internal dashboard system to get an overview on customer activity across several different services like Zendesk, Intercom, and Salesforce.
Let’s make Betty’s day special! We want her to first reach her goal, and along the way, become comfortable with GraphQL.
She’s not familiar with GraphQL syntax, so instead, let’s present her with a graphical representation of the data she’s looking for instead. We display the schema in a tree, almost like a file explorer, where she can check the fields she wants:

Now each possibility is presented neatly for Betty to choose. And as she selects each field, we build the corresponding GraphQL query for her:
Betty doesn’t have to be deeply familiar with GraphQL semantics or syntax now - we’ve pushed that bit of learning further down the road. More immediate wins for Betty means she can accomplish her goal faster, and see the concrete wins for GraphQL.
We can take it even further! When you or your company are embedding the explorer in your GraphiQL instance for your users, another challenge they'll face are cases where a query is syntactically valid, but semantically invalid.
Take a case we've seen many new users trip over, for example:
query {
    gitHub {
      user(login: "sgrove") {
        repositories {
          nodes {
            name
          }
        }
      }
    }
  }
It's obvious that the user is trying to get a list of repositories and their names, but they'll get an error back:
    {
      "data": {
        "gitHub": null
      },
      "errors": [
        {
          "message": "Error from GitHub: You must provide a `first` or `last` value to properly paginate the `repositories` connection.",
          "path": [
            "gitHub"
          ]
        }
      ]
    }
This is because while all of the arguments for repositories are optional, the user must provide some arguments2. This breaks the flow of a user building up a query, and really confuses new users.
So now a company embeds the explorer into their GraphiQL instance, they can optionally provide default arguments for cases where selecting a field would lead to these bad states. Simply specify additional arguments to fill in automatically when an ObjectType.fieldName is expanded, so that for example the same actions as before would lead to this query instead:
query {
    gitHub {
      user(login: "sgrove") {
        repositories(
          orderBy: { direction: DESC, field: CREATED_AT }
          first: 10
        ) {
          nodes {
            name
          }
        }
      }
    }
  }
Notice that first has been automatically selected and populated with a value of 10, along with natural sorting options. This is a manual decision by us, the authors of the API, because we expect that while last: 10 is also a valid argument, first is more likely what users will be looking for. This allows for a longer unbroken chain of success as our users explore OneGraph.
For novices and gurus alike
While we initially targeted the explorer at newcomers, it’s even become the preferred way of exploring and building up queries for our customers who are experienced GraphQL developers! New and experienced alike get new super powers to use at their companies and on their personal projects, thanks to the explorer.
Technical details
The explorer is written in JavaScript with Flow typing to make it fit in as much as possible with GraphiQL's codebase. Because of the introspectable nature of GraphQL (where there's a standard way for a client to ask a server about details on its API), we're able to get a list of all of the fields under the query, mutation, and subscription objects. Not only that, but we can intelligently render argument input fields like enums, explore intermediate concepts like interfaces and unions, and even bring in field and argument-level documentation on hover. Check out the source if you’re curious about the implementation and an example of how to use it in your own GraphiQL instance.
OneGraph’s Open Source Contribution
Today we’re providing our GraphiQL Explorer to the wider community as an open source contribution. I'm really proud of what the we've been able to build, and even more excited to think we contribute in some small way to thousands of others learning and enjoying GraphQL. Expect to see it soon in your favorite projects like Gatsby, Postgraphile, and more!
Take a look at the GitHub repository for the explorer itself, and check out our ready-to-go example to see how to use it in your own GraphiQL instance!
A special thanks
The seed of the idea originally came from Steve Hazel over tea in a cafe while he gave us early feedback on OneGraph. It took a while to work out the implementation, but we’re very thankful for him sharing this insight.
{"source":"blog","publishedDate":1548316800000,"url":"https://www.onegraph.com/blog/2019/01/24/How_OneGraph_onboards_users_new_to_GraphQL.html"}
Footnotes
OneGraph is Joining Netlify!

Our team and our technology are joining Netlify to make building on APIs in the modern web delightful - You can learn more about Netlify and the vision in this blog by Netlify CEO and co-founder Matt Biilmann!
While there’s much to come, today we take our first step in making multi-app service integrations easier with Netlify and OneGraph, API Authentication.
Quick summary:
- Existing customers will continue to use OneGraph with no interruption in service
- New signups outside of existing customer organizations will be disabled while we migrate systems to Netlify
- We’re launching API Authentication as our first example of what OneGraph can unlock on the Netlify platform
What’s changing?
Starting today, we’ll suspend new signups to OneGraph outside of existing customer organizations.
For existing customers however, nothing will change in the short term. All the same schemas, queries, tooling, and support you’ve come to expect working with us are still right there for you to use. As OneGraph rolls out more and more under the Netlify umbrella, and as necessary, we’ll help migrate our existing users over to the new experience.
Why is OneGraph joining Netlify?
Our goal is to put all of the internet’s API’s under a single GraphQL endpoint, and make the experience of building on top of that absolutely delightful. We’ve released quite a bit of open source tooling used all across the internet to support that goal, given dozens of talks at conferences, and demoed next-gen APIs thousands of times - and now we’re ready to hit the accelerator to not only bring the benefits to millions of developers but to also fill in many of the cracks that have developed for API providers as the ecosystem has expanded at a breakneck pace.
Why is Netlify acquiring OneGraph?
For developers, the growth in both the average number of APIs consumed in modern web development as well as the total number of API providers makes it very clear that we need a coherent strategy for discovery, consumption, securing, and maintaining integrations. On the API provider side of things, tackling the challenges associated with distribution, onboarding, monitoring, and maintenance are solved time and time again by each individual provider, often in an ad-hoc way, with little tooling.
Add to that the distributed-but-linked nature of our data - in Salesforce, Zendesk, Mux, GitHub, 1,000’s of APIs - as this is a problem that sits outside of any one API provider.
OneGraph slides in the middle of both points for apps running on Netlify, providing unified access to developers across APIs and lowering the friction of building amazing applications using the absolute best tools for the job.
What is API Authentication?
It’ll take time for the full roll-out of OneGraph within Netlify, but as a first step in making multi-api service integrations easier we’re launching API Authentication in Beta, through Netlify Labs.
Figuring out auth when accessing an API for the first time has been a constant pain point from developers looking to get things done quickly and securely. API Authentication uses OAuth to make provisioning API access tokens inside of your Netlify functions and site builds a one-click affair! You can visually select the service you want to access, the scopes you need for your app, and then click through the OAuth flow - that’s it, you’re finished! Using the @netlify npm package, you’ll be able to access the authentication tokens in your functions and site builds.
We’re quite excited to join Netlify on the journey to build a better web, and to make it easier to build and manage integrations across services!
Recommend Projects
-
 React
React
A declarative, efficient, and flexible JavaScript library for building user interfaces.
-
Vue.js
🖖 Vue.js is a progressive, incrementally-adoptable JavaScript framework for building UI on the web.
-
 Typescript
TypeScript is a superset of JavaScript that compiles to clean JavaScript output.
-
TensorFlow
An Open Source Machine Learning Framework for Everyone
-
Django
The Web framework for perfectionists with deadlines.
-
 Laravel
A PHP framework for web artisans
-
D3
Bring data to life with SVG, Canvas and HTML. 📊📈🎉
-
Recommend Topics
-
javascript
JavaScript (JS) is a lightweight interpreted programming language with first-class functions.
-
web
Some thing interesting about web. New door for the world.
-
server
A server is a program made to process requests and deliver data to clients.
-
Machine learning
Machine learning is a way of modeling and interpreting data that allows a piece of software to respond intelligently.
-
Visualization
Some thing interesting about visualization, use data art
-
Game
Some thing interesting about game, make everyone happy.
Recommend Org
-
Facebook
We are working to build community through open source technology. NB: members must have two-factor auth.
-
Microsoft
Open source projects and samples from Microsoft.
-
Google
Google ❤️ Open Source for everyone.
-
Alibaba
Alibaba Open Source for everyone
-
D3
Data-Driven Documents codes.
-
Tencent
China tencent open source team.