
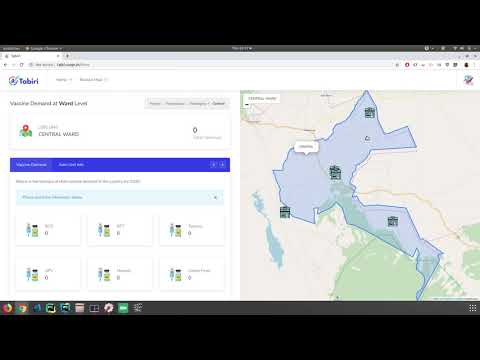
A Django REST API leveraging Geodjango to provide GIS capabilities to tabiri-ui as visible below. The API is integrated with a SARIMA model that predicts the demand for child vaccines.
Requirements include:
- The Python programming language (Python > 3)
- The Django web framework
- The PostgreSQL database for persisting data
- The PostGIS extension for supporting spatial features in the PostgreSQL database
- pip for installing dependencies
- The virtualenvwrapper module for managing a virtual environment
First check if python is installed
$ python3 --version
If its not installed run
sudo apt install python3
$ sudo apt install gdal-bin libgdal-dev
$ sudo apt install python3-gdal
$ sudo apt install binutils libproj-dev
$ sudo apt install python3-pip libpq-dev postgresql postgresql-contrib nginx curl
Create the database first
-
Option 1 Change user to postgres
$ su - postgresCreate user
$ createuser --interactive --pwpromptCreate database
$ createdb -O user dbname -
Option 2 Log in to postgres
$ psql -U username dbname;Create database
$ dbname=# create database dbname;Then grant superuser privileges to user
$ dbname=# GRANT all privileges ON DATABASE dbname TO user;
Import database from sql file
The tabiri_api_db.sql can be found here. Oops! Did I forget to mention its around 150MB, will upload it on to GIT LFS later.
$ psql -h hostname -d databasename -U username -f file.sql
Log in to postgres
$ psql -U username dbname;Enable the postgis extension. Connect to psql then execute the below script
$ dbname=# CREATE EXTENSION postgis;Install virtualenvwrapper
$ sudo pip3 install virtualenvwrapperAdd config to .bashrc on the home directory
export VIRTUALENVWRAPPER_PYTHON=/usr/bin/python3
export VIRTUALENVWRAPPER_VIRTUALENV=/usr/local/bin/virtualenv
source /usr/local/bin/virtualenvwrapper.sh
Execute the virtualenvwrapper
$ source .bashrcCreate virtual env
$ mkvirtualenv tabiri_venvTo work on the tabiri_venv
$ workon tabiri_venvClone the api from the repo
$ git clone https://github.com/ochomoswill/tabiri_api.gitThe folder structure will be as follows after cloning
tabiri_api/
    tabiri_api/
        apps/
        __init.py
        settings.py
        urls.py
        wsgi.py
    .gitignore
    manage.py
    requirements.txt
    setup.py
    README.md
Move into the root directory of the project. Run the below command to install the required packages
$ pip3 install -r requirements.txtAdd the allowed hosts to settings.py
ALLOWED_HOSTS = ['your_server_domain_or_IP', 'second_domain_or_IP', . . .,'127.0.0.1', 'localhost']Fake migrate
$ python manage.py migrate --fakeTo start the application. Run the below the root directory
$ python manage.py runserverYou can test that the api is app by
curl 127.0.0.1:8000/api/gis/countries- Django
- Geodjango
- Django Rest Framework
- Pandas
- Numpy
- Matplotlib
- Scikit Learn
-
Option 1 Fork this repo!
-
Option 2 Clone this repo to your local machine
$ git clone https://github.com/ochomoswill/tabiri_api.git
HACK AWAY! 🔨🔨🔨
Create a new pull request using https://github.com/ochomoswill/tabiri_api/compare/.
We use Gunicorn for the deployment
On the root directory of the project run
$ gunicorn --bind 0.0.0.0:8000 tabiri_api.wsgiCreate and open a systemd socket file for Gunicorn
$ sudo nano /etc/systemd/system/gunicorn.socketEdit /etc/systemd/system/gunicorn.socket as below:
[Unit]
Description=gunicorn socket

[Socket]
ListenStream=/run/gunicorn.sock

[Install]
WantedBy=sockets.target
Create and open a systemd service file for Gunicorn
$ sudo nano /etc/systemd/system/gunicorn.serviceEdit /etc/systemd/system/gunicorn.service as below:
[Unit]
Description=gunicorn daemon
Requires=gunicorn.socket
After=network.target

[Service]
User=user_account_name
Group=www-data
WorkingDirectory=/home/user_account_name/myprojectdir
ExecStart=/home/user_account_name/.virtualenvs/bin/gunicorn \
          --access-logfile - \
          --workers 3 \
          --bind unix:/run/gunicorn.sock \
          djangoprojectname.wsgi:application

[Install]
WantedBy=multi-user.target
Start and enable the Gunicorn socket
$ sudo systemctl start gunicorn
$ sudo systemctl enable gunicorn
Check the status of the Gunicorn service
$ sudo systemctl status gunicornYou can test that the api is app by
$ curl --unix-socket /run/gunicorn.sock 127.0.0.1:8000/api/gis/countriesIf you make changes to the /etc/systemd/system/gunicorn.service file, reload the daemon to reread the service definition and restart the Gunicorn process by typing:
$ sudo systemctl daemon-reload
$ sudo systemctl restart gunicornCreate and open a new server block in Nginx's sites-available directory:
$ sudo nano /etc/nginx/sites-available/myprojectEdit /etc/nginx/sites-available/myproject as below:
server {
    listen 80;
    server_name server_domain_or_IP;

    location = /favicon.ico { access_log off; log_not_found off; }
    location /static/ {
        root /home/user_account_name/myprojectdir;
    }

    location / {
        include proxy_params;
        proxy_pass http://unix:/run/gunicorn.sock;
    }
}
Enable the file by linking it to the sites-enabled directory
$ sudo ln -s /etc/nginx/sites-available/myproject /etc/nginx/sites-enabledTest your Nginx configuration for syntax errors by typing:
$ sudo nginx -tIf no errors are reported, go ahead and restart Nginx by typing:
$ sudo systemctl restart nginxFinally, we need to open up our firewall to normal traffic on port 80. Since we no longer need access to the development server, we can remove the rule to open port 8000 as well:
$ sudo ufw delete allow 8000
$ sudo ufw allow 'Nginx Full'After installing PostgreSQL, if you can't seem to log in to the postgres server using psql, follow the below steps
Open the file pg_hba.conf in /etc/postgresql/<postgres_version>/main and change this line:
local all postgres peer
to
local all postgres trust
Restart the server
$ sudo service postgresql restartLogin into psql and set your password
$ psql -U postgresChange the password for role postgres
$ dbname=# ALTER USER postgres with password 'your-pass';Finally change the pg_hba.conf from
local all postgres trust
to
local all postgres md5
After restarting the postgresql server, you can access it with your own password
Authentication methods details:
- trust - anyone who can connect to the server is authorized to access the database
- peer - use client's operating system user name as database user name to access it.
- md5 - password-base authentication
If you update your Django application, you can restart the Gunicorn process to pick up the changes by typing:
$ sudo systemctl restart gunicornIf you change Gunicorn socket or service files, reload the daemon and restart the process by typing:
$ sudo systemctl daemon-reload
$ sudo systemctl restart gunicorn.socket gunicorn.service
If you change the Nginx server block configuration, test the configuration and then Nginx by typing:
$ sudo nginx -t && sudo systemctl restart nginxReach out to me at one of the following places!
- Website at
ochomoswill

- MIT license
- Copyright 2019 © ochomoswill.


