This repo contains a demo project developed in Salesforce.com APEX, Javascript VisualForce for demonstrating how a team dedicated to building applications on the SFDC platform and releasing them via the embedded distribution channel the AppExchange.
Developers should have a general understanding of the following development concepts to better understand the material presented here:
- Salesforce.com APEX, Visualforce in the Force.com IDE
- Git (Version control)
- Amazon AWS (Hosted virtual machine for running intermediary applications)
- Jenkins (Continuous development build manager)
- ANT (Java framework for automating the deployment of SFDC 'Meta-data' between orgs)
The SFDC Platform uses the concept of an 'organization' for development purposes. This is semi-analogous to an installation of the application stack in any other web-based platform.
These 'organizations' are delimited by a username in for the format of an email address.
A developer 'org' can be optained from: http://developer.salesforce.com
The process for team developement relys on a series of orgs to develop and test applications and ulimately a specially annointed org, (aka "Packaging Org") where an application that is 'packaged' for distribution to the AppExchange.
In total, this team development process recommends a total of 3 SFDC Orgs (naming convention is useful but non-critical):
- developer@project_developer.com (individual developer org)
- developer@project_test.com (testing environment, for UAT's)
- [email protected] (packaging org, manaaged package origin, beta package origin)
Clone or establish a Git repository into the Force.com IDE workspace, using the following file structure:
project_name/src
Example:
git clone https://github.com/BracketLabs/AppExchange-Team-Development-on-Force.com-Platform-Demo [email protected]/src
Next, establish a new Force.com Project with the same name as the directory that is the parent of the 'src' folder:
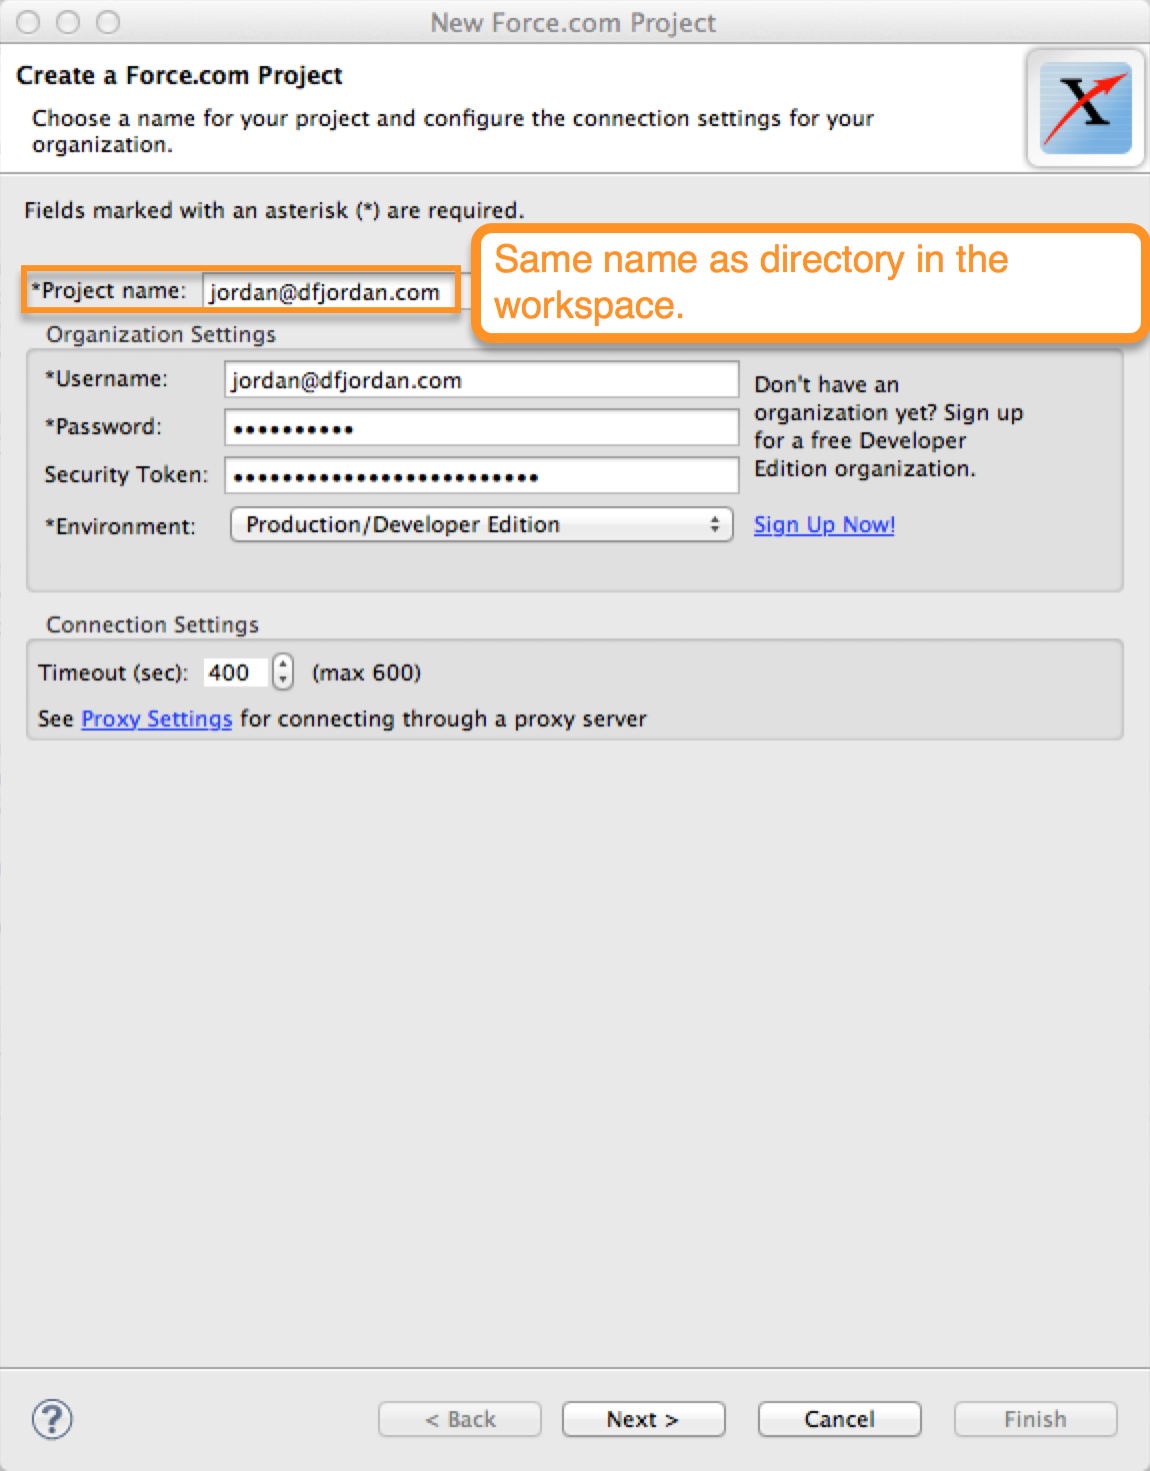
And choose not to download any components (granted the repo has already been established):
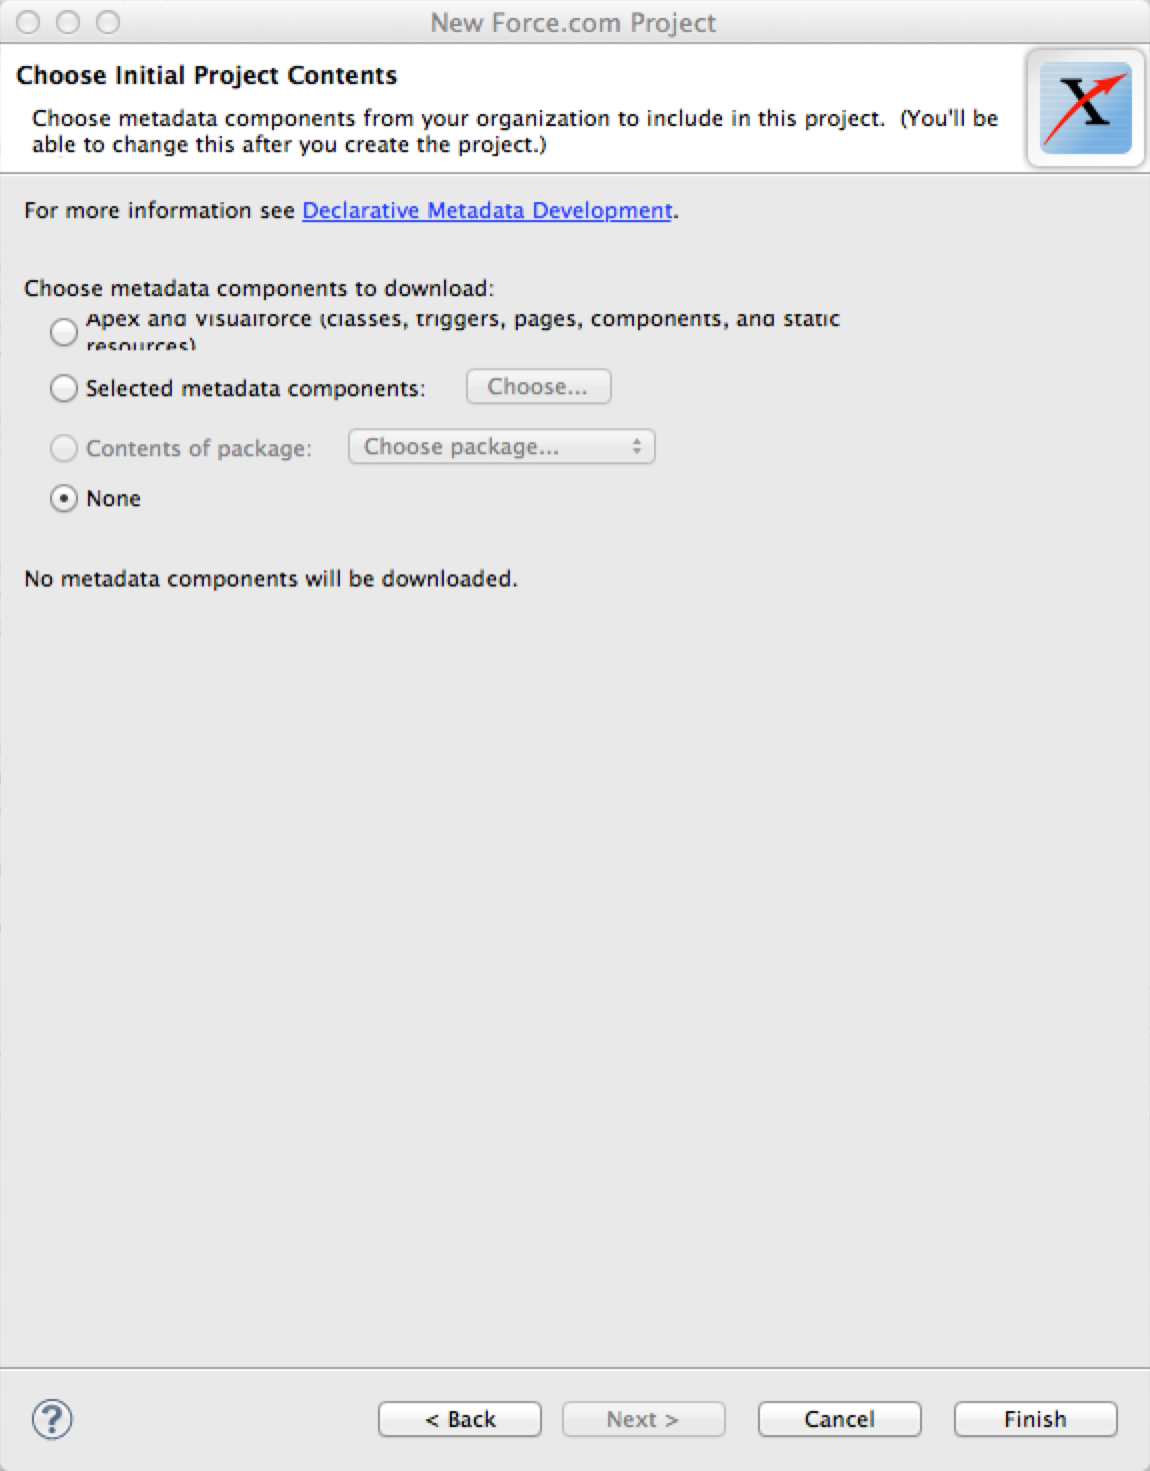
And you have a development environment ready to go.
Initializing your Force.com Org by right-clicking the directory tree and clicking 'Save to Server'. (The metadata API may complain about previous components having been replaced, or having been updated since you last 'Saved to Server'. Since Git is the standard for where our development code base is at, goahead and replace the elements on the server as necessary.)
Git acts as the traffic-light when it comes to checking in changes you've made on the individual developer org. I won't go into the specifics of Git source control, but once you (as the individual developer) have completed the changes you wish to make to the source control, you need to contribute your changes to the centralized repository.
Since Git and hosted Git repositories are seperate and apart from SFDC's developer environments, we need to use a tool from SFDC to move raw source-code into other orgs, without repeating the same process we just used for populating the individual developer org.
For this we'll use SFDC's Ant Migration Tool and a build-manager called Jenkins hosted on a 'Cloud Virtual Machine'
To save you some time use this Amazon AWS AMI that is preinstalled with a few of the tools necessary.
In our Jenkins Project, we will 'watch' the hosted Git repository and trigger a build when a new commit has been pushed into the repo.

The Jenkin's build project basically runs 2 operations from the shell to populate our 'Test Org'
git clone https://github.com/BracketLabs/AppExchange-Team-Development-on-Force.com-Platform-Demo sourceCode
ant deployUnpackaged
The first step, copies the source-code from the hosted github repo, and the second uses the SFDC Ant Migration plugin to deploy the sourceCode in the 'sourceCode' directory to the test org.
Configurations for the Ant Migration tool are stored in 'build.xml' and 'build.properties'
They can be customized as needed, and there are more methods in the ANT migration tool for invoking test methods, etc. However, they are not being used for this process.

Once the build has completed, the testing org is ready for UAT. The product owner can approve the team's work in a single org.

The final step in building an App for the AppExchange is migrating it to the 'Packaging Org'.
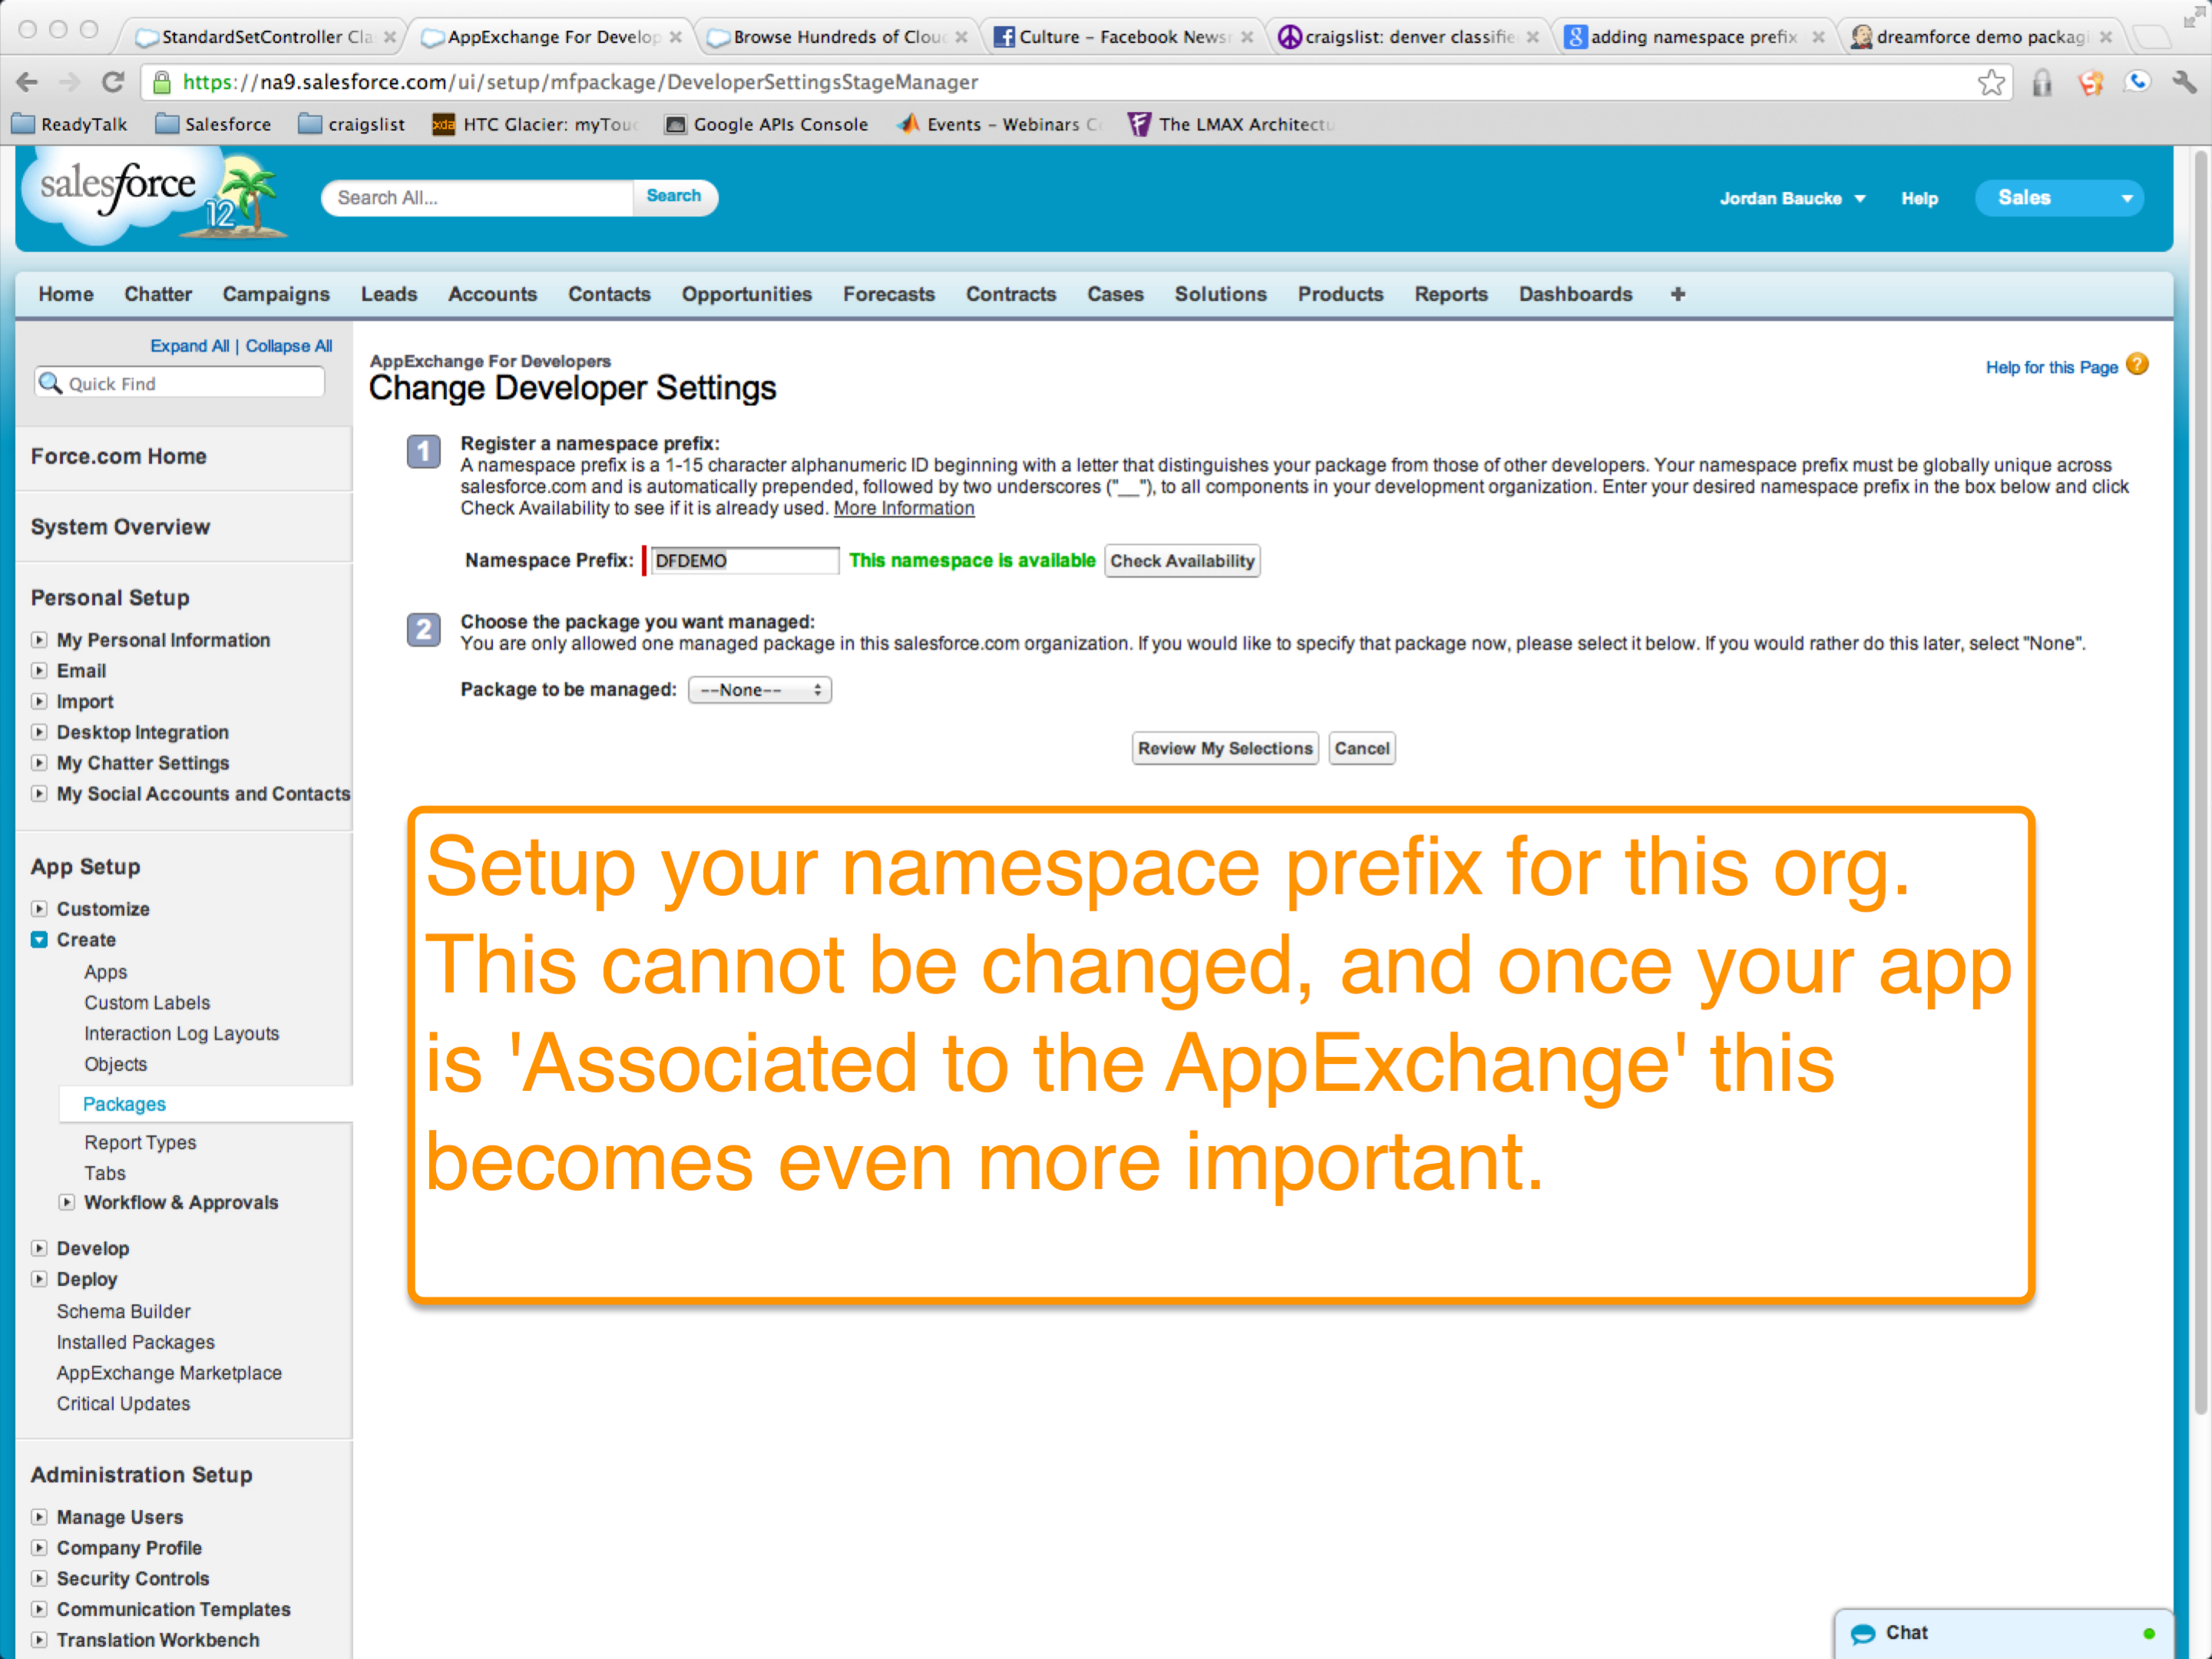
Apps that use the 'managed package' system on SFDC must have a namespace prefix. More about that here: https://github.com/jordanbaucke/sfdc-namespace-prefix
In addition to namespacing, to keep our App's code functioning normally once it has been installed into a customer's org, developers need to account for a number of items such as testing for specific Salesforce features that may or may-not be enabled in that customer's organization.
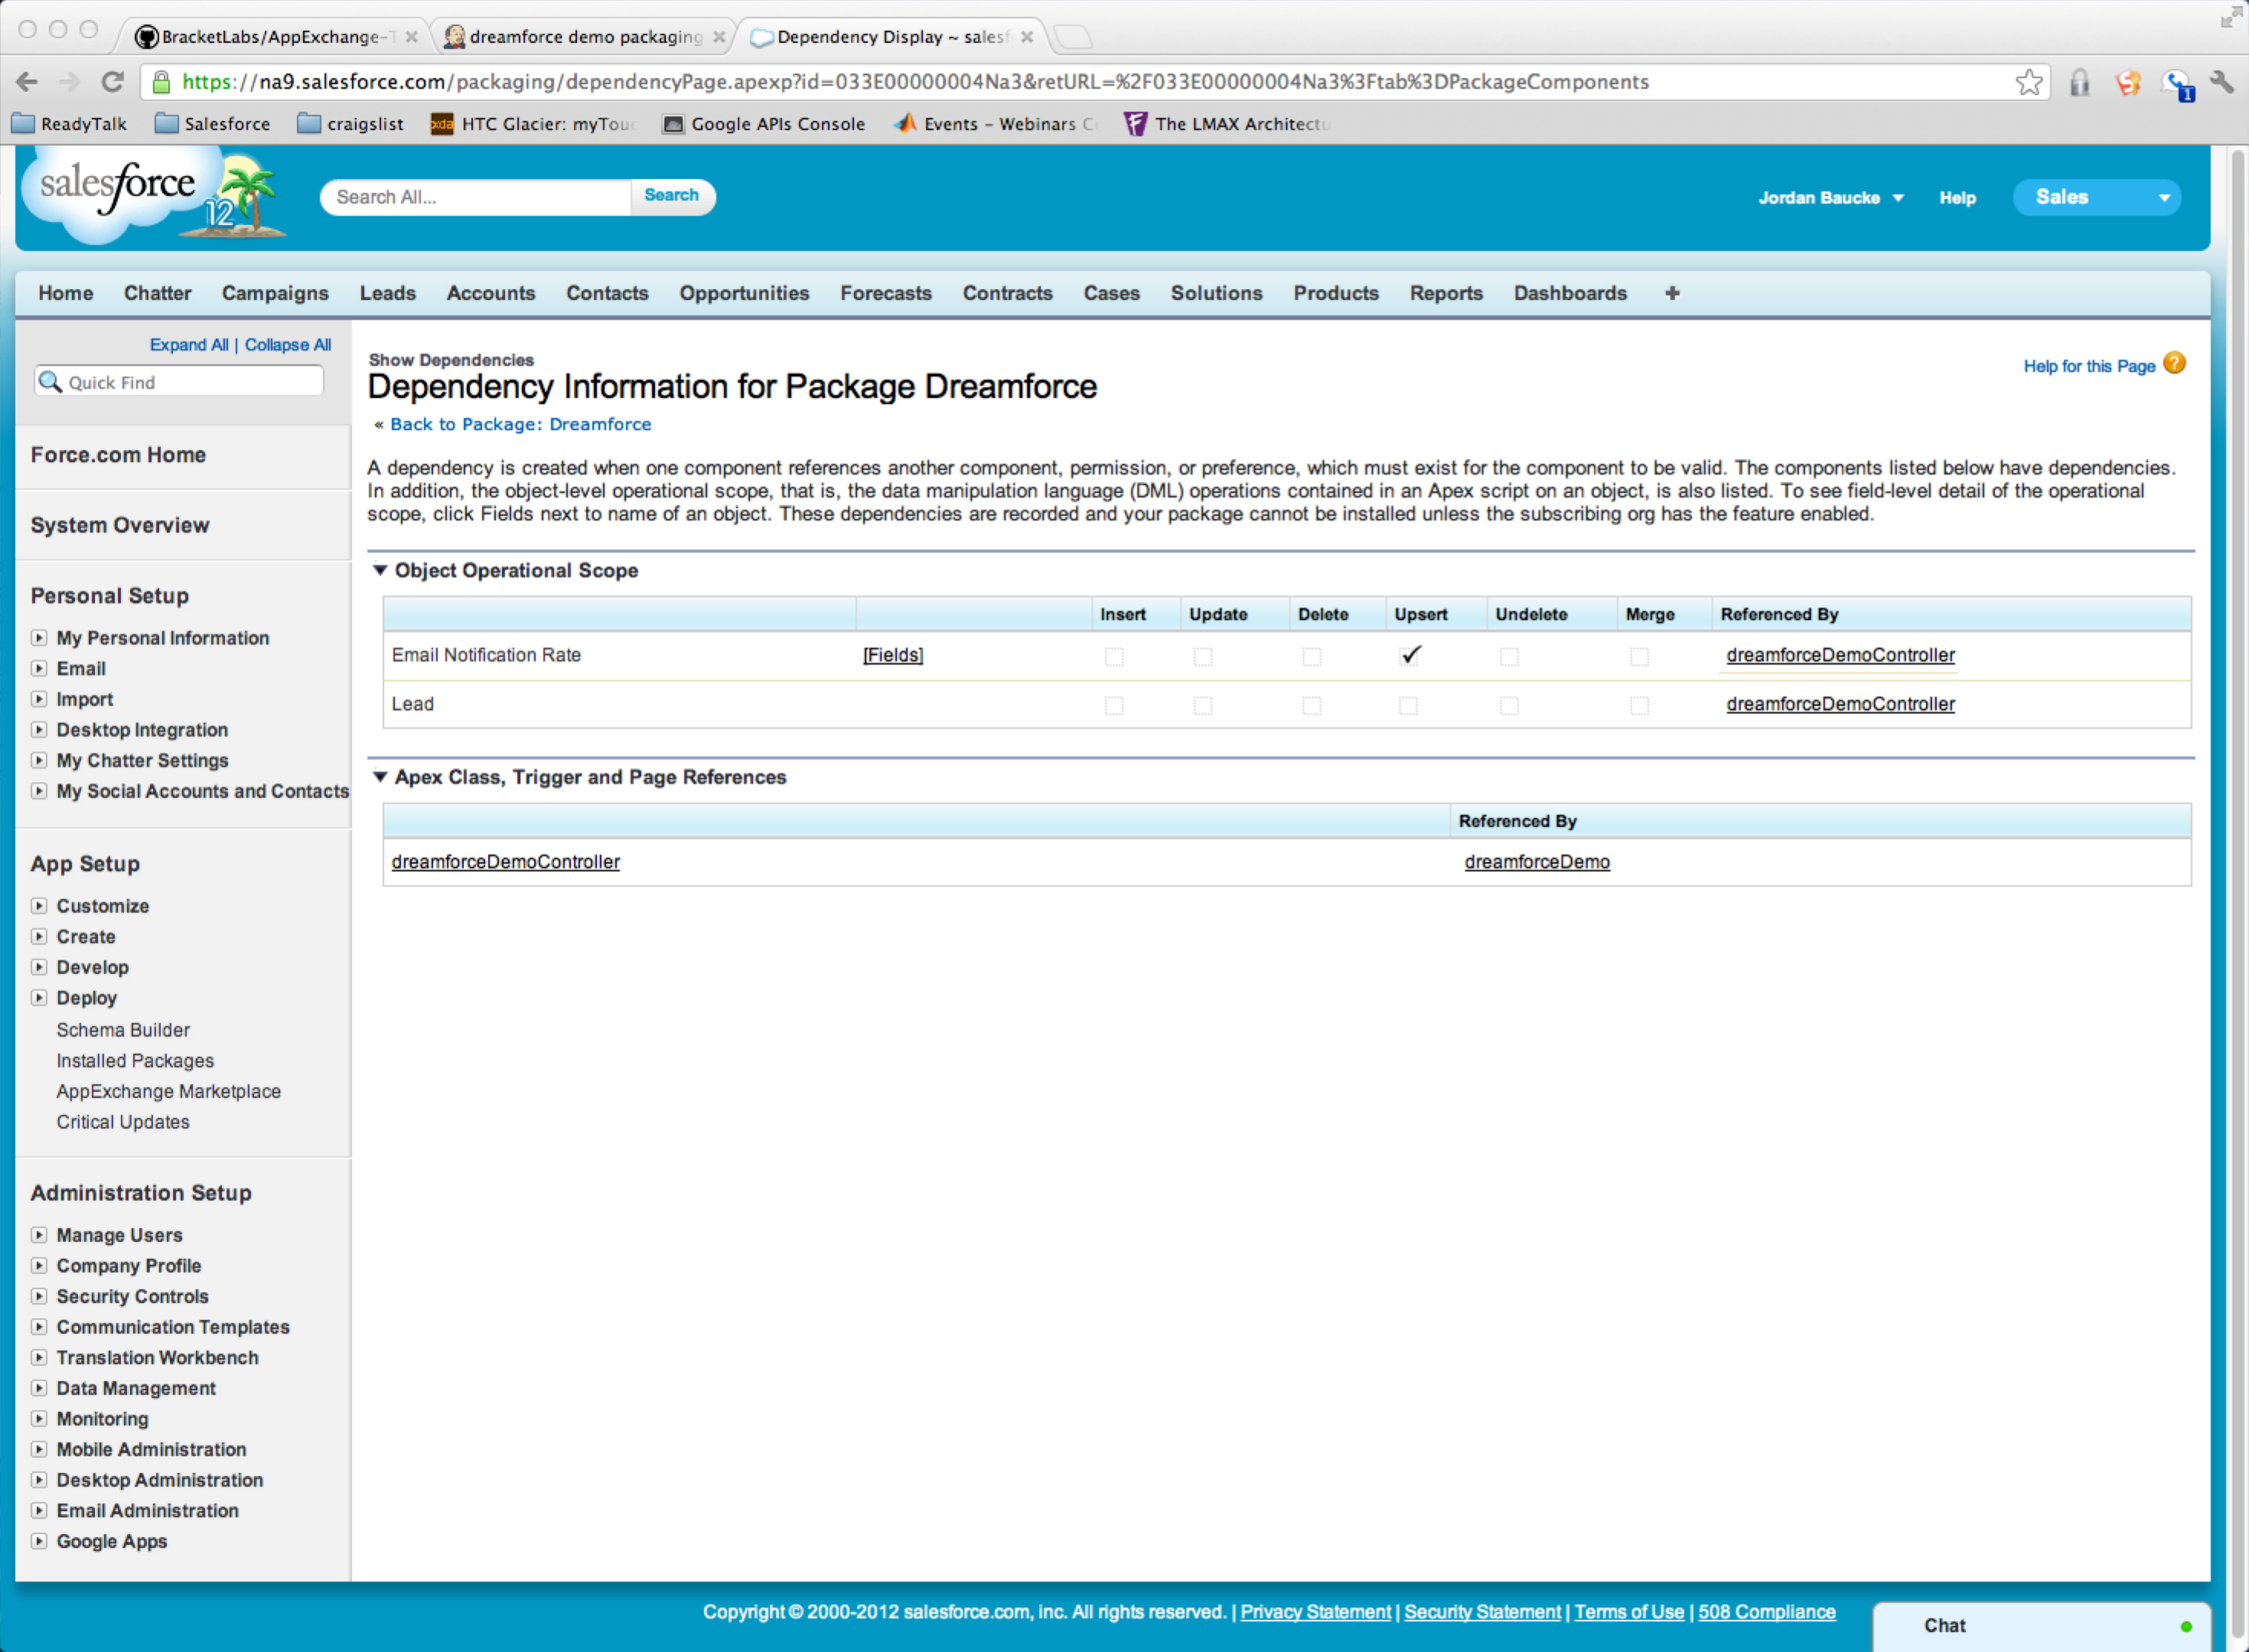
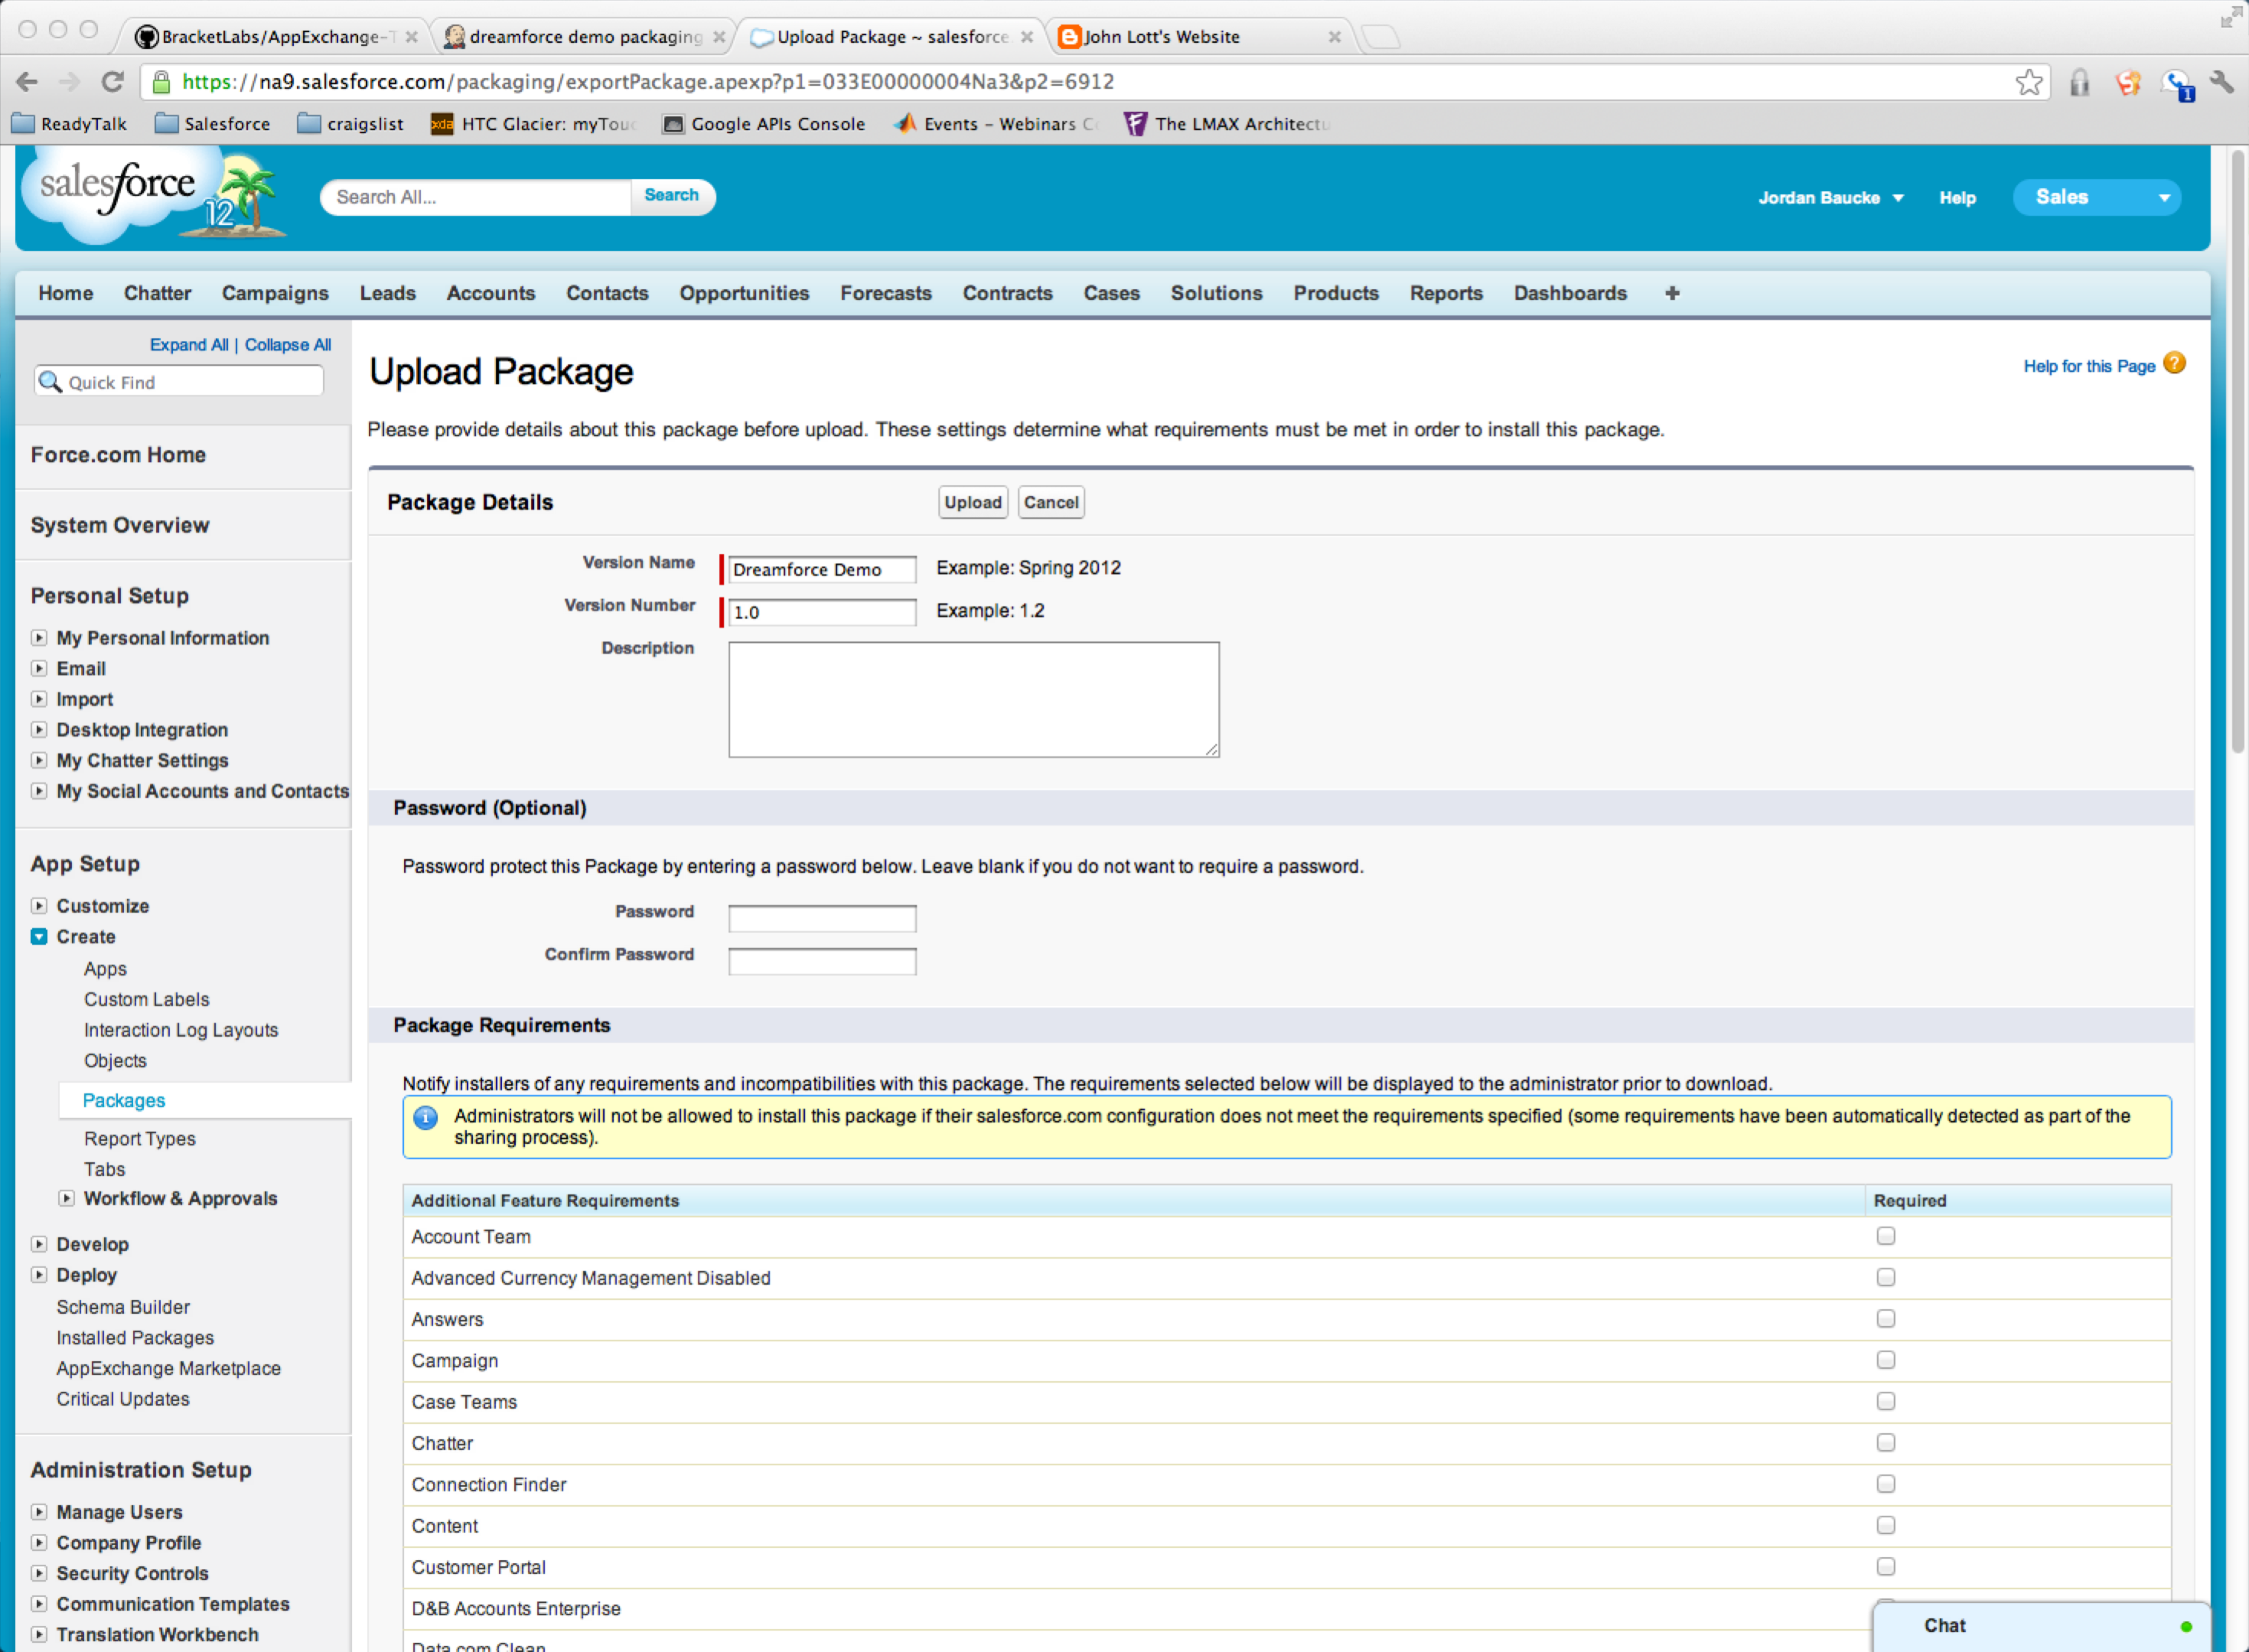
Before uploading your managed package, add all components, and review dependencies.

Once the managed package includes components and these dependencies cannot be changed. Consider if the destination org will require Chatter, tagging, permission sets, campaigns, etc.
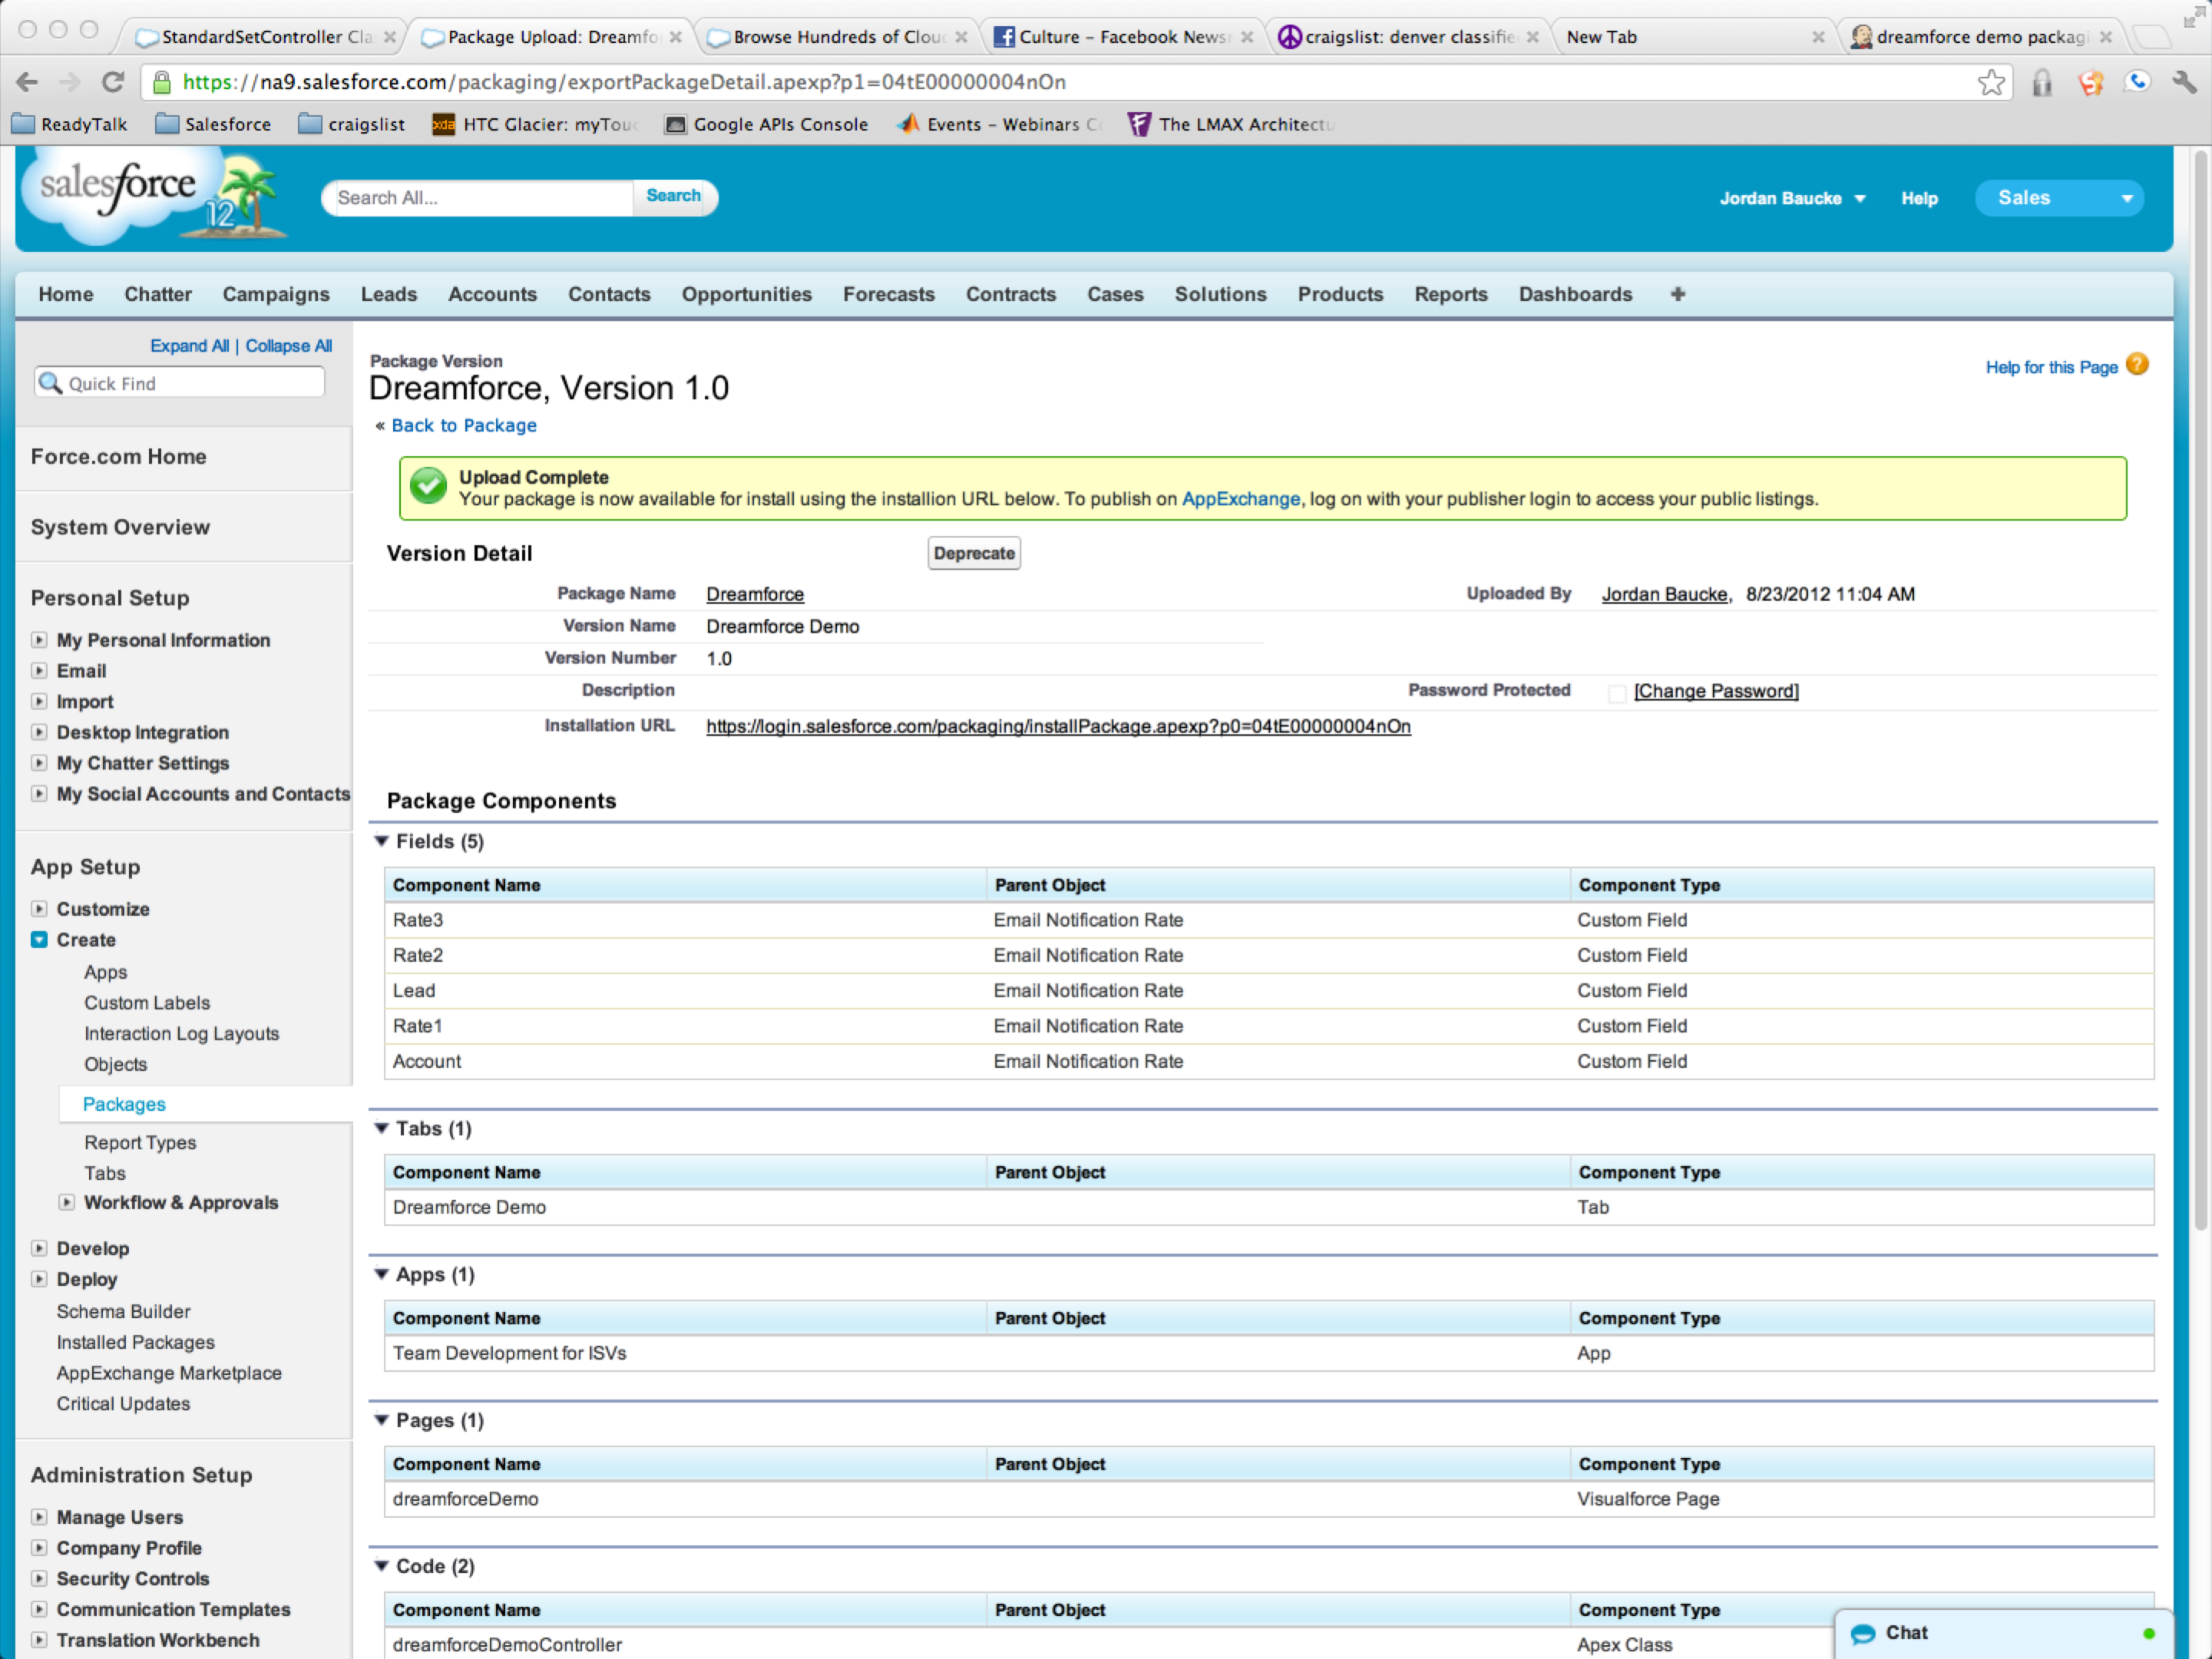
After clicking the 'Upload' button, the packaging process allows the user to manually define requirements (as the notice displayed by SFDC explains):
Administrators will not be allowed to install this package if their salesforce.com configuration does not meet the requirements specified (some requirements have been automatically detected as part of the sharing process).
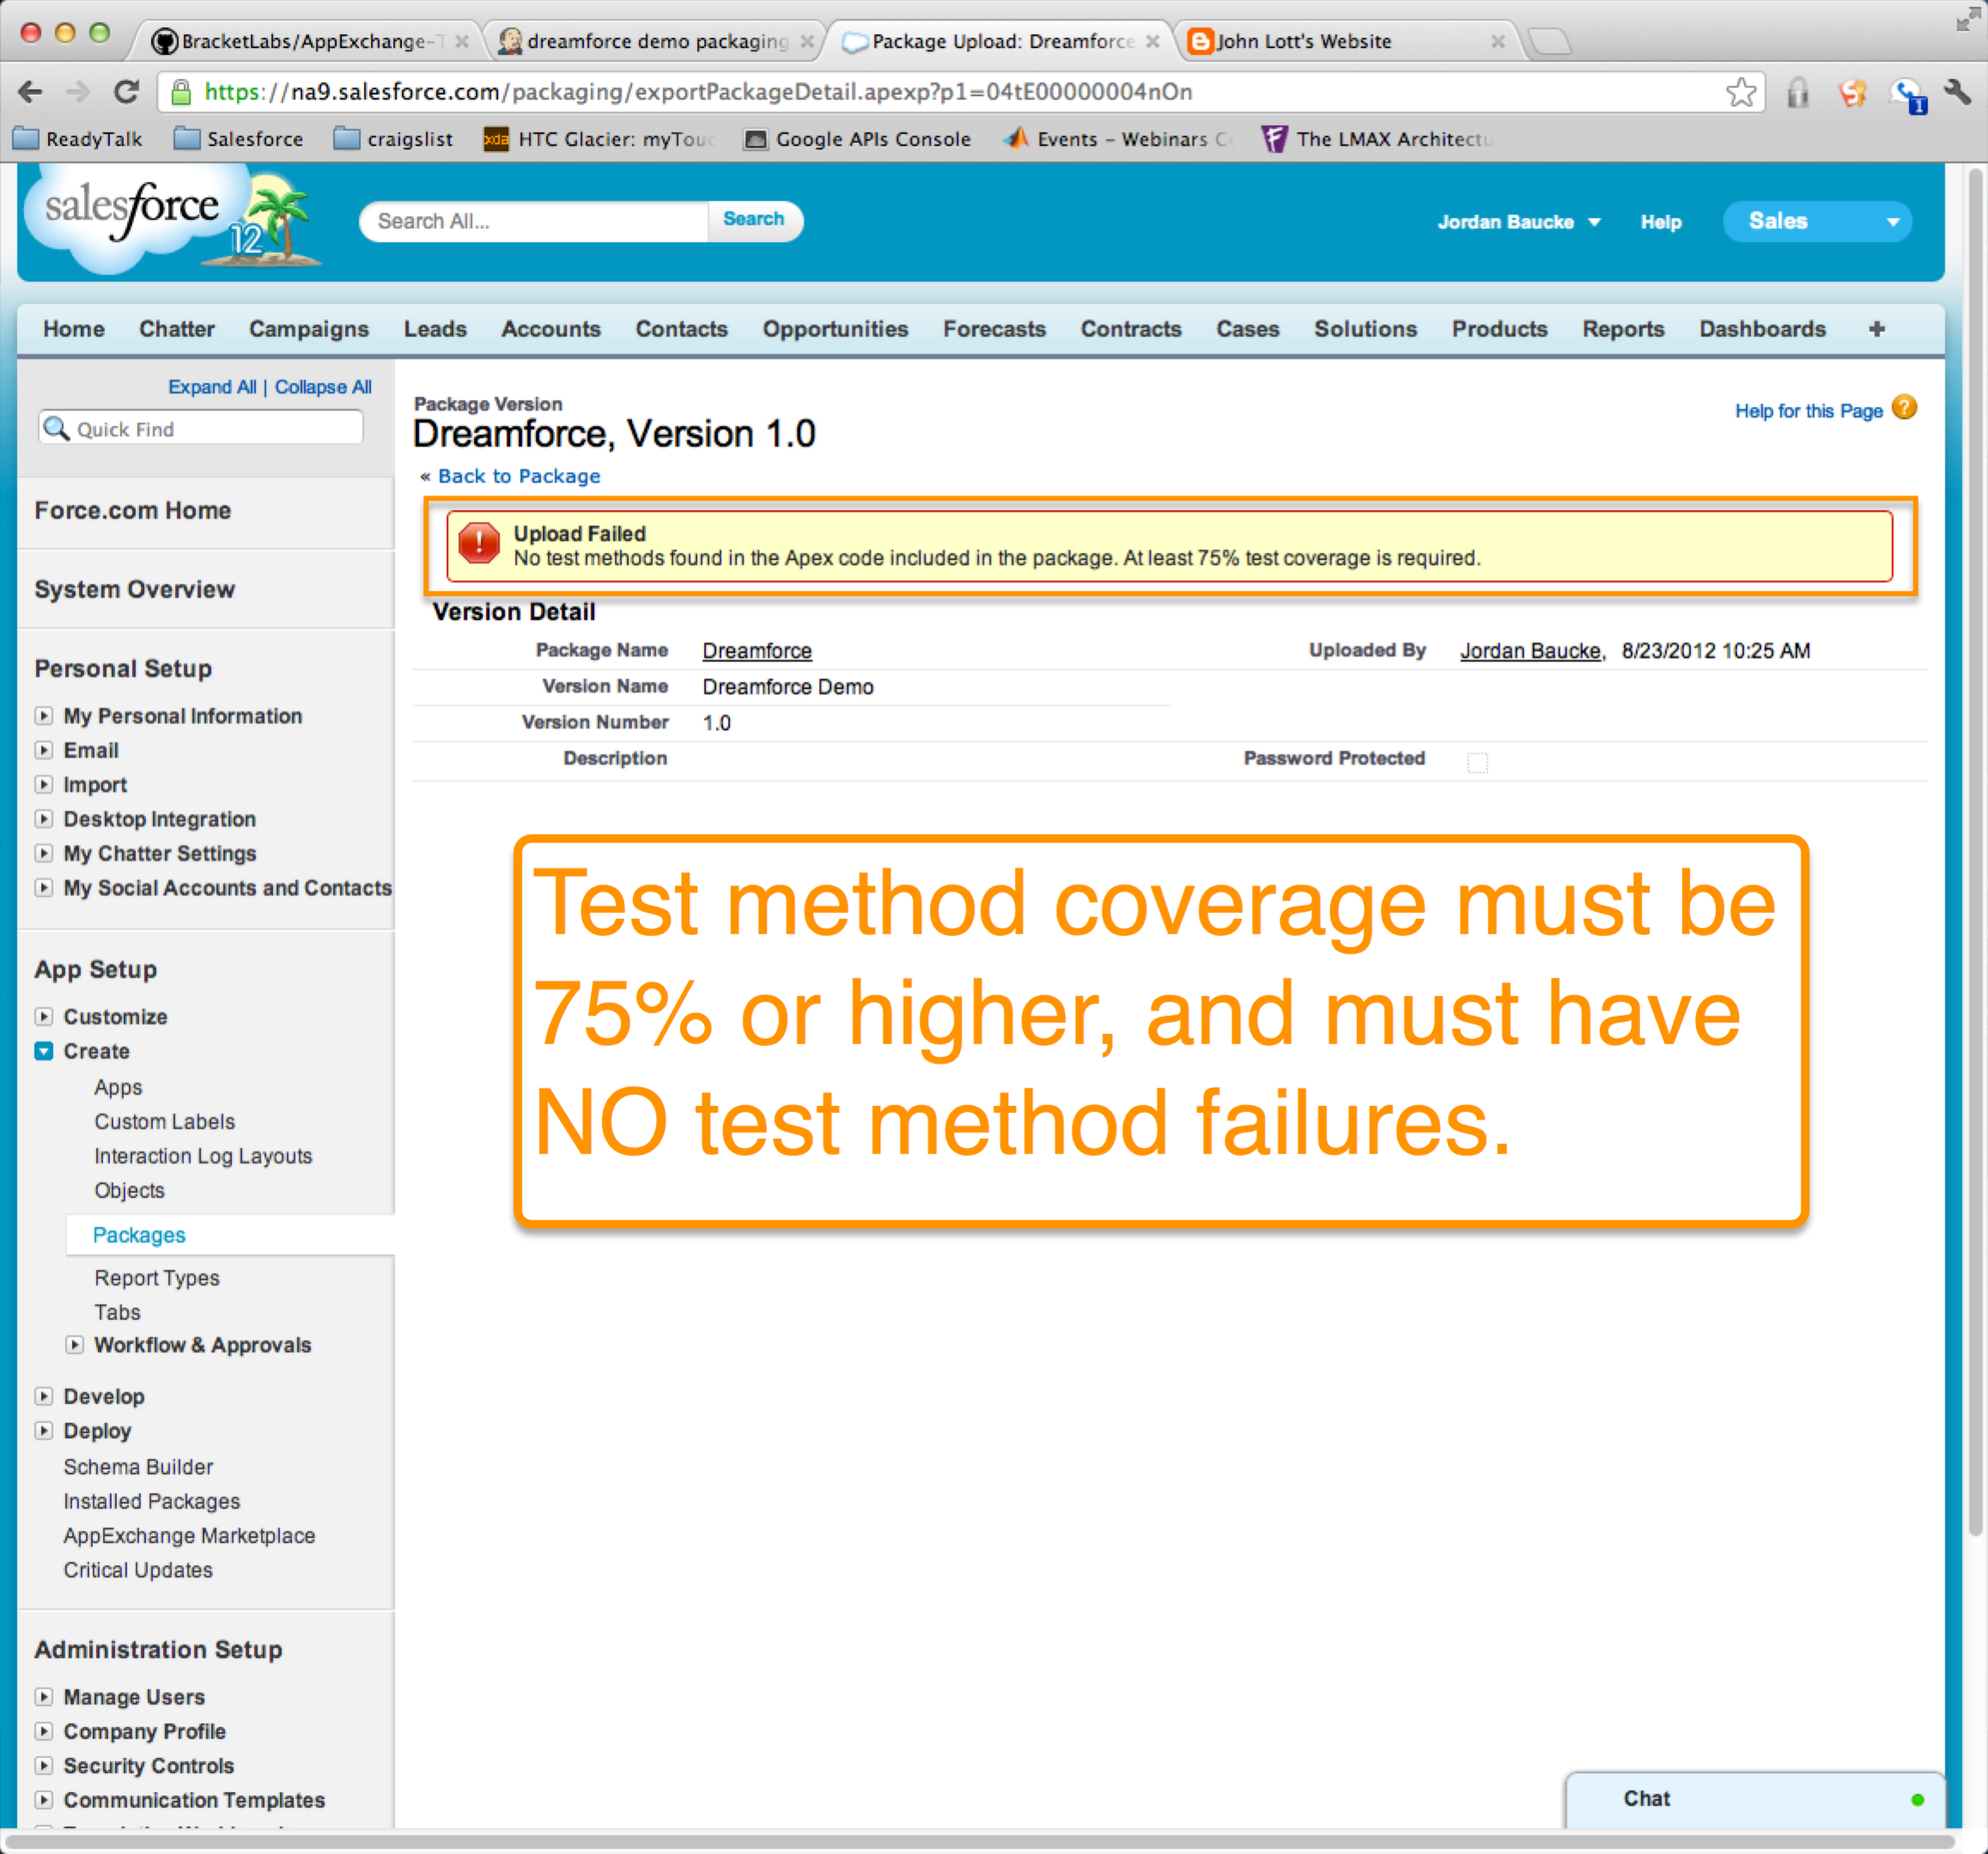
Test code coverage:
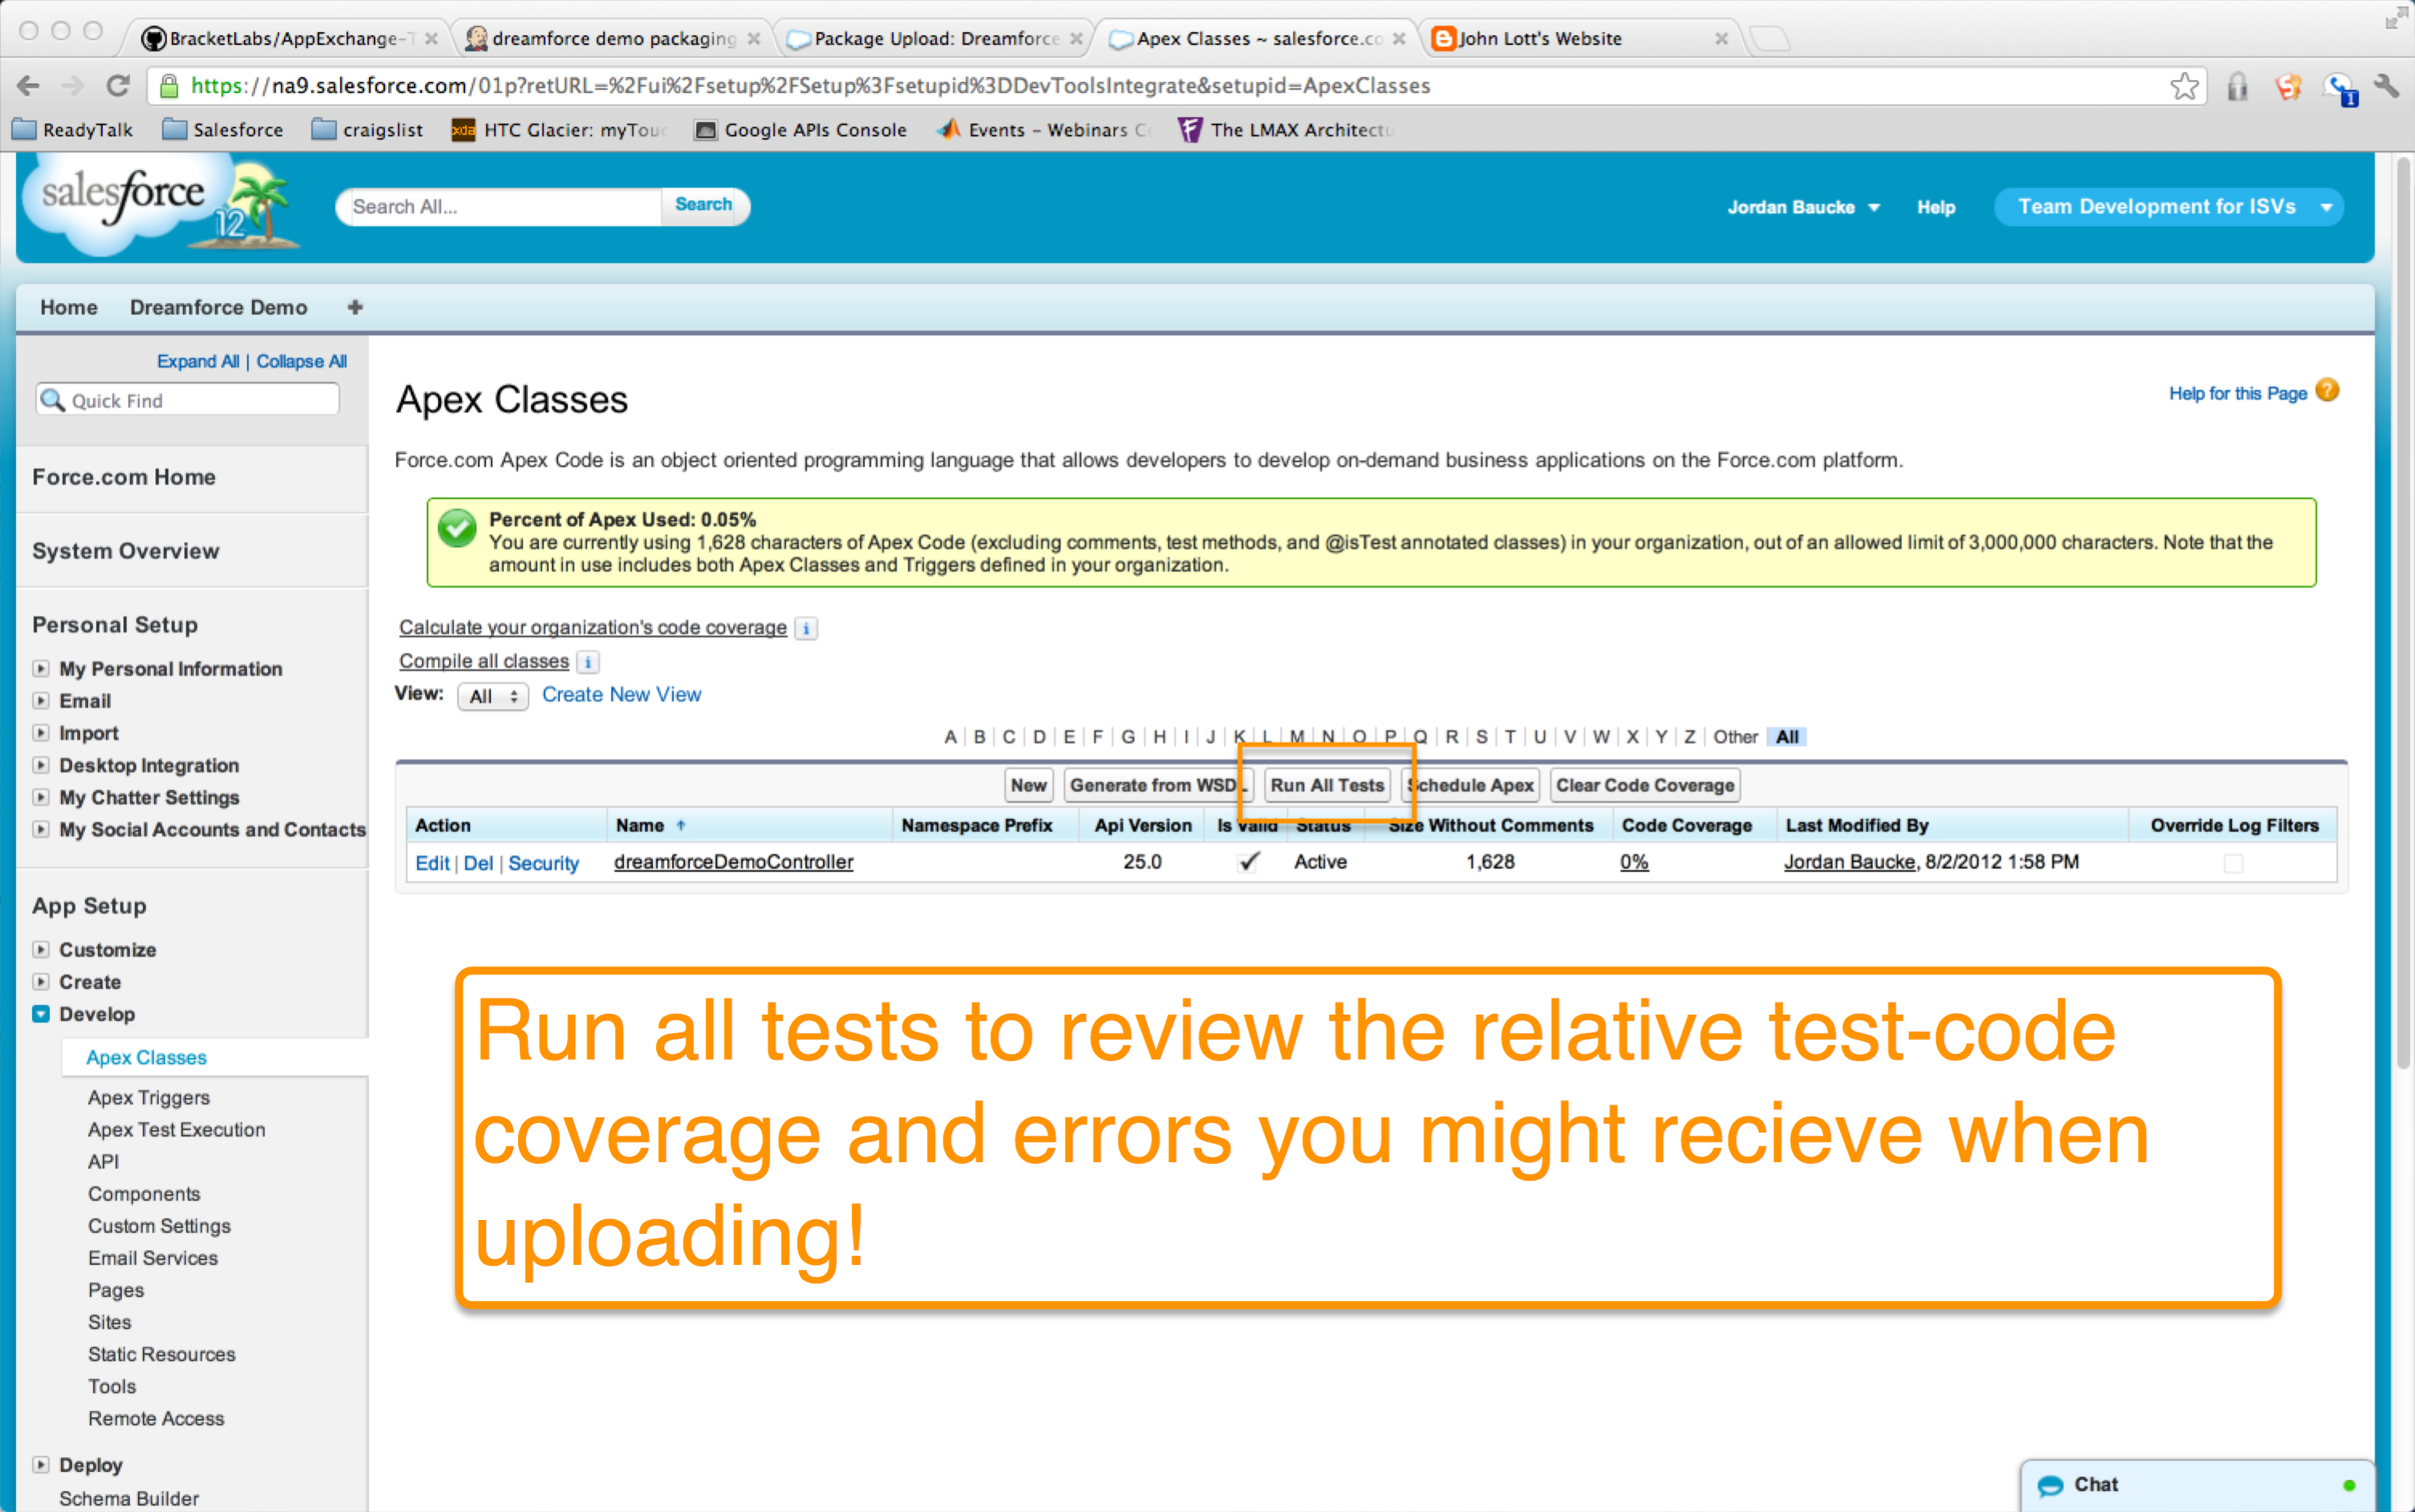
Run all tests:
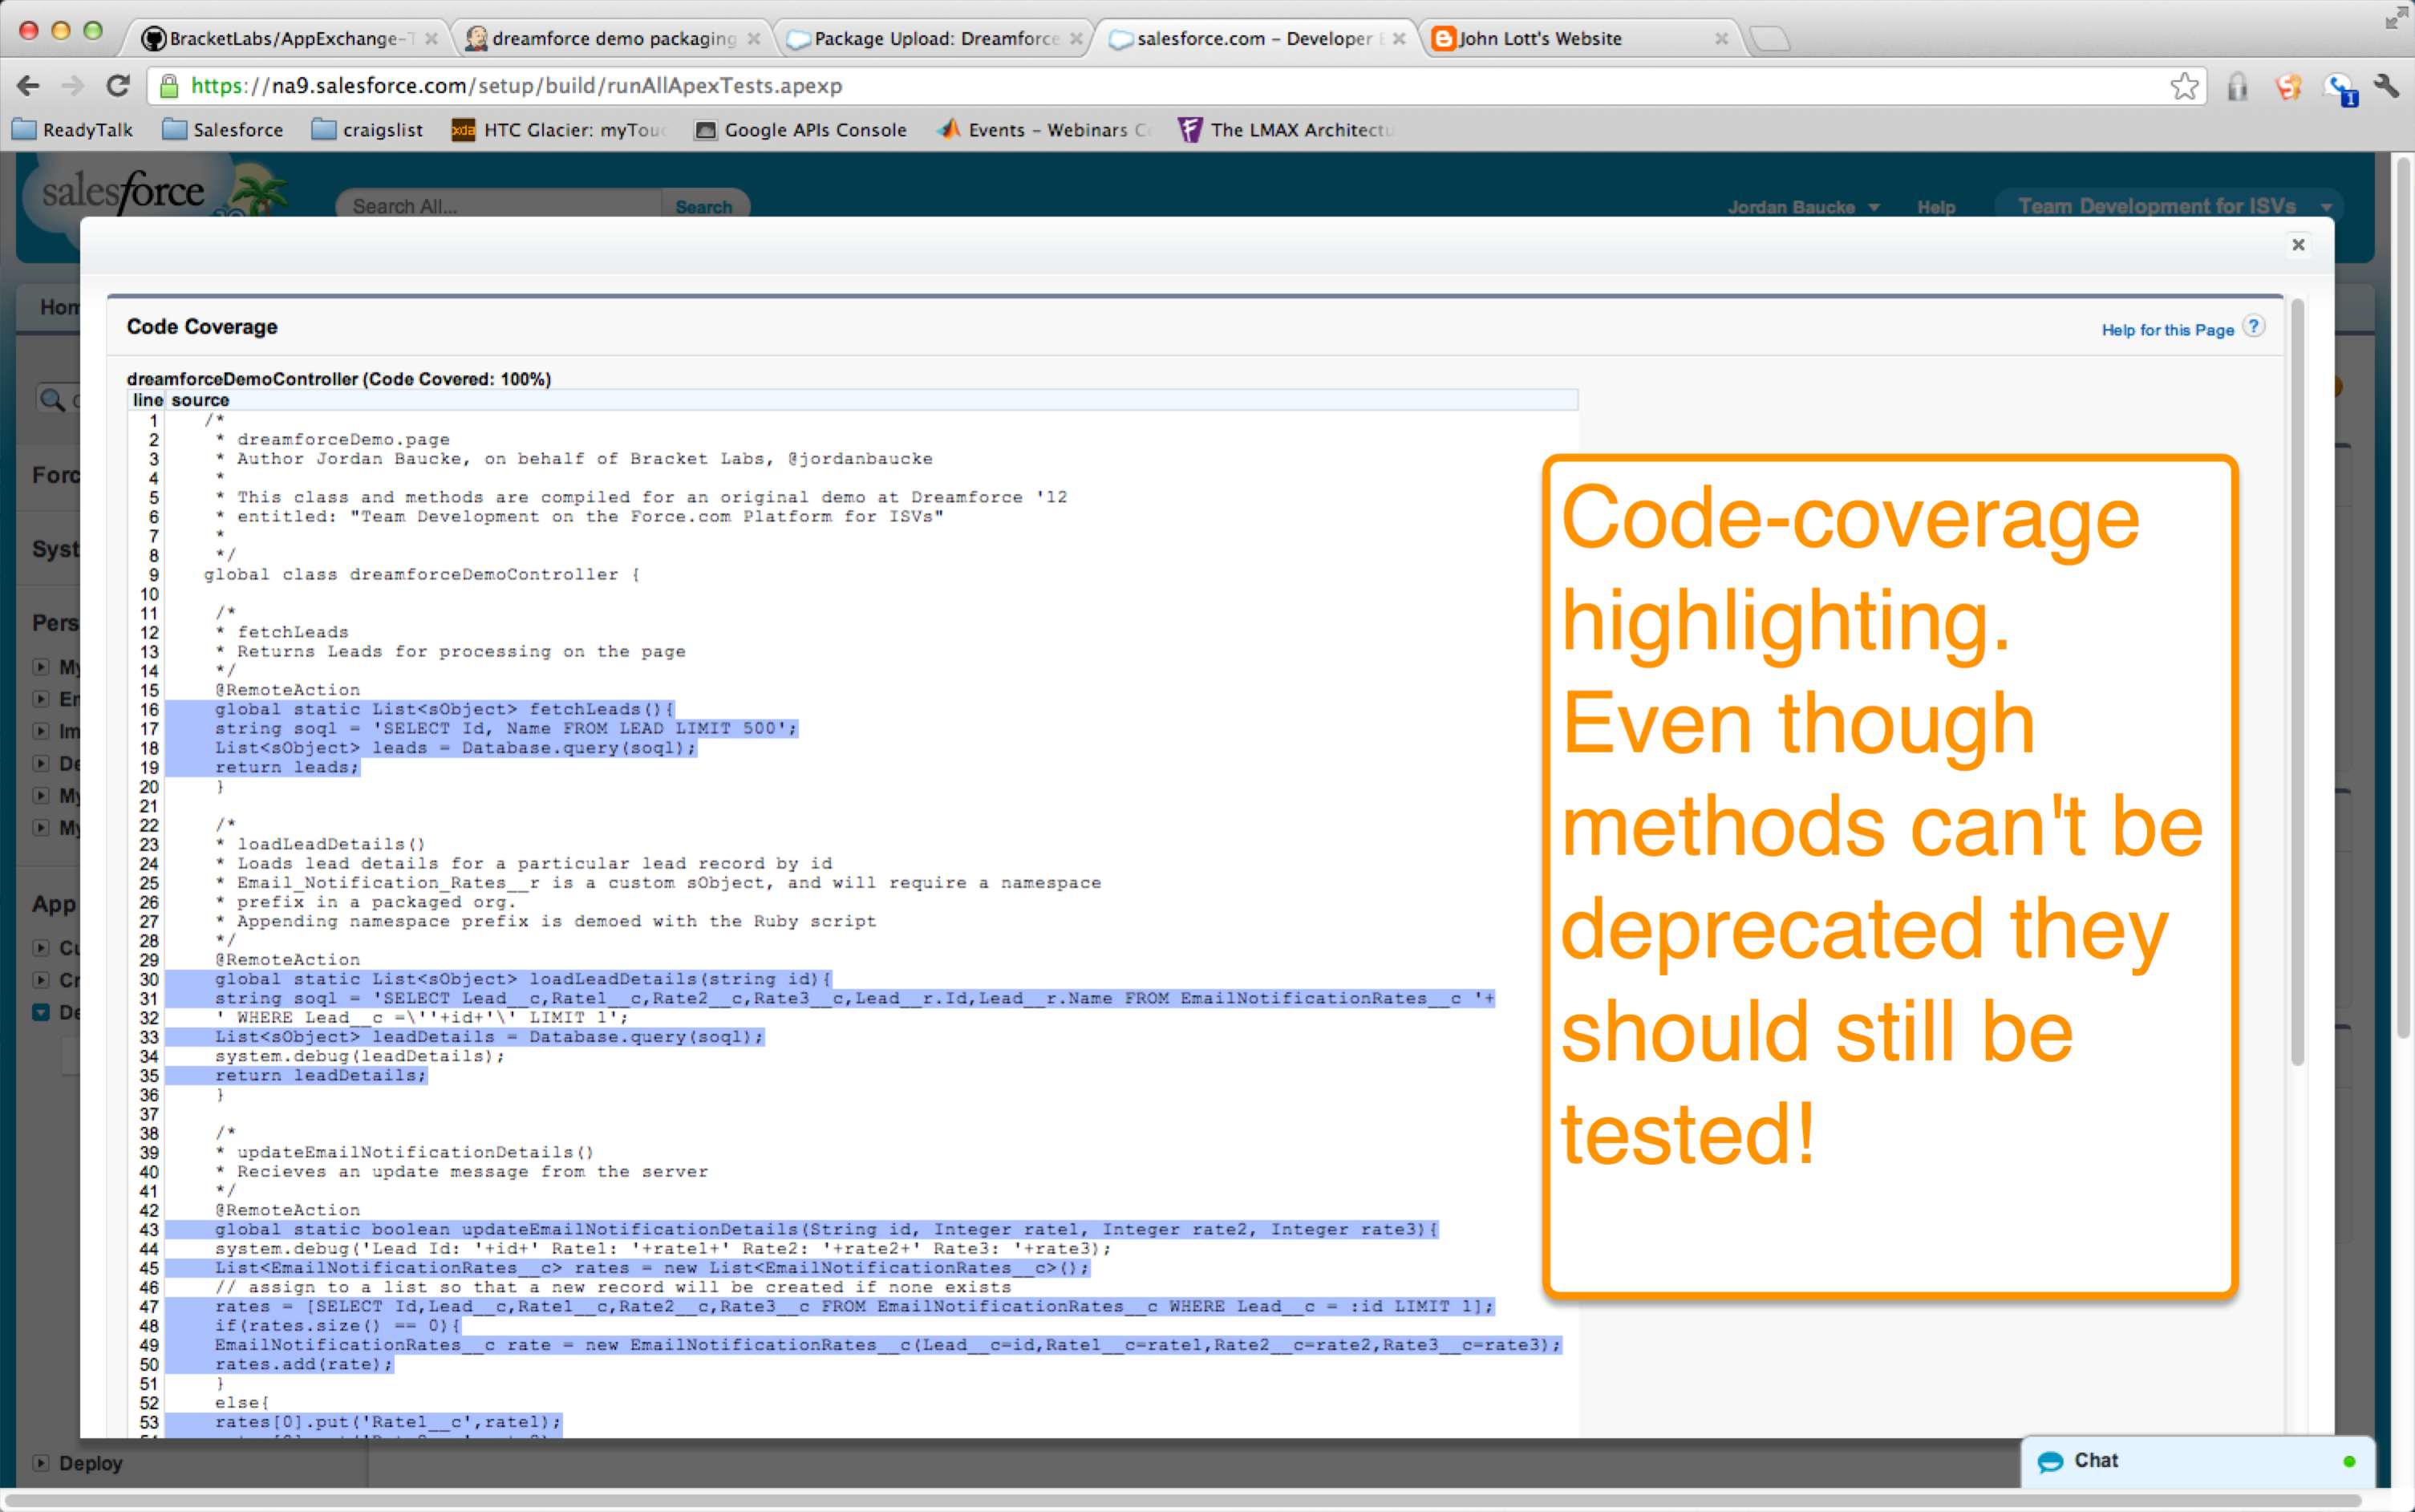
Review the results:
Finally...ready to upload and add a namespace prefix to our org.
Adding the namespace prefix:
Review the managed package:

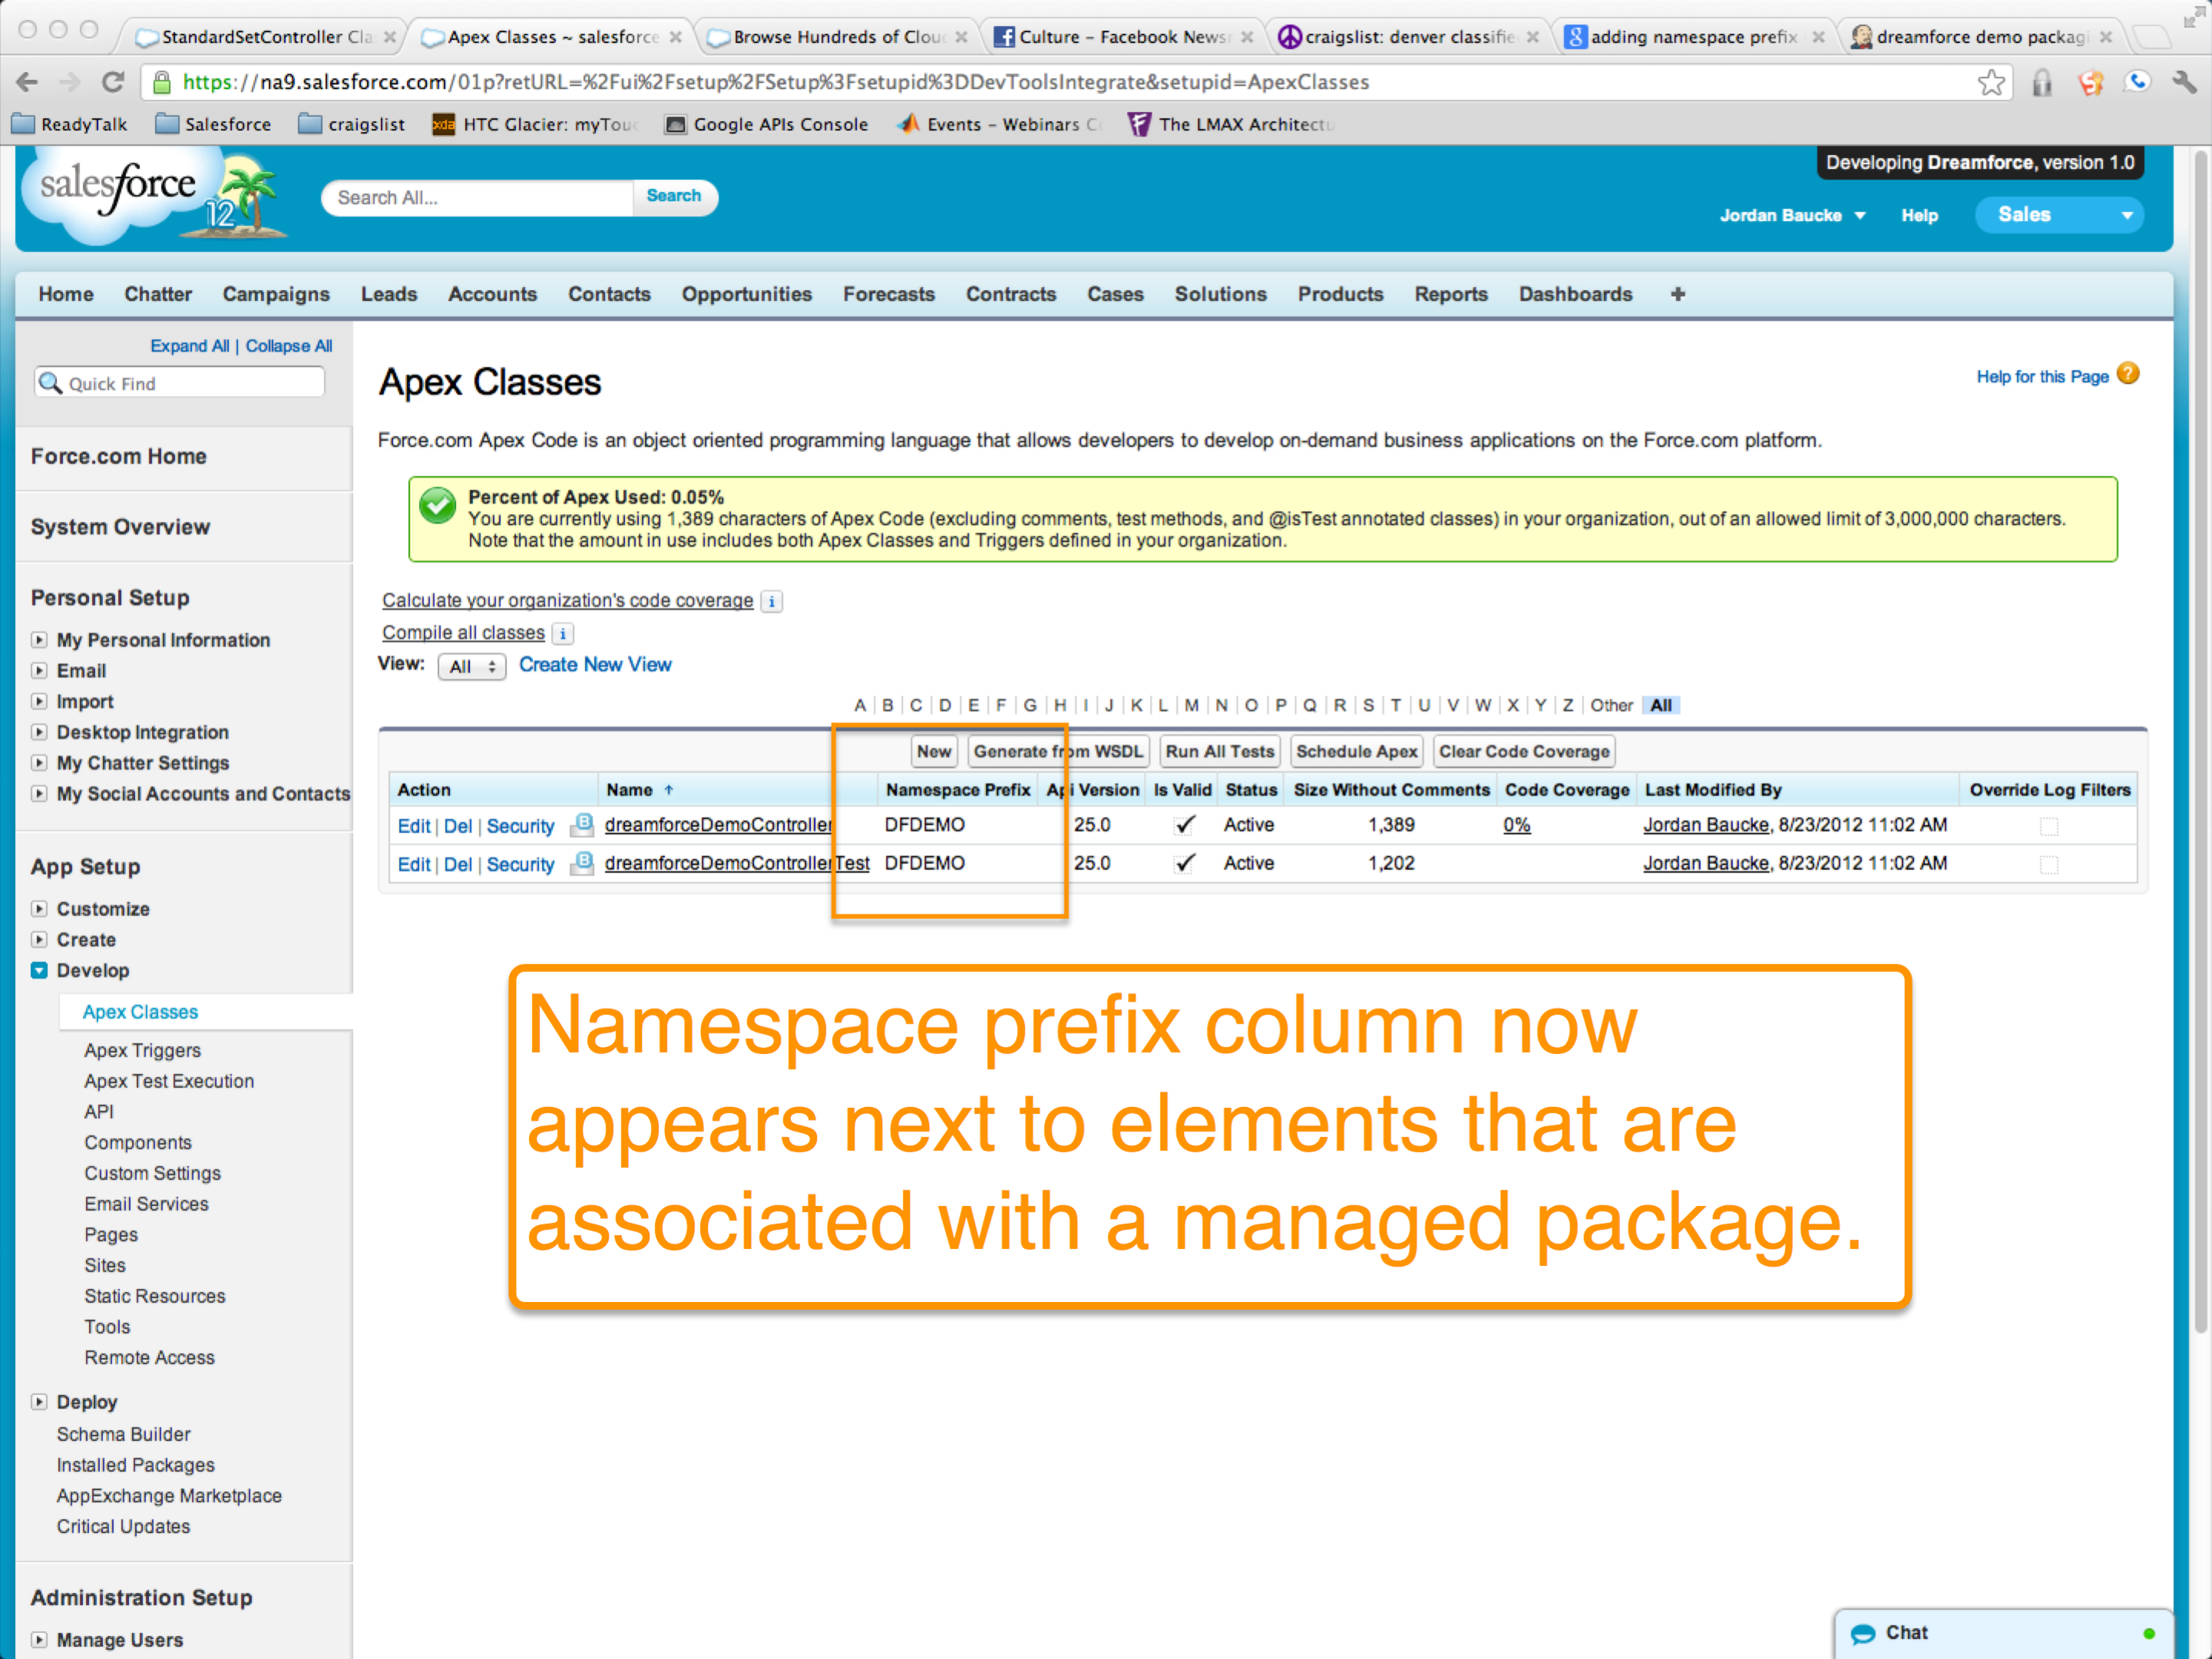
Now the packaging org has changed:
- A version number appears in the upper left corner of the org.
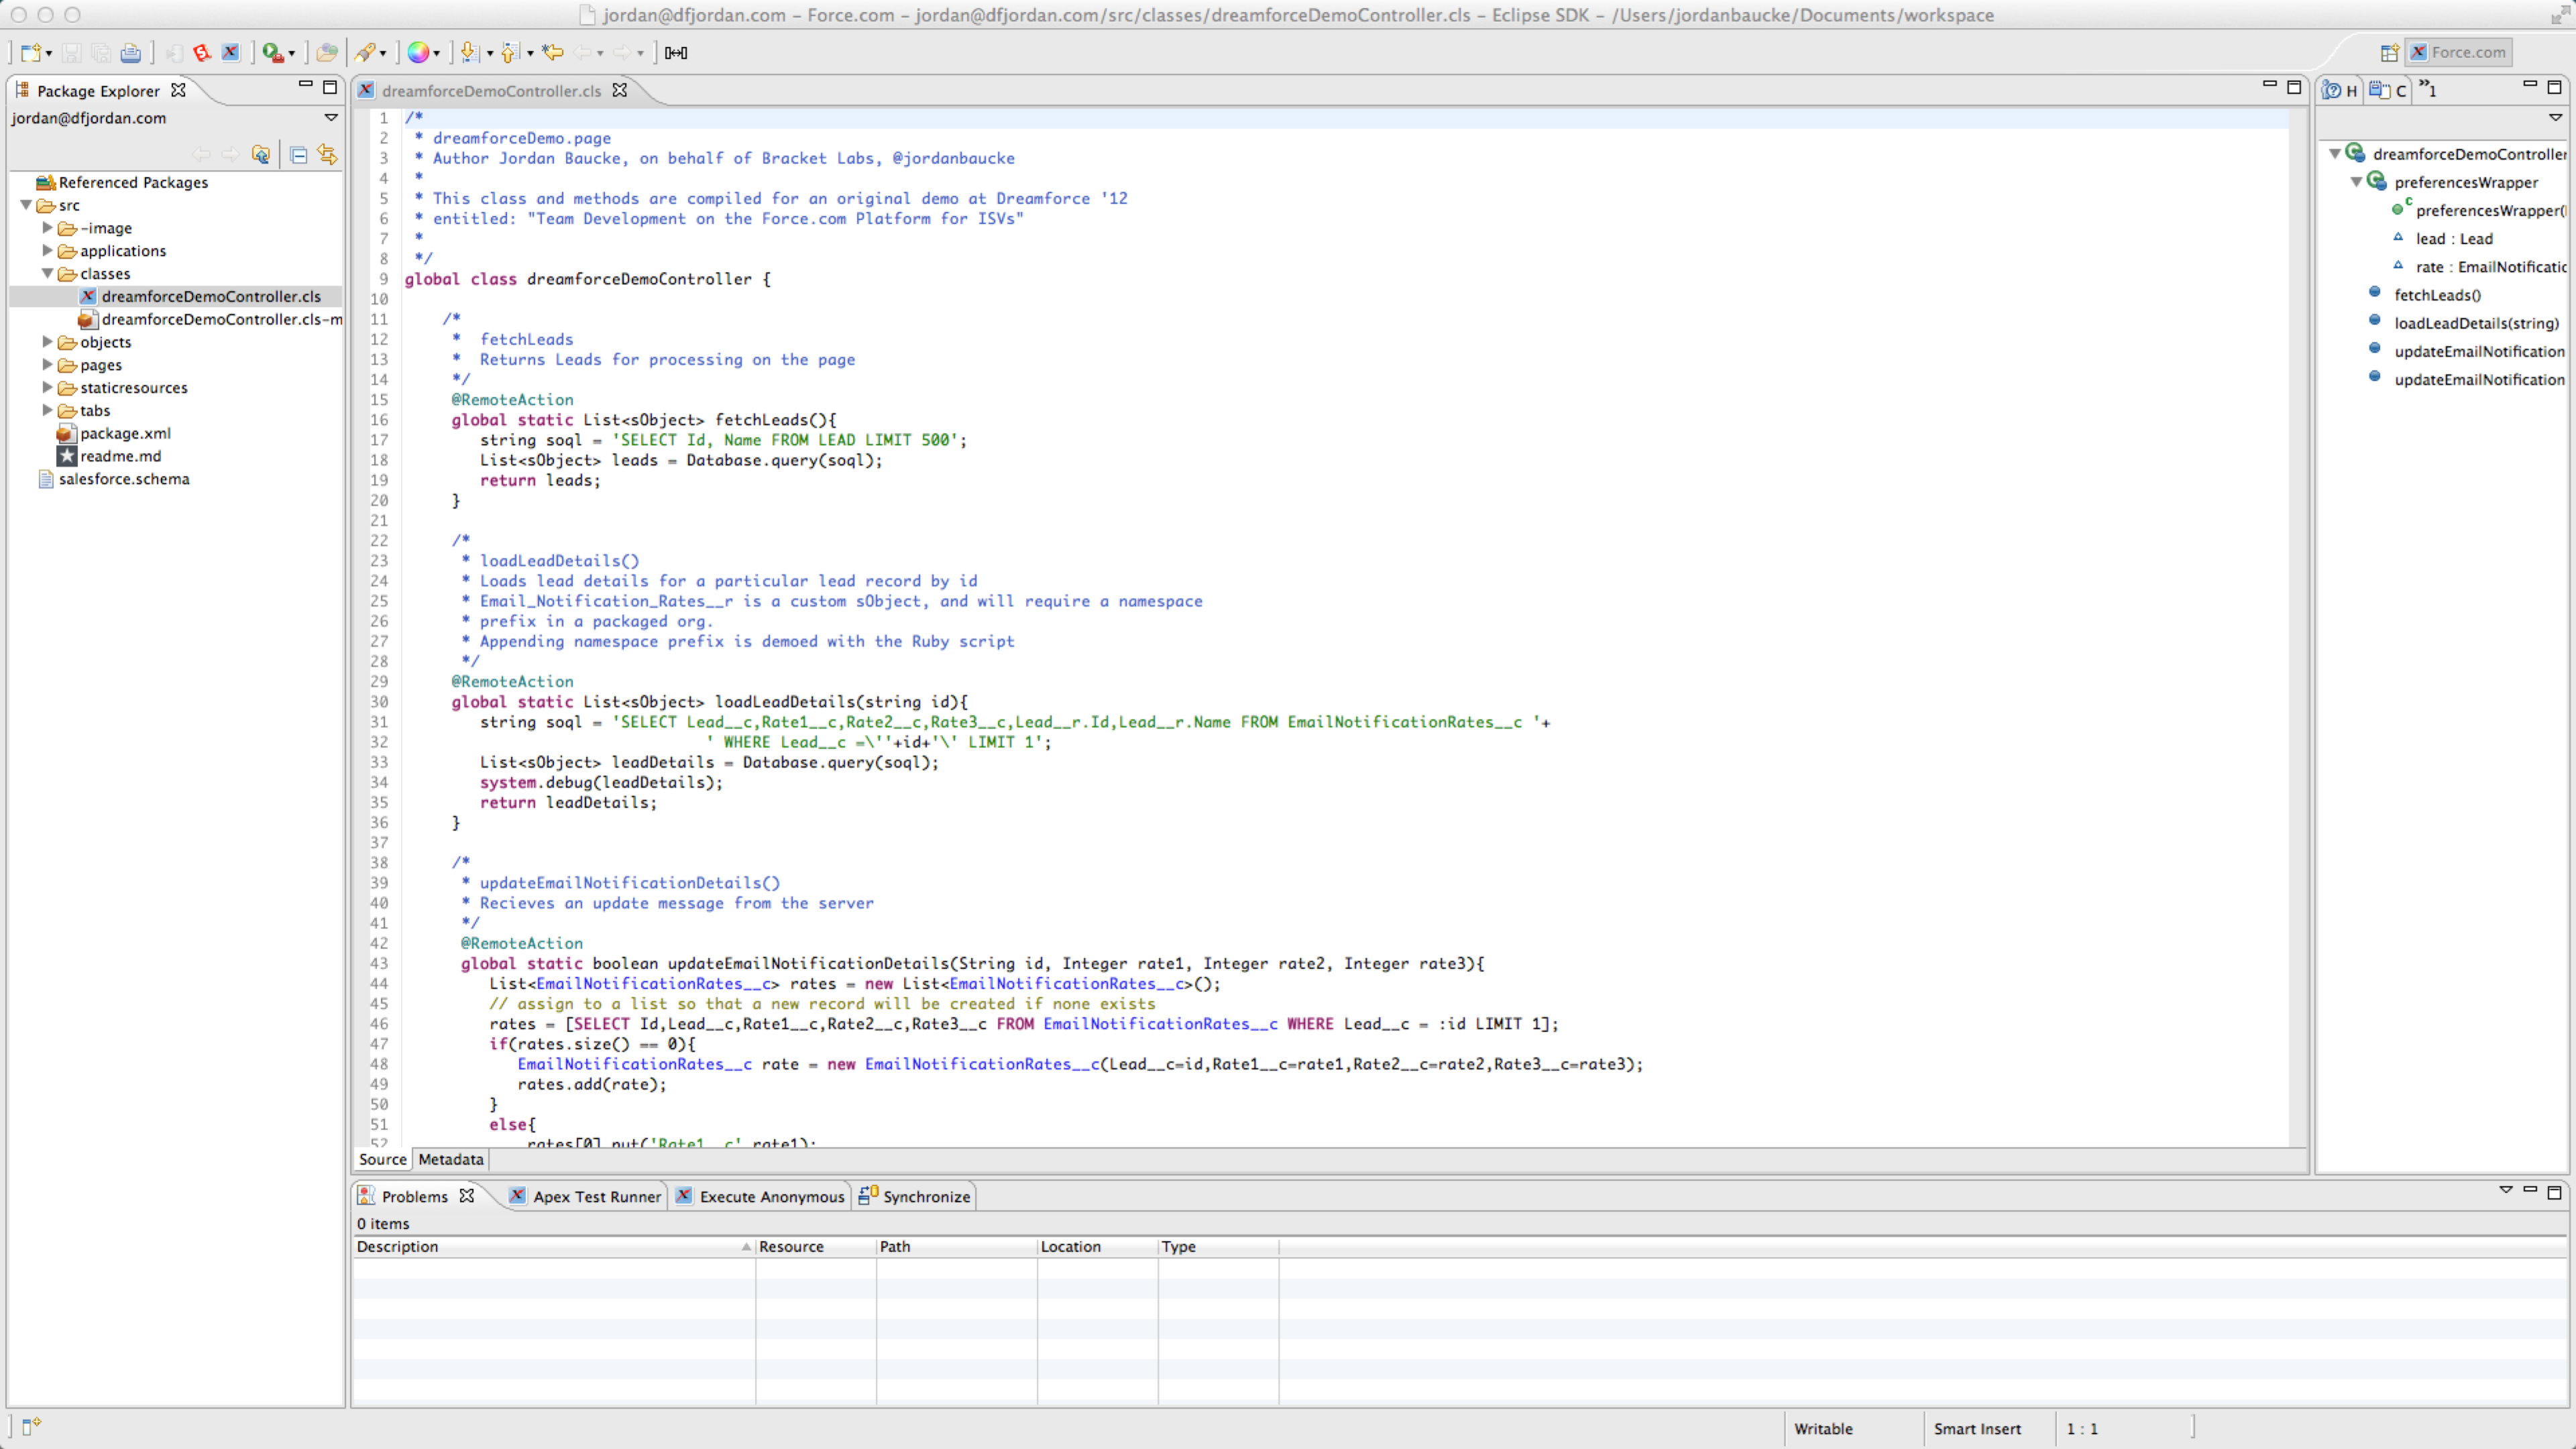
- Namespace prefix appears next to objects, classes, etc. that are packaged
- We can reference our web-service style methods with a namespace prefix.
- "Managed beta" and "Managed release" are avaliable on the Package Upload page.
Namespace prefixes in package members:
###Review the list of package release checklist items###
Packaging Checklist
- Complete code complete acceptance testing in @-test (include any updates to getting started wizard)
- Run Force.com security scanner (http://security.force.com/security/tools/forcecom/scanner)
- Deploy packaging namespacing & obfuscation script from Jenkins
- Manually confirm new package elements in packaging instance including static resources, classes, triggers, pages, components, custom settings.
Check for: - naming convention
- necessity
- regression/legacy code
- test fields
- Manually confirm metadata of all custom objects (See a-d above). Any changes must be logged as bugs/features as configuration modifications need to occur at dev environment and NOT in packaging, otherwise they will continue to persist.
- Manually confirm all packaging components are compatible with Group Edition and above. Watch out for things like Record Types, Permission Sets, etc.
- Calculate code coverage (must be >75%)
- Run All Tests on Apex Classes and confirm no failures Create BETA package (carefully review package manifest)
- Fresh install BETA to @enterprise, @professional, @group for full regression testing using test matrix across all browsers
- Repeat steps 1 - 9 until all tests are approved
- Create unobfuscated branch in Git and tag it with production release #
- Package RELEASED package using naming convention - “ Month Year - Version number”
- Update AppExchange listing with new release link
- Update production
- Update test drive
- Update internal release matrix
- Update release notes & user guide
- Update installation guide
- Kick off marketing release checklist (blog, email, etc.)
Note: The process does not incorporate Extensions or Trialforce requirements.
##Using the AMI##
AMI (Amazon managed image) is avaliable to associate with your Amazon web-services account and setup a preconfigured SFDC Jenkins-CI server. The ID of the Bracket Labs CI AMI is: ami-ed7a5da8, and can be found under the Community AMIs section of your Ec2 Launch Wizard.
The AMI includes the following:
- Jenkins (with the two projects from this demo pre-configured)
- Java + Ant
- SFDC Migration tools
- Ruby + Namespacing script
These projects are meant to serve as examples and will most likely need to be reconfigured to run properly.
The AMI is based on the Amazon ec2-linux. You need to have basic knowledge of ec2, SSH, and configuration to start and access the server.
Like other Amazon AMI's the default login is: ec2-user and your SSH public key.
Once it's booted Jenkins will run at: http://your-ec2-ip:8080
The Jenkins credentials are: jenkins/dfdemo
The project files for running the two projects are located at: $./usr/local/jenkins/
Each project requires the ANT Migration tool project files (at a minimum):
- build.xml
- build.properties
Remember that if your connecting a git repo, you need to add the authorized keys to the Jenkins user.