An example C++ library and Teensyduino project for the ADIS16470 iSensor Miniature MEMS Inertial Sensor
This example library was written to give engineers, students, and makers a starting point for using a high-performance, compact, precision inertial sensor. The code in this repository will provide the user with:
- A header file listing all of the unit's available registers
- Functions for reading output registers and writing control registers using 8-bit frames
- Note that the ADIS16470 requires 16 bit SPI transactions. spi.transfer() is called twice for each transfer and CS is manually toggled to overcome the Arduino language's limitation
- Functions for performing common routines such as resetting the sensor
- Burst-mode data acquisition and checksum verification
- Example Arduino sketches which synchronously read data from the sensor and write it to the USB serial port
- In order to compile and execute the Teensyduino sketch, you'll need to download the Arduino package (v1.8.4 as of this writing). You can download the IDE here.
- You'll also need to install the Teensyduino library provided by PJRC.
- Finally, you'll need a Teensy sold by PJRC here. Version 3.x or LC is supported.
- The main Teensyduino sketch issues a command to clear the terminal window after displaying data. For best results, connect to your Teensy using PuTTY, an open source terminal program.
Once you've installed the Arduino IDE and Teensyduino libraries, copy the ADIS16470 folder into My Documents > Arduino > libraries
Be sure to restart the Arduino IDE to refresh the library directory!
If using a Teensy, the onboard regulator should provide enough current for the ADIS16470 to properly operate.
You'll need to build a cable to interface the sensor with the ADIS16470/PCB. The image below shows a custom Teensy interface board designed for iSensor products.
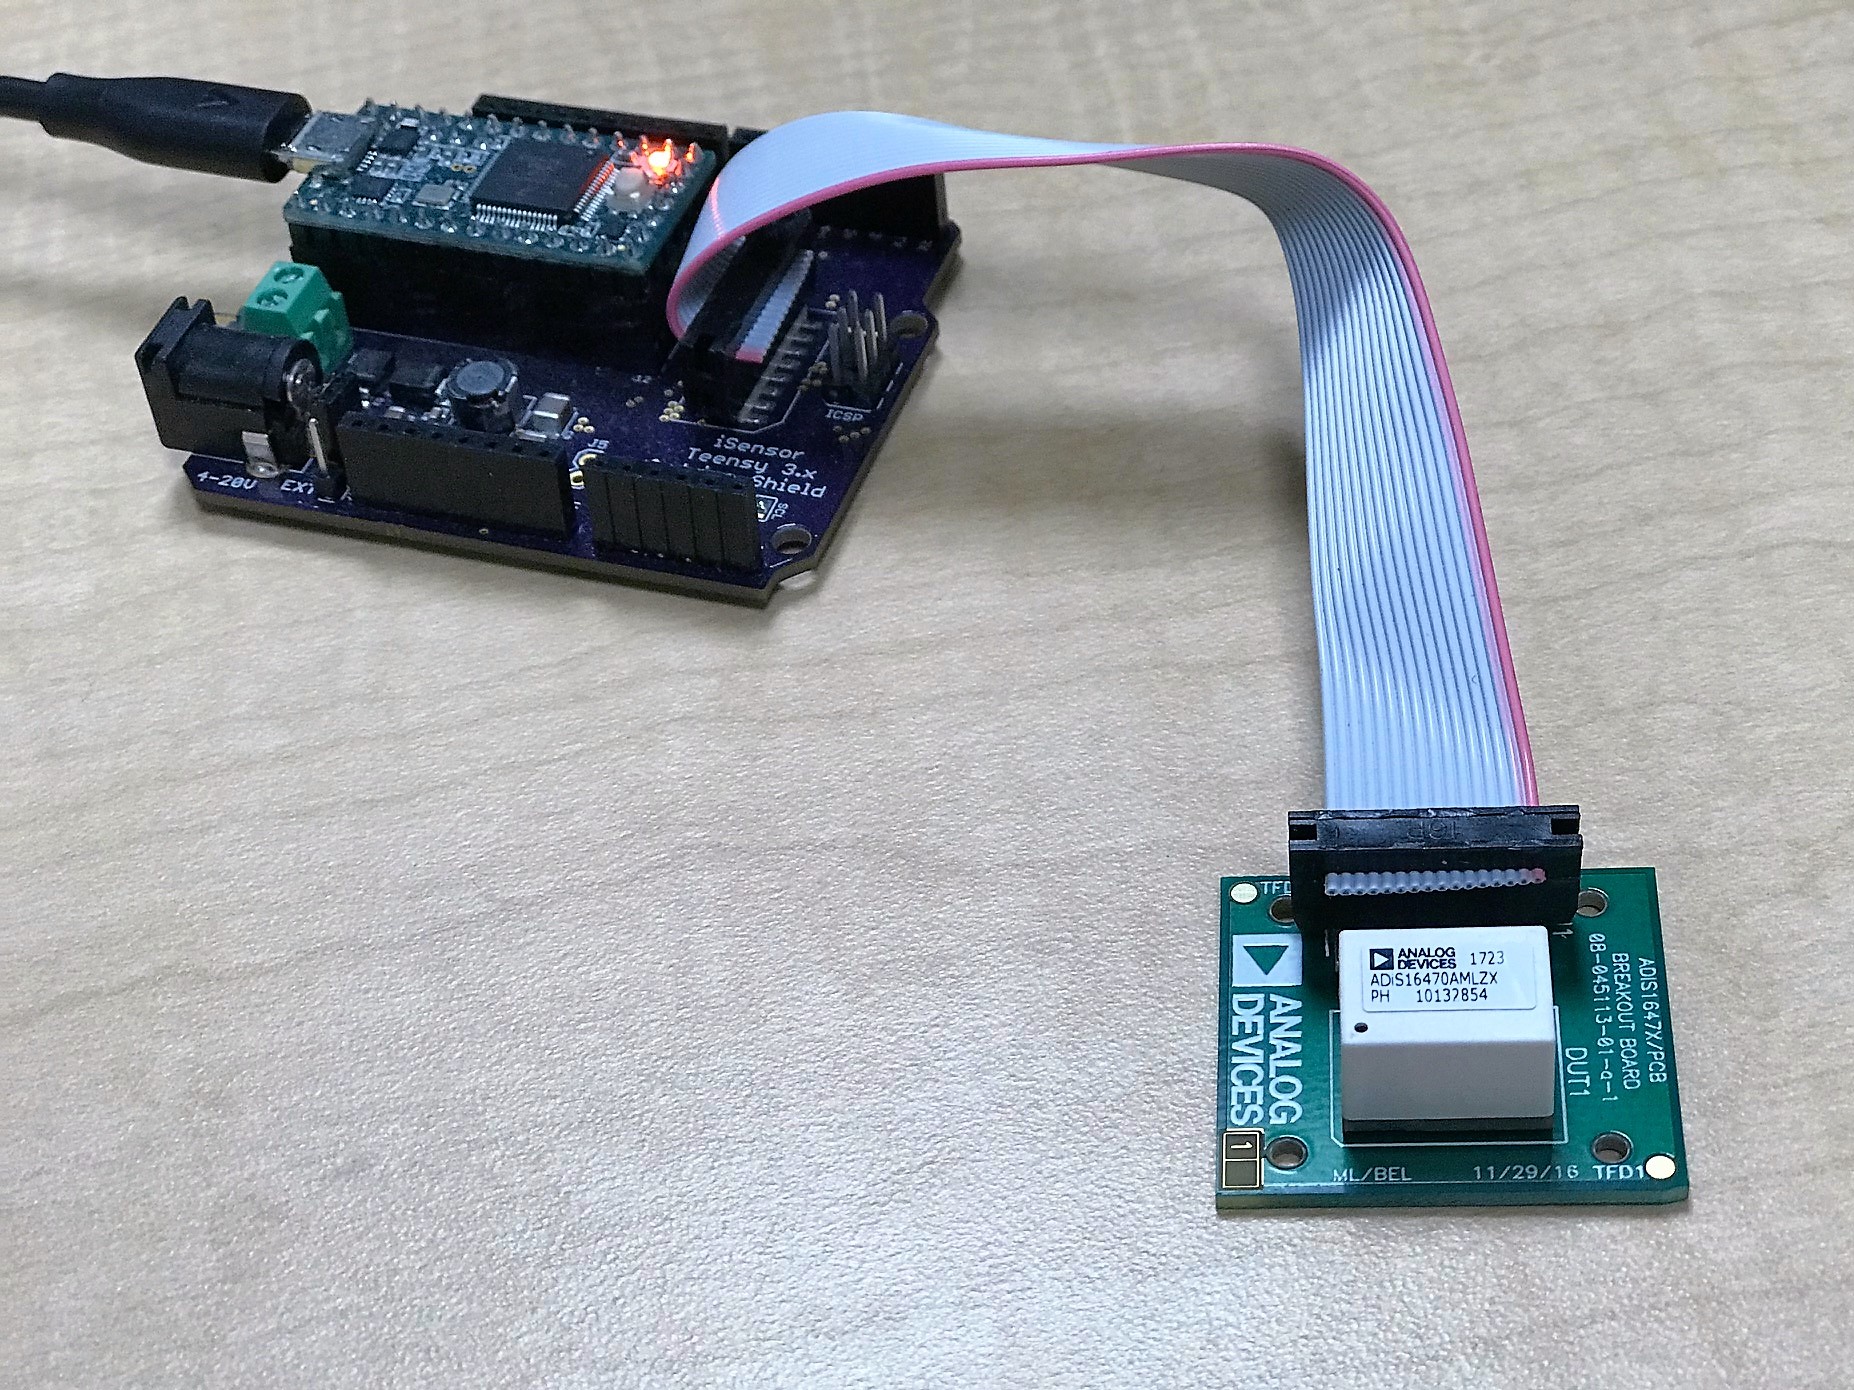
Pin assignments for the Teensy can be found in the example sketch comments.
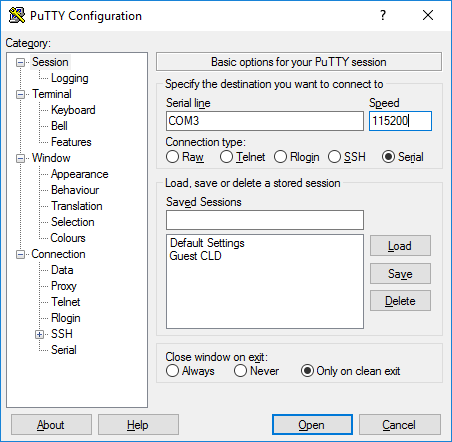
Once you have the sensor connected and have opened the ADIS16470_Teensy_BurstRead_Example.ino example sketch, use PuTTY to connect to the Arduino using the following settings. Note that your COM port may be different:
If everything is working, you should see a screen like this:
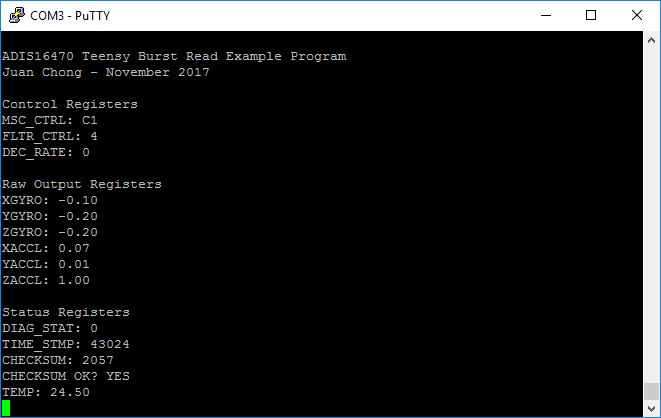
Note that the demo software will only update the screen ~2 times/second, but every sample is being captured by the interrupt service routine.


