This repository offers resources and sample code for Azure Email Communication Services, including setup guides, domain provisioning, and email sending via Azure Email client and SMTP. It features Python scripts and authentication setup instructions for developers and IT professionals.
-
Open the Azure portal to create a new resource.
-
Search for Email Communication Services.
-
Select Email Communication Services and press Create.
-
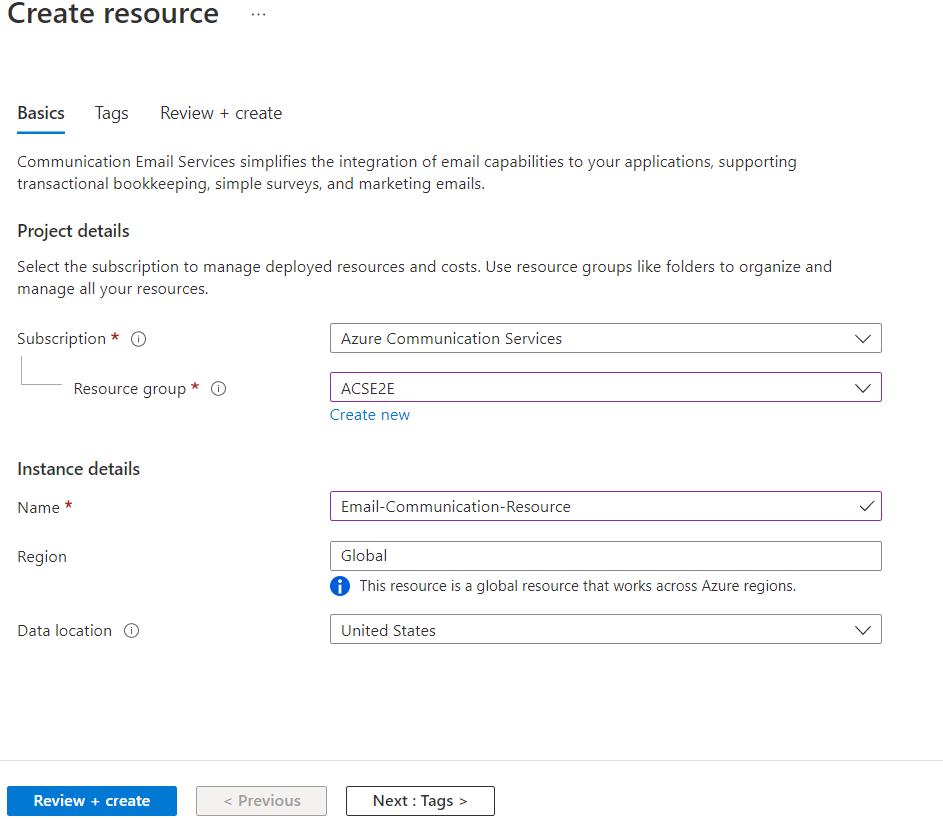
Enter the required information in the Basics tab:
- Select an existing Azure subscription.
- Select an existing resource group, or create a new one by clicking the Create new link.
- Provide a valid name for the resource.
- Select the region where the resource needs to be available.
- Select the data location.
- To add tags, click Next: Tags and add any name/value pairs.
-
Click Next: Review + create.
-
Wait for the validation to pass, then click Create.
-
Wait for the deployment to complete, then click Go to Resource to open the Email Communication Service overview.

-
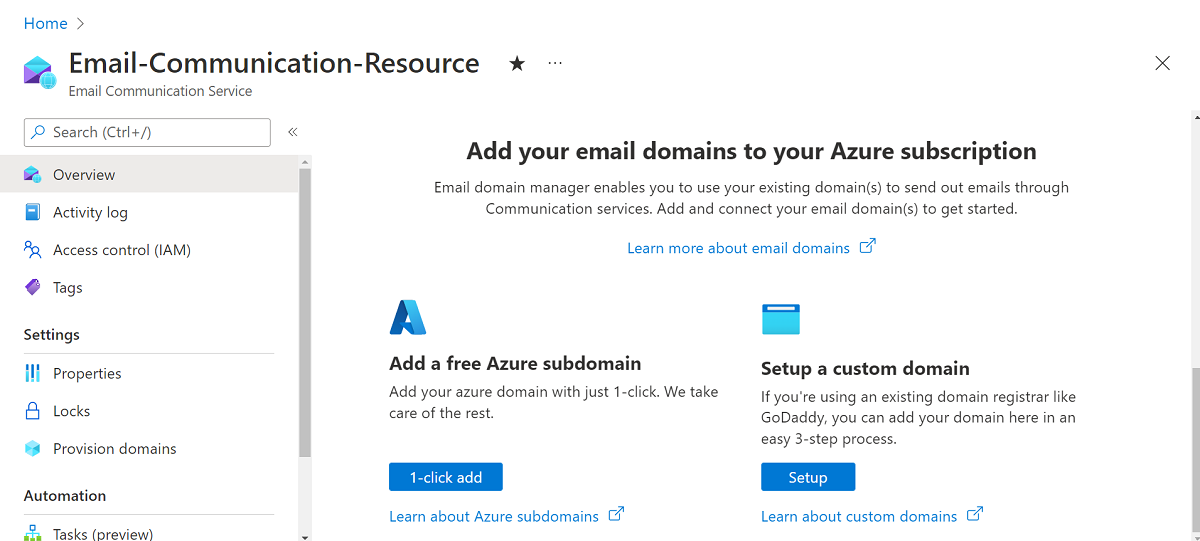
Open the Overview page of the Email Communications Service resource created in the above steps.
-
Create an Azure Managed Domain using one of the following options:
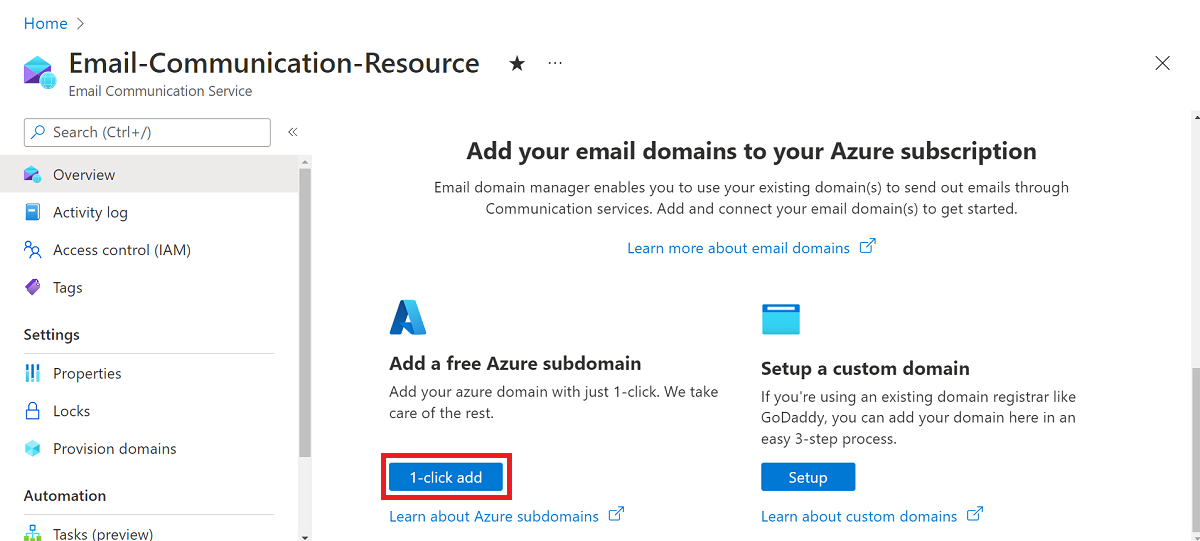
Option 1: Click the 1-click add button under Add a free Azure subdomain. Continue to step 3.
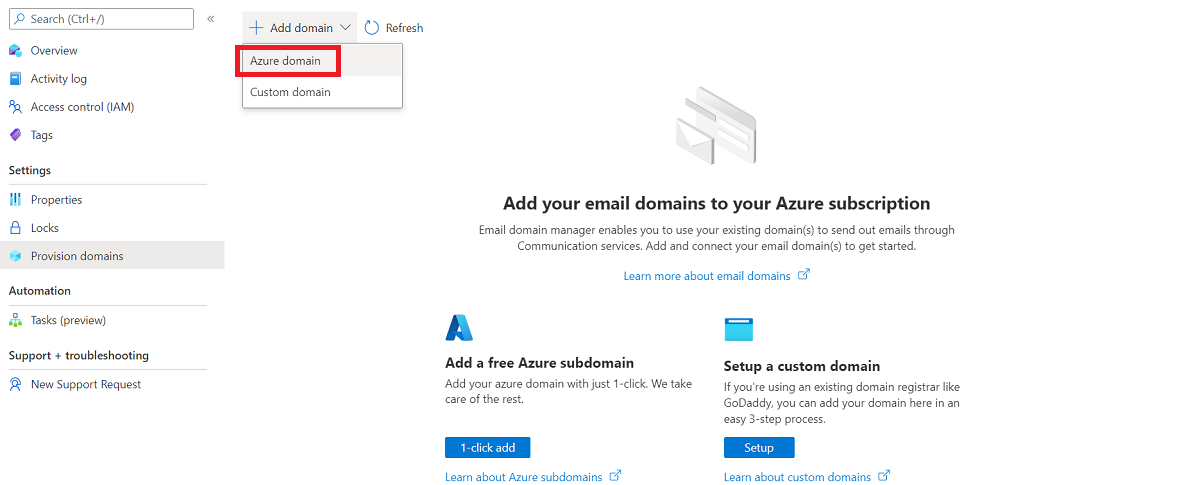
Option 2: Click Provision Domains on the left navigation panel.
Click Add domain on the upper navigation bar. Select Azure domain from the dropdown.
-
Wait for the deployment to complete.
-
Once the domain is created, you see a list view with the new domain.
-
Click the name of the provisioned domain to open the overview page for the domain resource type.

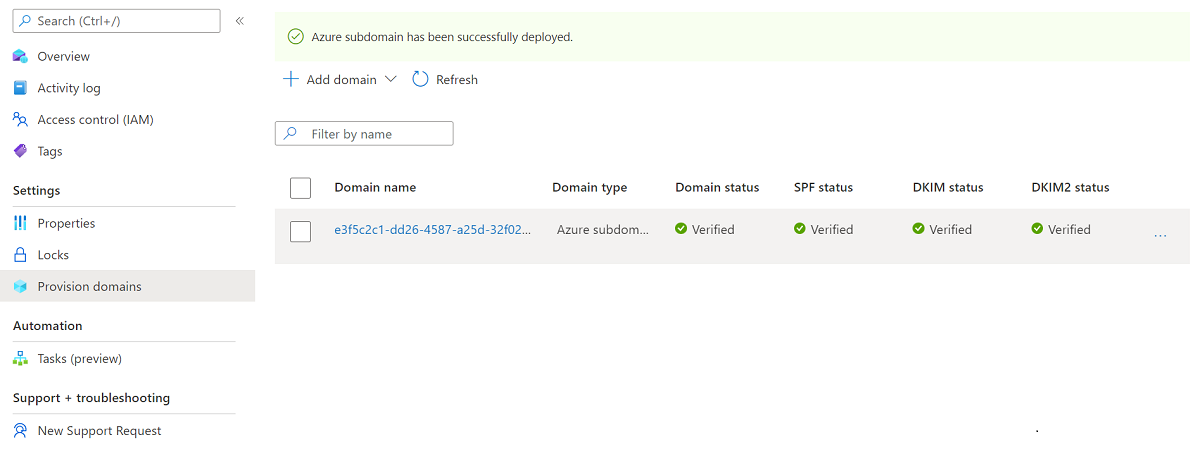

Azure Communication Services automatically configures the required email authentication protocols. The email domain is now ready to send emails.
To create an Azure Communication Services resource:
- Sign in to the Azure portal.
- In the upper-left corner of the page, select + Create a resource.
- Search for and select Communication Service, then select Create.
- Configure your Communication Services resource by specifying the following details:
- Subscription
- Resource group (create a new one or choose an existing resource group)
- Name of the Communication Services resource
- Geography associated with the resource
Review the configuration, add tags in the next step if required, and click Create.
-
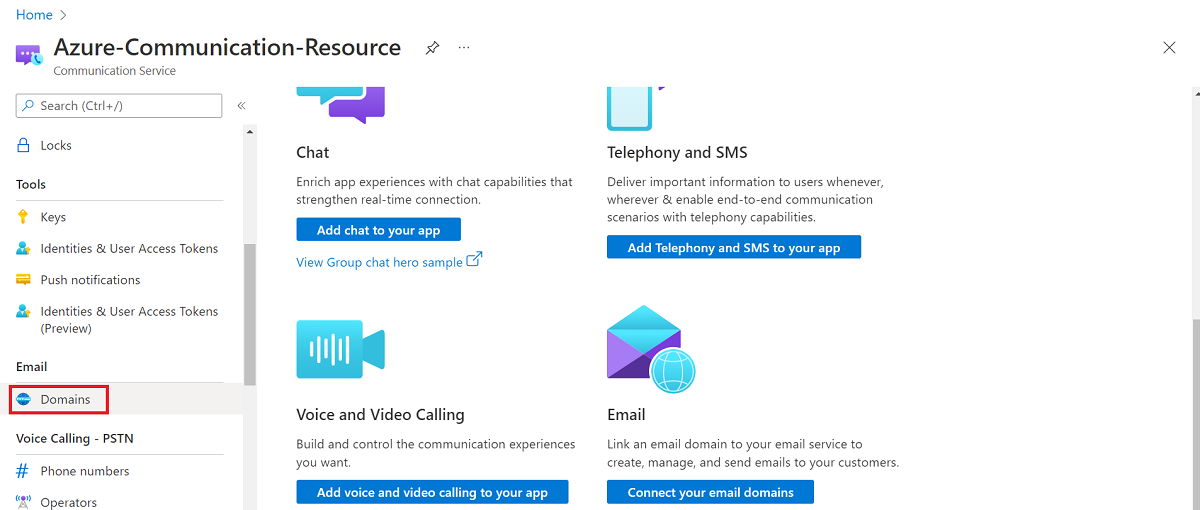
In the Azure Communication Service Resource overview page, click Domains on the left navigation panel under Email.
-
Select one of the options below:
- Click Connect domain in the upper navigation bar.
- Click Connect domain in the splash screen.
-
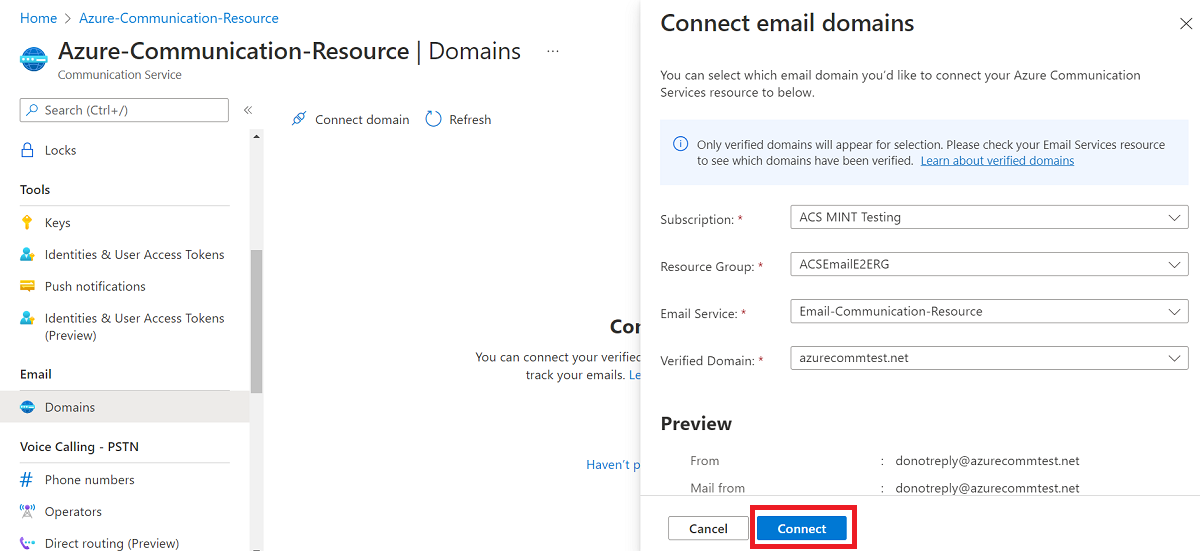
Filter and select one of the verified domains by:
- Subscription
- Resource Group
- Email Service
- Verified Domain
-
Click Connect.
Below is the sample code: Before executing make sure you installed required libraries.
pip install azure-communication-email# send-email.py
from azure.communication.email import EmailClient
def main():
try:
connection_string = "<ACS_CONNECTION_STRING>"
client = EmailClient.from_connection_string(connection_string)
message = {
"senderAddress": "<SENDER_EMAIL_ADDRESS>",
"recipients": {
"to": [{"address": "<recepient1email>" },{"address": "<recepient2email>" }],
},
"content": {
"subject": "<Subject>",
"plainText": "<Body Text>",
}
}
poller = client.begin_send(message)
result = poller.result()
except Exception as ex:
print(ex)
main()- Open an instance of PowerShell, Windows Terminal, Command Prompt, or equivalent program and navigate to the directory where you'd like to clone the sample.
git clone https://github.com/Azure-Samples/communication-services-python-quickstarts.git
Navigate to the send-email directory in the console. Create a virtual environment and activate it using the following commands:
python -m venv venv
.\venv\Scripts\activateExecute the following command to install the SDK:
pip install azure-communication-emailOpen the send-email.py file and configure the following settings:
connection_string: Replace<ACS_CONNECTION_STRING>with the connection string found within the 'Keys' blade of the Azure Communication Service resource.sender_address: Replace<SENDER_EMAIL_ADDRESS>with the sender email address obtained from the linked domain resource.recipient_address: Replace<recepientemail>with the recipient email address.
Execute the following command to run the app:
python ./send-email.py- An Entra application with access to the Azure Communication Services Resource. Register an application with Microsoft Entra ID and create a service principal
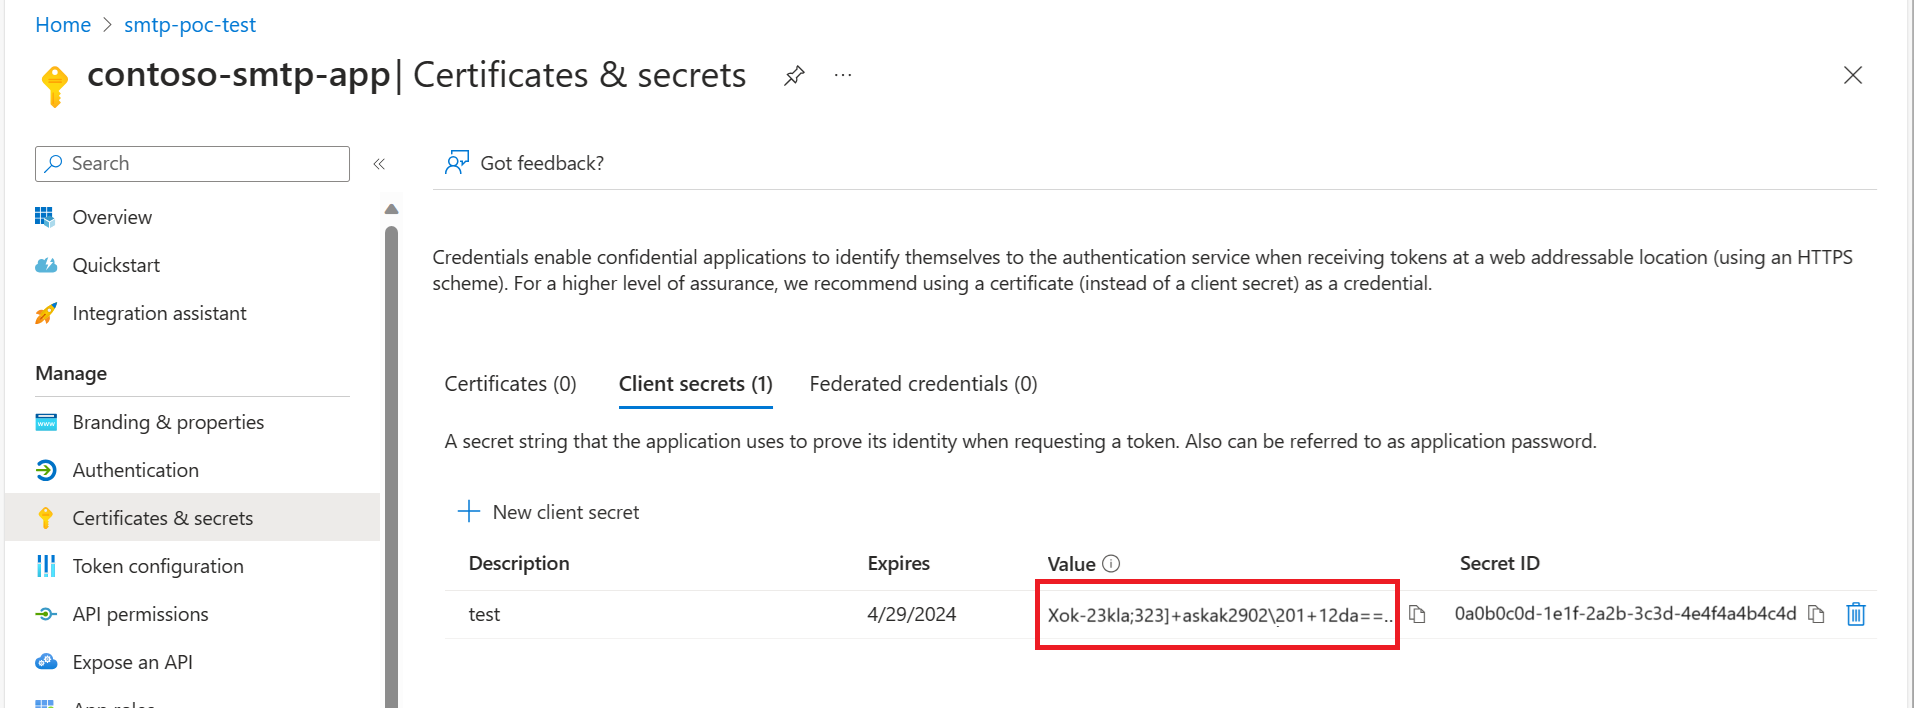
- A client secret for the Entra application with access to the Azure Communication Service Resource. Create a new client secret
-
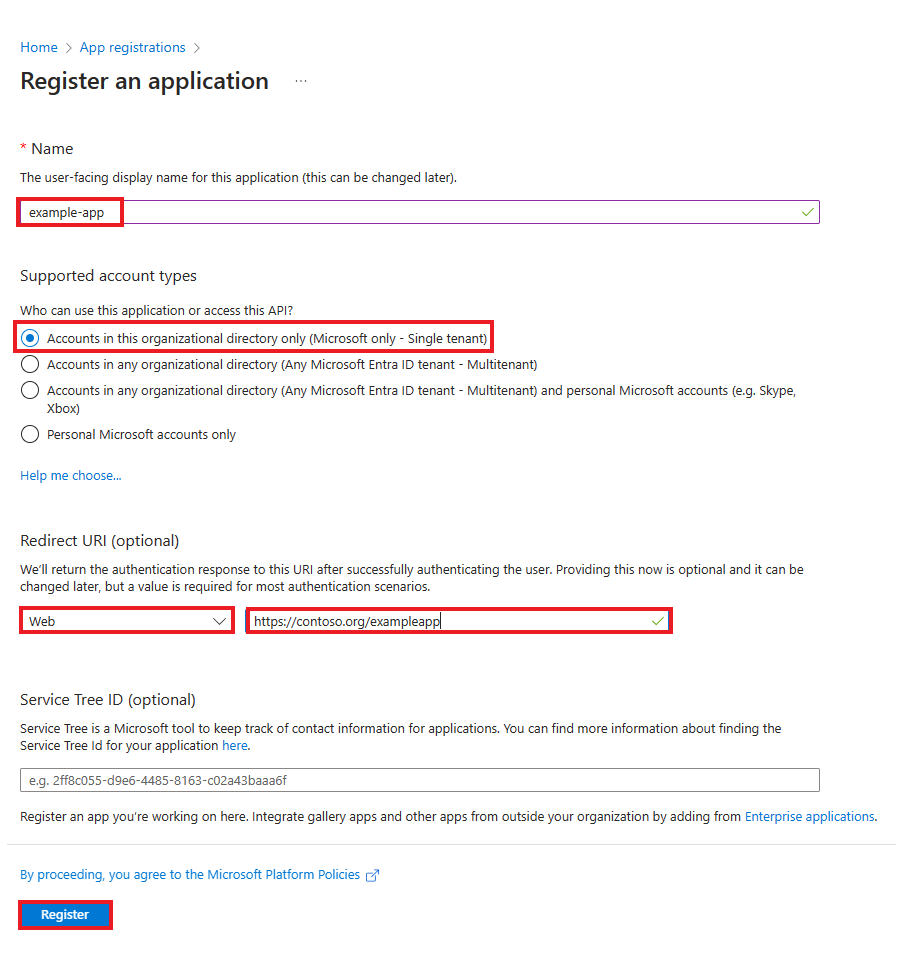
Sign in to the Microsoft Entra admin center as at least a Cloud Application Administrator.
-
Browse to Identity > Applications > App registrations, then select New registration.
-
Name the application, for example "example-app".
-
Select a supported account type, which determines who can use the application.
-
Under Redirect URI, select Web for the type of application you want to create. Enter the URI where the access token is sent to.
-
Select Register.
The Entra application must be assigned a role with both the Microsoft.Communication/CommunicationServices/Read and the Microsoft.Communication/EmailServices/write permissions on the Azure Communication Service Resource. This can be done either by using the Contributor role or by creating a custom role. Follow these steps to create a custom role by cloning an existing role:
-
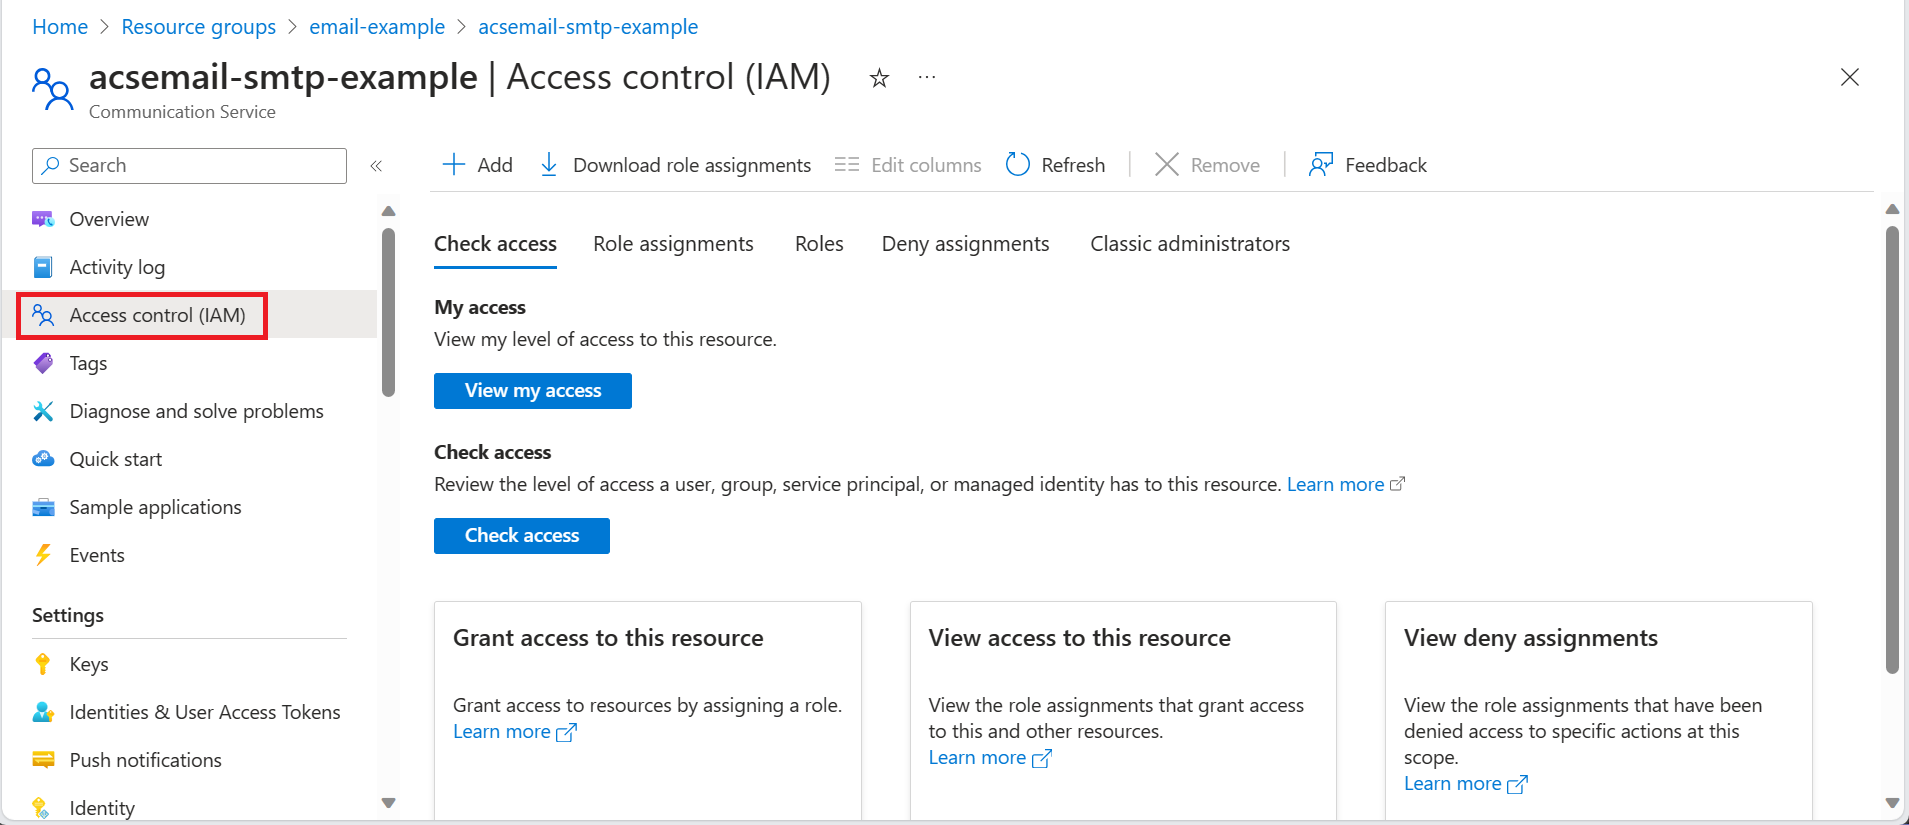
Navigate to the subscription, resource group, or Azure Communication Service Resource where you want the custom role to be assignable and then open Access control (IAM).
-
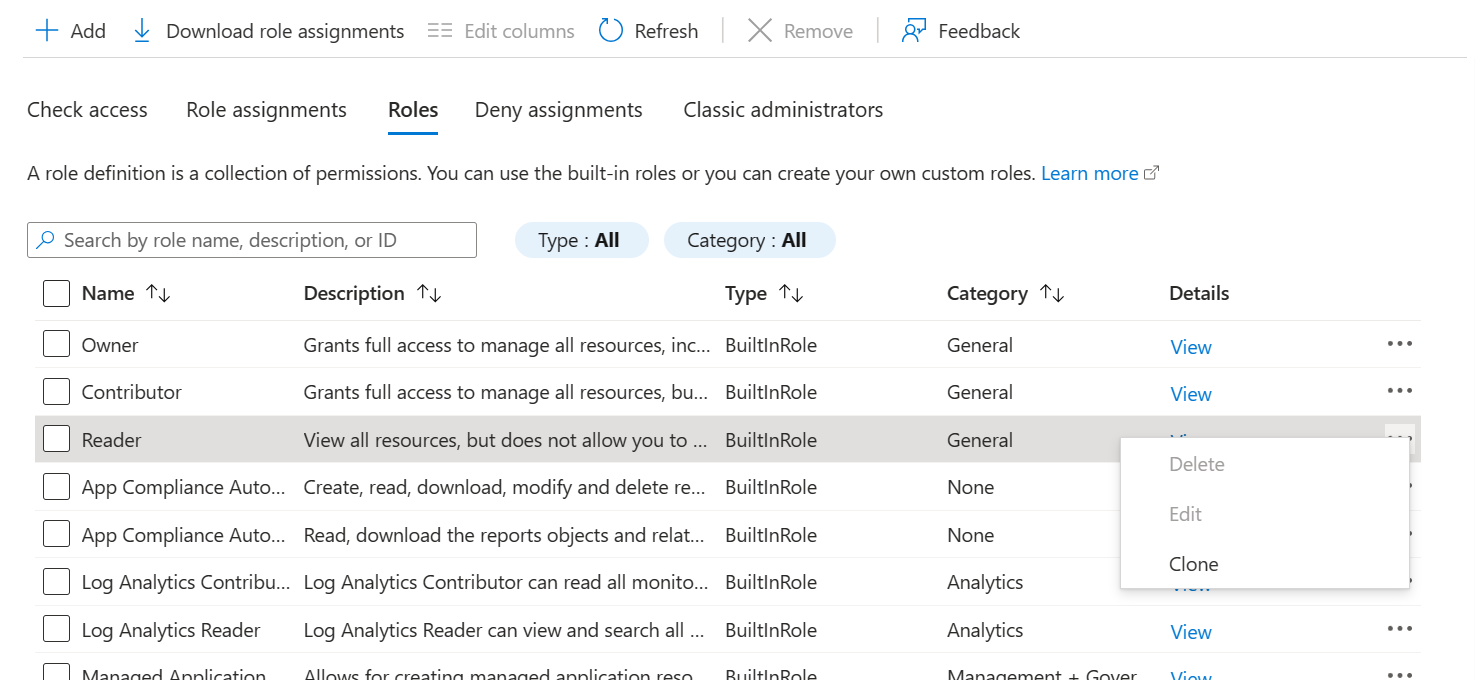
Click the Roles tab to see a list of all the built-in and custom roles.
-
Search for a role you want to clone, such as the Reader role.
-
At the end of the row, click the ellipsis (...) and then click Clone.
-
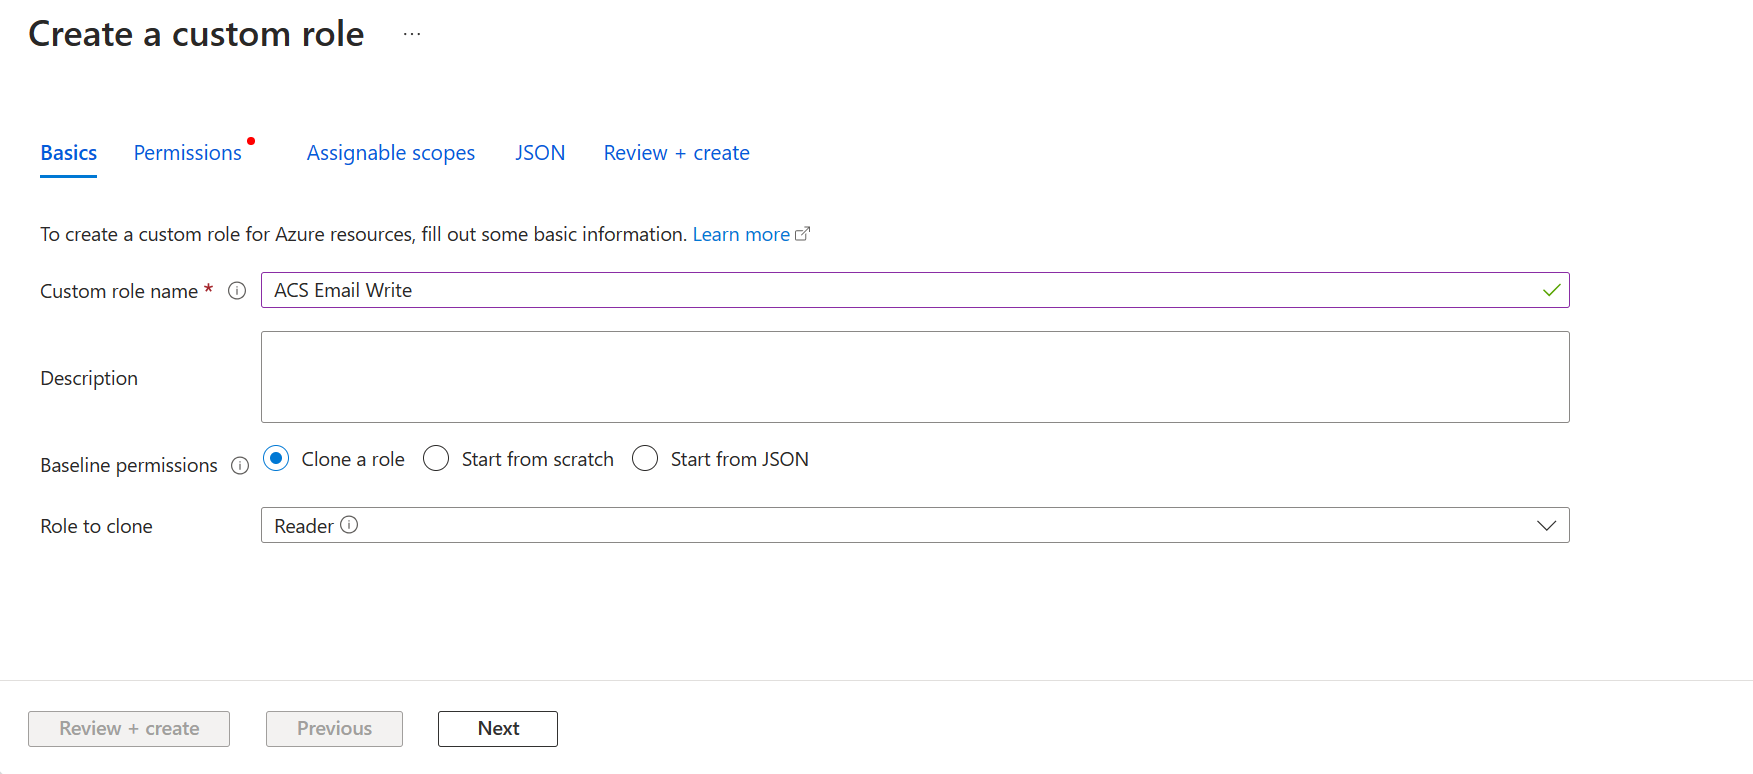
Click the Basics tab and give a name to the new role.
-
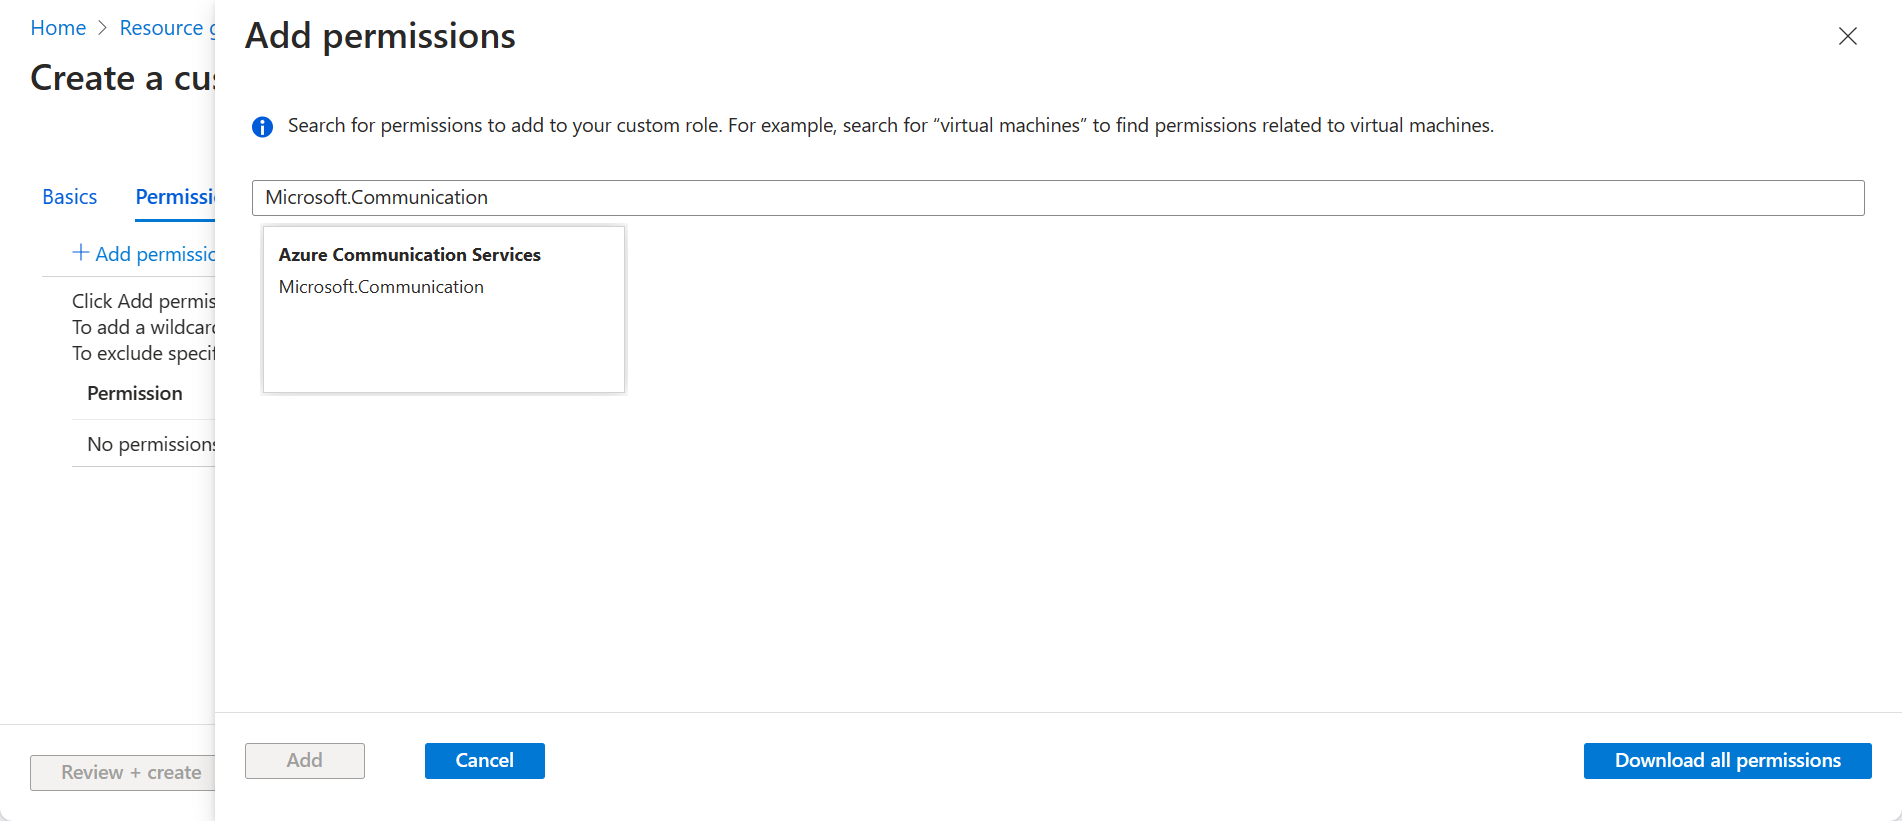
Click the Permissions tab and click Add permissions. Search for Microsoft.Communication and select Azure Communication Services.
-
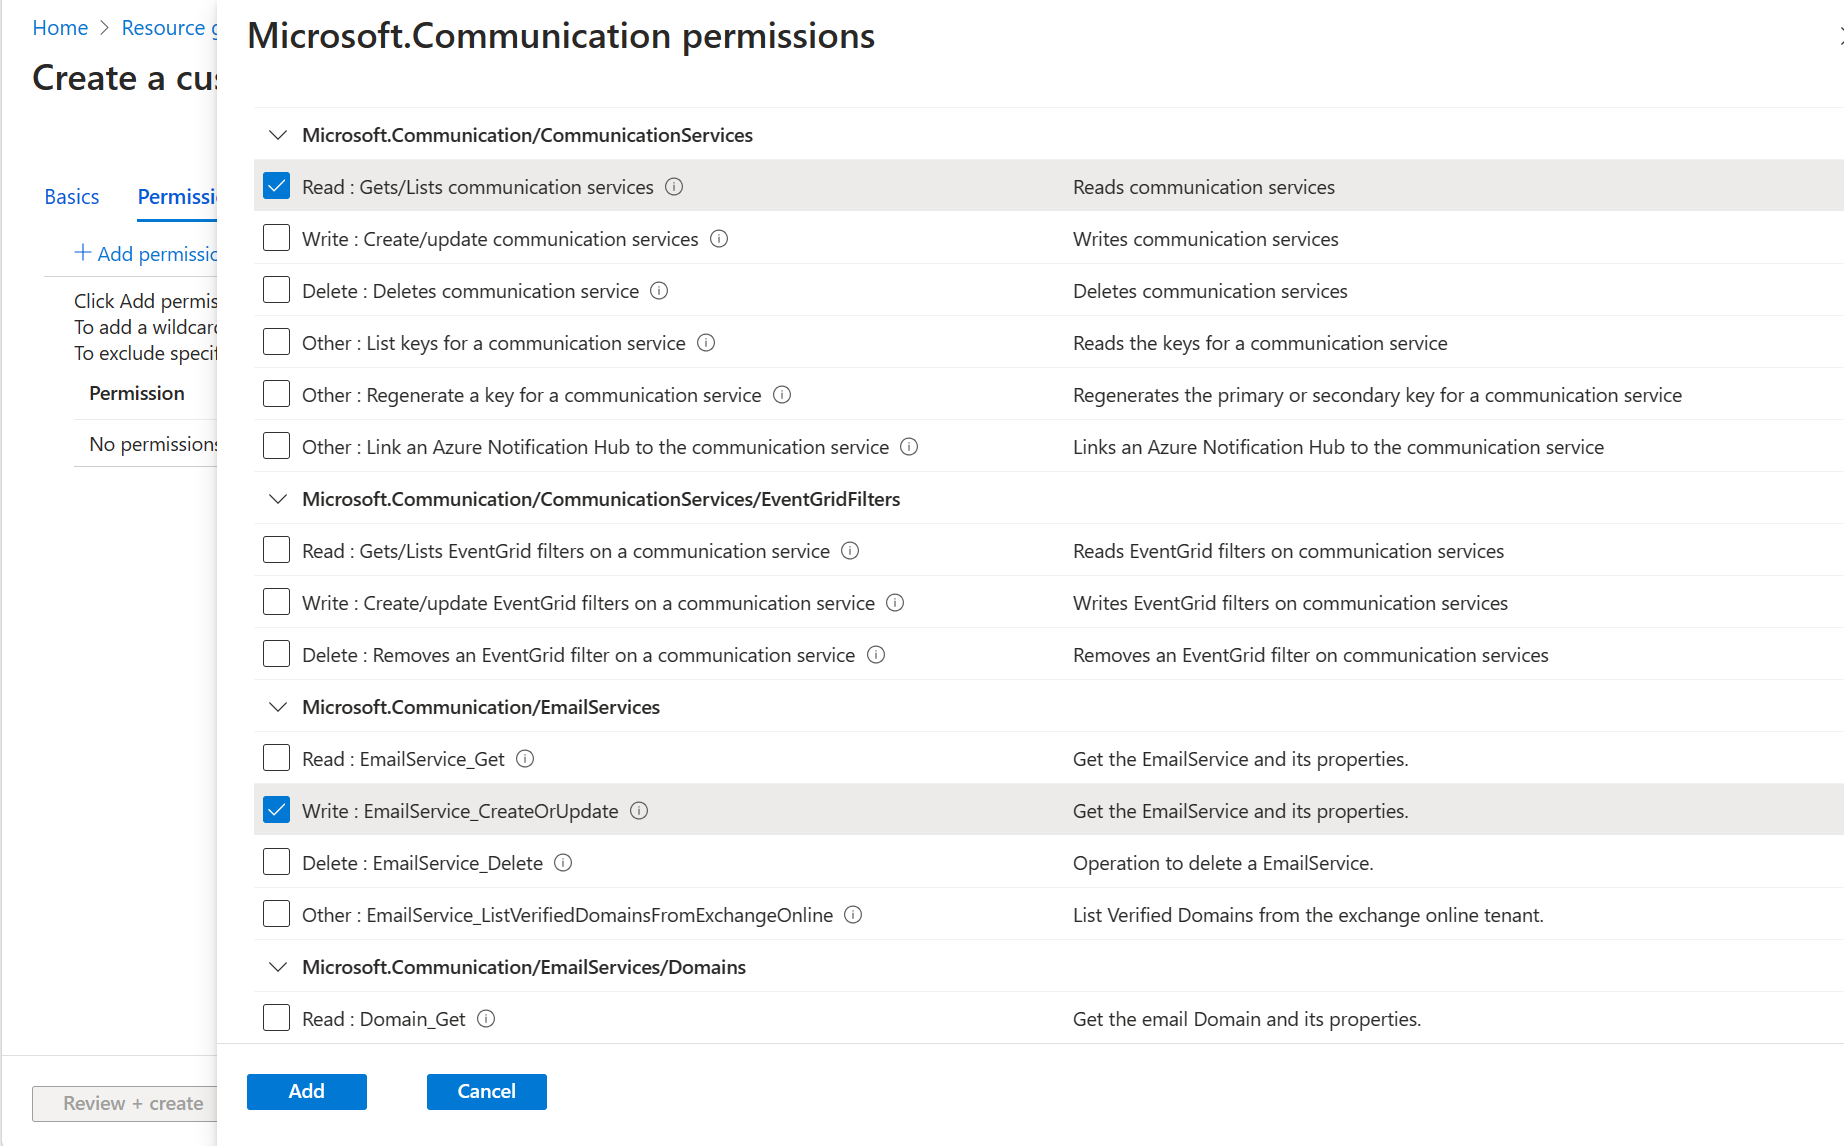
Select the Microsoft.Communication/CommunicationServices Read and the Microsoft.Communication/EmailServices Write permissions. Click Add.
-
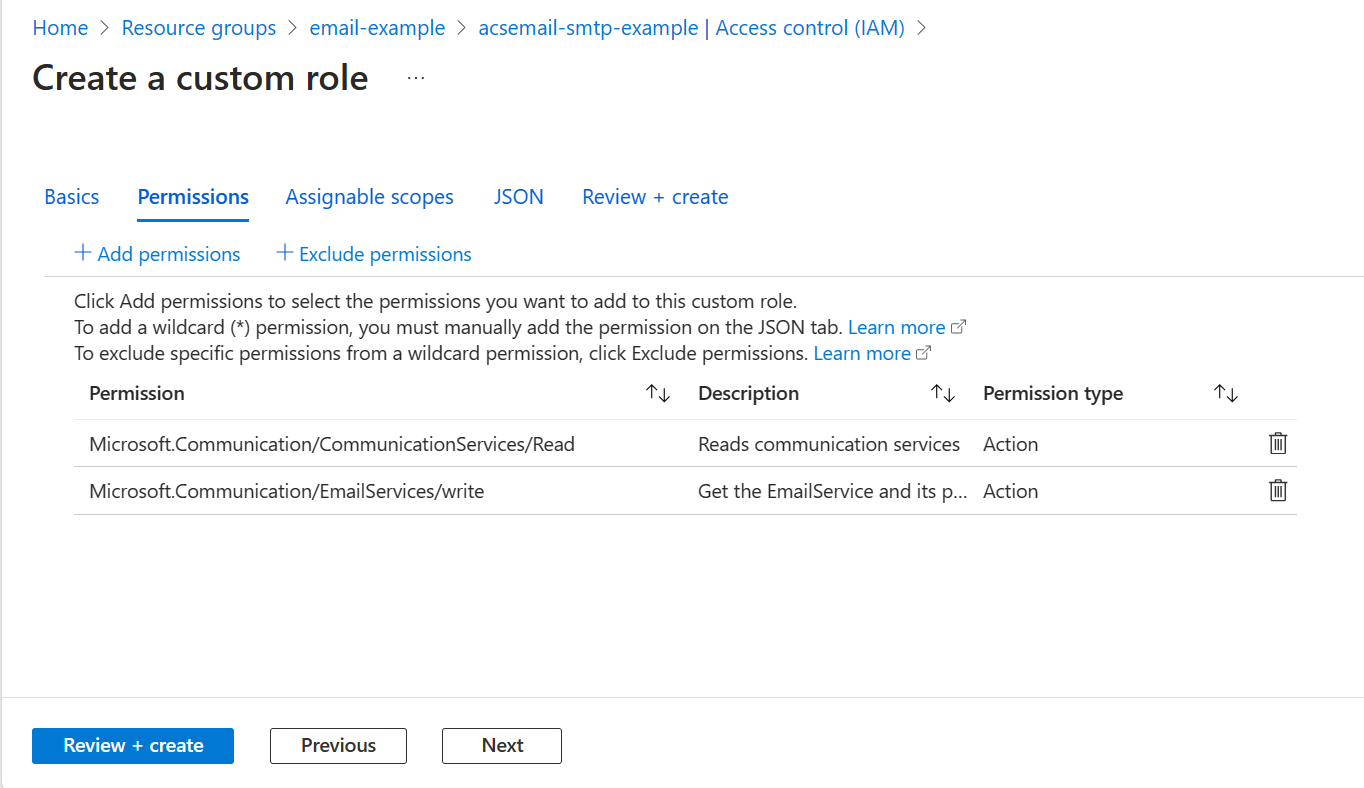
Review the permissions for the new role. Click Review + create and then Create on the next page.
-
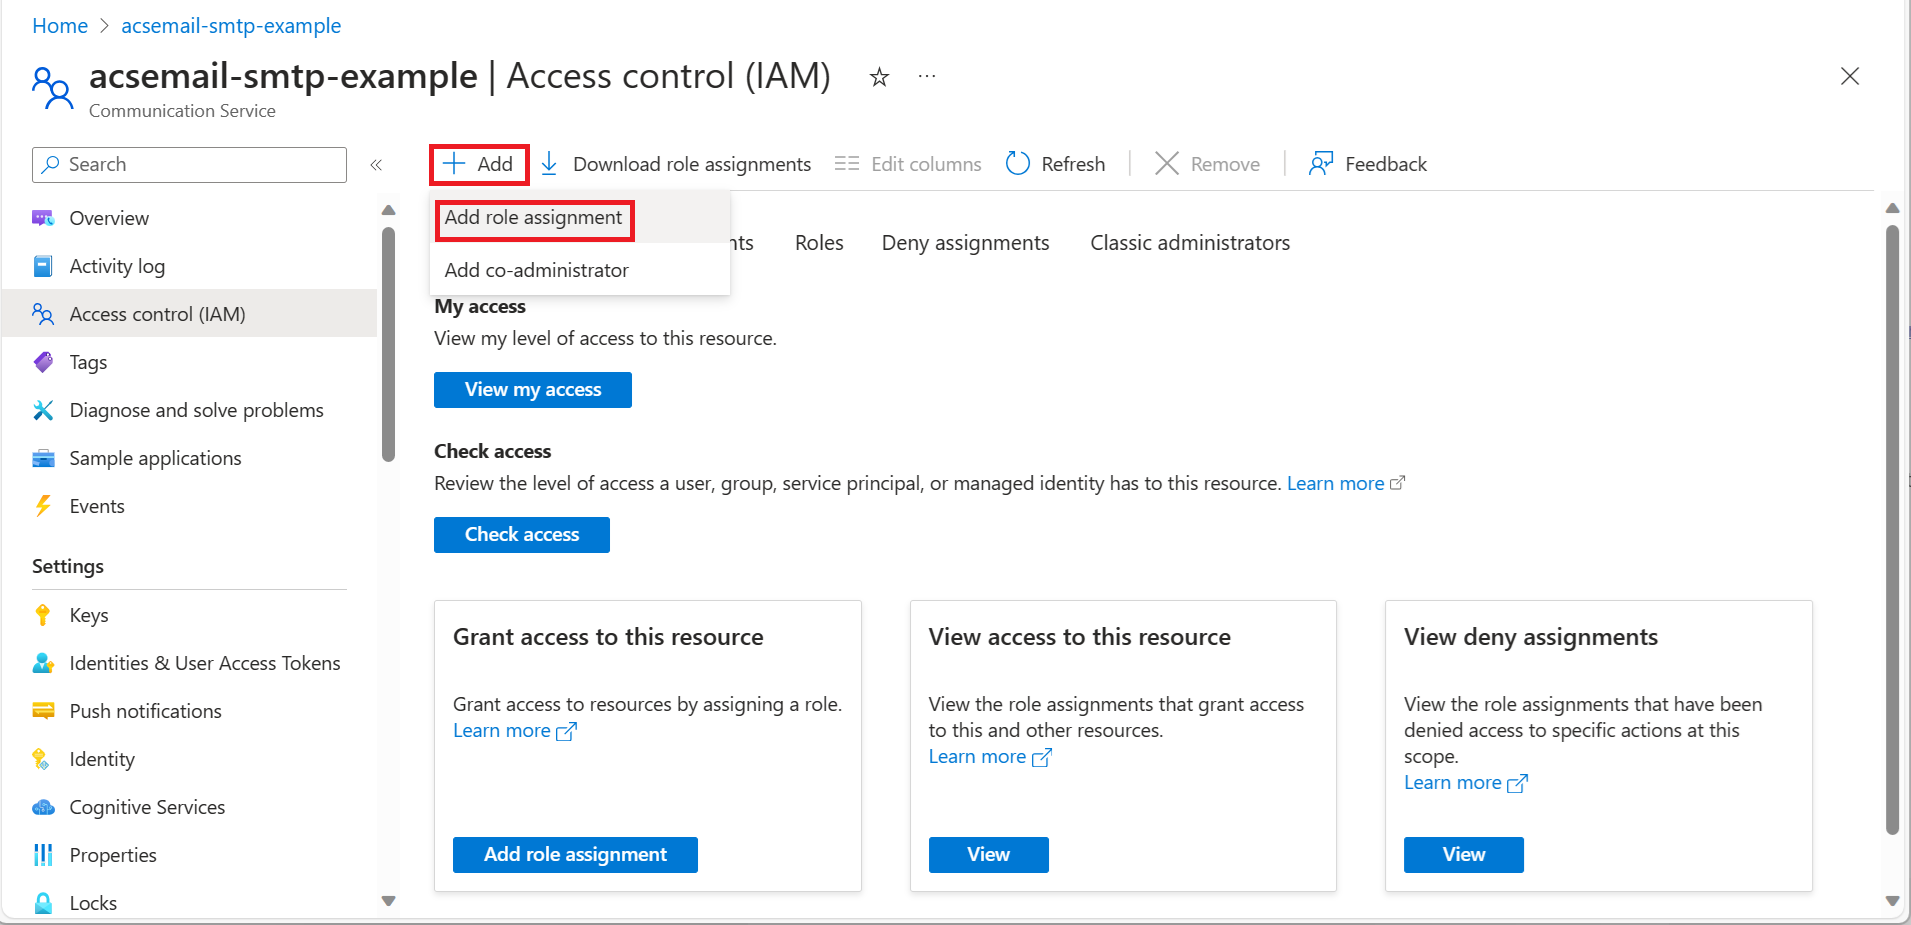
Navigate to the subscription, resource group, or Azure Communication Service Resource where you want the custom role to be assignable and then open Access control (IAM).
-
Click +Add and then select Add role assignment.
-
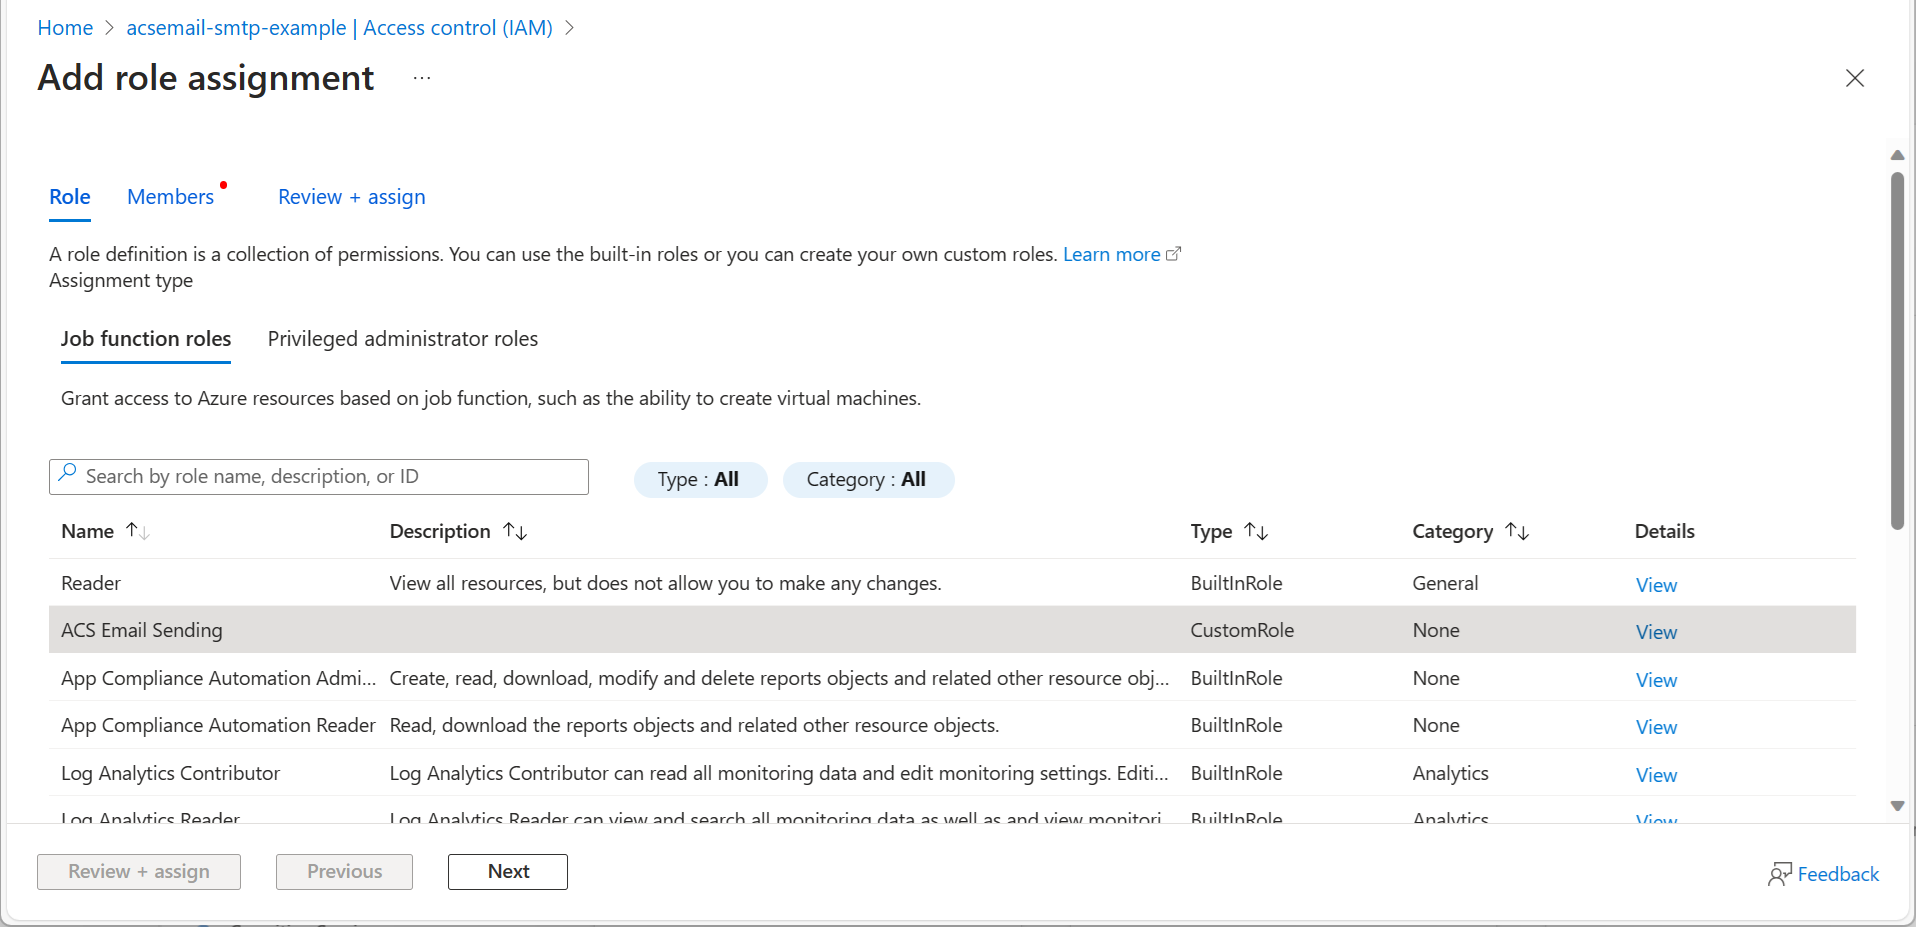
On the Role tab, select the custom role created for sending emails using SMTP and click Next.
-
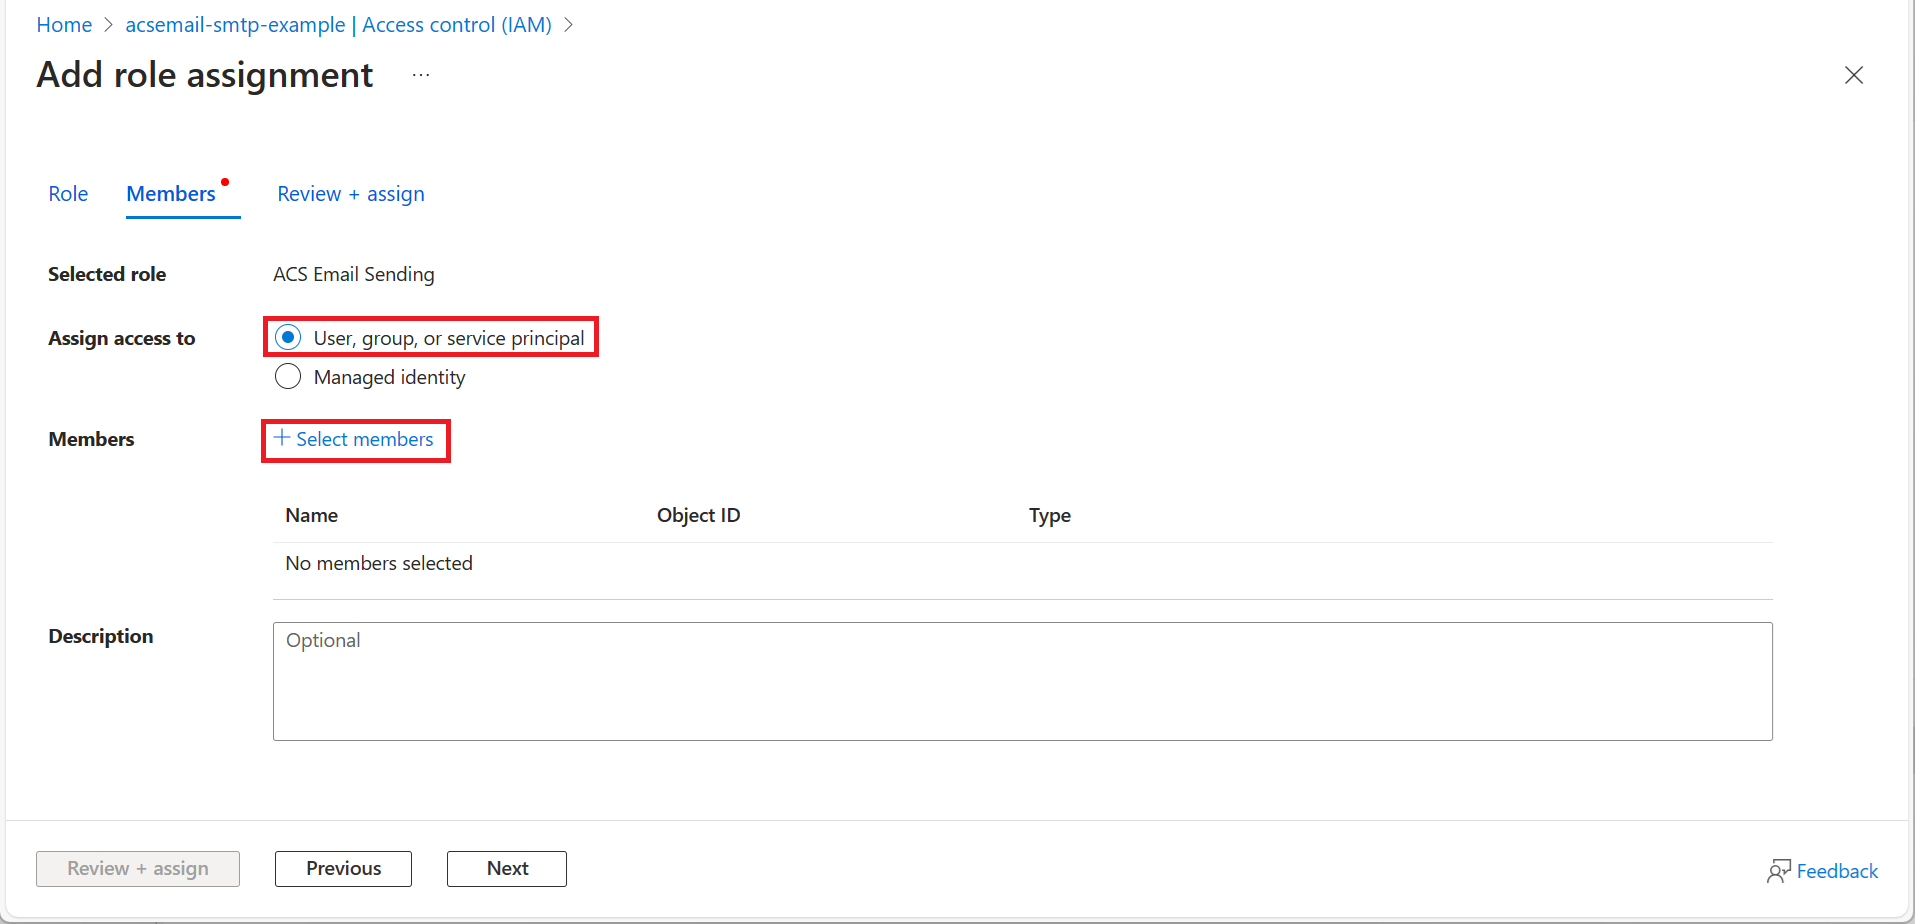
On the Members tab, choose User, group, or service principal and then click +Select members.
-
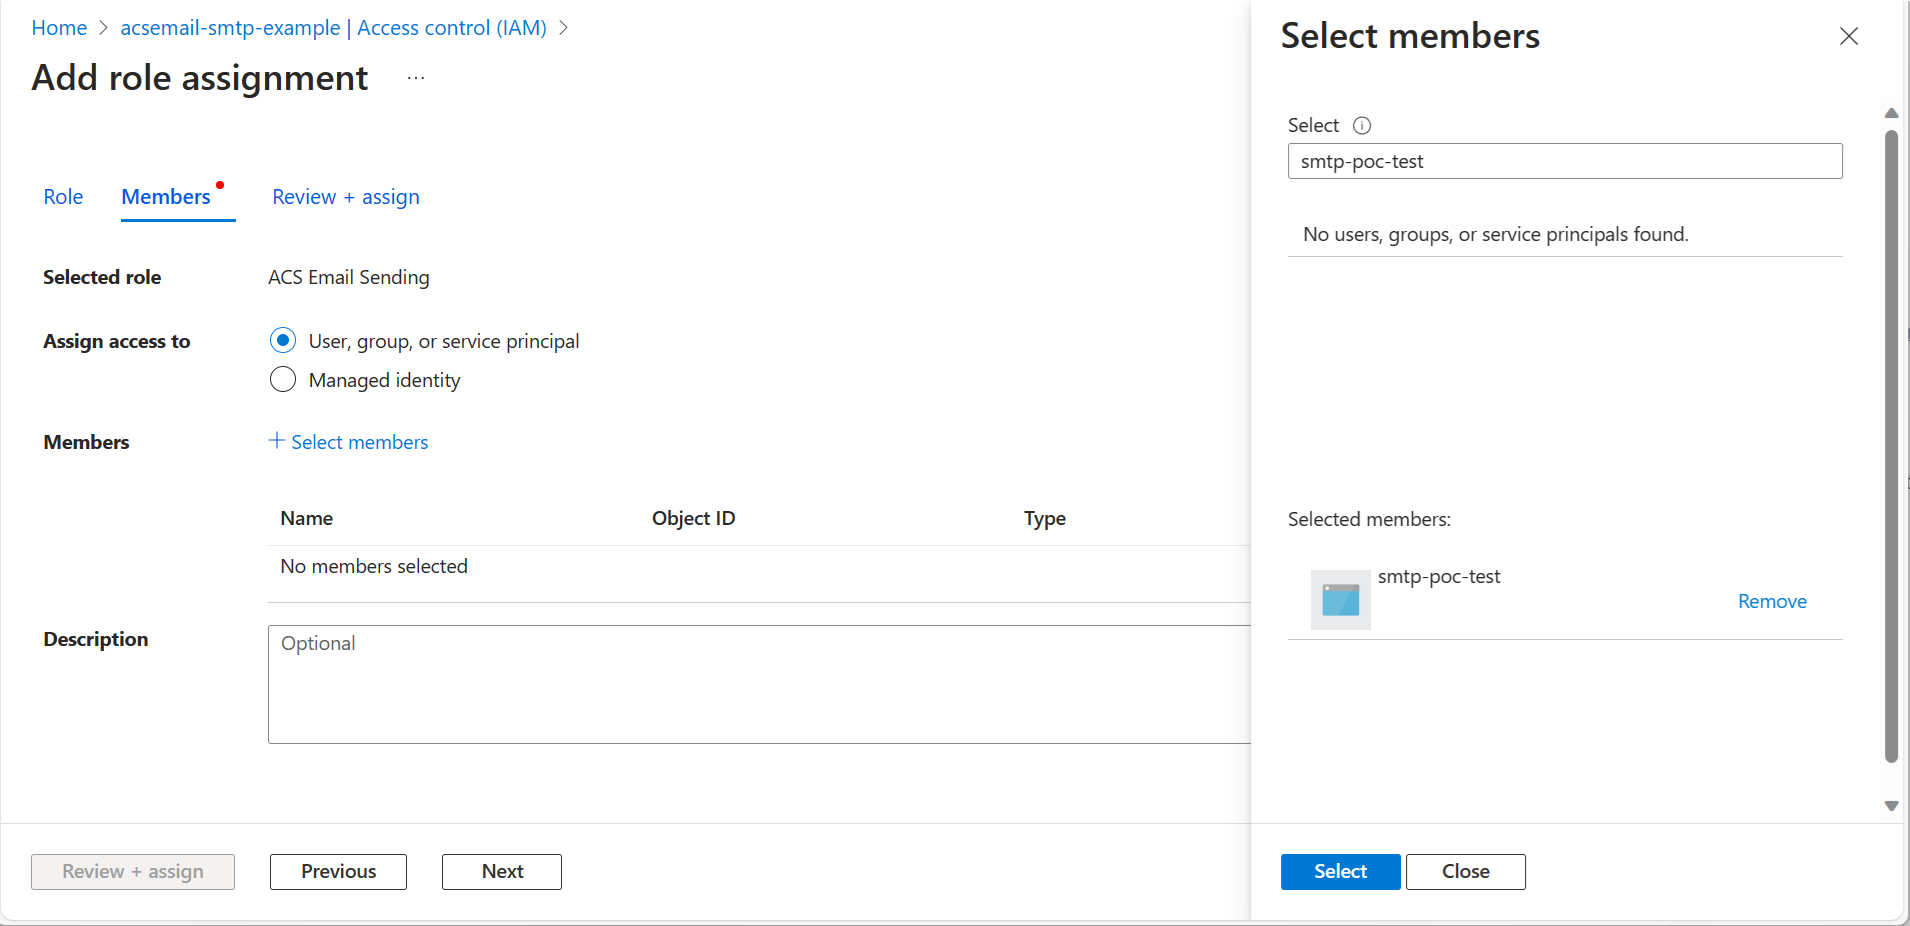
Use the search box to find the Entra application that you'll use for authentication and select it. Then click Select.
-
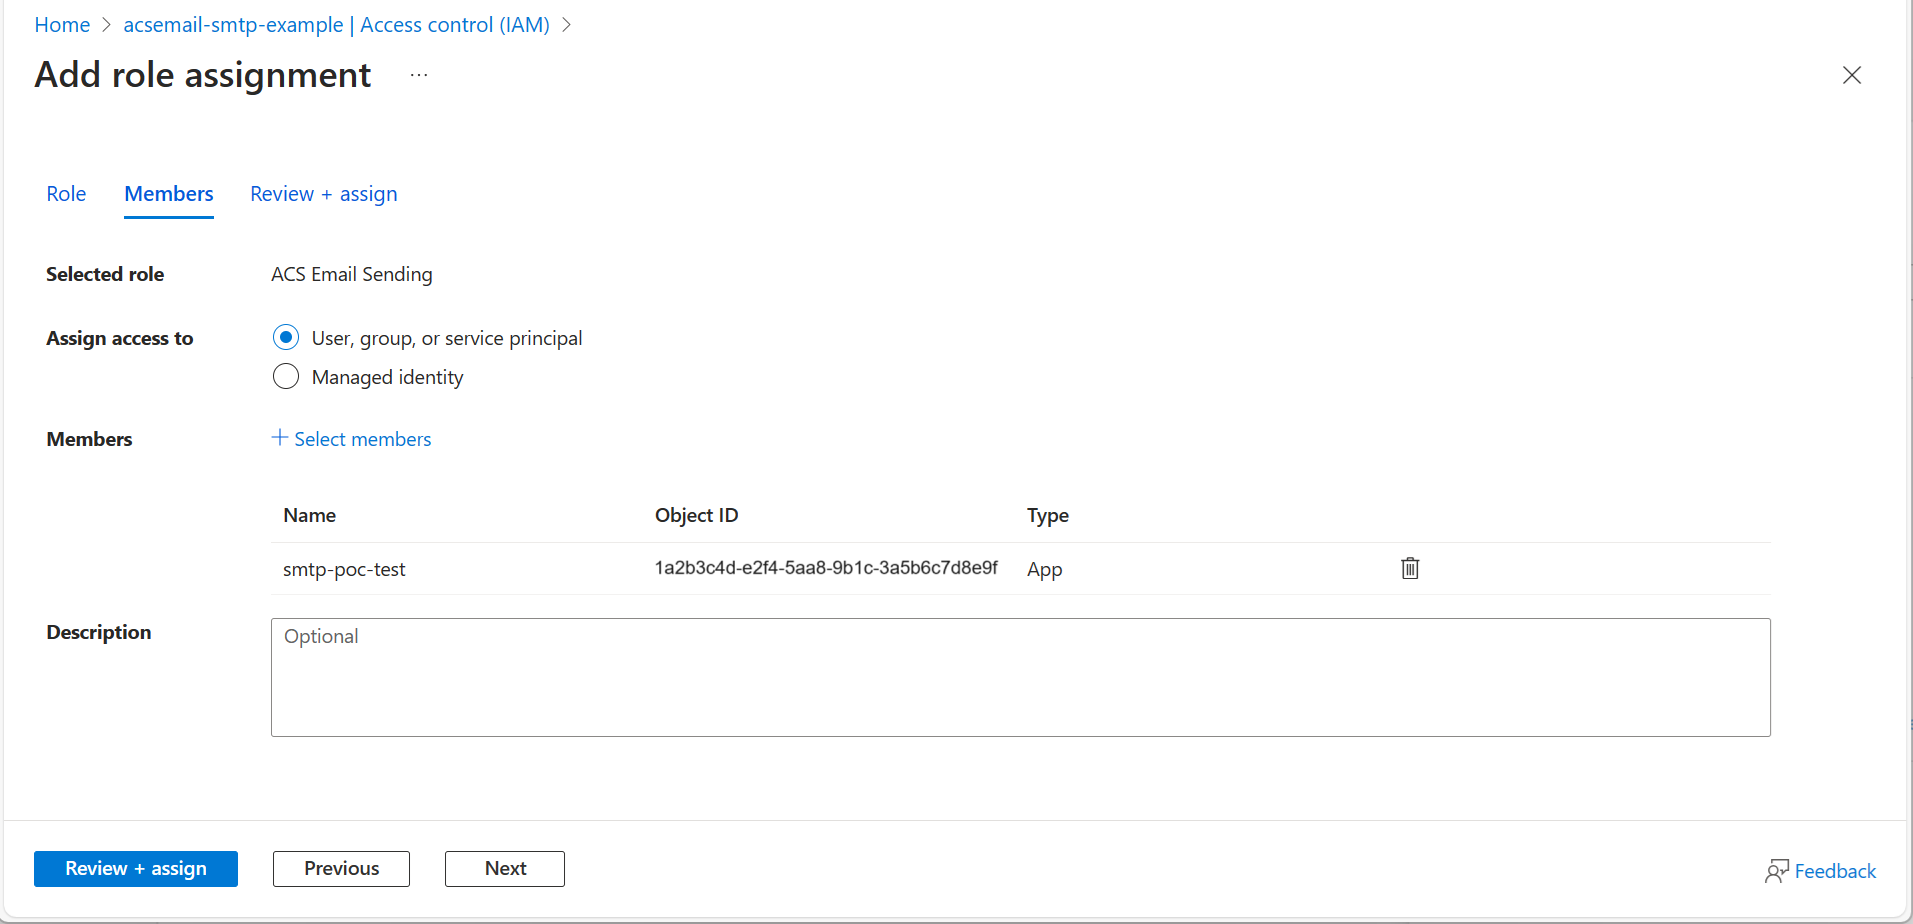
After confirming the selection, click Next.
-
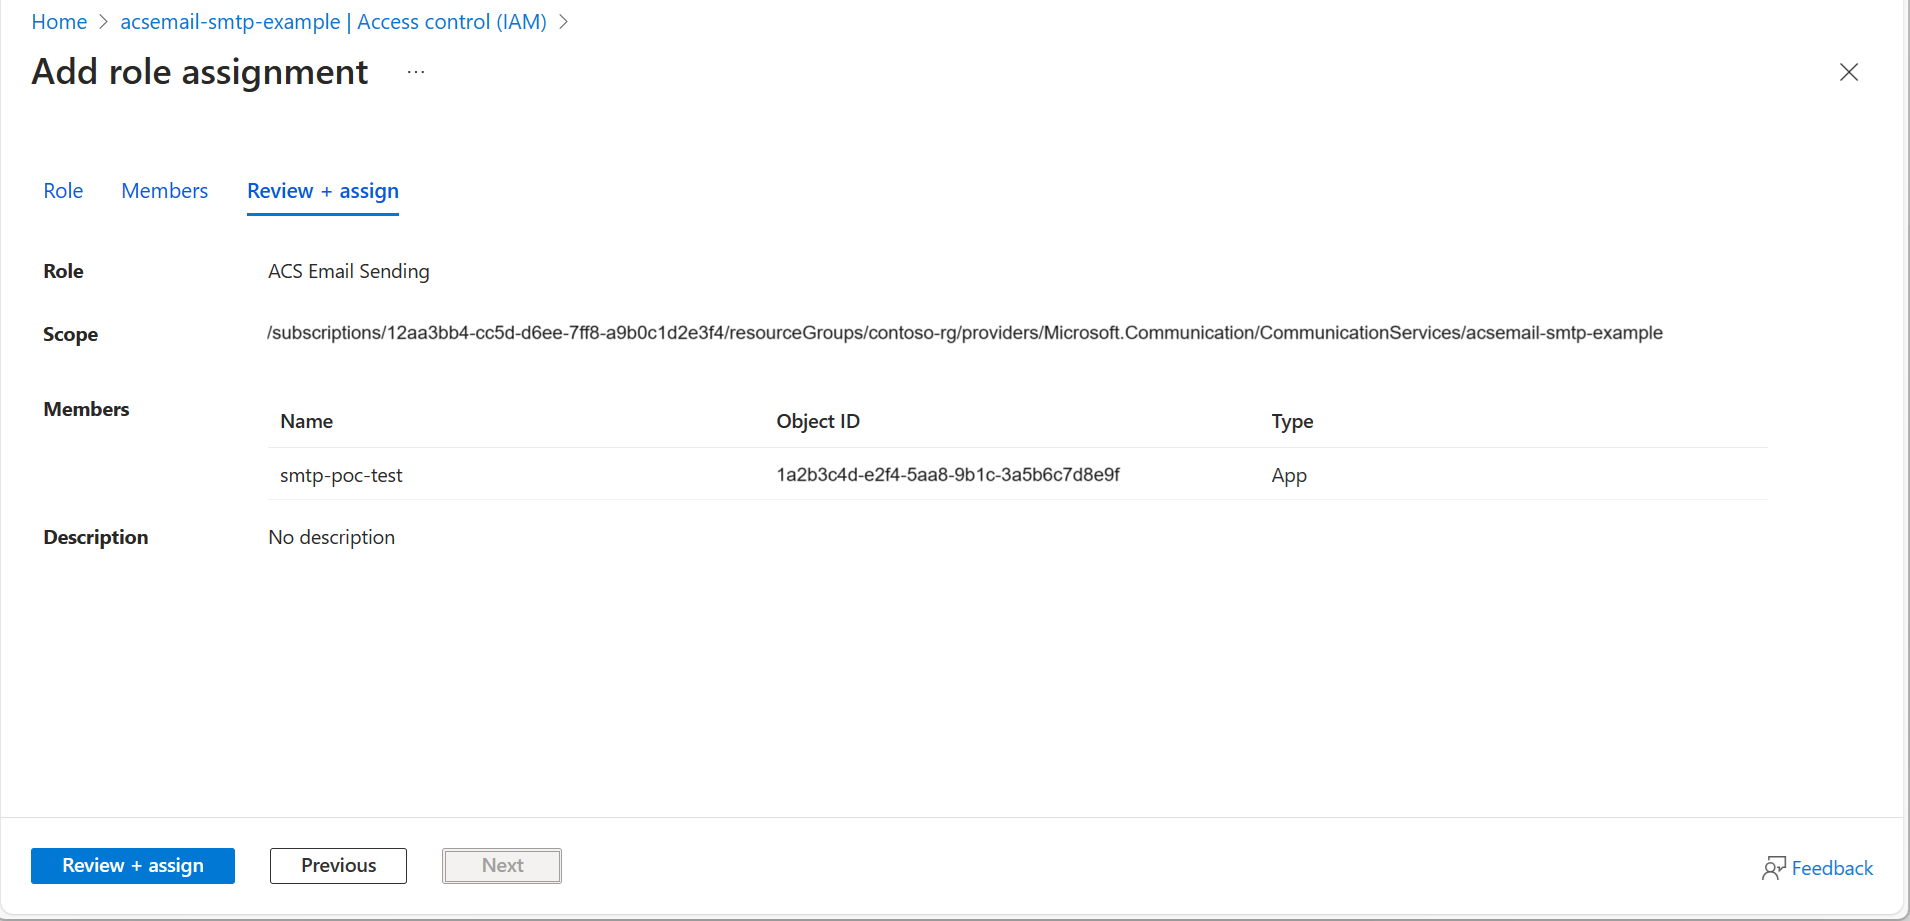
After confirming the scope and members, click Review + assign.
Azure Communication Services allows the credentials for an Entra application to be used as the SMTP username and password. The username consists of the following three parts and can be pipe or dot delimited:
-
The Azure Communication Service Resource name.
-
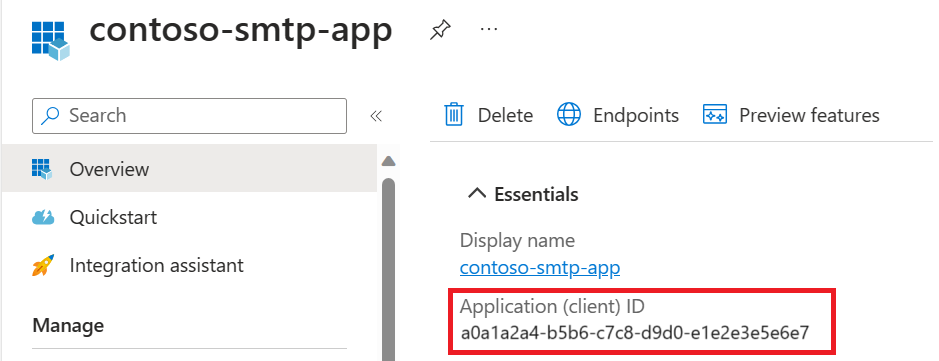
The Entra Application ID.
-
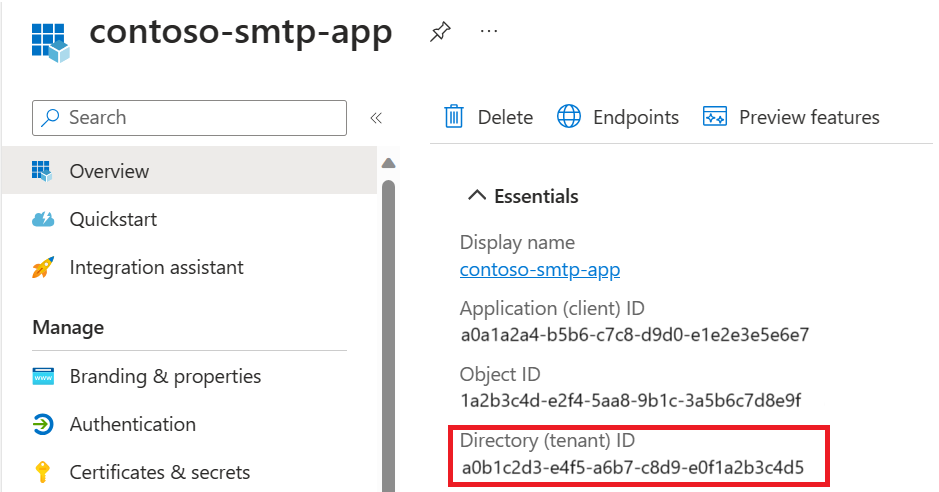
The Entra Tenant ID.

Dot-delimited Format:
username: <Azure Communication Services Resource name>.<Entra Application ID>.<Entra Tenant ID>
Pipe-delimited Format:
username: <Azure Communication Services Resource name>|<Entra Application ID>|<Entra Tenant ID>
The password is one of the Entra application's client secrets.
- Authentication: Username and password authentication is supported using Entra application details as the credentials. The Azure Communication Services SMTP service will use the Entra application details to get an access token on behalf of the user and use that to submit the email. Because the Entra token isn't cached, access can be revoked immediately by either changing the Entra application client secret or by changing the access controls for the Azure Communication Services Resource.
- Azure Communication Service: An Azure Communication Services Resource with a connected Azure Communication Email Resource and domain is required.
- Transport Layer Security (TLS): Your device must be able to use TLS version 1.2 and above.
- Port: Port 587 is required and must be unblocked on your network. Some network firewalls or ISPs block ports because that's the port that email servers use to send mail.
- DNS: Use the DNS name
smtp.azurecomm.net. Don't use an IP address for the Microsoft 365 or Office 365 server, as IP Addresses aren't supported.
Enter the following settings directly on your device or in the application as their guide instructs (it might use different terminology than this article). Provided your scenario aligns with the prerequisites for SMTP AUTH client submission, these settings allow you to send emails from your device or application using SMTP commands.
| Device or Application Setting | Value |
|---|---|
| Server / smart host | smtp.azurecomm.net |
| Port | Port 587 |
| TLS / StartTLS | Enabled |
| Username and password | Enter the Entra application credentials from an application with access to the Azure Communication Services Resource |
import smtplib
from email.mime.multipart import MIMEMultipart
from email.mime.text import MIMEText

from_email = '<SENDER_EMAIL_ADDRESS>'
to_email = '<recipients_email_address>'
user_name = '<Azure Communication Services Resource name>.<Entra Application ID>.<Entra Tenant ID>'
password = '<Entra application credential secret>'
msg = MIMEMultipart()
msg['From'] = from_email
msg['To'] = to_email
msg['Subject'] = '<subject_text>'
message = '<content_body>'
msg.attach(MIMEText(message))
mailserver = smtplib.SMTP('<host>', <port>)
mailserver.starttls()
mailserver.login(user_name, password)
mailserver.sendmail(from_email, to_email, msg.as_string())
mailserver.quit()Sending Emails: The cost is based on the number of emails sent and the amount of data transferred. The pricing is $0.00025 per email sent and $0.00012 per MB of data transferred.
Example Calculation:
If you send 1000 emails, each of 1 MB, the cost would be:
Email cost: 1000 emails x $0.00025 = $0.25
Data transfer cost: 1000 MB x $0.00012 = $0.12
Total cost for 1000 emails: $0.25 + $0.12 = $0.37
ref: GitHub
SMS, Voice, and Video: If you use additional features like SMS, voice, or video calls, the costs will depend on the specific services and usage volumes. Pricing details for these services can be found on the Azure Communication Services pricing page.
ref: Communication-services-pricing
Communication-services-pricing
App Registrations themselves do not incur direct costs, but the resources and services accessed through the registered apps might incur charges depending on their usage.