Very simple planter monitoring
This is a quick-and-dirty toy project meant to run on a secured home network.


- Raspberry pi
- DHT11 humidity sensor
- Planter - I have a discontinued IKEA Bittergurker
- Light timer
- USB webcam
- Connect the USB webcam to the raspberry pi
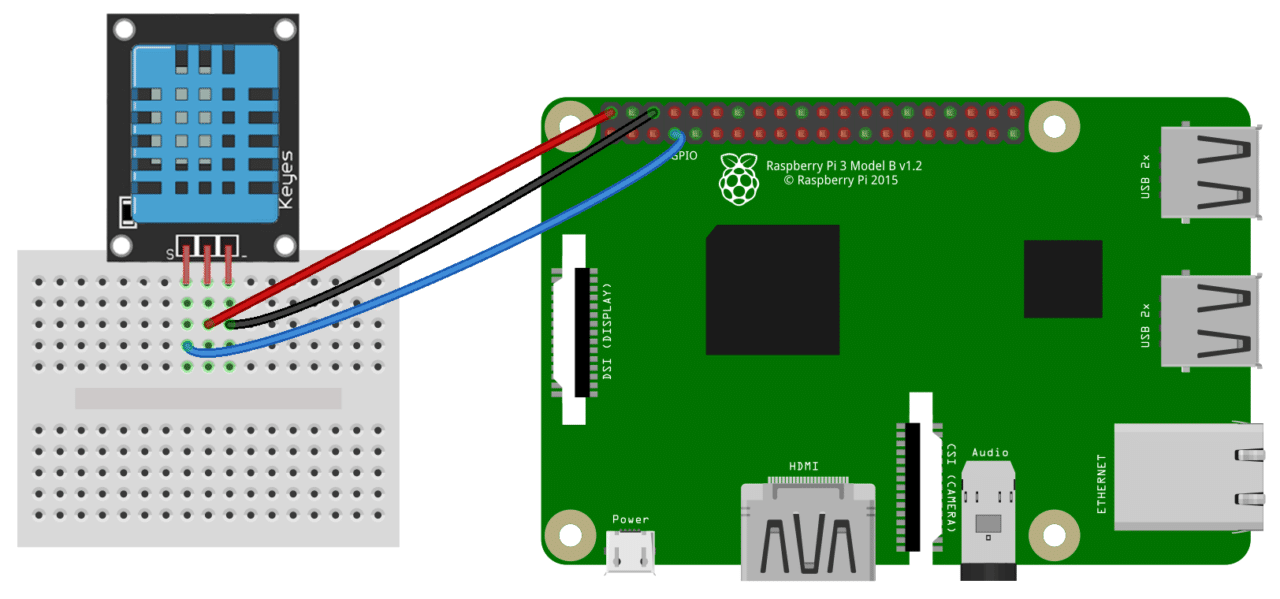
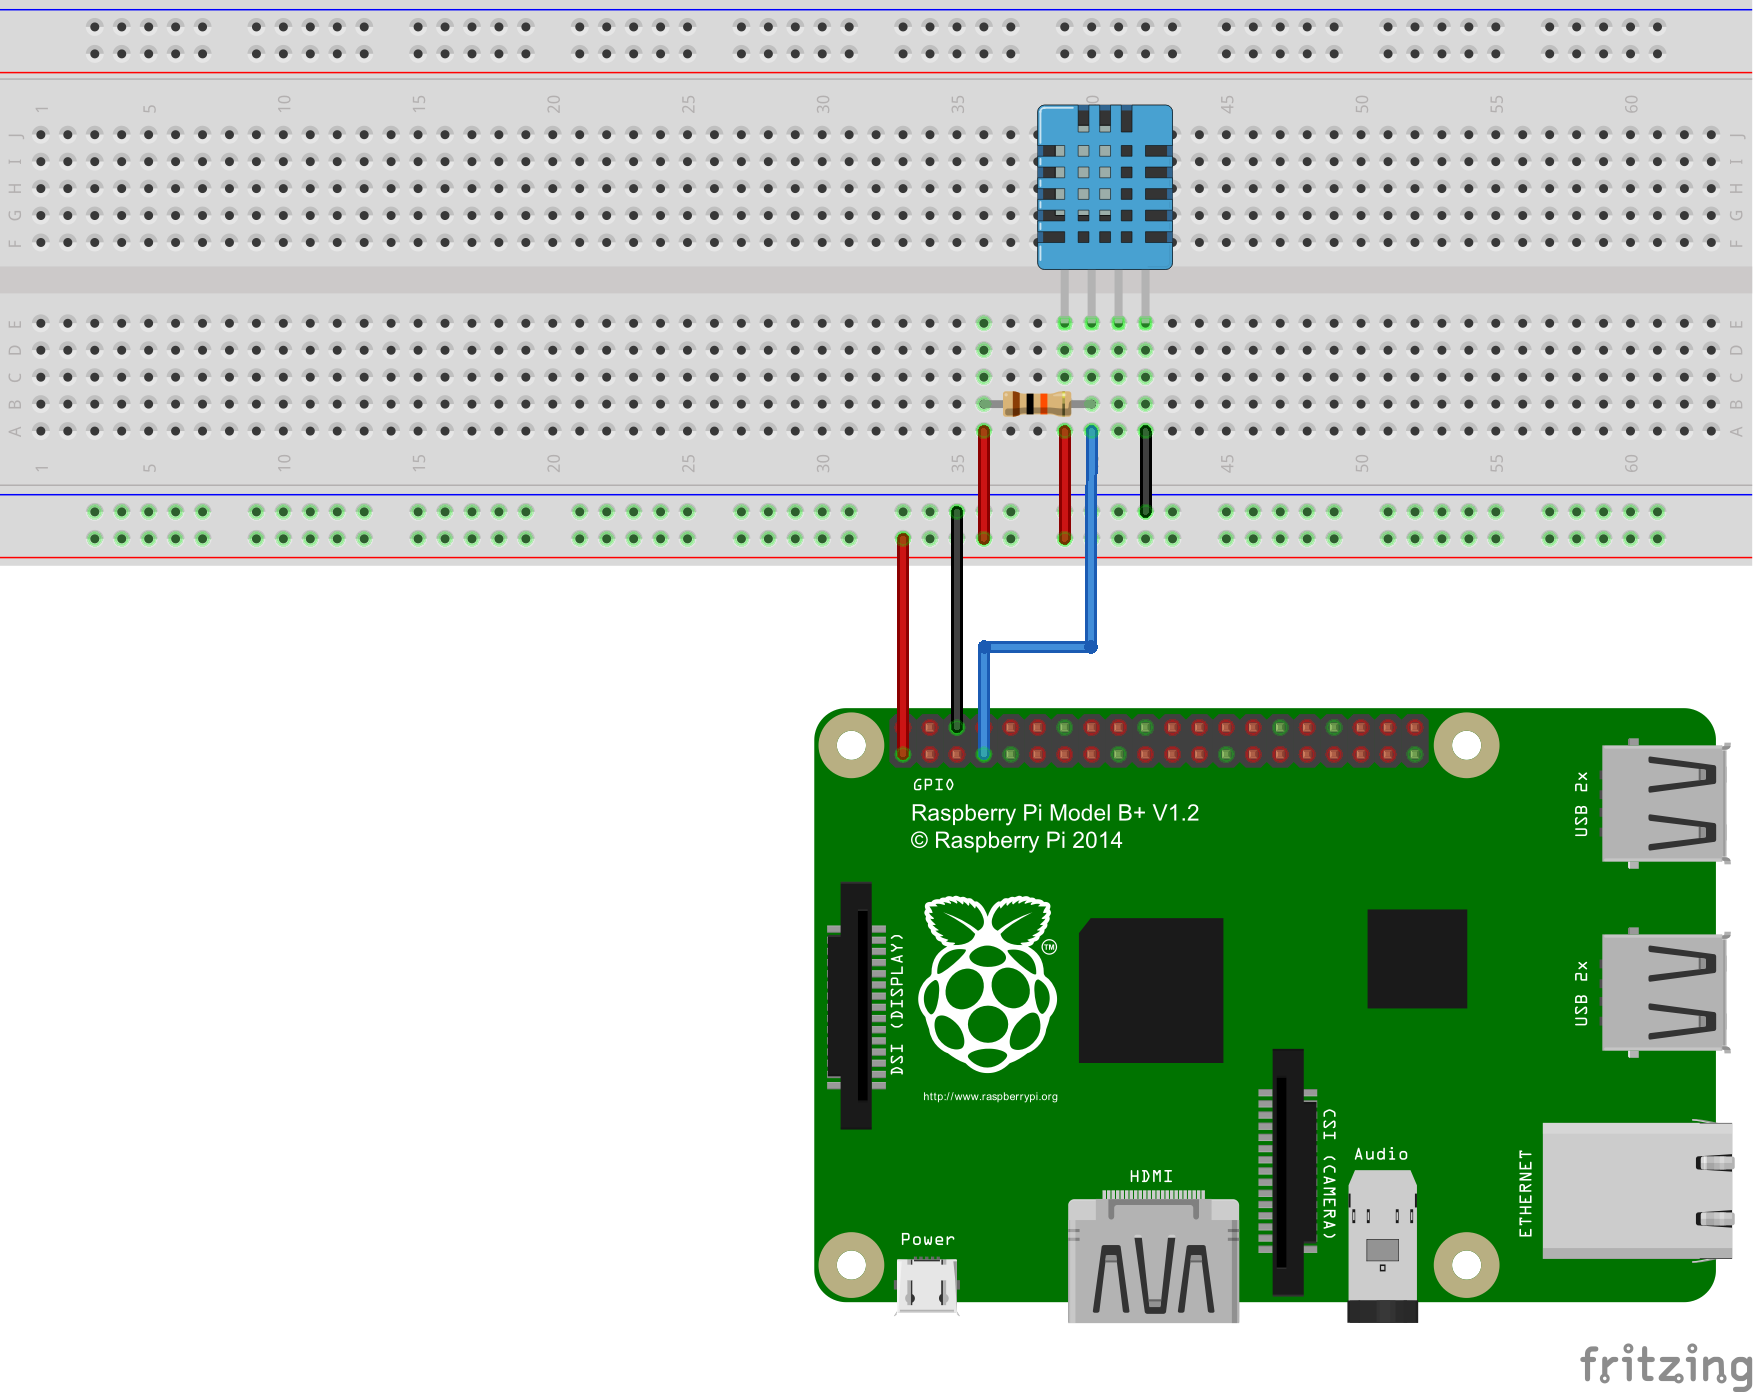
- Connect the humidity sensor to the raspberry pi (3-pin)(4-pin)
wget -q -O - https://packages.grafana.com/gpg.key | sudo apt-key add -
echo "deb https://packages.grafana.com/oss/deb stable main" | sudo tee -a /etc/apt/sources.list.d/grafana.list
sudo apt-get update
sudo apt-get install -y grafana
sudo /bin/systemctl enable grafana-server
sudo /bin/systemctl start grafana-server
sudo grafana-cli plugins install pierosavi-imageit-panel
sudo /bin/systemctl restart grafana-server
mkdir -p pics prometheus/data
wget https://github.com/prometheus/prometheus/releases/download/v2.25.0/prometheus-2.25.0.linux-armv7.tar.gz
tar xfz prometheus-2.25.0.linux-armv7.tar.gz
mv prometheus-2.25.0.linux-armv7/prometheus prometheus/
cp prometheus.yml ~/prometheus/

sudo cp prometheus.service /etc/systemd/system/
sudo systemctl enable prometheus.service
sudo systemctl start prometheus
curl localhost:9090/
- Humidity Exporter
chmod 755 humidity.py
sudo cp humidity_exporter.service /etc/systemd/system/
sudo systemctl enable humidity_exporter.service
sudo systemctl start humidity_exporter
curl localhost:9817
- Webcam
chmod 755 take_picture.sh
sudo apt install fswebcam
crontab -e
* * * * * /home/pi/take_picture.sh 2>&1 >> /dev/null
- File Server
sudo cp python_http_server.service /etc/systemd/system/
sudo systemctl enable python_http_server.service
sudo systemctl start python_http_server
- Grafana Setup
- Log into grafana (raspberry pi's ip:3000) with admin/admin. Change the password.
- Left panel -> Gearbox -> Data Sources -> Add Data Source -> Prometheus -> http://RPI_IP_ADDRESS:9090/ -> Save & Test
- Left panel -> + sign -> Import -> Upload JSON file -> Chili_Metrics.json
- Live Cam -> edit -> Panel -> Display -> Image URL: Change 192.168.1.116 to RPI_IP_ADDRESS -> Save
Pull requests are welcome. For major changes, please open an issue first to discuss what you would like to change.


