
In this lesson, we are going to create a Chronometer. Chronometers are very common in a lot of sports, like car racing, athletism, etc. In this case, we are going to create a Chronometer to count how many minutes and seconds we use to do the Ironhack Exercises!
Our Chronometer will have an LCD Screen, where we will see the minutes and seconds moving forward. It will also have two different buttons, that will change their behaviour depending on the status of the Chronometer. For example, the start button will become stop button when the Chronometer is running.
Last, but not least, we are going to add a Split functionality, that will be very helpful to remember how many time we spent in each iteration of the exercise. Every time we finish an iteration, we will be able to press the split button, so we will know how hard or easy it was.

- Use
setIntervalto update the chronometer each second. - Use Prototypal Inheritance to create a JavaScript object that encapsulates all the
Chronometerfunctionalities.
Upon completion, run the following commands:
$ git add .
$ git commit -m "done"
$ git push origin master
Navigate to your repo and create a Pull Request -from your master branch to the original repository master branch.
In the Pull request name, add your campus, name and last names separated by a dash "-".
We have already created you the main structure you will need to create your chronometer. The project structure is the following:
starter-code/
├── fonts
│   └── ds-digib.ttf
├── index.html
├── main.js
└── styles.css
The style sheet has already the ds-digib font inserted. This font helps us to have a classic LCD screen, to achieve the styles of the classic chronometers.
We have also created the clock to let you focus on the JavaScript. If you open the index.html file, you will see something like this:
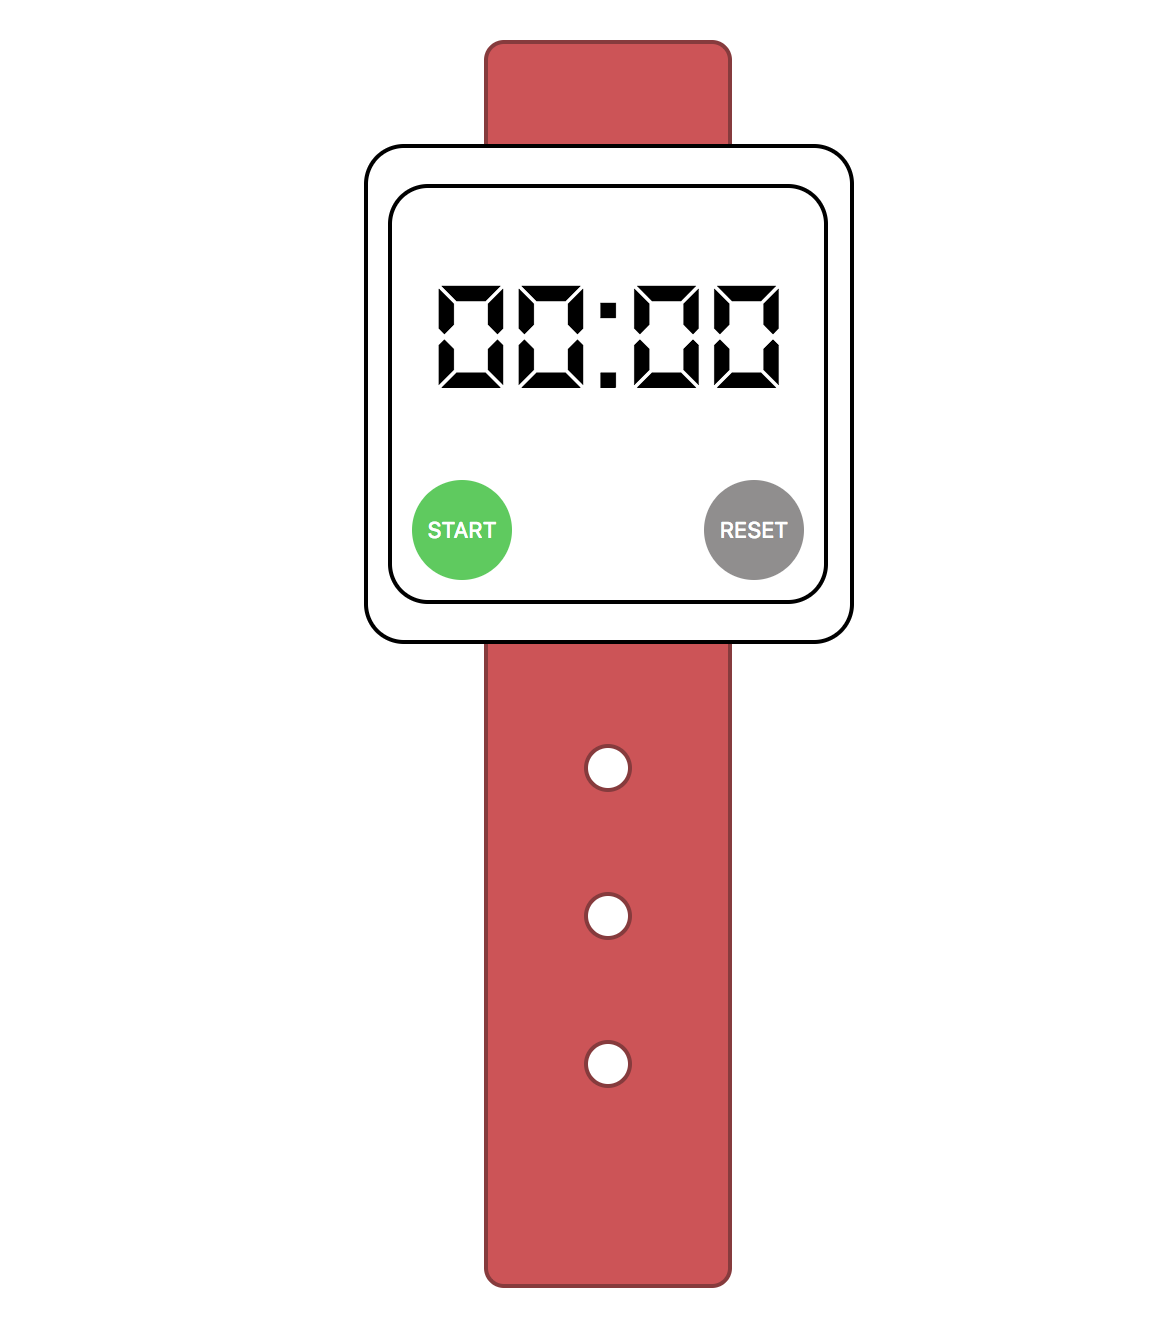
All the files that compose the project, including the HTML, CSS, and JavaScript.
Let's start working on our solution. As we have seen, we already have all the necessary HTML and CSS files of our clock.
As you can see, we have two different buttons: start and clear. These are the button values when the chronometer is not running. When the chronometer is running, the start button will change its behaviour to stop the chronometer, while the reset button will change to split.
First of all, we are going to create the visual interaction, and then we will continue with the behaviour of our chronometer.
As we said, we have two buttons that will have different behaviour depending on the chronometer. These buttons are btnLeft and btnRight in our HTML. We can see the different values they will have in the following table:
| Chronometer Status | Button ID | Text | CSS Clas |
|---|---|---|---|
| Stopped | btnLeft |
START | btn start |
| Stopped | btnRight |
RESET | btn reset |
| Running | btnLeft |
STOP | btn stop |
| Running | btnRight |
SPLIT | btn split |
Note that you don't have to create any CSS class. All of them are already defined in the starter-code style sheet.
In the main.js file you will find two click events that are already linked with both btnLeft and btnRight buttons. You have to create the necessary code to change the status between buttons.
It means that when we click in the btnLeft, if it has the start class you will have to change the btnLeft and btnRight buttons setting them up with the Running status described in the table above.
On the other hand, if the btnLeft doesn't have the start class when we click, we will have to change both btnLeft and btnRight properties setting them up with the Stopped status described in the table above.
Important
Our chronometer will have a bunch of functionalities that will be using its properties and values. You have to create a Chronometer object and add all the necessary methods through Prototypal Inheritance.
- Create a new
chronometer.jsfile (remember to include it into theindex.htmlfile) that will contain ourChronometerobject with the following methods:startClick, that will be triggered when the left button is clicked while the chronometer is stopped. In this iteration, this methods has to:- Set the
btnLeftbutton with the text STOP, and the classbtn stop. - Set the
btnRightbutton with the text SPLIT, and the classbtn split.
- Set the
stopClick, that will be triggered when the left button is clicked while the chronometer is running. In this iteration, this method has to:- Set the
btnLeftbutton with the text START, and the classbtn start. - Set the
btnRightbutton with the text RESET, and the classbtn reset.
- Set the
- In the
main.jsfile, create a new instance of theChronometerobject. - Create the necessary code in the
main.jsto call the ChronometerstartClickmethod if the button has thestartclass, or thestopClickmethod if the button has thestopclass applied.
The following step consits in create the chronometer timer. So we are going to need to create the functionality to start and stop the time. We will also need to create all the necessary code to show the progress on the clock screen.
We have already created the events that are triggered when we click on the start/stop button. In the same methods, we will need to add the chronometer start/stop behaviour.
How does a chronometer work? There are two different ways to create a chronometer:
- The first way is to get the current Date when you click on the start button, and each second calculate the difference between the initial time and the current time.
- The second way is to create a counter and each second increment this counter by one.
Whichever method you use, you will need a setInterval method that will be executed each second. In the callback function of the setInterval, you will need to update the time value in the clock screen.

- Create the necessary properties to store the current chronometer value, depending on the way you want to implement it.
- When the
startClickmethod is called, start counting:- Create a
setIntervalmethod to update the clock screen and the chronometer timer. - Save the
setIntervalid in a variable to be able to stop the interval.
- Create a
- When the
stopClickmethod is called, stop counting:- Call the
clearIntervalmethod with thesetIntervalid to stop the chronometer.
- Call the
Remember that all these functionalities should be in the Chronometer object :)
The following feature we will implement is the split button. Remember that the split button is located in the btnRight button when the chronometer is running. In this iteration we will have to create two different things: HTML & CSS, and the associated JavaScript.
First of all, we have to create in our index.html file an ordered list where we are going to append the current time every time we press the split button. Once you have added the ordered list, you can style it in the styles.css file.
Once we have created the ordered list in our HTML, we have to create the button functionality. Every time we click on the split button, we will have to create a new <li> element and append it to the ordered list. The text of this element will be the current time of the chronometer.
Remember that we are using the Chronometer object, so you will have to create a new method on it to be able to handle the split behaviour.
- Create an ordered list
<ol>in the HTML, and style it through thestyles.cssfile. - Create the code that will handle the split feature on the
btnRightbutton of our clock. The split will have to:- Capture the Chronometer time.
- Create a new
<li>element, setting as the text the current time. - Append this new
<li>element to the ordered list we created in the HTML.

To finish up with this lesson, we are going to create the clear feature. Remember we will execute this when the chronometer is stopped and the user clicks on the right button. The behaviour here is very simple: we have to clear all the data of the clock.
To do that, we will have to set the minutes and seconds to zero in our clock, and remove all the <li> elements that we could have in the list we created in the previous iteration. We will also have to clear the counter that we have in the Chronometer class that helps us to count how many time has been the chronometer running.
- Create the code that will handle the reset feature on the
btnRightbutton of our clock. This code will be executed when the chronometer is stopped. It will have to:- Clear the
Chronometerattribute that controls the time that it has been running. - Remove all the
<li>elements from the Split list. - Set up the clock time to 00:00.
- Clear the
Now, we can use our chronometer to calculate how many time we spend on each Ironhack exercise. What happens if we want to calculate our time in a race? We need to be more accurate with our chronometer. How can we be more accurate? By adding milliseconds!
If we want to add milliseconds to the chronometer, we will have to manipulate the HTML, the CSS, and the JavaScript. In the HTML we will have to a container to show the milliseconds, changing the style of this container. Finally, in the JavaScript we will have to add all the logic to show the milliseconds in clock. You will also have to add these milliseconds in the split counter.

- Add the necessary HTML to show the milliseconds in the clock.
- Add the necessary styles in the CSS to show the milliseconds as you like.
- Create the JavaScript logic to:
- Be able to count the milliseconds.
- Show the milliseconds going forward.
- Show the milliseconds when you capture an split time.
- Clear the milliseconds when the Reset button is clicked.
/Happy coding!


