A tiny library that contains helpers for creating and animating sprites using Decentraland's SDK.
This project includes:
createAtlas(): Generates a sprite based on frames from a texture atlas (meant for UIs)createSpriteSheet(): Generates frames from a sprite sheet (meant for animations)
-
Install the dependency on your scene's folder by running the following code:
npm i --save dcl-sprites -
In your scene's
.tsxfile, import the library:import { createSpriteSheet, createAtlas } from 'dcl-sprites' -
Define a basic material to be used by the sprites:
<basic-material
  id="material"
  texture="materials/spritesheet.png"
/>
Basic materials are not affected by light and allow you to change the texture sampling to render pixelart-like textures.
Texture atlas files contain a series of assorted images of varying sizes and positioning. This library allows you to select a specific rectangular area of the atlas file and apply it as a texture.
Call the createAtlas() function to define a custom entity class that uses textures from this atlas. The entity you define through this function will be based on the plane entity, but with an added frame property to specify which area of the texture to use.
const UIEntity = createAtlas({
 material: "#material",
 textureSize: { width: 512, height: 512 },
 frames: {
   myFrame: { x: 0, y: 0, width: 128, height: 128 }
 }
}
The createAtlas() function takes the following arguments:
material: A reference to a material entity. This material should use the texture atlas image file as its texture.textureSize: The dimensions (in pixels) of the texture atlas image file.frames: A comma-separated list of all the frames to extract from the atlas. Each frame must have a name, x & y coordinates, width and height.
Once the custom class is defined, you can add a new entity of this class to your scene. This entity must include a frame property to specify which frame to use out of the ones defined for the class.
   <UIEntity
    frame="myFrame"
    scale={0.15}
    position = {{x: 3, y: 1, z: 5}}
  />
Note: The custom class name must start with an upper case to be recognized by the SDK as a class.
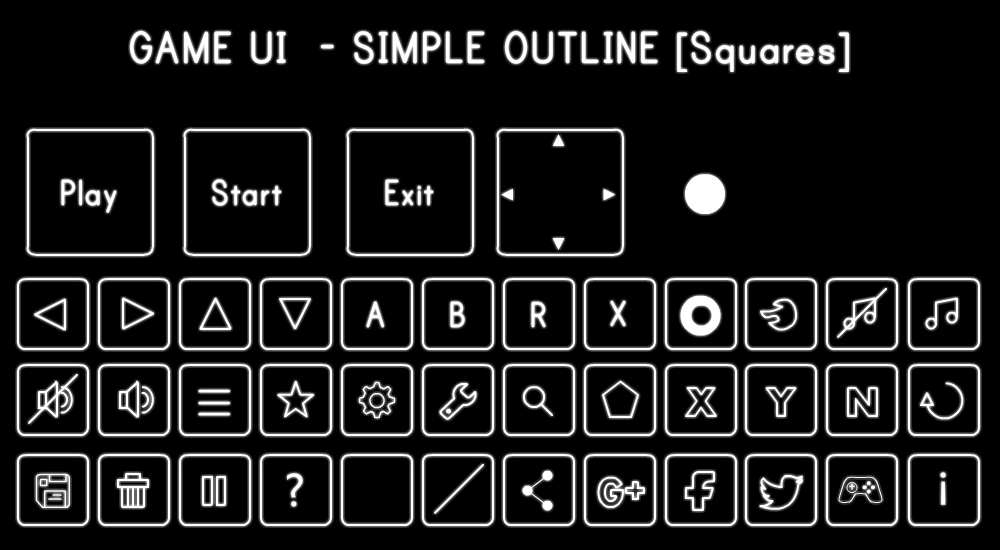
The following example uses a texture atlas to display several individual icons in a scene.
// import { createAtlas } from 'dcl-sprites'
// ...
async render() {
    const UIPlane = createAtlas({
      material: "#material",
      textureSize: { width: 512, height: 512 },
       frames: {
        play: { x: 26, y: 128, width: 128, height: 128},
        start: { x: 183, y: 128, width: 128, height: 128 },
        exit: { x: 346, y: 128, width: 128, height: 128 },
        expand:{ x: 496, y: 128, width: 128, height: 128 }
      }
    });

    return (
      <scene>
        <basic-material
          id="material"
          texture="materials/game_UI.png"
        />
        <entity position={{ x: 5, y: 1, z: 5 }}>
          <UIPlane
            frame="play"
            position={{ x: 0, y: 1, z: 1 }}
          />
          <UIPlane
            frame="start"
            position={{ x: 0, y: 1, z: 2 }}
          />
          <UIPlane
            frame="exit"
            position={{ x: 0, y: 1, z: 3 }}
          />
        </entity>
      </scene>
    );
}Sprite sheet files contain a series of images that are evenly sized and spaced, each of these is meant to be used as a frame in an animation. This library allows you to specify the size of the frames and automatically generates a series of uv mappings that apply each frame as a texture.

Call the createSpriteSheet() function to define a custom entity class that uses textures from this sprite sheet. The entity you define through this function will be based on the plane entity, but with an added frame property to specify which area of the texture to use.
 const Sprite = createSpriteSheet({
     material: "#explosion",
     textureSize: { width: 512, height: 512 },
     cellSize: { width: 171, height: 171 }
   })
The function takes the following arguments:
material: A reference to a material entity. This material should use the sprite sheet image file as its texture.textureSize: The dimensions (in pixels) of the sprite sheet image file.cellSize: The dimensions (in pixels) of each frame. All frames are assumed to be the same size and arranged with no paddings or margins.
Once the custom class is defined, you can add a new entity of this class to your scene. This entity must include a frame property to specify which frame to use. Frames will have names that are automatically generated based on the frame number, for example frame0 or frame15.
<Sprite
  frame="frame0"
  position={{ x: 2, y: 2, z: 3 }}
  scale={{ x: 1, y: 1, z: 1 }}
/>
Note: The custom class name must start with an upper case to be recognized by the SDK as a class.
The following example uses a sprite sheet to display frames from a sprite sheet.
// import { createSpriteSheet } from 'dcl-sprites'
// ...
async render() {
    const Sprite = createSpriteSheet({
      material: "#explosion",
      textureSize: { width: 512, height: 512 },
      cellSize: { width: 171, height: 171 }
    })
    return (
      <scene>
        <basic-material
          id="explosion"
          texture="materials/explosion_atlas_512x512.png"
        />
        <entity position={{ x: 5, y: 1, z: 5 }}>
          <Sprite
            frame="frame0"
            position={{ x: 0, y: 1, z:1 }}
          />
        </entity>
      </scene>
    );
}
The example below takes this a step forward and animates the sprite by determining what frame to use based on a variable on the scene state. It uses a setInterval() to change this variable at a regular interval.
import * as DCL from 'decentraland-api'
import { createSpriteSheet, createAtlas } from 'dcl-sprites'

export default class SampleScene extends DCL.ScriptableScene {
  state= {
    frame: 0
  }

 sceneDidMount(){
    setInterval(() => {
      let frameNum = (this.state.frame += 1) % 8
      this.setState({ frame: frameNum })
    }, 200)
 }

async render() {
    const Sprite = createSpriteSheet({
      material: "#explosion",
      textureSize: { width: 512, height: 512 },
      cellSize: { width: 171, height: 171 }
    })
    return (
      <scene>
        <basic-material
          id="explosion"
          texture="materials/explosion_atlas_512x512.png"
        />
        <entity position={{ x: 5, y: 1, z: 5 }}>
          <Sprite
            frame={"frame" + this.state.frame}
            position={{ x: 0, y: 1, z:1 }}
          />
        </entity>
      </scene>
    );
}
