稳定版请查看main分支
mirai-client4j是一个简易的基于mah(mirai-api-http)的mirai客户端开发框架,用于快速开发基于mirai的qq机器人。目前只支持http+webhook的方式实现事件处理功能,后续可能会逐步完善适配各种不同的模式。 如果你还不了解mirai生态,可以通过以下链接了解:
mirai-client4j需要mirai-api-http的http以及webhook适配器的支持,mah的配置示例:
# 必须要开启http以及webhook
adapters:
  - http
  - webhook
debug: false
enableVerify: true
# 填写你的verifyKey
verifyKey: 1234567890
singleMode: false
cacheSize: 4096
persistenceFactory: 'built-in'
## adapter 的单独配置,键名与 adapters 项配置相同
adapterSettings:
  ## 详情看 http adapter 使用说明 配置
  http:
    host: localhost
    port: 8080
    cors: ["*"]
    unreadQueueMaxSize: 100
  webhook:
    ## 回调(上报)地址,mirai-client4j已经配置好,无需、也不能变动(ip、端口号改为自己的)
    destinations:
- 'http://localhost:8081/messageListener'目前mirai-client4j暂时处于开发阶段,还没有发布版本,但是这并不妨碍您快速体验一下mirai-client4j的方便快捷。 由于没有发布版本,您首先得在maven的pom.xml中添加快照仓库:
<repositories>
    <repository>
        <id>nexus-snapshots</id>
        <url>https://s01.oss.sonatype.org/content/repositories/snapshots/</url>
    </repository>
</repositories> 随后通过以下片段在maven中引入mirai-client4j的springboot启动器:
<dependency>
    <groupId>io.github.hoshinojyunn</groupId>
    <artifactId>mirai-client4j-spring-boot-starter</artifactId>
    <version>1.0.0-SNAPSHOT</version>
</dependency> 在application配置文件中添加需要的配置,以下以yaml文件为示例:
mirai:
  config:
    # bot的qq
    qq: xxxxxxxx
    # mirai监听的url
    mirai-url: localhost:8080
    # mirai中配置的verifyKey
    verifyKey: 1234567890
    # 目前只支持http适配器
    api-adapter: "http"
spring:
  application:
    name: mirai-client4j
# 当前应用监听8081端口,注意不要与mirai端口发生冲突
server: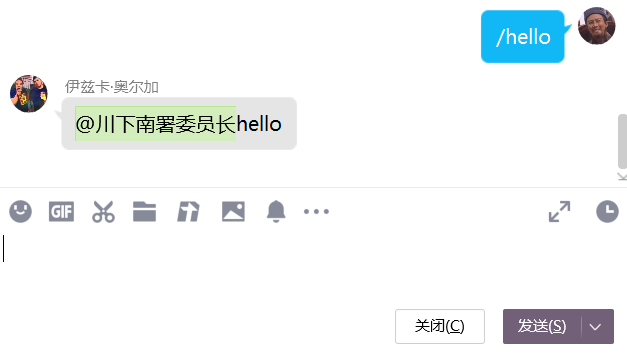
port: 8081 通过一个demo说明示例:
@CommandListener
public class DemoListener {
    // mirai-client4j会通过配置文件自动注入一个bot实例到spring容器
    @Resource
    public Bot bot;
    // 监听qq客户端发来的/hello指令,收到指令后bot返回一句"hello"并艾特发送者
    @OnCommand(command = "/hello")
    public void hello(MessageEvent event){
        bot.send(event, new MessageChain().appendLast(new Plain("hello")), true);
    }

} 结果展示: