Remote-controlled LEDs using Intel Edison and Node.js. iOS and Android clients are also available.
The demo uses the JavaScript MRAA API to interface with Edison's IO. See led-speech-edison for a Python example. The demo also uses Socket.IO (WebSockets) to control the LEDs remotely.
Take a look at this video to see it in action.
- Intel Edison
- SparkFun Base Block
- SparkFun GPIO Block (solder headers, either male or female, to use the pins)
- 4 LEDs (red, green, blue, yellow)
- 4 330Ω resistors
- 4 1kΩ resistors
- 4 NPN transistors
- Plenty of jumper wires
If you haven't already, follow the Getting Started instructions from Intel, then return to these instructions.
Add AlexT's unofficial opkg repository. It contains many precompiled packages that can be installed by simply typing opkg install <package name>.
To configure the repository, add the following lines to /etc/opkg/base-feeds.conf:
src/gz all http://repo.opkg.net/edison/repo/all
src/gz edison http://repo.opkg.net/edison/repo/edison
src/gz core2-32 http://repo.opkg.net/edison/repo/core2-32
Update the package manager and install the first package we need:
opkg update
opkg install git
With git installed, we can now clone this repository onto Edison.
Note: Newer versions of the Edison firmware may already have MRAA installed, so this step may be unnecessary.
edison-scripts provides a set of scripts for simplifying some things on Edison. Although only one script is needed for this demo, it may be useful for future projects. To use it, do the following:
git clone https://github.com/drejkim/edison-scripts.git ~/edison-scripts

# Add ~/edison-scripts to PATH
echo 'export PATH=$PATH:~/edison-scripts' >> ~/.profile
source ~/.profile
Then, run the following:
# Install MRAA, the low level skeleton library for IO communication on Galileo, Edison, and other platforms
installMraa.sh- Navigate to
server. - Install the Node.js packages by typing
npm install.
SparkFun recommends using transistors to fully (and safely) light LEDs. To learn more about using transistors as switches, see this tutorial.
Note: You can use the Edison Mini or Arduino Breakout boards. However, the pin mappings will differ. For more details, see this tutorial from SparkFun.
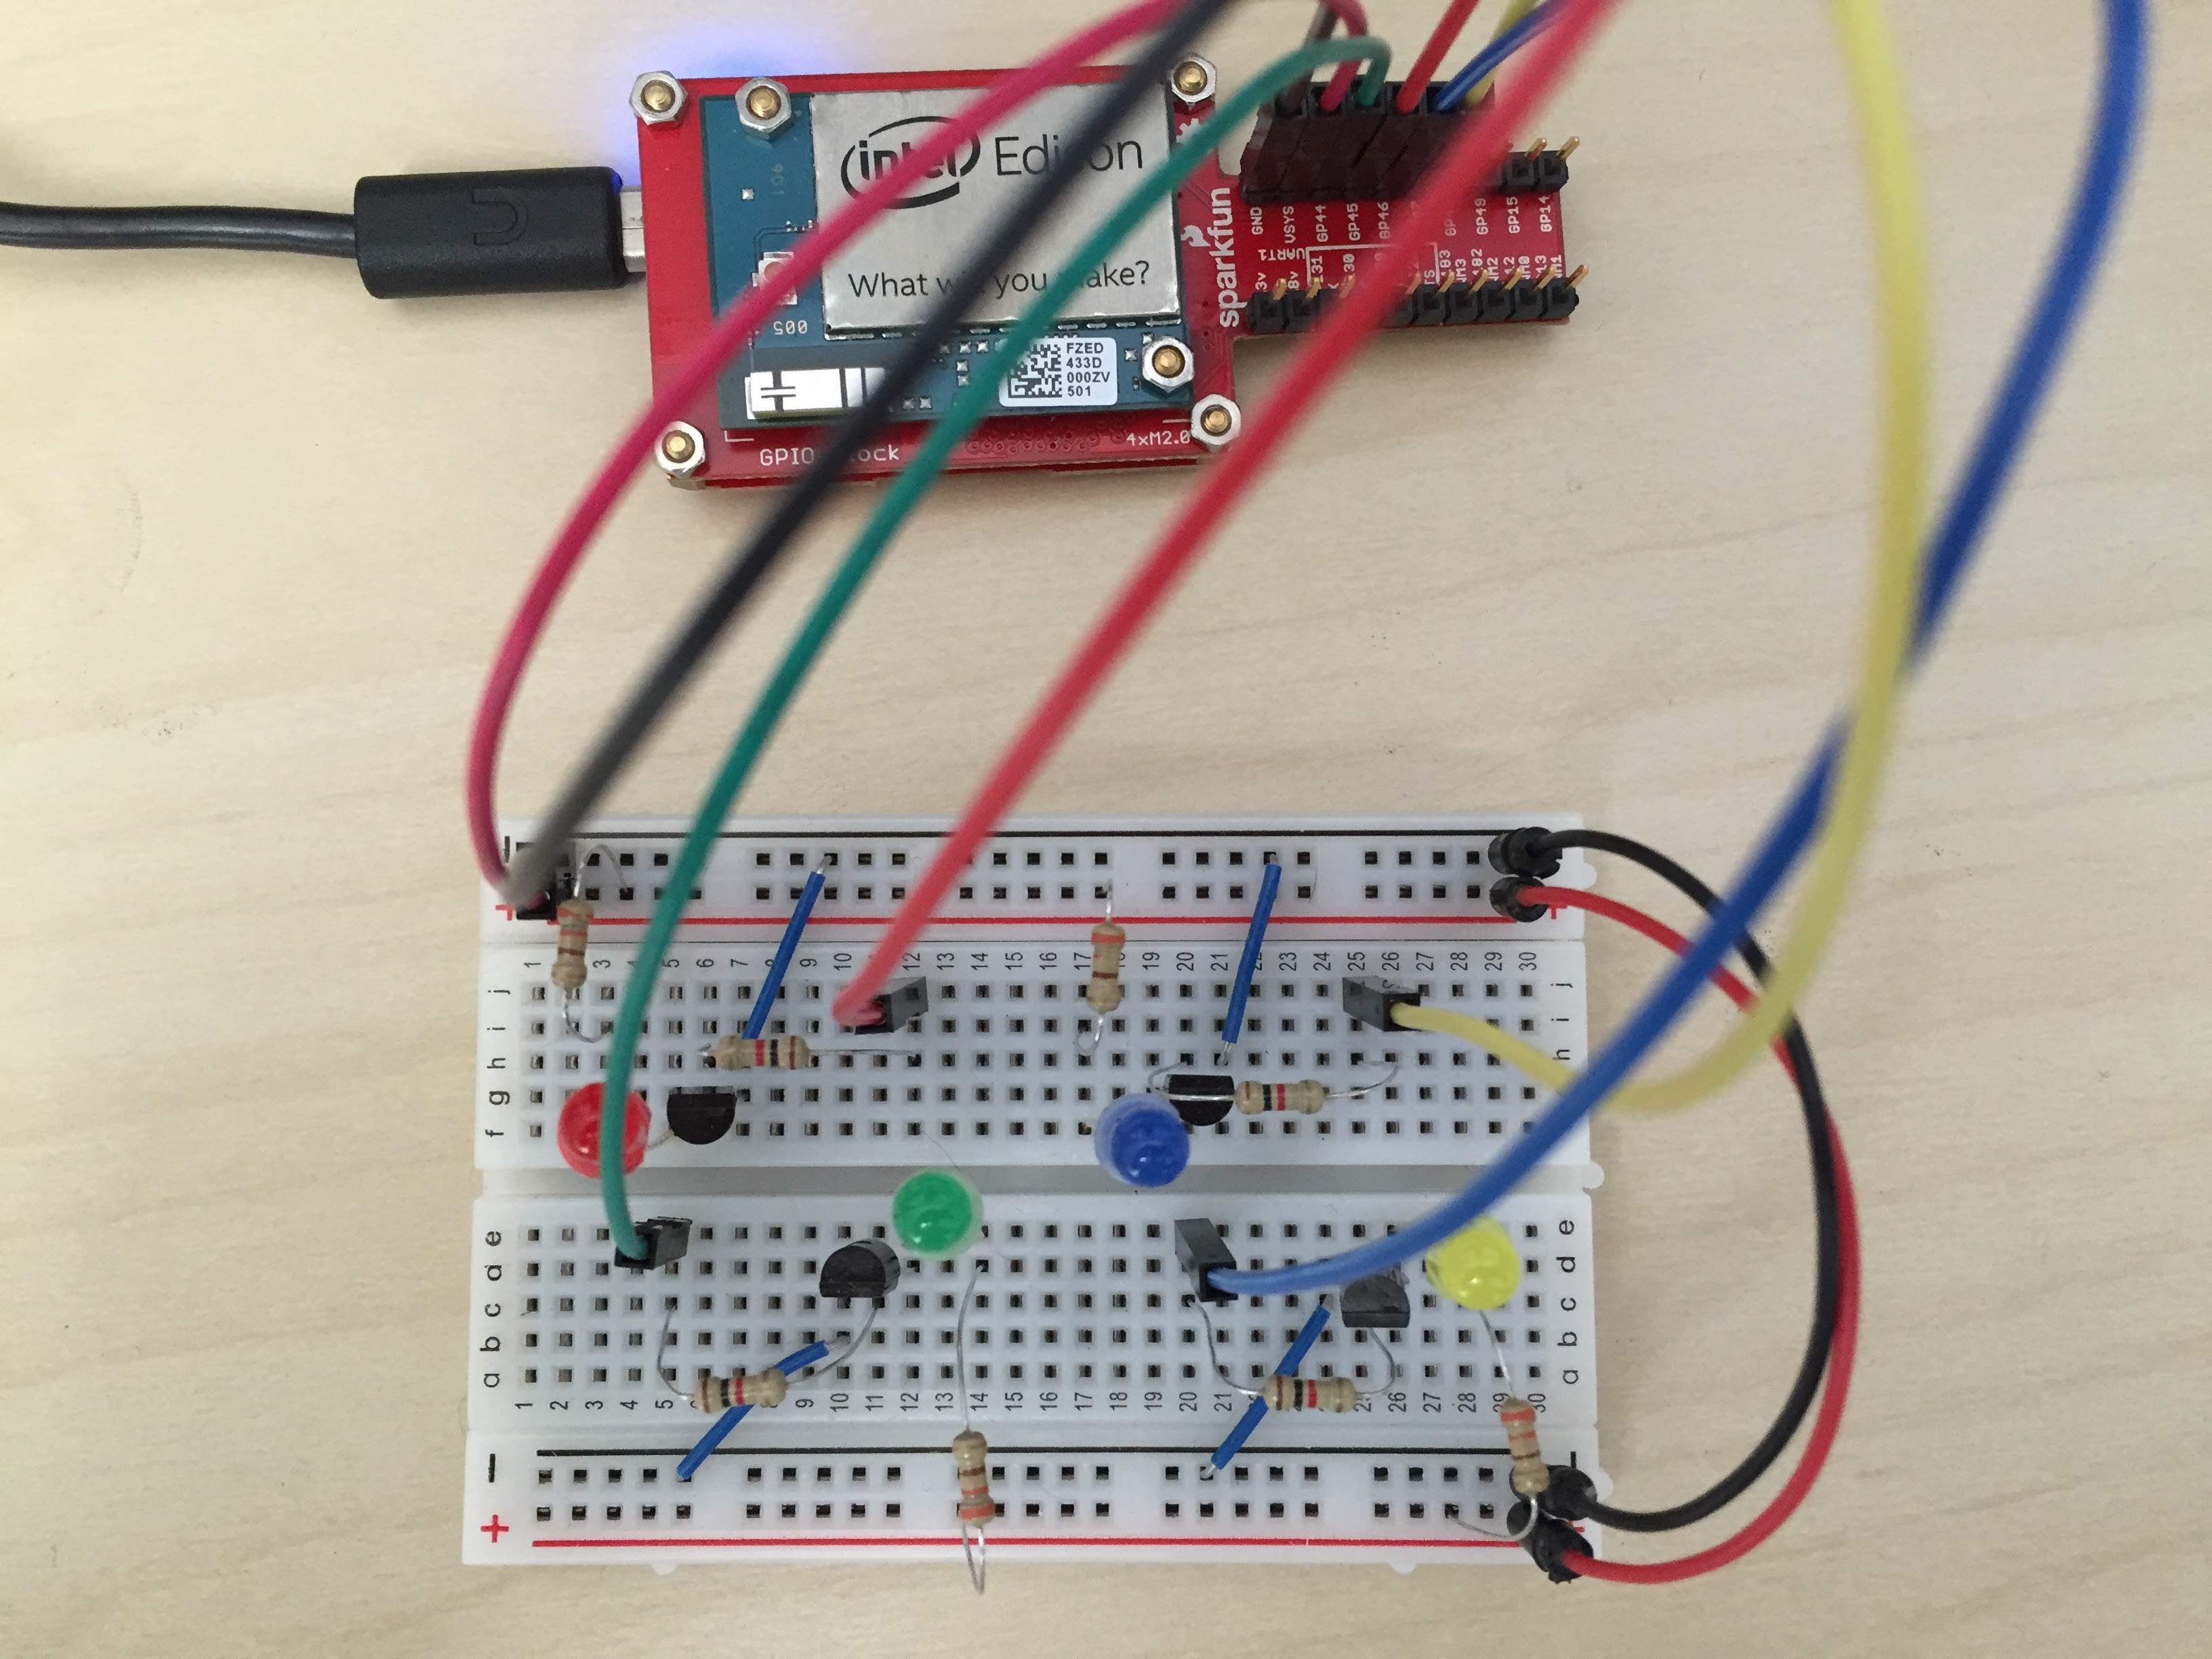
Shut down Edison and unplug it from power. Connect the LEDs to the GPIO block as shown:
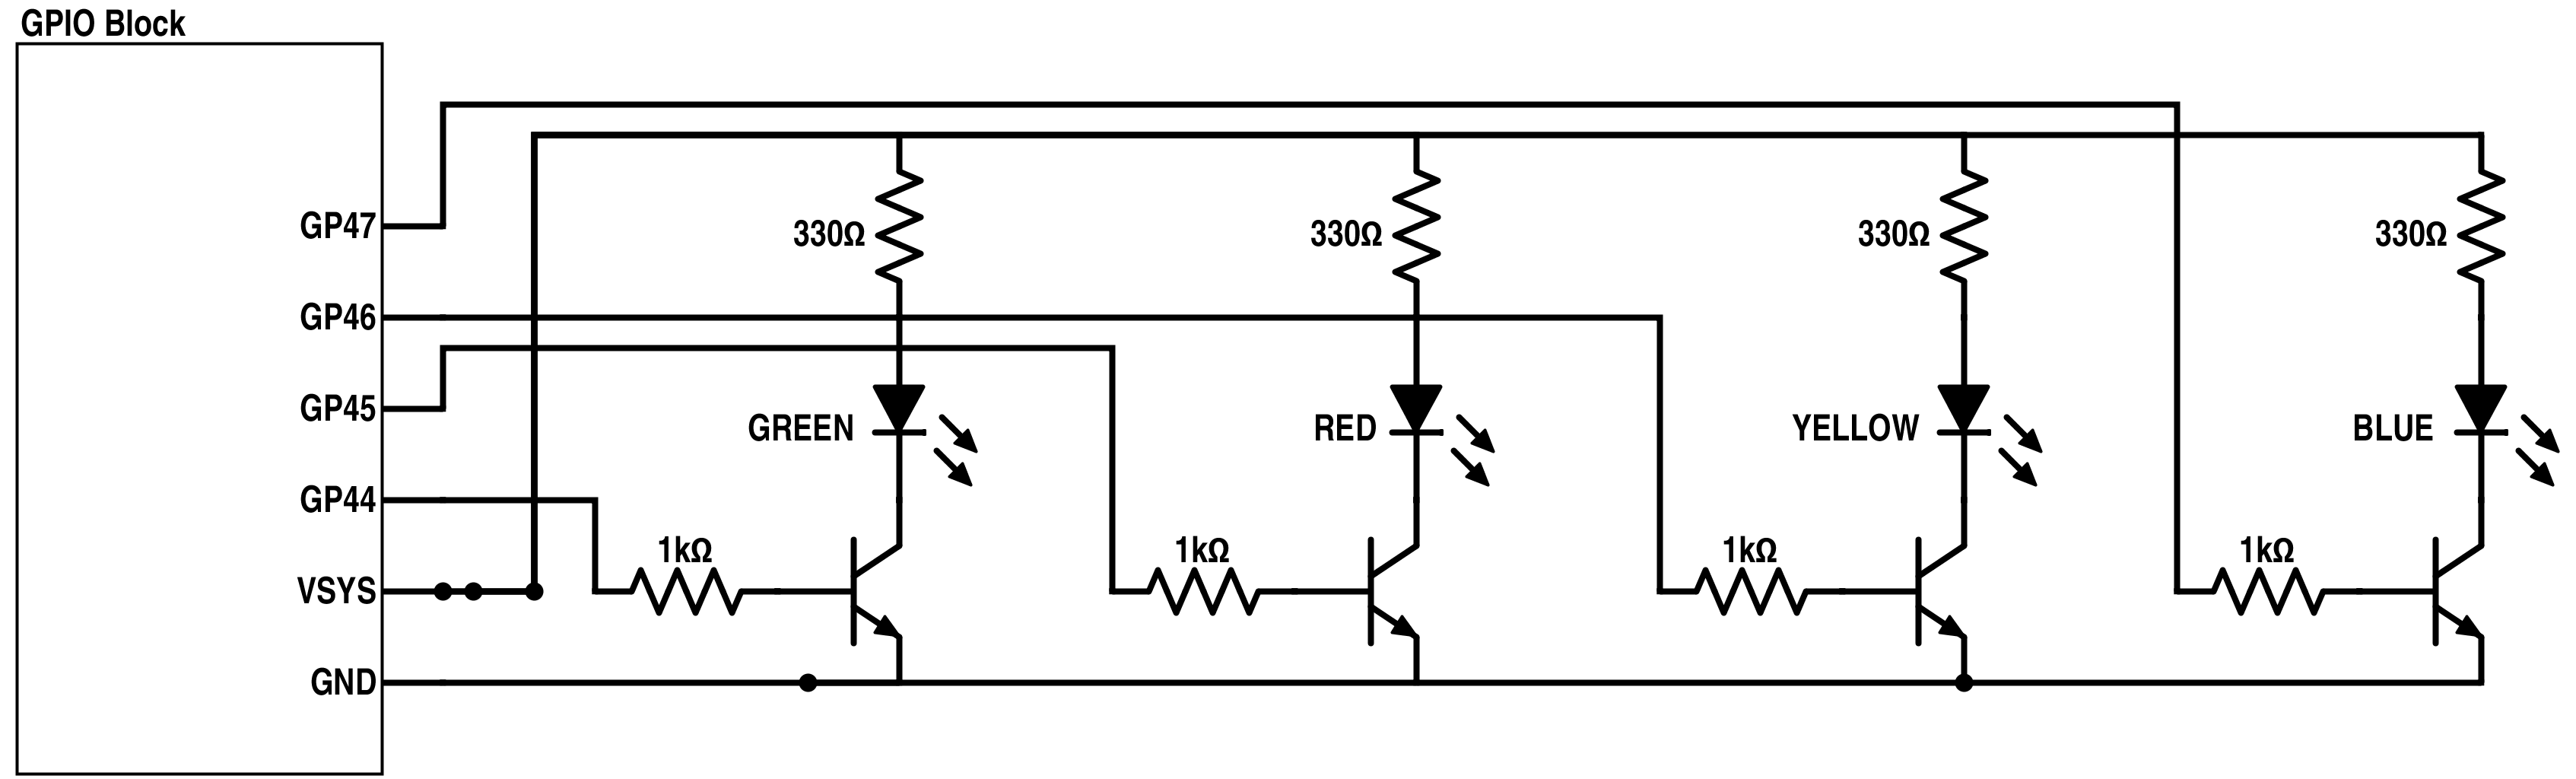
Important: The direction of the LEDs and the transistors matter! For the LEDs, the anode (longer leg) connects to a 330Ω resistor, while the cathode (shorter leg) connects to the collector of the transistor. When the flat edge of a transistor is facing you, the order of the pins from left to right are as follows: emitter, base, and collector.
To see if the LEDs are configured correctly:
- Navigate to
server. - Run the blink code by typing
node blink.js.
The LEDs should blink on and off simultaneously.
Modify socket in web/app.js. The section of the code looks like this:
// MODIFY THIS WITH THE APPROPRIATE URL
var socket = io.connect('http://myedison.local:8080');
Replace myedison with the name of your Edison.
- Navigate to
server. - Run the server by typing
node server.js.
The Node.js server should now be running. The console will look something like this:
HTTP server listening on port 8080Open a browser window and navigate to http://myedison.local:8080, where myedison is the name of your Edison. You should now be able to control the LEDs from the browser! If you are unable to access the page, make sure your PC is on the same WiFi network as your Edison.
See LediMoteiOS.
See LediMoteAndroid.


