A coder's Journey is a web application which serves as a database & online community of people interested in the particulars related to software development, entreprenuership, and learning. The site aims to be a living document of user and admin expertise, as it relates to the ins-and-outs of software engineering.
The site is constructed as a user-friendly blog/newssite where users can view, comment on, create and like blog posts. General users are able to exercise CRUD functionality, as it pertains to their individual profile, with the abilities to read, update and delete their own profile.
Admin users are able to manage all CRUD functionalities within the site, as well as search post information by username, date create and slug information. The overall structure and asthetic of A Coder's Journey is modeled on the I Think Therefore I Blog Code Institute Walkthrough.
- A Coder's Journey - A Journey Into Software Development
- Index - Table of Contents
- User Experience (UX)
- Features
- Existing Features
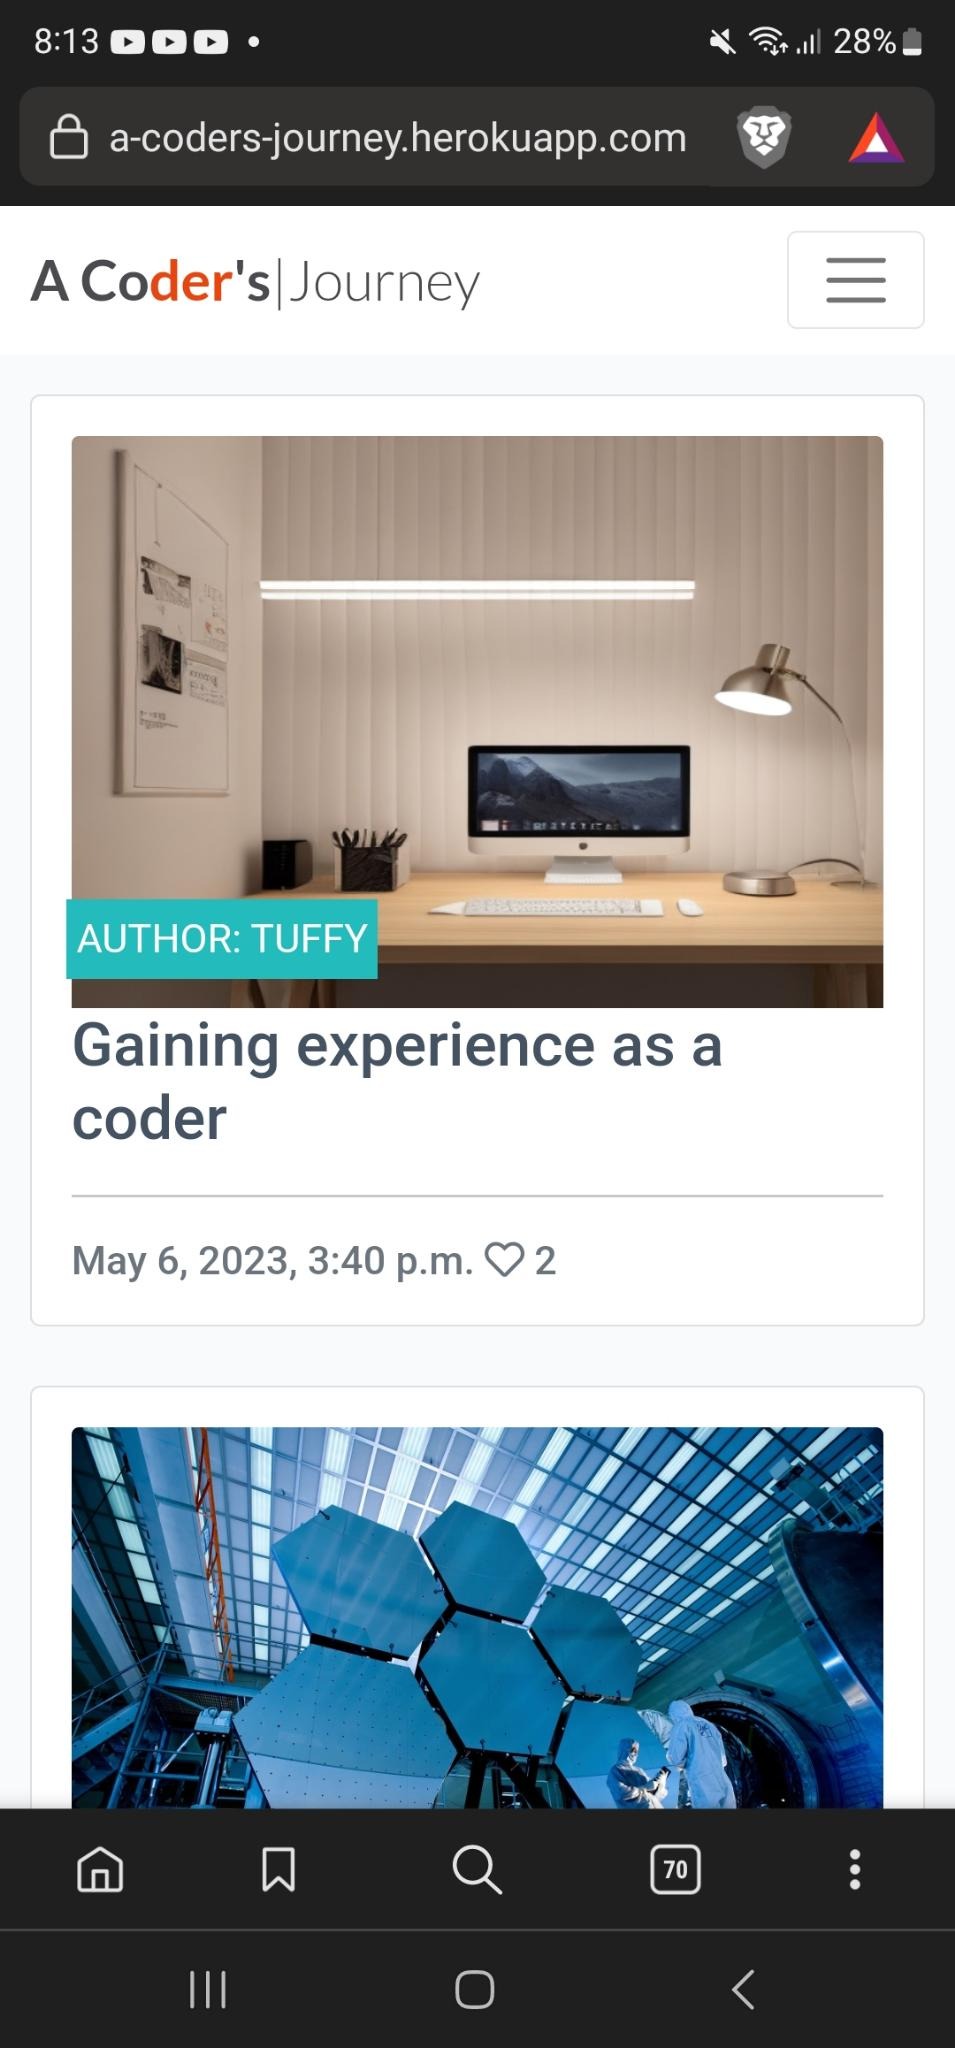
- Fig 01-A Desktop example
- Fig 01-B Mobile example
- Fig 02-A-User Icon upon authentication (signup) to site
- Fig 03-A-Site Home Page
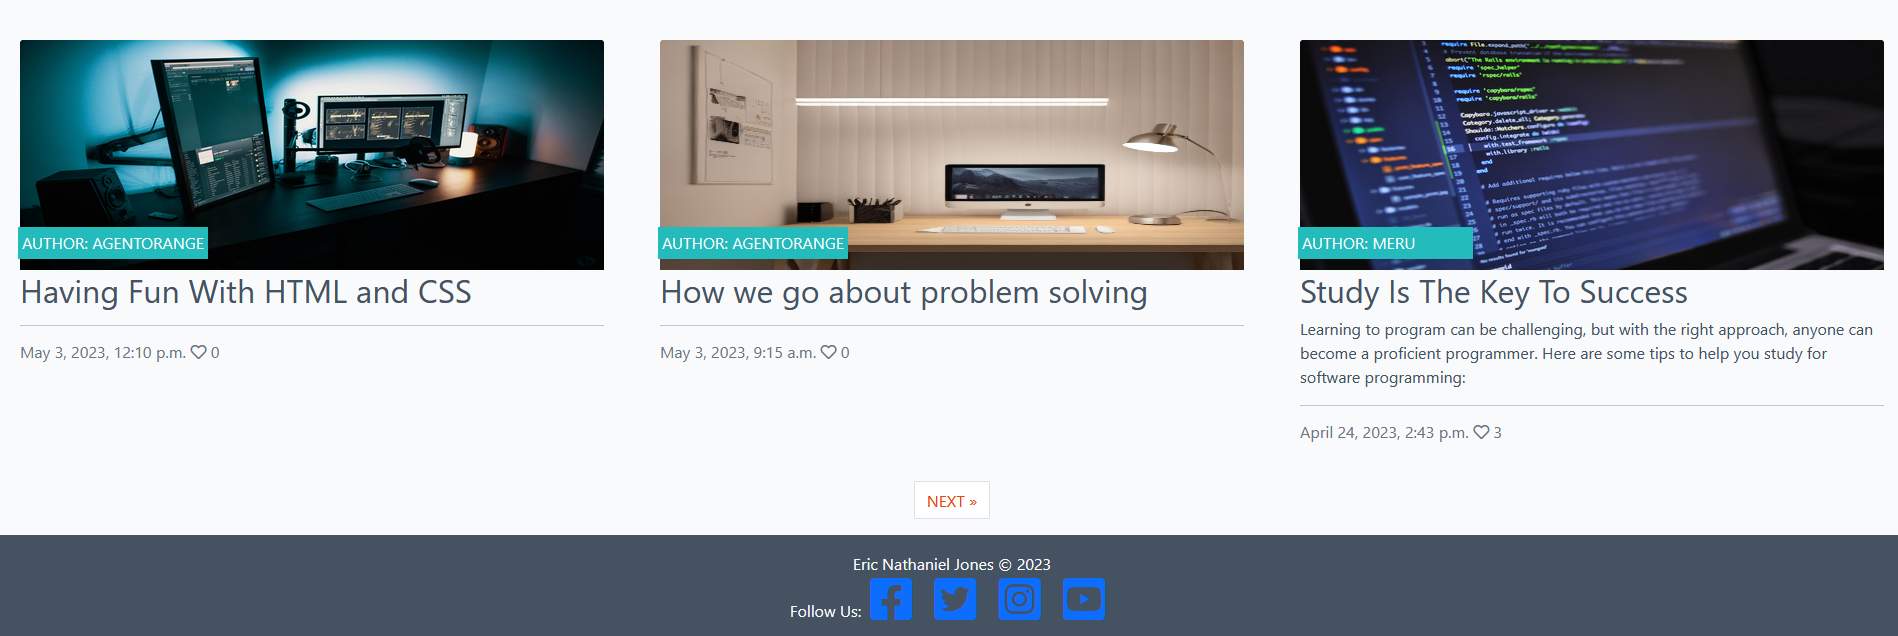
- Fig 04-A-List of Blog Posts
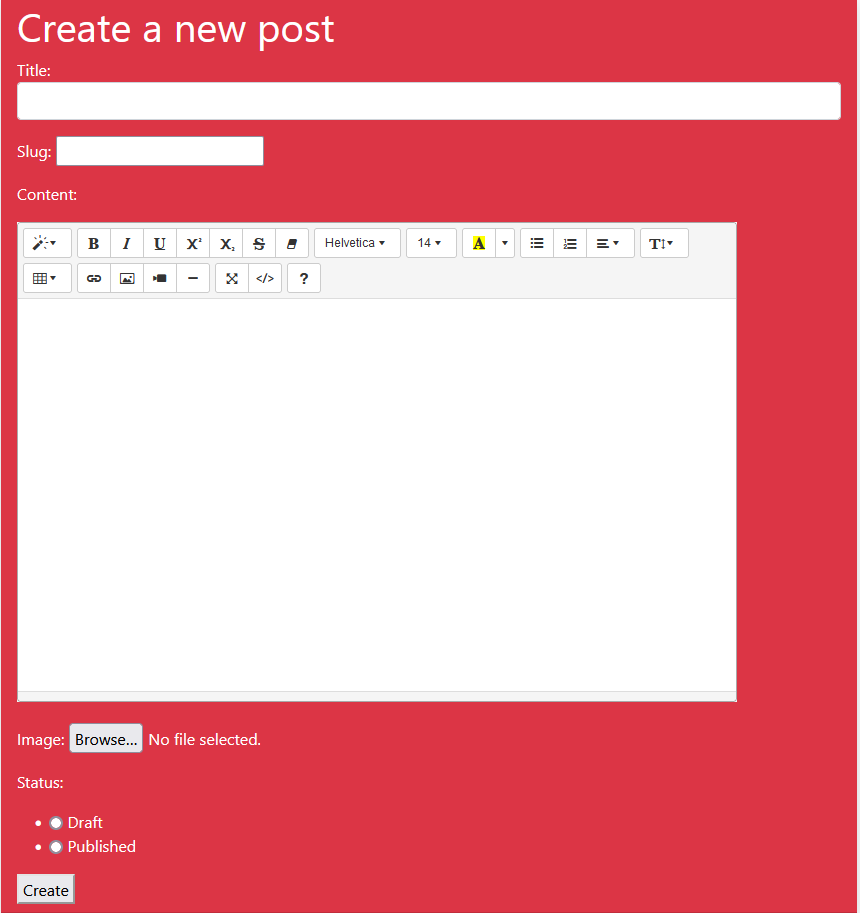
- Fig 05-A-Create Post View
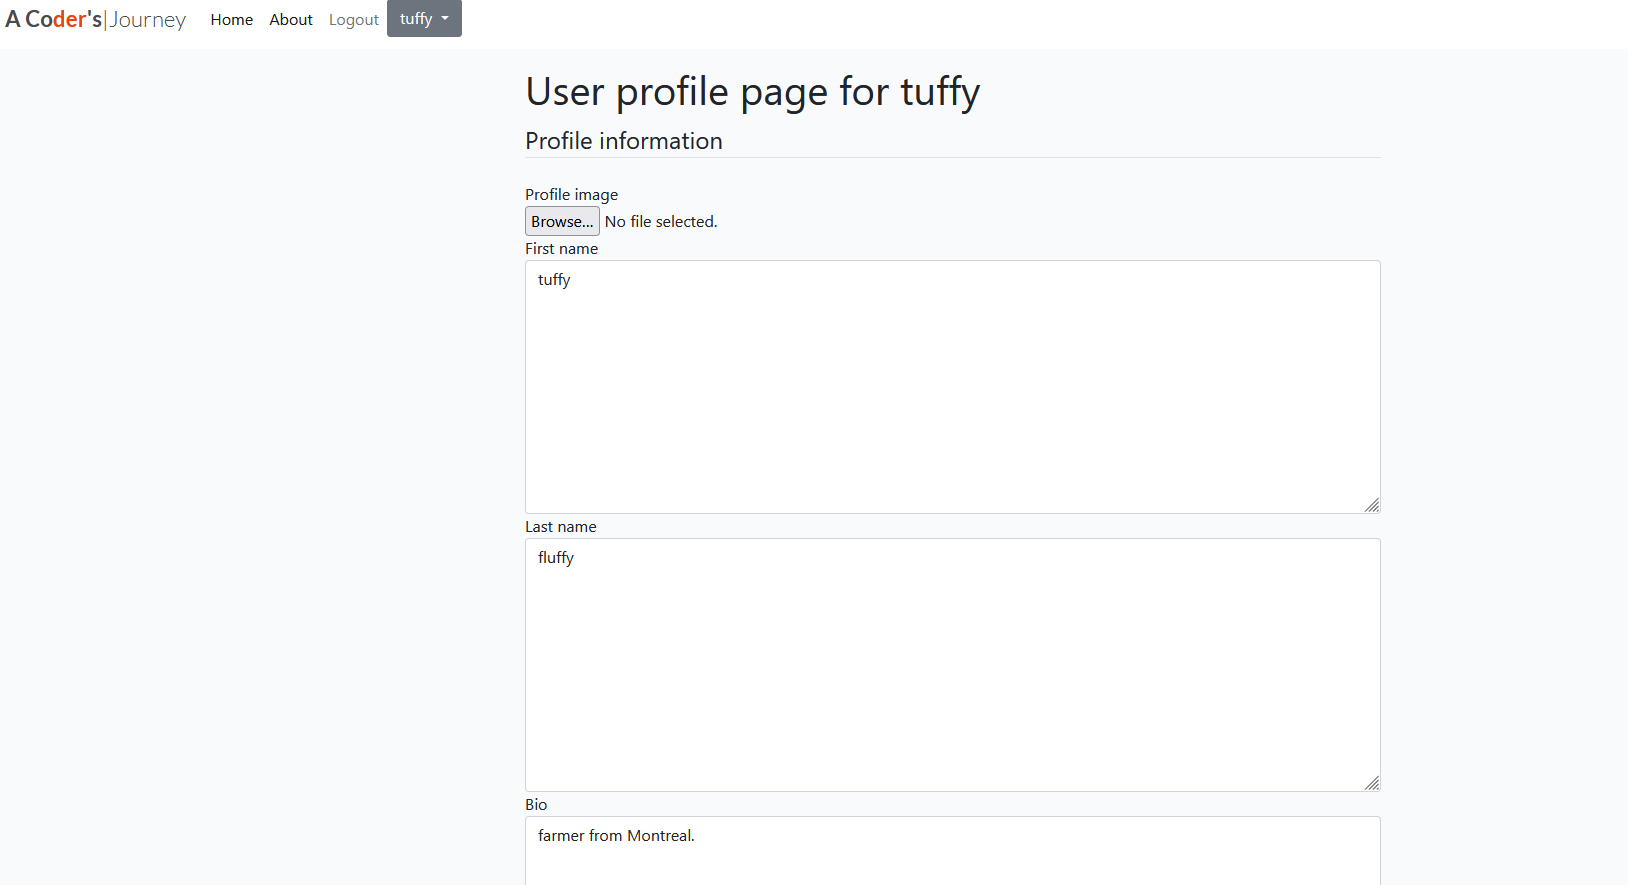
- Fig 06-A-Create Profile View
- Fig 07-A-Edit Profile
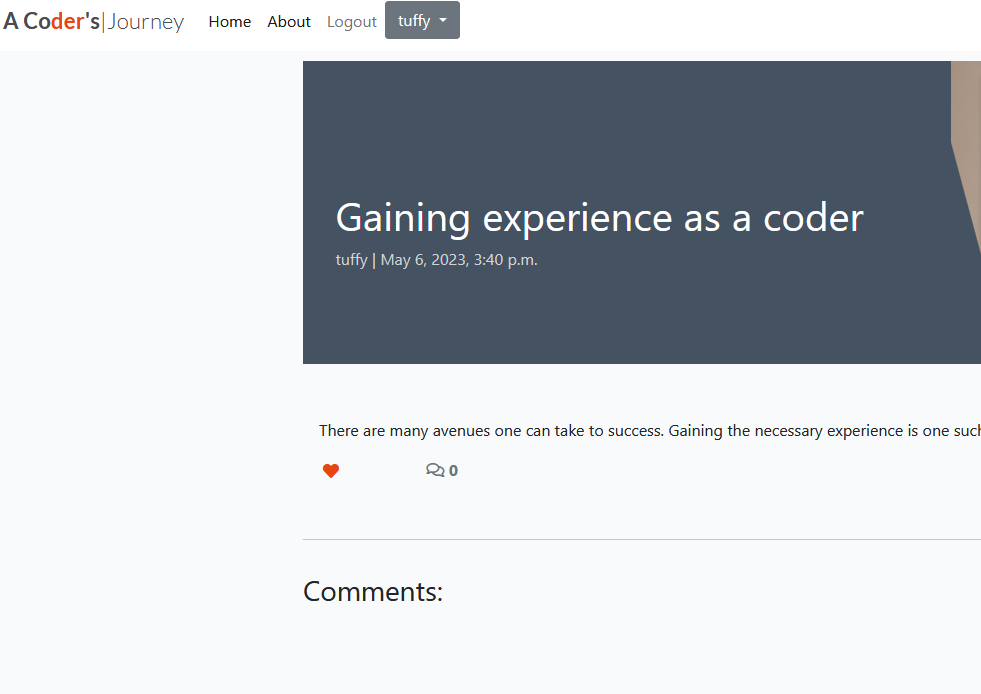
- Fig 08-A-Comments and Likes.
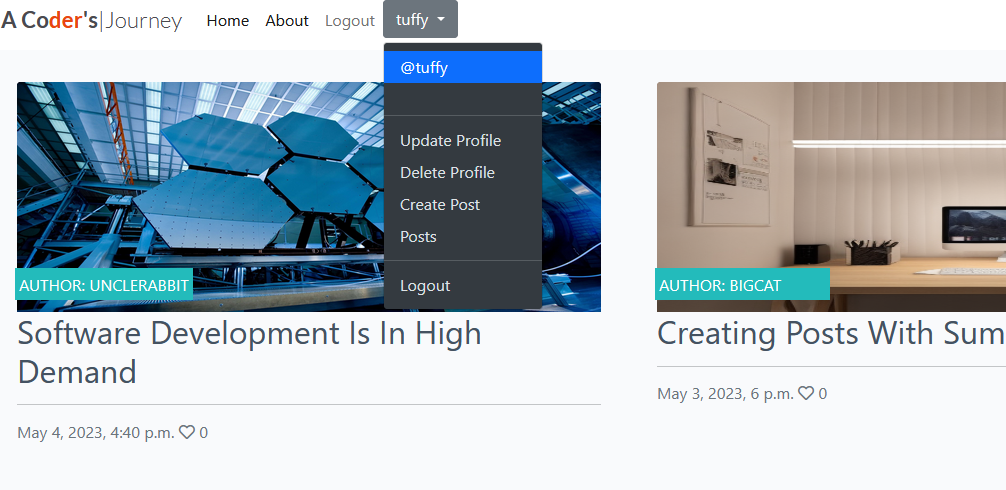
- Fig 09-A-Options for Authenticated Users.
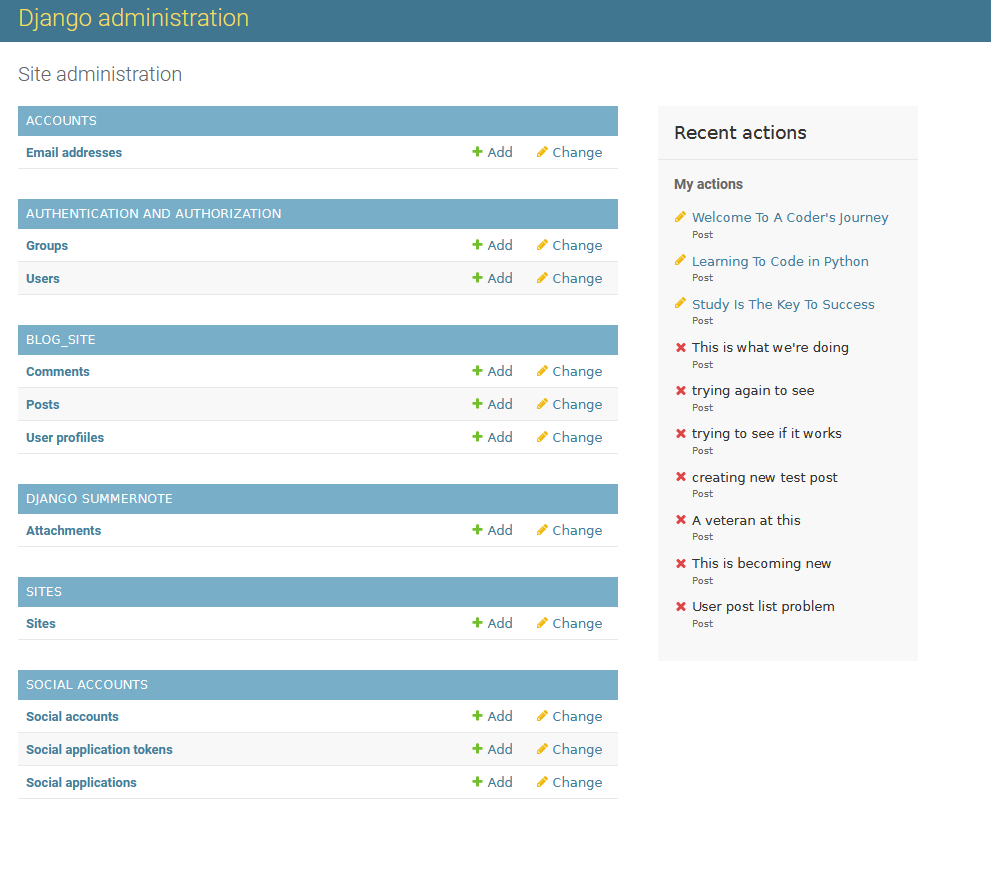
- Fig 10-A-Site Administration Page
- Fig 11-A-About Us Page
- Fig 12-A-Footer
- Design
- Planning
- Technologies Used
- Frameworks, Libraries & Programs Used
- Testing
- Manual Testing Test Cases and Results
- Known Bugs
- Deployment
- Credits
- Media
- Acknowledgments
- Index - Table of Contents
Table of contents generated with markdown-toc
-
EPIC 01: Registration and Account Management
User Stories:
- US101: Account Registration
- As a Site User I can register an account so that I can be able to log in and manage my account settings
- US102: Login and Logout
- As As a Site user / Admin I can Log in to the site so that I can gain access to my profile and functionalities
- US103: Profile Page Creation
- As a Site User I can create my own user profile page so that I can create a short description/bio to showcase to other Site Users
- US104: Update User Profile
- As a Site user I can update my profile information so that my information is current and applicable
- US105: Delete User Profile
- As a Site user I can delete a user profile so that the user profile is removed from the database
- US101: Account Registration
-
EPIC 02: Viewing and Navigation
User Stories:
- US201: Site Navigations - As a Site User I can understand site navigation so that I can easily navigate the site
-
EPIC 03: Posts and Comments
User Stories:
- US301: View Posts
- As a Site User I can click on a post so that I can read the full text
- US302: Comment On a Post
- As a Site User I can leave comments on a post so that I can be involved in the conversation
- US303: Like / Unlike a Post
- As a Site User I can like or unlike a post so that I can interact with the content
- US304: Create Drafts
- As a Site User & Site Admin I can create draft posts so that I can finish writing the content later
- US305: Like / View Post Likes
- As a Site User / Admin I can view the number of likes on each post so that I can see which is the most popular or viral
- US301: View Posts
-
EPIC 04: Admin and Management
User Stories:
- US401: Approve Comments
- As a Site Admin I can approve or disapprove comments so that I can filter out objectionable comments
- US402: Manage Posts
- As a Site Admin I can create, read, update and delete posts so that I can manage the blog content
- US403: Manage Users
- As a Site Admin I can have full CRUD capability on Users so that manage users on the site
- US401: Approve Comments
The following is a breakdown of the primary features of the application. Based on the 'I Think Therefore I Blog' walkthrough project model, this blog site features capabilites that are standard for most blog sites.
Any standard feature that is not outlined here, will be included in the 'future build features' section of this document.
-
UX Related Features
-
Fo1 - Consistency among site conten
Consistency is a key aspect of the website's design, and it extends to the page layout, navigation bar, header, footer, color scheme, and typography. This cohesive approach ensures that the user has a seamless and intuitive experience regardless of which page they're on. Additionally, the navigation bar is responsive to different screen sizes and can be collapsed into a 'burger' menu on smaller screens, further enhancing the user experience.
-
-
- Fo2 - Authenticated user indicator
The user can affirm when they are authenticated (logged in) after successful sign up to the site, to which they are taken to the hompage and can view, within the navbar at the top, a greyed button with their username within it.
-
- Fo3 - Home Page
The application homepage contains a collagae of blog post with stylized post images. The site layout gives an introductory view, illustrating to the user what the overall them of the site relates to.
-
- Fo4 - View Posts
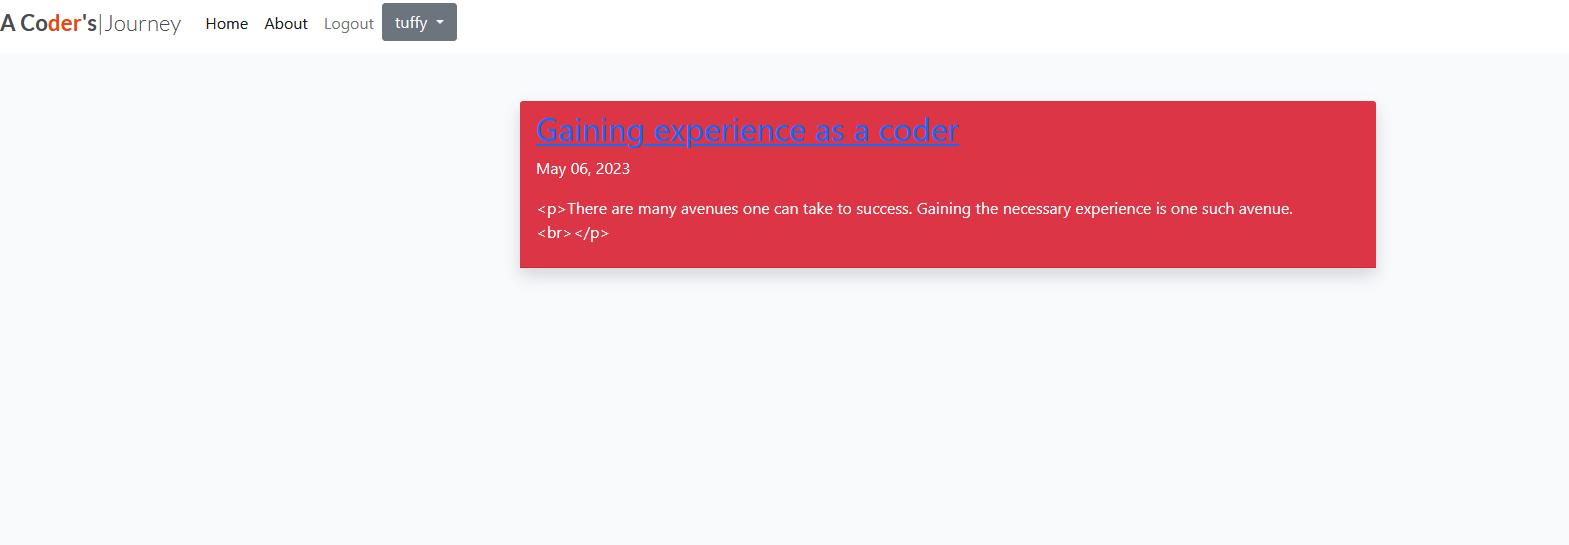
Users are able to view blog posts on main site and, using 'next' feature link at the bottom of the page, they are able to view historical posts. When users create their own post, they are taken to a post list page that shows a history of their post. If no post have been created, then a banner is displayed to the user indicating that no post have yet been created.
-
- Fo5 - Create Post
Users are able to click, within the top navbar profile button, the dropdown and select to create a post. They are then taken to the create blog post view, where they are able to format their post via the summernote WSYIWYG editor. Upon click of the 'create' button, located underneath the post text box area, they are taking to their individual post list page, which lists their historical posts.
-
- Fo6 - Profile View
From the authenticated user view, a user can click on the '@' portion of their profile button and be taken to their respective profile page. When using the profile navbar to click the 'edit profile' choice, they are taken to their individual edit profile page, where they are able to edit and save their information.
-
- Fo7 - Edit Profile
From the authenticated user view, a user can click on the '@' portion of their profile button and be taken to their respective profile page. When using the profile navbar to click the 'edit profile' choice, they are taken to their individual edit profile page, where they are able to edit and save their information.
-
- Fo8 - Comments and Post Likes
Users are able to toggle the heart-shaped like icon, to like or unlike a post. Users can also submit comments, for review, approval or disproval of the site admin.
-
- Fo9 - Role Based Interactions
Certain functionality is only possible from authenticated users. Likeing a post, commenting, editing profile and creating a post are reserved for authenticated users only.
-
- F10 - Site Administration
The admin dashboard is only available to the superuser. With this dashboard an Admin is able to manage users, posts and site structure.
-
- F11 - About Us
The about us page gives the user a welcome message, detailing to the user what the site is about. It also offers a registration link for those who may be interested in joining the site.
-
- F12 - Footer
The footer section gives the user access to join the site owners on various social media platforms, such as Facebook, Twitter, Instagram and Youtube.
-
How these features support the user stories
In the User Experience (UX) section of this readme there are 17 user stories split between 4 Epics. An additional user story (18 - Social Login) is not included within this.
-
Features which could be impletemented in the future
-
User functionality
-
Allow the users the ability to delete thier own post
Having the ability to delete one's own post and/or information is integral to great user experience. This would improve site usability.
-
Post, category and user search function
With the ability to properly search the site, it would create an easier navigation, thus increasing viewership.
-
Social Login
The ability to log on using popular social media accounts provides an ease of access and fosters a bigger online community and patronage.
-
Change Password
Changing a password is sometimes necessary to increase personal, as well as site security.
-
Site Chat
Have an online social chat space can increase the likelyhood of information sharing between prospective software engineers and is a sought after function on a great deal of blogs.
-
-
-
I think Therefore I blog
This site design and layout used the Code Institute walkthrough and, as such, didn't require a wireframe. Although wireframes are useful for prototyping new websites, the backend functionality took precedent, due to time constraints.
-
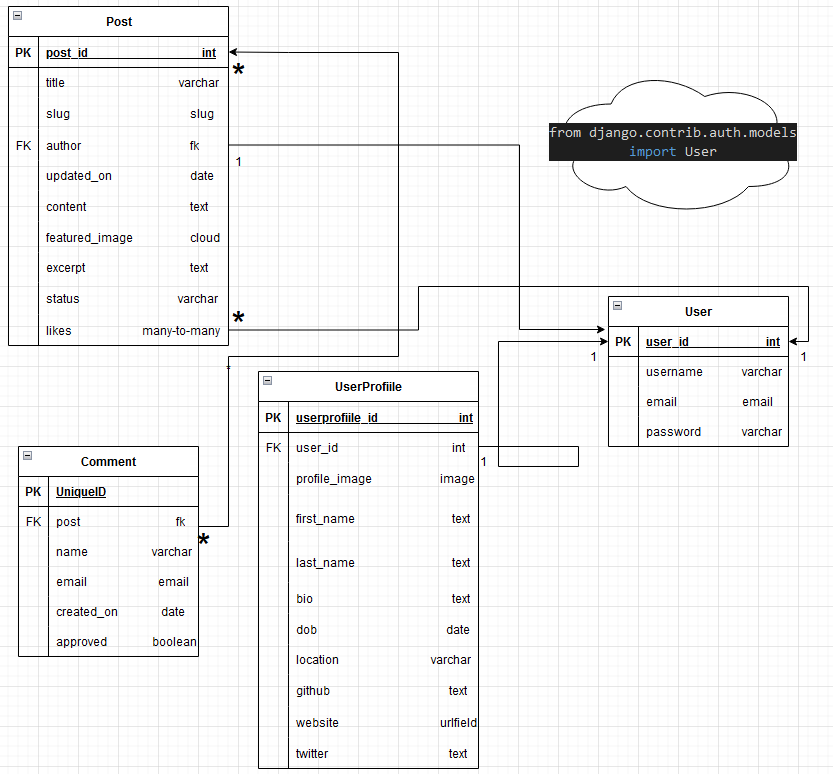
Entity-Relationship Diagram for DBMS
-
Notes on the ER diagram:
The ER diagram (ERD) provided shows the logical data model. The many-to-many relations between Comment and Post is identified by an asterisk to clarify the relationship. The foreign key relationship between Post and User is identified as a 1-to-1 relationship, with User being the imported Django User model, used throughout the site.
The UserProfiile (misspelling intentional) is the custom model created to handle the backened server side of the User object, as it is serviced for things such as profile creation, reading, updating and deletion.
The Comment and Like models rely heavily on the 'I Think Therefore I Blog' walkthrough. The PostForm Model (not pictured here) is implemented with an import from Summernote software to service the PostForm functionality.
-
Using GitHub Project as the Agile to for this web app, User Stories with acceptance criteria were defined using GitHub Issues. The Kanban board was used as a control mechanism for the different stages of the product iterations. The acceptance criteria were tested as each story moved to the 'Done' section of the Kanban.
The Epic, User Stories and Kanban board can be accessed here: A Coder's Journey Agile Tool
- Google Fonts: used for consistent site wide standard fonts.
- Font Awesome: was used to add icons for aesthetic and UX purposes.
- Git: was used for version control by utilising the Gitpod terminal to commit to Git and Push to GitHub.
- GitHub: is used as the respository for the project code after being pushed from Git. In addition, for this project GitHub was used for the agile development aspect through the use of User Stories (GitHub Issues) and tracking them on a Kanban board.
- Django: was used as the framework to support rapid and secure development of the application.
- Bootstrap: was used to build responsive web pages
- Django allauth used for account registration and authentication (version 0.41.0 installed because of project dependencies).
- Pillow: Python Imaging Library used for image handling.
- Django crispy forms: used to simplify form rendering.
- Summernote: used to provide WYSIWYG editing on the Artist Bio editing screen.
- Gunicorn: was used as the Web Server to run Django on Heroku.
- dj_database_url: library used to allow database urls to connect to the postgres db.
- psycopg2: database adapter used to support the connection to the postgres db.
- Heroku: used to host the deployed application.
-
-
As this project uses Django templates, the html has been validated by manually through the application pages, copying the source of the rendered pages and then validating this version of the html using the W3C validator (link shown above).
-
Validation Results:
-
-
CSS Validator
- Validation Results
-
Python Validation was performed using the command: python3 -m flake8. No serious errors were reported.
- Python Validation Results
- The link below details the test cases that were used, the results, and a cross-reference to the Feature ID that each test case exercised (click link to open pdf). The test cases are primarily based on the User Story acceptance criteria that were used to test iterations of the code during development.
- X_FRAME_SETTINGS known to cause errors with how Summernot displays
- The user post widget doesn't properly display the WYSIWYG editor
- amiresponsive website does not display live site due to cookie settings in settings.py
Detailed below are instructions on how to clone this project repository and the steps to configure and deploy the application.
- How to Clone the Repository
- Create Application and Postgres DB on Heroku
- Connect the Heroku app to the GitHub repository
-
Steps for deployment:
How to clone a repository
-
Clone portfolio-four-project repo to CodeAnywhere(CA) via opening an account on code anywhere, clicking 'new workspace' within the CodeAnywhere menu, copying the GitHub repository URL and pasting it into the CA text box for 'Create from your project repository'.
- Click the 'Create' button at the bottom of the screen and await completion of the new workspace.
- To install the packages required by the application use the command:
pip install -r requirements.txt - When developing and running the application locally set
DEBUG=Truein thesettings.pyfile - Changes made to the local clone can be pushed back to the repository using the following commands:
git add filenames(or "." to add all changed files)git commit -m "text message describing changes"git push
-
Any changes pushed to the master branch will take effect on the live project once the application is re-deployed from Heroku
-
Be careful not to upload
DEBUG=Truein thesettings.pyfile to GitHub - this setting should only be used locally.
Create Application and Postgres DB on elephantSQL
- Log in to Heroku at https://heroku.com - create an account if needed.
- From the Heroku dashboard, click the Create new app button. For a new account an icon will be visible on screen to allow you to Create an app, otherwise a link to this function is located under the New dropdown menu at the top right of the screen.
- On the Create New App page, enter a unique name for the application and select region. Then click Create app.
- Next, click on Settings on the Application Configuration page and click on the "Reveal Config Vars" button
- ensure that the proper environment variables pertaining to your specific project build are entered and saved
- create an account on elephantSQL, create a new database and copy database url to your env.py and heroku config vars
- Add a new Config Var (heroku)called DISABLE_COLLECTSTATIC and assign it a value of 1.
- Add a new Config Var called SECRET_KEY and assign it a value - any random string of letters, digits and symbols.
- The settings.py file should be updated to use the DATABASE_URL and SECRET_KEY environment variable values as follows :
- DATABASES = {'default': dj_database_url.parse(os.environ.get('DATABASE_URL'))}
- SECRET_KEY = os.environ.get('SECRET_KEY')
- In Gitpod, in the project terminal window, to initialize the data model in the postgres database, run the command : python3 manage.py migrate
- Set up and admin user in the postgres db using the command : python3 manage.py createsuperuser
- Set DEBUG flag to False in settings.py
- Commit and push any local changes to GitHub.
- In order to be able to run the application on localhost, add SECRECT_KEY and DATABASE_URL and their values to env.py
Connect the Heroku app to the GitHub repository
- Go to the Application Configuration page for the application on Heroku and click on the Deploy tab.
- Select GitHub as the Deployment Method and if prompted, confirm that you want to connect to GitHub. Enter the name of the github repository (the one used for this project is (https://github.com/ericjonesdev/portfolio-four-project/) and click on Connect to link up the Heroku app to the GitHub repository code.
- Scroll down the page and choose to either Automatically Deploy each time changes are pushed to GitHub, or Manually deploy - for this project Manual Deploy was selected.
- The application can be run from the Application Configuration page by clicking on the Open App button.
- The live link for this project is (https://a-coders-journey.herokuapp.com/)
-
- Much of the coding and testing relies heavily on information in the 'I Think Therefore I Blog' walkthrough in the Code Institute Fullstack Frameworks Modules. Functionality such as the like comment were gleaned/utilized from that.
- Code to implement site Bootsrtap was also taken from the walkthrough.
- The following list of links were used as either examples upon which to further build the models and views this project, inspiration and troubleshooting various issues that arose during the process:
Favicon generator:
https://favicon.io/favicon-generator/
readme inspiration my mentor - Elaine Roche:
https://github.com/elainebroche-dev/pf5-iomha-prints
Troubleshooting wsgi:
https://stackoverflow.com/questions/20034278/where-to-place-wsgi-script-in-django-project
https://code.google.com/archive/p/modwsgi/wikis/IntegrationWithDjango.wiki
https://docs.djangoproject.com/en/dev/howto/deployment/wsgi/modwsgi/
https://modwsgi.readthedocs.io/en/master/
Heroku deployment issue troubleshooting links:
https://laracasts.com/discuss/channels/laravel/heroku-not-loading-appcss-or-appjs
https://www.youtube.com/watch?v=V7ynNo_bko8
Summernote Troubleshooting:
https://cdnjs.com/libraries/summernote
https://developer.mozilla.org/en-US/docs/Web/HTTP/Headers/X-Frame-Options?utm_source=mozilla&utm_medium=firefox-console-errors&utm_campaign=default
Cloudinary troubleshooting and settings.py code example:
https://github.com/deji12/blog
amiresponsive troubleshooting code examples:
https://developer.mozilla.org/en-US/docs/Web/HTTP/Headers/Set-Cookie#samesitesamesite-value
Django / Python code examples:
https://stackoverflow.com/questions/15215295/how-to-use-current-logged-in-user-as-pk-for-django-detailview/15222588#15222588
https://docs.djangoproject.com/en/4.2/ref/class-based-views/generic-display/
https://stackoverflow.com/questions/5531258/example-of-django-class-based-deleteview
https://stackoverflow.com/questions/862522/django-populate-user-id-when-saving-a-model/15540149#15540149
https://docs.djangoproject.com/en/3.0/ref/class-based-views/mixins-editing/#django.views.generic.edit.ModelFormMixin.form_valid
example for user, form and views within blog_site: https://github.com/yashpatel-py/django_blog_youtube/blob/master/main/models.py https://github.com/yashpatel-py/django_blog_youtube/blob/master/main/forms.py https://youtu.be/D_KyndgwD1o
Markdown:
https://www.digitalocean.com/community/tutorials/markdown-markdown-images
ERD Diagrams: https://app.diagrams.net
- The images used for the default blog posts where taken from Pexels
- Thank you to my mentor Elaine Roche for all of her guidance, help and feedback throughout each project on this course.


