A student that completes this project shows that they can:
- understand and explain what Auto Layout is, and the problems it solves
- implement common layouts using constraints in Interface Builder
- implement common layouts using UIStackView
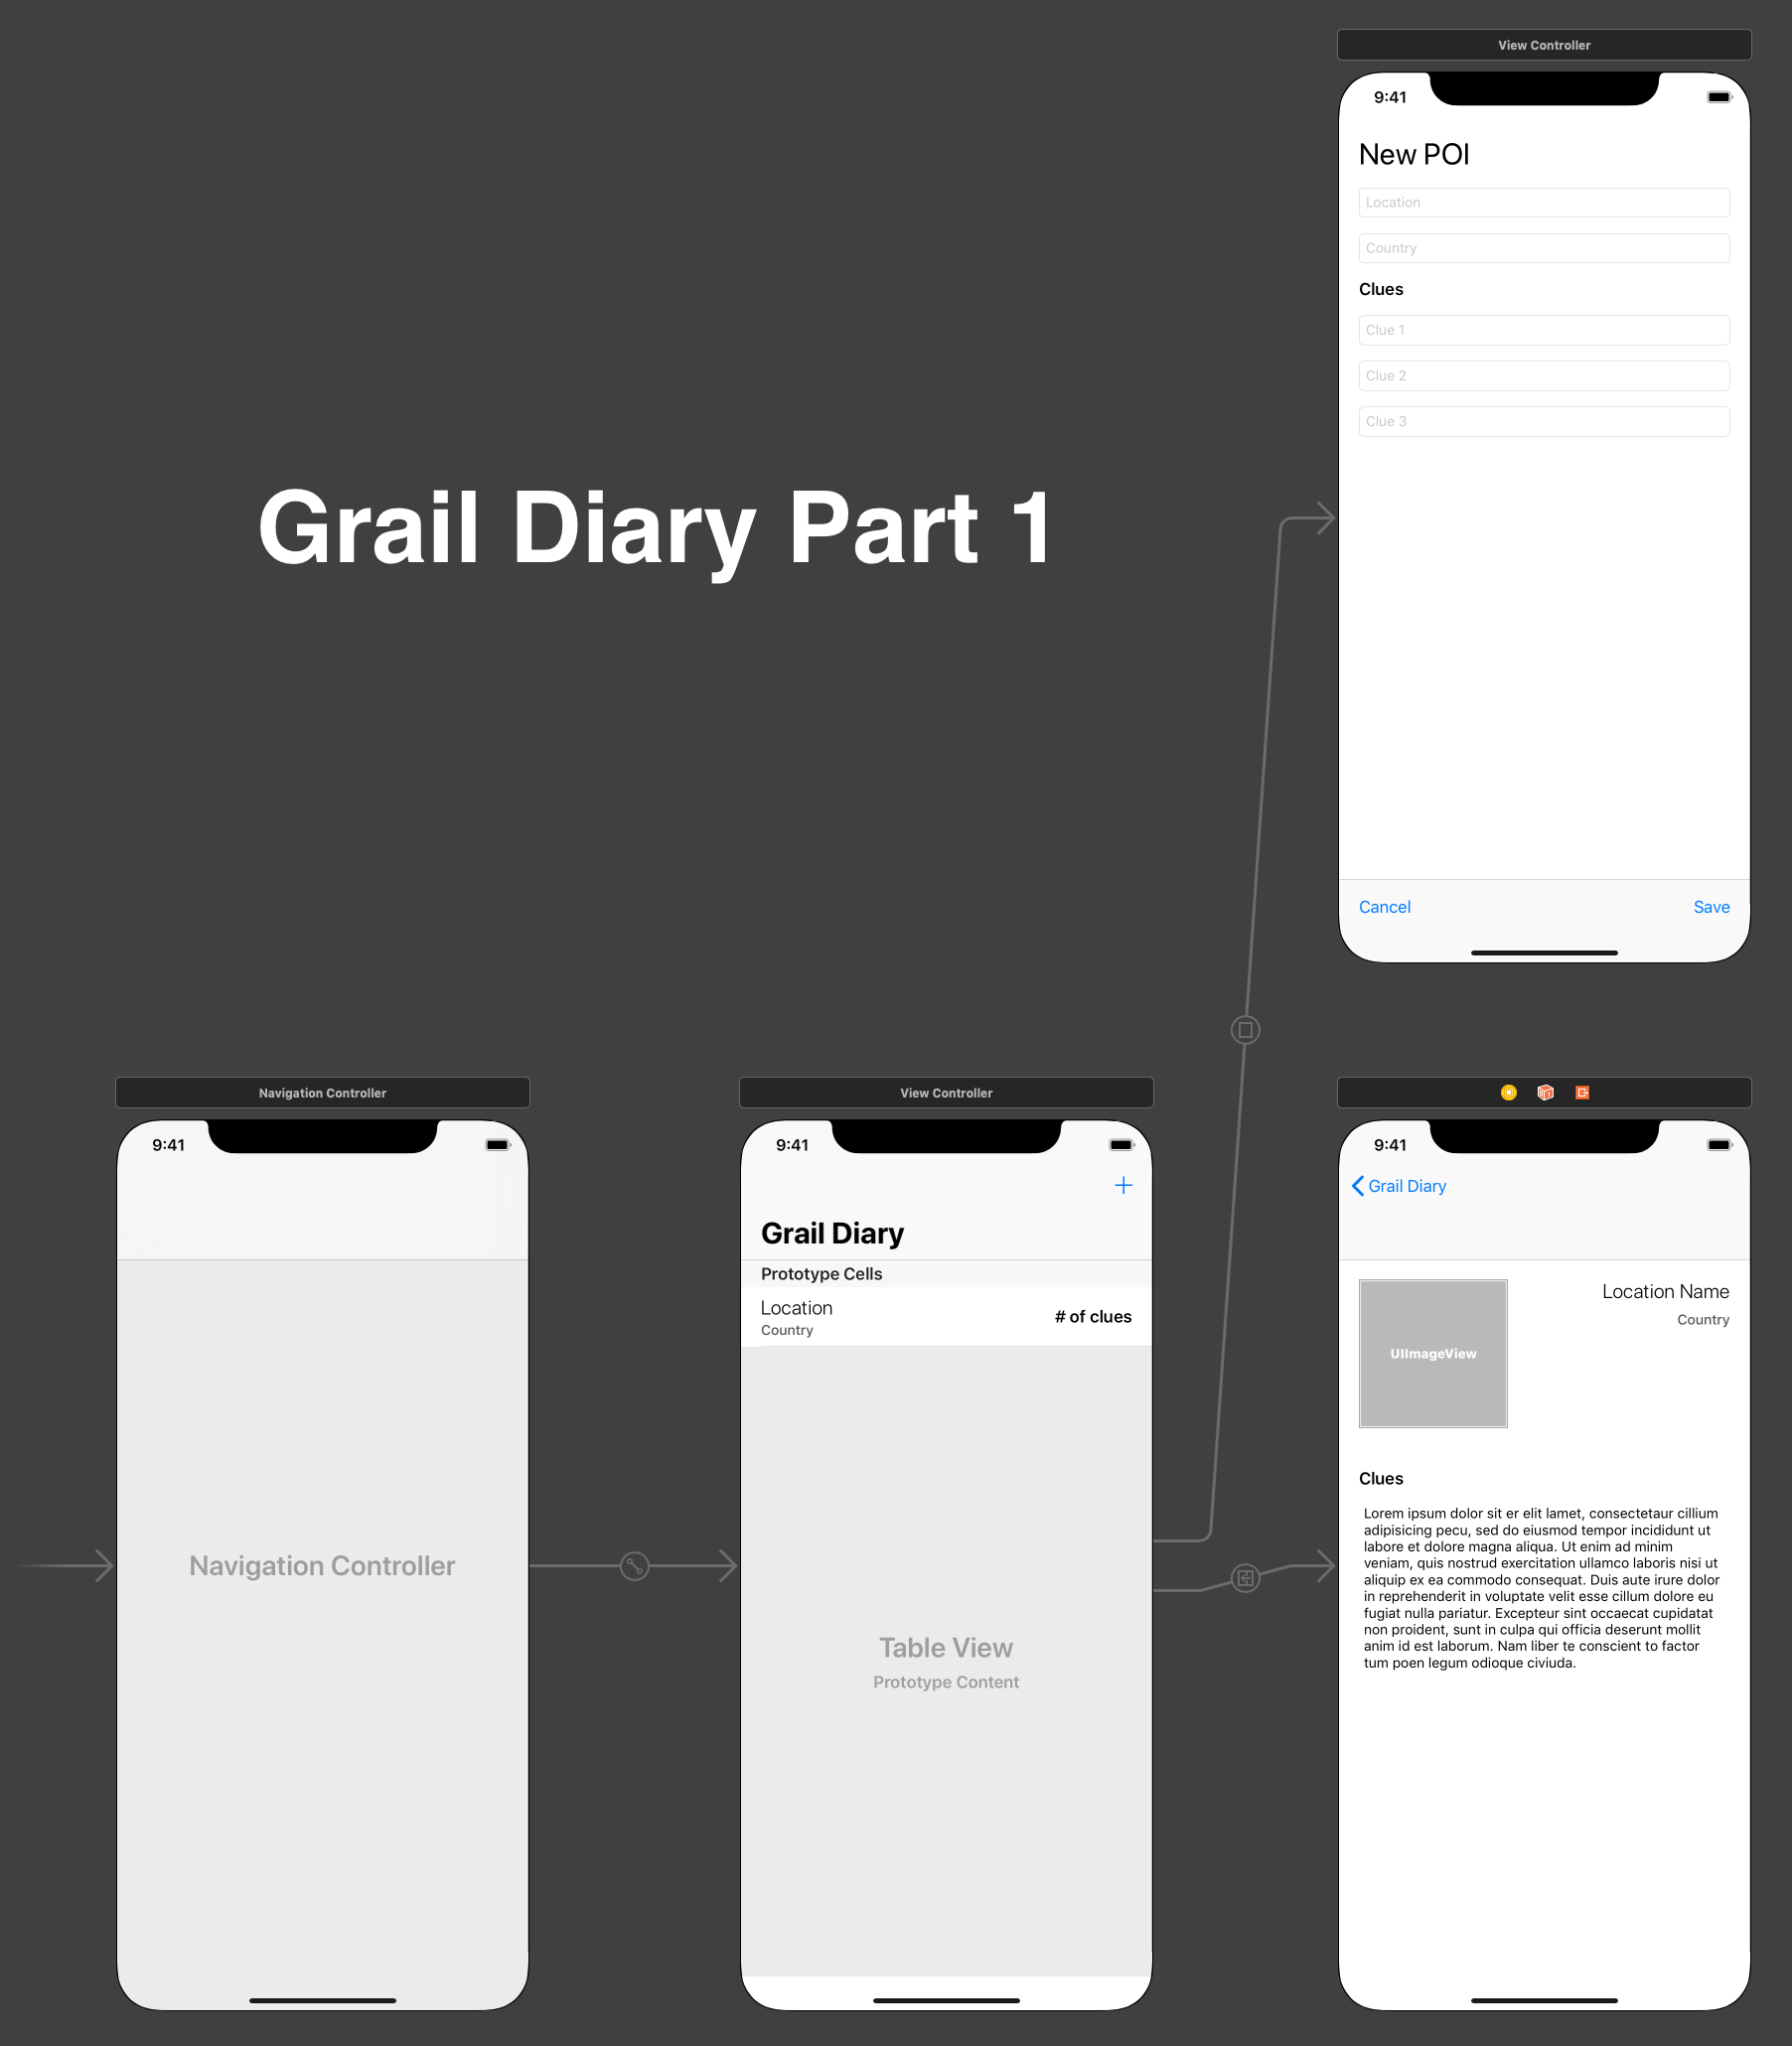
Grail Diary is an app that allows the user to track locations of interest (POIs) and useful clues about those locations.
Please fork and clone this repository. Create a new Xcode project inside of the cloned repository. Use the single view app template and name it "GrailDiary"
- Rename the View Controller to
POIsTableViewControllerwith the refactor->rename option in the source code file. To do this, right click on the class calledViewControllerand a contextual menu will appear. Select "Refactor", then "Rename..." and type the new class name. - Embed the single View Controller scene in a Navigation Controller
- Drag in a Table View to that View Controller
- Set the navigation bar to show large titles
- Give the View Controller scene a title of "Grail Diary"
- Add constraints with margins disabled to the Table View:
- Top =
0 - Leading =
0 - Trailing =
0 - Bottom =
0
- Top =
- Set the Table View to show 1 prototype cell (select the Table View and look in the attributes inspector); set the prototype cell identifier to "POICell"
- Set the Table View to show 60 pt rows (row height in the Table View's size inspector)
- Drag 3 labels into the cell prototype
- Give one a text value of
"Location", one"Country", and the last one"# of clues" - Change the text styles for the three labels to emphasize the location primarily
- Select the location and country labels and embed them in a vertical Stack View
- Use the following attributes for the Stack View:
- an alignment of
leading - a distribution of
fill - spacing =
2
- an alignment of
- Add the following constraints to the Stack View:
- vertical centering in the container (cell)
- margin-based leading =
0
- Add the following constraints to the clues label:
- vertical centering in the container (cell)
- margin-based trailing =
0
- Add a constraint between the Stack View and the clues label with these attributes:
- horizontal spacing
- change the relationship to
>= - constant =
8
- Add a bar button item to the right side of the navigation bar and set the system item value to "Add"
- Drag a View Controller scene onto the canvas
- Control-click from the add bar button item in the list of clues view to the new scene; choose "present modally" for the segue kind and use "AddPOIModalSegue" for the identifier
- Drag 5 text fields into the new View Controller scene; use these placeholders: "Location", "Country", "Clue 1", "Clue 2", "Clue 3"
- Place the 5 text fields into a vertical Stack View with the following Stack View attributes:
fillfor both alignment and distribution- spacing =
16
- Add the following constraints to the Stack View:
- leading =
20 - trailing =
20 - top =
20
- leading =
- Insert a label into the top of the Stack View and give it a value of "New POI"; set the font text style to "Large Title"
- Insert a label above the first clue Text Field in the Stack View and give it a value of "Clues"; set the font text style to "Headline"
- Add a toolbar to the bottom of the scene
- Constrain the toolbar to the view with the following:
- leading =
0 - trailing =
0 - bottom =
0
- leading =
- Add 3 bar button items: 1 set to "cancel", 1 to "flexible space", and 1 to "save"; this should separate the two buttons to the left and right edges
- Drag in a View Controller scene to the canvas
- Control-drag from the location cell to the new scene; select "show" for the segue kind and enter "ShowPOIDetailSegue" for the identifier
- Drag 3 labels into the new scene
- Set one to "Location Name" and use the following constraints:
- top =
20 - trailing =
20
- top =
- Place another label below that and set it to "Country"; control-drag from this label to the location name label above and add these constraints:
- trailing alignment (trailing edges of both labels are aligned)
- vertical spacing =
8
- Drag an Image View into the scene
- Constrain it with the following:
1:1aspect ratio (check the box and then edit the value to make it 1:1)- width =
150 - leading =
20 - using a constraint, align the top of the image with the top of the location name label
- Find a square image of an interesting location on Google and drag it into your asset catalog; set a sensible name and set the name as the image in the Image View attributes
- Add a horizontal distance constraint between the location label and the Image View
- set the constant value to
8 - make it a
>=constraint
- set the constant value to
- Add a horizontal distance constraint between the country label and the Image View
- set the constant value to
8 - make it a
>=constraint
- set the constant value to
- Place the third label below; set the value to "Clues"; use the following constraints:
- align the leading with the Image View
- set a top distance to the Image View =
40
- Drag a text view into the canvas
- Constrain it below the clues label with the following:
- leading alignment with clues label
- vertical distance of
8 - relate the text view and the "Country" label by aligning their trailing values
- bottom to view =
20