node-red-contrib-ui-svg
A Node-RED widget node to show interactive SVG (vector graphics) in the dashboard
Special thanks to Stephen McLaughlin, my partner in crime for this node!
And also, lots of credits to Joseph Liard, the author of DrawSvg for his assistance!
msg.eventhas becomemsg.event.typemsg.coordinates.xhas becomemsg.event.svgXmsg.coordinates.yhas becomemsg.event.svgYmsg.position.xhas becomemsg.event.pageXmsg.position.yhas becomemsg.event.pageY- The (selector) content has moved from
msg.elementIdtomsg.selector, andmsg.elementIdnow contains the real element id where the event has occurred. See here for detailed information.
Install
Run the following npm command in your Node-RED user directory (typically ~/.node-red):
npm install node-red-contrib-ui-svg
It is advised to use Dashboard version 2.16.3 or above.
Introduction to SVG
Scalable Vector Graphics (SVG) is an XML-based vector image format for two-dimensional graphics with support for interactivity and animation. We won't explain here how it works, because the internet is full of information about it.
An SVG drawing contains a series of SVG elements, which will be rendered by the browser from top to bottom. For example:
<svg ...>
  <image .../>
  <circle .../>
  <text .../>
</svg>
The browser will first draw the (background) image, then the circle (on top of the image), and so on ...
Each of those SVG elements has attributes (fill colour, ...), can respond to events (clicked, ...) and can be animated (e.g. shrink...).
Node usage
This node can be used to visualize all kind of graphical stuff in the Node-RED dashboard. This can range from simple graphics (e.g. a round button, ...) to very complex graphics (floorplans, industrial processes, piping, wiring, ...). But even those complex graphics will consist out of several simple graphical shapes. For example, a floorplan is in fact a simple image of your floor, and a series of other SVG elements (e.g. Fontawesome icons) drawn on top of that (background) image.
Simply deploy your SVG string in the config screen, and the Node-RED dashboard will render your vector graphics:
But what if you are not familiar with the SVG syntax. Do not worry, we have integrated a DrawSvg drawing editor in the config screen of our node.
The node's config screen consists of a series of tab sheets:
"Editor" tab sheet
DrawSvg is a free SVG drawing editor that will run entirely in your browser, so no installation required. We have integrated DrawSvg into this node, to allow users to edit their SVG source via a nice drawing program.
!!! DrawSvg is free software. Note that DrawSvg and the online service is used as is without warranty of bugs !!!
Steps to use DrawSvg:
- Click the "Open SVG editor", to show the SVG in the DrawSvg drawing editor.
- DrawSvg will be opened in a popup dialog window, and it will visualize the SVG source (from this node).
- The SVG drawing can be edited.
- You can intermediately save your changes (to this node), using the "Save" button in the upper right corner of the popup dialog window.
- As soon as the popup dialog window is being closed, a notification will appear. There you can choose to ignore all changes (i.e. you do not need them anymore), or to save all the changes (to this node).
- The updated SVG source will appear in the "SVG source" tab sheet of this node.
By default, this node will use the free online DrawSvg service (see "Editor URL" in the "Settings" tab sheet). However we it is also possible to use the node-red-contrib-drawsvg node, which can host a DrawSvg service locally for offline systems.
"SVG source" tab sheet
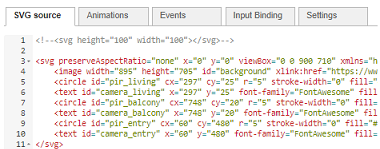
Enter you (XML-based) SVG graphics in this editor. This can be done in different ways:
- If you are a die-hard SVG fanatic, you can enter the SVG string manually in the "SVG" tab sheet.
- If you prefer to use an SVG drawing editor, you can use the embedded DrawSvg editor.
- If you need very specific types of drawings, you can use a third party SVG editor to create your drawing (and simple paste the generated SVG string into this tab sheet). Multiple (online) editors are free available, each with their own dedicated speciality:
However:
- Be aware that those third-party SVG editors could create rather complex SVG strings, which are harder to understand when you want to change them manually afterwards.
- Be aware that the browser has a lot of work to render all the SVG elements in the drawing! In some cases, it might be useful - to gain performance - to convert your SVG once to an image and use that as a background image in this SVG node (and draw other shapes on top of that image). For example, in Floorplanner website, the SVG drawing can be saved as a JPEG/PNG image. That image can be loaded into an SVG 'image' element, like I have done in the example flows on this readme page ...
At the bottom of the "SVG source" tab sheet, a series of buttons are available:
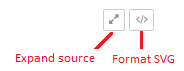
- Expand source: show the SVG source in full screen mode.
- Format SVG: by formatting the SVG source, the source will be beatified. This means the empty lines will be removed, each line will get a single SVG element, indents will be corrected ...
"Animation" tab sheet
SVG allows users to animate element attributes over time. For example, you can make the radius of a circle grow in 3 seconds from 10 pixels to 40 pixels.
Adding animations to your SVG graphics can be done in different ways:
-
Via the "SVG" tab sheet manually, for die-hard SVG fanatics:
<circle id="mycircle" ... r="5" ...>
   <animate id="myanimation" attributeName="r" begin="0s" dur="3s" repeatCount="1" from="10" to="40"/>
</circle>
The animation will be applied by the browser to the parent element (in this example the circle). However it is also possible to add an animation element on its own (i.e. not as child element), with a link to the SVG element it needs to be applied to:
<circle id="mycircle" ... r="5" .../> <animate xlink:href="#mycircle" id="myanimation" attributeName="r" begin="0s" dur="3s" repeatCount="1" from="10" to="40"/> -
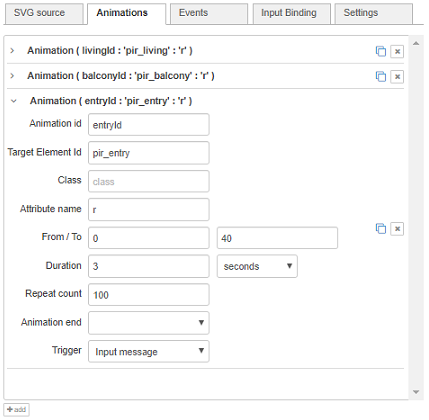
Via the "Animation" tab sheet, to keep the drawing and the animations separated. Click the 'add' button to create a new animation record, where following properties need to be entered:
- Animation id: The id of this SVG animate element (in this example "myanimation").
- Target element id: The id of the SVG element that you want to animate (in this example "mycircle").
- Class: By setting a value in class, you can use a selector to start or stop multiple animations.
- Attribute name: The name of the element's attribute that you want to animate (in this example "r").
- From: The attribute value at the start of the animation (in this example "10").
- To: The attribute value at the end of the animation (in this example "40").
- Duration: How long the animation will take.
- Repeat count: How many times the animation needs to be repeated (in this example *"1" which means only once). Caution: when "0" is selected, this means that the animation will be repeated "indefinite"!
- Animation end: What to do with the new value when the animation is ended.
- Freeze new value: the attribute value will keep the new 'To' value (in this example "40").
- Restore original value: the attribute value will be restored to its original value (in this example "5"), from the start of the animation.
- Trigger: Which trigger will result in the animation being started.
- Input message: the animation will be started by injecting an input message (see below).
- Time delay: the animation will be started after a specified time.
- Custom: the animation will be started using standard begin options. For example:
2s; myRect.click; myAnim.end-400ms
Creating animations via this tab sheet has the advantage that the SVG source and the animations are being kept separate. More specifically when the SVG is being created in a third-party SVG editor (which most of the time don't support animations), your manually inserted animation elements would be overwritten each time you need to update your SVG...
Remark: it is also possible to animate transformations. Indeed, when the attribute name is "transform" an extra "animation type" dropdown will appear:

-
Via an input message as explained in the Control via messages section below.
"Event" tab sheet
An SVG element can be added here, to make that element able to intercept one of the following events:
- Click: when a mouse-down and mouse-up on the same element.
- Double click: when a double mouse click on an element.
- Context menu: when a right mouse click on an element.
- Mouse down: when a mouse button is pressed down on an element.
- Mouse up: when a mouse button is released on an element.
- Mouse over: when the mouse is moved onto an element.
- Mouse out: when the mouse is moved away from an element.
- Focus: when an element receives focus.
- Focus in: when an element is about to receive focus.
- Focus out: when an element is about to lose focus.
- Blur: when an element loses focus.
- Key down: when a key is pressed down.
- Key up: when a key is released.
- Touch start: when a touch event starts (on mobile/tablet only).
- Touch end: when a touch event ends (on mobile/tablet only).
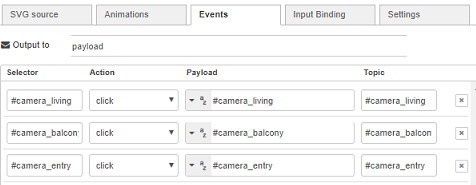
When adding a new line in this tab sheet, several properties need to be entered:
- Selector: the selection of (one or more) SVG elements that needs to intercept events. See the syntax of CSS selectors.
- Action: the event that the shape needs to intercept.
- Payload: the
msg.payloadcontent of the output message, which will be sent when the event occurs. - Topic: the
msg.topiccontent of the output message, which will be sent when the event occurs.
By default the content will be stored in msg.payload of the output message. However when the result needs to end up in msg.anotherField, this message field can be specified at the top of the tab sheet:

Two things will happen when an event occurs on such an SVG element:
-
The mouse cursor will change when hoovering above the element, to visualize that an element responds to events.
-
An output message will be send as soon as the element is clicked, with a Node-RED standard format:
"elementId": "light_bulb_kitchen",
"selector": "#light_bulb_kitchen",
"event": {
   "type":"click",
   "svgX":28.02083396911621,
   "svgY":78.66666412353516,
   "pageX":1105,
   "pageY":310,
   "screenX":829,
   "screenY":304,
   "clientX":1105,
   "clientY":310,
   "bbox": [
      1076.979248046875,
      311.3333435058594,
      1136.979248046875,
      251.33334350585938
   ]
}
The coordinates (where the event occurs) in the output message allow the next nodes in the flow to display information at that location. For example we have developed the node-red-contrib-ui-contextmenu to show a popup context menu in the dashboard above the SVG drawing, at the location where a shape has been clicked. The following demo explains this combination of both nodes:
[{"id":"107fa0c1.cb755f","type":"debug","z":"60ad596.8120ba8","name":"Floorplan output","active":true,"tosidebar":true,"console":false,"tostatus":false,"complete":"true","x":1340,"y":440,"wires":[]},{"id":"58329d91.3fc564","type":"ui_svg_graphics","z":"60ad596.8120ba8","group":"f014eb03.a3c618","order":1,"width":"14","height":"10","svgString":"<svg preserveAspectRatio=\"none\" x=\"0\" y=\"0\" viewBox=\"0 0 900 710\" xmlns=\"http://www.w3.org/2000/svg\" xmlns:svg=\"http://www.w3.org/2000/svg\" xmlns:xlink=\"http://www.w3.org/1999/xlink\">\n <image width=\"889\" height=\"703\" id=\"background\" xlink:href=\"https://www.roomsketcher.com/wp-content/uploads/2016/10/1-Bedroom-Floor-Plans.jpg\"/>\n <circle id=\"pir_living\" cx=\"310\" cy=\"45\" r=\"5\" stroke-width=\"0\" fill=\"#FF0000\"/>\n <text id=\"camera_living\" x=\"310\" y=\"45\" font-family=\"FontAwesome\" fill=\"blue\" stroke=\"black\" font-size=\"35\" text-anchor=\"middle\" alignment-baseline=\"middle\" stroke-width=\"1\"></text>\n</svg>","clickableShapes":[{"targetId":"#camera_living","action":"click","payload":"camera_living","payloadType":"str","topic":"camera_living"}],"smilAnimations":[],"bindings":[],"showCoordinates":false,"autoFormatAfterEdit":false,"outputField":"","editorUrl":"http://drawsvg.org/drawsvg.html","directory":"","name":"","x":1140,"y":440,"wires":[["107fa0c1.cb755f"]]},{"id":"f014eb03.a3c618","type":"ui_group","z":"","name":"Floorplan test","tab":"80068970.6e2868","disp":true,"width":"14","collapse":false},{"id":"80068970.6e2868","type":"ui_tab","z":"","name":"SVG","icon":"dashboard","disabled":false,"hidden":false}]The
msg.eventobject contains multiple coordinates, corresponding to different available coordinate systems in a browser:
- SVG coordinates to the borders of the SVG editor, i.e. relative to the origin of the SVG drawing.
- Client coordinqtes to the borders of the Browser's visible window.
- Page coordinates to the top of the current of the dashboard page, (which will only become visible after scrolling, since it is too short to show in the browser window).
- Screen coordinates to the border of your monitor screen.
Remark: the
msg.bboxcontains the bounding box (left / bottom / right / top) of the SVG element where the event occurs
Instead of specifying events in the config screen, it is also possible to add or remove events via input messages. This is explained in the Control via messages section below.
"JS" tab sheet

An SVG element can be added here, to make that element able to intercept one of the events: see "Event" tabsheet section above.
When adding a new line in this tab sheet, several properties need to be entered:
- Selector: the selection of (one or more) SVG elements that needs to intercept events. See the syntax of CSS selectors.
- Action: the event that the shape needs to intercept.
- Javascript code: the Javascript code that needs to be executed on the client side (i.e. inside the dashboard), when the event occurs.
Note that there is a 'fullscreen" button at every row, to show the Javascript code in a fullscreen editor with syntax highlighting!
Two things will happen when an event occurs on such an SVG element:
- The mouse cursor will change when hoovering above the element, to visualize that an element responds to events.
- The Javascript code will be executed in the dashboard.
Instead of specifying Javascript events in the config screen, it is also possible to add or remove events via input messages. This is explained in the Control via messages section below. When your Javascript code doesn't work correctly, the wiki page contains some tips and tricks.
The following example flow shows how to change the color of the circle, every time the circle has been clicked. The flow also shows that the Javascript event handler can be removed, and another Javascript event handler (to show an alert) can be injected via an input message:

[{"id":"89244415.be9278","type":"ui_svg_graphics","z":"a03bd3cf.177578","group":"5ae1b679.de89c8","order":4,"width":"0","height":"0","svgString":"<svg x=\"0\" y=\"0\" height=\"350\" viewBox=\"-0.04032258064515237 0 250.0806451612903 350\" width=\"250\" xmlns=\"http://www.w3.org/2000/svg\" xmlns:svg=\"http://www.w3.org/2000/svg\" xmlns:xlink=\"http://www.w3.org/1999/xlink\" preserveAspectRatio=\"xMidYMid meet\">\n<circle id=\"my_circle\" cx=\"30\" cy=\"30\" r=\"25\" style=\"stroke: none; fill: #0000ff;\">\n</circle>\n</svg>","clickableShapes":[],"javascriptHandlers":[{"selector":"#my_circle","action":"click","sourceCode":"var letters = '0123456789ABCDEF';\n var color = '#';\n for (var i = 0; i < 6; i++) {\n color += letters[Math.floor(Math.random() * 16)];\n }\n\n$(\"#my_circle\")[0].style.fill = color;\n \n$scope.send({payload: color, topic: 'circle_color'})"}],"smilAnimations":[{"id":"","targetId":"","classValue":"","attributeName":"transform","transformType":"rotate","fromValue":"","toValue":"","trigger":"msg","duration":"1","durationUnit":"s","repeatCount":"0","end":"restore","delay":"1","delayUnit":"s","custom":""}],"bindings":[],"showCoordinates":false,"autoFormatAfterEdit":true,"showBrowserErrors":true,"showBrowserEvents":true,"outputField":"payload","editorUrl":"http://drawsvg.org/drawsvg.html","directory":"","panning":"disabled","zooming":"disabled","panOnlyWhenZoomed":false,"doubleClickZoomEnabled":false,"mouseWheelZoomEnabled":false,"name":"SVG with Javascript","x":540,"y":180,"wires":[["e06da0e0.2c837"]]},{"id":"d9df6292.785bc","type":"inject","z":"a03bd3cf.177578","name":"Show alert at click","props":[{"p":"payload"}],"repeat":"","crontab":"","once":false,"onceDelay":0.1,"topic":"","payload":"{\"command\":\"add_js_event\",\"event\":\"click\",\"selector\":\"#my_circle\",\"script\":\"alert('Click event handled on the client ...')\"}","payloadType":"json","x":230,"y":140,"wires":[["89244415.be9278"]]},{"id":"5074f893.d378d8","type":"inject","z":"a03bd3cf.177578","name":"Remove clicked event","props":[{"p":"payload"}],"repeat":"","crontab":"","once":false,"onceDelay":0.1,"topic":"","payload":"{\"command\":\"remove_js_event\",\"event\":\"click\",\"selector\":\"#my_circle\"}","payloadType":"json","x":240,"y":180,"wires":[["89244415.be9278"]]},{"id":"e06da0e0.2c837","type":"debug","z":"a03bd3cf.177578","name":"","active":true,"tosidebar":true,"console":false,"tostatus":false,"complete":"true","targetType":"full","statusVal":"","statusType":"auto","x":750,"y":180,"wires":[]},{"id":"8572fad7.dd39b8","type":"inject","z":"a03bd3cf.177578","name":"change color at click","props":[{"p":"payload"}],"repeat":"","crontab":"","once":false,"onceDelay":0.1,"topic":"","payload":"{\"command\":\"add_js_event\",\"event\":\"click\",\"selector\":\"#my_circle\",\"script\":\"var letters = '0123456789ABCDEF'; var color = '#'; for (var i = 0; i < 6; i++) { color += letters[Math.floor(Math.random() * 16)]; } $('#my_circle')[0].style.fill = color; $scope.send({payload: color, topic: 'circle_color'})\"}","payloadType":"json","x":230,"y":280,"wires":[["89244415.be9278"]]},{"id":"f678a359.157b4","type":"comment","z":"a03bd3cf.177578","name":"Multiline program ...","info":"","x":220,"y":240,"wires":[]},{"id":"5ae1b679.de89c8","type":"ui_group","name":"Press Demo","tab":"3667e211.c08f0e","order":1,"disp":true,"width":"5","collapse":false},{"id":"3667e211.c08f0e","type":"ui_tab","name":"Home","icon":"dashboard","order":1,"disabled":false,"hidden":false}]
Which will result in this:

The main difference between the events on the "Event" tabsheet and Javascript events on the "JS" tabsheet:
-
The "Event" tabsheet is used when an event simply needs to send an output message, which in turn can trigger some other nodes in the flow on the server. E.g. click a light-bulb icon to turn on the lights in your smart home.
-
The "JS" tabsheet is used when an event simply needs to trigger some Javascript code, to trigger functionality directly in the SVG.
Note that there is some overlap between the events on both tabsheets:
-
The "Event" tabsheet could be used to trigger an output message on the server flow, which triggers in turn an input message for this SVG node. That input message can manipulate the SVG. However then we have an entire roundtrip (from dashboard via the server flow back to the dashboard) to trigger functionality on the dashboard:

Instead it is much easier to use a JS event handler to stay inside the dashboard and run some Javascript code immediately:

-
The "JS" tabsheet could be used to trigger some Javascript code to send a message to the server flow. For example:
$scope.send({payload: color, topic: 'circle_color'})However it is much easier to use a normal event handler, which sends a message (incl. bounding box and all coordinates) without any coding...
"Binding" tab sheet
As explained in the section Control via messages below, this node can be controlled via input messages. For example, to change the fill colour of circle with id "mycircle" to green. As a result, the input messages need to contain a lot of information (element id, attribute name, attribute value ...), to let this node know what you want it to do. This means the flow will become quite complex, since a lot of extra nodes are required to put all that information in the message.
Another way to control this node is by using bindings. This means that you must specify most of the information in the binding, so the input message will only need to contain the new value itself. Since the input messages need to contain less information, the flow can be simplified ...
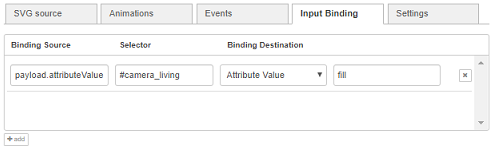
Input bindings can be added to link sources (= input message fields) to destinations (= element attribute/text values).
Several properties need to be entered:
- Binding source: the field of the input message that will contain the new value.
- Selector: the selection of (one or more) SVG elements on which the new attribute value will be applied. See the syntax of CSS selectors.
- Binding destination: on which attribute of those selected SVG elements the new values will be applied.
-
Text content: when this option is selected, the value (from the input message) will be applied to the inner text content of the element.
For example, set the text content in
<text x="20" y="20">Some text content</text>. -
Attribute value: when this option is selected, the value (from the input message) will be applied to an attribute. This means an extra "attribute name" will have to be specified, to make sure the new value will be applied to the attribute with that name.
For example, set the fill colour value in
<circle fill="yellow"/>. -
Style value: when this option is selected, the value (from the input message) will be applied to a style attribute. This means an extra style "attribute name" will have to be specified, to make sure the new value will be applied to the attribute with that name.
For example, set the fill colour value in
<circle style="fill: yellow;"/>.
-
For example:

When e.g. the input message contains msg.payload.position.x, then that value (250) will be set to the "x" attribute of SVG element with id "camera_living".
The following flow shows the above binding example in action:
[{"id":"c9ab8554.337588","type":"debug","z":"60ad596.8120ba8","name":"Floorplan output","active":true,"tosidebar":true,"console":false,"tostatus":false,"complete":"true","x":1380,"y":440,"wires":[]},{"id":"56869c57.d65c74","type":"ui_svg_graphics","z":"60ad596.8120ba8","group":"d4ee73ea.a7676","order":1,"width":"14","height":"10","svgString":"<svg preserveAspectRatio=\"none\" x=\"0\" y=\"0\" viewBox=\"0 0 900 710\" xmlns=\"http://www.w3.org/2000/svg\" xmlns:svg=\"http://www.w3.org/2000/svg\" xmlns:xlink=\"http://www.w3.org/1999/xlink\">\n <image width=\"889\" height=\"703\" id=\"background\" xlink:href=\"https://www.roomsketcher.com/wp-content/uploads/2016/10/1-Bedroom-Floor-Plans.jpg\" />\n <text id=\"banner\" x=\"10\" y=\"16\" fill=\"black\" stroke=\"black\" font-size=\"35\" text-anchor=\"left\" alignment-baseline=\"middle\" stroke-width=\"1\">This is the #banner</text>\n <circle id=\"pir_living\" cx=\"310\" cy=\"45\" r=\"5\" stroke-width=\"0\" fill=\"#FF0000\" />\n <text id=\"camera_living\" x=\"310\" y=\"45\" font-family=\"FontAwesome\" fill=\"grey\" stroke=\"black\" font-size=\"35\" text-anchor=\"middle\" alignment-baseline=\"middle\" stroke-width=\"1\"></text>\n</svg> ","clickableShapes":[{"targetId":"#camera_living","action":"click","payload":"camera_living","payloadType":"str","topic":"camera_living"}],"smilAnimations":[],"bindings":[{"selector":"#banner","bindSource":"payload.title","bindType":"text","attribute":""},{"selector":"#camera_living","bindSource":"payload.position.x","bindType":"attr","attribute":"x"},{"selector":"#camera_living","bindSource":"payload.camera.colour","bindType":"attr","attribute":"fill"}],"showCoordinates":false,"autoFormatAfterEdit":false,"outputField":"","editorUrl":"http://drawsvg.org/drawsvg.html","directory":"","name":"","x":1180,"y":440,"wires":[["c9ab8554.337588"]]},{"id":"62a285fb.bd046c","type":"inject","z":"60ad596.8120ba8","name":"databind","topic":"databind","payload":"{\"camera\":{\"colour\":\"yellow\"},\"position\":{\"x\":320},\"title\":\"databind strikes again\"}","payloadType":"json","repeat":"","crontab":"","once":false,"onceDelay":0.1,"x":980,"y":460,"wires":[["56869c57.d65c74"]]},{"id":"132d184e.ff0ab8","type":"inject","z":"60ad596.8120ba8","name":"databind","topic":"databind","payload":"{\"camera\":{\"colour\":\"green\"},\"position\":{\"x\":250},\"title\":\"New banner title by databind\"}","payloadType":"json","repeat":"","crontab":"","once":false,"onceDelay":0.1,"x":980,"y":420,"wires":[["56869c57.d65c74"]]},{"id":"d4ee73ea.a7676","type":"ui_group","z":"","name":"Floorplan test","tab":"b4bb5633.ba92b8","disp":true,"width":"14","collapse":false},{"id":"b4bb5633.ba92b8","type":"ui_tab","z":"","name":"SVG","icon":"dashboard","disabled":false,"hidden":false}]
Note that there is another way to implement data binding (without using the "Binding" tabsheet), by using user attributes inside the SVG source:
- Use a
data-bind-textto set the text content of an element For example:Then the text content can be updated by injecting the following message:<svg ...> <text data-bind-text="payload.SystemStateDesc" ...>Temporary text content</text> </svg>"payload": { "SystemStateDesc": "Updated text content"}, "topic": "databind" } - Use
data-bind-attributesto specify which SVG element attributes need to be binded to which message fields (specified indata-bind-values). For example:Then the circle fill color and radius attributes can be updated by injecting following message:<svg ...> <circle data-bind-attributes="fill,r" data-bind-values="payload.circleColour,payload.size" ...>; </svg>"payload": { "fill": "circleColour", "size": 25 }, "topic":"databind"
"Settings" tab sheet
Show coordinates
When this option is selected, a tooltip will be displayed to show the current mouse location (i.e. X and Y coordinate):
This option has been introduced to simplify lay outing during manual editing of the SVG string (without external SVG drawing tool). Without this option determining the location of your shapes would require a lot of calculations or guessing ...
Remark: The location is measured in the SVG coordinate system, which means the origin (X=Y=0) is in the top left of your drawing.
Auto format SVG Source after saving edits in SVG Editor
When editing the SVG source via DrawSvg, the manipulated SVG source is not very pretty: the SVG source will contain empty lines, multiple SVG elements on a single line ... This SVG source can be manually beautified using the "Format SVG" button, or automatically (every time the DrawSvg popup dialog window is closed - by activating this checkbox.
Show browser errors on the server
Unfortunately, not all kind of errors can be validated on the server, but instead they will occur on the client side. For example, when an input message arrives, but no SVG element can be found for the specified selector. As a result, your drawing will not be updated, and in the 1.x.x version you had to figure out yourself what is going wrong... Of course, you can have a look in the browser console log to have a look at the client side errors. However, on some systems (e.g. Android smartphones) it is very difficult to get access to that console log (unless you setup a remote connection via USB with your desktop browser).
To simplify troubleshooting, the client-side errors will appear in the Node-RED debug panel when this checkbox is activated. But keep in mind that if you have N drawings visible simultaneously (when your dashboard is currently displayed in N browsers), then you will get N errors instead of 1 ...
Show browser events on the server
Rather similar to the previous option (about browser errors), except that here browser events (click, ...) are being logged on the server:

Enable JS event debugging
When this setting is active (and you have opened your browser's development tools), the browser's debugger will automatically halt when a JS event handler will be executed. This allows you to experiment live with your Javascript code, to troubleshoot problems with that code.
See the wiki page for more information about debugging JS code.
Send output msg when the client is (re)loaded
When this setting is active, an output message will be send every time the client side widget is (re)loaded. This can be useful to trigger the flow to start preloading data into the SVG drawing when it is opened. The output msg will look like this:
   "payload": <the id of the SVG node>,
   "topic": "loaded"
Editor URL
This is the URL where the DrawSvg editor instance is being hosted. By default this field contains a link to the official DrawSvg cloud system, but it can also contain a link to a local DrawSvg installation (hosted via a node-red-contrib-drawsvg node).
Be aware that this is a free system, so there is no guarantee about availability of the cloud system!
Directory
This directory of your local system (where your Node-RED instance is running) can be used to make your local images available, to both your dashboard and your flow editor.
Pan and zoom
A series of options are available to allow panning and zooming, which is useful for large drawings (like buildings, process flows, ...):
- "Panning": enable panning in X, Y or in both directions.
- "Zooming": enable zooming.
- "Pan only when zoomed": when this option is activated, the SVG drawing can only be panned when it has been zoomed previously. Indeed, when the drawing is at its original size, it might in some cases be pointless to allow panning.
- "Enable mouse-wheel zooming": allow zooming in/out by rotating the mouse wheel.
- "Enable double click zooming": the behaviour of this option differs on a touch screen.
- When a mouse is being used, every double click will trigger zooming in. Or it will trigger zooming out when the SHIFT key is being pressed meanwhile.
- On a touch screen the first double tap will trigger zooming in. The second double tap will trigger zooming out. And so on ...
The following demo shows how to pan and zoom via the mouse (mouse-wheel and dragging):

When a touch device has been detected, panning and zoom through touch events is also supported. Thanks to tkirchm for getting us started with these new features! The following hand gestures are currently supported:

It is also possible to control panning and zooming via input messages, as explained in the section Control via messages below. The following example flow shows how to control panning and zooming from the flow editor (using Inject nodes) and via the dashboard (using dashboard button widgets):

[{"id":"a289199.a1714e8","type":"debug","z":"4ae15451.7b2f5c","name":"Floorplan output","active":true,"tosidebar":true,"console":false,"tostatus":false,"complete":"true","targetType":"full","x":2140,"y":380,"wires":[]},{"id":"32dfda30.706666","type":"ui_svg_graphics","z":"4ae15451.7b2f5c","group":"8d1b9121.83b3c","order":1,"width":"14","height":"10","svgString":"<svg xmlns=\"http://www.w3.org/2000/svg\" xmlns:xlink=\"http://www.w3.org/1999/xlink\" xmlns:svg=\"http://www.w3.org/2000/svg\" width=\"600px\" height=\"500px\" preserveAspectRatio=\"xMidYMid meet\"><defs id=\"svgEditorDefs\"><polygon id=\"svgEditorShapeDefs\" style=\"fill:rosybrown;stroke:black;vector-effect:non-scaling-stroke;stroke-width:1px;\"/></defs><rect id=\"svgEditorBackground\" x=\"0\" y=\"0\" width=\"100%\" height=\"100%\" style=\"fill: none; stroke: none;\"/><circle id=\"e1_circle\" cx=\"100\" cy=\"100\" style=\"fill:rosybrown;stroke:black;stroke-width:1px;\" r=\"25.8069758011\"/><text style=\"fill:black;font-family:Arial;font-size:20px;\" x=\"94\" y=\"105\" id=\"e2_texte\">A</text><text style=\"fill:black;font-family:Arial;font-size:20px;\" x=\"104\" y=\"98\" id=\"e3_texte\"/><circle id=\"e2_circle\" cx=\"200\" cy=\"100\" style=\"fill:rosybrown;stroke:black;stroke-width:1px;\" r=\"25.8069758011\"/><text style=\"fill:black;font-family:Arial;font-size:20px;\" x=\"193\" y=\"107\" id=\"e4_texte\">B</text><text style=\"fill:black;font-family:Arial;font-size:20px;\" x=\"195\" y=\"97\" id=\"e5_texte\"/><circle id=\"e3_circle\" cx=\"100\" cy=\"200\" style=\"fill:rosybrown;stroke:black;stroke-width:1px;\" r=\"25.8069758011\"/><text style=\"fill:black;font-family:Arial;font-size:20px;\" x=\"93\" y=\"206\" id=\"e6_texte\">F</text><circle id=\"e4_circle\" cx=\"200\" cy=\"200\" style=\"fill:rosybrown;stroke:black;stroke-width:1px;\" r=\"25.8069758011\"/><circle id=\"e5_circle\" cx=\"100\" cy=\"300\" style=\"fill:rosybrown;stroke:black;stroke-width:1px;\" r=\"25.8069758011\"/><circle id=\"e6_circle\" cx=\"200\" cy=\"300\" style=\"fill:rosybrown;stroke:black;stroke-width:1px;\" r=\"25.8069758011\"/><circle id=\"e7_circle\" cx=\"302\" cy=\"102\" style=\"fill:rosybrown;stroke:black;stroke-width:1px;\" r=\"25.8069758011\"/><text style=\"fill:black;font-family:Arial;font-size:20px;\" x=\"293\" y=\"109\" id=\"e7_texte\">C</text><circle id=\"e8_circle\" cx=\"402\" cy=\"102\" style=\"fill:rosybrown;stroke:black;stroke-width:1px;\" r=\"25.8069758011\"/><text style=\"fill:black;font-family:Arial;font-size:20px;\" x=\"397\" y=\"108\" id=\"e8_texte\">D</text><circle id=\"e9_circle\" cx=\"300\" cy=\"200\" style=\"fill:rosybrown;stroke:black;stroke-width:1px;\" r=\"25.8069758011\"/><text style=\"fill:black;font-family:Arial;font-size:20px;\" x=\"295\" y=\"208\" id=\"e9_texte\">H</text><circle id=\"e10_circle\" cx=\"400\" cy=\"200\" style=\"fill:rosybrown;stroke:black;stroke-width:1px;\" r=\"25.8069758011\"/><circle id=\"e11_circle\" cx=\"300\" cy=\"300\" style=\"fill:rosybrown;stroke:black;stroke-width:1px;\" r=\"25.8069758011\"/><circle id=\"e12_circle\" cx=\"402\" cy=\"302\" style=\"fill:rosybrown;stroke:black;stroke-width:1px;\" r=\"25.8069758011\"/><circle id=\"e13_circle\" cx=\"100\" cy=\"400\" style=\"fill:rosybrown;stroke:black;stroke-width:1px;\" r=\"25.8069758011\"/><circle id=\"e14_circle\" cx=\"200\" cy=\"400\" style=\"fill:rosybrown;stroke:black;stroke-width:1px;\" r=\"25.8069758011\"/><circle id=\"e15_circle\" cx=\"300\" cy=\"400\" style=\"fill:rosybrown;stroke:black;stroke-width:1px;\" r=\"25.8069758011\"/><circle id=\"e16_circle\" cx=\"400\" cy=\"400\" style=\"fill:rosybrown;stroke:black;stroke-width:1px;\" r=\"25.8069758011\"/><circle id=\"e17_circle\" cx=\"500\" cy=\"100\" style=\"fill:rosybrown;stroke:black;stroke-width:1px;\" r=\"25.8069758011\"/><text style=\"fill:black;font-family:Arial;font-size:20px;\" x=\"493\" y=\"106\" id=\"e17_texte\">E</text><circle id=\"e18_circle\" cx=\"500\" cy=\"200\" style=\"fill:rosybrown;stroke:black;stroke-width:1px;\" r=\"25.8069758011\"/><circle id=\"e19_circle\" cx=\"500\" cy=\"300\" style=\"fill:rosybrown;stroke:black;stroke-width:1px;\" r=\"25.8069758011\"/><circle id=\"e20_circle\" cx=\"500\" cy=\"400\" style=\"fill:rosybrown;stroke:black;stroke-width:1px;\" r=\"25.8069758011\"/><text style=\"fill:black;font-family:Arial;font-size:20px;\" x=\"93\" y=\"307\" id=\"e1_texte\">K</text><text style=\"fill:black;font-family:Arial;font-size:20px;\" x=\"93\" y=\"406\" id=\"e10_texte\">P</text><text style=\"fill:black;font-family:Arial;font-size:20px;\" x=\"191\" y=\"208\" id=\"e11_texte\">G</text><text style=\"fill:black;font-family:Arial;font-size:20px;\" x=\"193\" y=\"307\" id=\"e12_texte\">L</text><text style=\"fill:black;font-family:Arial;font-size:20px;\" x=\"193\" y=\"406\" id=\"e13_texte\">Q</text><text style=\"fill:black;font-family:Arial;font-size:20px;\" x=\"494\" y=\"308\" id=\"e14_texte\">O</text><text style=\"fill:black;font-family:Arial;font-size:20px;\" x=\"492\" y=\"406\" id=\"e15_texte\">T</text><text style=\"fill:black;font-family:Arial;font-size:20px;\" x=\"493\" y=\"207\" id=\"e16_texte\">J</text><text style=\"fill:black;font-family:Arial;font-size:20px;\" x=\"392\" y=\"207\" id=\"e18_texte\">I</text><text style=\"fill:black;font-family:Arial;font-size:20px;\" x=\"396\" y=\"309\" id=\"e19_texte\">N</text><text style=\"fill:black;font-family:Arial;font-size:20px;\" x=\"393\" y=\"407\" id=\"e20_texte\">S</text><text style=\"fill:black;font-family:Arial;font-size:20px;\" x=\"293\" y=\"306\" id=\"e21_texte\">M</text><text style=\"fill:black;font-family:Arial;font-size:20px;\" x=\"292\" y=\"407\" id=\"e22_texte\">R</text><text style=\"fill:black;font-family:Arial;font-size:20px;\" x=\"82.55244445800781\" y=\"26.68446922302246\" id=\"e23_texte\">100</text><text style=\"fill:black;font-family:Arial;font-size:20px;\" x=\"182.9540252685547\" y=\"27.42818832397461\" id=\"e24_texte\">200</text><text style=\"fill:black;font-family:Arial;font-size:20px;\" x=\"285.5868225097656\" y=\"27.42818832397461\" id=\"e25_texte\">300</text><text style=\"fill:black;font-family:Arial;font-size:20px;\" x=\"385.2447204589844\" y=\"26.684473037719727\" id=\"e26_texte\">400</text><text style=\"fill:black;font-family:Arial;font-size:20px;\" x=\"484.1588134765625\" y=\"27.428176879882812\" id=\"e27_texte\">500</text><text style=\"fill:black;font-family:Arial;font-size:20px;\" x=\"8.180865287780762\" y=\"106.26204681396484\" id=\"e28_texte\">100</text><text style=\"fill:black;font-family:Arial;font-size:20px;\" x=\"8.92458724975586\" y=\"204.4324493408203\" id=\"e29_texte\">200</text><text style=\"fill:black;font-family:Arial;font-size:20px;\" x=\"6.693431854248047\" y=\"306.3215026855469\" id=\"e30_texte\">300</text><text style=\"fill:black;font-family:Arial;font-size:20px;\" x=\"9.668293952941895\" y=\"405.23565673828125\" id=\"e31_texte\">400</text><text style=\"fill:black;font-family:Arial;font-size:20px;\" x=\"40.160640716552734\" y=\"25.197044372558594\" id=\"e32_texte\"/><path d=\"M4.848484684596244,-1.5151515315403765v-2l4,4l-4,4v-2h-4v-4Z\" style=\"fill:rosybrown; stroke:black; vector-effect:non-scaling-stroke;stroke-width:1px;\" id=\"e37_shape\" transform=\"matrix(3.06783 0 0 3.06783 50.9445 18.8755)\"/><path d=\"M3.000000026913421,2.5000000672835476h2l-4,4l-4,-4h1.9999999999999998v-4h4Z\" style=\"fill:rosybrown; stroke:black; vector-effect:non-scaling-stroke;stroke-width:1px;\" id=\"e38_shape\" transform=\"matrix(2.97486 0 0 2.97486 22.3115 63.1265)\"/><text style=\"fill:black;font-family:Arial;font-size:20px;\" x=\"35.698360443115234\" y=\"28.171905517578125\" id=\"e39_texte\">X</text><text style=\"fill:black;font-family:Arial;font-size:20px;\" x=\"19.336605072021484\" y=\"54.94566345214844\" id=\"e40_texte\">Y</text></svg>","clickableShapes":[{"targetId":"#mycircle","action":"click","payload":"cam living clicked","payloadType":"str","topic":"camera_living"}],"smilAnimations":[],"bindings":[{"selector":"#e26_texte","bindSource":"payload.title","bindType":"text","attribute":""}],"showCoordinates":false,"autoFormatAfterEdit":false,"showBrowserErrors":false,"selectorAsElementId":false,"outputField":"","editorUrl":"https://drawsvg.org/drawsvg.html","directory":"","panning":"both","zooming":"enabled","panOnlyWhenZoomed":false,"doubleClickZoomEnabled":true,"mouseWheelZoomEnabled":true,"name":"","x":1940,"y":380,"wires":[["a289199.a1714e8"]]},{"id":"91163354.31b2f","type":"inject","z":"4ae15451.7b2f5c","name":"Zoom in","topic":"","payload":"{\"command\":\"zoom_in\"}","payloadType":"json","repeat":"","crontab":"","once":false,"onceDelay":0.1,"x":1480,"y":260,"wires":[["32dfda30.706666"]]},{"id":"8c7c165f.dee1a8","type":"inject","z":"4ae15451.7b2f5c","name":"Zoom out","topic":"","payload":"{\"command\":\"zoom_out\"}","payloadType":"json","repeat":"","crontab":"","once":false,"onceDelay":0.1,"x":1480,"y":300,"wires":[["32dfda30.706666"]]},{"id":"d984058a.02d818","type":"inject","z":"4ae15451.7b2f5c","name":"Zoom 200%","topic":"","payload":"{\"command\":\"zoom_by_percentage\",\"percentage\":200}","payloadType":"json","repeat":"","crontab":"","once":false,"onceDelay":0.1,"x":1490,"y":340,"wires":[["32dfda30.706666"]]},{"id":"62277e70.5c676","type":"inject","z":"4ae15451.7b2f5c","name":"Zoom point (x=300, y=300) 200%","topic":"","payload":"{\"command\":\"zoom_by_percentage\",\"percentage\":200,\"x\":300,\"y\":300}","payloadType":"json","repeat":"","crontab":"","once":false,"onceDelay":0.1,"x":1550,"y":380,"wires":[["32dfda30.706666"]]},{"id":"365d5483.fa174c","type":"inject","z":"4ae15451.7b2f5c","name":"Pan to point (x=200 / y= 100)","topic":"","payload":"{\"command\":\"pan_to_point\",\"x\":200,\"y\":100}","payloadType":"json","repeat":"","crontab":"","once":false,"onceDelay":0.1,"x":1540,"y":420,"wires":[["32dfda30.706666"]]},{"id":"4d1e70dd.f51f3","type":"inject","z":"4ae15451.7b2f5c","name":"Pan to direction (x=200, y= 100)","topic":"","payload":"{\"command\":\"pan_to_direction\",\"x\":200,\"y\":100}","payloadType":"json","repeat":"","crontab":"","once":false,"onceDelay":0.1,"x":1550,"y":460,"wires":[["32dfda30.706666"]]},{"id":"79ebf8c1.adadd8","type":"inject","z":"4ae15451.7b2f5c","name":"Reset","topic":"","payload":"{\"command\":\"reset_panzoom\"}","payloadType":"json","repeat":"","crontab":"","once":false,"onceDelay":0.1,"showConfirmation":false,"confirmationLabel":"","x":1470,"y":220,"wires":[["32dfda30.706666"]]},{"id":"61be354.f7175cc","type":"ui_button","z":"4ae15451.7b2f5c","name":"Reset","group":"8d1b9121.83b3c","order":4,"width":"3","height":"1","passthru":false,"label":"Reset","tooltip":"","color":"","bgcolor":"","icon":"","payload":"{\"command\":\"reset_panzoom\"}","payloadType":"json","topic":"","x":1730,"y":140,"wires":[["32dfda30.706666"]]},{"id":"d43dfb27.a0f308","type":"ui_button","z":"4ae15451.7b2f5c","name":"Zoom in","group":"8d1b9121.83b3c","order":4,"width":"3","height":"1","passthru":false,"label":"Zoom in","tooltip":"","color":"","bgcolor":"","icon":"","payload":"{\"command\":\"zoom_in\"}","payloadType":"json","topic":"","x":1740,"y":180,"wires":[["32dfda30.706666"]]},{"id":"ef78f0f5.c44b3","type":"ui_button","z":"4ae15451.7b2f5c","name":"Zoom out","group":"8d1b9121.83b3c","order":4,"width":"3","height":"1","passthru":false,"label":"Zoom out","tooltip":"","color":"","bgcolor":"","icon":"","payload":"{\"command\":\"zoom_out\"}","payloadType":"json","topic":"","x":1740,"y":220,"wires":[["32dfda30.706666"]]},{"id":"8d1b9121.83b3c","type":"ui_group","z":"","name":"Pan/zoom test","tab":"5021fcf2.ee7ac4","order":1,"disp":true,"width":"14","collapse":false},{"id":"5021fcf2.ee7ac4","type":"ui_tab","z":"","name":"SVG","icon":"dashboard","disabled":false,"hidden":false}]
Which results in this dashboard behaviour:

Notice the different behaviour between the two types of buttons in this flow:
-
The dashboard buttons will trigger a message that contains the socketid:

Based on that socketid, only that client - where the button has been pressed - will receive the pan/zoom command (which is exactly what we want).
-
The Inject node buttons will trigger a message that contains no socketid (since there is no specific dashboard client involved here), so ALL clients will receive the same pan/zoom command (which is most of the time not useful).
Caution: make sure the panning and zooming is enabled in the Settings tab sheet, otherwise it will not be possible to control panning and zooming via input messages!
Control via messages
Most of the SVG information can be manipulated by sending input messages to this node.
Some general msg guidelines:
-
In most messages, you need to specify on which SVG element(s) the control message needs to be applied. To specify a single element, the
elementIdfield can be specified:"payload": { "command": "update_text", "elementId": "some_element_id", "textContent": "my title" }However it is also possible to specify one or more elements via a CSS selector. This is a very powerful query mechanism that allows you to apply the control message to multiple SVG elements at once! For example, set all texts with class 'titleText' to value 'my title':
"payload": {
     "command": "update_text",
     "selector": ".titleText", //standard dom selector '#' for id, '.' for class etc.
     "textContent": "my title"
 }
This can be used to do the same update on multiple elements with a single message. Note that a
selectorcan also be used to specify a single element id (similar toelementId), by using a hashtag like "#some_element_id". -
A message can contain a single command. For example:
"payload": {
    "command": "update_attribute",
    "selector": "#cam_living_room",
    "attributeName": "fill",
    "attributeValue": "orange"
}
But it is also possible to specify multiple commands (as an array) in a single control message. For example:
"payload": [ { "command": "update_attribute", "elementId": "cam_kitchen", /*use elementId or selector*/ "attributeName": "fill", "attributeValue": "orange" }, { "command": "set_attribute", "selector": "#cam_living", /*use elementId or selector*/ "attributeName": "fill", "attributeValue": "red" } ] -
When multiple identical commands are being used in a single message, the message might be simplified by specifying the command inside the
msg.topic:"payload": [ { "elementId": "cam_kitchen", /*use elementId or selector*/ "attributeName": "fill", "attributeValue": "orange" }, { "selector": "#cam_living", /*use elementId or selector*/ "attributeName": "fill", "attributeValue": "red" }, ], "topic": "update_attribute"This can be used to do multiple commands with a single message.
-
To further simplify the message, the CSS selector - when it is required - can also be added to the topic (separated by
|):{ "topic": "update_text|#myRect > .faultMessage", "payload": "hello" }This way the message becomes yet shorter, but you can only use 1 selector or command value (even when the payload contains an array).
Update/set an attribute value via msg
The SVG elements' attribute values can be added/changed via an input message:
-
Use command update_attribute to update the value of an existing SVG element attribute:
"payload": { "command": "update_attribute", "selector": "#camera_living", "attributeName": "fill", "attributeValue": "green" }When the specified element does not have the specified attribute, nothing will happen and, in the browser console log an entry will appear (to indicate that the specified element attribute doesn't exist).
-
Use command set_attribute to update the value of an existing SVG element attribute, or create the attribute when it does not exist yet:
"payload": { "command": "set_attribute", "selector": "#camera_living", "attributeName": "rotate", "attributeValue": "90" }
For example, a camera is visualized by a FontAwesome icon (text), which has multiple attributes (x, y, fill ...):
<text id="camera_living" x="310" y="45" font-family="FontAwesome" fill="blue" stroke="black" ...>
The following flow demonstrates how to change the 'fill' colour and 'rotation' attribute values via input messages:
[{"id":"4e6e1448.6e2acc","type":"debug","z":"2203d76d.b17558","name":"Floorplan output","active":true,"tosidebar":true,"console":false,"tostatus":false,"complete":"true","x":740,"y":2040,"wires":[]},{"id":"135dd5c9.59cd2a","type":"ui_svg_graphics","z":"2203d76d.b17558","group":"d4b5416a.9c25f","order":1,"width":"14","height":"10","svgString":"<svg preserveAspectRatio=\"none\" x=\"0\" y=\"0\" viewBox=\"0 0 900 710\" xmlns=\"http://www.w3.org/2000/svg\" xmlns:svg=\"http://www.w3.org/2000/svg\" xmlns:xlink=\"http://www.w3.org/1999/xlink\">\n <image width=\"889\" height=\"703\" id=\"background\" xlink:href=\"https://www.roomsketcher.com/wp-content/uploads/2016/10/1-Bedroom-Floor-Plans.jpg\" />\n <text id=\"banner\" x=\"10\" y=\"16\" fill=\"black\" stroke=\"black\" font-size=\"35\" text-anchor=\"left\" alignment-baseline=\"middle\" stroke-width=\"1\">This is the #banner</text>\n <circle id=\"pir_living\" cx=\"310\" cy=\"45\" r=\"5\" stroke-width=\"0\" fill=\"#FF0000\" />\n <text id=\"camera_living\" x=\"310\" y=\"45\" font-family=\"FontAwesome\" fill=\"grey\" stroke=\"black\" font-size=\"35\" text-anchor=\"middle\" alignment-baseline=\"middle\" stroke-width=\"1\"></text>\n</svg> ","clickableShapes":[{"targetId":"#camera_living","action":"click","payload":"camera_living","payloadType":"str","topic":"camera_living"}],"smilAnimations":[],"bindings":[{"selector":"#banner","bindSource":"payload.title","bindType":"text","attribute":""},{"selector":"#camera_living","bindSource":"payload.position.x","bindType":"attr","attribute":"x"},{"selector":"#camera_living","bindSource":"payload.camera.colour","bindType":"attr","attribute":"fill"}],"showCoordinates":false,"autoFormatAfterEdit":false,"outputField":"","editorUrl":"http://drawsvg.org/drawsvg.html","directory":"","name":"","x":540,"y":2040,"wires":[["4e6e1448.6e2acc"]]},{"id":"2fc1c8e6.b48e18","type":"inject","z":"2203d76d.b17558","name":"databind","repeat":"","crontab":"","once":false,"onceDelay":0.1,"topic":"databind","payload":"{\"camera\":{\"colour\":\"yellow\"},\"position\":{\"x\":320},\"title\":\"databind strikes again\"}","payloadType":"json","x":160,"y":2180,"wires":[["135dd5c9.59cd2a"]]},{"id":"3367d220.c43b0e","type":"inject","z":"2203d76d.b17558","name":"databind","props":[{"p":"payload"},{"p":"topic","vt":"str"}],"repeat":"","crontab":"","once":false,"onceDelay":0.1,"topic":"databind","payload":"{\"camera\":{\"colour\":\"green\"},\"position\":{\"x\":250},\"title\":\"New banner title by databind\"}","payloadType":"json","x":160,"y":2140,"wires":[["135dd5c9.59cd2a"]]},{"id":"97fd3117.1e4e3","type":"inject","z":"2203d76d.b17558","name":"Fill camera green + rotate 90","props":[{"p":"payload"}],"repeat":"","crontab":"","once":false,"onceDelay":0.1,"topic":"","payload":"[{\"command\":\"update_attribute\",\"selector\":\"#camera_living\",\"attributeName\":\"fill\",\"attributeValue\":\"green\"},{\"command\":\"set_attribute\",\"selector\":\"#camera_living\",\"attributeName\":\"rotate\",\"attributeValue\":\"90\"}]","payloadType":"json","x":220,"y":2000,"wires":[["135dd5c9.59cd2a"]]},{"id":"5bbcfbfe.f0d834","type":"inject","z":"2203d76d.b17558","name":"Fill camera orange + rotate 180","props":[{"p":"payload"}],"repeat":"","crontab":"","once":false,"onceDelay":0.1,"topic":"","payload":"[{\"command\":\"update_attribute\",\"selector\":\"#camera_living\",\"attributeName\":\"fill\",\"attributeValue\":\"orange\"},{\"command\":\"set_attribute\",\"selector\":\"#camera_living\",\"attributeName\":\"rotate\",\"attributeValue\":\"180\"}]","payloadType":"json","x":230,"y":2040,"wires":[["135dd5c9.59cd2a"]]},{"id":"52db2b3d.e23494","type":"inject","z":"2203d76d.b17558","name":"Fill camera icon blue","props":[{"p":"payload"}],"repeat":"","crontab":"","once":false,"onceDelay":0.1,"topic":"","payload":"[{\"command\":\"update_attribute\",\"selector\":\"#camera_living\",\"attributeName\":\"fill\",\"attributeValue\":\"blue\"},{\"command\":\"set_attribute\",\"selector\":\"#camera_living\",\"attributeName\":\"rotate\",\"attributeValue\":\"0\"}]","payloadType":"json","x":190,"y":1960,"wires":[["135dd5c9.59cd2a"]]},{"id":"d4b5416a.9c25f","type":"ui_group","z":"","name":"Floorplan test","tab":"b9052fac.2b0e9","order":1,"disp":true,"width":"14","collapse":false},{"id":"b9052fac.2b0e9","type":"ui_tab","z":"","name":"SVG","icon":"dashboard","disabled":false,"hidden":false}]
Update/set a style attribute value via msg
The SVG elements' style attribute values can be added/changed via an input message:
"payload": {
"command": "update_style",
"selector": ".camera",
"attributeName": "fill",
"attributeValue": "purple"
}
Note that both commands update_style and set_style will both update the value of an existing SVG element style attribute or create the style attribute when it doesn't exist yet. So, there is no difference between both commands (in contradiction to set_attribute and update_attribute). Indeed, because there will be always default SVG styles and optionally inline and external SVG styles, the style attributes will always already exist...
Instead of adding/changing a single style attribute value, it is also possible to add/change the entire style attribute at once. In this case the "style" needs to be specified, instead of the "attributeName":
- Use command update_style to update the value of the existing SVG element style:
"payload": { "command": "update_style", "selector": ".camera", "style": { "fill": "blue", "transform": "rotate(5deg)" } } - Use command set_style to update the value of the existing SVG element style attribute, or create the style when it does not exist yet:
"payload": { "command": "set_style", "selector": ".camera", "style": { "fill": "blue", "transform": "rotate(5deg)" } }
Remove an attribute via msg
An attribute of an SVG element can be removed via an input message:
- Use command remove_attribute to remove an SVG element attribute:
"payload": { "command": "remove_attribute", "selector": ".camera", "attributeName": "fill" } - Use command update_style to remove an SVG element attribute by setting the attribute value to an empty string:
This can also be used to remove SVG element style attributes:
"payload": { "command": "update_style", "selector": ".camera", "attributeName": "fill", "attributeValue": "" }"payload": { "command":"update_style", "selector":".camera", "style":{"fill":"", "transform":""} }
The following demo shows to set an attribute "visibility" (with value "hidden"), and then removing that same attribute via a second Inject button:

[{"id":"2399b014.7c6ad","type":"ui_svg_graphics","z":"4ae15451.7b2f5c","group":"2df28529.6748aa","order":2,"width":"12","height":"11","svgString":"<svg width=\"100%\" height=\"100%\" \n xmlns=\"http://www.w3.org/2000/svg\" xmlns:xlink=\"http://www.w3.org/1999/xlink\"> \n <image id=\"my_request\" href=\"https://www.securitymagazine.com/ext/resources/SEC/2016/0216/SEC0216-edu-feature-slide1_900px.jpg\" height=\"100%\" width=\"100%\" preserveAspectRatio=\"xMidYMid meet\"/>\n</svg>","clickableShapes":[],"smilAnimations":[],"bindings":[],"showCoordinates":false,"autoFormatAfterEdit":false,"showBrowserErrors":false,"selectorAsElementId":true,"outputField":"payload","editorUrl":"http://drawsvg.org/drawsvg.html","directory":"","panEnabled":false,"zoomEnabled":false,"controlIconsEnabled":false,"dblClickZoomEnabled":false,"mouseWheelZoomEnabled":false,"name":"","x":1200,"y":720,"wires":[[]]},{"id":"6e24eeff.683db","type":"inject","z":"4ae15451.7b2f5c","name":"Remove attribute","topic":"","payload":"{\"command\":\"remove_attribute\",\"elementId\":\"my_request\",\"attributeName\":\"visibility\"}","payloadType":"json","repeat":"","crontab":"","once":false,"onceDelay":0.1,"showConfirmation":false,"confirmationLabel":"","x":980,"y":760,"wires":[["2399b014.7c6ad"]]},{"id":"196fb554.773beb","type":"inject","z":"4ae15451.7b2f5c","name":"Set attribute","topic":"","payload":"{\"command\":\"set_attribute\",\"elementId\":\"my_request\",\"attributeName\":\"visibility\",\"attributeValue\":\"hidden\"}","payloadType":"json","repeat":"","crontab":"","once":false,"onceDelay":0.1,"showConfirmation":false,"confirmationLabel":"","x":970,"y":720,"wires":[["2399b014.7c6ad"]]},{"id":"2df28529.6748aa","type":"ui_group","z":"","name":"Default","tab":"60e30c13.98a7e4","order":1,"disp":true,"width":"12","collapse":false},{"id":"60e30c13.98a7e4","type":"ui_tab","z":"","name":"Attribute add/remove demo","icon":"dashboard","disabled":false,"hidden":false}]
Although of course it would make more sense to achieve the same effect, by keeping the attribute and update its value from "visible" to "hidden".
Set text content via msg
The text content (or inner html) of an SVG element can be set via an input message:
"payload": {
"command": "update_text",
"selector": "#myRect > .faultMessage",
"textContent": "Hello from a command message"
}
When the command is being specified inside the topic, you can simply send the text in the payload:
 {
     "topic": "update_text|#myRect > .faultMessage",
     "payload": "hello"
 }
There are some different naming conventions possible:
- The command can be both "update_text" or "update_innerHTML".
- The text can be delivered in "textContent" or "text" or "html".
- Beside to plain text, it is also possible to specify text containing HTML or SVG markup! For example "
\<b>Hello\</b> \<i>from a command message\</i>".
This can be used for example to show live sensor values, like in this flow:

[{"id":"33d2b8c4.d8b238","type":"ui_svg_graphics","z":"2203d76d.b17558","group":"95c5d2ef.84601","order":0,"width":"15","height":"15","svgString":"<svg preserveAspectRatio=\"none\" x=\"0\" y=\"0\" viewBox=\"0 0 900 710\" xmlns=\"http://www.w3.org/2000/svg\" xmlns:svg=\"http://www.w3.org/2000/svg\" xmlns:xlink=\"http://www.w3.org/1999/xlink\">\n <text id=\"my_text\" x=\"100\" y=\"30\" fill=\"blue\" font-size=\"25\" text-anchor=\"middle\" alignment-baseline=\"middle\" font-weight=\"bold\">10°C</text>\n <text id=\"my_icon\" x=\"160\" y=\"50\" font-family=\"FontAwesome\" fill=\"blue\" font-size=\"80\" text-anchor=\"middle\" alignment-baseline=\"middle\" stroke-width=\"1\">fa-thermometer-empty</text>\n</svg>","clickableShapes":[],"smilAnimations":[],"bindings":[],"showCoordinates":true,"autoFormatAfterEdit":false,"showBrowserErrors":false,"outputField":"anotherField","editorUrl":"","directory":"","panning":"disabled","zooming":"disabled","panOnlyWhenZoomed":false,"doubleClickZoomEnabled":false,"mouseWheelZoomEnabled":false,"name":"Thermometer","x":820,"y":1820,"wires":[[]]},{"id":"f5cea410.d11948","type":"function","z":"2203d76d.b17558","name":"Color interpolation","func":"const color1 = [0, 0, 255]; // blude\nconst color2 = [255, 0, 0]; // red\n\nvar temperature = msg.payload;\nvar factor = msg.payload / 100;\n\nvar red = Math.round(color1[0] + factor * (color2[0] - color1[0]));\nvar green = Math.round(color1[1] + factor * (color2[1] - color1[1]));\nvar blue = Math.round(color1[2] + factor * (color2[2] - color1[2]));\n\nvar interpolatedColor = \"rgb(\" + red + \",\" + green + \",\" + blue + \")\"; \n\nmsg.payload = [{\n \"command\": \"update_text\",\n \"selector\": \"#my_text\",\n \"textContent\": temperature + \"°C\"\n},{\n \"command\": \"update_attribute\",\n \"selector\": \"#my_text\",\n \"attributeName\": \"fill\",\n \"attributeValue\": interpolatedColor\n},{\n \"command\": \"update_attribute\",\n \"selector\": \"#my_icon\",\n \"attributeName\": \"fill\",\n \"attributeValue\": interpolatedColor\n}]\n\nreturn msg;","outputs":1,"noerr":0,"initialize":"","finalize":"","x":590,"y":1820,"wires":[["33d2b8c4.d8b238"]]},{"id":"a90255d4.4ac008","type":"ui_slider","z":"2203d76d.b17558","name":"","label":"Temperature","tooltip":"","group":"95c5d2ef.84601","order":3,"width":"6","height":"1","passthru":true,"outs":"all","topic":"","min":0,"max":"100","step":1,"x":370,"y":1820,"wires":[["f5cea410.d11948"]]},{"id":"95c5d2ef.84601","type":"ui_group","z":"","name":"Home Floor Plan","tab":"c411008f.d8abc","order":1,"disp":true,"width":"15","collapse":false},{"id":"c411008f.d8abc","type":"ui_tab","z":"","name":"Home Floor Plan","icon":"dashboard","disabled":false,"hidden":false}]
Get text content via msg
The text content (or inner html) of an SVG element can be get via an input message:
"payload": {
    "command": "get_text",
    "selector": "#myText"
}
The text(s) will be sent in the output message payload as an array.
Start/stop animations via msg
Existing animations can be started/stopped via an input message, by a start or stop action value:
"payload": {
   "command": "trigger_animation",
   "selector": "#myAnimation",
   "action": "start"
}
Note that you need to specify in the "Animations" tab sheet which animations will be triggered via input messages:

Such messages allow you to create dynamic effects like in the following demo:
[{"id":"c997135f.8035f","type":"debug","z":"f939feb8.8dc6","name":"Floorplan output","active":true,"tosidebar":true,"console":false,"tostatus":false,"complete":"true","x":520,"y":220,"wires":[]},{"id":"bb93fff5.927ba","type":"ui_svg_graphics","z":"f939feb8.8dc6","group":"997e40da.b5acc","order":1,"width":"14","height":"10","svgString":"<svg preserveAspectRatio=\"none\" x=\"0\" y=\"0\" viewBox=\"0 0 900 710\" xmlns=\"http://www.w3.org/2000/svg\" xmlns:svg=\"http://www.w3.org/2000/svg\" xmlns:xlink=\"http://www.w3.org/1999/xlink\">\n <image width=\"889\" height=\"703\" id=\"background\" xlink:href=\"https://www.roomsketcher.com/wp-content/uploads/2016/10/1-Bedroom-Floor-Plans.jpg\" />\n <text id=\"banner\" x=\"10\" y=\"16\" fill=\"black\" stroke=\"black\" font-size=\"35\" text-anchor=\"left\" alignment-baseline=\"middle\" stroke-width=\"1\">This is the #banner</text>\n <circle id=\"pir_living\" cx=\"310\" cy=\"45\" r=\"1\" stroke-width=\"1\" fill=\"#FF0000\" />\n <text id=\"camera_living\" x=\"310\" y=\"45\" font-family=\"FontAwesome\" fill=\"grey\" stroke=\"black\" font-size=\"35\" text-anchor=\"middle\" alignment-baseline=\"middle\" stroke-width=\"1\"></text>\n</svg> ","clickableShapes":[{"targetId":"#camera_living","action":"click","payload":"camera_living","payloadType":"str","topic":"camera_living"}],"smilAnimations":[{"id":"myAnimation","targetId":"pir_living","classValue":"all_animation","attributeName":"r","fromValue":"1","toValue":"30","trigger":"cust","duration":"500","durationUnit":"ms","repeatCount":"5","end":"restore","delay":"1","delayUnit":"s","custom":"camera_living.click; "},{"id":"textRotate","targetId":"banner","classValue":"all_animation","attributeName":"rotate","fromValue":"0","toValue":"360","trigger":"msg","duration":"750","durationUnit":"ms","repeatCount":"3","end":"restore","delay":"1","delayUnit":"s","custom":""}],"bindings":[{"selector":"#banner","bindSource":"payload.title","bindType":"text","attribute":""},{"selector":"#camera_living","bindSource":"payload.position.x","bindType":"attr","attribute":"x"},{"selector":"#camera_living","bindSource":"payload.camera.colour","bindType":"attr","attribute":"fill"}],"showCoordinates":false,"autoFormatAfterEdit":false,"outputField":"","editorUrl":"","directory":"","name":"","x":420,"y":180,"wires":[["c997135f.8035f"]]},{"id":"356e2a8f.a08fe6","type":"inject","z":"f939feb8.8dc6","name":"databind","topic":"databind","payload":"{\"camera\":{\"colour\":\"yellow\"},\"position\":{\"x\":320},\"title\":\"databind strikes again\"}","payloadType":"json","repeat":"","crontab":"","once":false,"onceDelay":0.1,"x":240,"y":260,"wires":[["bb93fff5.927ba"]]},{"id":"4e2e2d82.5950e4","type":"inject","z":"f939feb8.8dc6","name":"databind","topic":"databind","payload":"{\"camera\":{\"colour\":\"green\"},\"position\":{\"x\":250},\"title\":\"New banner title by databind\"}","payloadType":"json","repeat":"","crontab":"","once":false,"onceDelay":0.1,"x":240,"y":220,"wires":[["bb93fff5.927ba"]]},{"id":"97b80c2d.b5c35","type":"inject","z":"f939feb8.8dc6","name":"Fill camera green + rotate 90","topic":"update_attribute","payload":"[{\"command\":\"update_attribute\",\"selector\":\"#camera_living\",\"attributeName\":\"fill\",\"attributeValue\":\"green\"},{\"command\":\"set_attribute\",\"selector\":\"#camera_living\",\"attributeName\":\"rotate\",\"attributeValue\":\"90\"}]","payloadType":"json","repeat":"","crontab":"","once":false,"onceDelay":0.1,"x":300,"y":360,"wires":[["bb93fff5.927ba"]]},{"id":"4be0130f.78b13c","type":"inject","z":"f939feb8.8dc6","name":"Fill camera orange + rotate 180","topic":"update_attribute","payload":"[{\"command\":\"update_attribute\",\"selector\":\"#camera_living\",\"attributeName\":\"fill\",\"attributeValue\":\"orange\"},{\"command\":\"set_attribute\",\"selector\":\"#camera_living\",\"attributeName\":\"rotate\",\"attributeValue\":\"180\"}]","payloadType":"json","repeat":"","crontab":"","once":false,"onceDelay":0.1,"x":310,"y":400,"wires":[["bb93fff5.927ba"]]},{"id":"46128135.4fcdd","type":"inject","z":"f939feb8.8dc6","name":"Fill camera icon blue","topic":"update_attribute","payload":"[{\"command\":\"update_attribute\",\"selector\":\"#camera_living\",\"attributeName\":\"fill\",\"attributeValue\":\"blue\"},{\"command\":\"set_attribute\",\"selector\":\"#camera_living\",\"attributeName\":\"rotate\",\"attributeValue\":\"0\"}]","payloadType":"json","repeat":"","crontab":"","once":false,"onceDelay":0.1,"x":270,"y":320,"wires":[["bb93fff5.927ba"]]},{"id":"735182fa.b0c50c","type":"inject","z":"f939feb8.8dc6","name":"Start animation","topic":"trigger_animation","payload":"[{\"command\":\"trigger_animation\",\"selector\":\".all_animation\",\"action\":\"start\"}]","payloadType":"json","repeat":"","crontab":"","once":false,"onceDelay":0.1,"x":240,"y":60,"wires":[["bb93fff5.927ba"]]},{"id":"7b608d5b.d892a4","type":"inject","z":"f939feb8.8dc6","name":"Stop animation","topic":"","payload":"[{\"command\":\"trigger_animation\",\"selector\":\"#myAnimation\",\"action\":\"stop\"},{\"command\":\"trigger_animation\",\"selector\":\"#textRotate\",\"action\":\"stop\"}]","payloadType":"json","repeat":"","crontab":"","once":false,"onceDelay":0.1,"x":240,"y":100,"wires":[["bb93fff5.927ba"]]},{"id":"997e40da.b5acc","type":"ui_group","z":"","name":"Floorplan test","tab":"95801a22.bd5f18","disp":true,"width":"14","collapse":false},{"id":"95801a22.bd5f18","type":"ui_tab","z":"","name":"SVG","icon":"dashboard","disabled":false,"hidden":false}]
Add events via msg
When SVG elements always need to respond server-side to an event (e.g. click), those elements should be enumerated in the "Events" tab sheet. However, in some cases it is required to make SVG elements to respond only temporary to events, which can be achieved by adding events to SVG elements via an input message.
"payload": {
   "command"  : "add_event",
   "event"    : "click",
   "selector" : "#circle_2",
   "payload"  : "circle 2 has been clicked", // Content of the output message payload
   "topic"    : "CIRCLE_CLICKED" // Content of the output message topic
}]
By sending this input message, the circle will become clickable.
Remarks:
- The payload of the input message contains both the payload and topic of the output message (which will be sent in when the specified event occurs on the specified SVG element).
- The following events can be specified: "click", "dblclick", "contextmenu", "mouseover", "mouseout", "mouseup", "mousedown", "focus", "focusin", "focusout", "blur", "keyup", "keydown", "touchstart", "touchend"
- You need to remove the previous event handler (via the center inject node), before you add a new event handler. Otherwise an error will occur.
Remove events via msg
An event (handler) can be removed from an SVG element via an input message:
"payload": {
   "command"  : "remove_event",
   "event"    : "click",
   "selector" : "#circle_1"
}
Add Javascript events via msg
When SVG elements always need to respond client-side to an event (e.g. click), those elements should be enumerated in the "JS" tab sheet. However, in some cases it is required to make SVG elements to respond only temporary via Javascript to events, which can be achieved by adding events to SVG elements via an input message.
"payload": {
   "command"  : "add_js_event",
   "event"    : "click",
   "selector" : "#circle_2",
   "script"   : "alert('circle 2 has been clicked');" // The Javascript code that needs to be executed
}]
By sending this input message, the circle will become clickable. And the specified Javascript code will be executed on the client-side (i.e. inside the dashboard) as soon as the event occurs.
Remarks:
-
The following events can be specified: "click", "dblclick", "contextmenu", "mouseover", "mouseout", "mouseup", "mousedown", "focus", "focusin", "focusout", "blur", "keyup", "keydown", "touchstart", "touchend"
-
You need to remove the previous event handler first (e.g. by adding both remove_js_event and add_js_event commands inside a single message), before you can specify a new event handler. Otherwise an error will occur.
-
When the "show browser errors on the server" option is activated, an error will be displayed in the Debug sidebar when the injected Javascript code contains errors. For example we inject the code snippet "var x=1 var y=2;", which doesn't contain a
;between the two statements. As soon as the event occurs (and the Javascript code is executed), this error will be displayed:
Remove Javascript events via msg
A Javascript event (handler) can be removed from an SVG element via an input message:
"payload": {
   "command"  : "remove_js_event",
   "event"    : "click",
   "selector" : "#circle_1"
}
Add elements via msg
Normally SVG elements need to exist all the time, by defining them in the "SVG" tab sheet. However, it might be required to add SVG elements dynamically, which can be achieved via input messages:
"payload": {
   "command": "add_element",
   "elementType": "circle",
   "elementId": "extra_circle",
   "elementAttributes": [
      "cx": "100",
      "cy": "50",
      "r": "30"
   ],
   "elementStyleAttributes": [
      "fill": "red",
      "stroke": "black"
   ],
   "textContent": "my content"
}
Some remarks about the input message:
- A
parentElementIdproperty can be specified if the new element should be a child of the specified parent element. If not available, the new element will be added directly under the root SVG element. - A
parentSelectorproperty can be specified, if an instance of this element should be added to all the parent elements that match the CSS selector. This way you can create multiple elements at once via a single command. Note that it is not allowed in that case to specify an elementId property, since only one element can have the same id. - When an element with the same
elementIdalready exists (for the same parent element), then that existing element will be replaced by this new element!
When the "Event" tab sheet already contains a CSS selector that matches this new element, then this new element automatically gets those event handlers.
The following demo shows how to create an icon every time the button is being clicked (and remove them afterwards):

[{"id":"2b26f529.49dbfa","type":"ui_svg_graphics","z":"4ae15451.7b2f5c","group":"5a9e7538.2c2fbc","order":2,"width":"6","height":"6","svgString":"<svg x=\"0\" y=\"0\" height=\"300\" viewBox=\"0 0 300 300\" width=\"300\" xmlns=\"http://www.w3.org/2000/svg\" xmlns:svg=\"http://www.w3.org/2000/svg\" xmlns:xlink=\"http://www.w3.org/1999/xlink\">\n</svg>","clickableShapes":[{"targetId":"#circle_1","action":"click","payload":"#circle_1","payloadType":"str","topic":"#circle_1"}],"smilAnimations":[],"bindings":[],"showCoordinates":true,"autoFormatAfterEdit":false,"showBrowserErrors":false,"selectorAsElementId":true,"outputField":"payload","editorUrl":"http://drawsvg.org/drawsvg.html","directory":"","panEnabled":false,"zoomEnabled":false,"controlIconsEnabled":false,"dblClickZoomEnabled":false,"mouseWheelZoomEnabled":false,"name":"","x":1820,"y":160,"wires":[[]]},{"id":"4eaee1f9.e29a","type":"inject","z":"4ae15451.7b2f5c","name":"Add element \"newElement\"","topic":"","payload":"{\"command\":\"add_element\",\"elementType\":\"text\",\"elementId\":\"burglar\",\"elementAttributes\":{\"x\":\"50\",\"y\":\"60\",\"font-family\":\"FontAwesome\",\"font-size\":\"35\",\"text-anchor\":\"middle\",\"alignment-baseline\":\"middle\",\"stroke-width\":\"1\"},\"elementStyleAttributes\":{\"fill\":\"blue\",\"stroke\":\"black\"},\"textContent\":\"fa-video-camera\"}","payloadType":"json","repeat":"","crontab":"","once":false,"onceDelay":0.1,"showConfirmation":false,"confirmationLabel":"","x":1490,"y":160,"wires":[["2b26f529.49dbfa"]]},{"id":"13d4363.22c11ca","type":"inject","z":"4ae15451.7b2f5c","name":"Remove element","topic":"","payload":"{\"command\":\"remove_element\",\"elementId\":\"burglar\"}","payloadType":"json","repeat":"","crontab":"","once":false,"onceDelay":0.1,"showConfirmation":false,"confirmationLabel":"","x":1460,"y":200,"wires":[["2b26f529.49dbfa"]]},{"id":"7b4a624b.97e90c","type":"function","z":"4ae15451.7b2f5c","name":"Set random coordinates","func":"// Generate random coordinates between 0 and 300\nvar x = Math.floor(Math.random() * 300);\nvar y = Math.floor(Math.random() * 300);\nmsg.payload.elementAttributes.x = x;\nmsg.payload.elementAttributes.y = y;\nmsg.payload.elementId = \"burglar_\" + Math.random();\nreturn msg;","outputs":1,"noerr":0,"x":1670,"y":300,"wires":[["2b26f529.49dbfa"]]},{"id":"9b51204a.ea4f9","type":"inject","z":"4ae15451.7b2f5c","name":"Add element","topic":"","payload":"{\"command\":\"add_element\",\"elementType\":\"text\",\"elementAttributes\":{\"font-family\":\"FontAwesome\",\"font-size\":\"35\",\"text-anchor\":\"middle\",\"alignment-baseline\":\"middle\",\"stroke-width\":\"1\"},\"elementStyleAttributes\":{\"fill\":\"blue\",\"stroke\":\"black\"},\"textContent\":\"fa-male\"}","payloadType":"json","repeat":"","crontab":"","once":false,"onceDelay":0.1,"showConfirmation":false,"confirmationLabel":"","x":1450,"y":300,"wires":[["7b4a624b.97e90c"]]},{"id":"7bc4610d.d954c","type":"inject","z":"4ae15451.7b2f5c","name":"Remove all","topic":"","payload":"{\"command\":\"remove_element\",\"selector\":\"[id^=burglar]\"}","payloadType":"json","repeat":"","crontab":"","once":false,"onceDelay":0.1,"showConfirmation":false,"confirmationLabel":"","x":1450,"y":260,"wires":[["2b26f529.49dbfa"]]},{"id":"5a9e7538.2c2fbc","type":"ui_group","z":"","name":"Boundingbox test","tab":"80f0e178.bbf4a","order":2,"disp":true,"width":"12","collapse":false},{"id":"80f0e178.bbf4a","type":"ui_tab","z":"","name":"Home","icon":"dashboard","order":1,"disabled":false,"hidden":false}]
Remove elements via msg
An SVG element can be removed via an input message:
"payload": {
   "command": "remove_element",
   "elementId": "circle_1"
}
By specifying a selector property (instead of an elementId property), it is possible to remove multiple elements at once via a single command.
Set entire SVG via msg
It is possible to set an entire SVG drawing via an input message, to replace the current drawing:
"payload": {
    "command": "replace_svg",
    "svg": "<svg height=\"140\" width=\"140\"><circle id=\"myShape\" cx=\"50\" cy=\"50\" r=\"40\" fill=\"yellow\"/></svg>"
}
Note that it is required to escape all quotation marks (") around the attribute names attributes, by a forward slash \ in the "svg" message field. For example replace width="140" by width=\"140\". If this isn't sufficient on some browsers, you can find extra tips here. Please report it to me, so I can update this documentation here!
The following example flow demonstrates how the entire SVG can be replaced:

[{"id":"16a953b2.21beec","type":"ui_svg_graphics","z":"5598090d.febad8","group":"925439b0.2863c8","order":0,"width":"3","height":"3","svgString":"<svg x=\"0\" y=\"0\" width=\"144\" height=\"144\" viewBox=\"0 0 144 144\" xmlns=\"http://www.w3.org/2000/svg\" xmlns:svg=\"http://www.w3.org/2000/svg\" xmlns:xlink=\"http://www.w3.org/1999/xlink\">\n<circle id=\"myShape\" cx=\"73\" cy=\"72\" r=\"20\" color=\"red\" outline=\"black\"/>\n</svg>","clickableShapes":[{"targetId":"#myShape","action":"click","payload":"myShape clicked","payloadType":"str","topic":"#myShape"}],"smilAnimations":[],"bindings":[],"showCoordinates":false,"autoFormatAfterEdit":false,"showBrowserErrors":true,"outputField":"payload","editorUrl":"//drawsvg.org/drawsvg.html","directory":"","panning":"both","zooming":"disabled","panOnlyWhenZoomed":false,"doubleClickZoomEnabled":false,"mouseWheelZoomEnabled":false,"name":"svg-graphics","x":590,"y":260,"wires":[["4672821a.2f296c"]]},{"id":"e105ccfb.c2849","type":"inject","z":"5598090d.febad8","name":"SVG with yellow circle","props":[{"p":"payload"}],"repeat":"","crontab":"","once":false,"onceDelay":0.1,"topic":"","payload":"{\"command\":\"replace_svg\",\"svg\":\"<svg height=\\\"140\\\" width=\\\"140\\\"><circle id=\\\"myShape\\\" cx=\\\"50\\\" cy=\\\"50\\\" r=\\\"40\\\" fill=\\\"yellow\\\"/></svg>\"}","payloadType":"json","x":380,"y":260,"wires":[["16a953b2.21beec"]]},{"id":"b232e2bf.52efb","type":"inject","z":"5598090d.febad8","name":"SVG with blue rectangle","props":[{"p":"payload"}],"repeat":"","crontab":"","once":false,"onceDelay":0.1,"topic":"","payload":"{\"command\":\"replace_svg\",\"svg\":\"<svg height=\\\"140\\\" width=\\\"140\\\"><rect id=\\\"myShape\\\" x=\\\"20\\\" y=\\\"30\\\" width=\\\"110\\\" height=\\\"70\\\" fill=\\\"blue\\\"/></svg>\"}","payloadType":"json","x":380,"y":320,"wires":[["16a953b2.21beec"]]},{"id":"5f208d4d.047af4","type":"inject","z":"5598090d.febad8","name":"SVG with pink ellipse","props":[{"p":"payload"}],"repeat":"","crontab":"","once":false,"onceDelay":0.1,"topic":"","payload":"{\"command\":\"replace_svg\",\"svg\":\"<svg height=\\\"140\\\" width=\\\"140\\\"><ellipse id=\\\"myShape\\\" cx=\\\"60\\\" cy=\\\"50\\\" rx=\\\"60\\\" ry=\\\"30\\\" fill=\\\"pink\\\"/></svg>\"}","payloadType":"json","x":380,"y":380,"wires":[["16a953b2.21beec"]]},{"id":"4672821a.2f296c","type":"debug","z":"5598090d.febad8","name":"log events","active":true,"tosidebar":true,"console":false,"tostatus":false,"complete":"true","targetType":"full","statusVal":"","statusType":"auto","x":770,"y":260,"wires":[]},{"id":"925439b0.2863c8","type":"ui_group","z":"","name":"svg-panning-test","tab":"5c613937.fe7368","order":4,"disp":true,"width":"3","collapse":false},{"id":"5c613937.fe7368","type":"ui_tab","z":"","name":"Home","icon":"home","order":1,"disabled":false,"hidden":false}]
When event handlers or input msg bindings have been specified on the config screen, those will automatically be applied to the new SVG drawing.
Zoom in/out via msg
As explained above (in the Pan and zoom section), it is possible to zoom in/out via an input message:
"payload": {
   "command": "zoom_in"
}
Or the reverse is also possible:
"payload": {
   "command": "zoom_out"
}
Or zoom by a percentage, for example 130% (which means a factor 1.3):
"payload": {
   "command": "zoom_by_percentage",
   "percentage": 130
}
Optionally coordinates can be specified, to zoom in on that specific point by a specified percentage:
"payload": {
   "command": "zoom_by_percentage",
   "percentage": 130,
   "x": 300,
   "y": 400
}
Panning via msg
As explained above (in the Pan and zoom section), it is possible to pan absolute to a specified point via an input message:
"payload": {
   "command": "pan_to_point",
   "x": 300,
   "y": 400
}
Or it is also possible to pan relative in a specified direction:
"payload": {
   "command": "pan_to_direction",
   "x": 300,
   "y": 400
}
Various stuff
Fontawesome icons
Fontawesome icons are used widely in Node-RED and are in fact little SVG drawings on their own. They are a very easy way e.g. to represent devices on a floorplan. Such an icon can easily be added via DrawSvg, as demonstrated in this animation:
By specifying an identifier for the icon (like in the above animation), the icon can be updated afterwards via input messages (like any other SVG element).
When you want to enter your SVG source manually (without using DrawSvg), there is another mechanism provided:
-
Search the Fontawesome website for an icon that fits your needs. For example, 'fa-video-camera'.
-
Create a text element (with font family "FontAwesome") containing that icon name:
<text id="camera_living" x="310" y="45" font-family="FontAwesome" fill="blue" stroke="black" font-size="35" text-anchor="middle" alignment-baseline="middle" stroke-width="1">fa-video-camera</text> -
The result will be the FontAwesome icon at the specified location:
Some remarks:
-
The node will automatically lookup the unicode value for that icon, based on this list:
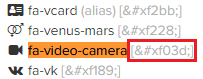
As a result, in the generated dashboard html you will see only the unicode value (instead of the original fa-video-camera value):
<text id="camera_living" x="310" y="45" font-family="FontAwesome" fill="blue" stroke="black" font-size="35" text-anchor="middle" alignment-baseline="middle" stroke-width="1"></text> -
Currently DrawSvg doesn't support the FontAwesome font. See this issue.
! This means in the current DrawSvg version you will see "fa-xxx" instead of the FontAwesome icon: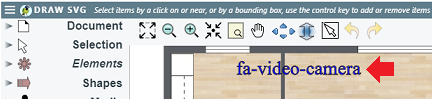
-
Since FontAwesome icons are displayed in
<text>SVG elements, it is very easy to change the icon using a update_text (see 'Control messages' section above):
[{"id":"f369eb92.6c5558","type":"ui_svg_graphics","z":"553defb0.b99fb","group":"9ec8b304.368cc","order":0,"width":"15","height":"15","svgString":"<!--<svg height=\"100\" width=\"100\"></svg>-->\n\n<svg preserveAspectRatio=\"none\" x=\"0\" y=\"0\" viewBox=\"0 0 900 710\" xmlns=\"http://www.w3.org/2000/svg\" xmlns:svg=\"http://www.w3.org/2000/svg\" xmlns:xlink=\"http://www.w3.org/1999/xlink\">\n <text id=\"my_text\" x=\"100\" y=\"50\" font-family=\"FontAwesome\" fill=\"blue\" stroke=\"black\" font-size=\"80\" text-anchor=\"middle\" alignment-baseline=\"middle\" stroke-width=\"1\">fa-thermometer-empty</text>\n</svg>","clickableShapes":[{"targetId":"#camera_living","action":"click","payload":"#camera_living","payloadType":"str","topic":"#camera_living"},{"targetId":"#camera_balcony","action":"click","payload":"#camera_balcony","payloadType":"str","topic":"#camera_balcony"},{"targetId":"#camera_entry","action":"click","payload":"#camera_entry","payloadType":"str","topic":"#camera_entry"}],"smilAnimations":[],"bindings":[{"selector":"#camera_living","bindSource":"payload.attributeValue","bindType":"attr","attribute":"fill"},{"selector":"#camera_entry","bindSource":"payload.attribueValue","bindType":"attr","attribute":"fill"},{"selector":"#camera_balcony","bindSource":"payload.attributeValue","bindType":"attr","attribute":"fill"}],"showCoordinates":true,"autoFormatAfterEdit":false,"outputField":"anotherField","editorUrl":"","directory":"","name":"Home Floor Plan","x":1130,"y":520,"wires":[[]]},{"id":"866e2e46.ba033","type":"inject","z":"553defb0.b99fb","name":"fa-thermometer-three-quarters","topic":"","payload":"{\"command\":\"update_text\",\"selector\":\"#my_text\",\"textContent\":\"fa-thermometer-three-quarters\"}","payloadType":"json","repeat":"","crontab":"","once":false,"onceDelay":0.1,"x":820,"y":520,"wires":[["f369eb92.6c5558"]]},{"id":"68c4730b.af00bc","type":"inject","z":"553defb0.b99fb","name":"fa-thermometer-full ","topic":"","payload":"{\"command\":\"update_text\",\"selector\":\"#my_text\",\"textContent\":\"fa-thermometer-full\"}","payloadType":"json","repeat":"","crontab":"","once":false,"onceDelay":0.1,"x":790,"y":560,"wires":[["f369eb92.6c5558"]]},{"id":"46183ab5.42fd54","type":"inject","z":"553defb0.b99fb","name":"fa-thermometer-empty","topic":"","payload":"{\"command\":\"update_text\",\"selector\":\"#my_text\",\"textContent\":\"fa-thermometer-empty\"}","payloadType":"json","repeat":"","crontab":"","once":false,"onceDelay":0.1,"x":800,"y":400,"wires":[["f369eb92.6c5558"]]},{"id":"501c7f9a.08ac4","type":"inject","z":"553defb0.b99fb","name":"fa-thermometer-half ","topic":"","payload":"{\"command\":\"update_text\",\"selector\":\"#my_text\",\"textContent\":\"fa-thermometer-half\"}","payloadType":"json","repeat":"","crontab":"","once":false,"onceDelay":0.1,"x":790,"y":480,"wires":[["f369eb92.6c5558"]]},{"id":"d3ea2538.fa9458","type":"inject","z":"553defb0.b99fb","name":"fa-thermometer-quarter","topic":"","payload":"{\"command\":\"update_text\",\"selector\":\"#my_text\",\"textContent\":\"fa-thermometer-quarter\"}","payloadType":"json","repeat":"","crontab":"","once":false,"onceDelay":0.1,"x":800,"y":440,"wires":[["f369eb92.6c5558"]]},{"id":"9ec8b304.368cc","type":"ui_group","z":"","name":"Home Floor Plan","tab":"bb4f2a94.83b338","disp":true,"width":"15","collapse":false},{"id":"bb4f2a94.83b338","type":"ui_tab","z":"","name":"Home Floor Plan","icon":"dashboard","disabled":false,"hidden":false}]
Display images
In an SVG drawing, an "image" element can be used to display an image inside an SVG drawing. See this tutorial on the wiki for more information!
Troubleshooting
Some tips and tricks to solve known problems:
-
When SVG path elements get the same colour as the dashboard theme, like in this example where the shapes become blue:

You can avoid this by applying the fill colour as a
styleattribute (e.g. <element style="fill:red" ... />) to the path, instead of as a normal attribute (e.g. <element fill="red" ... />). And the normalfillattribute on an SVG path will get overwritten by the dashboard theme colour...Remark: drawings created with DrawSvg are already correct, but some third-party editors use the
fillattribute. -
Some basic input messages validation has been added on the server-side, and validation errors will be showed in the debug side-panel.
-
See the DrawSvg how to show client-side errors in your Node-RED debug panel.
Remark: when N drawings are visible now (e.g. running in N dashboards simultaneously), then N duplicate messages will be displayed (where N can be 0 is no dashboards are open...).


