Three.js is a Javascript library that allows users to easily create and animate 3D models and graphics. It is built using WebGL allowing it to render graphics in most modern web browsers without extra plugins. It's commonly used in a lot of websites as seen in our presentation here
In our workshop (a simplified version of this tutorial), we'll be going over some of the basics of three.js by creating a globe that you can rotate with your mouse. With this, you'll learn about creating some of the basic components in three.js such as a scene, camera, renderer, lighting, etc…

Let’s start off with some basic HTML to get our site going. Create a new document and let's call it index.html. Let's then declare a basic container where our project will live.
Your HTML file can look something like this:
<!DOCTYPE html>
<html>
	<head>
		<title>It’s a Large World</title>
	</head>
	<body>
		<script src="https://cdnjs.cloudflare.com/ajax/libs/three.js/91/three.min.js"></script>
    		<div id="container" width="100%" height="100%" />
		<script src="main.js"></script>
	</body>
</html>
Let’s create another file (in the same directory as index.html) and call it main.js.
This is where all of the code that makes up our 3D render will be going. To target the container we just made in our index.html, we need to call the container in our main.js file.
const container = document.querySelector('#container')A 3D render is made up of three crucial participants: scene, camera, and renderer. The next steps involve instantiating these.
Let’s start off with the scene. Our 3D render needs a place to live, right?
const scene = new THREE.Scene()
And add a black background:
scene.background = new THREE.Color( 0x000 )
We need to declare some variables that our camera is going to use!
const WIDTH = window.innerWidth
const HEIGHT = window.innerHeight
const FOV= 45
const ASPECT = WIDTH / HEIGHT
const NEAR = 0.1
const FAR = 10000
What do these all mean??
- FOV: Field of vision is the amount of the scene that is displayed on the screen calculated in degrees.
- Aspect: Our aspect ratio should almost always be the
window.width / window.heightso that we do not squish objects when viewing on different devices. - Near and Far: These values affect the performance in determining what gets rendered. Objects farther from the camera than far won’t get rendered and objects closer than near will also not render. We highly recommend that you play around with these to understand what is going on. Three.js has multiple cameras for different project applications. They range from the OrthographicCamera that is used for rendering 2D models to the ArrayCamera that’s used for Virtual Reality. We will be using the PerspectiveCamera as it is best applied to 3D models.
Instantiate the camera:
const camera = new THREE.PerspectiveCamera(FOV, ASPECT, NEAR, FAR)
We also need to set the camera's location on the screen with x,y,z. We encourage you to play around with this a little bit:
camera.position.set( 0, 0, 500 )
Finally, let’s attach the camera to the scene.
scene.add(camera)
Finally the last necessary object, the renderer! WebGL (Web Graphics Library) renders interactive 2D and 3D graphics in the browser.
const renderer = new THREE.WebGLRenderer()
renderer.setSize(WIDTH, HEIGHT)
Tell your program that there is a container that needs rendering!
container.appendChild(renderer.domElement)
Now we can move on to our globe!
Three.js uses geometric meshes to create primitive 3D shapes like spheres, cubes, cylinders, etc. Since we want to model Earth, we'll be using a sphere.
We start by defining the sphere’s attributes:
const RADIUS = 200
const SEGMENTS = 50
const RINGS = 50
Then, because we want to texture the sphere with an image of the Earth, we’re going to create a group that will hold our sphere and its texture meshed together:
const globe = new THREE.Group()
scene.add(globe)
And now, we’ll create our sphere and its texture, and mesh them together using TextureLoader:
var loader = new THREE.TextureLoader()
We call the load method, which takes an image URL (here’s the one we used) as the first argument, and a function that:
- Creates a sphere with the predefined attributes
- Maps the texture to the material (read more here about three.js materials here
- Creates a mesh of our sphere and the material
- Adds the mesh to our globe group
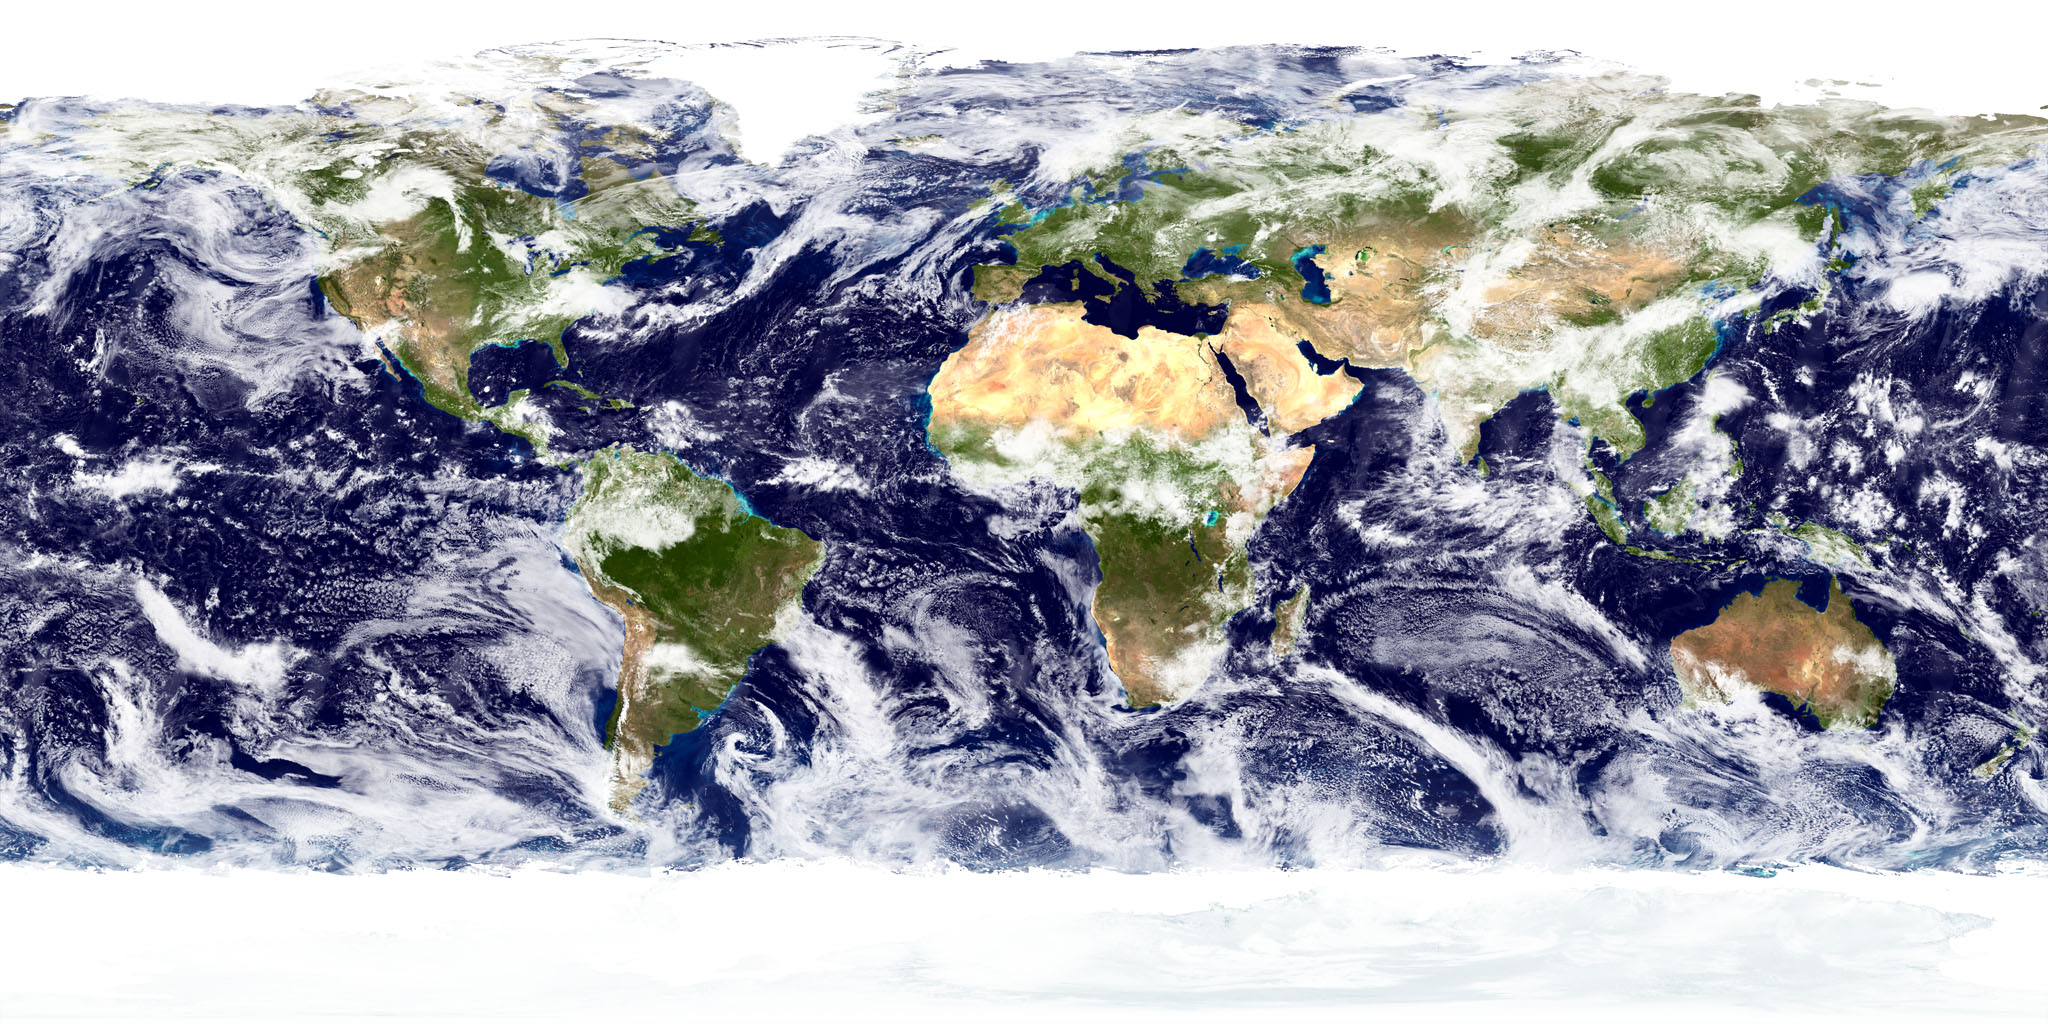
loader.load('https://eoimages.gsfc.nasa.gov/images/imagerecords/57000/57735/land_ocean_ice_cloud_2048.jpg', function ( texture ) {
    //create the sphere
    var sphere = new THREE.SphereGeometry( RADIUS, SEGMENTS, RINGS )

    //map the texture to the material. Read more about materials in three.js docs
    var material = new THREE.MeshBasicMaterial( { map: texture, overdraw: 0.5 } )

    //create a new mesh with sphere geometry.
    var mesh = new THREE.Mesh( sphere, material )

    //add mesh to globe group
    globe.add(mesh)
} )
Now that we have our sphere, let’s position it backward (along the z-axis) so that we can see it:
globe.position.z = -300
Lighting is incredibly important in any 3D scene. Because we used a mesh material, our globe won’t be affected by the lighting, but it’s useful when modeling objects with other textures. For our lighting, we’ll be using a point light. A point light gets emitted from a single point in all directions. A common use case for pointlight is to replicate the light emitted from a bare lightbulb.
The pointlight takes 4 parameters: color, intensity, distance, and decay. All the parameters are optional, with the default color being 0xFFFFFF.
const pointLight = new THREE.PointLight(0xFFFFFF)
Now we set the light’s position:
pointLight.position.x = 10
pointLight.position.y = 50
pointLight.position.z = 400
And then we add it to the scene:
scene.add(pointLight)
Let’s get to animating out globe!
First, we’re going to set up the update function for the built-in requestAnimationFrame to initially render our scene, and to re-render our scene after changes.
function update () {

  //Render:
  renderer.render(scene, camera)

  // Schedule the next frame:
  requestAnimationFrame(update)
}

// Schedule the first frame:
requestAnimationFrame(update)This is the best part because it almost feels like you’re spinning the globe with your own hands when you’re controlling it with your mouse or trackpad 😛
To start, we’ll set up an array that stores our previous mouse position, with its start value being at the center of the page:
var lastMove = [window.innerWidth/2, window.innerHeight/2]
Next, we’ll define a listener function to fire when the mouse moves:
function rotateOnMouseMove(e) {
  e = e || window.event

  //calculate difference between current and last mouse position
  const moveX = ( e.clientX - lastMove[0])
  const moveY = ( e.clientY - lastMove[1])

  //rotate the globe based on distance of mouse moves (x and y)
  globe.rotation.y += ( moveX * .005)
  globe.rotation.x += ( moveY * .005)

  //store new position in lastMove
  lastMove[0] = e.clientX
  lastMove[1] = e.clientY
}
And finally, we define our event listener:
document.addEventListener('mousemove', rotateOnMouseMove)
And there you have it!
Run python -m SimpleHTTPServer to run your project!
Finally, let’s deploy our beautiful animation to surge! 🚀 You’ve done this a million times by now but here are the steps in case you forgot…
- make sure you’re in the root directory (the same level as
index.html) and typesurge - when prompted, choose your domain name (ex.
<YOUR DOMAIN>.surge.sh) - Ta-da! 💃
Now that you know some basic three.js... go nuts! :squirrel:
Feel free to experiment with:
- the sphere’s texture and image 🌛 (see here for some flat planet images...)
- background 🌟
- animations (zooming, resizing…) 🔍
- adding new shapes using Three Js Geometry
- and so on
☺️
- Instantiated a canvas, camera, renderer
- Created a basic object using the geometry class
- Added a point light object to shine on the 3D object
- Learned how to animate the 3D object
- Introduced to some of the mechanics behind movement
- Created your own 3D object
- The surge URL for your sphere animation site
Check out some of these websites!
-
https://tympanus.net/codrops/2016/04/26/the-aviator-animating-basic-3d-scene-threejs/
-
Mobile VR (Text the link to yourself, and check it out on your phone): https://threejs.org/examples/misc_controls_deviceorientation.html


