Overview
RV Engine supports direct type transformations which allows creators to use slightly more complicated animations than usual and that is what this script is about. I would like to thank in this place Redphoenix for initial setup of script with basic UI - without it I would probably spend couple extra days figuring out Max UI creation. While script for exporting key frame animations to model.cfg was created with character weapons in mind, it can also be used with vehicles or buildings. For anyone wondering about potential FPS drops due to usage of that method, some basic tests that I performed with with just single animation source, seems to indicate that performance impact of those multiple animation classes is negligible.
When using that script with vehicles, bear in mind, that output of this script doesn't work with autocenter enabled objects or at least not without some manual adjustments. It is possible for instance to create invisible box which contains whole model so even after auto centering, coordinates of model remains same. That method is mentioned at very bottom of that manual.
Installation
If you want to start Frame Exporter on 3DS Max startup then paste ExportFrameData.ms to scripts\startup folder. There are also other ways to set it up and if you are interested in them I would recommend using Google to find them.
Example path:
C:\Program Files\Autodesk\3ds Max 2018\scripts\Startup
UI Explanation
| After successfully installing that script, you should see following UI window somewhere in the middle of screen.
|
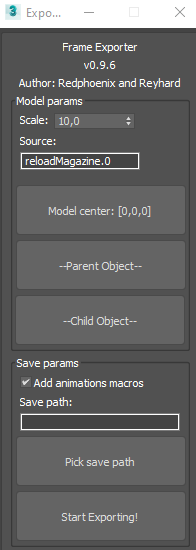
Please note, that plugin stores some of the export settings in model itself, so you don't have to re select everything every time you are doing export. Master scale & model center are stored in root node & individual settings like source, macros settings & save path are saved in child bone helper.
Usage

In current form, script is creating translation and rotation transformations separately and that means that your skeleton needs to be prepared accordingly. More about is written in section "Importing animation to model.cfg"
Exporting mesh from Object Builder to FBX
Master scale is also dependent on units settings that you are using in 3DS Max - if you have some issues with exported file, try to play with those values and adjust it if you are using inches for instance.
Please notice presence of model center box already in P3D - it's there so exporter can correctly grab scale of model out of it. Of course, you can also create it in 3ds Max itself but matching scale & direction might be quite tricky in some situations.
Importing weapon mesh to rig
After importing weapon to template rig, you will end up with something like this.
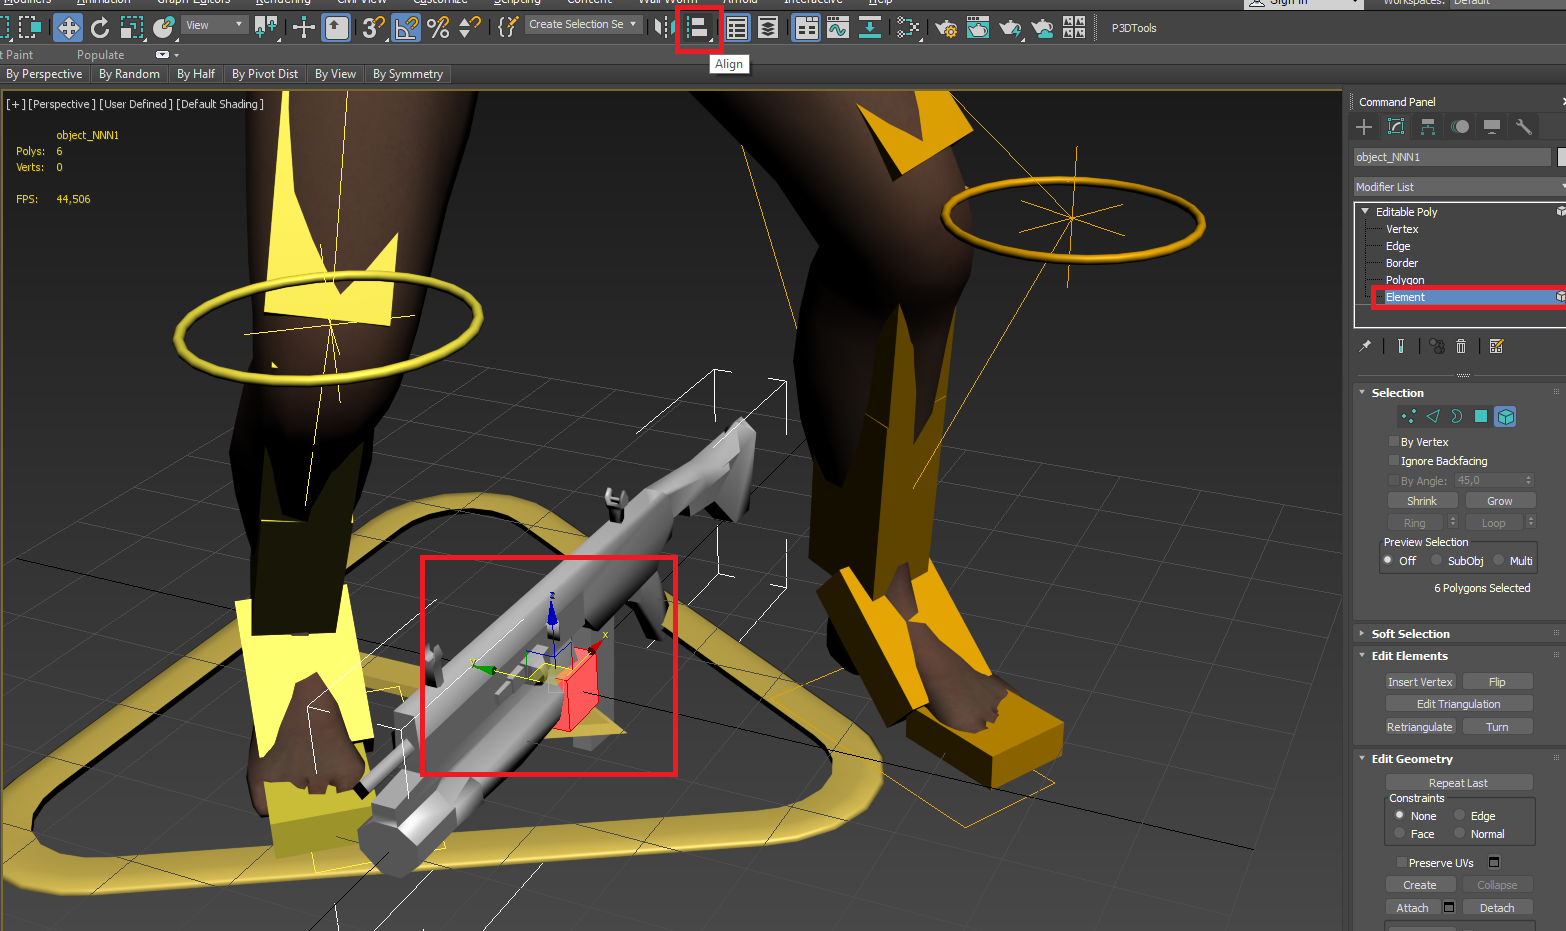
Go to modify tab and detach elements you would like to animate separately & don't forget about you model center box. After that, organize your weapon into segments and make weapon as child of "model center" selection. Once you are ready, rotate weapon by 90 degrees and use align button on Weapon Holder (big green box). You should have something like this as a result.

Now you are ready for creation of your first reload animation!
Exporting animation to RTM
After you are done with your animation you would most likely would like to try it in game. In order to do so, let's begin with basic export of FBX. That process is covered in detail in Kiory tutorial so if you are interested, check it out and feel free to leave him some bucks
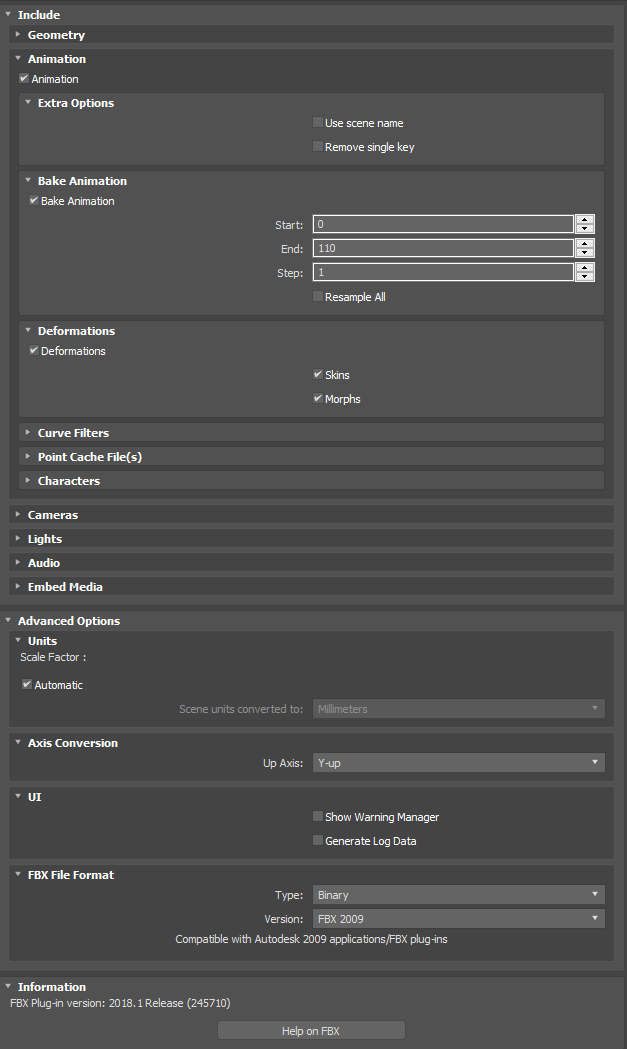
Once you have your animation exported to FBX, you can use FBXtoRTM tool which comes with Arma 3 Tools package. Kiory created some handy batch file ( toRTM.bat in example data) for quick, drag & drop conversion of multiple FBX files to rtm and I recommend to use them. Before using it though, make sure to copy modelBoxKiory.xml to FBXtoRTM folder in Arma 3 Tools ( i.e. C:\Program Files (x86)\Steam\steamapps\common\Arma 3 Tools\FBXToRTM ). Without that, batch file will not be able to convert your FBX correctly! After you are done with setting it up, just drag & drop your rtm on toRTM.bat file. If your FBX was correct (2009 plugin was used & animations is checked) then rtm file should appear in your folder.
Note: In case you have some crashes during attempts to export your animation to FBX, try to disable deformations in export dialog.
Importing animation to model.cfg
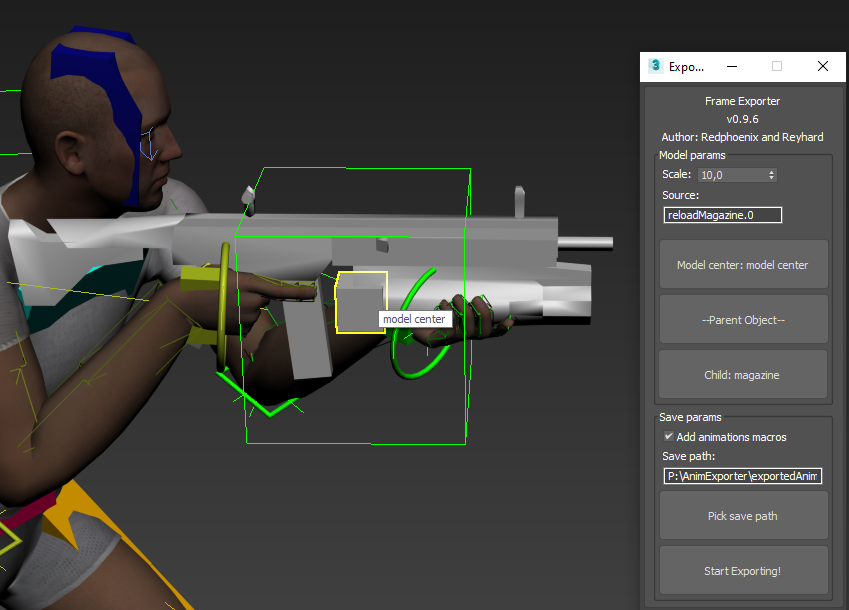
In order to export animation, first select model center (if it wasn't automatically detected by script) and then pick children bone. Since we are not animating "weapon" bone at all, model center will be enough to have proper animation. As mentioned in UI Explanation paragraph, parent bone is only useful if your child bone has parent in model.cfg too. Next, it's time to pick up save path. In my case its P:\AnimExporter\exportedAnims_weapon.hpp.
Once you have exporter ready, press "Start Exporting!" button and check the results. If everything was setup correctly before, file which was selected before should be filled with data. Now, the only thing that you need to to do is include that new .hpp file to your model.cfg and enjoy your first exported animation. Below is example on how to include your exported animation to model.cfg
Example model.cfg file with proper includes for exported files
class CfgSkeletons
{
    class weapon_animexp_skeleton
    {
        pivotsModel="";
        isDiscrete = 0;
        skeletonInherit = "";
        skeletonBones[] =
        {
            "magazine_base",    "",
                "magazine",     "magazine_base"
        };
    };
};

class CfgModels
{
    class weapon_example
    {
        skeletonName    = "weapon_animexp_skeleton";
        sectionsInherit = "";
        sections[]      = {};
        class Animations
        {
            #include "exportedAnims_weapon.hpp"
        };
    };
};
As it was mentioned before, it's quite important to have your skeleton setup correctly. Take a look at above example and don't forget to create parent bone with name following this scheme
   "nameOfYourSelectionInP3D_base", "",
   "nameOfYourSelectionInP3D", "nameOfYourSelectionInP3D_base"
nameOfYourSelectionInP3D_base doesn't need to be present in P3D - it's artificial bone which is only used to simplify some calculations in P3D. In future that requirement might be removed but there is no ETA on it.
Examples
There are 2 example files which you can use to text animation exporter. They include source files, example configuration & ready to use files. Max files were saved in 2018 version.
First demo - plane_export - involves export of plane movement and is basic demo of how to use it with vehicles.
Second one - weapon_export - is example reload animation with whole scene already set up for use. Note that this animation rig was created by Kiory and kudos to him for letting me use it as a showcase for that animation exporter!
Troubleshooting
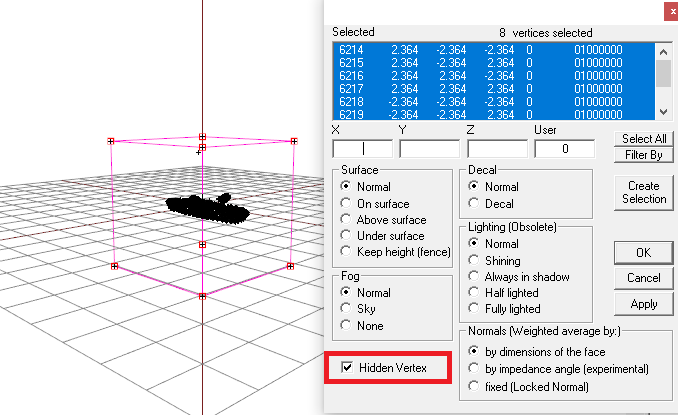
Example workaround for autocenter=1 issue
Note that floating objects need autocenter = 1 otherwise their buoyancy won't work. In order to bypass it, I've created invisible box which makes me sure that model will be in same spot after being autocentered.
Useful links
https://github.com/reyhard/mta_animExporter - GitHub repository with up to date version
https://gumroad.com/l/KAOLj - Kiory Rig
https://community.bistudio.com/wiki/Model_Config - Includes list of available model.cfg animation sources that can be used with weapon
