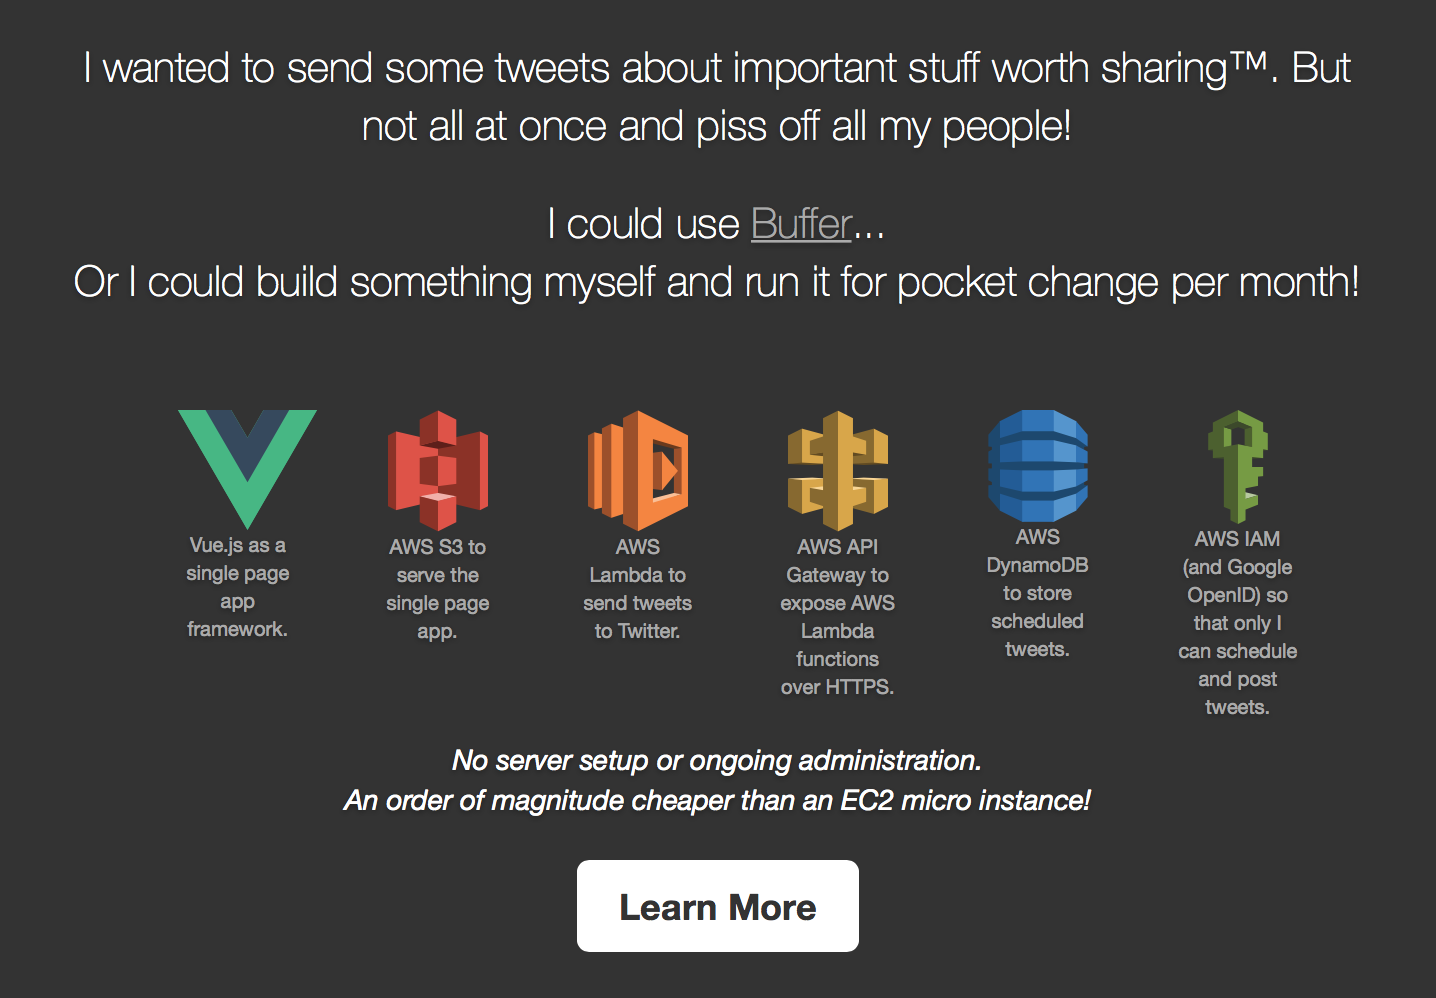
Check out a live version of the app (work in progress).
or
Use the setup instructions below to make one for yourself!

(instructions not yet complete)
Give yourself an 1-2 hours to complete this setup. It is a long process -- too long, I think. That is the current reality in this world of stitching AWS services together like this. In January 2016, I am going to create a script that will do the bulk of this work. This will greatly speed up and simplify the setup process.
- Clone this repo and the serverless-buffer-app-lambda repo to your dev machine. The first one contains all the front-end code. The second one contains the AWS Lambda function code, which is effectively the server code.
- Let's create an IAM user with access only to the AWS services we need. This is more secure as the IAM user has restricted permissions compared to your primary AWS user. In general, it's a bad idea to use your primary AWS user's credentials for building apps.


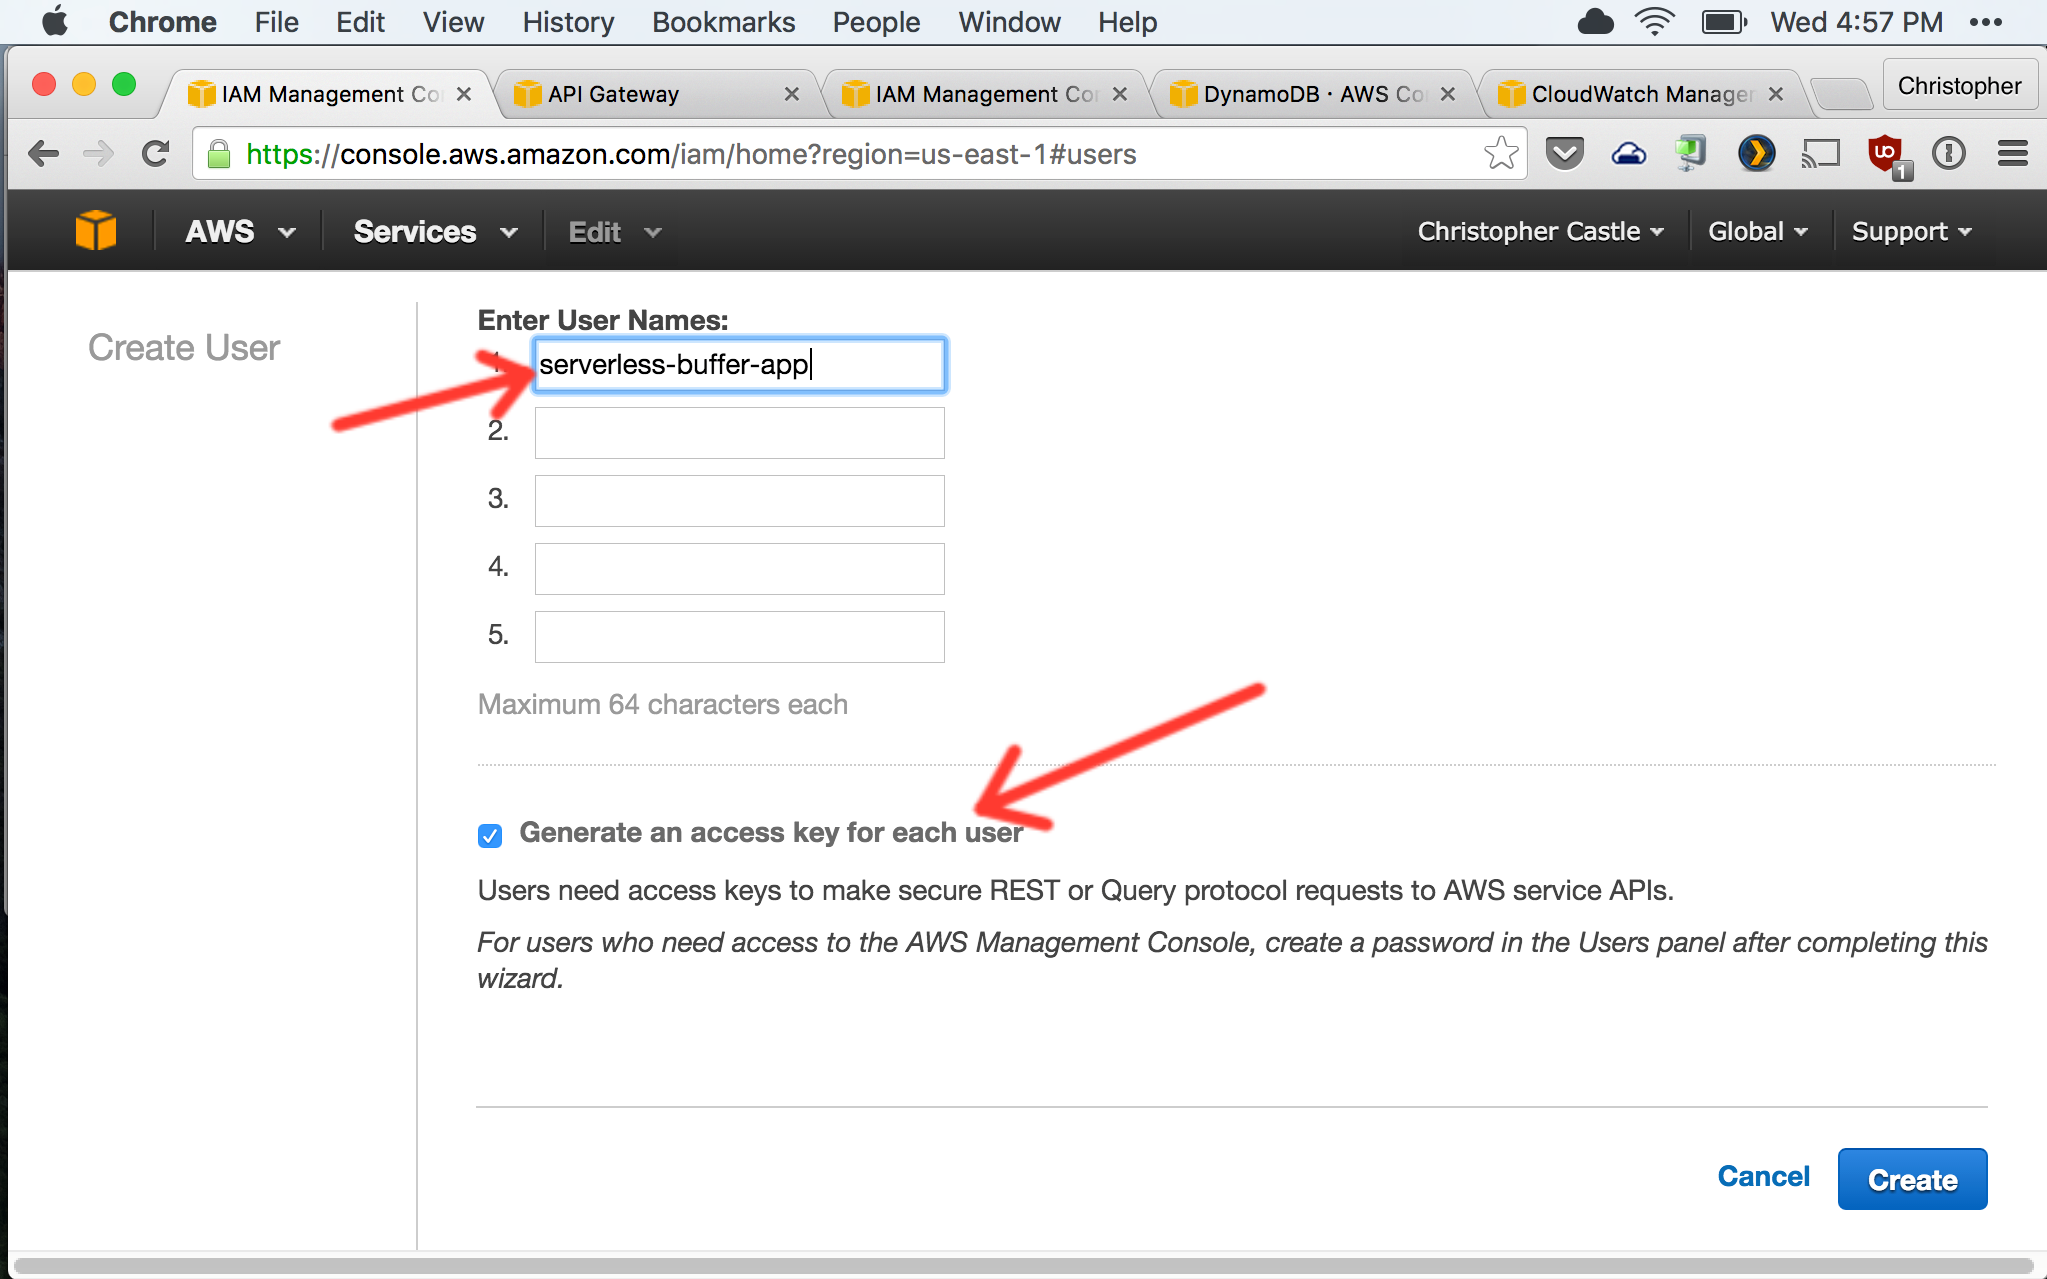
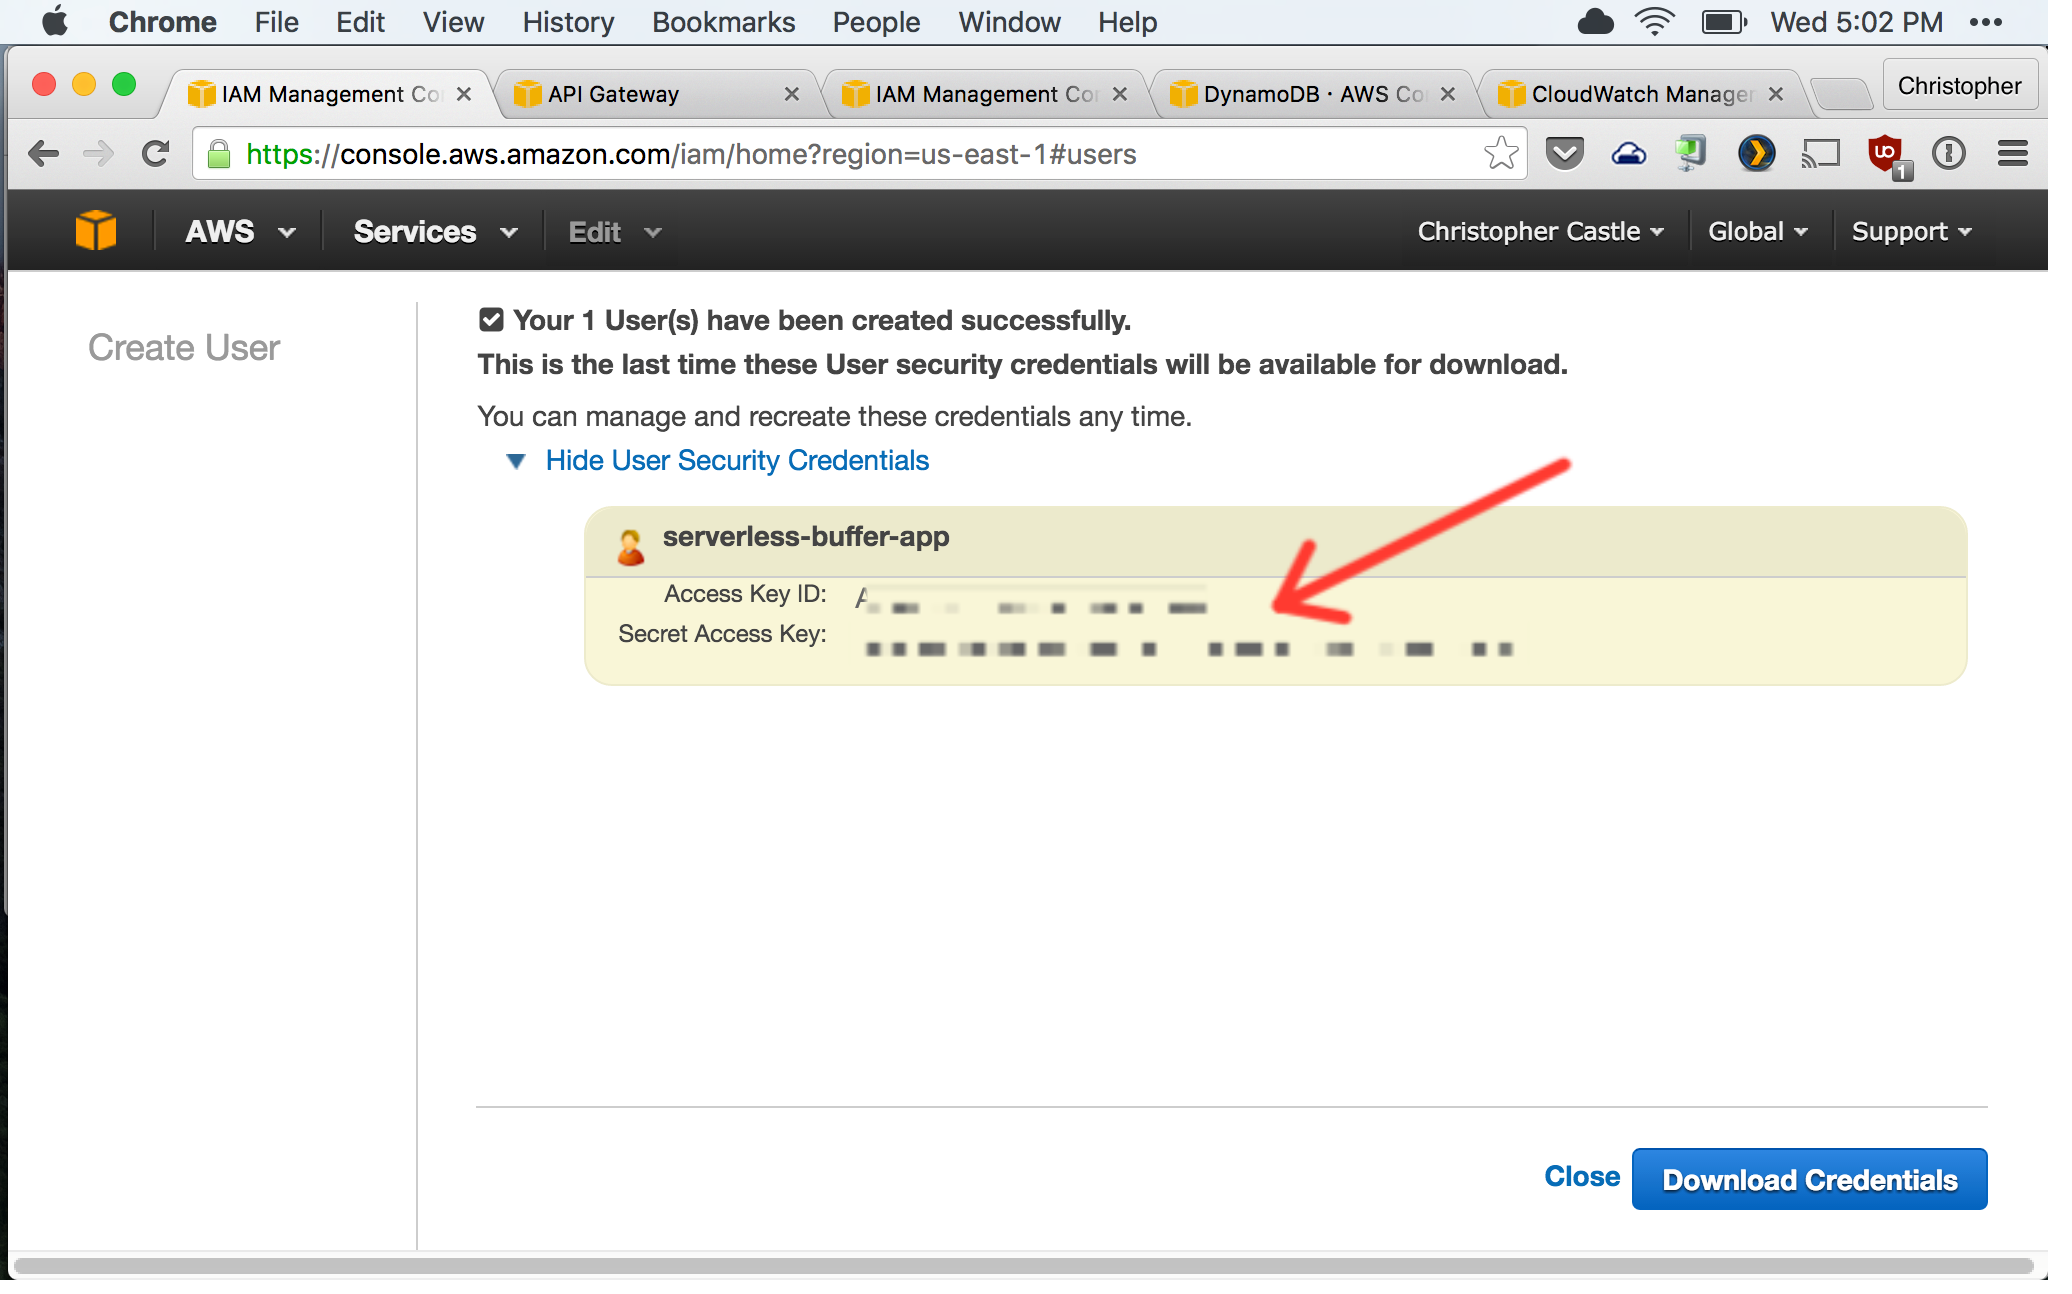
2. Type `aws configure` on the command line and copy/paste the new user's Access Key ID and Secret Access Key to configure the AWS CLI tool.

2. Now attach the following AWS IAM policies to the user. These policies give the user permissions for only the specific AWS services we need for our Serverless Buffer App.
1. AmazonAPIGatewayAdministrator
2. AmazonAPIGatewayInvokeFullAccess
3. AmazonAPIGatewayPushToCloudWatchLogs
2. AWSLambdaFullAccess
3. AmazonDynamoDBFullAccess

The user's list of policies should look like this when you're done.

3. Now let's create a policy that will give our AWS Lambda functions permissions to make DynamoDB queries and send log info to CloudWatch.


Configure the policy as shown below.
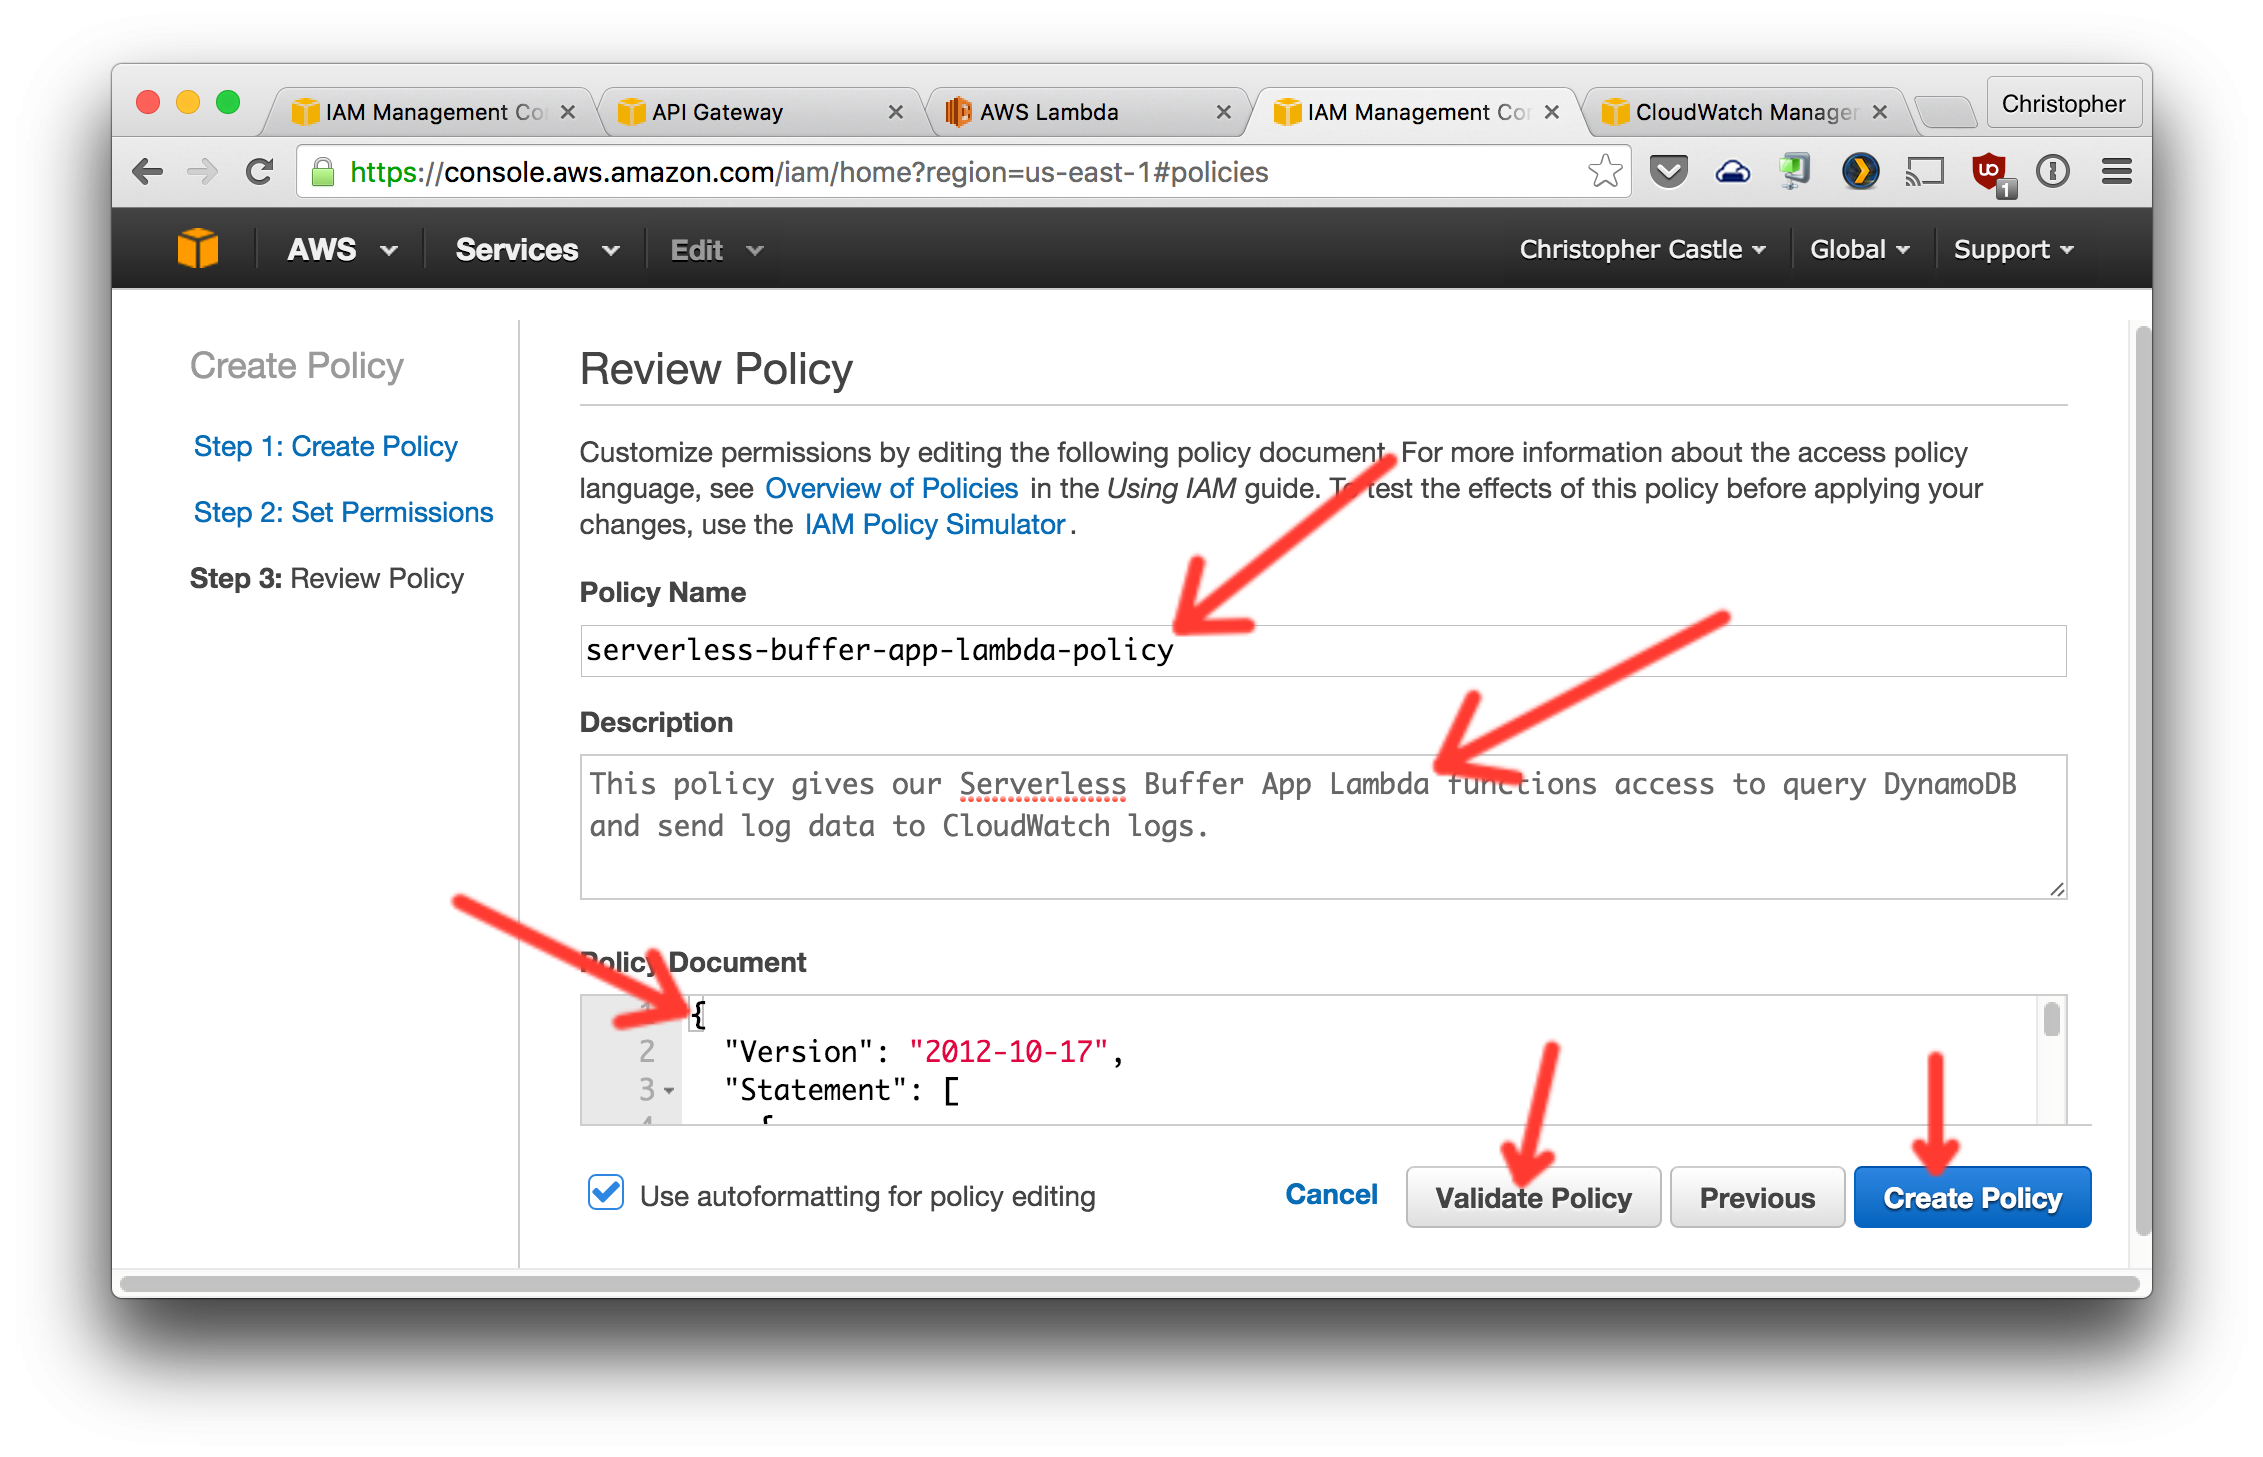
Here is the JSON to paste in as the Policy Document:
{
  "Version": "2012-10-17",
  "Statement": [
    {
      "Sid": "Stmt1428341300017",
      "Action": [
        "dynamodb:DeleteItem",
        "dynamodb:GetItem",
        "dynamodb:PutItem",
        "dynamodb:Query",
        "dynamodb:Scan",
        "dynamodb:UpdateItem"
      ],
      "Effect": "Allow",
      "Resource": "*"
    },
    {
      "Sid": "",
      "Resource": "*",
      "Action": [
        "logs:CreateLogGroup",
        "logs:CreateLogStream",
        "logs:PutLogEvents"
      ],
      "Effect": "Allow"
    }
  ]
}
- Now create a role that uses this policy. This role will be assigned to the Lambda functions.


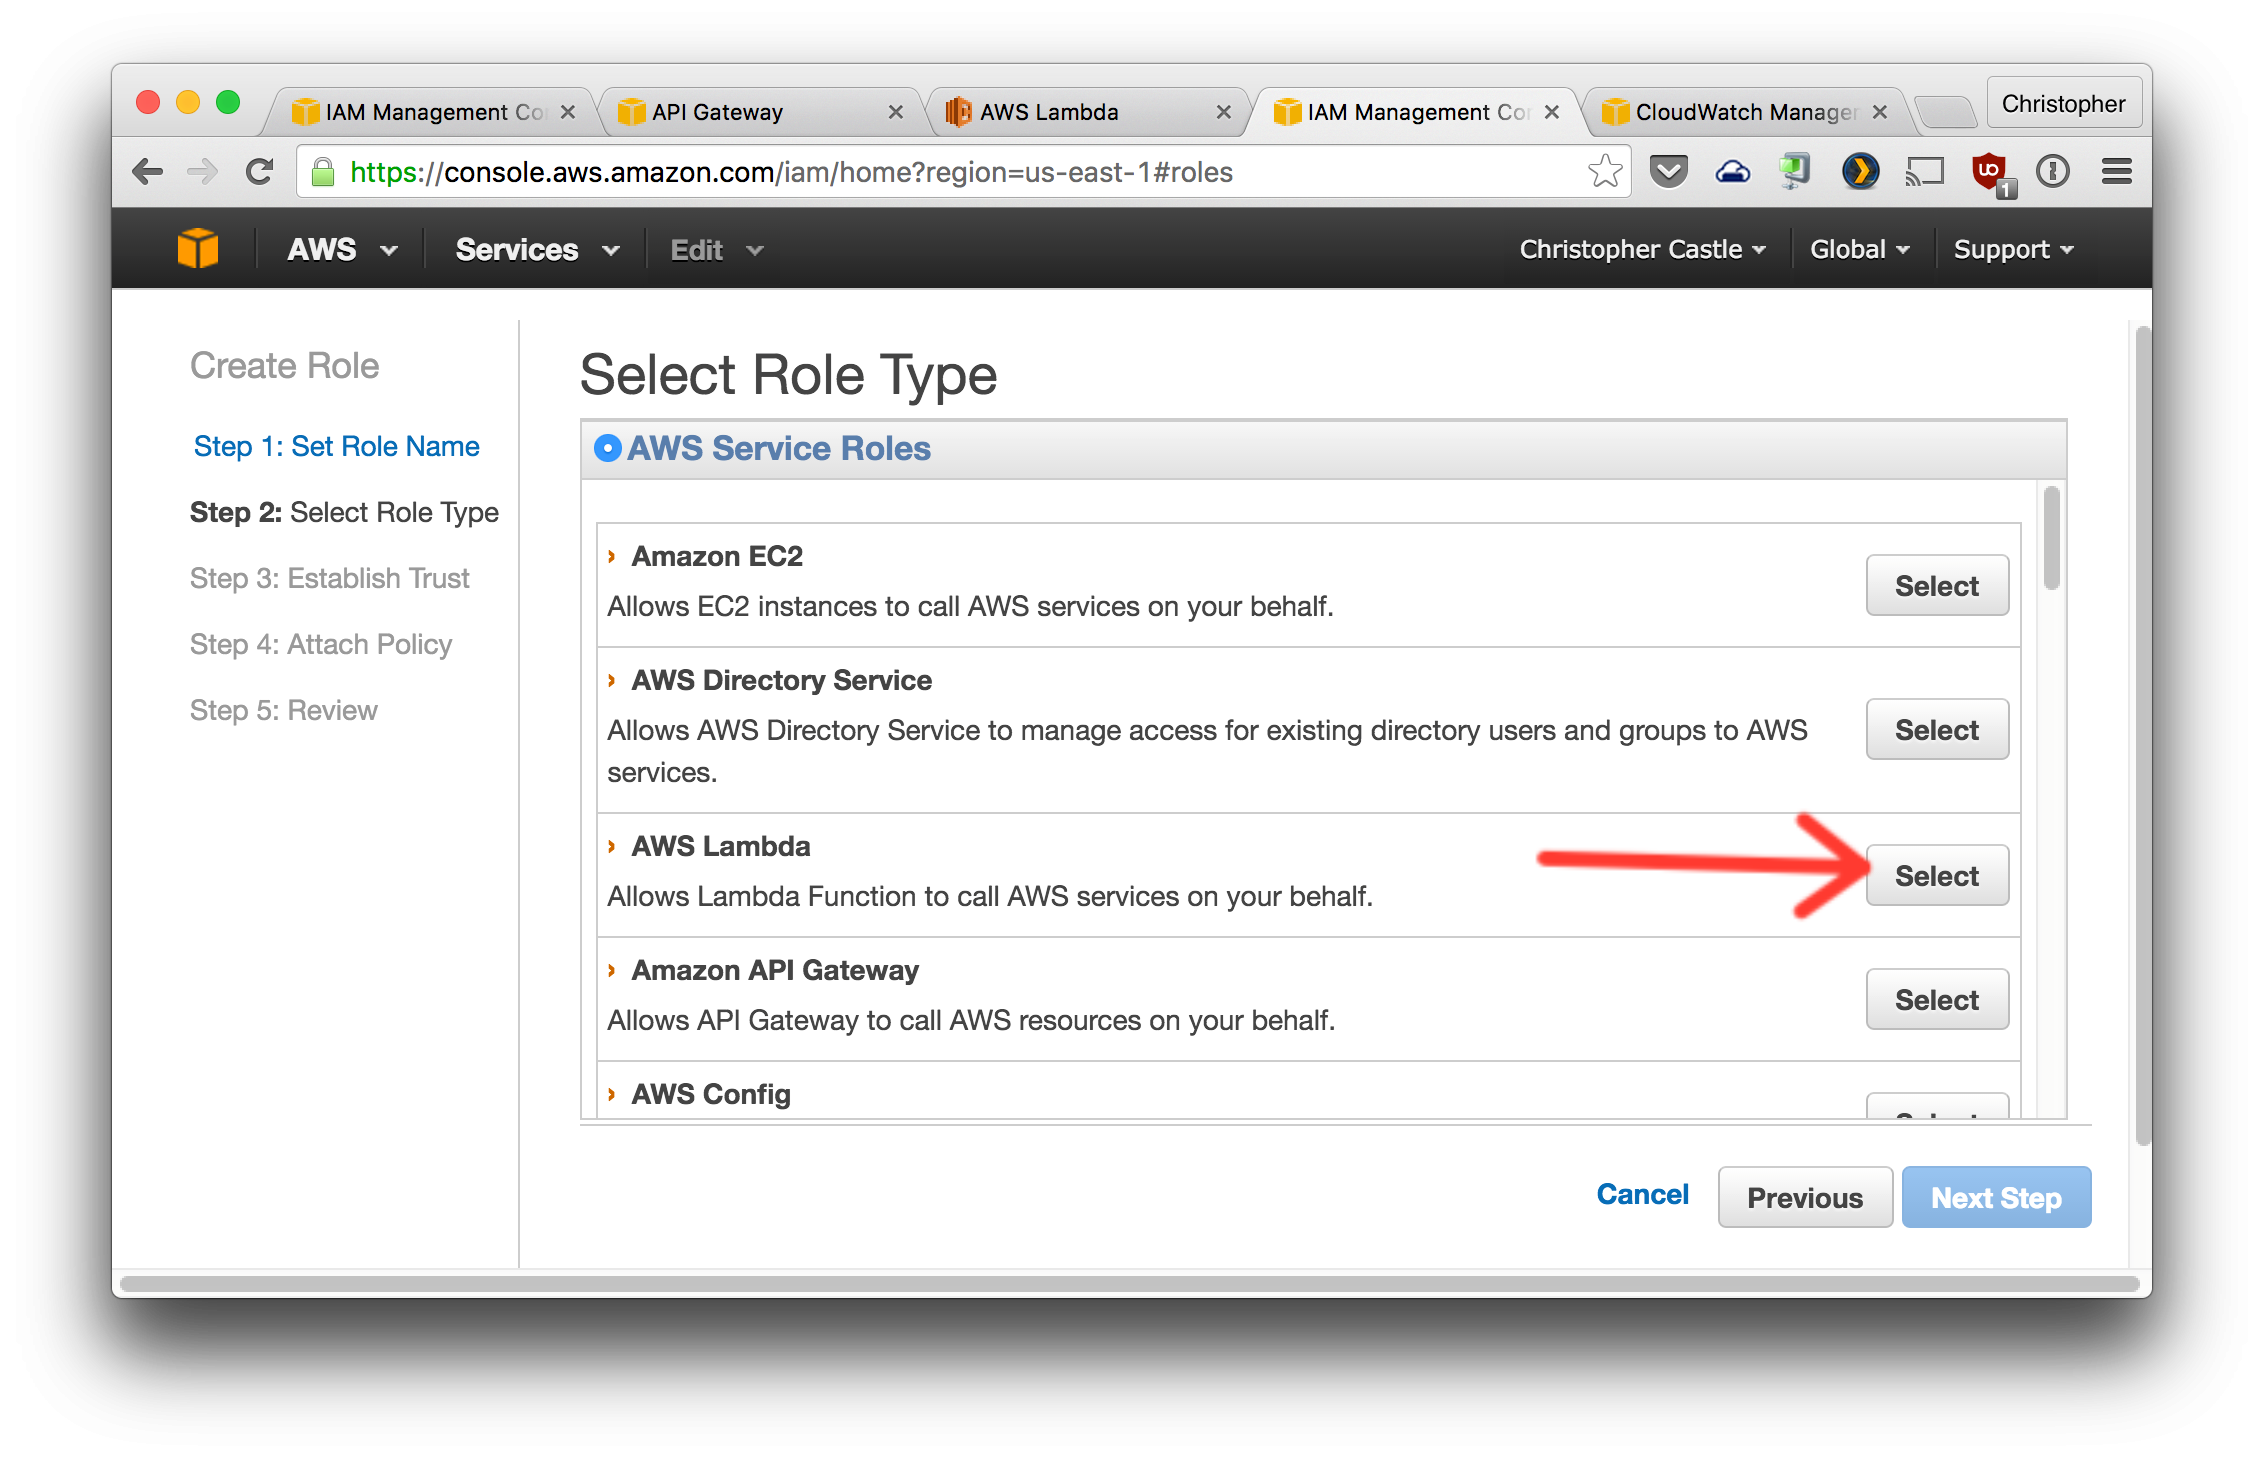
Select the policy created in the previous step. You can search for it by name.


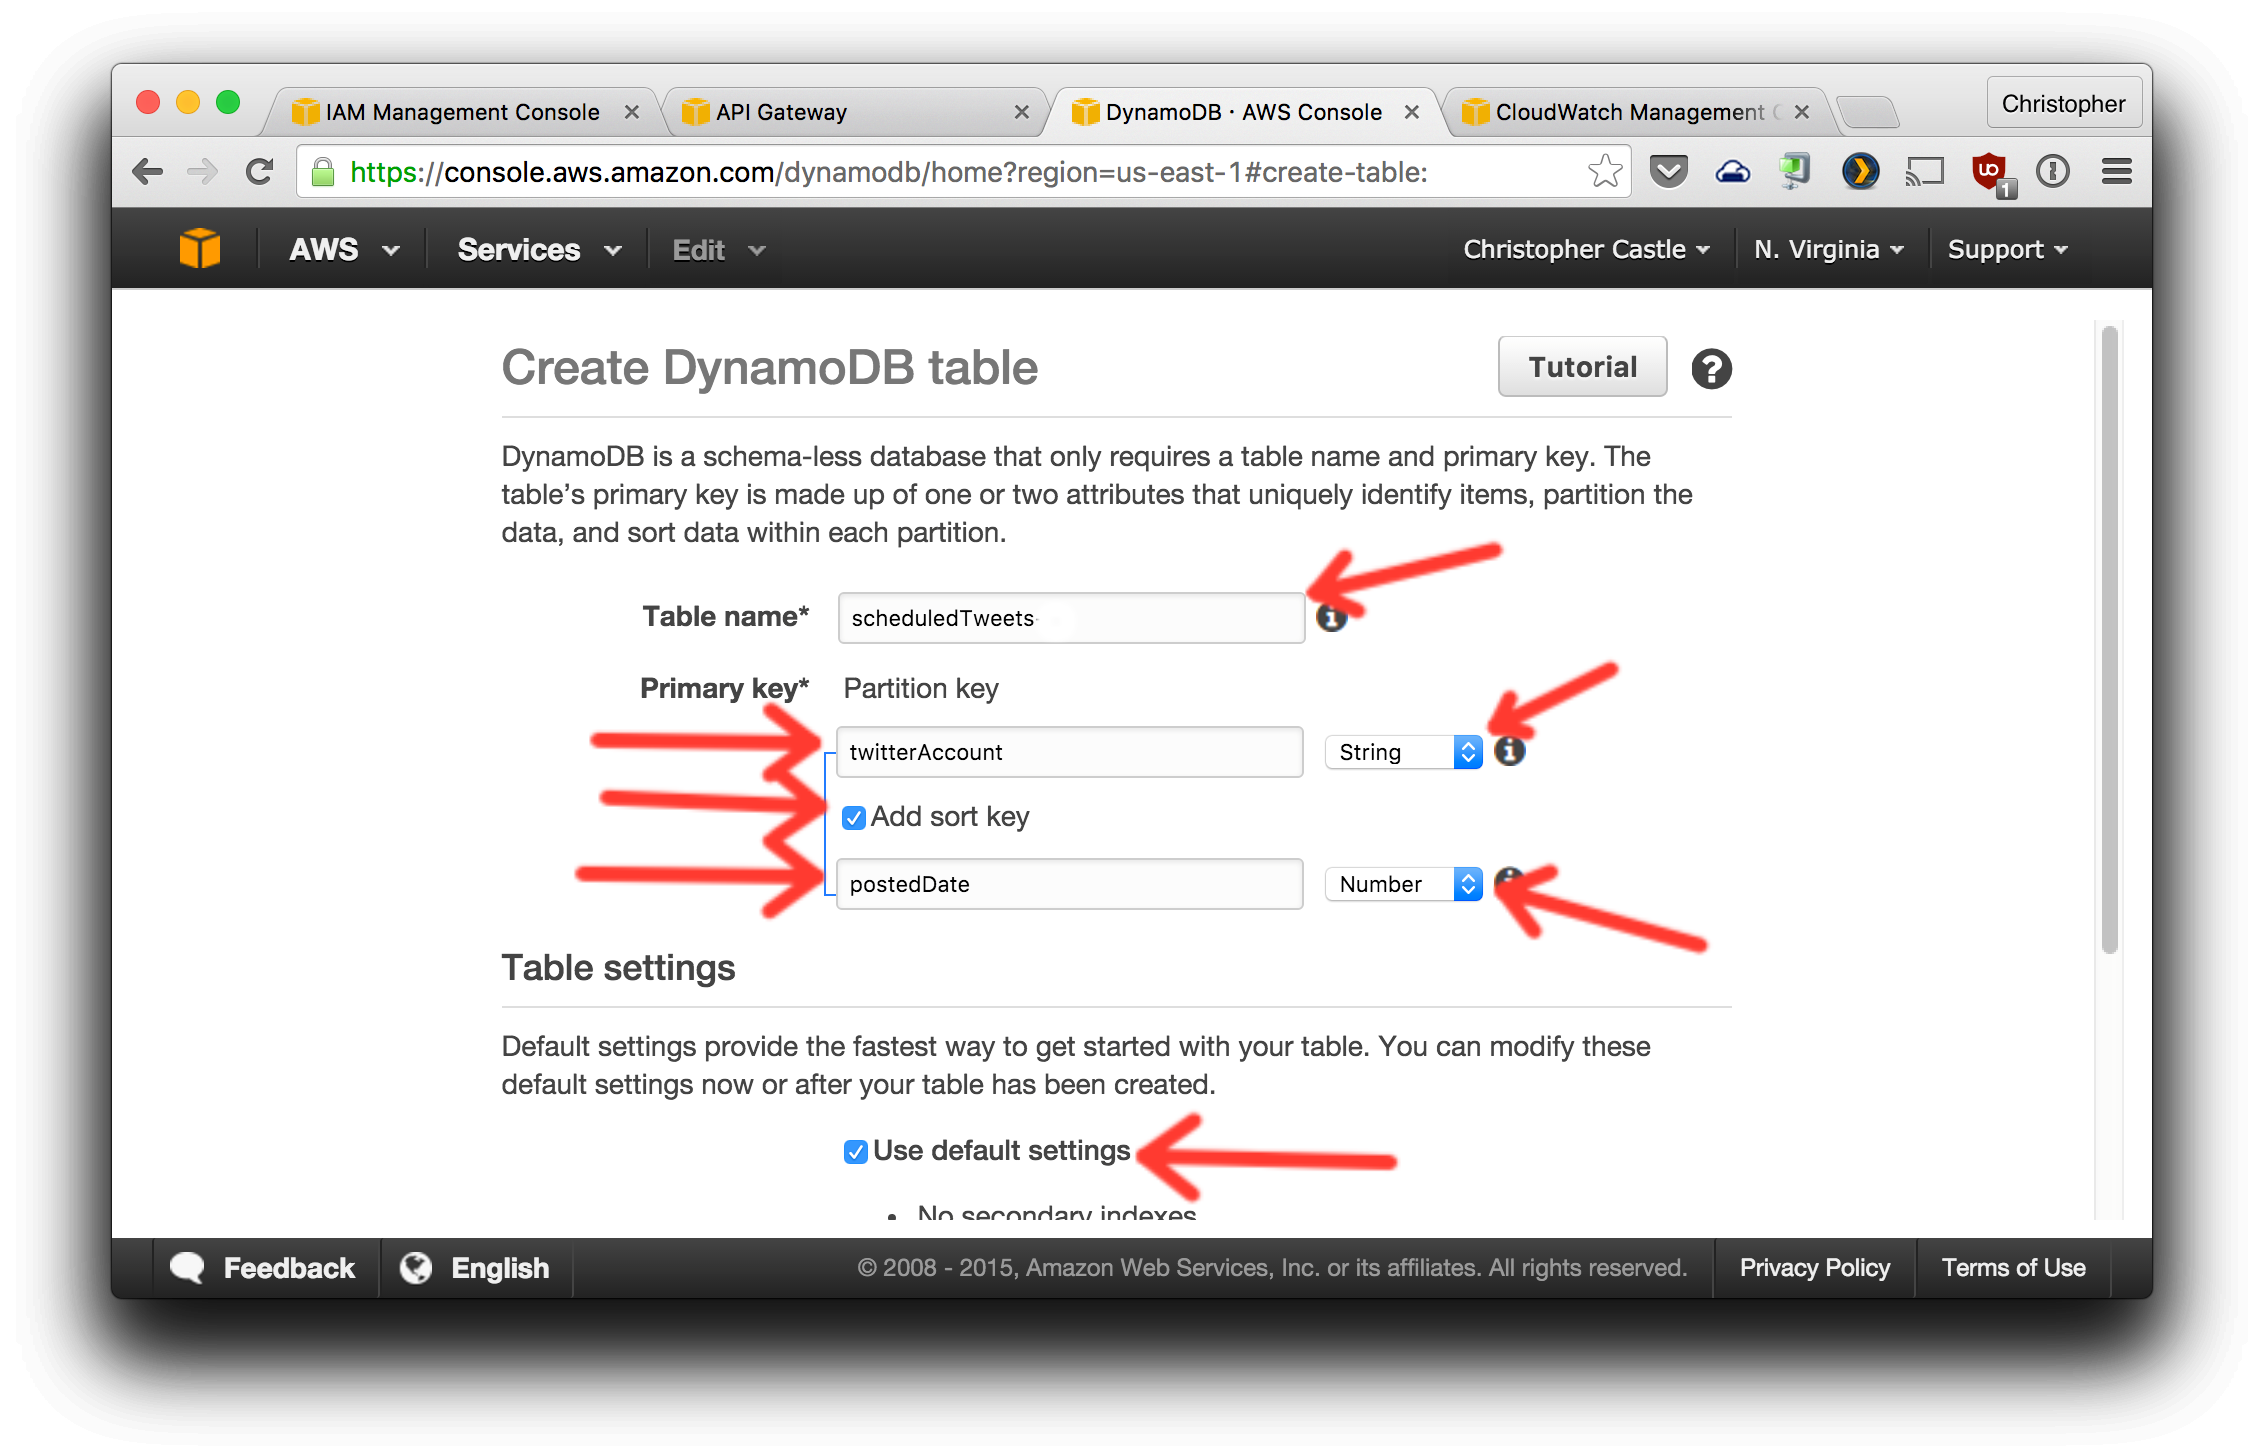
3. Nice, now we're ready to start creating the good stuff... Let's create the AWS DynamoDB table that will store the scheduled tweets before they're posted to Twitter. ($$$)
1. Open the DynamoDB management console and create a table named `scheduledTweets` configured with the Primary Key, Sort Key, and other settings as shown in the screenshot below https://console.aws.amazon.com/dynamodb/home

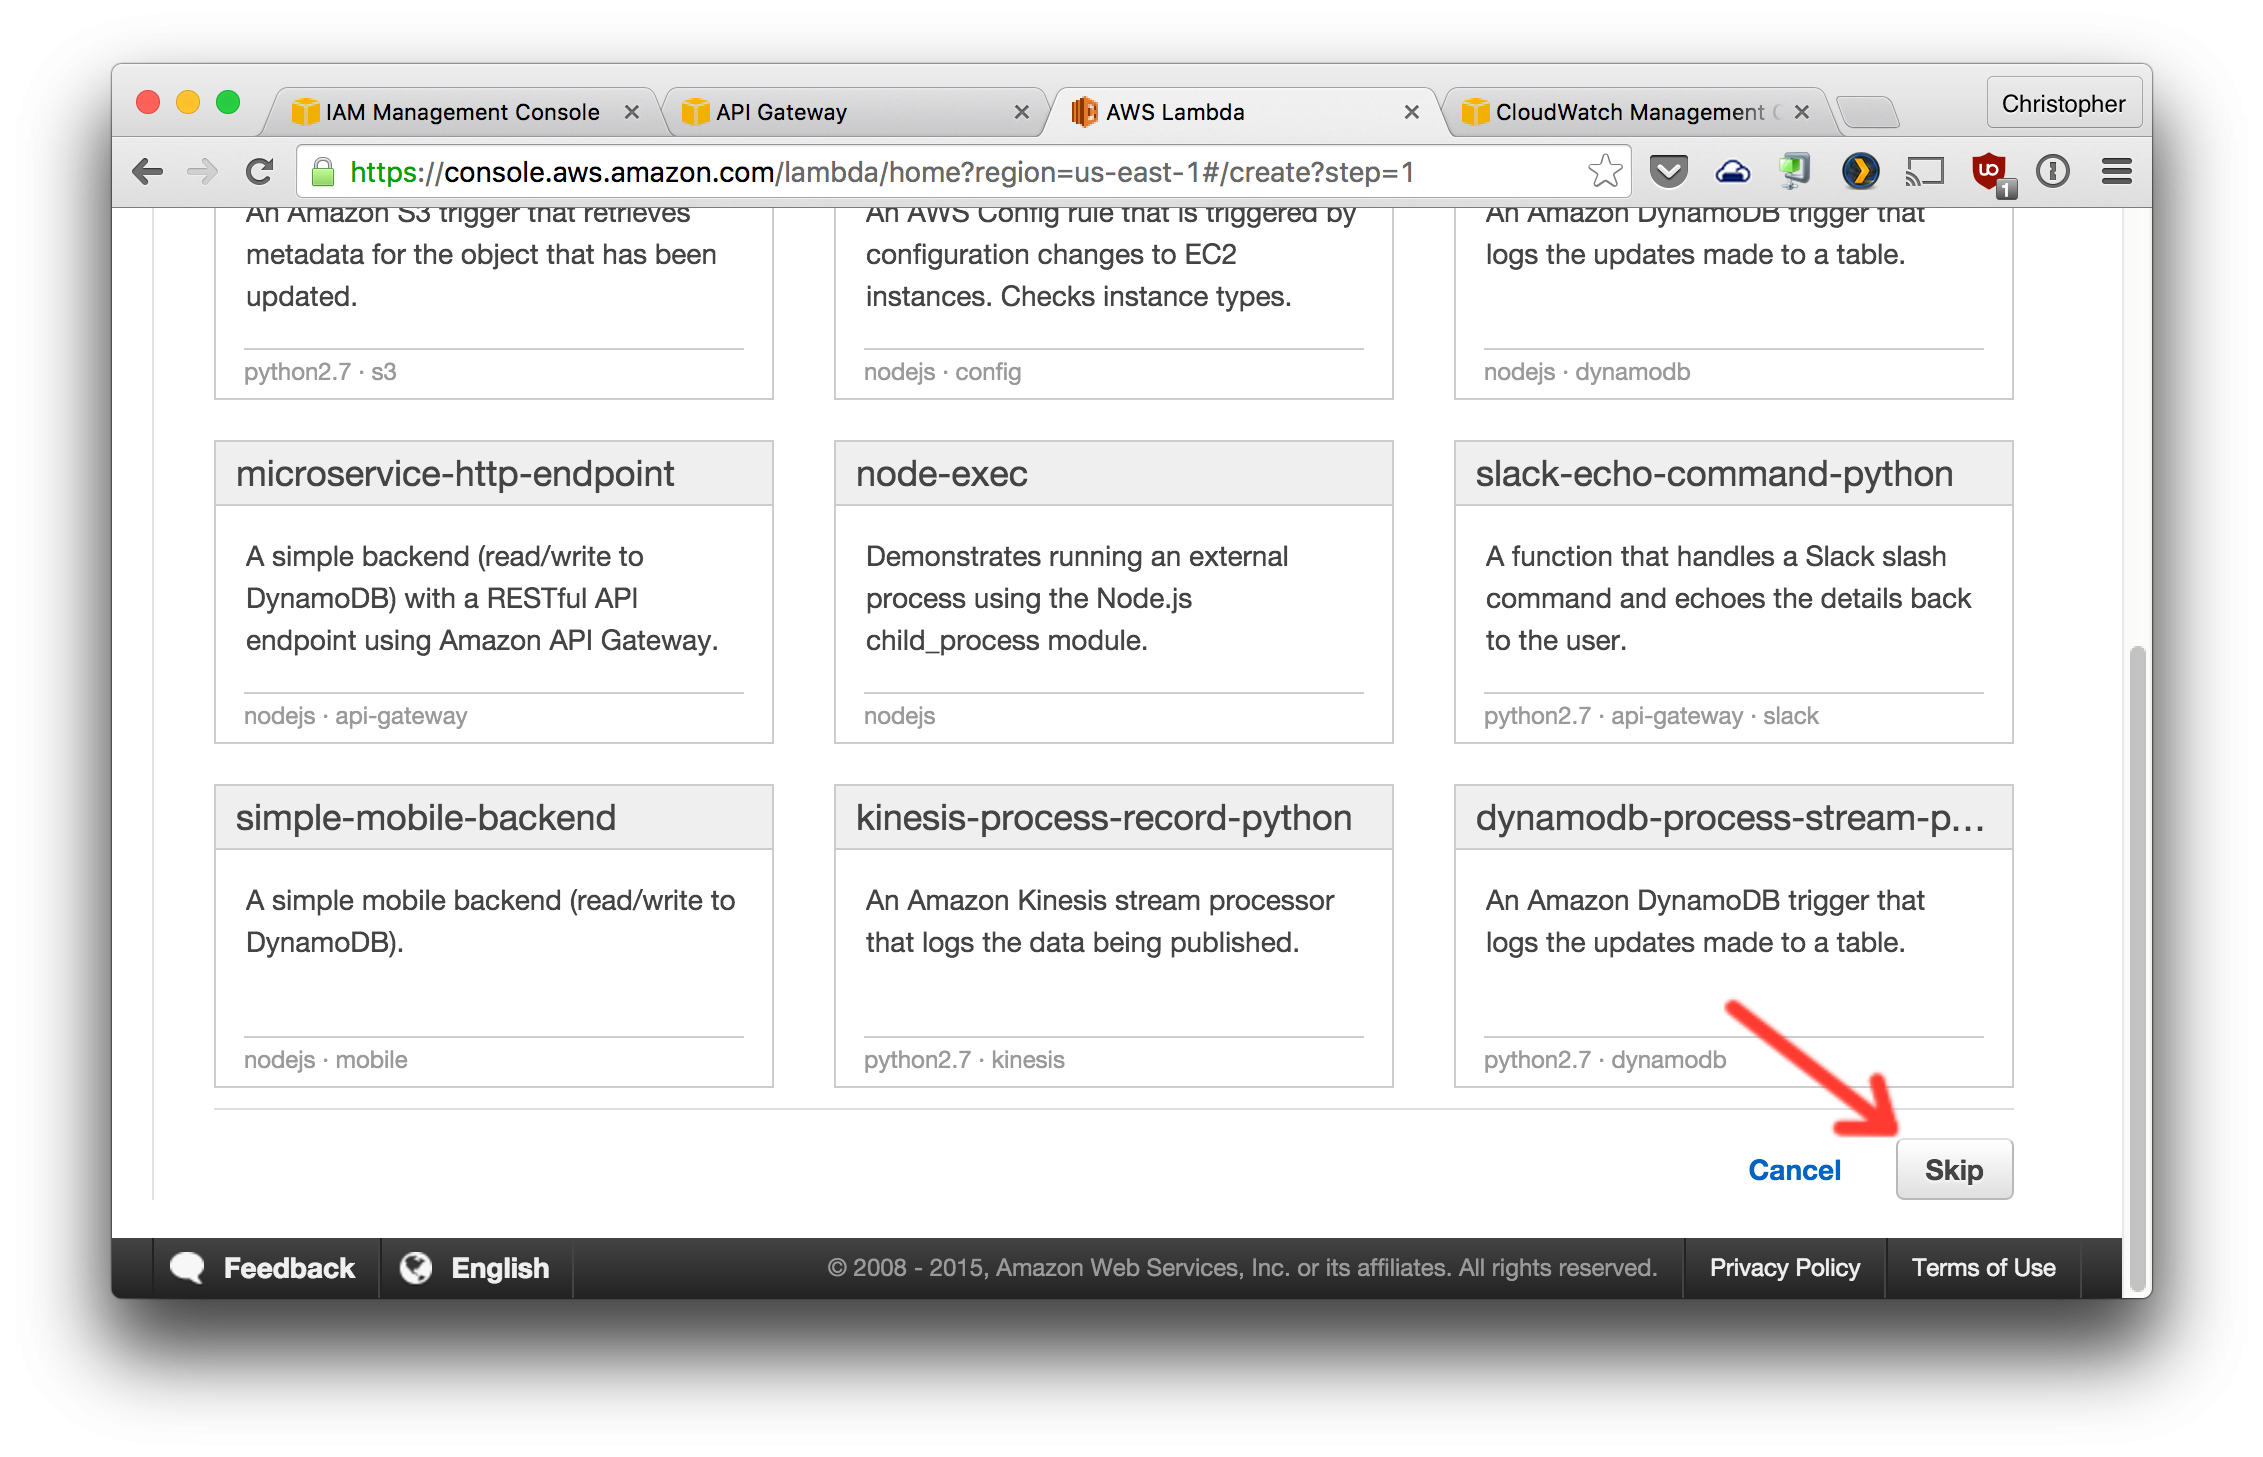
4. It will take a little while for the DynamoDB table to be created. In the meantime, we can setup the AWS Lambda functions. We'll create three functions: one to schedule a new tweet, one to list scheduled tweets, and one to post tweets on a specified scheduled.
1. From the AWS Lambda console, you'll either click "Get Started" or "Create a Lambda function". Then you'll be shown several Lambda blueprints from which to choose. Do not use a blueprint. Click the "Skip" button at the bottom.
2. Configure the first function as shown in the next two screenshots.
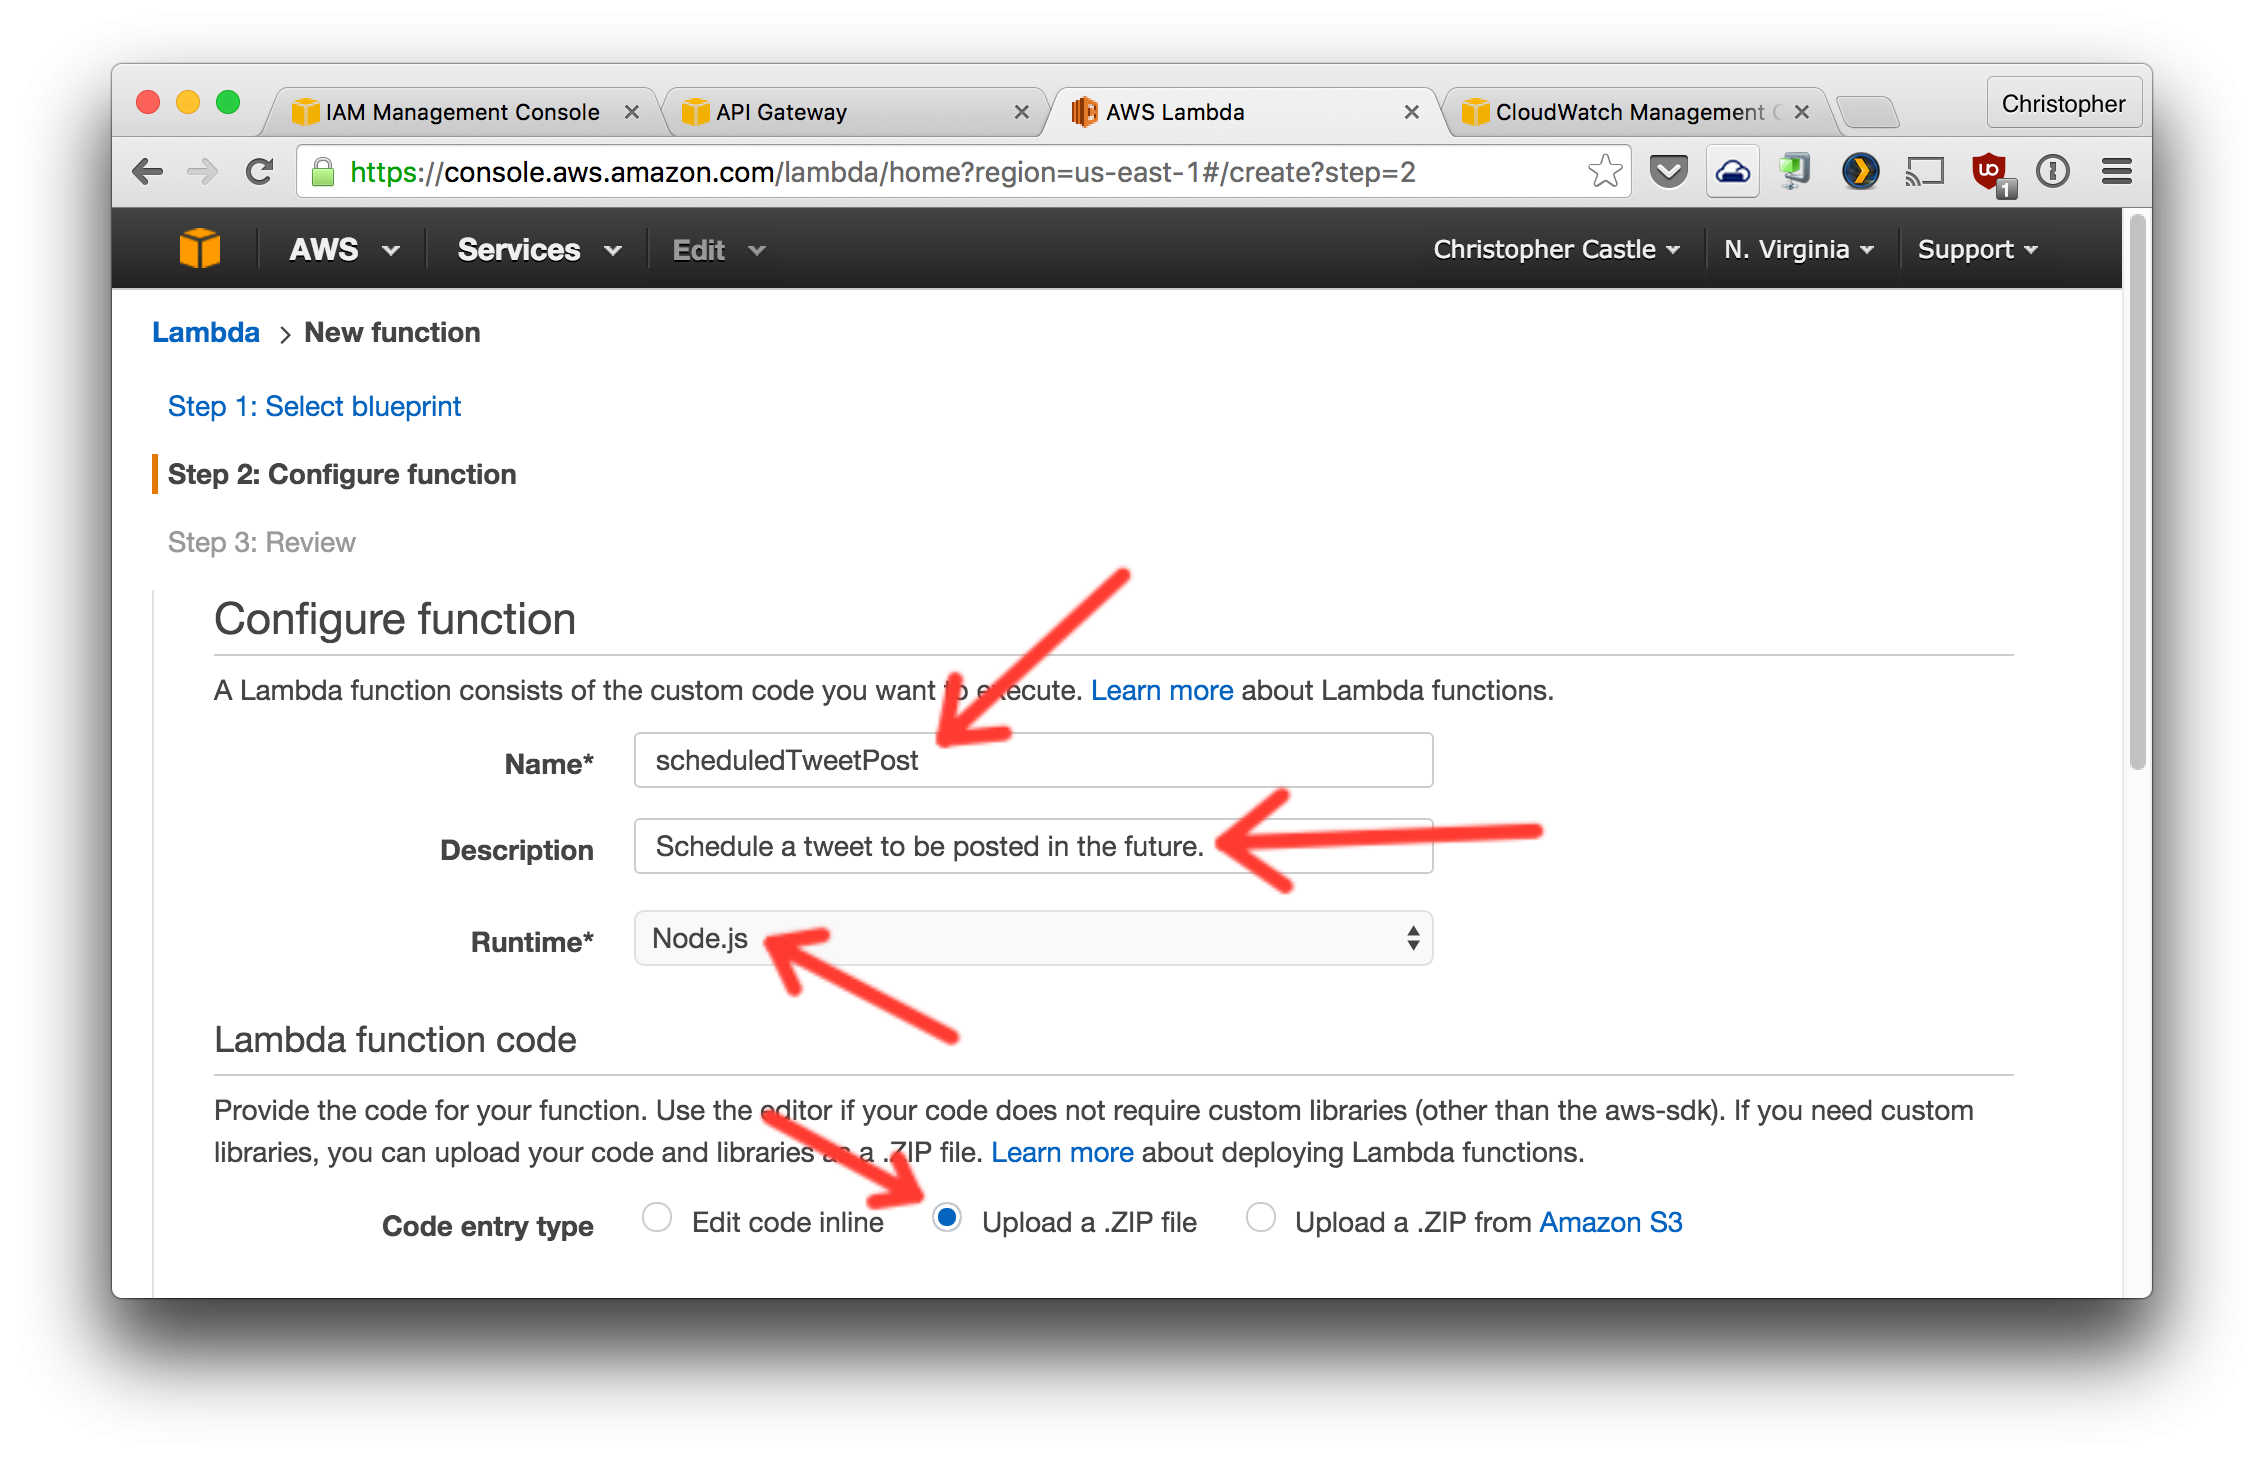
Generate the ZIP file to upload by running `npm run build` from your cloned copy of the [serverless-buffer-app-lambda](https://github.com/crcastle/serverless-buffer-app-lambda) repo. It will create a file named `lambda-code.zip`

3. Create and configure the other two in the same way but with the following changes:
1. scheduledTweetList
1. Name: `scheduledTweetList`
2. Description: `Returns all scheduled tweets to post with a specified time range`
3. Handler: `index.scheduledTweetList`
2. scheduledTweetWorker
1. Name: `scheduledTweetWorker`
2. Description: `A worker function to post scheduled tweets to Twitter.`
3. Handler: `index.scheduledTweetWorker`
5. Alright, more than half way done. Last big step is to create the AWS API Gateway endpoints. The front-end code will use these HTTPS endpoints to trigger the Lambda functions and get data back from them.
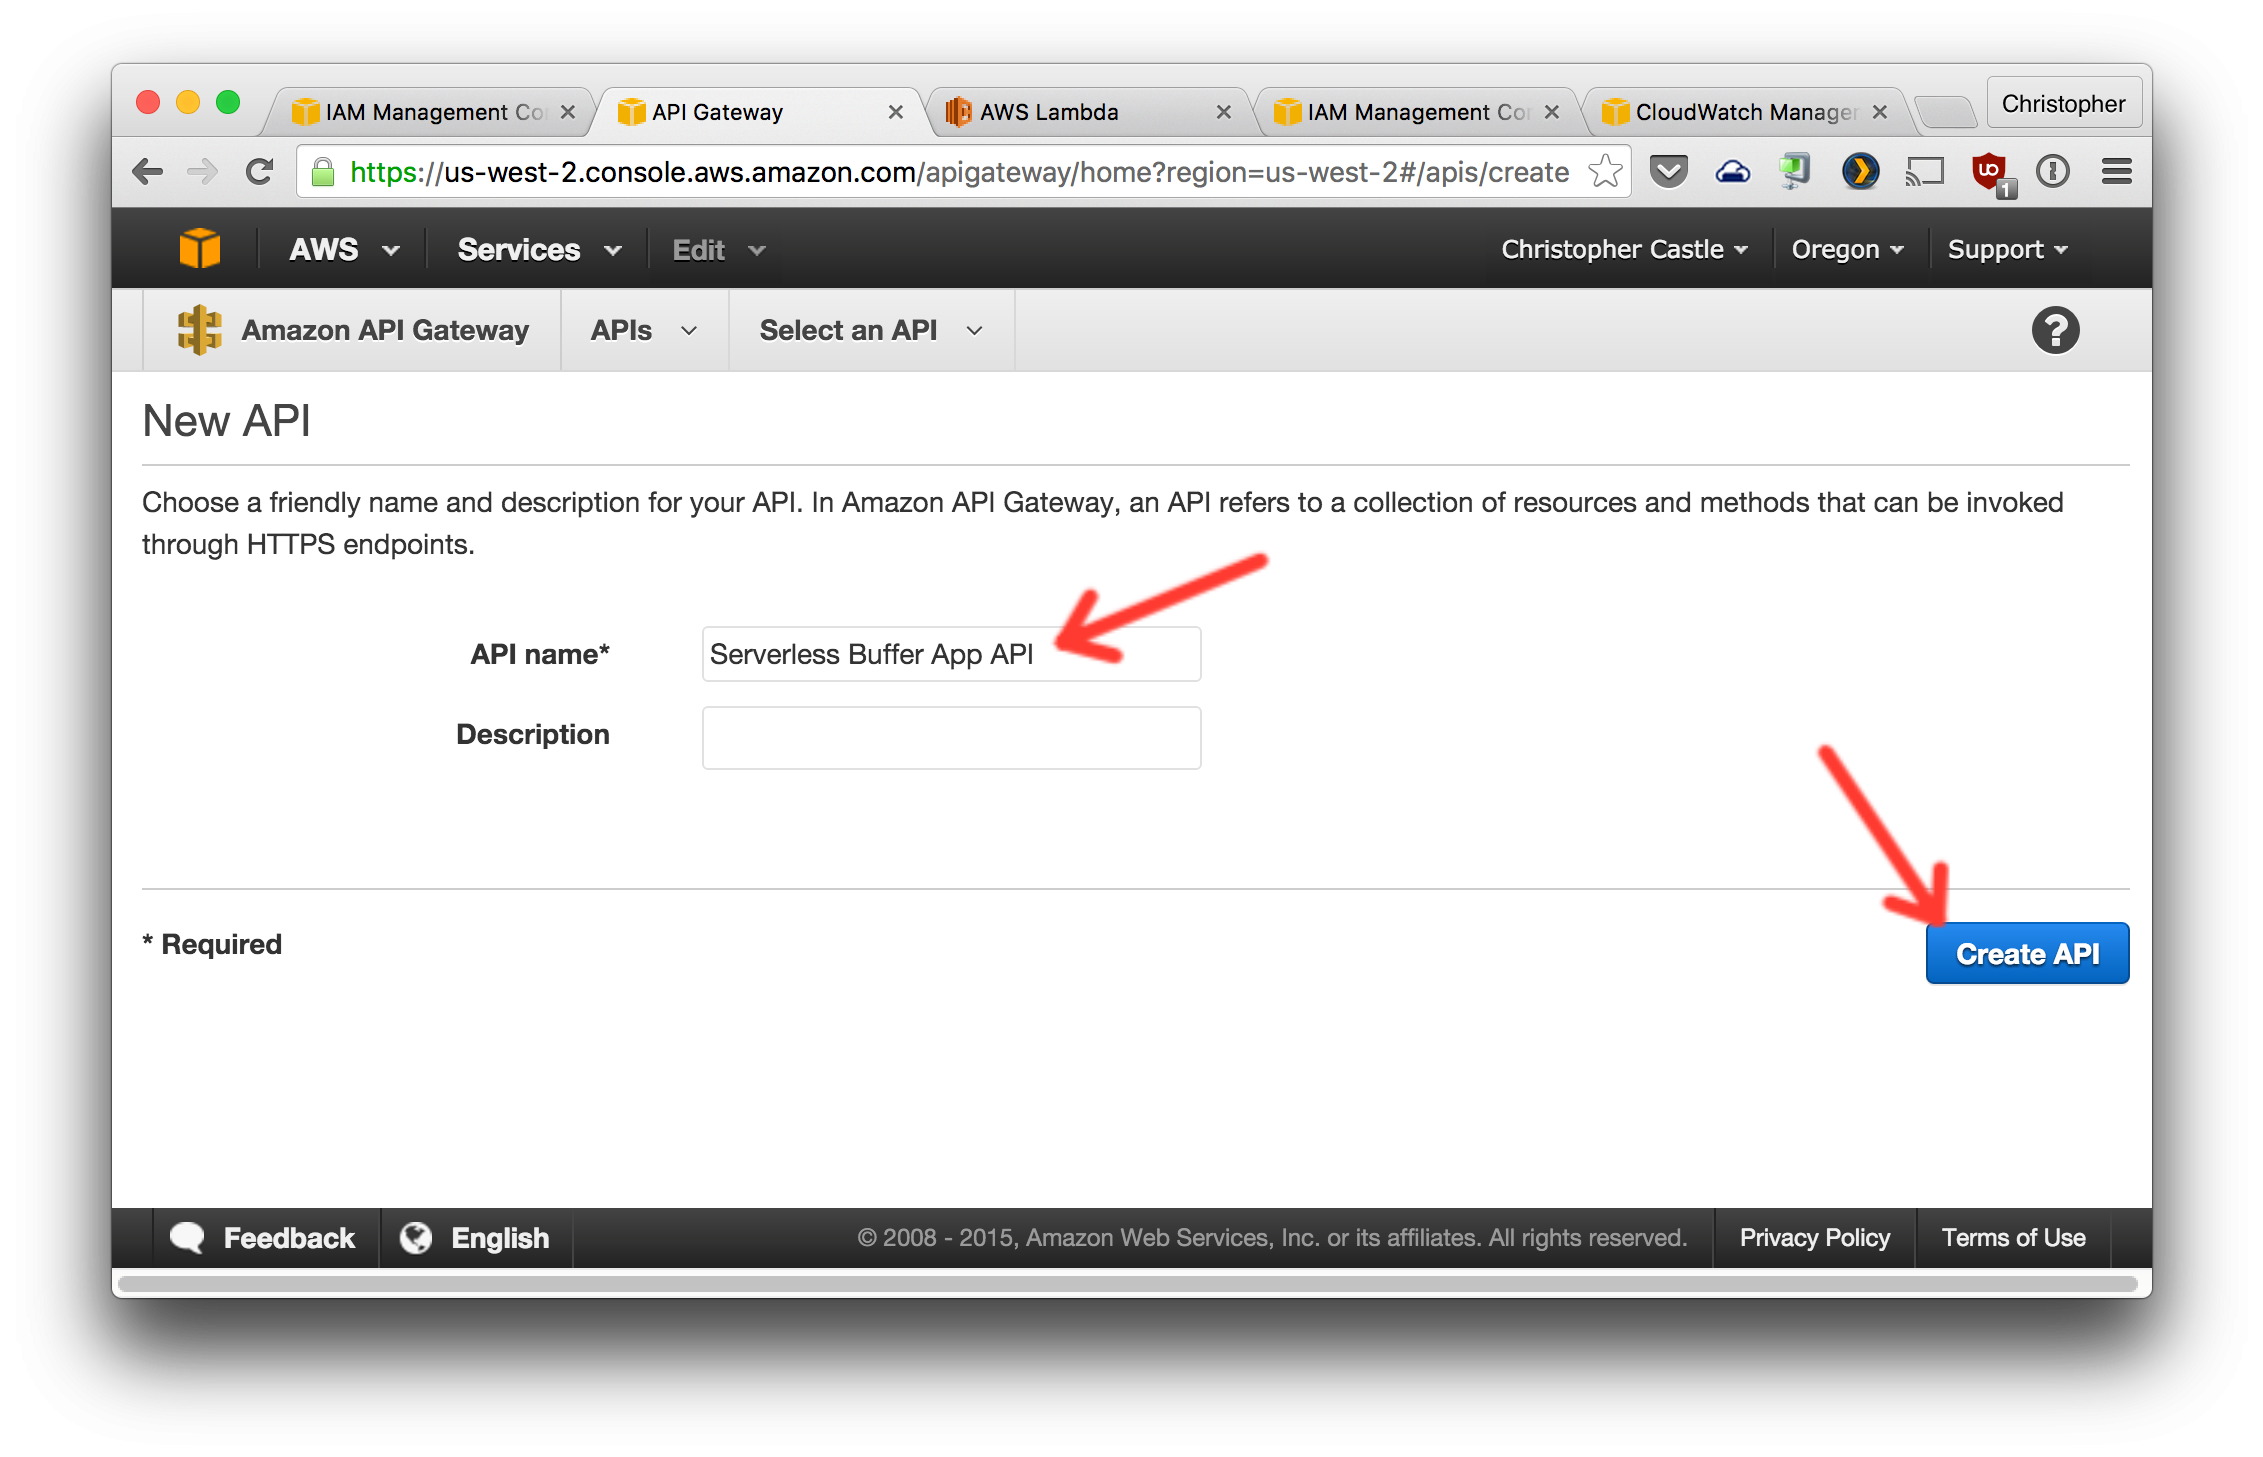
1. From the AWS API Gateway console, create a new API and set it up like the screenshots below.
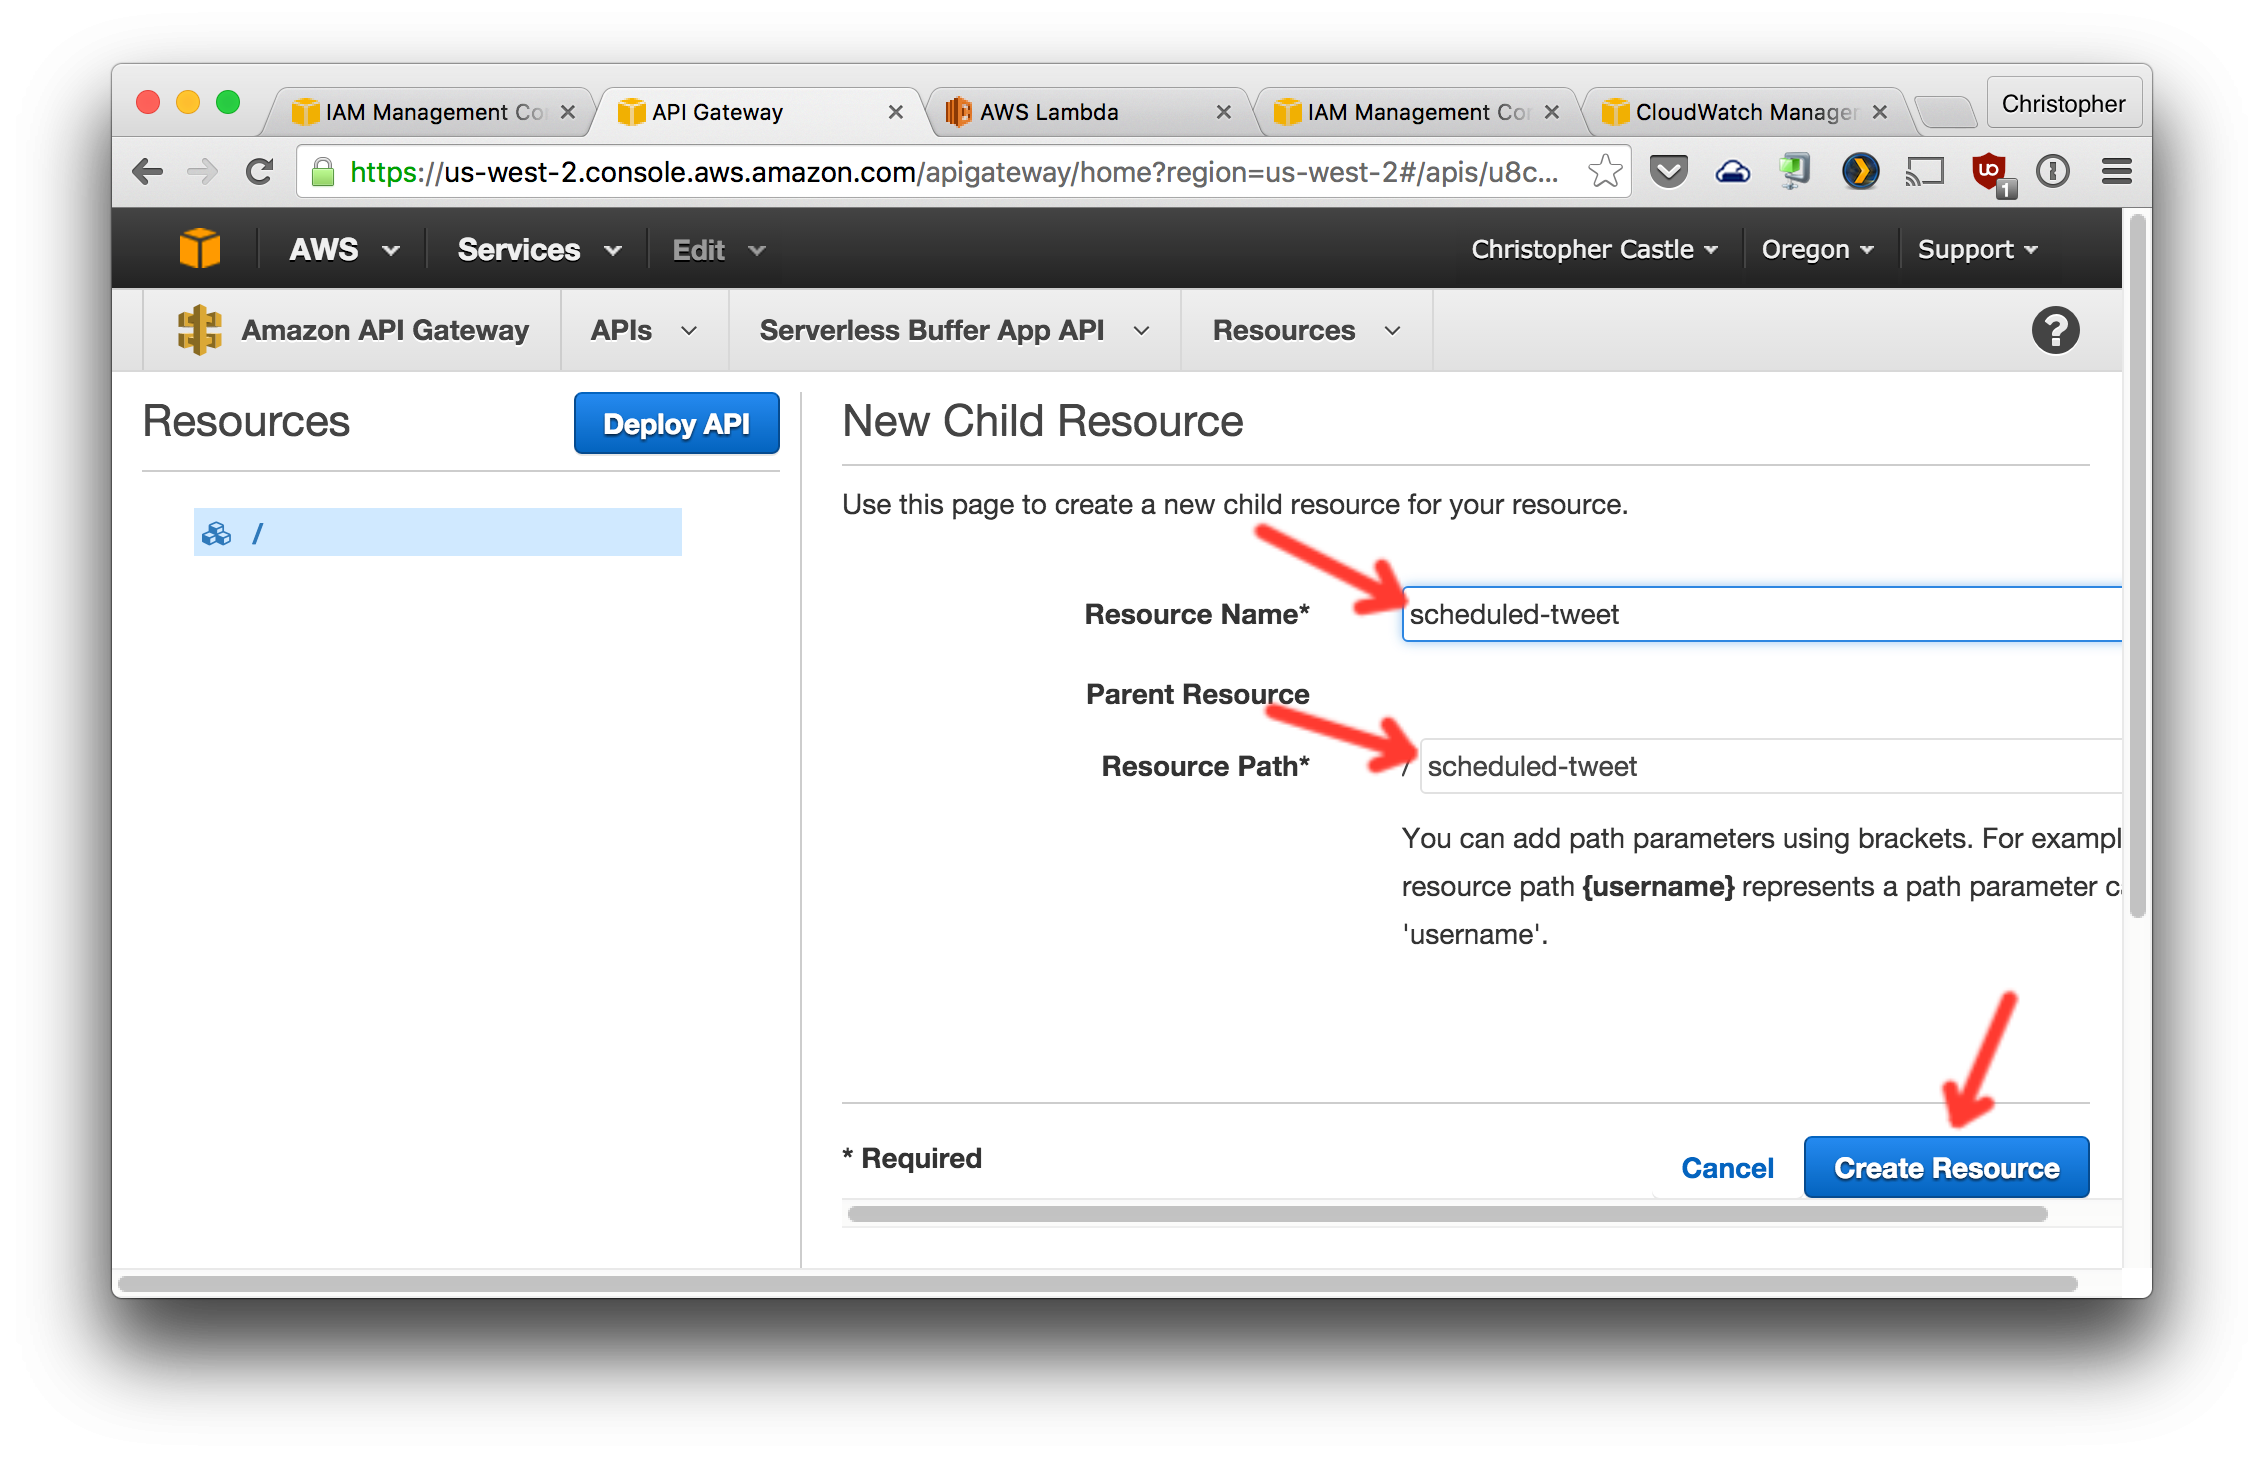
2. Create a new resource named `scheduled-tweet`.

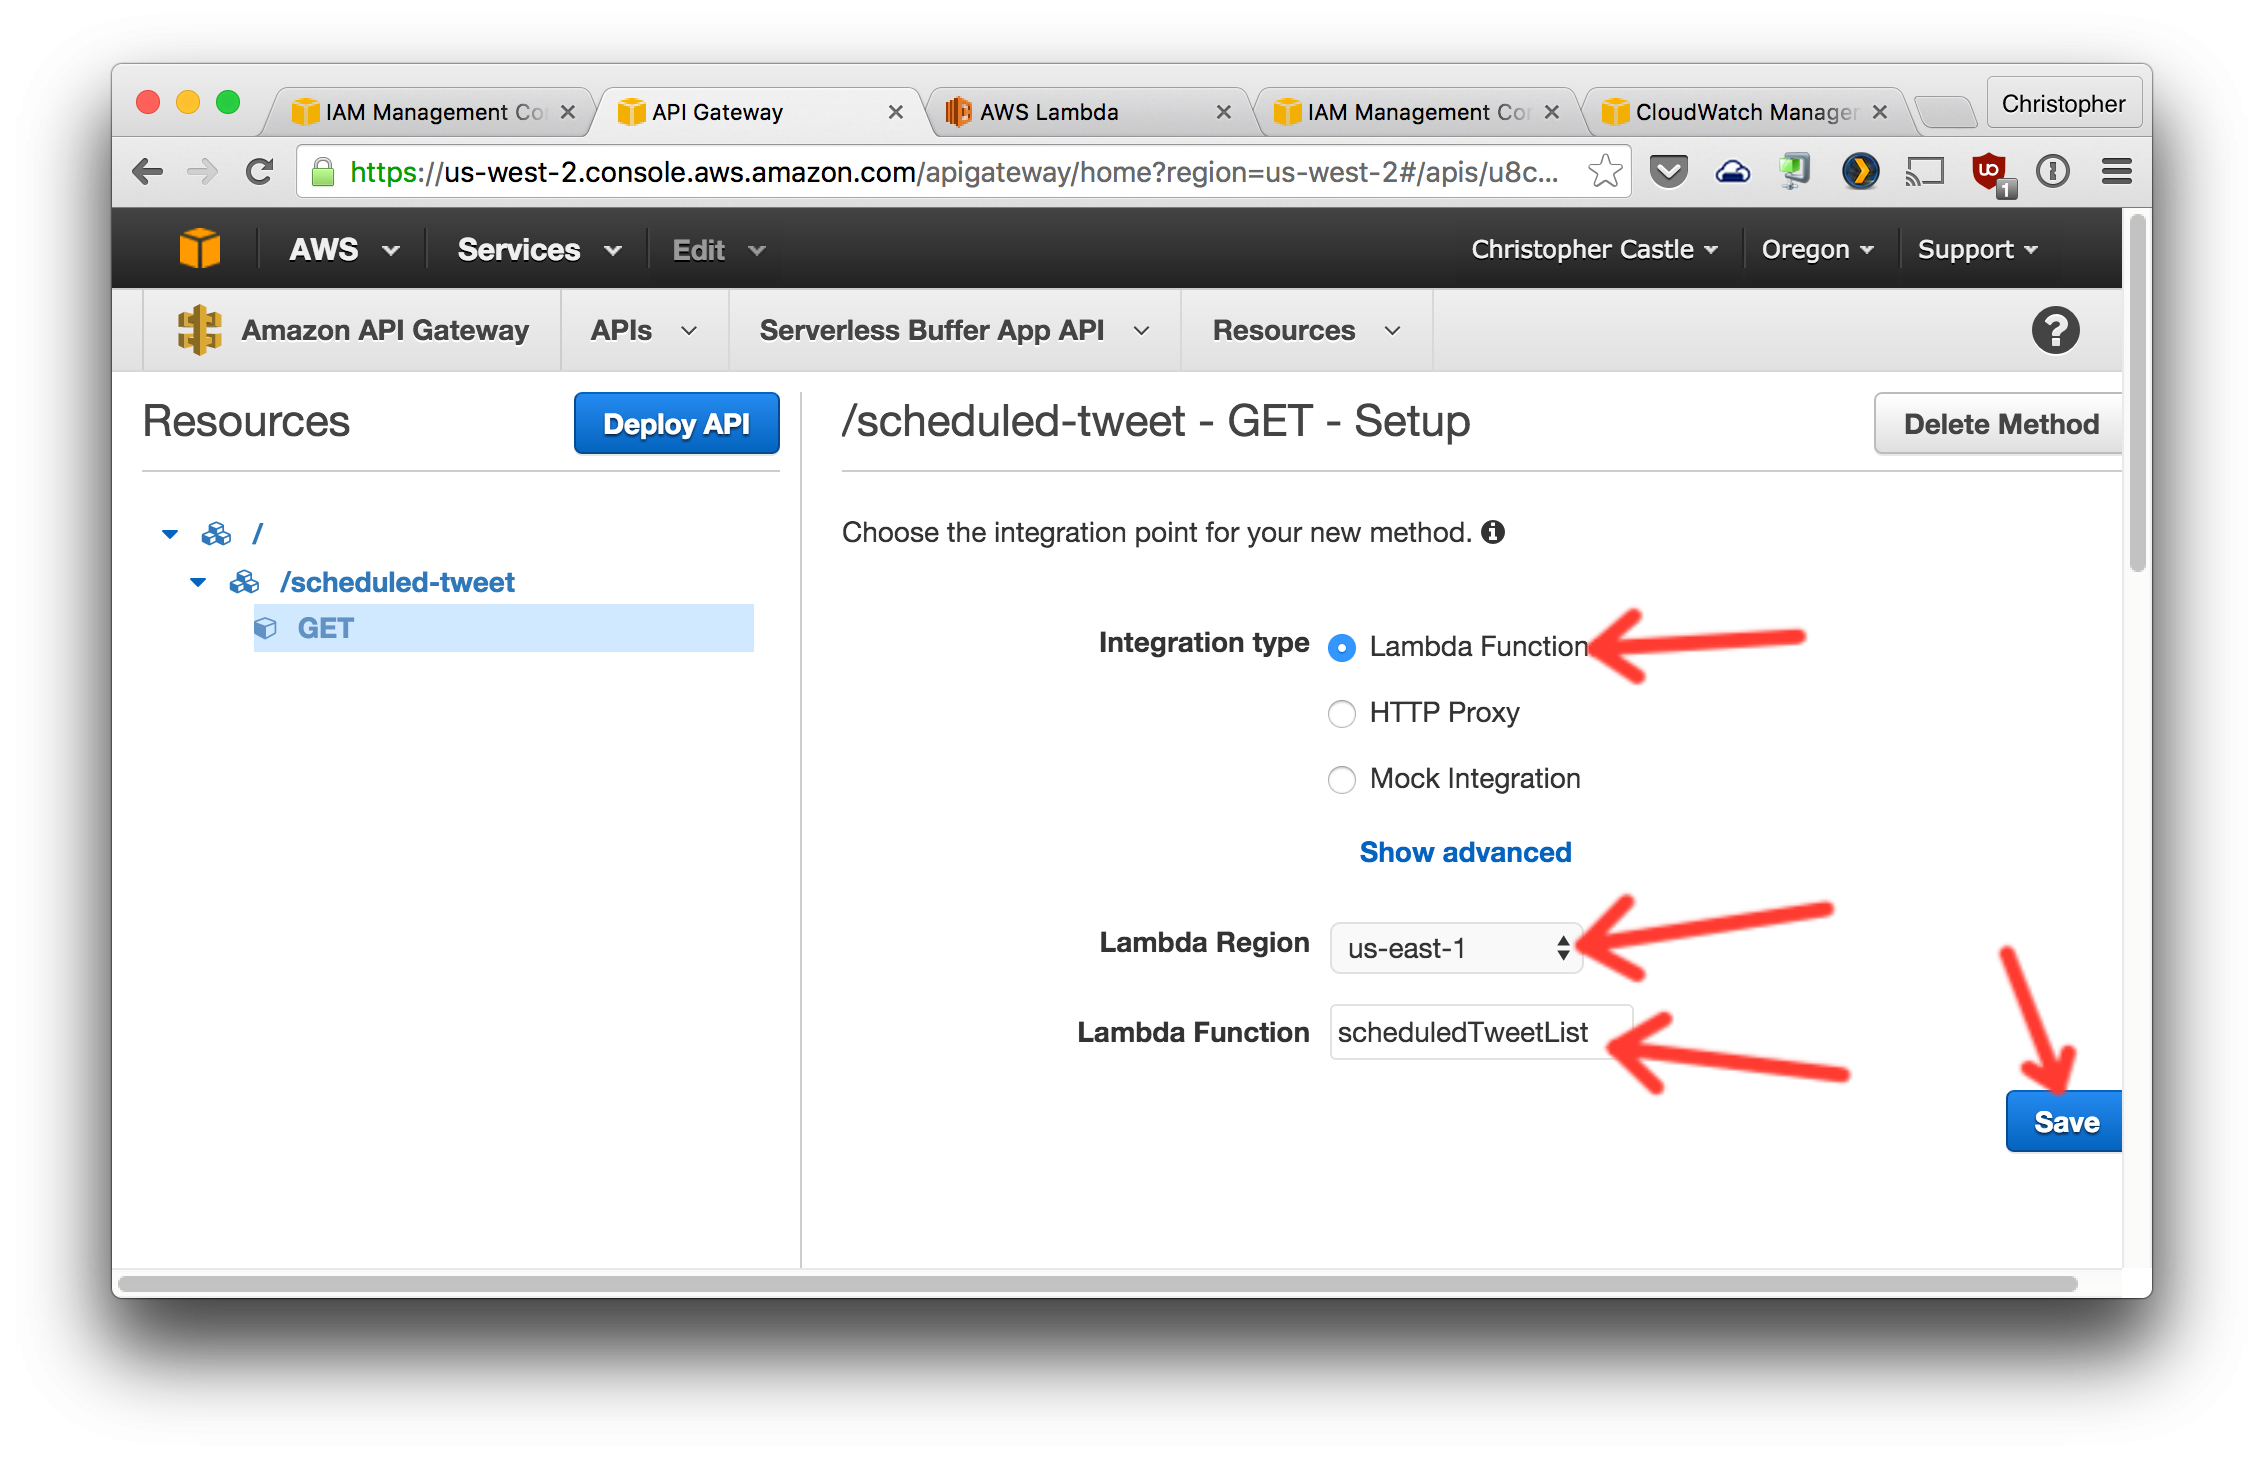
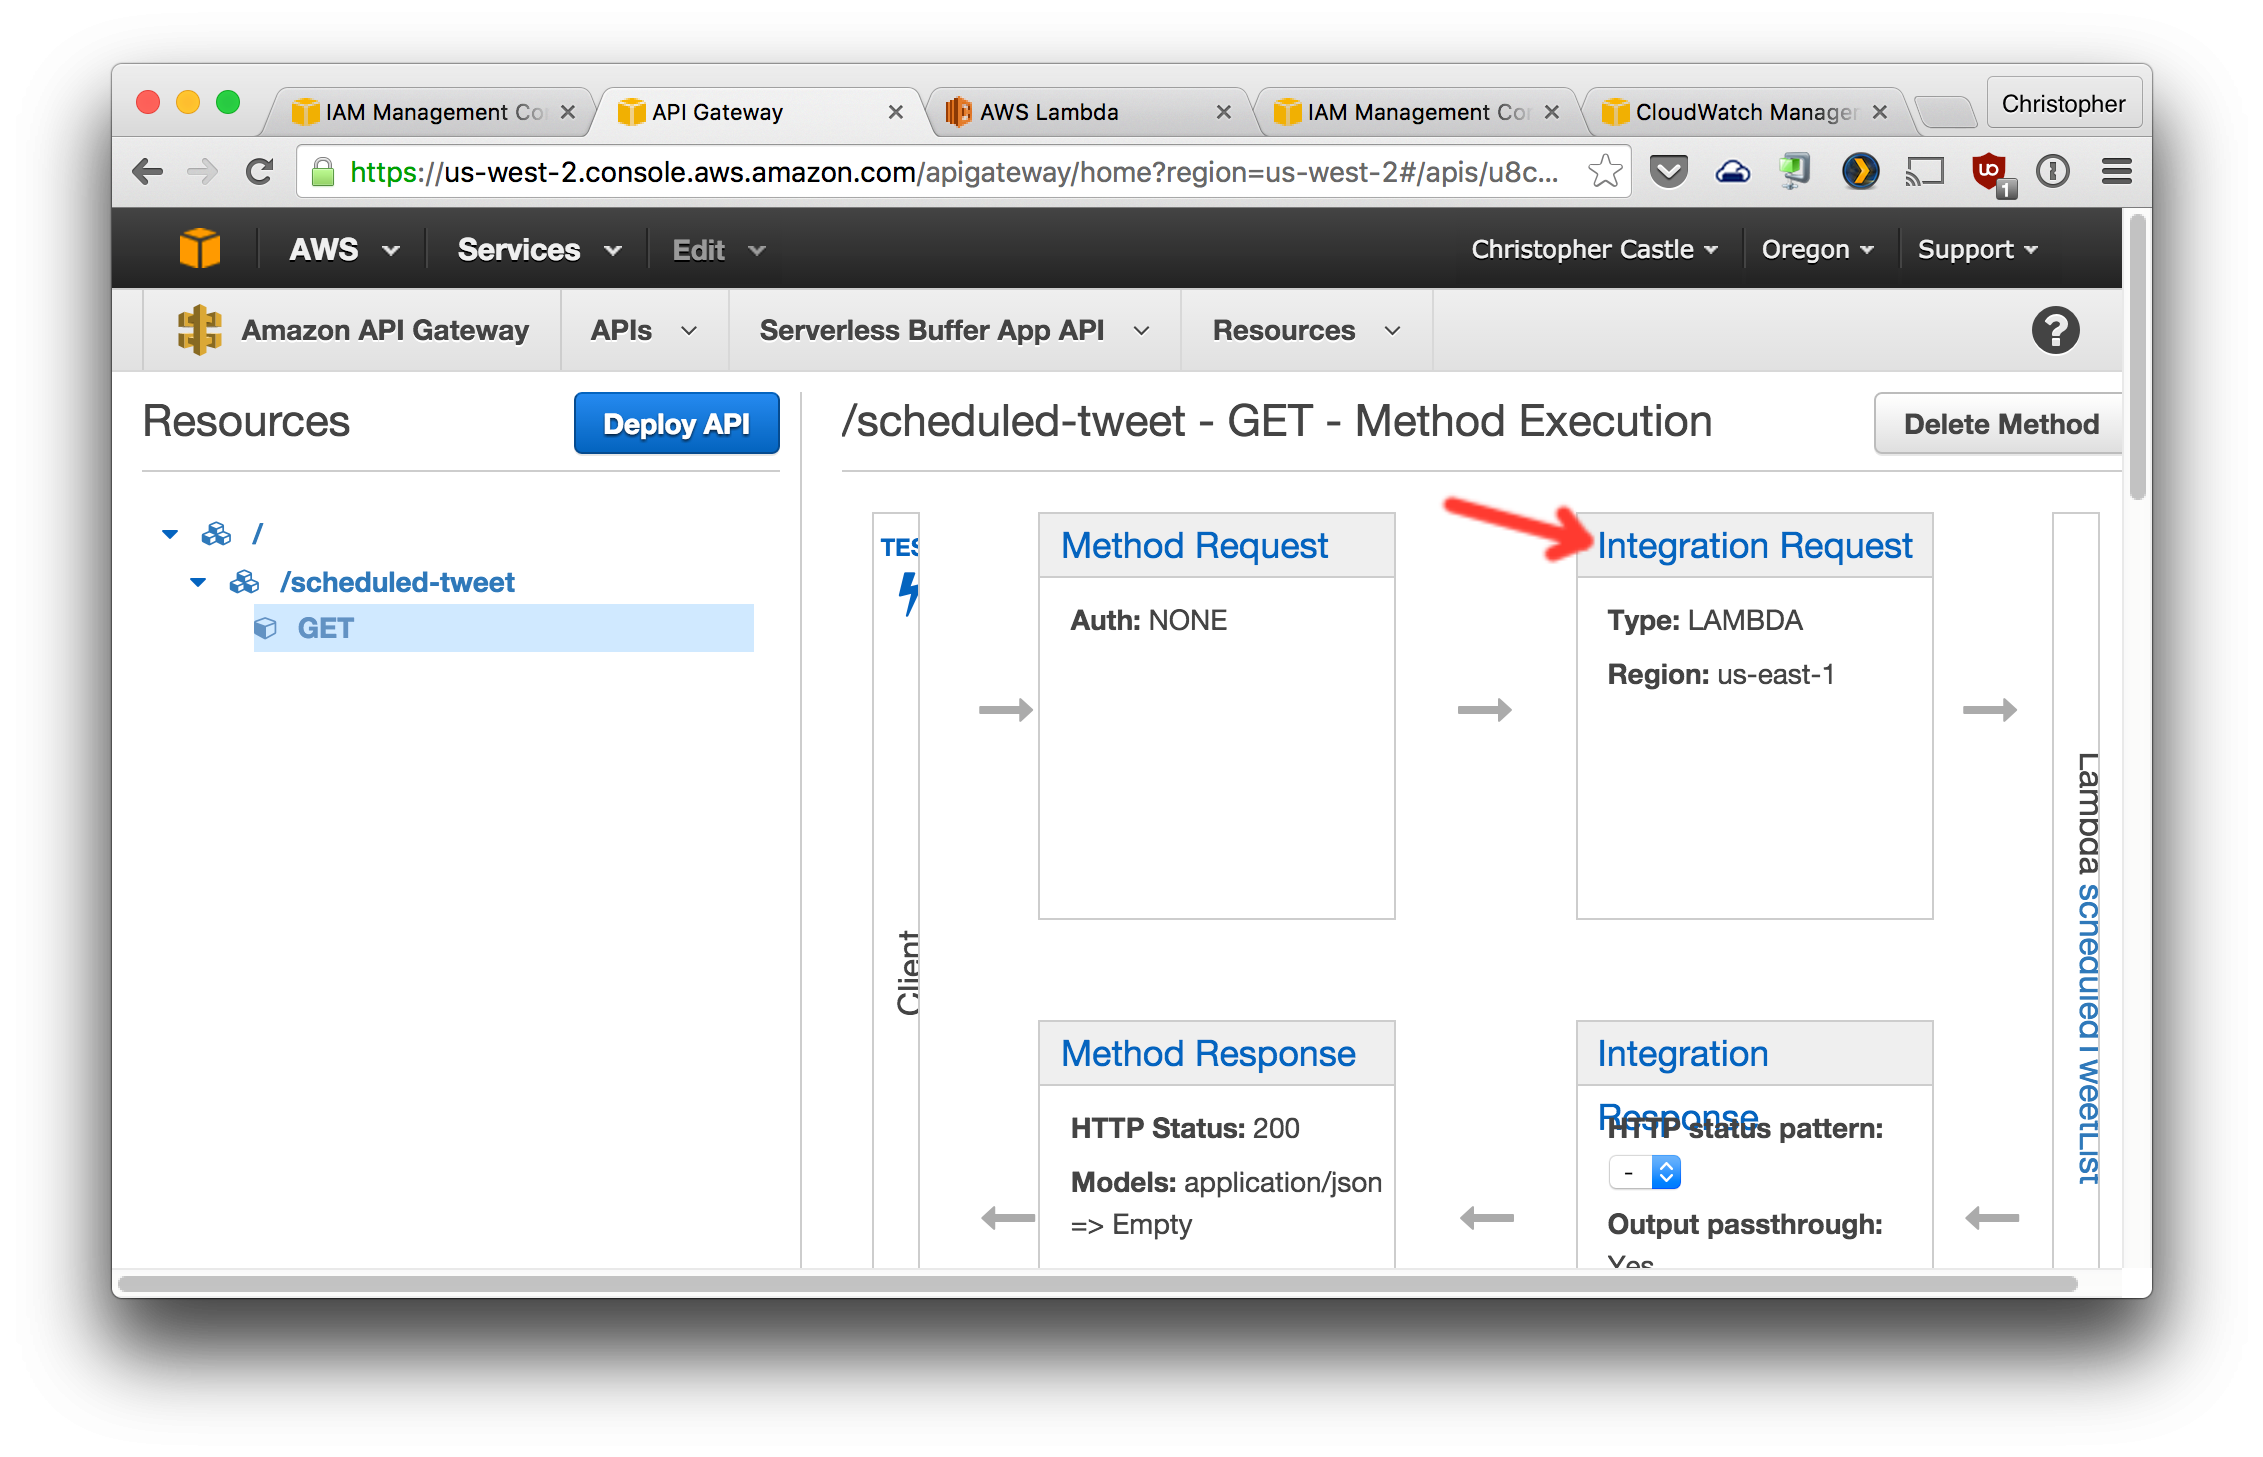
3. Create a GET method for this resource and configure it as shown. Note that the `Lambda Region` you choose needs to be the AWS region in which you created the Lambda functions. If you didn't choose a region, you probably used `us-east-1`.

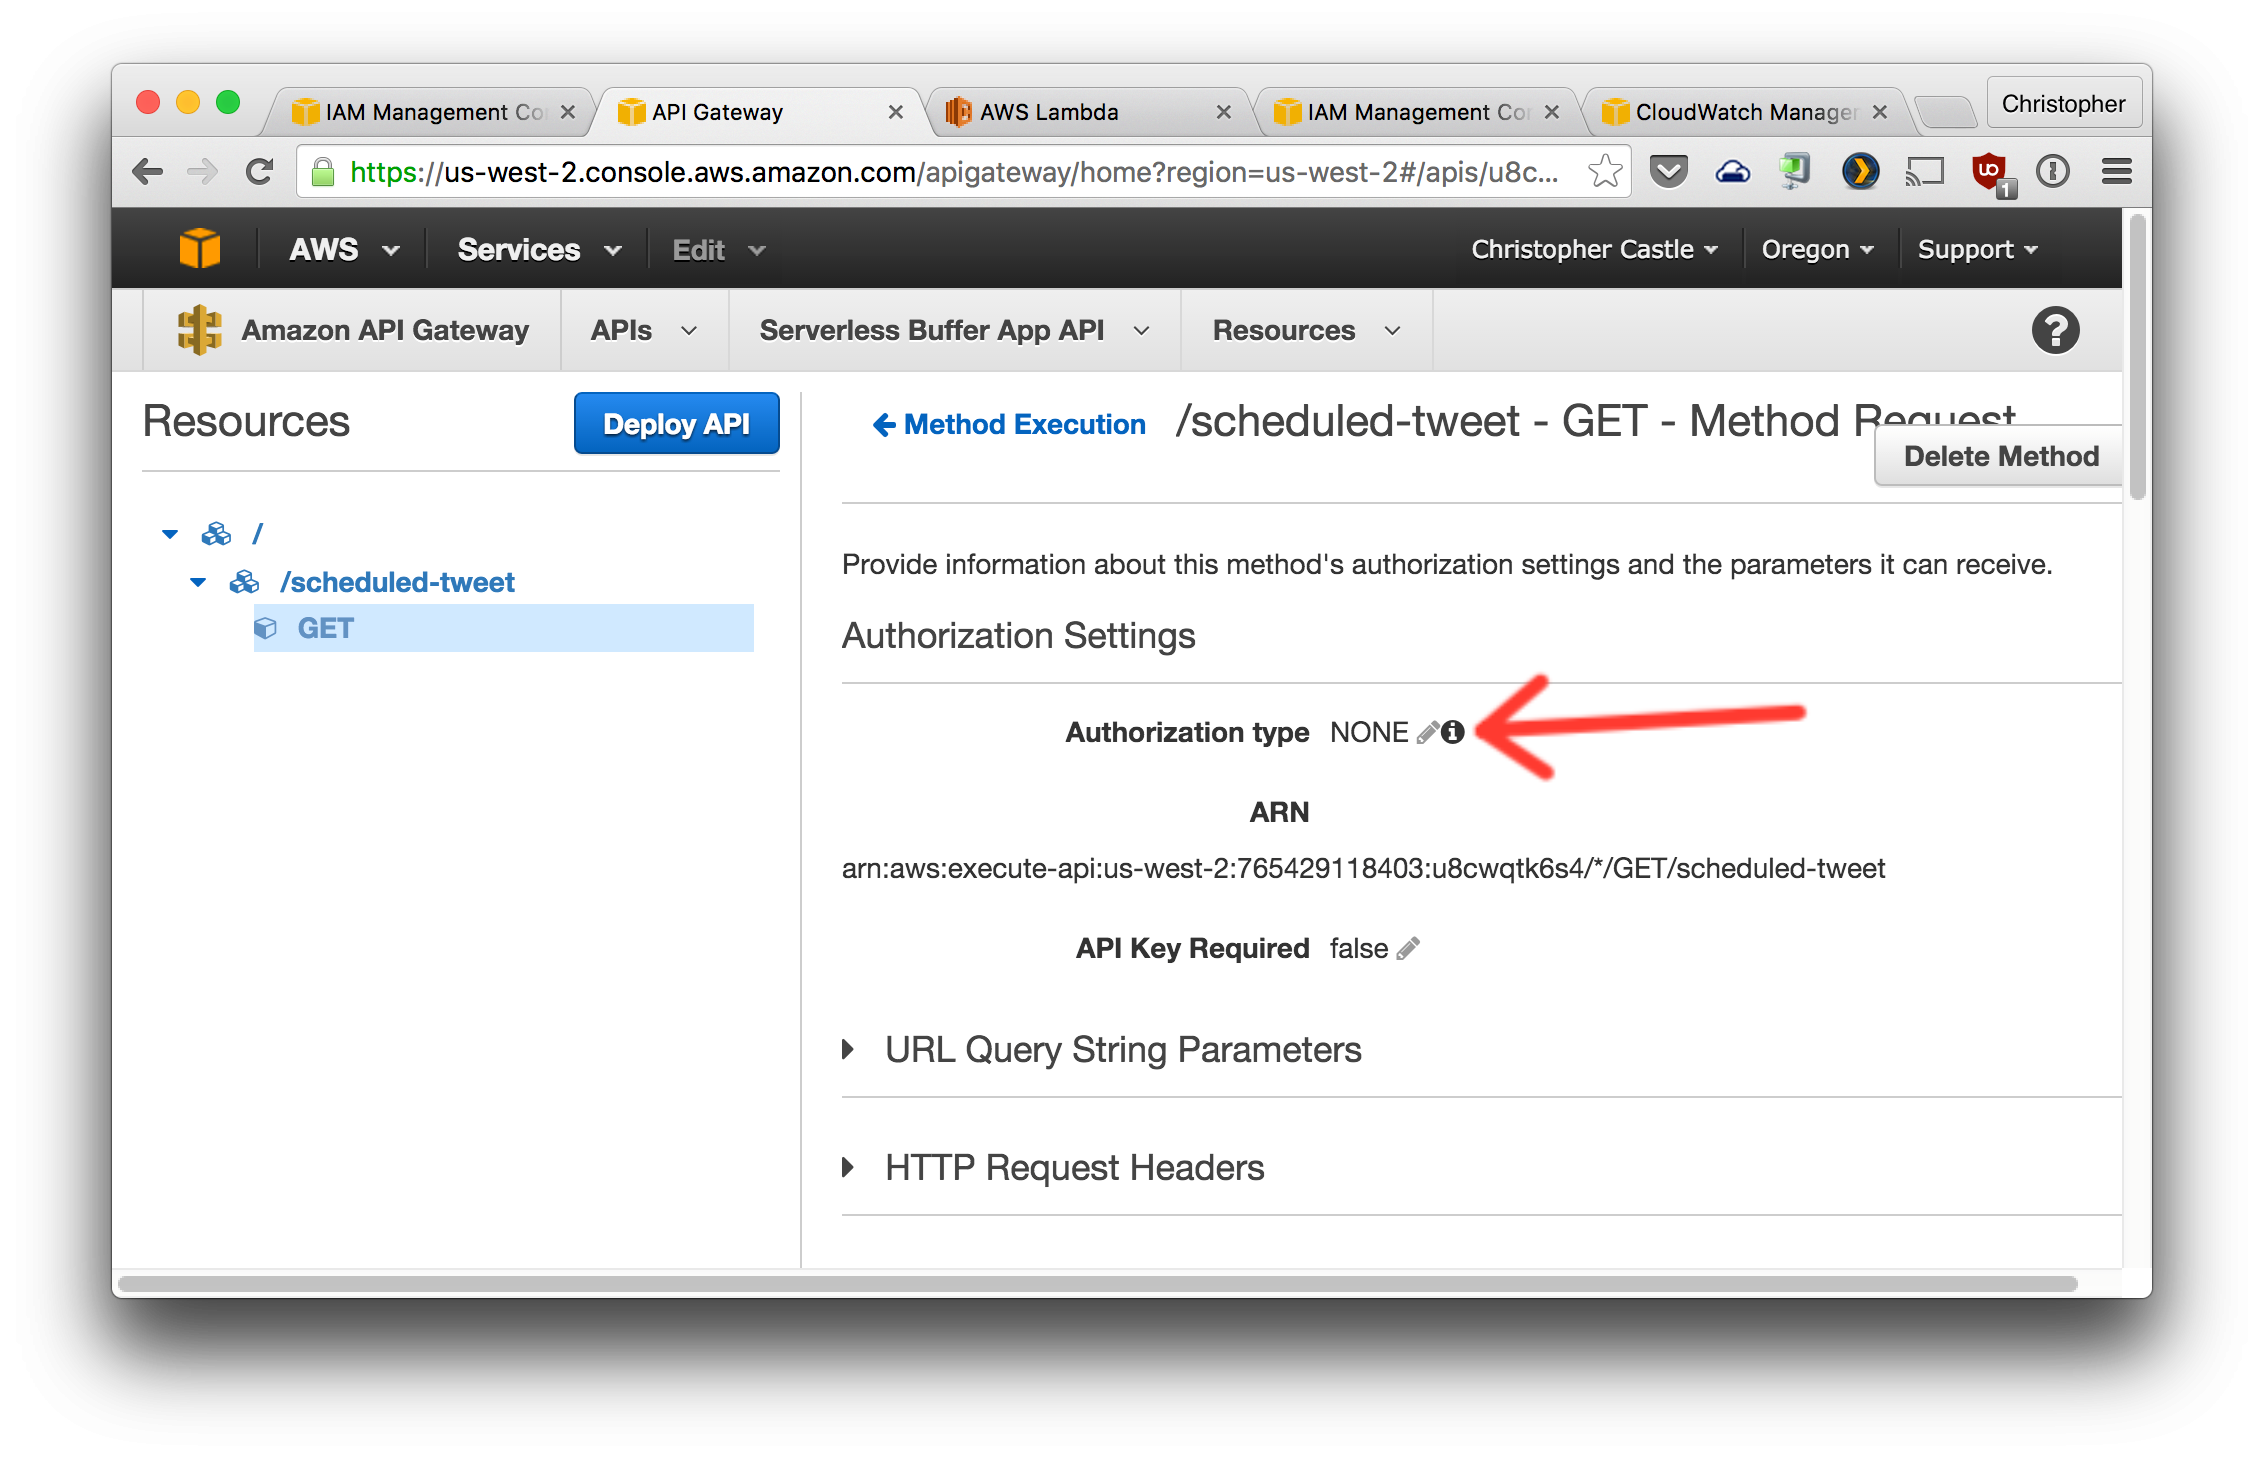
4. Change the `Method Request` `Authorization Type` to `AWS_IAM`.

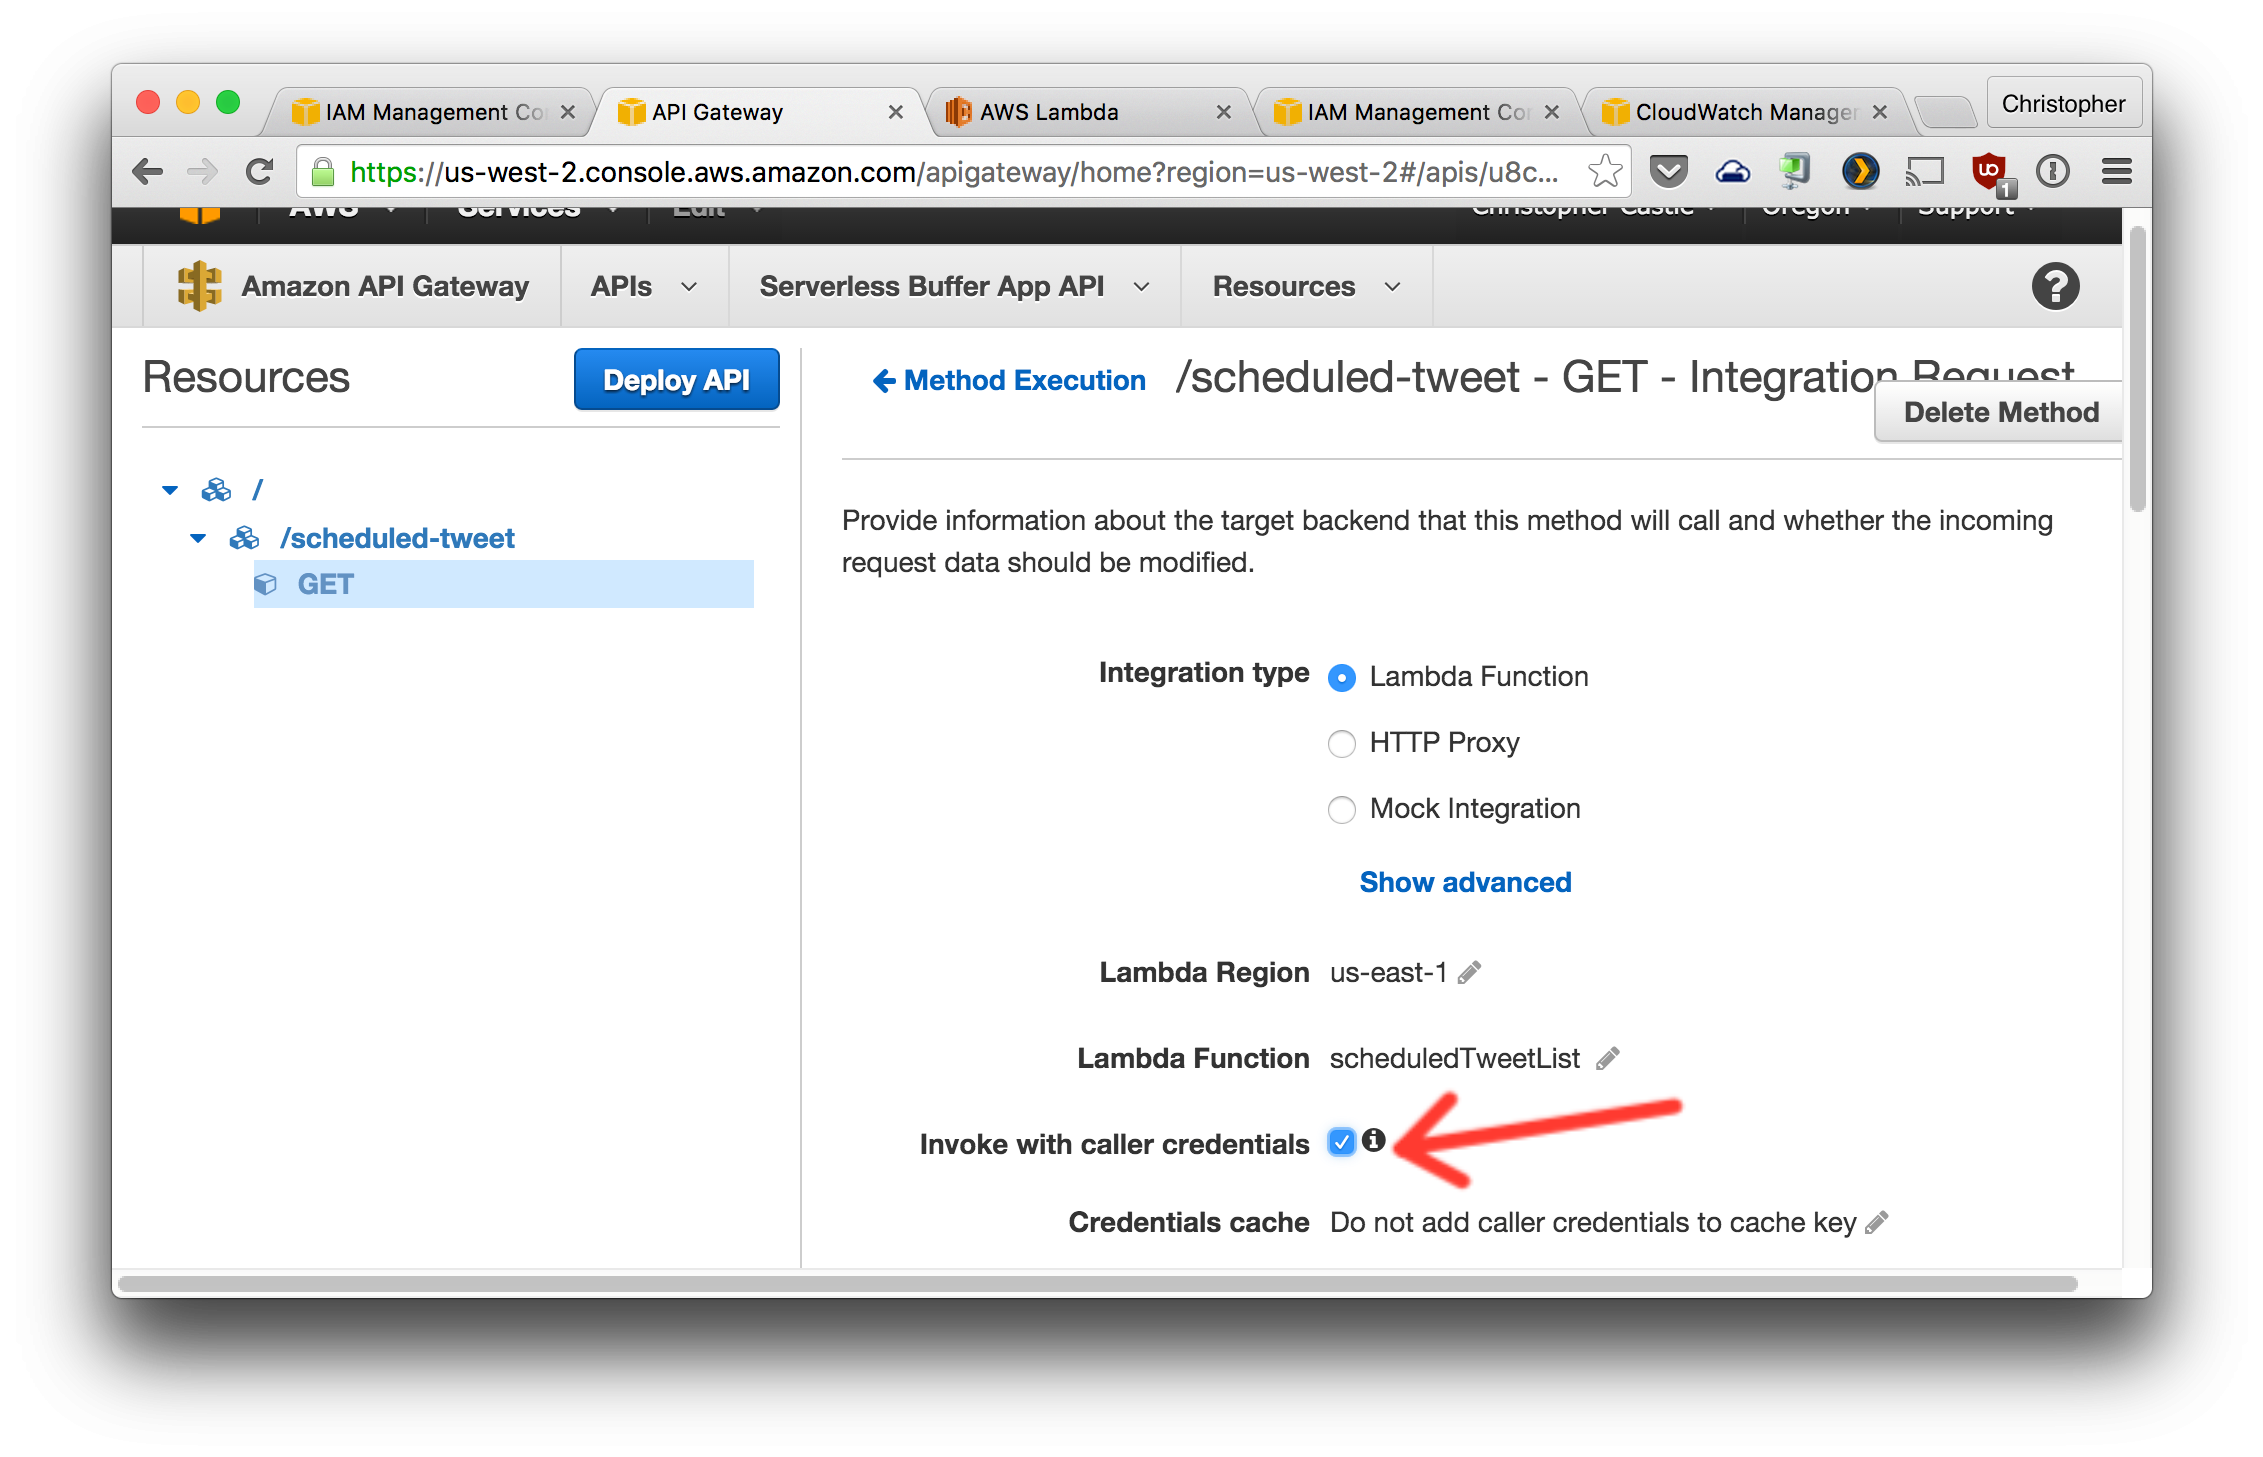
5. Enable `Invoke with caller credentials` from the `Integration Request` section.
5. Create a POST method for this resource and configure it as shown.

6. Configure the `Method Request` `Authentication Type` and `Integration Request` `Invoke with caller credentials` the same way as the GET request.
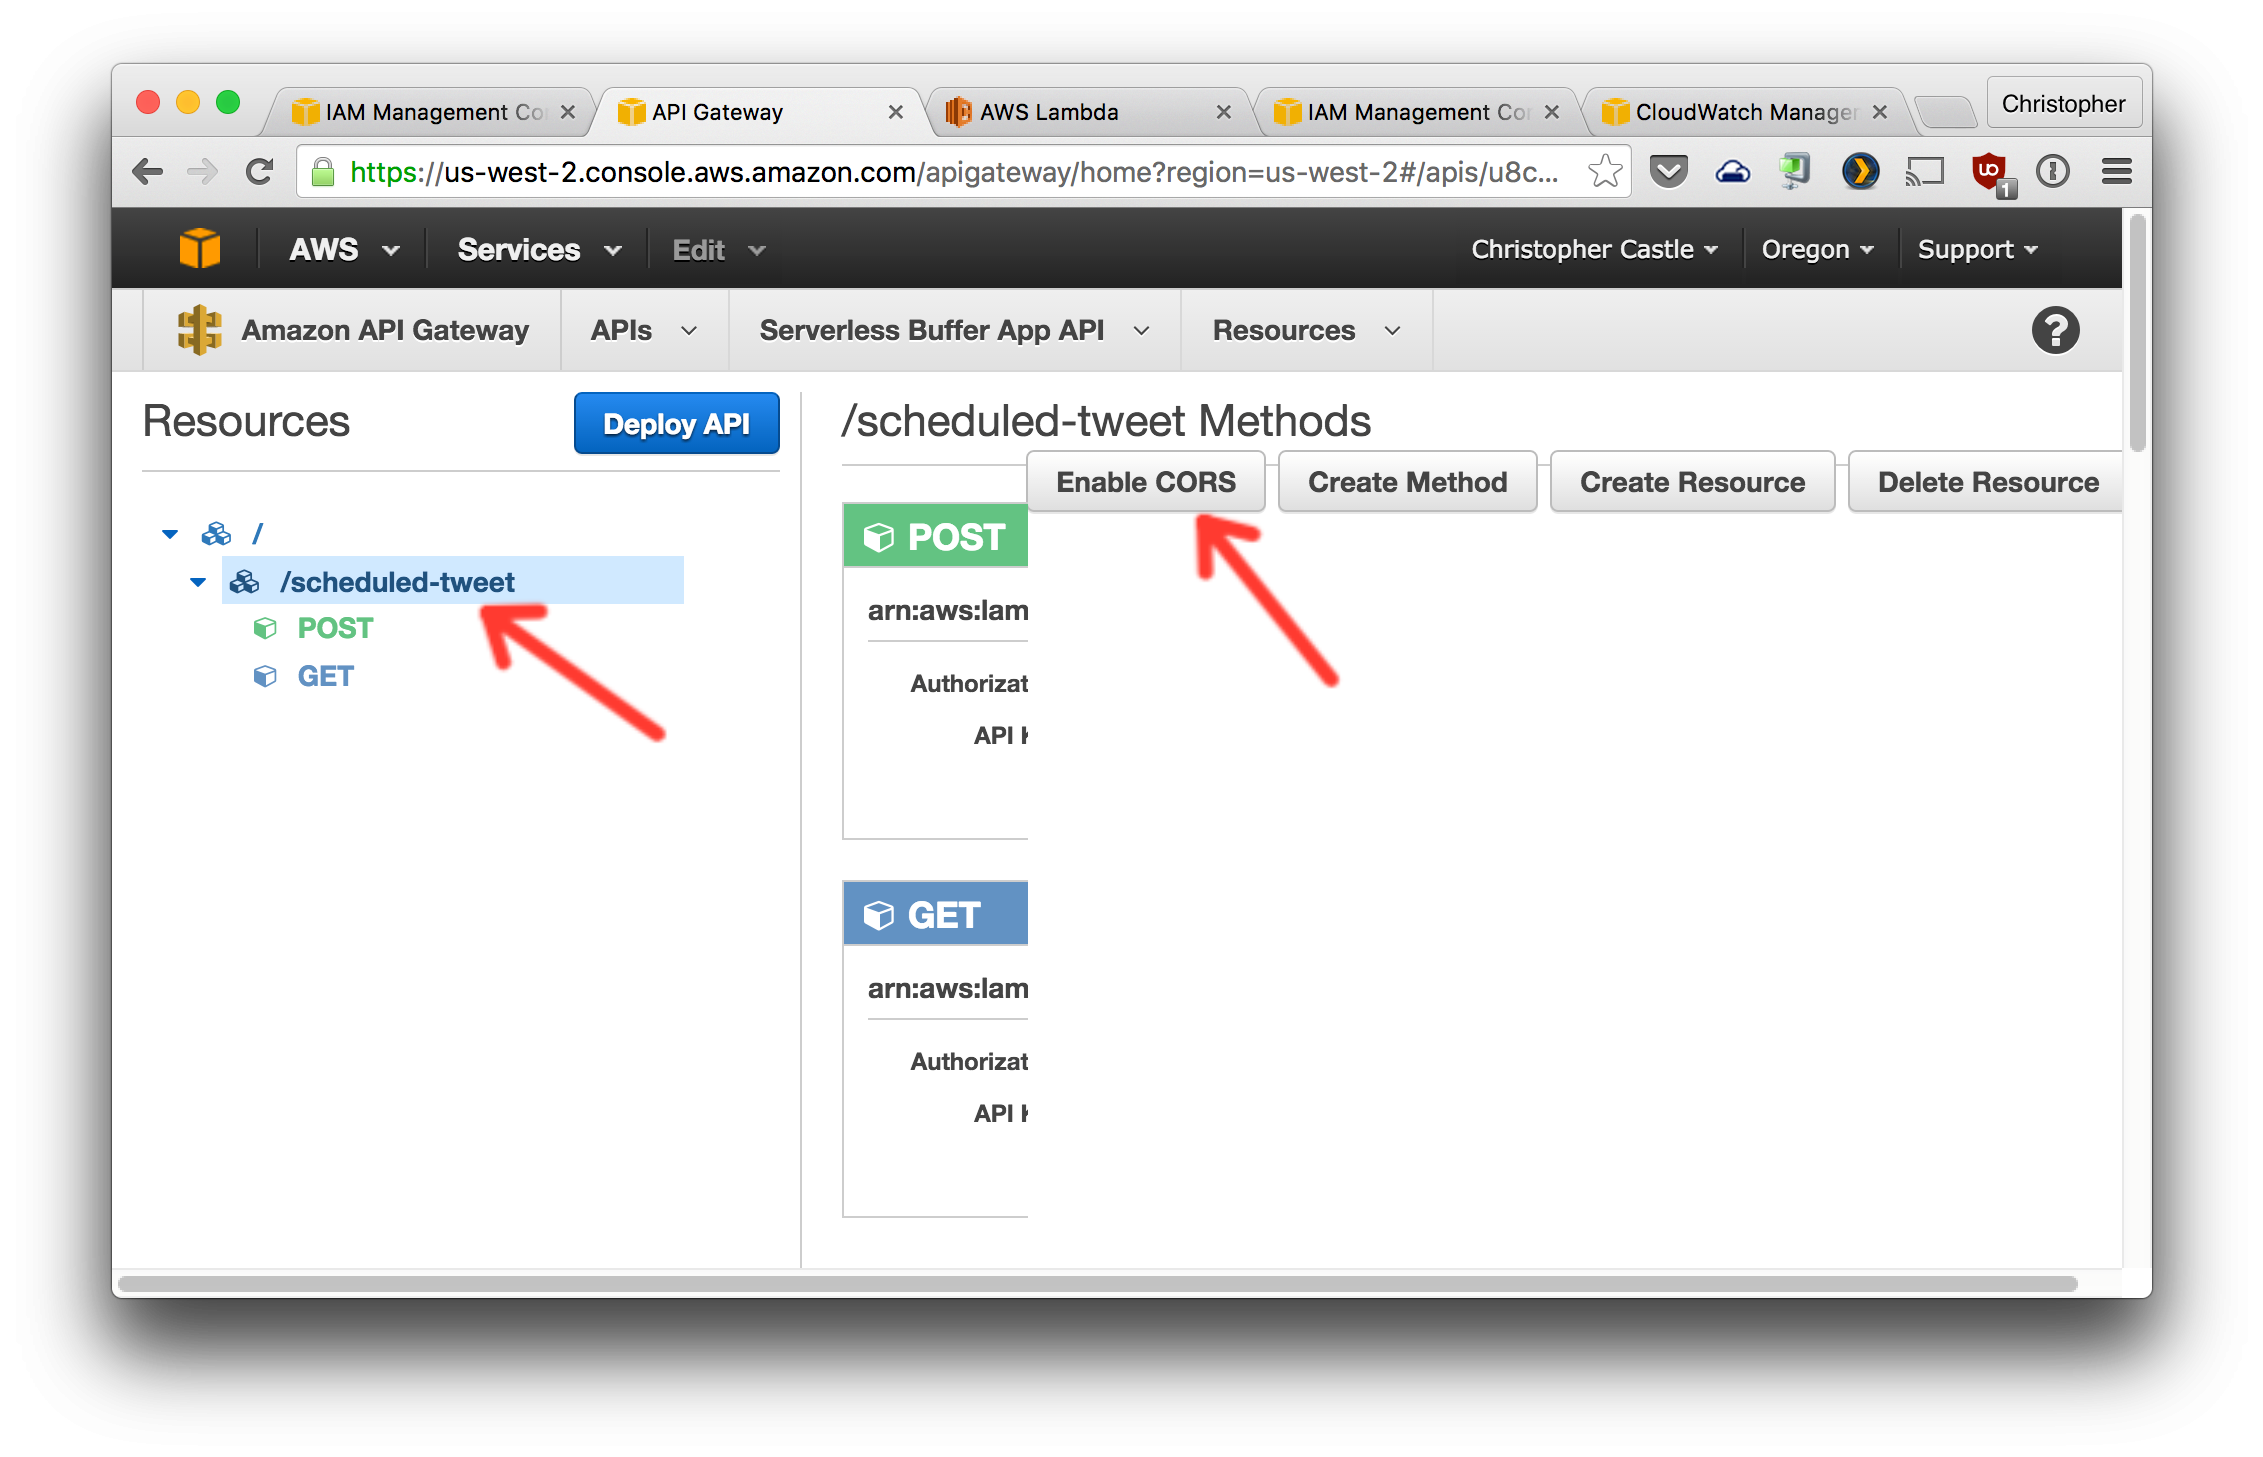
7. Now we need to enable [CORS](https://en.wikipedia.org/wiki/Cross-origin_resource_sharing) on these two request methods so that the front-end JavaScript code is allowed to make requests to the API.
1. Click the `scheduled-tweet` resource on the left. Then click the `Enable CORS` button.
2. Configure CORS as shown below. Note that `x-amz-security-token` needs to be added to the comma-separated list in the `Access-Control-Allow-Headers` field.
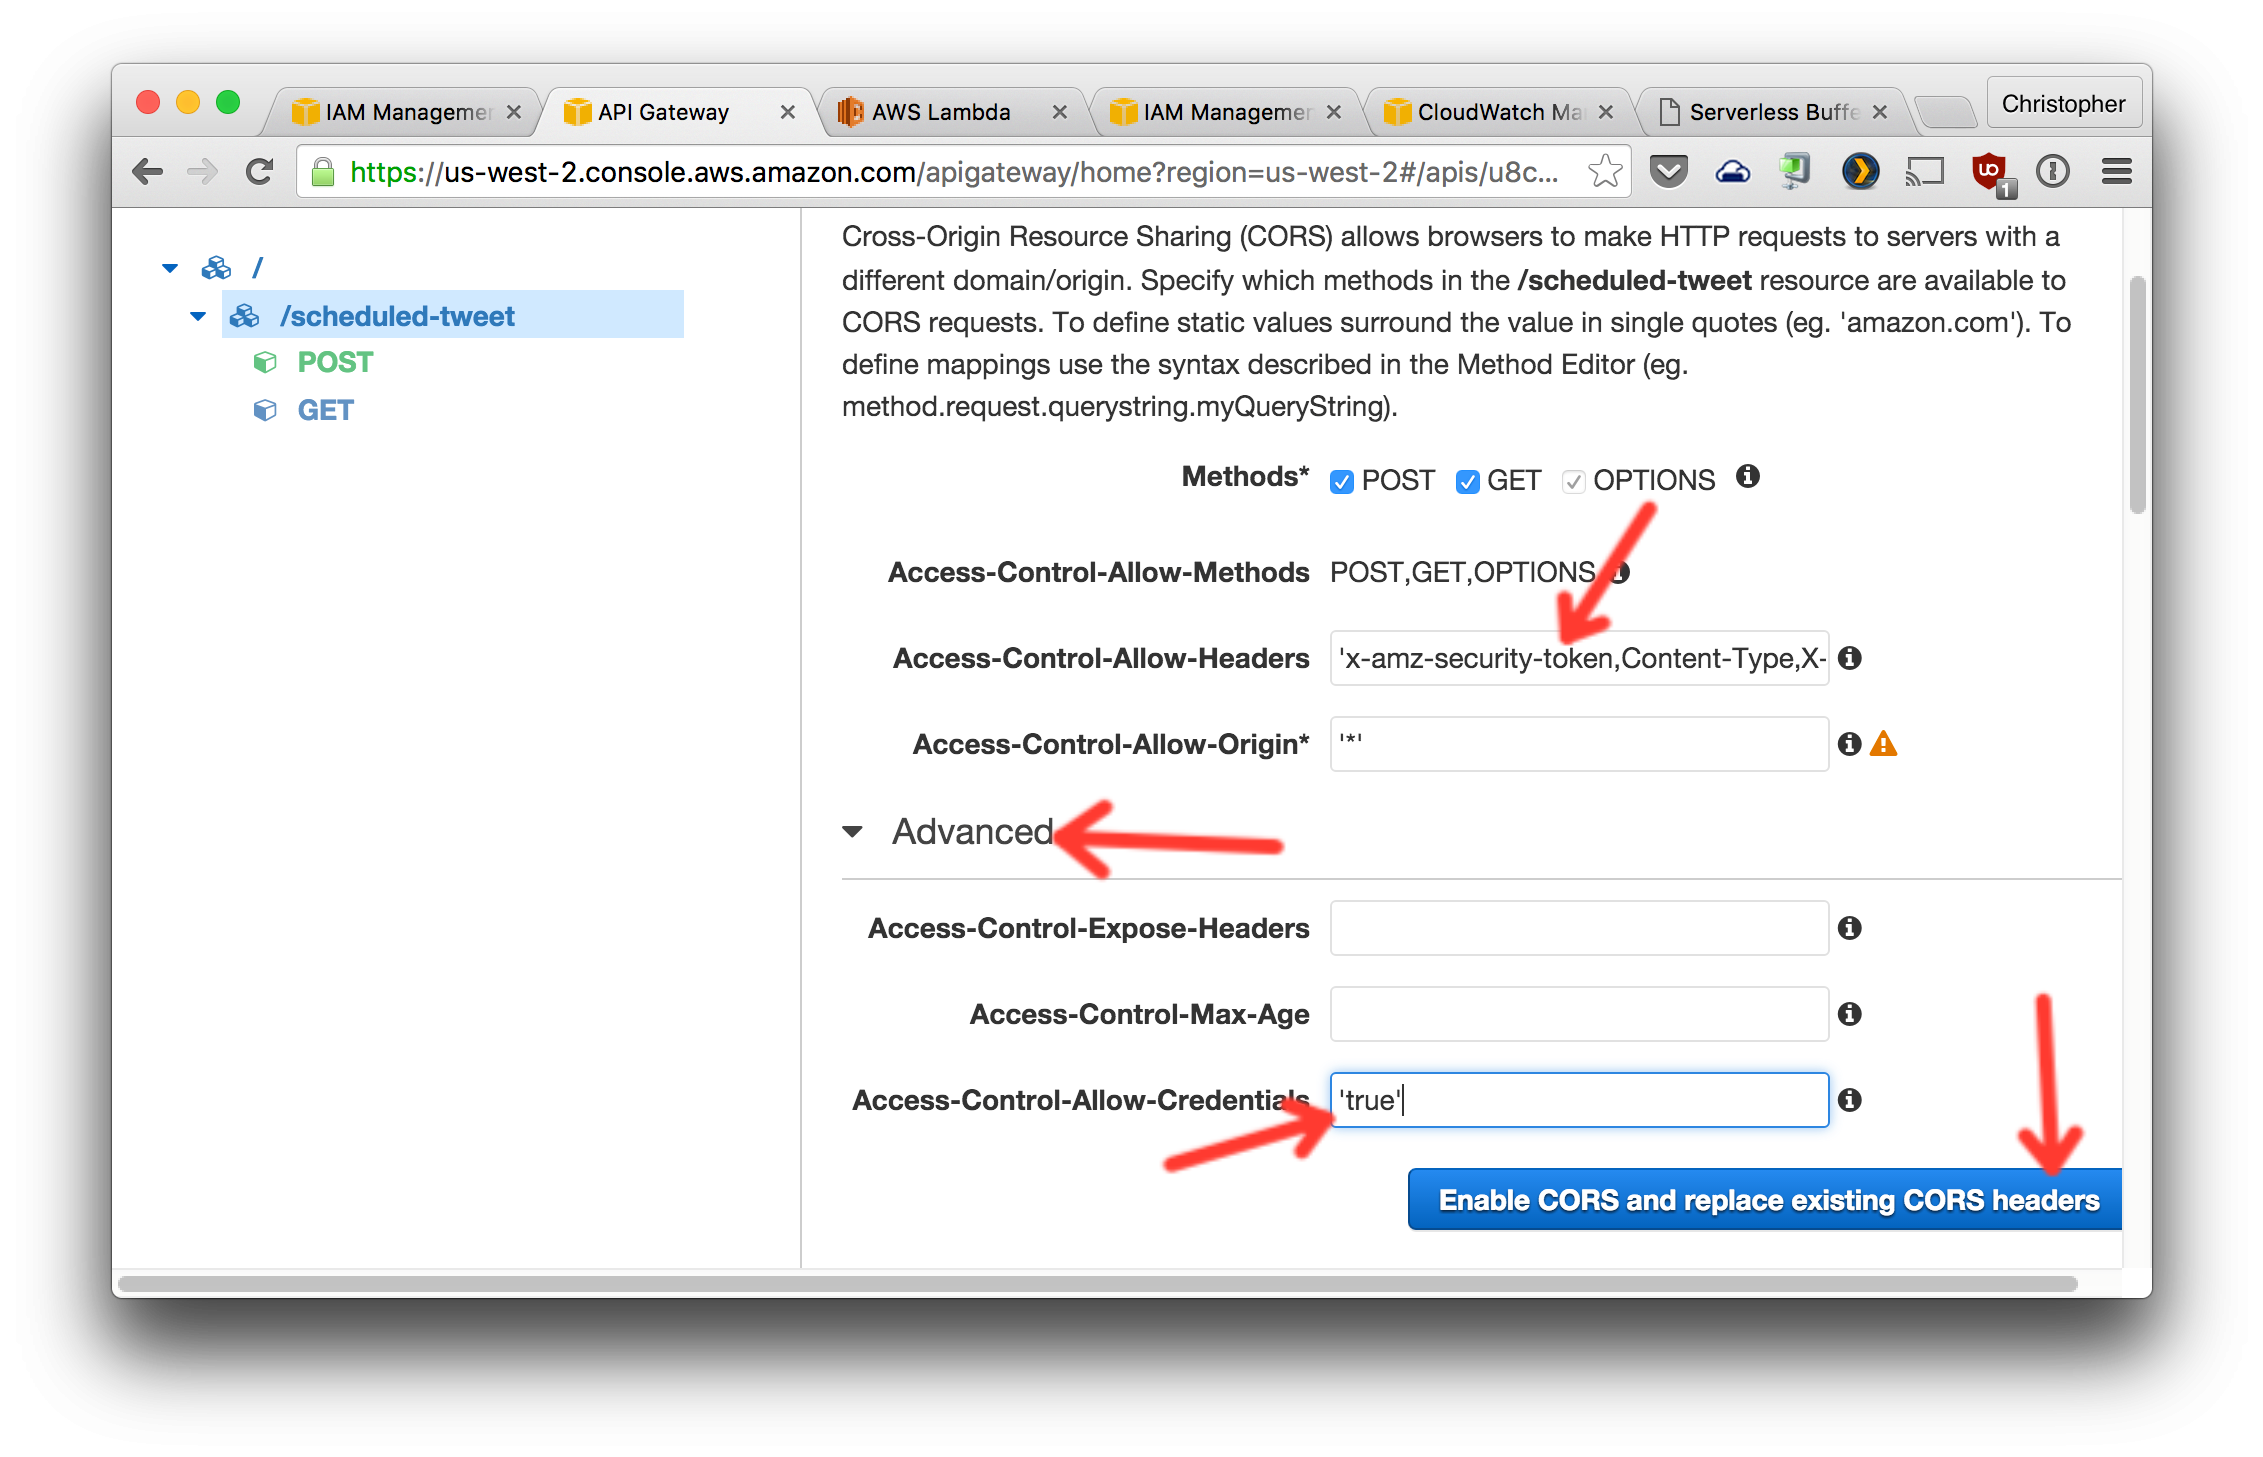
You should see all green check marks after confirming these changes as they are being made.
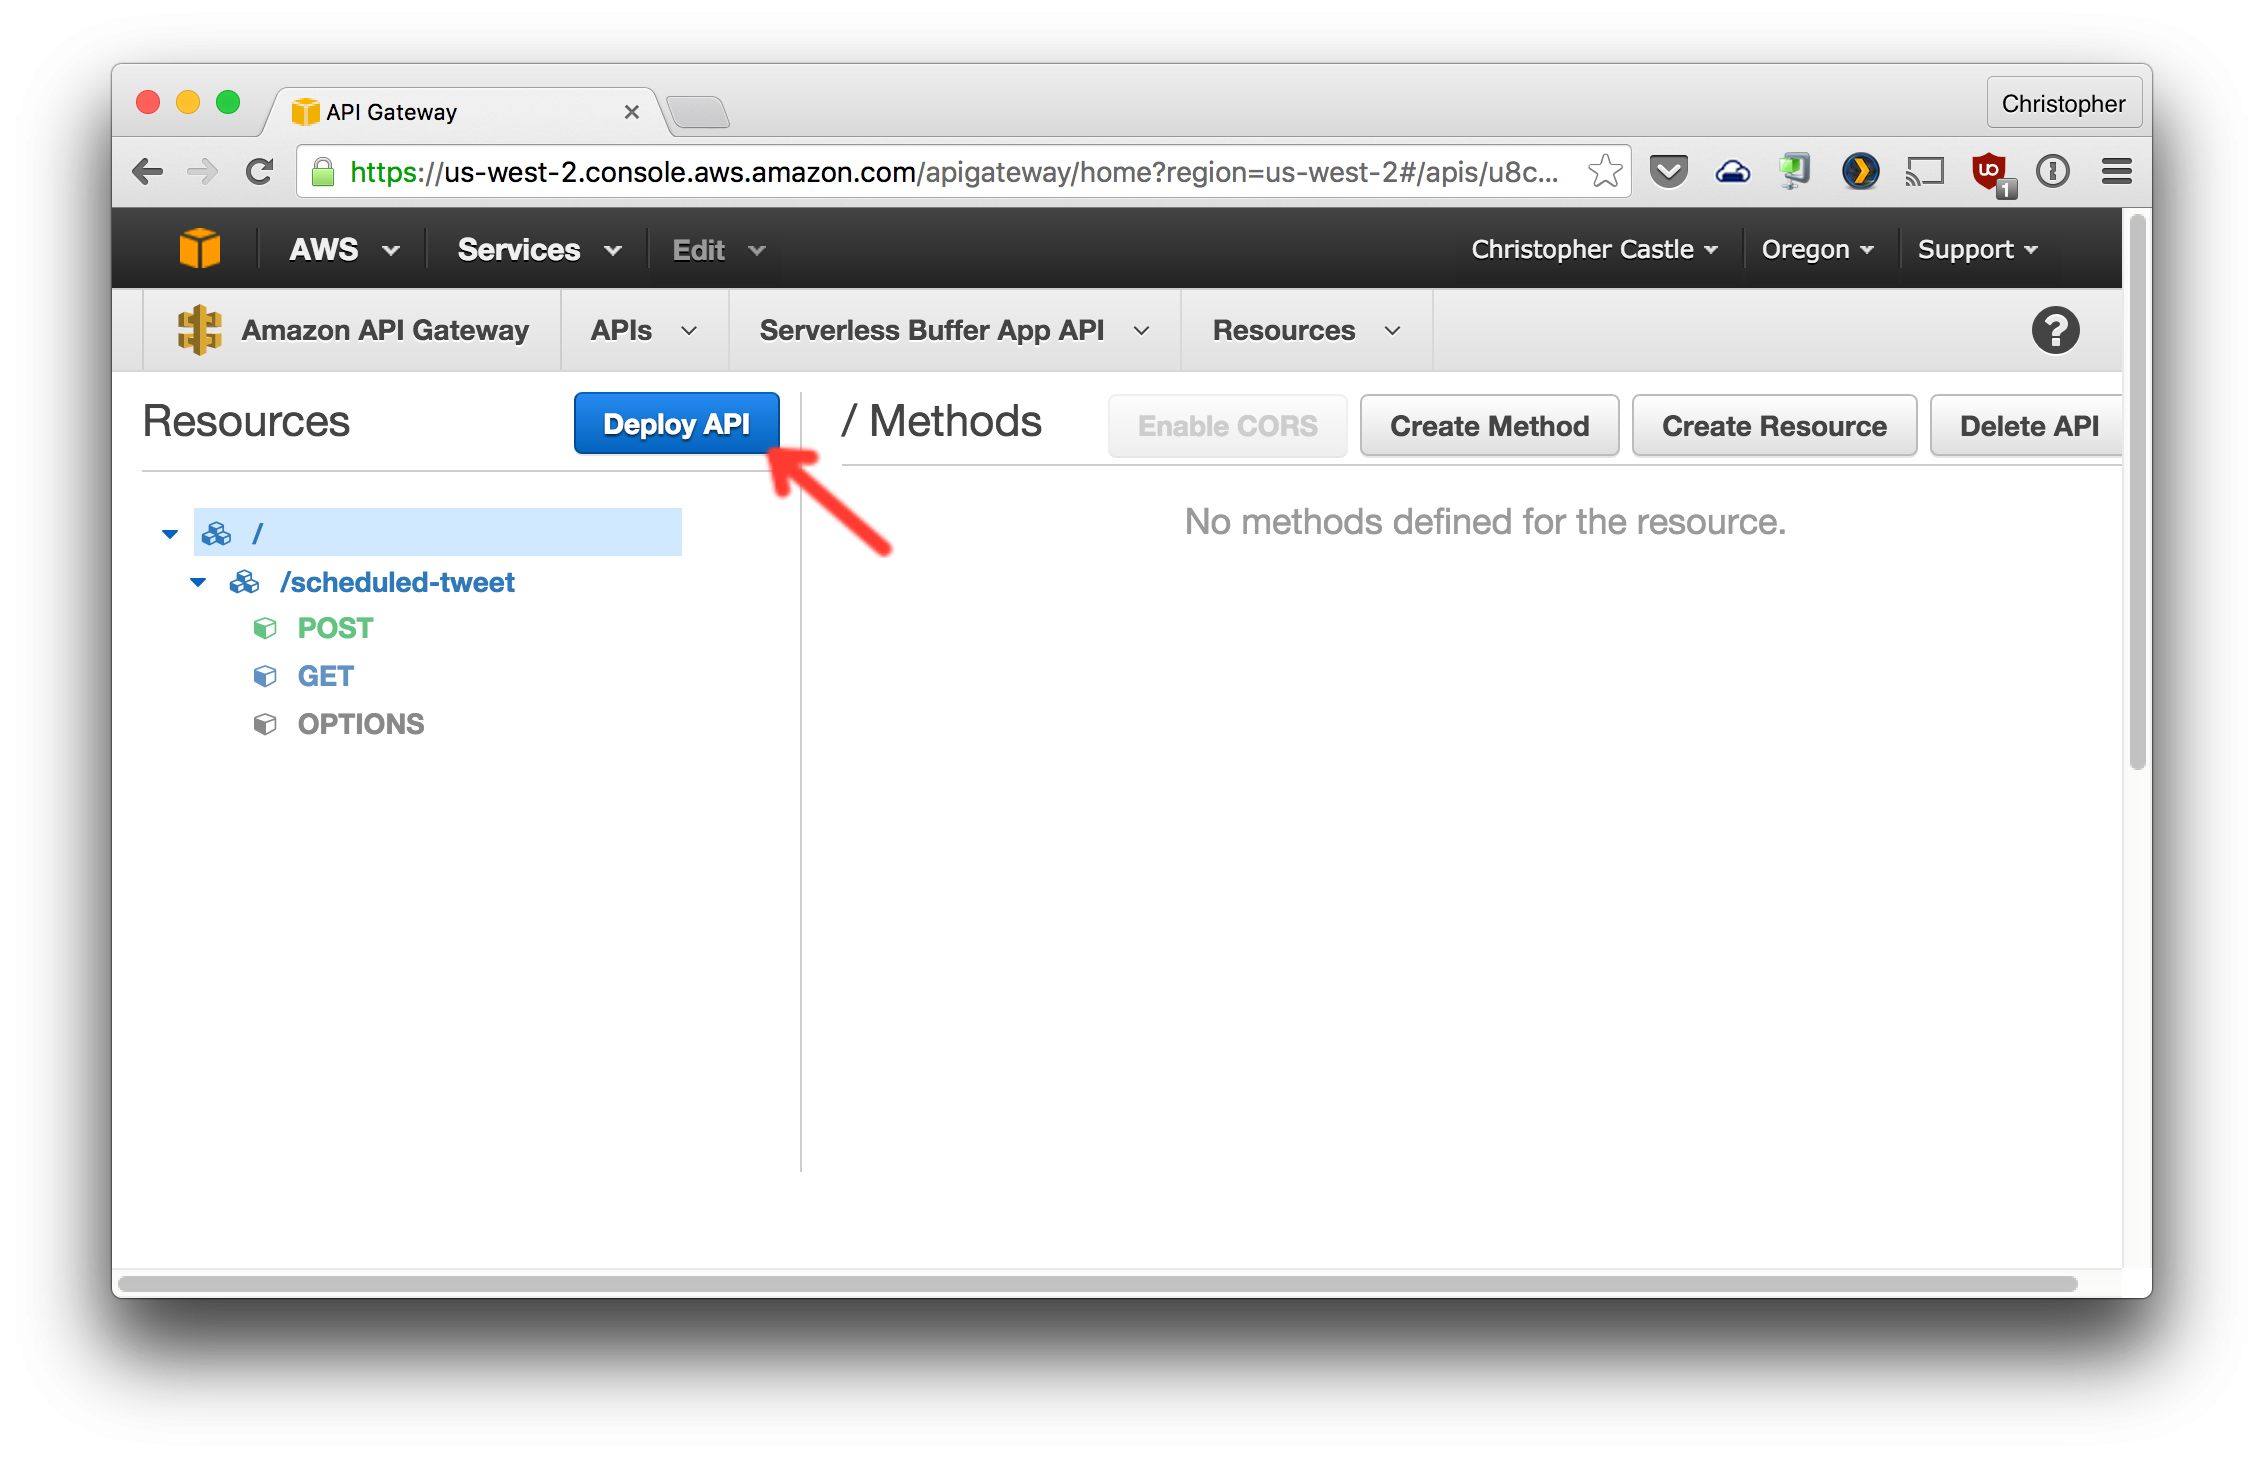
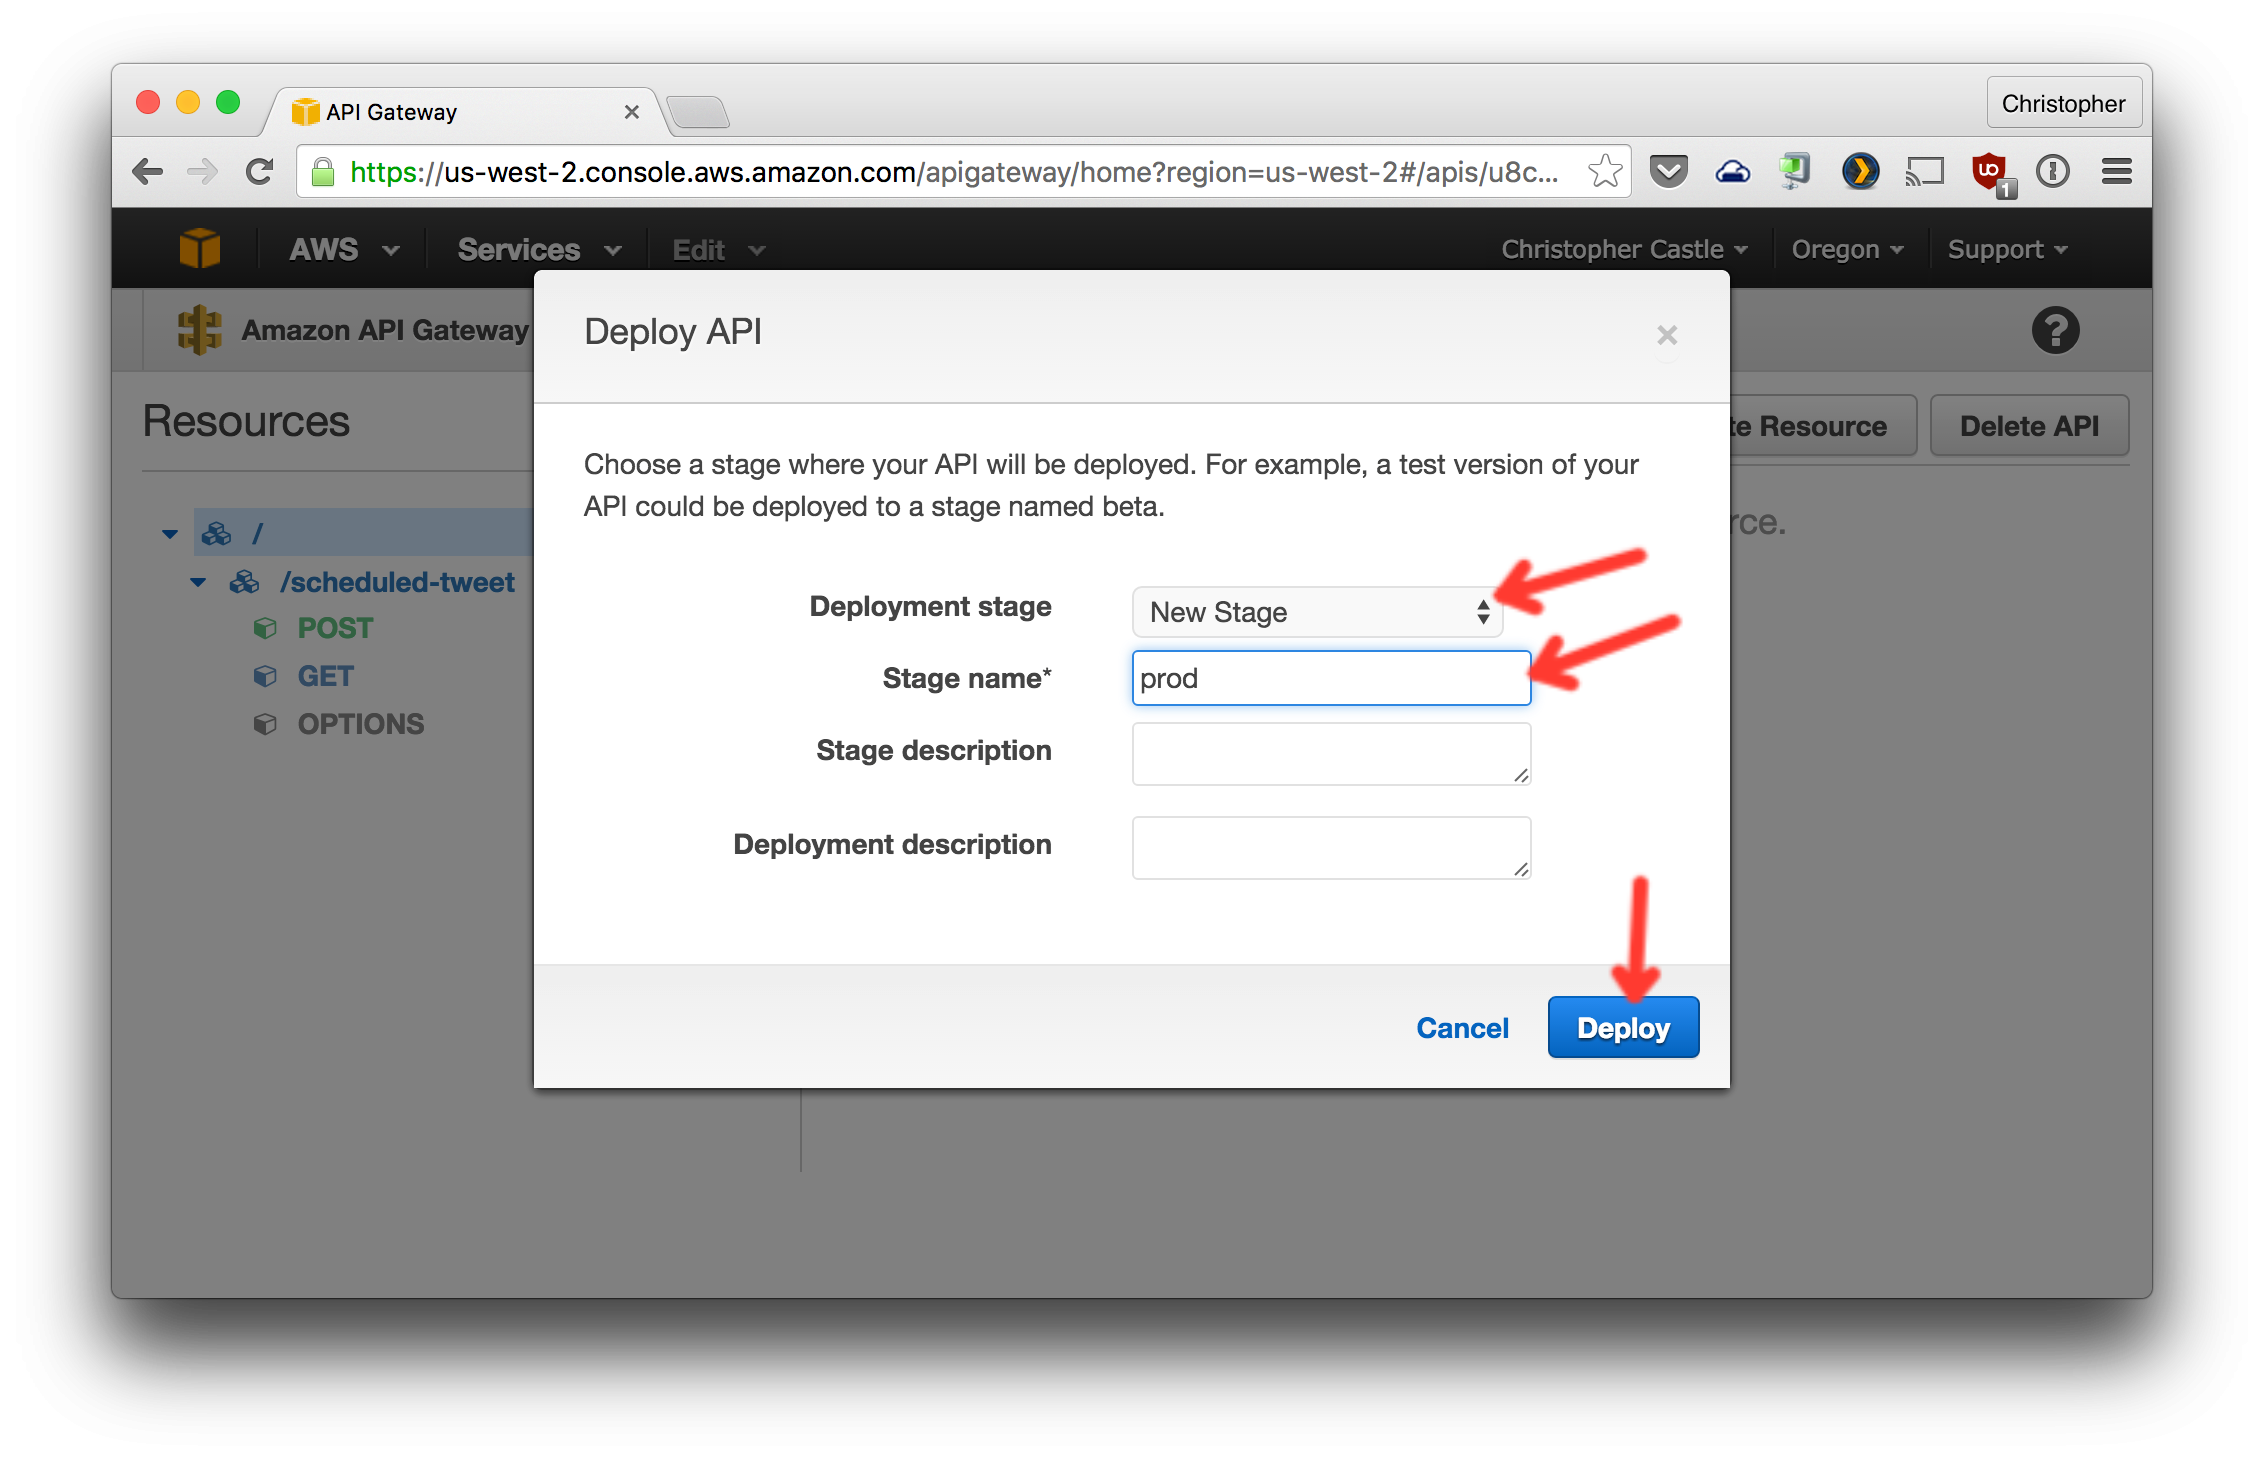
8. Deploy a version of the API, creating a stage for it.
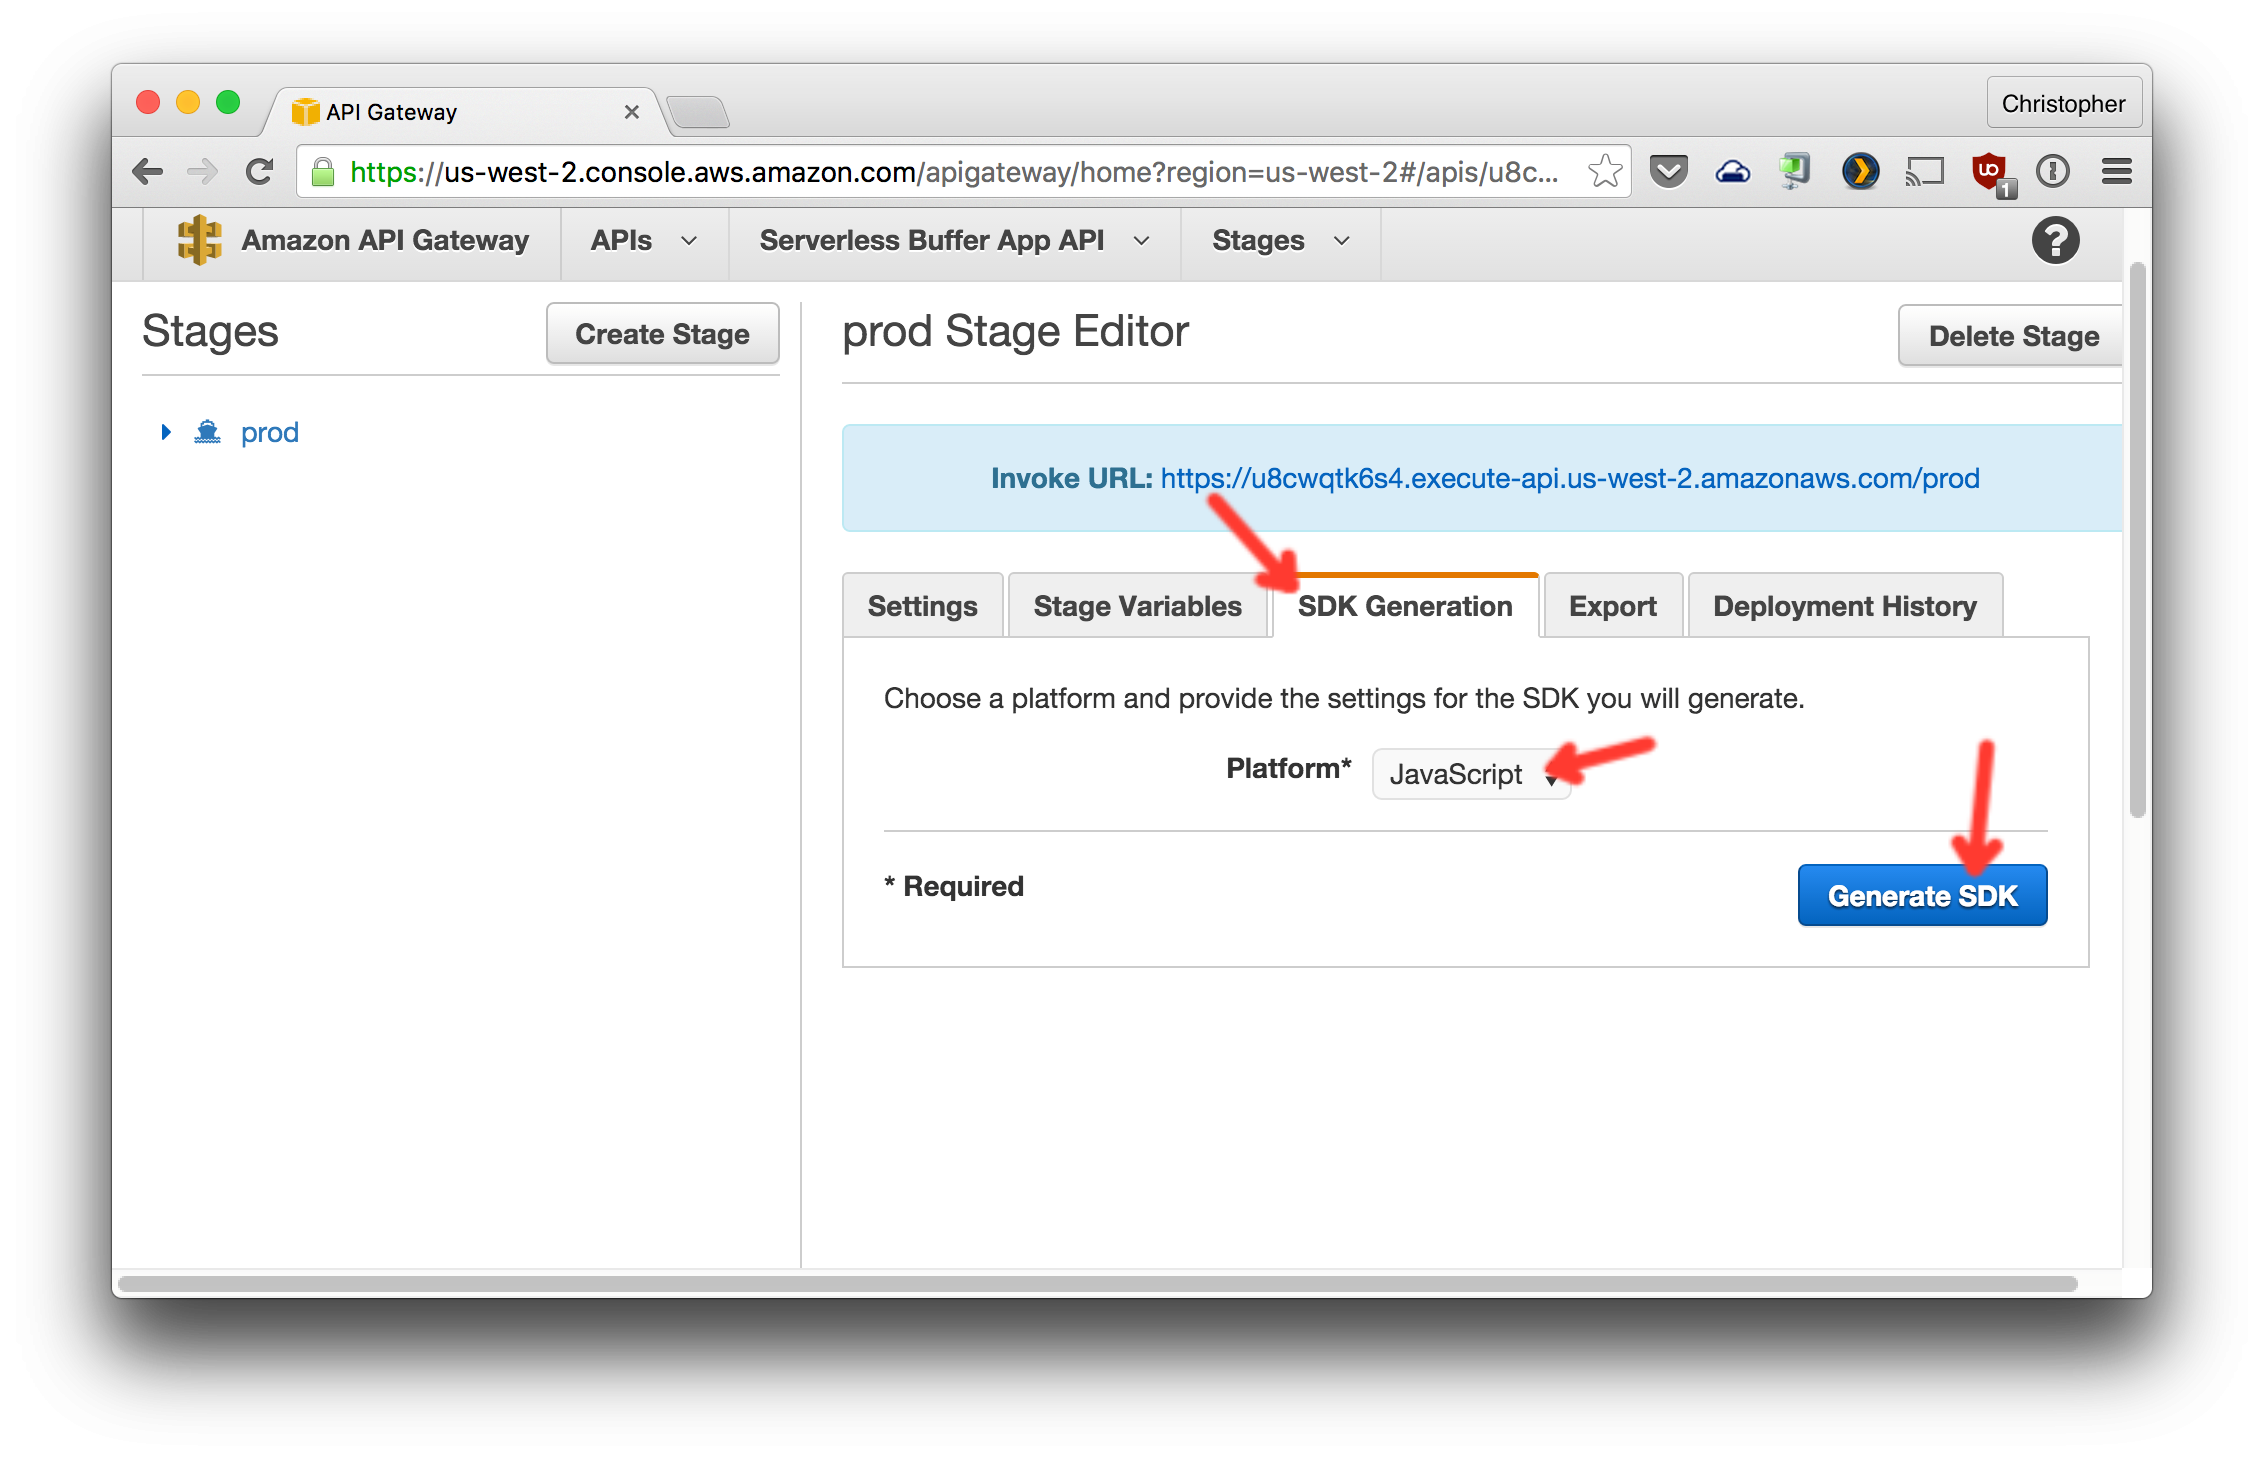
9. Download the JavaScript SDK for this deploy. AWS API Gateway auto-generates the code to make HTTPS request to your API -- including the code to generate the security token for the request.
10. Extract the folder in this zip into `serverless-buffer-app-gui/static/js/`.

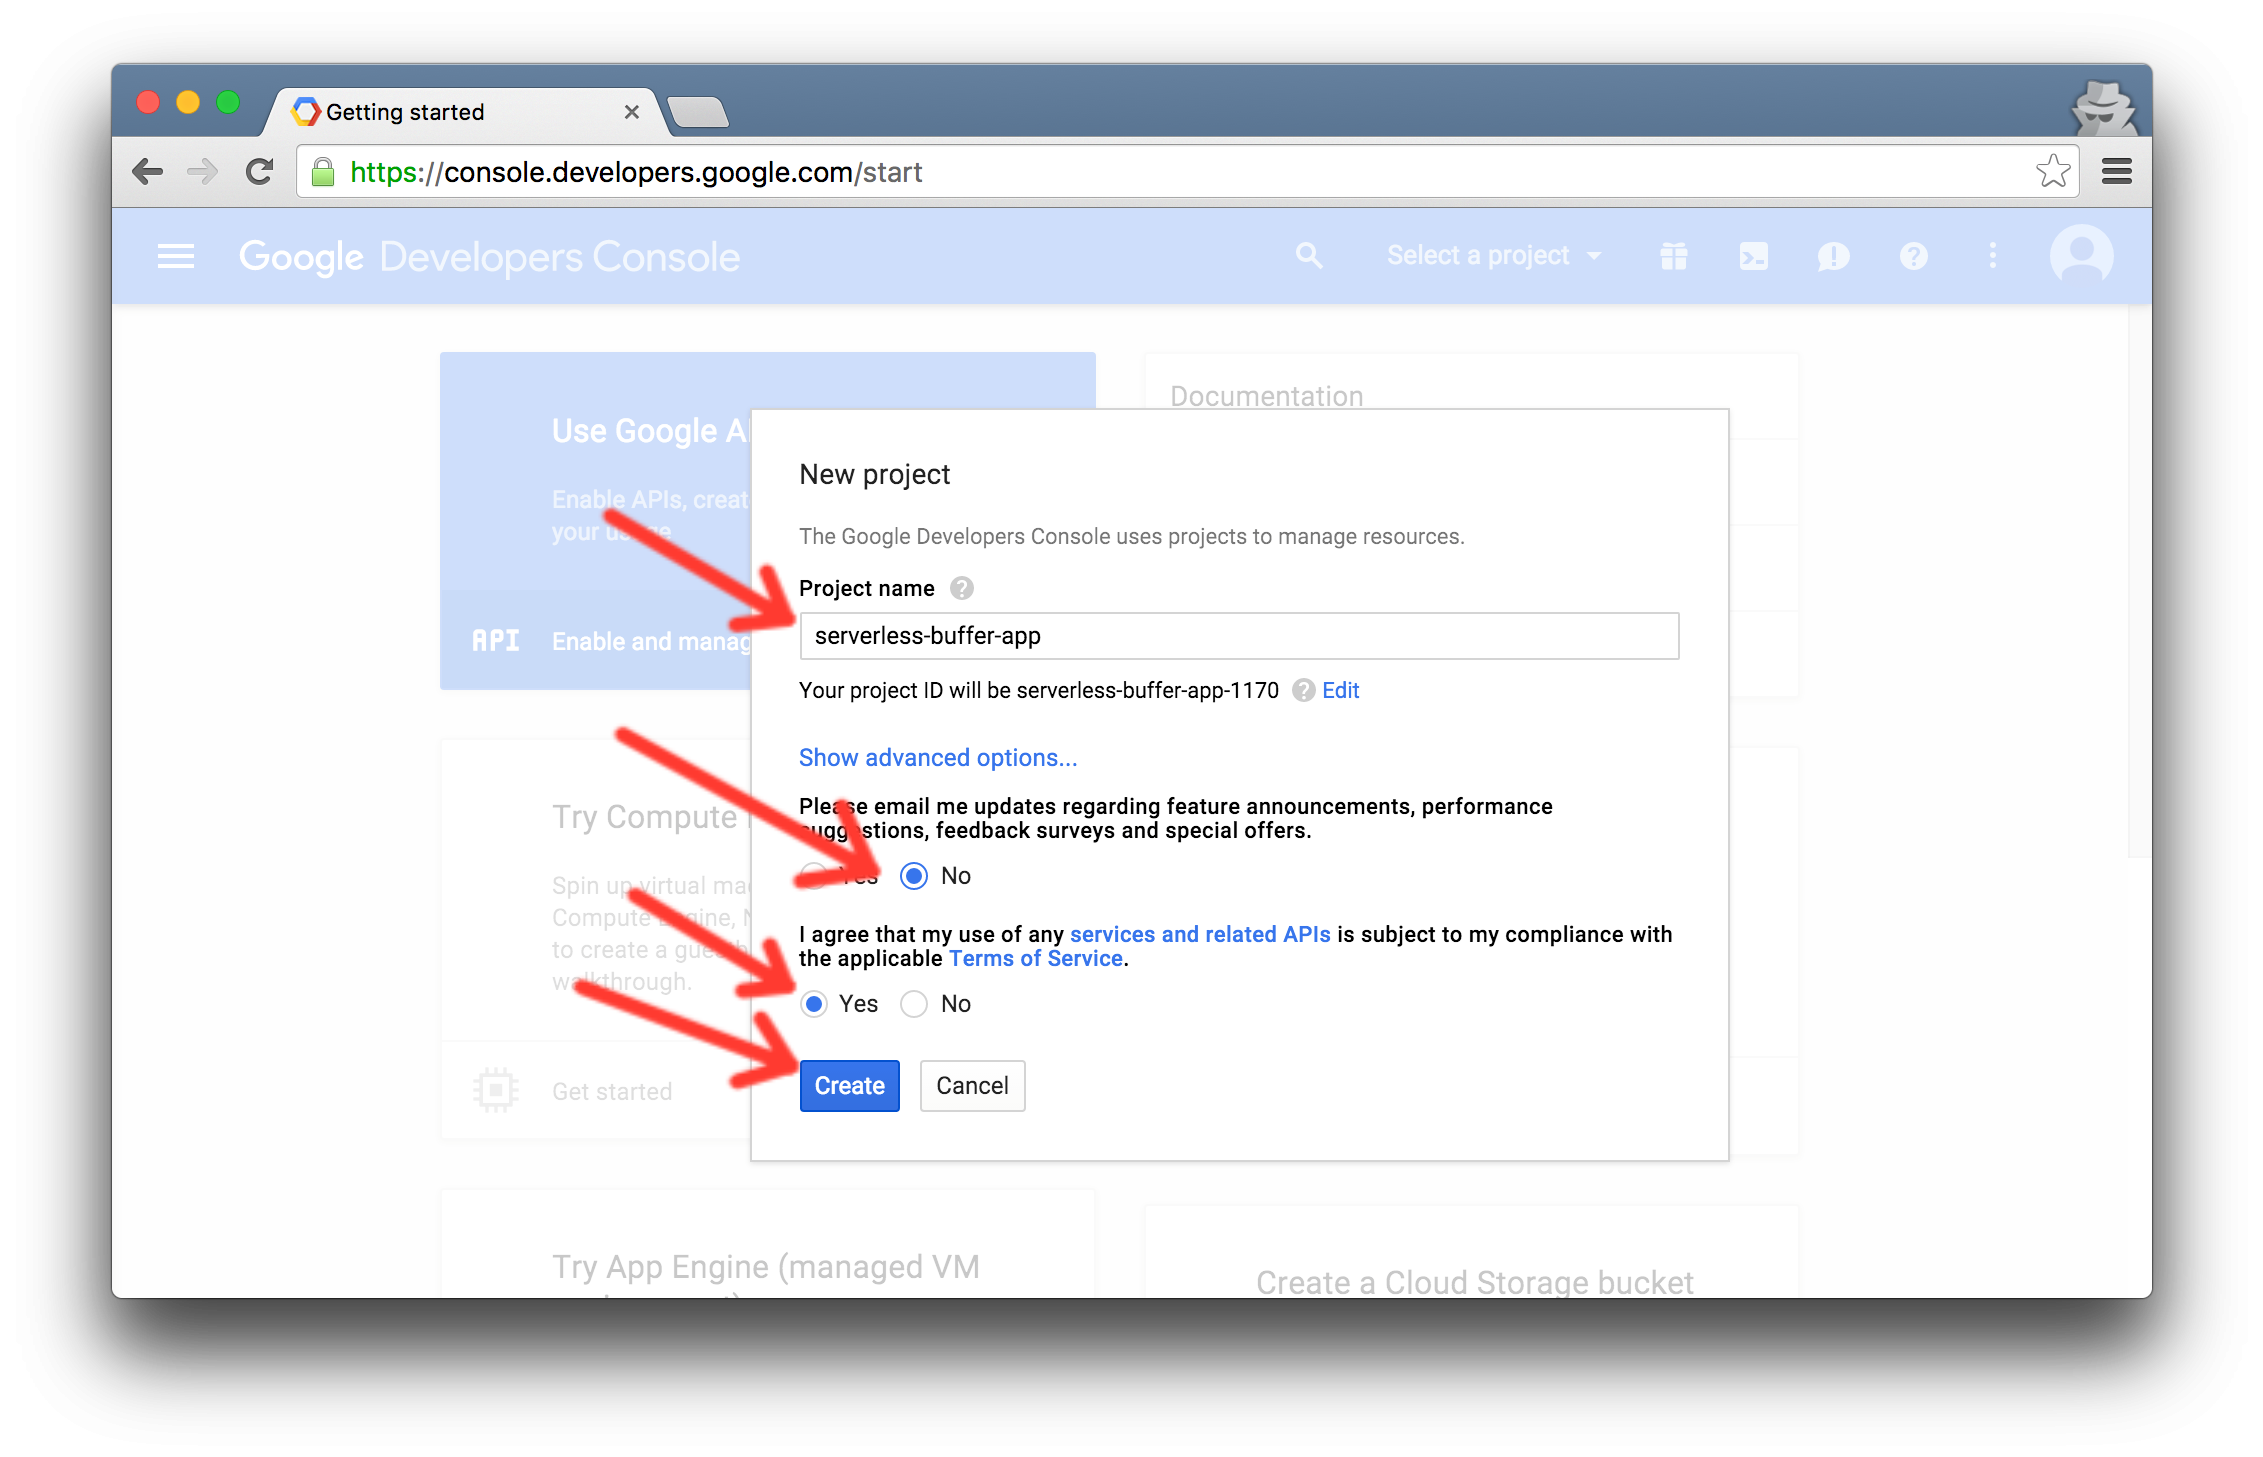
6. Now we need to create a Google project whose only purpose will be to authenticate users on the Serverless Buffer App. This is what will control who is allowed to login. Only the Google account you specify will be allowed to schedule tweets and see the list of previously scheduled tweets.
1. Create a Google project at this URL https://console.developers.google.com/start

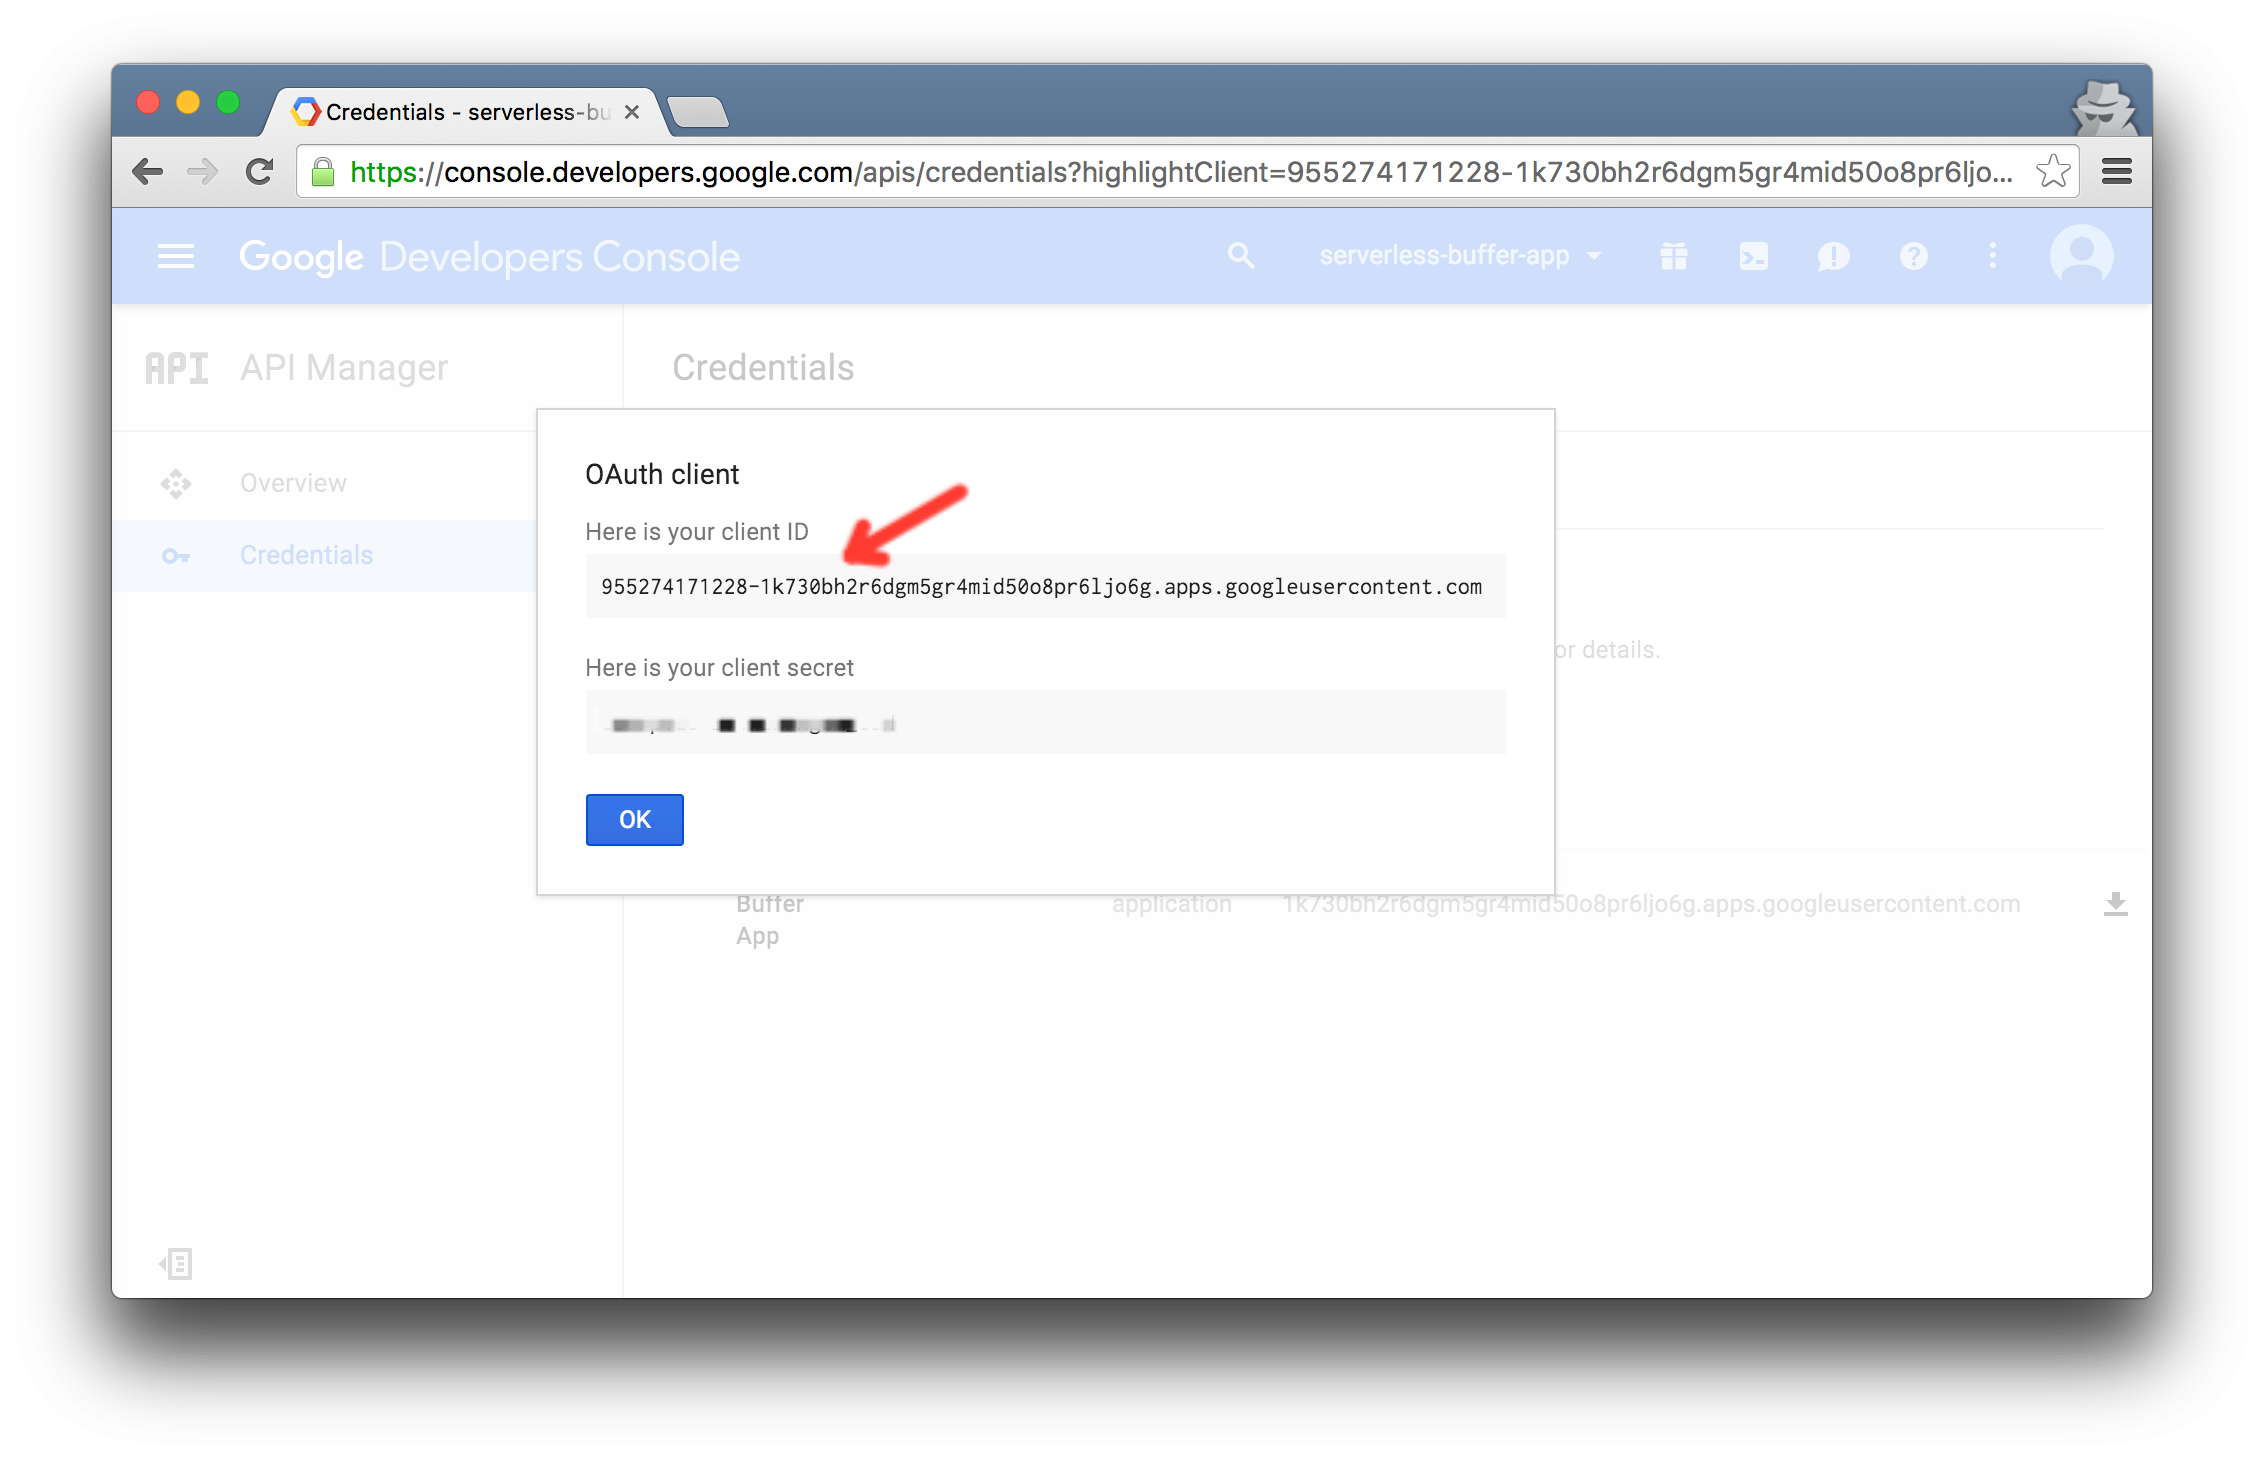
2. Create an OAuth client ID
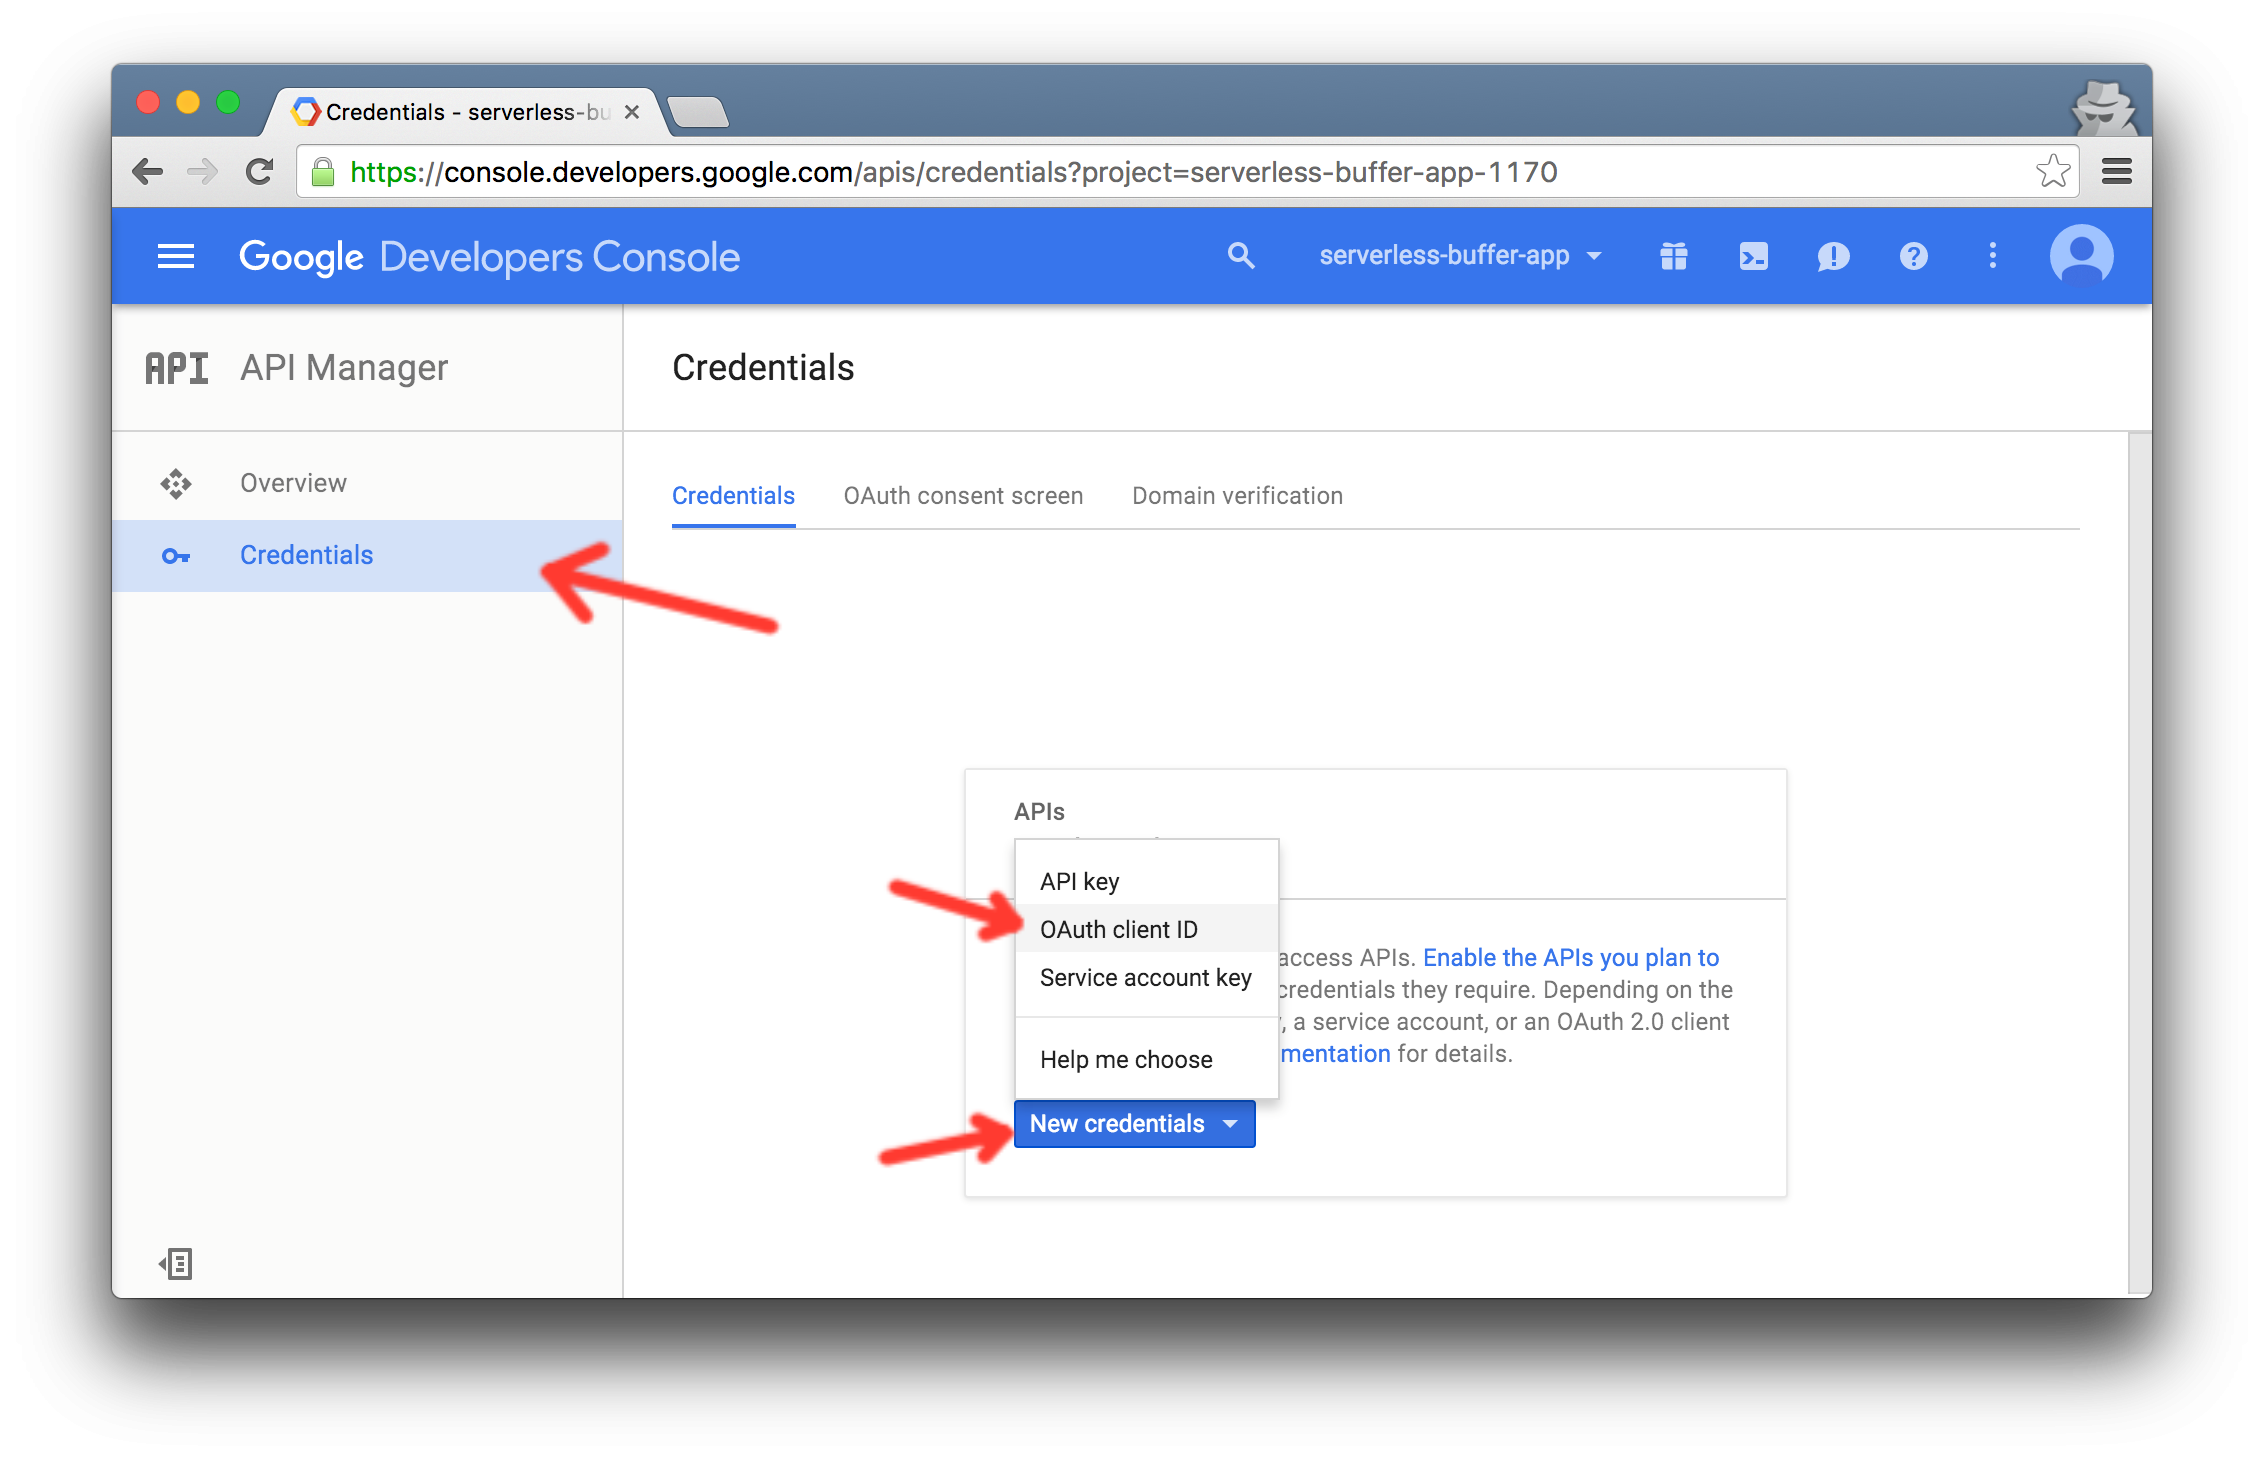
![API Manager]()
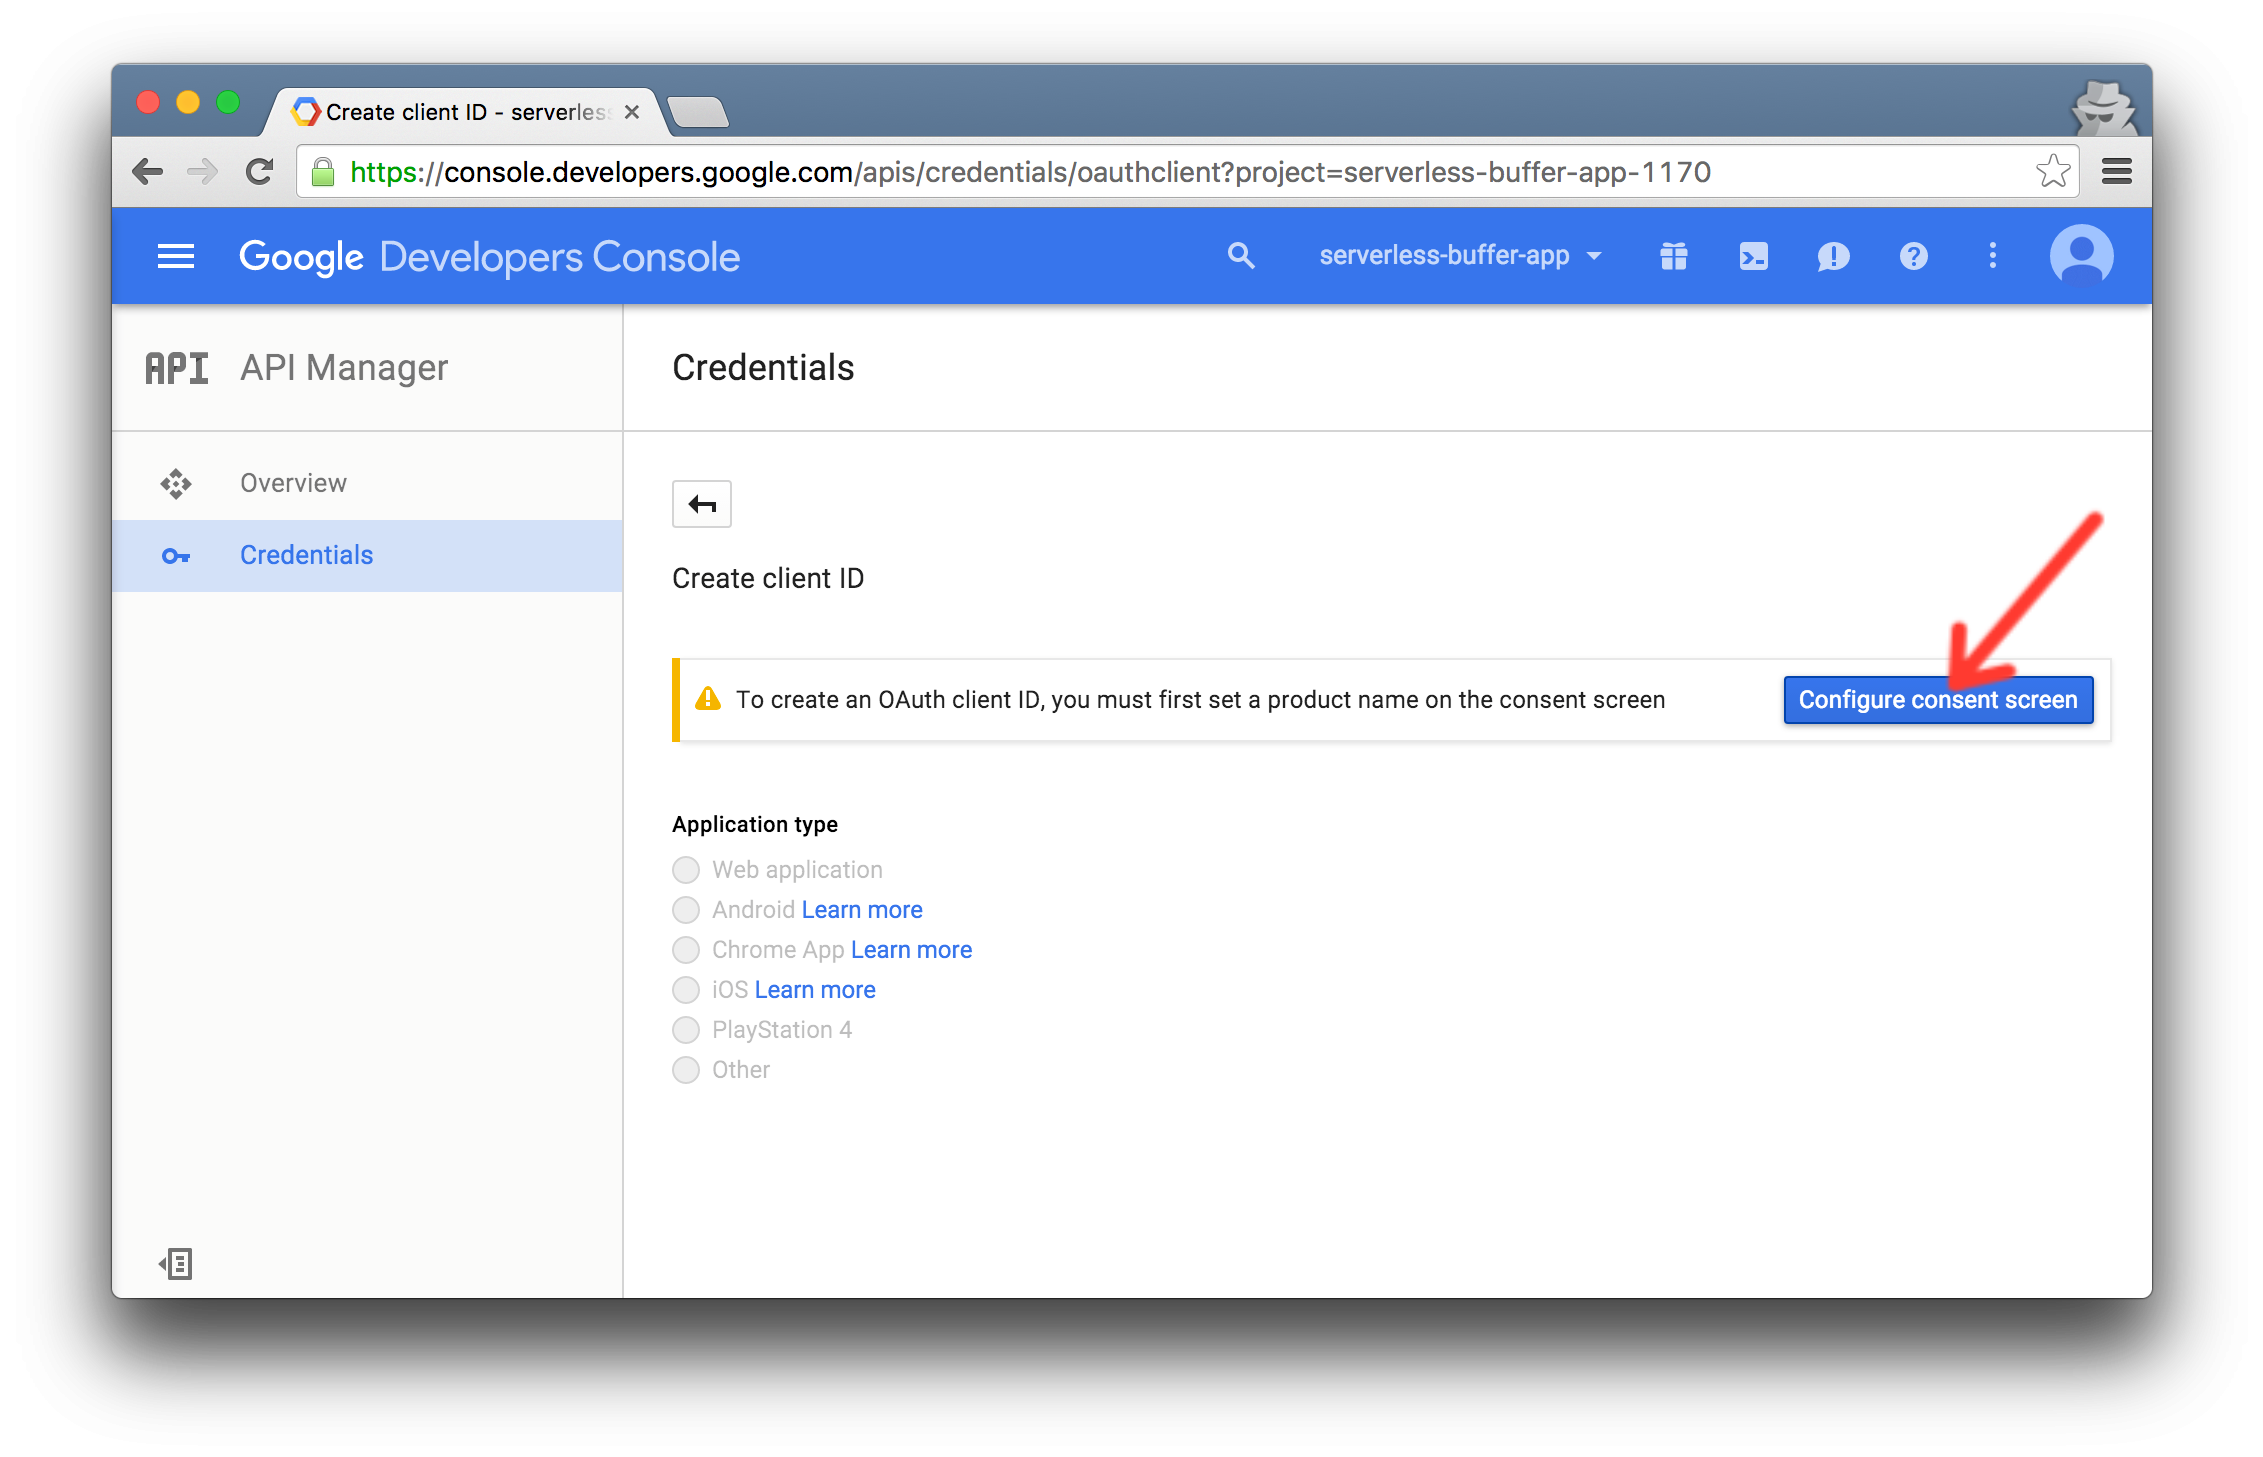
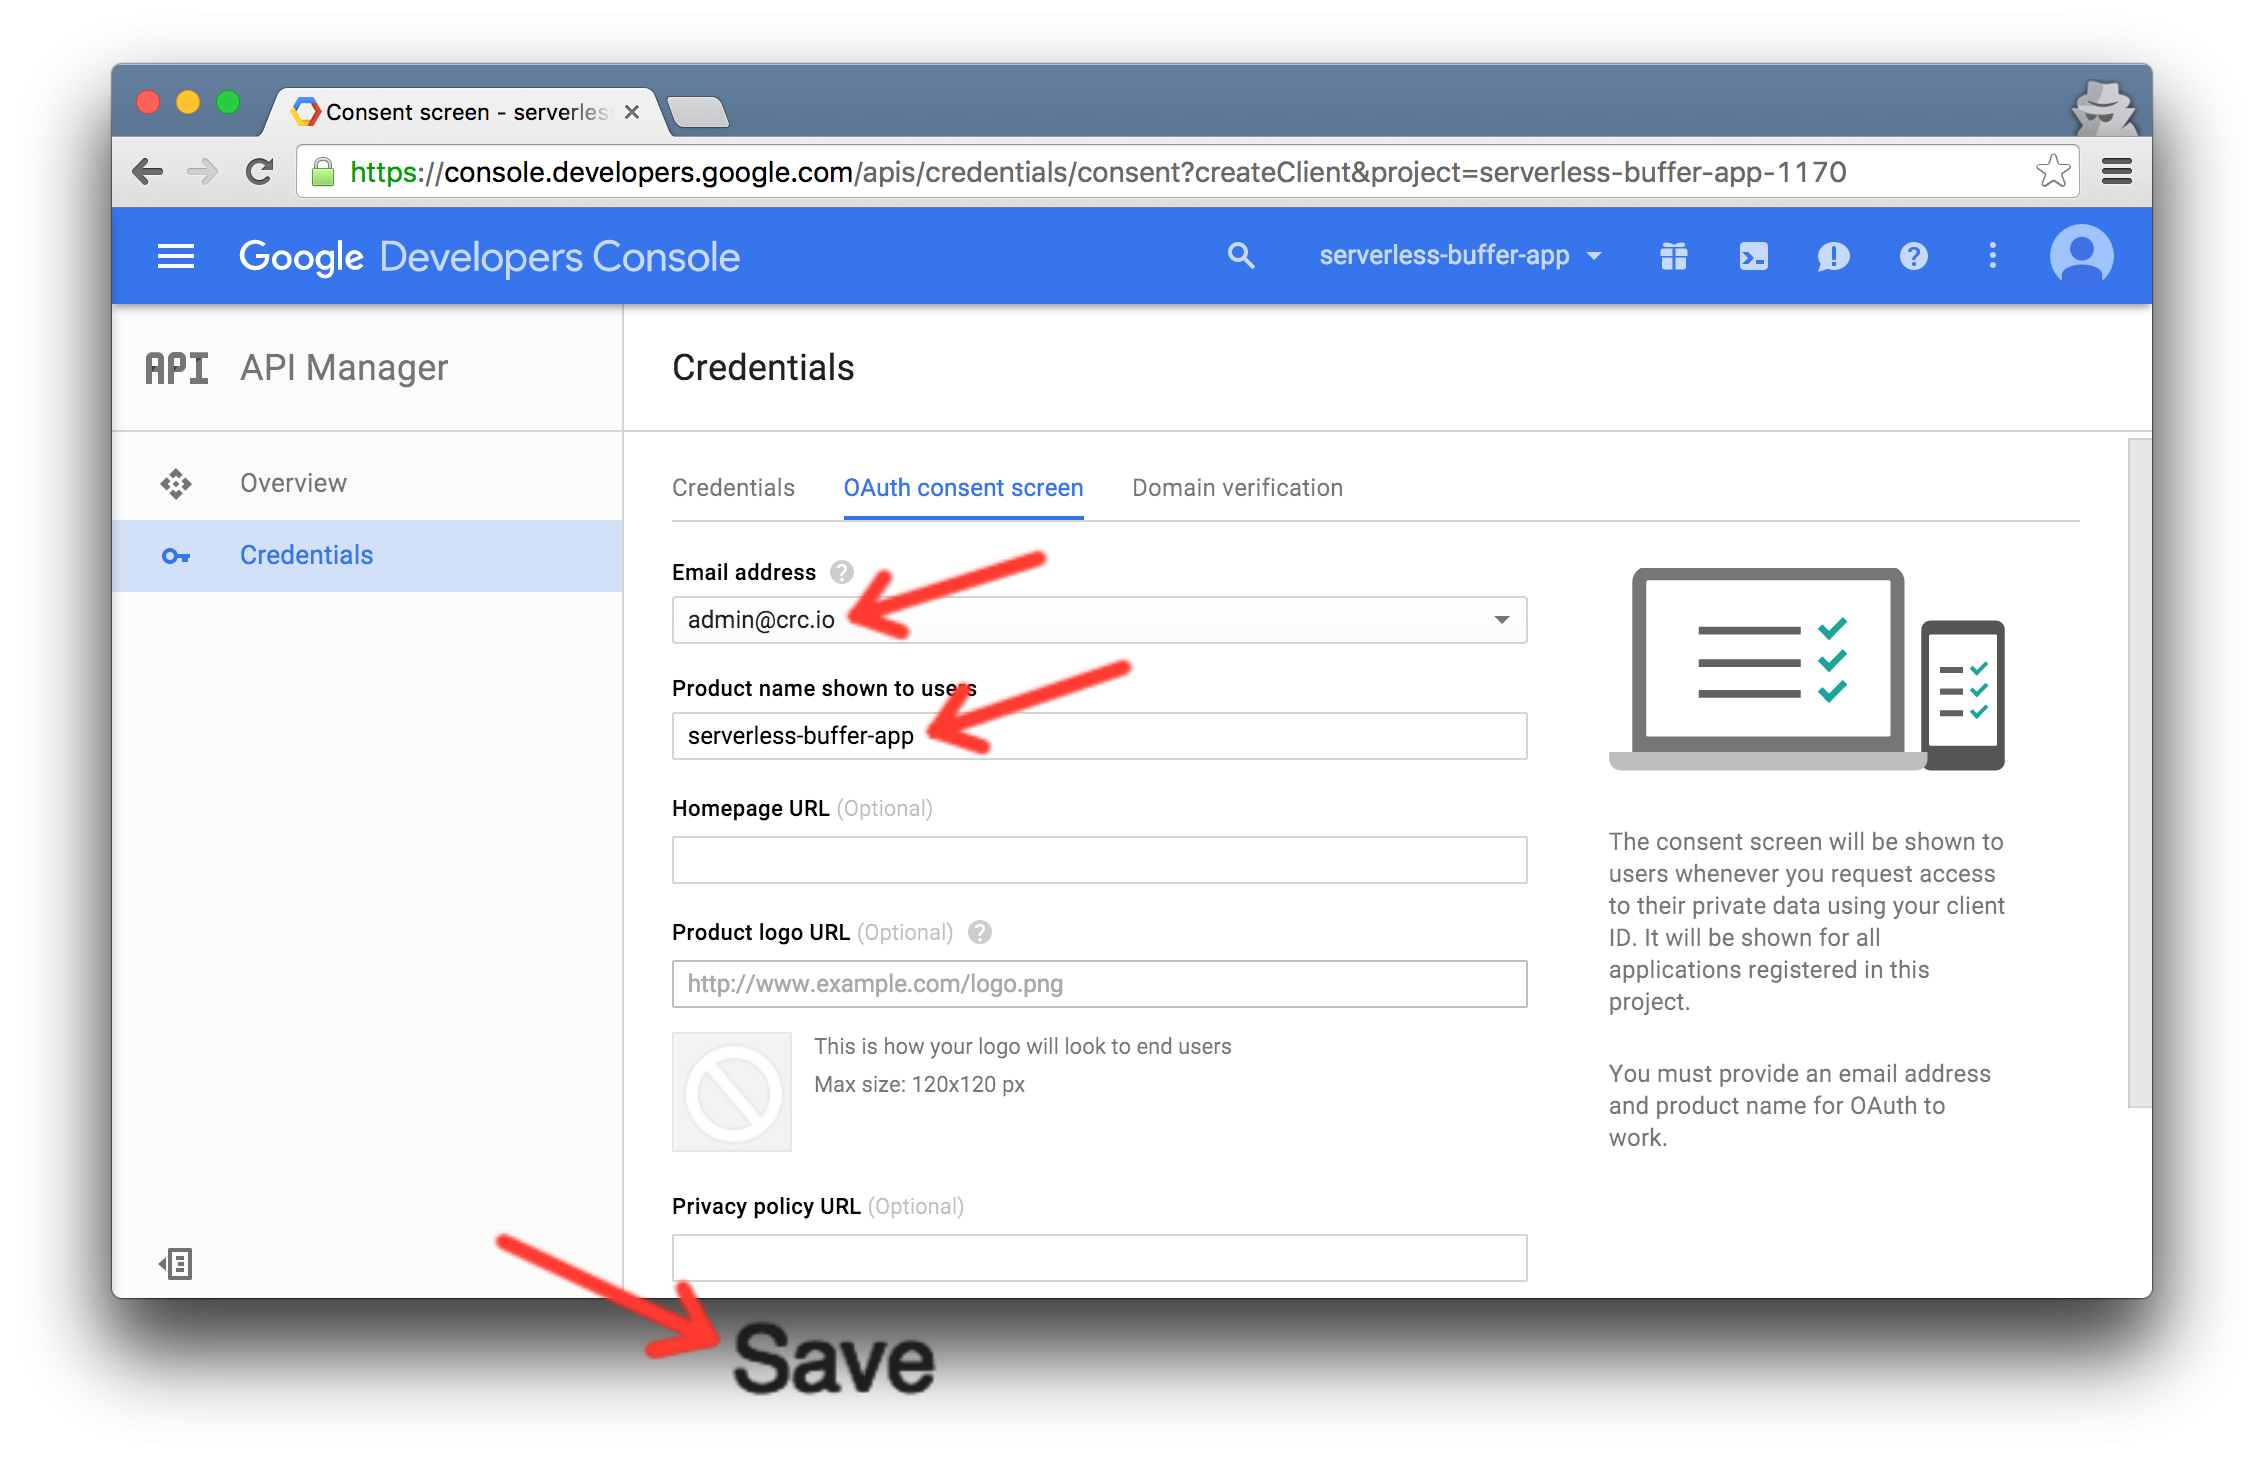
- Add an email address and product name to enable OAuth authentication in this project.
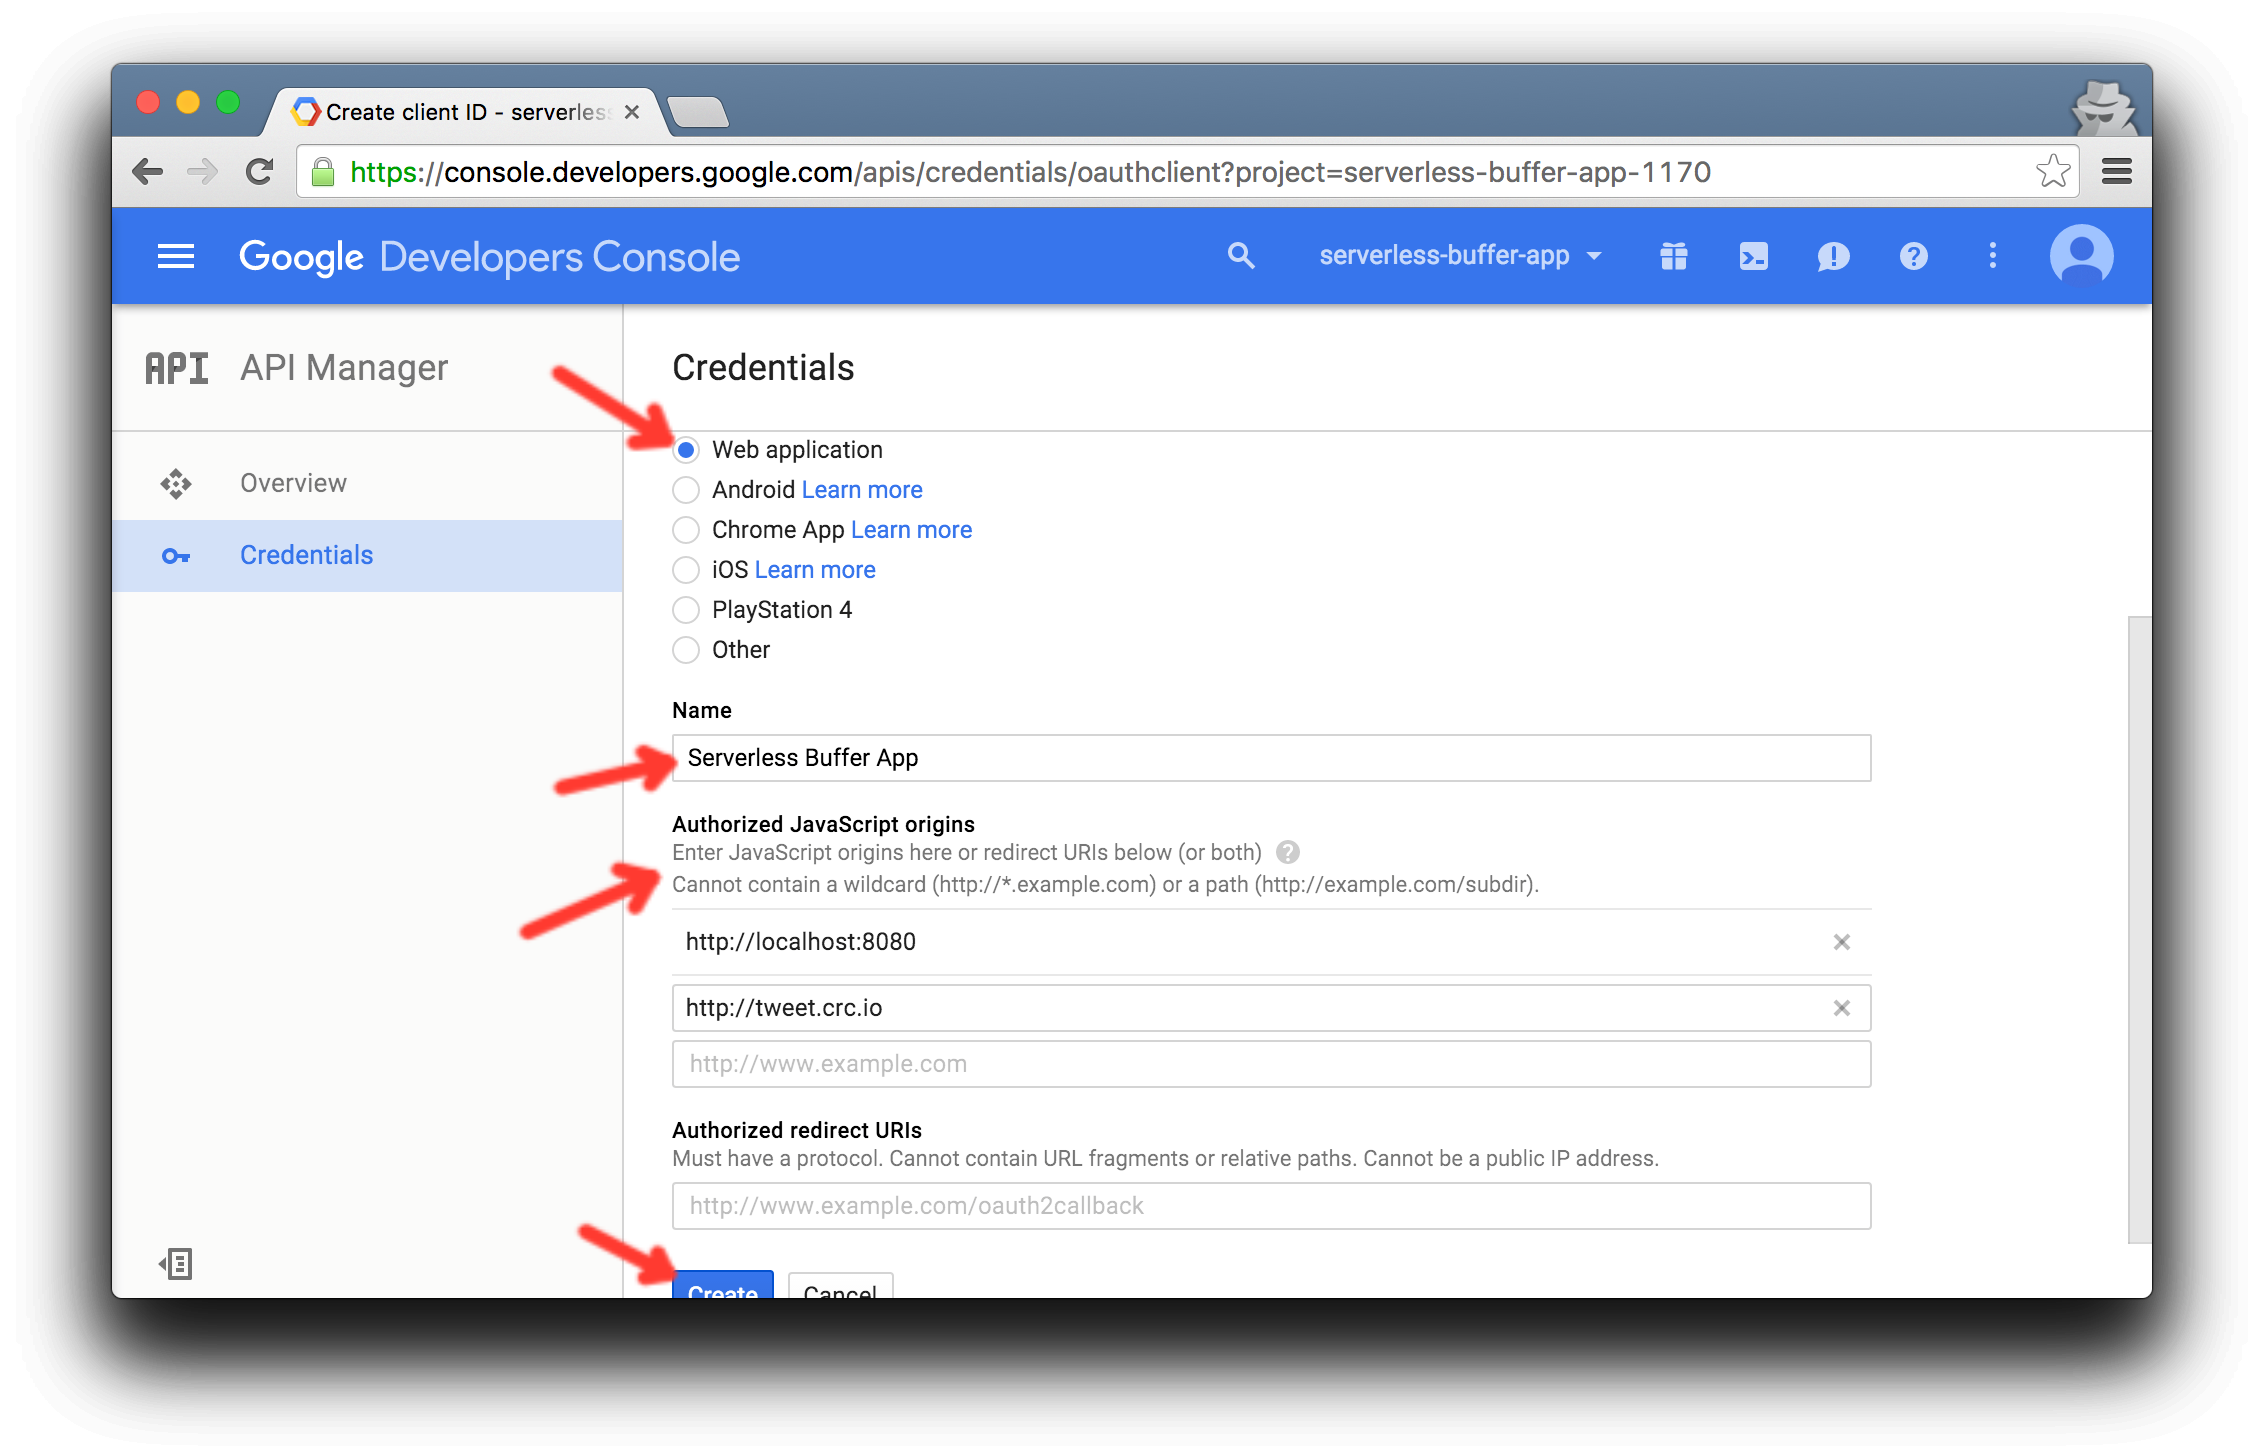
- Configure OAuth. Add all the domains from which your app will be hosted (e.g. http://localhost:8080 and http://tweet.crc.io). Save the client ID you get for later.
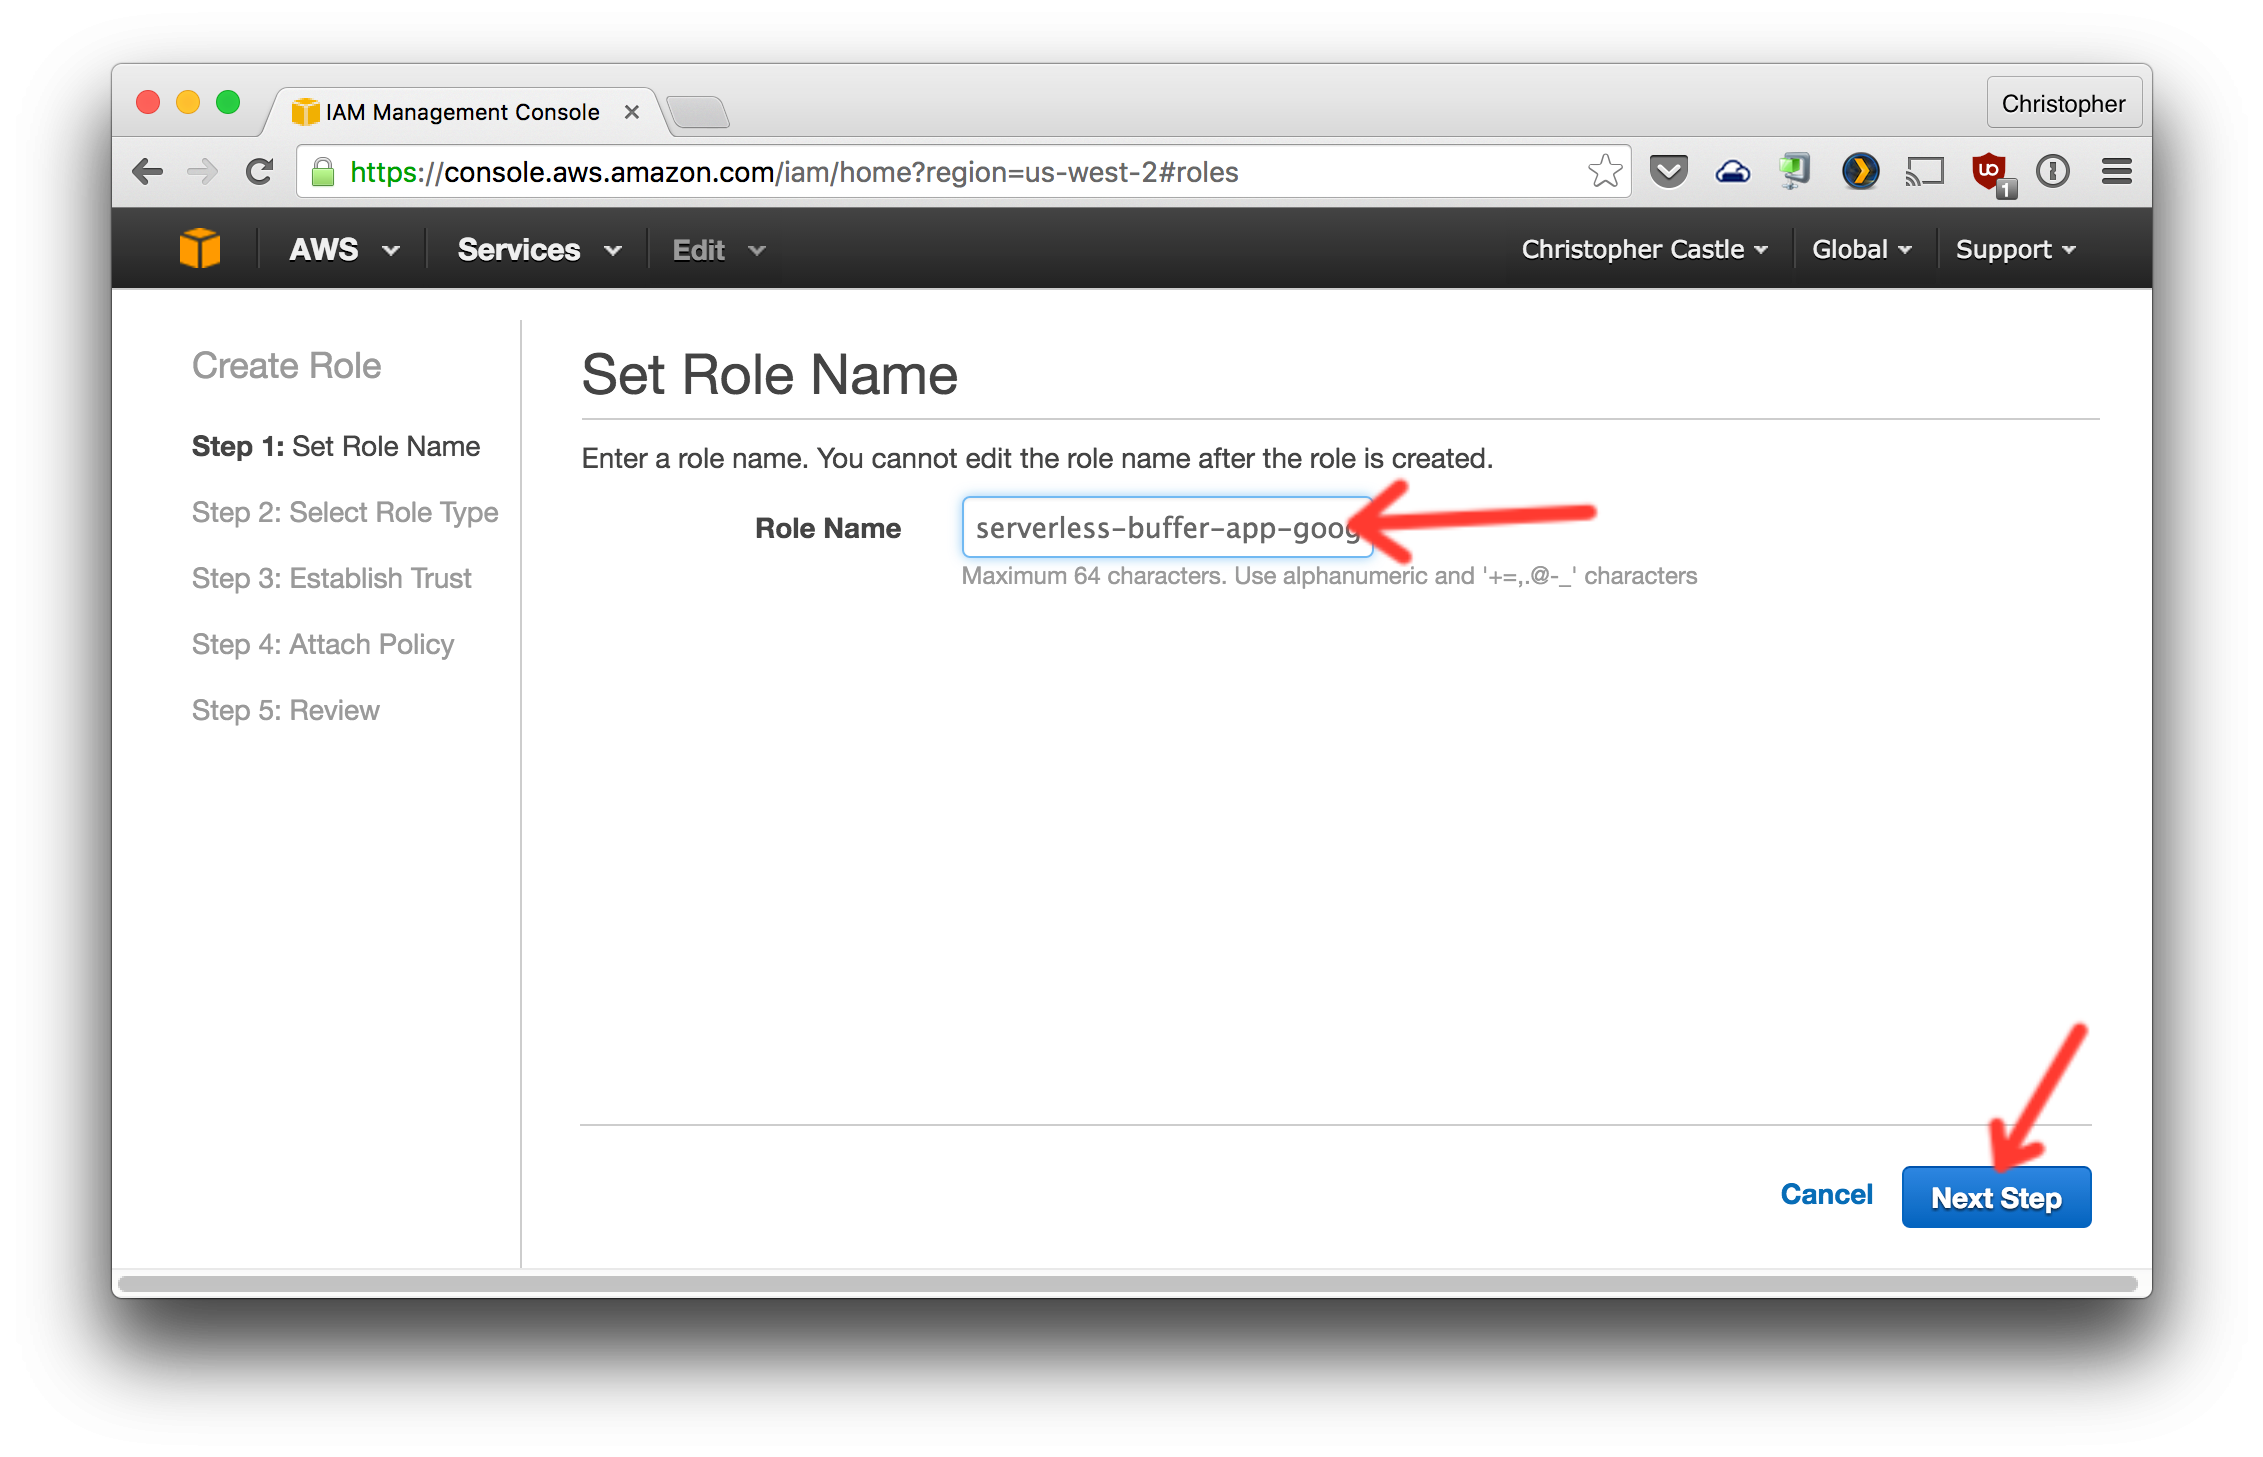
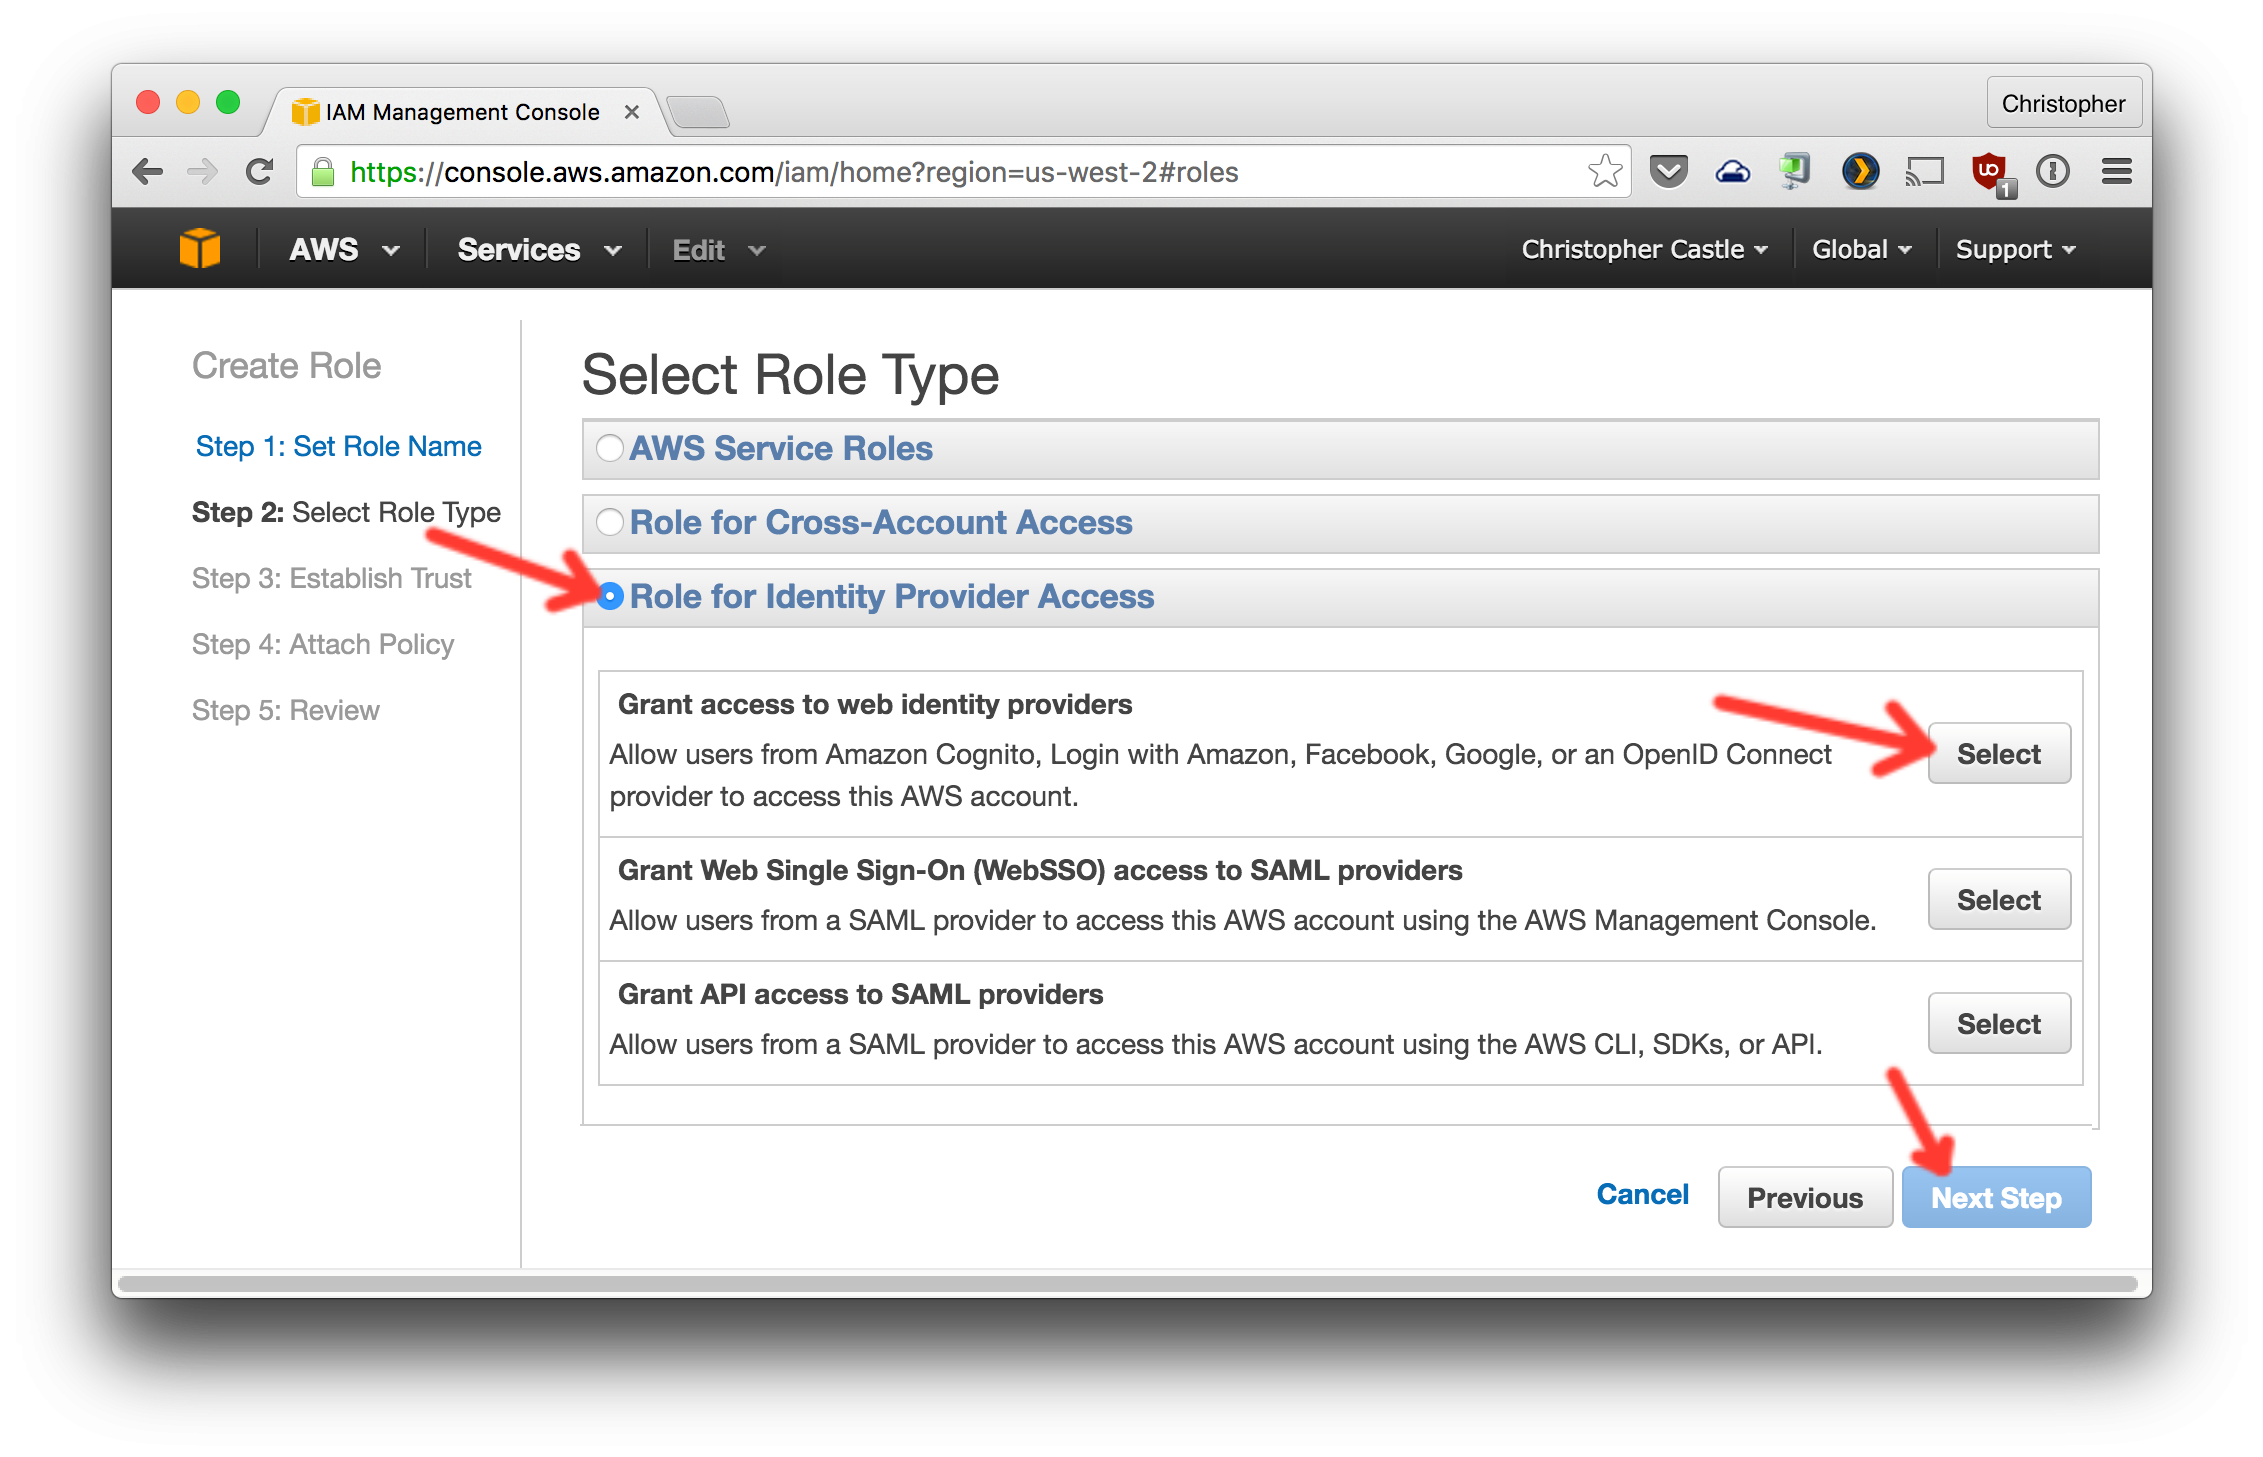
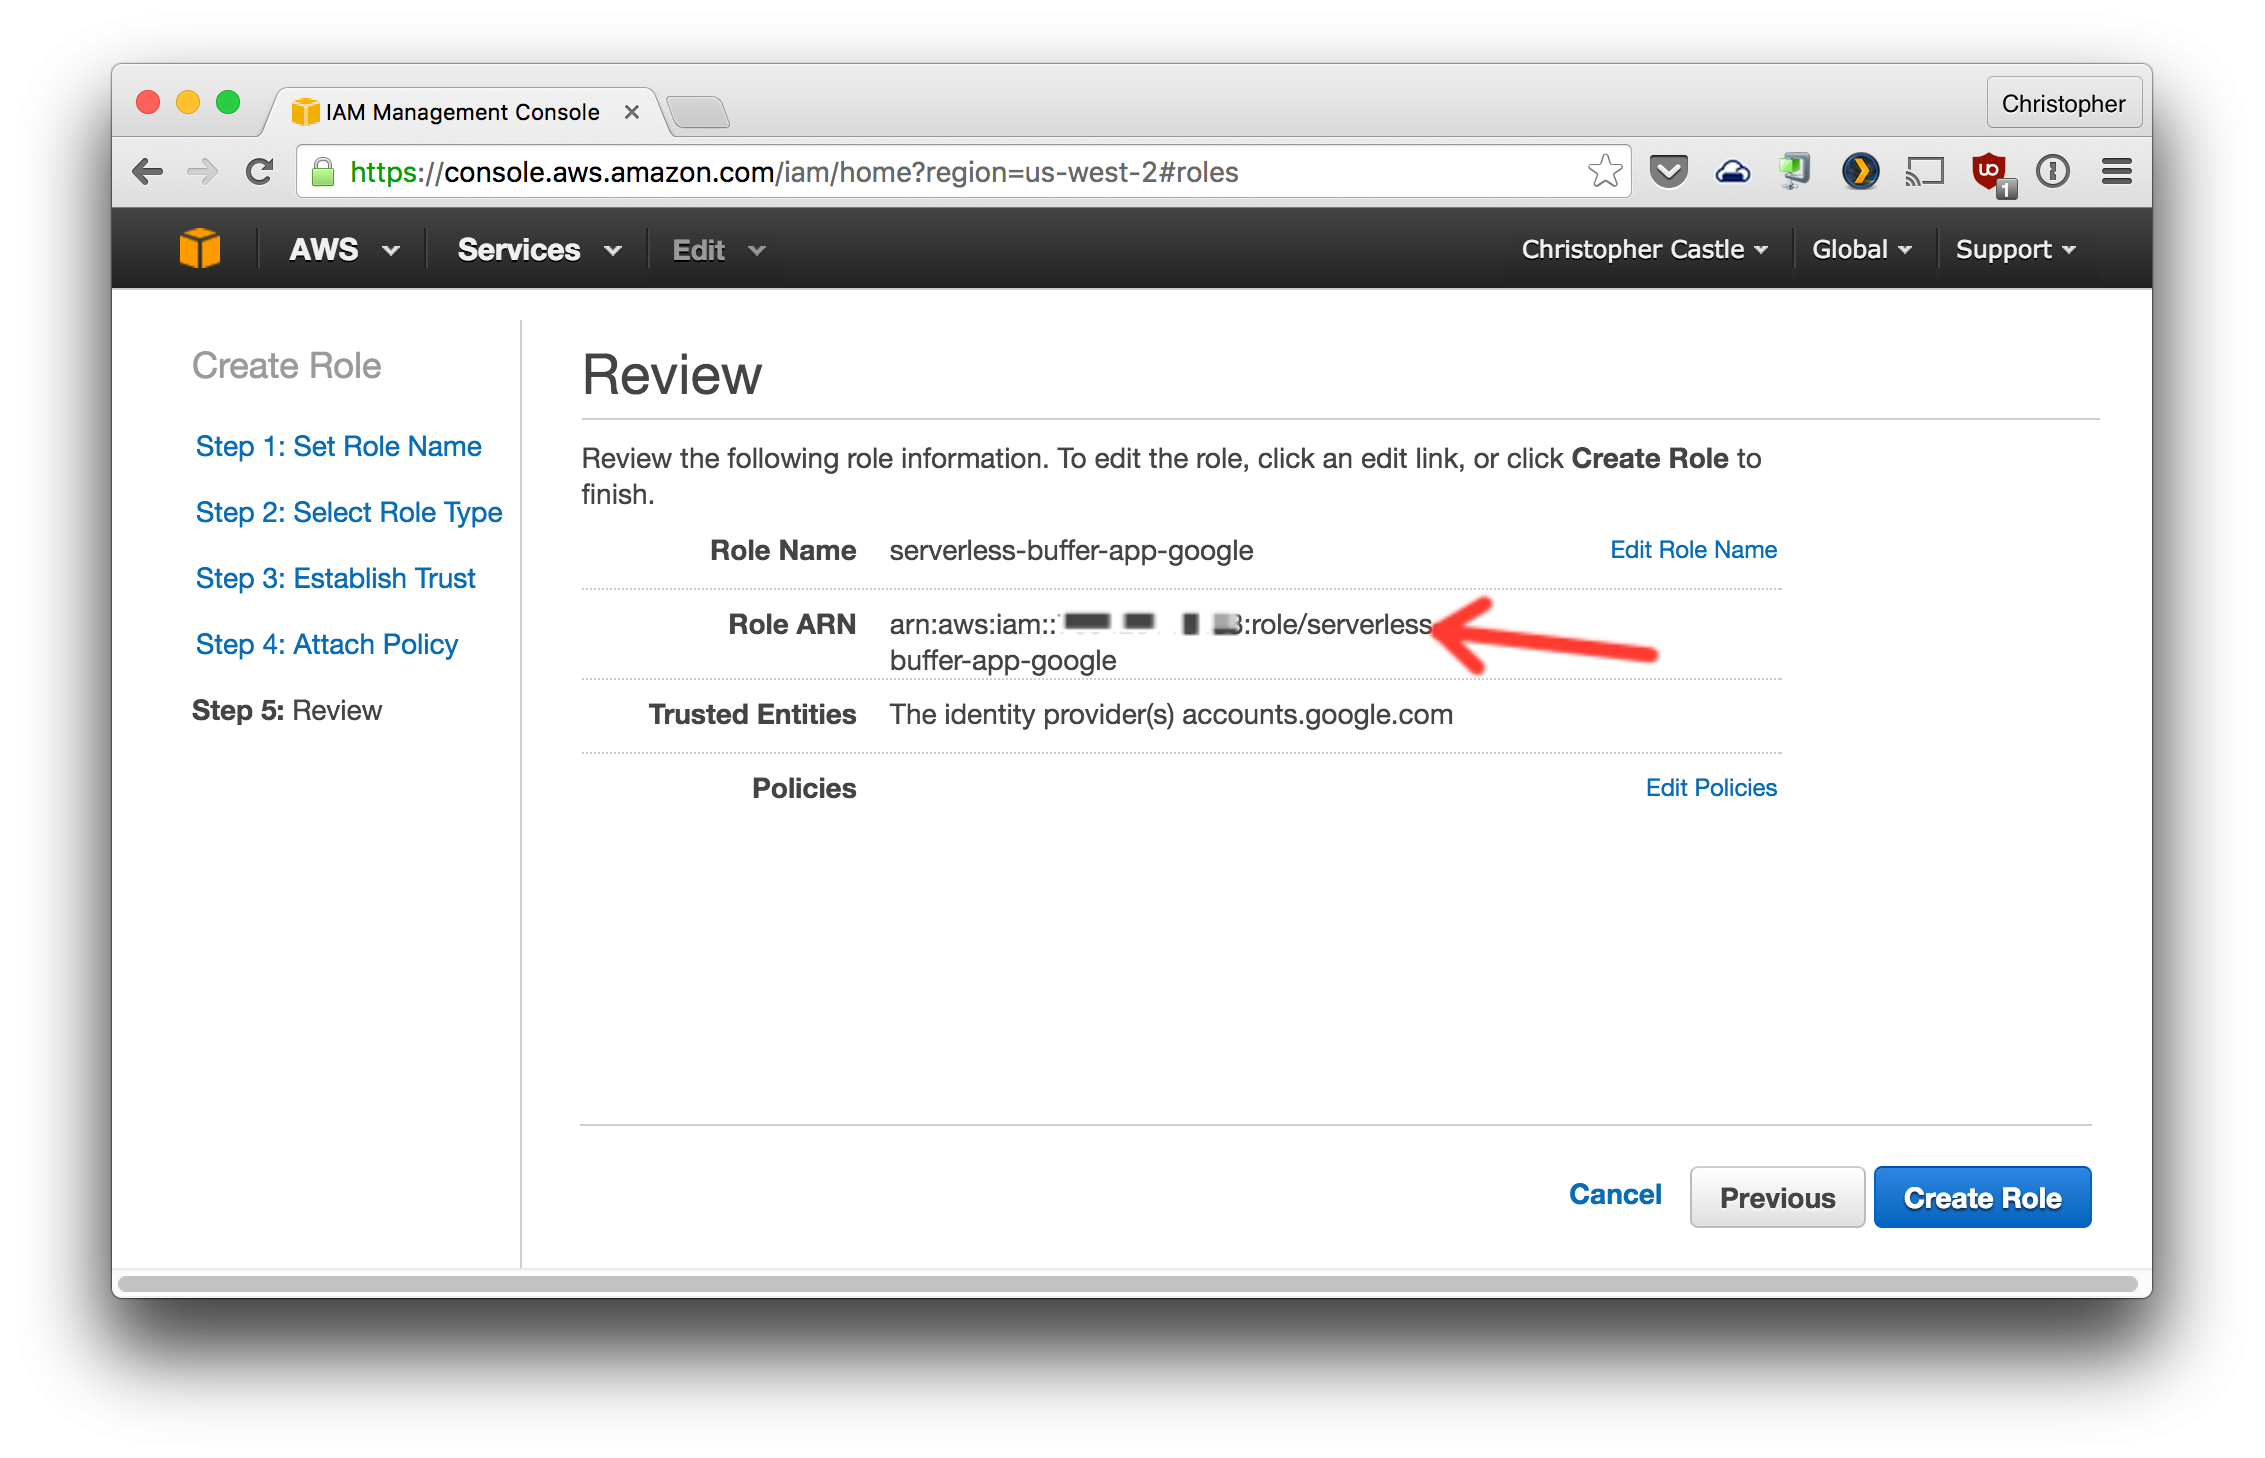
- Now create an AWS IAM role that will use Google as the authentication provider.

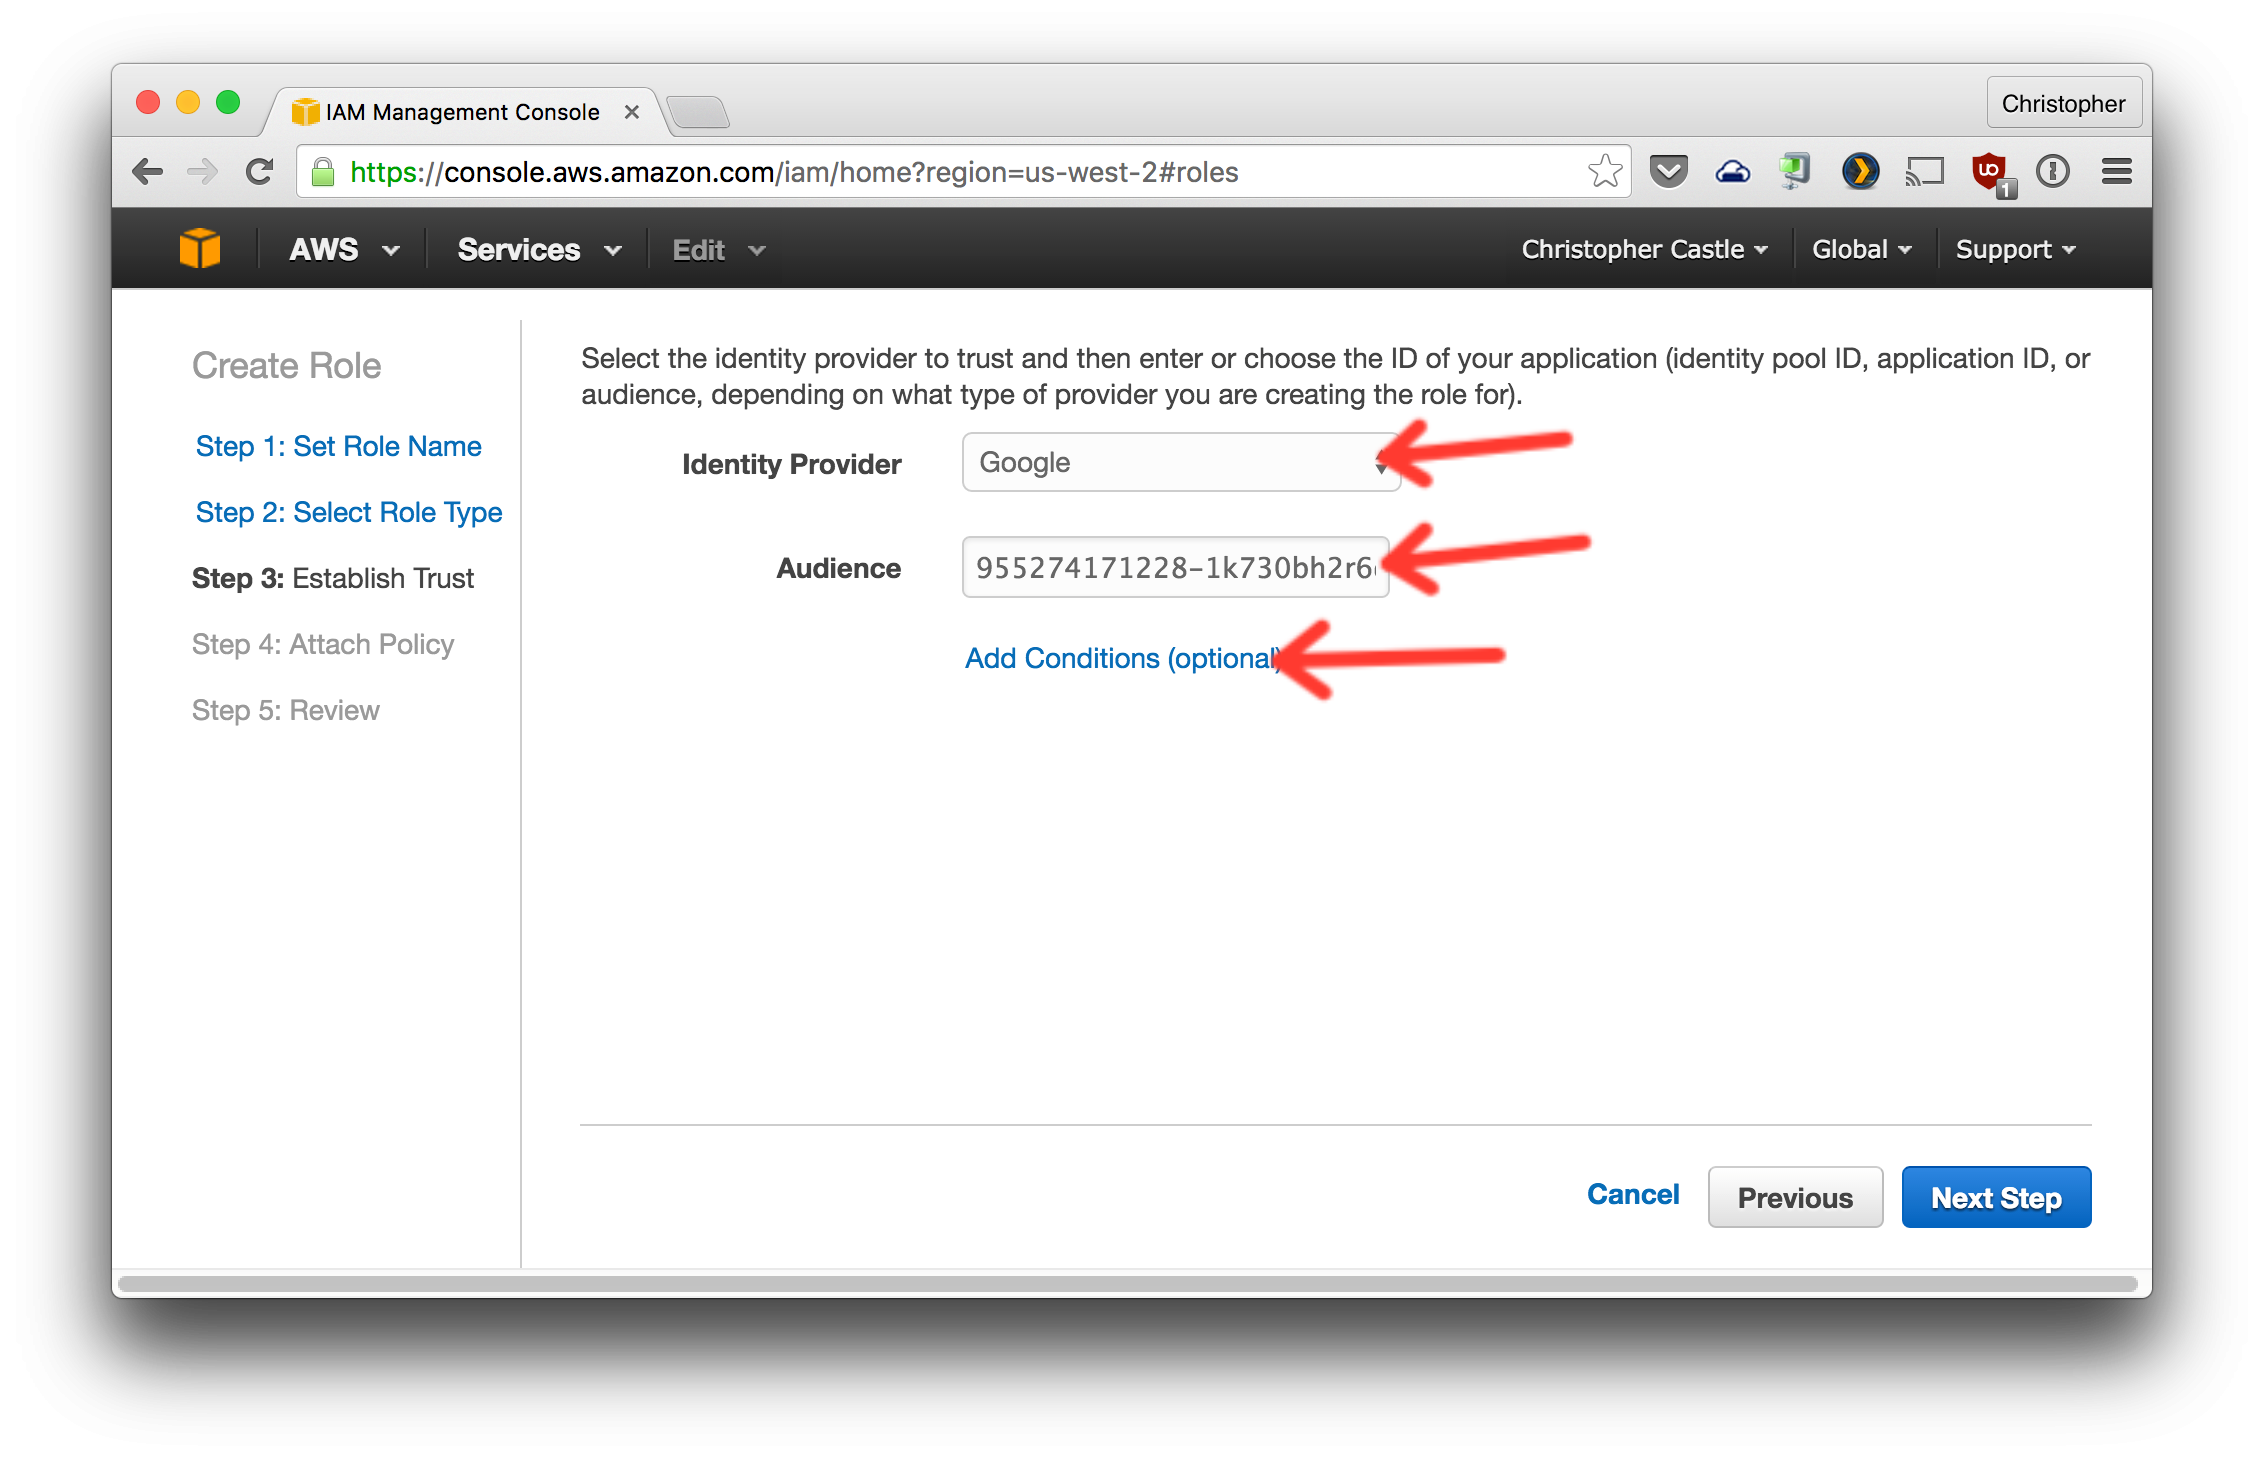
Choose Google and paste in the client ID you got from Google.
- Now let's restrict login to only your Google account. Get your Google ID by going to https://plus.google.com and clicking
Profile. Your Google ID is the number in the URL.


- Click Next on the following two screens.
- Copy/paste the new role's ARN to the serverless-buffer-app-gui config file and finish creating the role. (TODO: update path of config file)
I'd love your help! Check out the open issues to find something you can help on.
Copyright (c) 2015, Chris Castle
Permission to use, copy, modify, and/or distribute this software for any purpose with or without fee is hereby granted, provided that the above copyright notice and this permission notice appear in all copies.
THE SOFTWARE IS PROVIDED "AS IS" AND THE AUTHOR DISCLAIMS ALL WARRANTIES WITH REGARD TO THIS SOFTWARE INCLUDING ALL IMPLIED WARRANTIES OF MERCHANTABILITY AND FITNESS. IN NO EVENT SHALL THE AUTHOR BE LIABLE FOR ANY SPECIAL, DIRECT, INDIRECT, OR CONSEQUENTIAL DAMAGES OR ANY DAMAGES WHATSOEVER RESULTING FROM LOSS OF USE, DATA OR PROFITS, WHETHER IN AN ACTION OF CONTRACT, NEGLIGENCE OR OTHER TORTIOUS ACTION, ARISING OUT OF OR IN CONNECTION WITH THE USE OR PERFORMANCE OF THIS SOFTWARE.


