
CloudStack-UI is a project which purpose is to develop an easy-to-use, light, and user-friendly frontend interface for the Apache CloudStack virtualization management system. Apache CloudStack itself is a great product which is used very widely, but its frontend is developed for administrators (from our point of view), not for cloud end-users. Some of the interactions are not straightforward and unnatural to an average user and require quite a long time to adapt. Other reasons to develop alternative UI are connected with the lack of functions such as virtual machine statistics & charting, sophisticated resource accounting, and application management. These are in our long-term TODO list.
Join CloudStack-UI LinkedIn Group.
At Bitworks Software, we run an ACS public cloud for 3 years (actually we still run CS 4.3 cloud in production) and we found that average users who are familiar with Digital Ocean, Amazon AWS, and other VPS management systems feel uncomfortable with original CloudStack UI and make a lot of operational mistakes. That’s why we decided to implement a convenient and neat end-user facing UI covering regular activities, which are important for day-to-day VM management.
The project is developed by Bitworks Software Frontend Division within the educational marathon, which has the purpose to incorporate our new team members and show them our standard frontend development instrument.
- Designed compatible with Apache CloudStack 4.11 and has been tested for the previous versions of CS (4.9, 4.10).
- Powered by Angular and Material 2.
- Tested and works fine in the next modern browsers:
- Google Chrome 60.0.3112.78
- Chromium 60.0.3169.0
- Mozilla Firefox 54.0.1
- Safari 5.1.7
- Internet Explorer 11.483.150630
Actual Changelog can be found here.
Since we designed the product from the perspective of well-known use cases, which are common to our public cloud deployment, we implemented only ones which are 100% required and cover most of the use cases. Other deployments may imply other requirements, which is why it’s an open source product.
So, what is supported:
- Basic CloudStack zones with virtual router
- Security groups
- KVM Hypervisor
- Security group templates
- Multiple zones
- CloudStackAccount Domains
- Virtual machine standard operations supported by Apache CloudStack
- Root and Data disks management
- Ad-hoc snapshots for disks
- Affinity groups management
- VM groups
- Localization support
- Frontend Themes, Custom VM colors
- Custom and Fixed service and disk offerings
- Password management
- SSH keys management
- API keys management
- Accounts management
- A lot of small improvements which affect user experience greatly
Pulse plugin
Pulse Plugin is designed for visualization of virtual machines performance statistics. Currently, this CloudStack-UI extension is only compatible with ACS clusters that use the KVM hypervisor. With help of sensors that collect virtual machines performance statistics via the Libvirt API and store them in an InfluxDB datastore and RESTful statistics server, CloudStack-UI is able to display CPU, RAM, disk IO and network traffic utilization in the form of convenient visual charts.
Pulse allows users of Apache CloudStack to monitor current and previous operational states of virtual machines. The plugin supports various view scales like minutes, hours, days and enables data overlays to monitor peak and average values.
We consider this plugin very important for the CloudStack ecosystem as currently there is no built-in functionality to track VM operational states, although it is vital for system administrators to successfully operate virtual servers. Read more about Plugin deployment here.
WebShell Plugin
WebShell is a CloudStack-UI extension designed to perform a clientless SSH connection to a virtual machine. The extension is activated in the CloudStack-UI configuration file and is supported by an additional Docker container. As for the way of WebShell usage, the plugin is similar to NoVNC interface provided by CloudStack. However, WebShell uses the SSH protocol and doesn’t allow VM emergency management.
This feature is not available in basic CloudStack UI and API. Plugin deployment and configuration instructions can be found on the plugin page.
Log View Plugin
This extension allows users to view VM log files. It uses the Log View backend-plugin that extends the CloudStack API with additional requests providing access the VM log files storage. For the Log View UI-plugin operation, firstly, the Log View backend-plugin should be downloaded from GitHub and deployed. The plugin uses the ELK stack to store machine log files and Filebeat to export log files from a VM to the storage. The plugin is tested with Apache CloudStack 4.11.2.0.
Then, it is necessary to enable the LogView UI-plugin via the CloudStack-UI configuration file. After activation, the System Logs section appears in CloudStack-UI. There a user can select the log files to display by setting up main parameters - a virtual machine and a date for which a user wishes to see the logs.
Plugin deployment and configuration instructions can be found at the plugin page.
Resource Limits Management Plugin
We developed the Resource Limits Management plugin to make it possible for administrators to manage resource quotas, and for users to change resource limits. With the new plugin a user does not need to request an administrator to provide more resources or to reduce the available amount of resources. A user gets access to resource limits, and an administrator can manage resoure quotas via UI. The extension uses two backend plugins:
- the µAPI Gateway plugin developed by us to help developers to create extensions for CloudStack using any programming language.
- the Resource Limits Management backend plugin that extends CloudStack API with additional endpoints.
After the backend plugins are deployed and configured the Resource Limits management UI-plugin can be activated and configured via the configuration file (see the configuration guide). Once it is activated, users and administrators get access to resource limits and quotas management via UI.
Please, visit the plugin page to find more information.
We intensively use features like projects in our own CloudStack cloud to manage resources dedicated to project groups, etc. but generic users don’t need them, so we don’t support the following features yet:
- Advanced Zones
- Hypervisors other than KVM have not been tested
- Responsive interface for smart devices
- SAML2 authentication support
- CloudStack projects
- OTA/KVS integration for VM automation
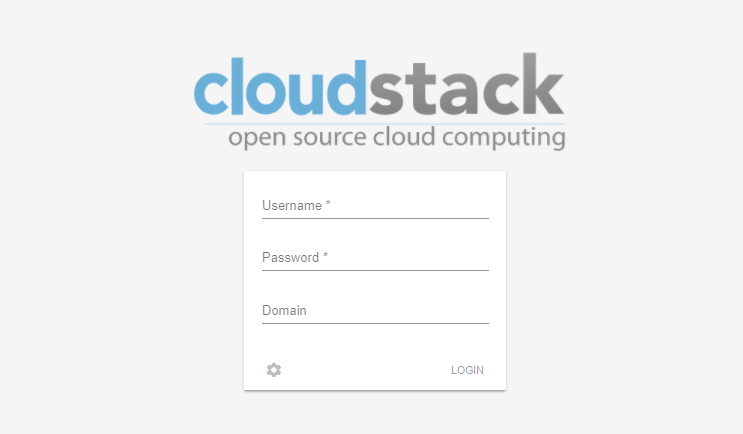
The login screen has a nice preloader which can be used to brand it for specific company. By default, it shows Apache CloudStack banner. There are three possible ways to use domain (the form presented on the screen like in native UI, default domain in settings or an URL-based scheme).
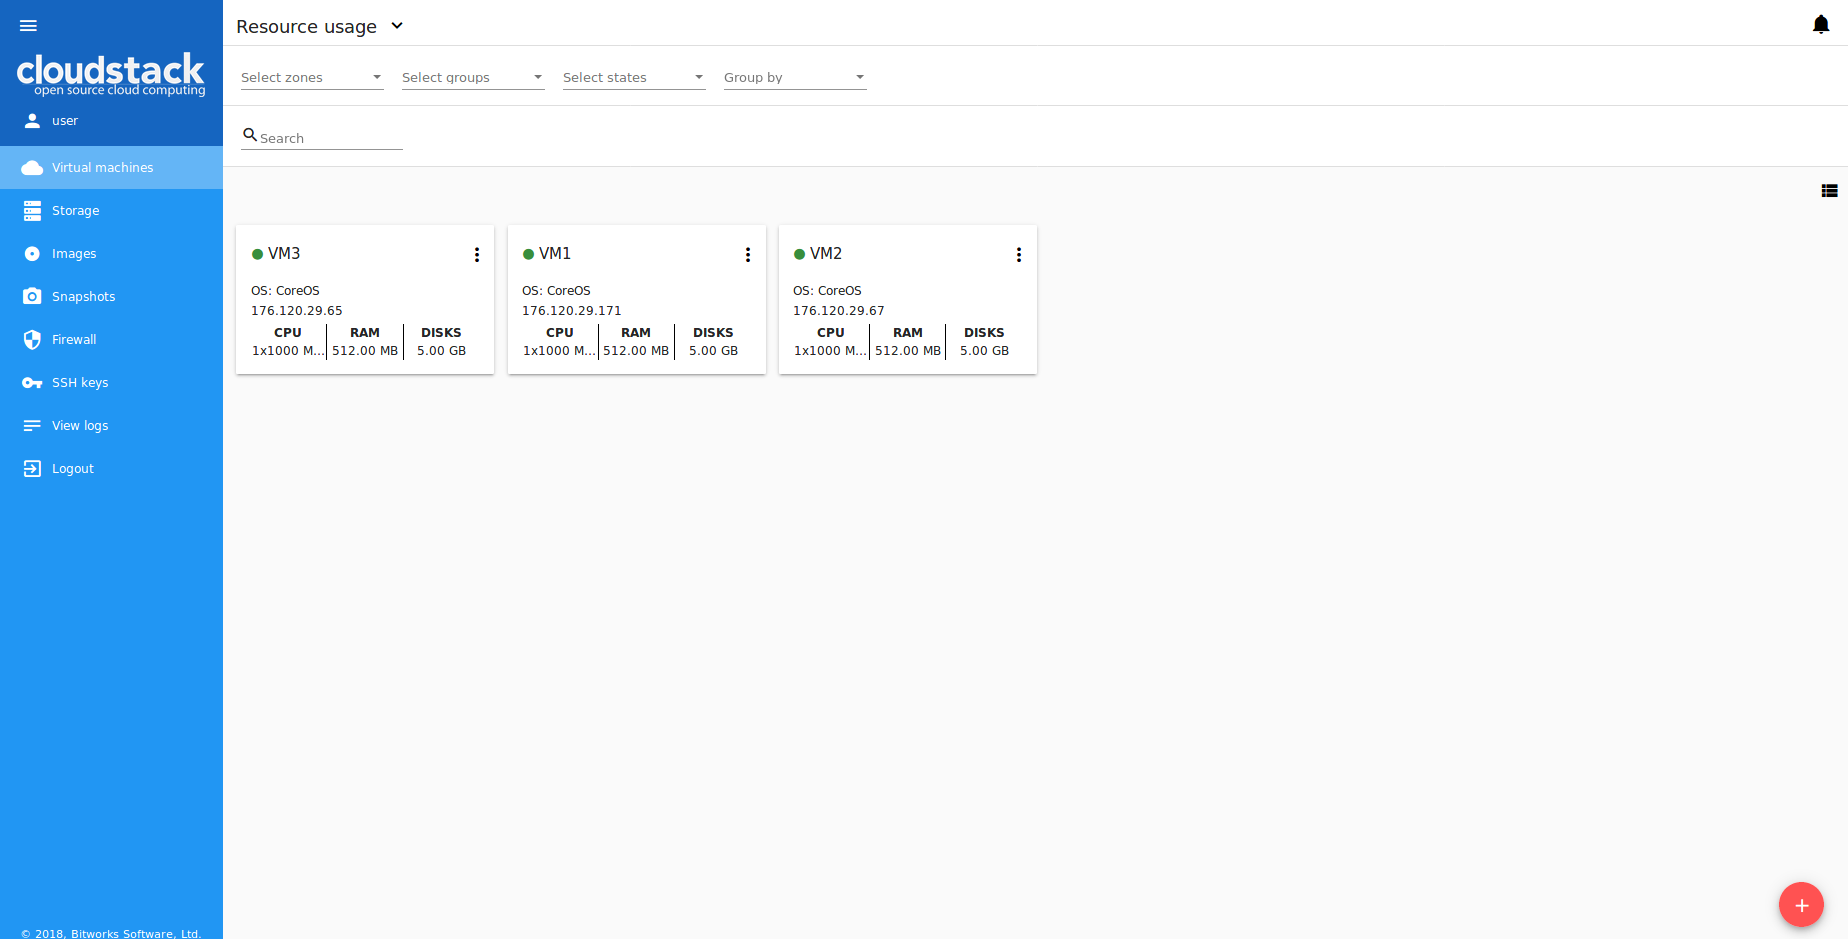
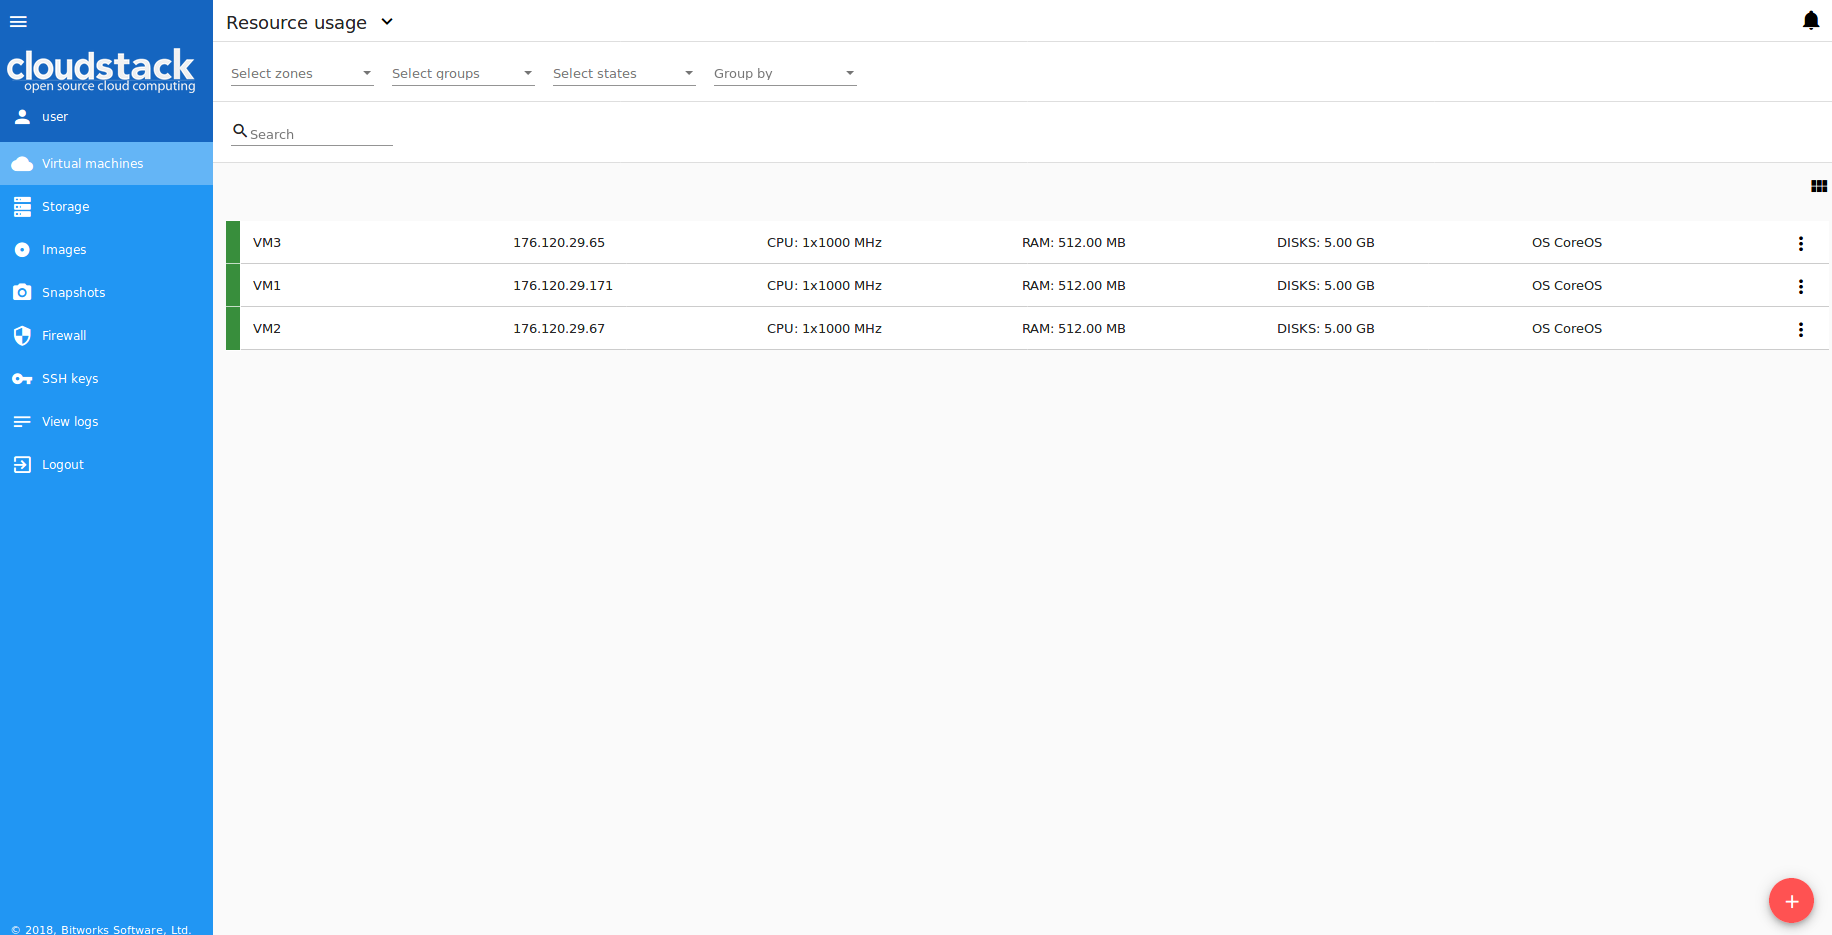
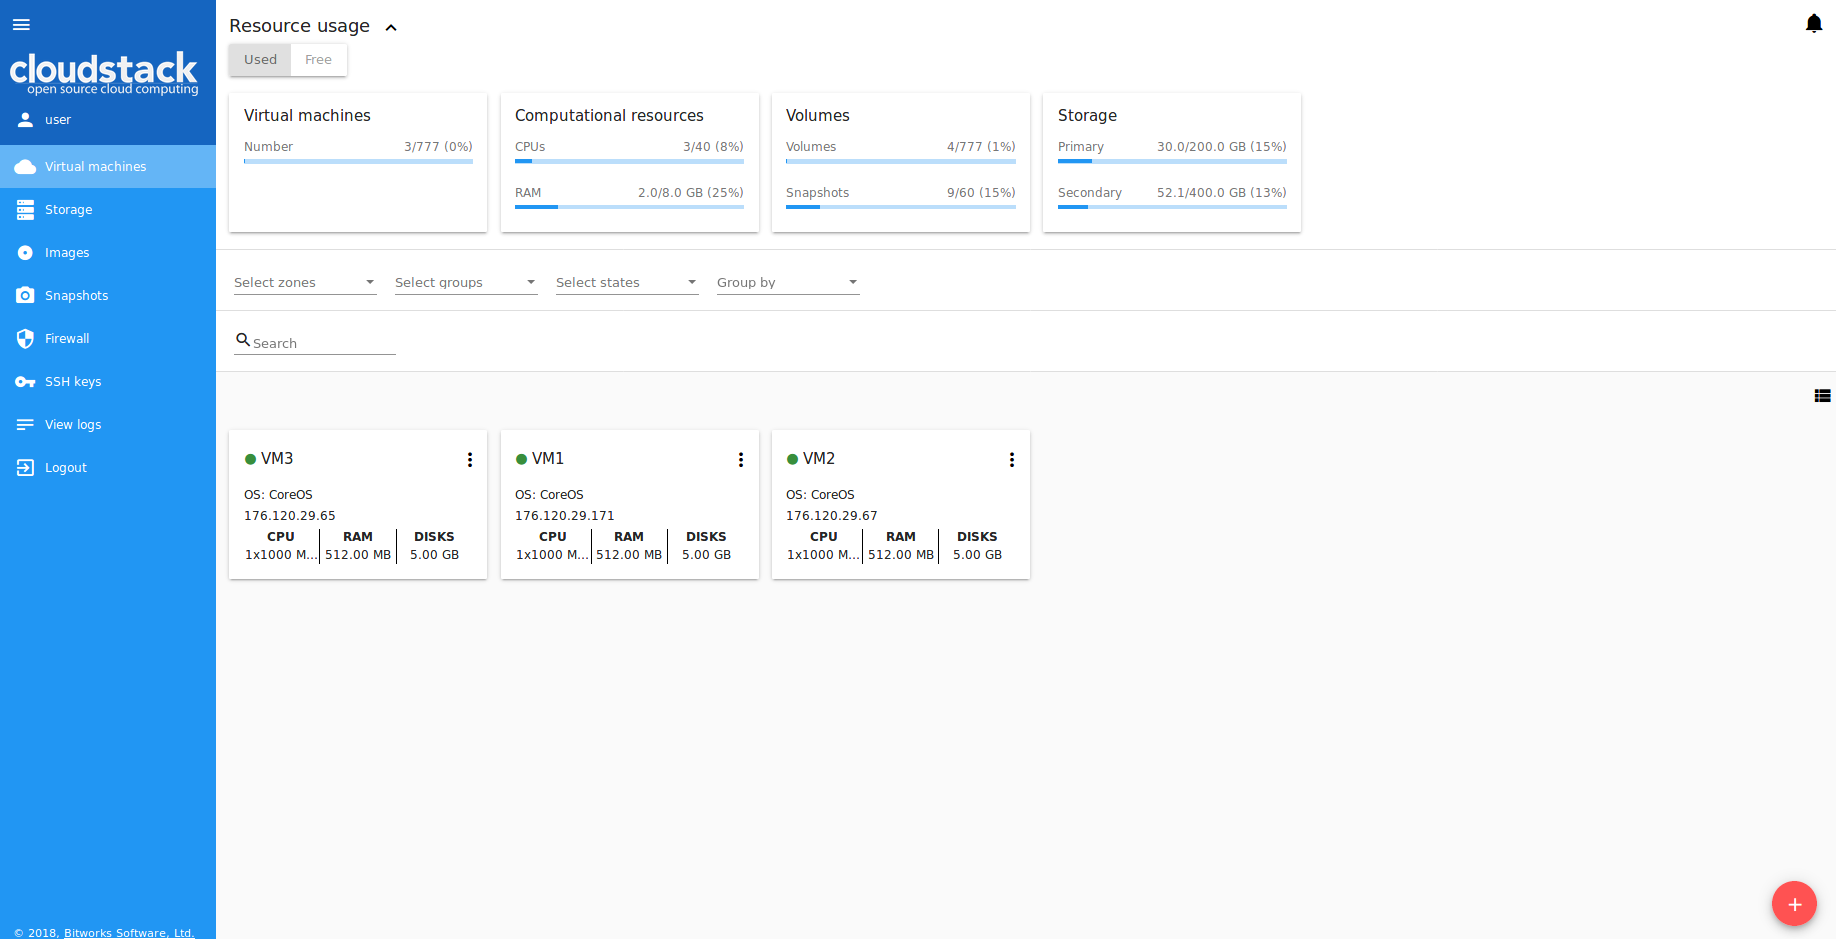
This screen was rethought greatly. First of all, we implemented the “one step” approach everywhere, and we also made it work without moving from view to view, like ACS native interface does. Thus, all actions on VM instances are managed from the same screen. Also, the interface allows to view several zones immediately, group virtual machines by zones, by logical groups (e.g. Databases, WWW), and by colors. We added a feature to brush a virtual machine with a specific color to make it look unique and meaningful to users from a certain perspective.
Also, we moved most of VM information to the sidebar, which now has four tabs - General view, Storage (disks, snapshots, and ISO), Network (NICs configuration, Firewall rules) and Tags. From the system behavior standpoint, we have changed it sometimes, e.g. when the user wants to change service offering for running VM, the interface says that VM will be stopped and started, and it doesn’t make the user do it separately. So we replaced disconnected action sequences with connected ones. The data representation can be changed between the "card" and "table" view. Each section contains a switch and this improvement gives a user an opportunity to work with data in each specific section in a more convenient way.

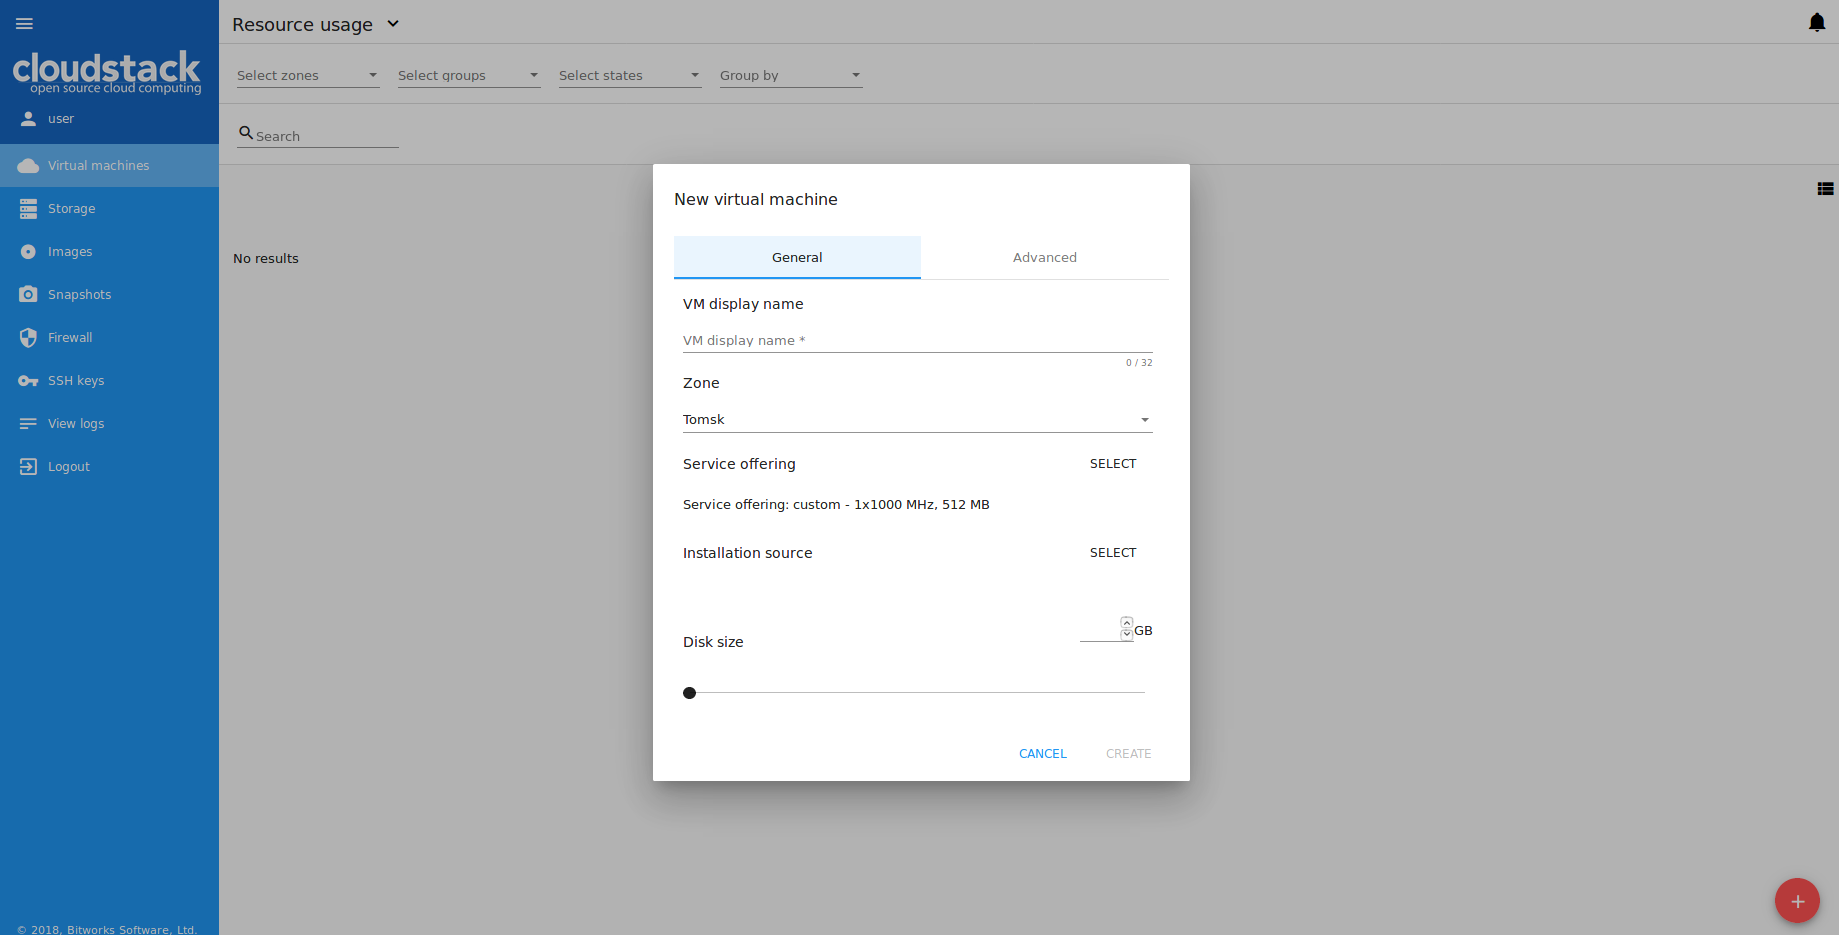
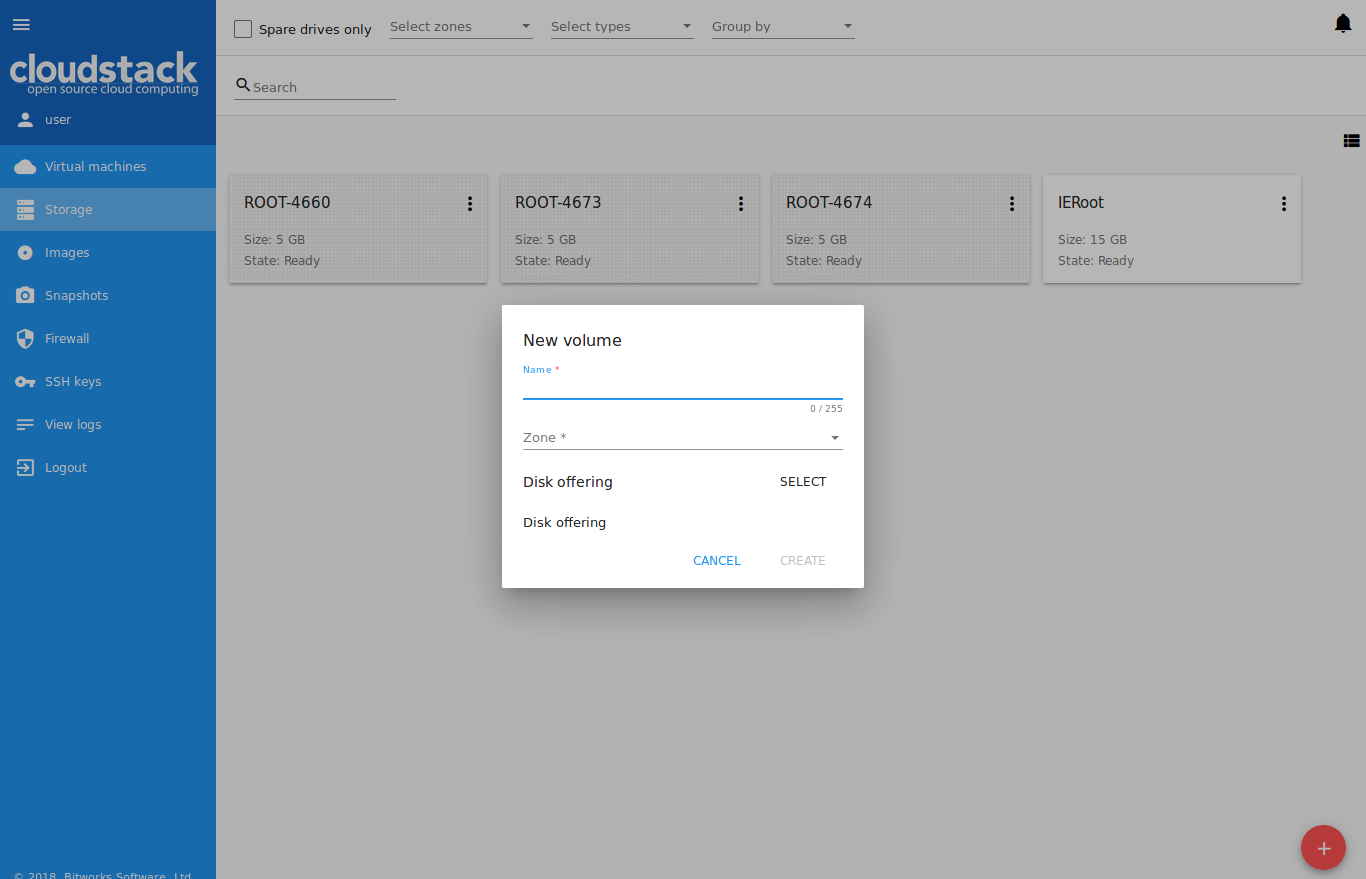
We changed a new virtual machine screen a lot. Now it’s a one-step dialog and it allows selecting everything from one screen without additional steps. We believe it’s much better for a regular user than the one used with the native UI. We also allow users to define any VM name - a VM display name - to make it more convenient to manage a VM. Alogside with a display name a user can define a host name for the VM that should be unique within the domain. If no host name defined, the system generates a meaningful unique VM name like vm-<UID>.
Another important thing is that the form checks that a user has the required amount of resources to create the virtual machine immediately and thus it doesn’t allow him launching creation that will fail for sure.
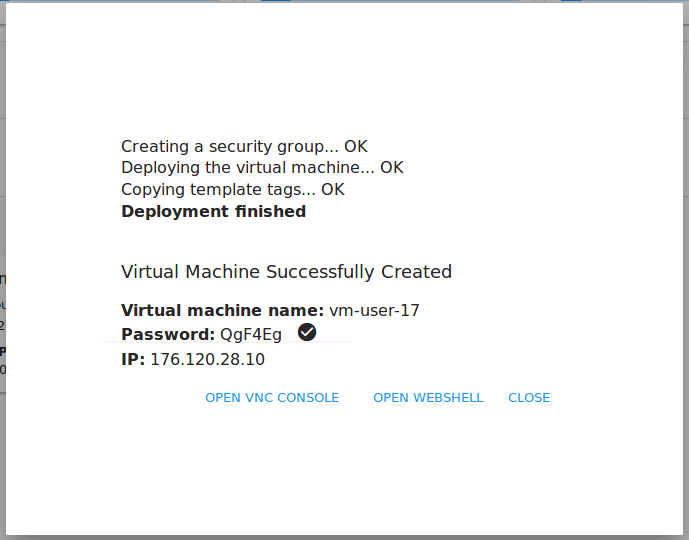
Our team has made a big contribution to the improvement of UX when creating a virtual machine. First of all, a user now has an access to the list of all creation steps. Depending on installation source (ISO or a Template) system allows getting not only a login, password, and IP of the machine but also an access to VM interaction interface.
Currently supported:
- VNC console,
- Access via SSH if VM has a csui.vm.auth-mode tag with SSH value. To configure access to VM using WebShell, please refer to wiki,
- Access via HTTP if VM has a csui.vm.auth-mode tag with HTTP value. To configure access to VM via HTTP, please refer to wiki.
We also decided to place the resource usage bar on the same virtual machine view screen. It can be collapsed or displayed. A resource usage bar allows switching between "used" and "free" presentations to help users understanding capabilities in a better way. Domain administrators can also choose between Account and Domain view.
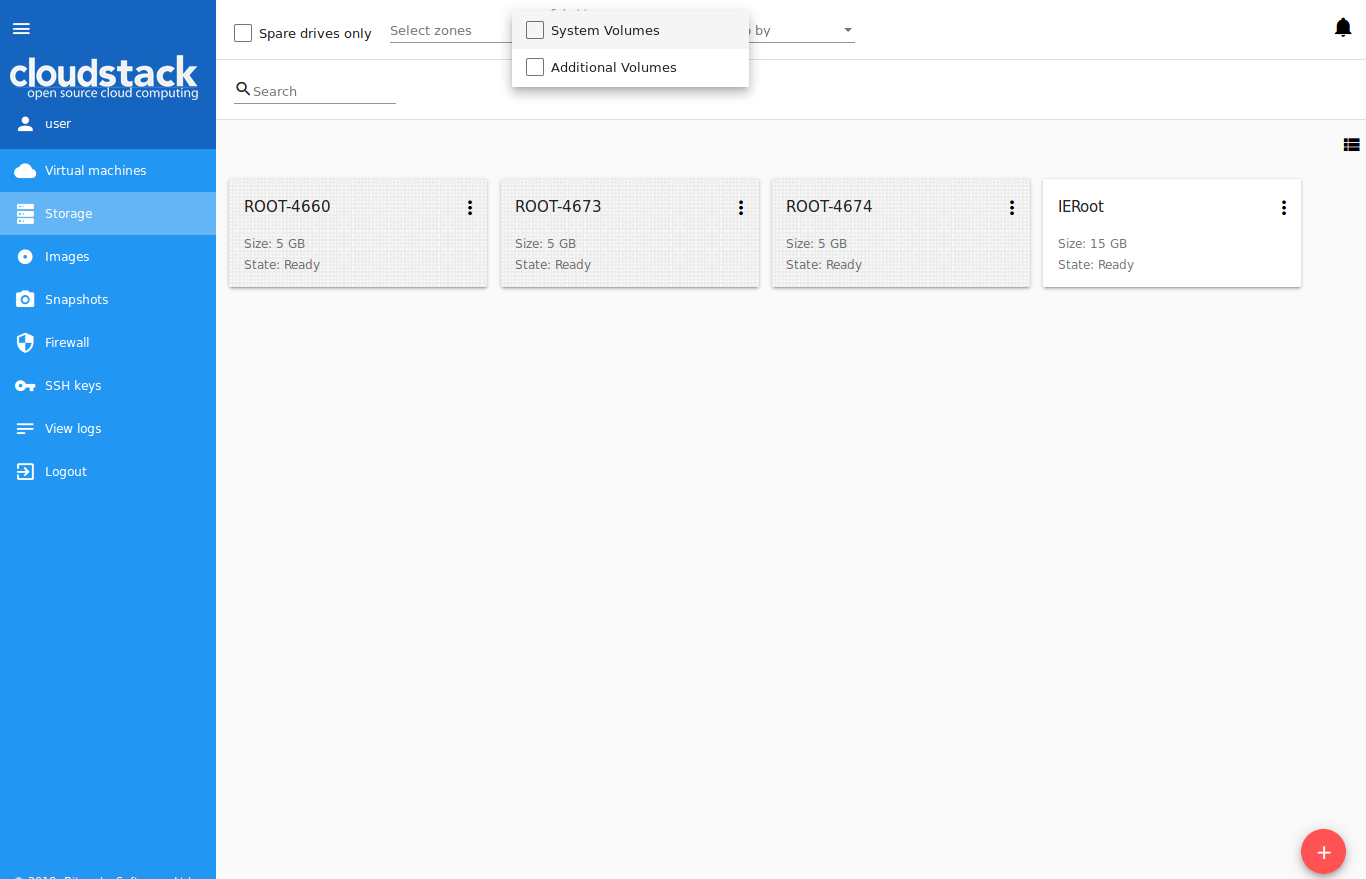
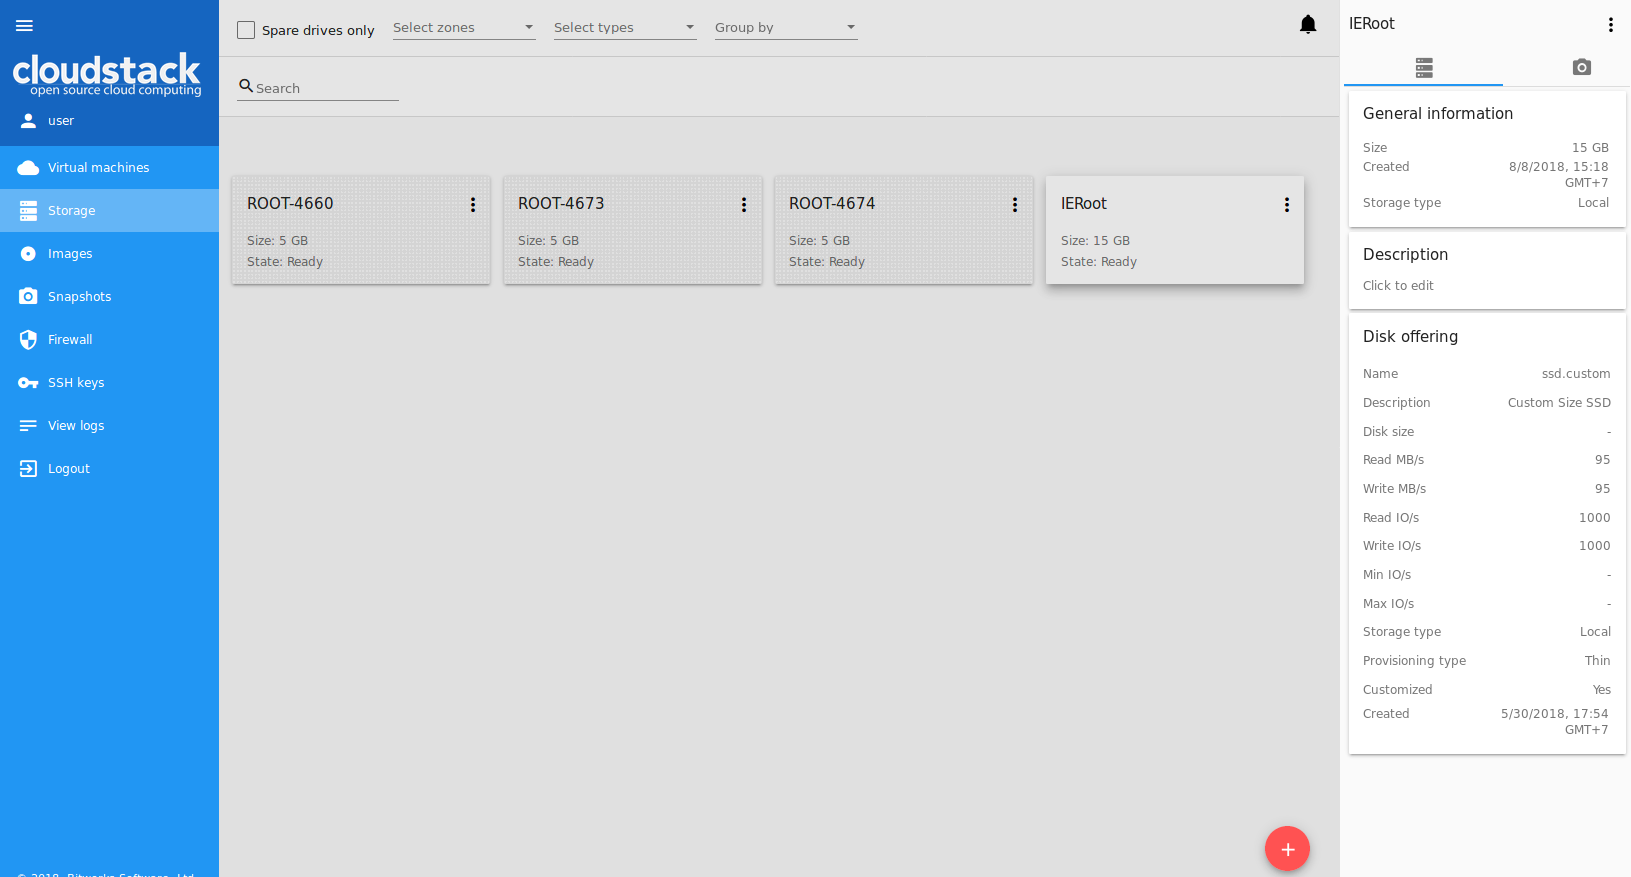
This panel displays existing drives. Root disks are visually distinguished from data disks. In addition, there is an option to display only spare disks, which allows saving user's time in certain cases. Each drive has a detailed sidebar with two tabs (Volume and Snapshots). When a virtual machine is removed, attached drives can be automatically removed. Also, we don’t allow a user to create additional disks on a virtual machine creation because it leads to confusion when the virtual machine is created from a template – the user doesn’t realize that they add an “additional” drive and it’s not a root one.
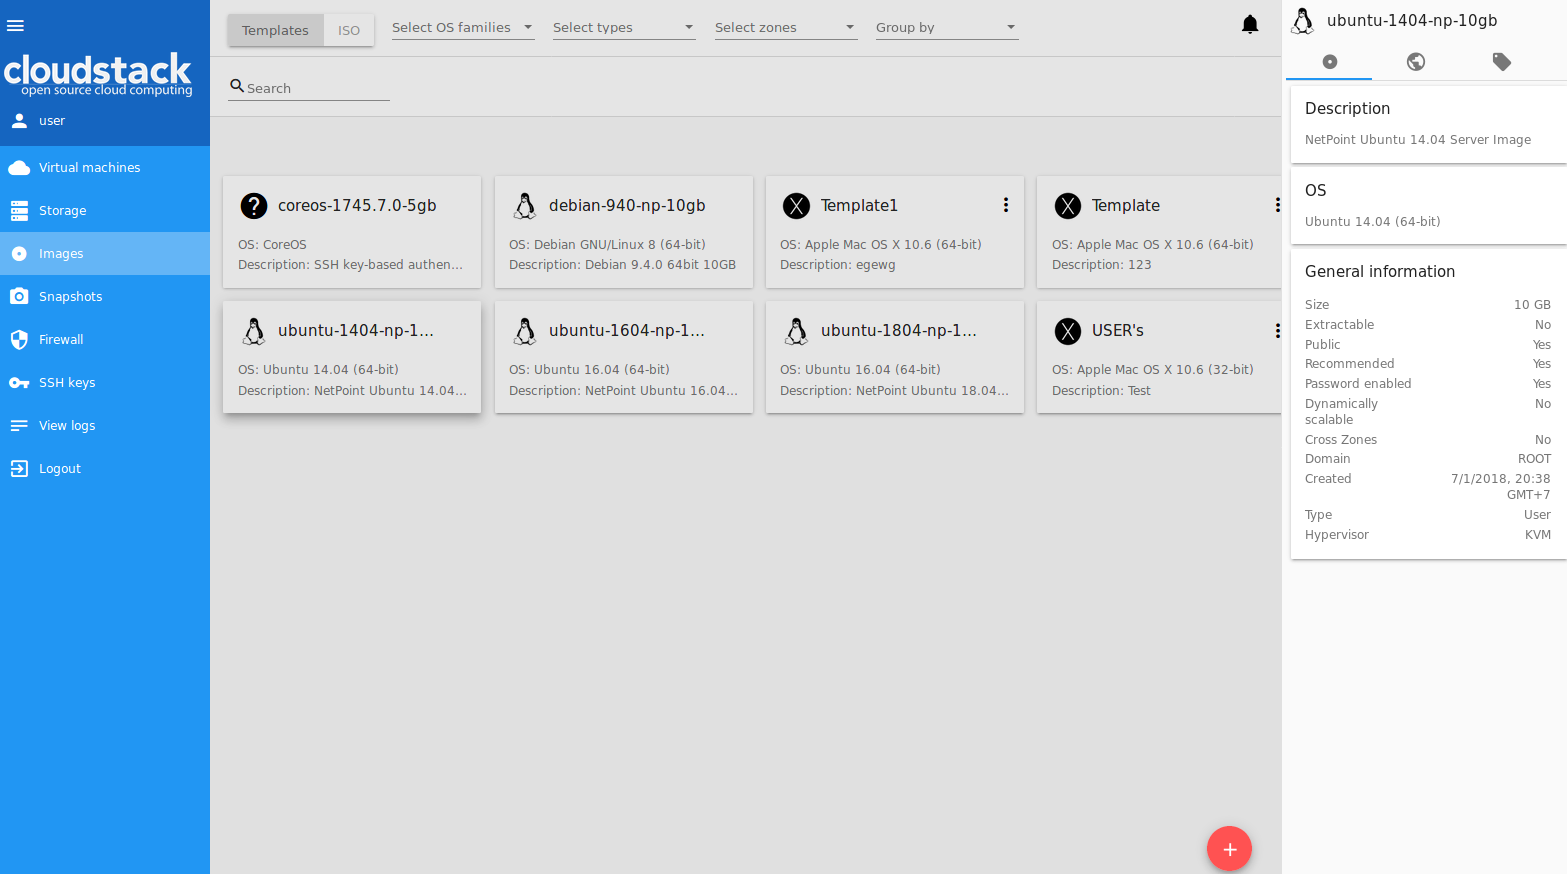
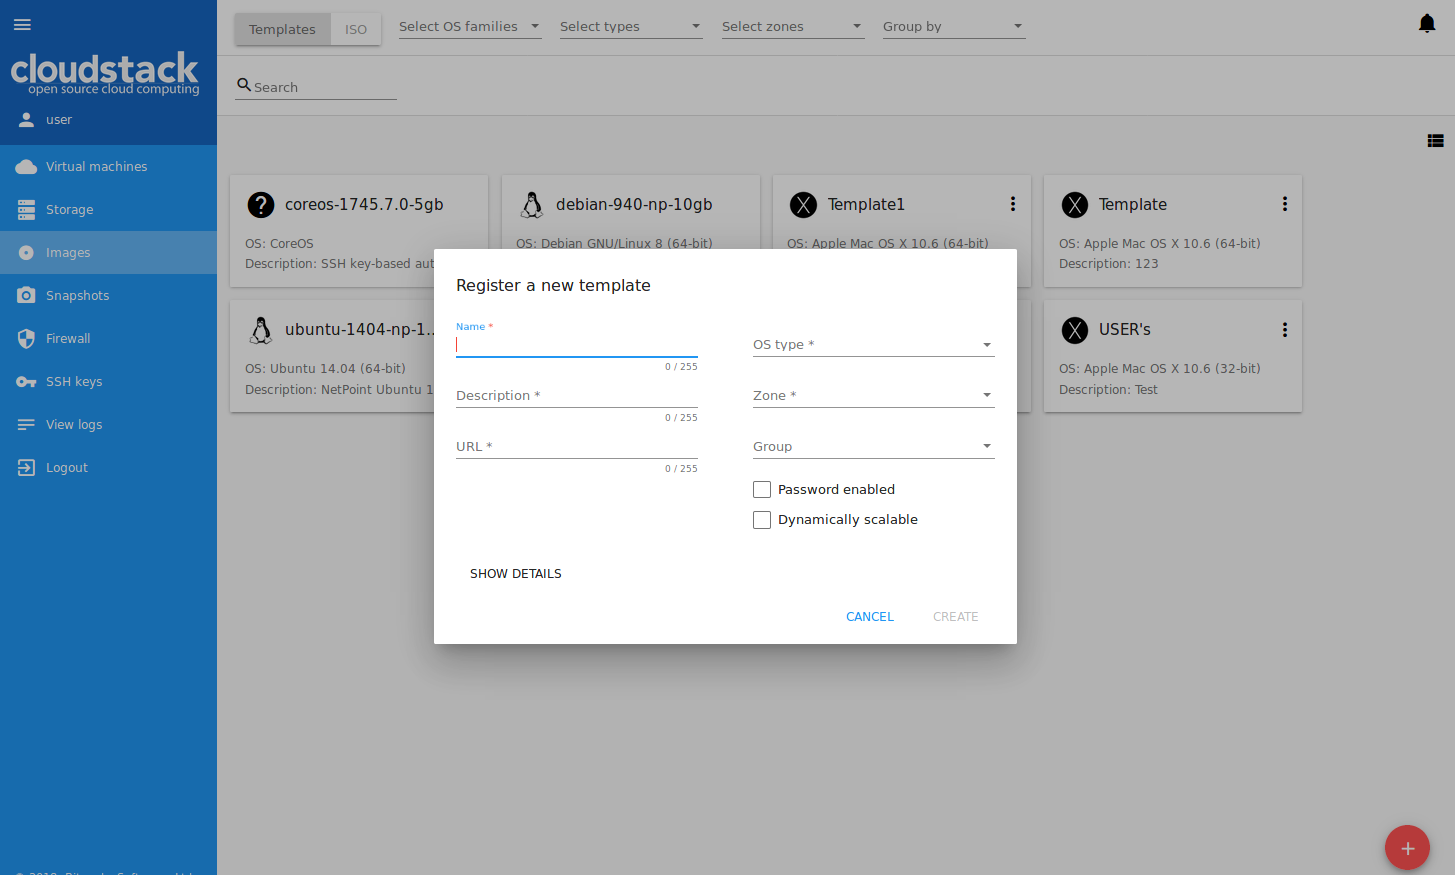
We changed the templates and ISOs view making it more obvious and neat to use. Also, a user can choose a required OS family to filter out unnecessary images. Also, the same concept of single view without moving between screens is applied here. Additional things are displayed in the sidebar.
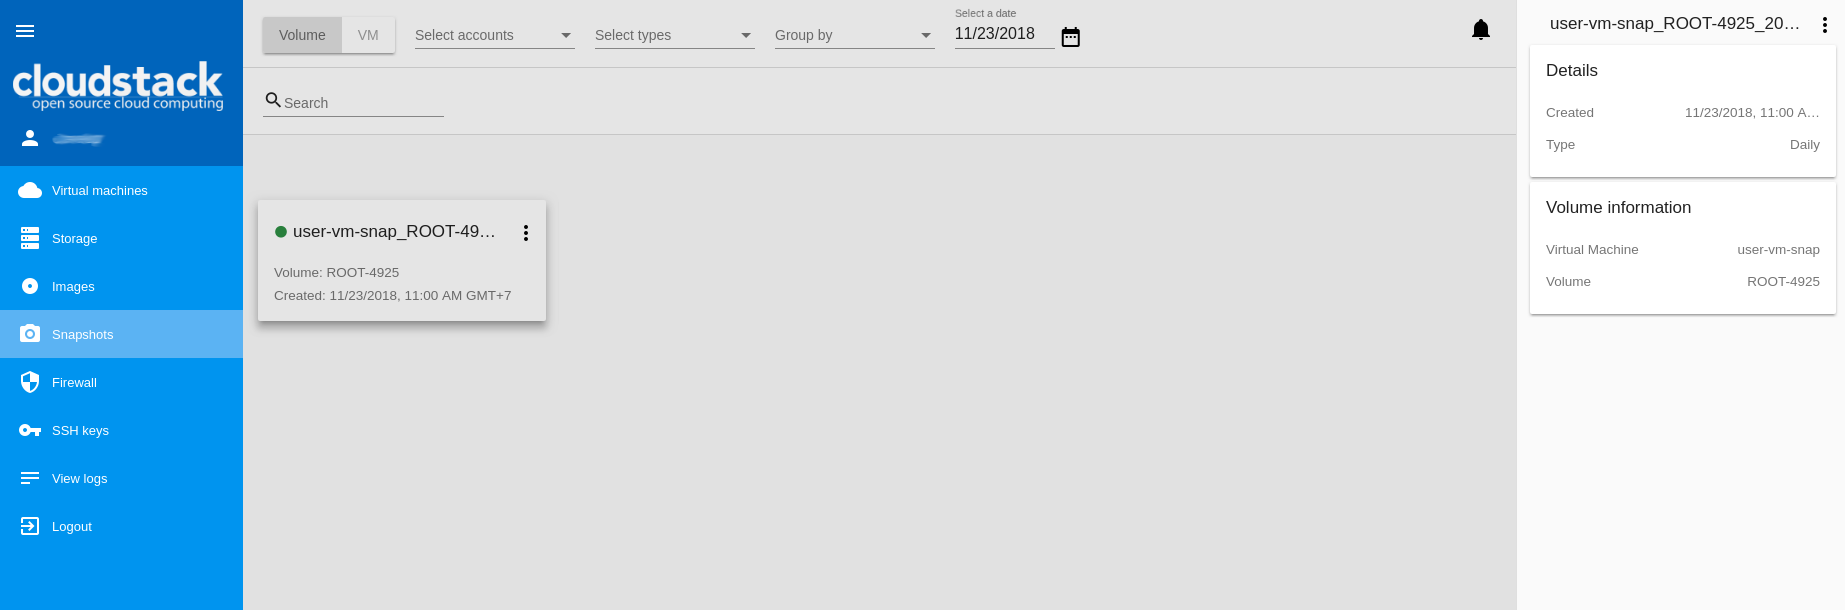
We have added a section - Snapshots - that makes it easier for a user to manage snapshots created for volumes and virtual machines in the system. A user can view the list of snapshots and filter or group it by type/VM or account (available to Administrators). We also added filtering snapshots by creation date.
In the details sidebar a user can see the snapshot general information and the volume/VM that the snapshot is created for.
Here the action box also allows a user to create template or volume from a volume snapshot, revert a volume/VM to the snapshot, or delete a snapshot.

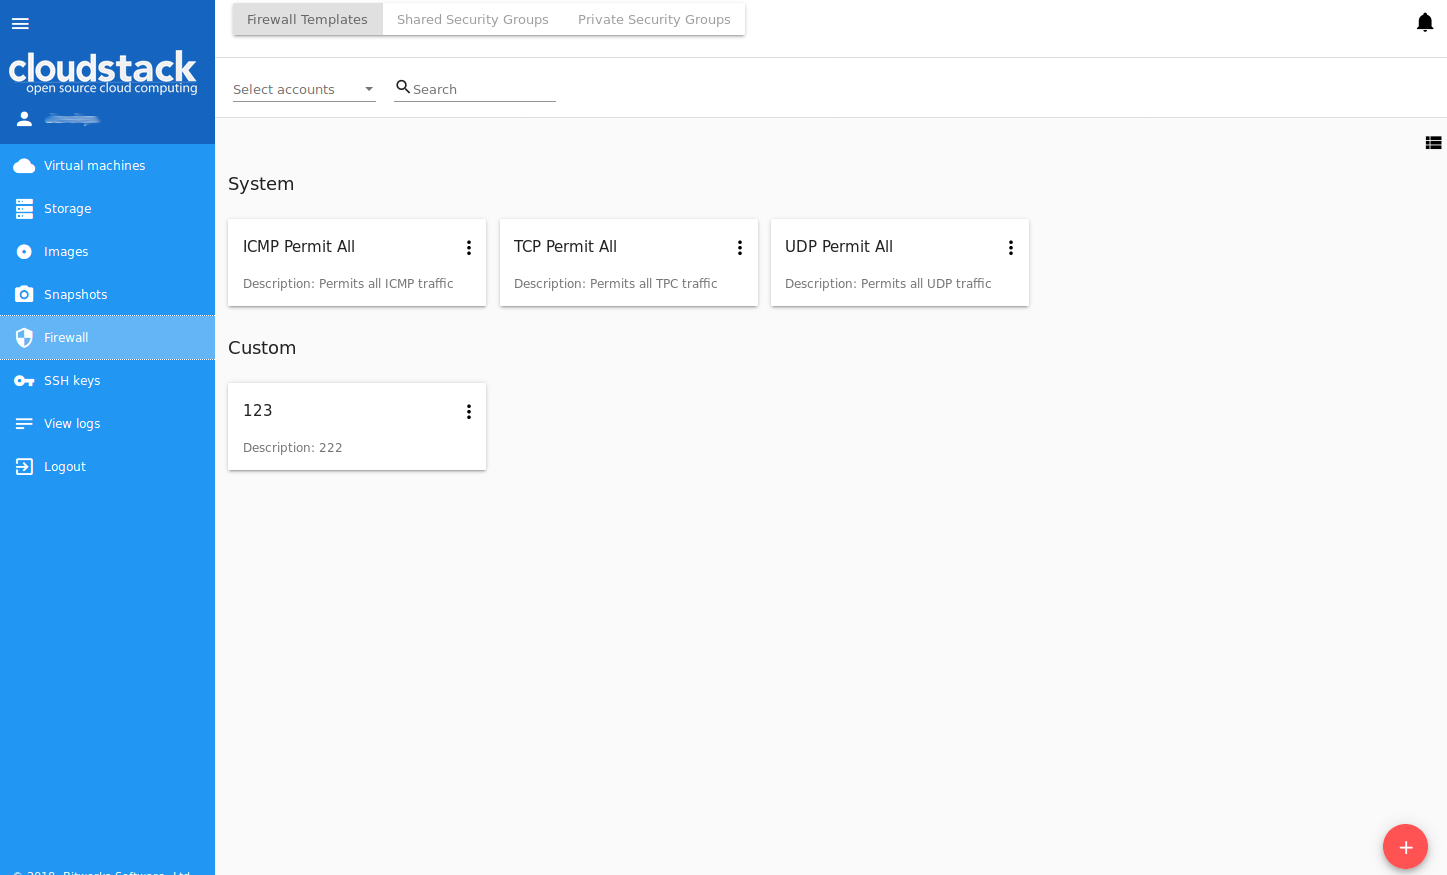
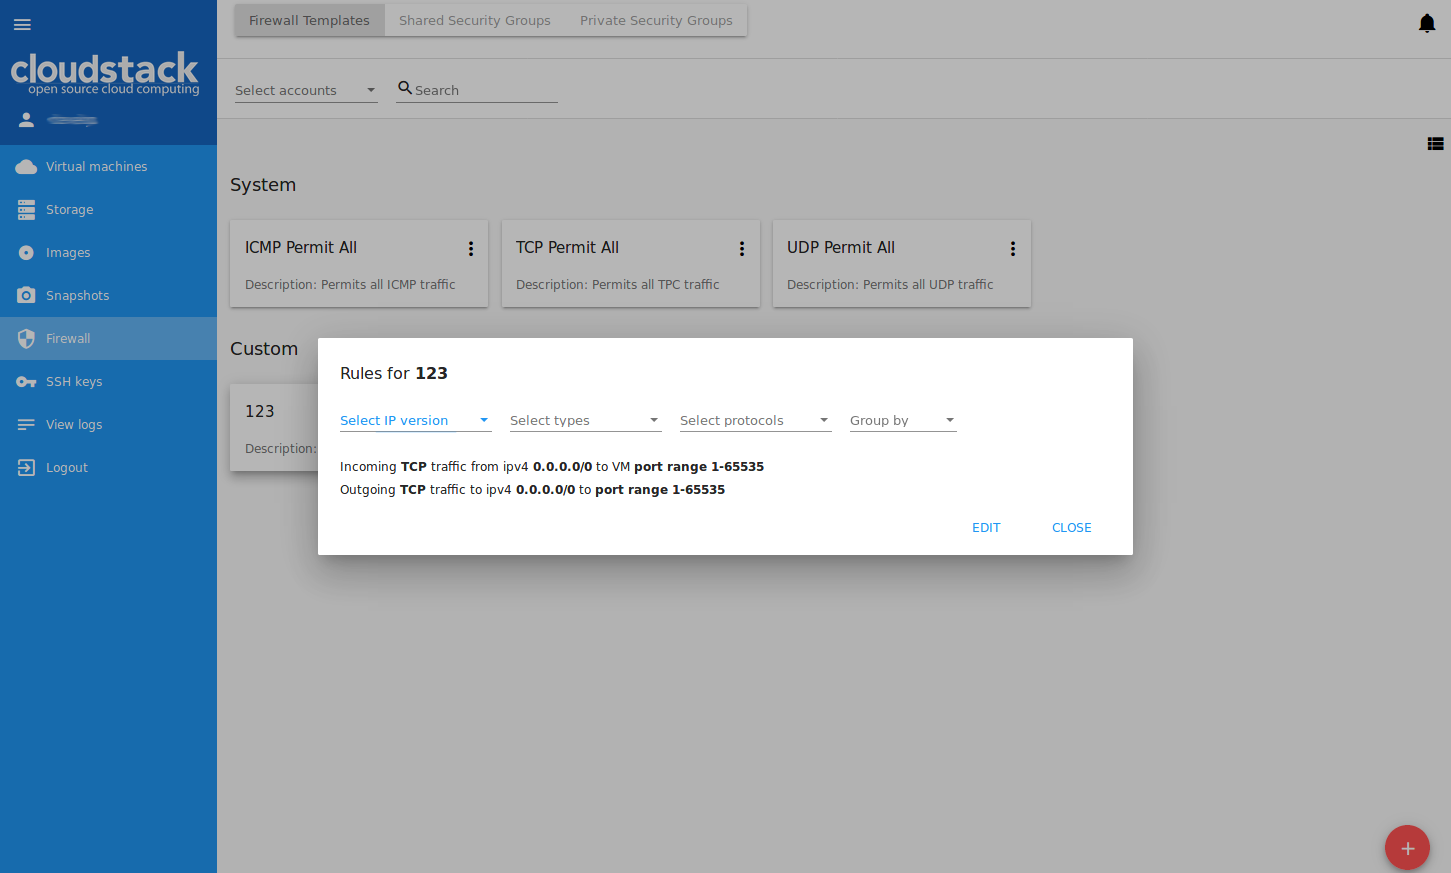
Firewall section includes three views: Firewall templates, Shared security groups and Private security groups.
It is important to understand the concept of Firewall templates. This is a preset of rules that can be system default or developed by a user. System administrators can specify default presets during the interface deployment in the json configuration file. Upon VM creation the system uses a default security group created by CloudStack, or a user can create a new security group right in the VM creation form. Next, when a user changes the rules for a certain virtual machine, they don’t affect other machines. These changed rules make a private security group used for that virtual machine only.
The second way is to use a shared security group - a group that is used by other VMs.
Users can manage security group rules in two modes: a "view" mode with filtering by types and protocols and an “edit” mode. Security groups editing is available when switching from "view" mode to "editing" mode. If editing a shared group, a user is warned that changes will affect other VMs using this group. This behavior allows avoiding undesirable changes for other VMs.
It’s a simplified view for account activities. It lets you choose the date and levels and see all of them. It’s close to the same screen in the ACS native UI, but we believe that the user is interested in the events of specific date and scrolling a huge event log back to find something is not productive. Sometimes the HelpDesk service just wants to show a user that something had happened on a specific date, and thus the interface allows you to find information easier.

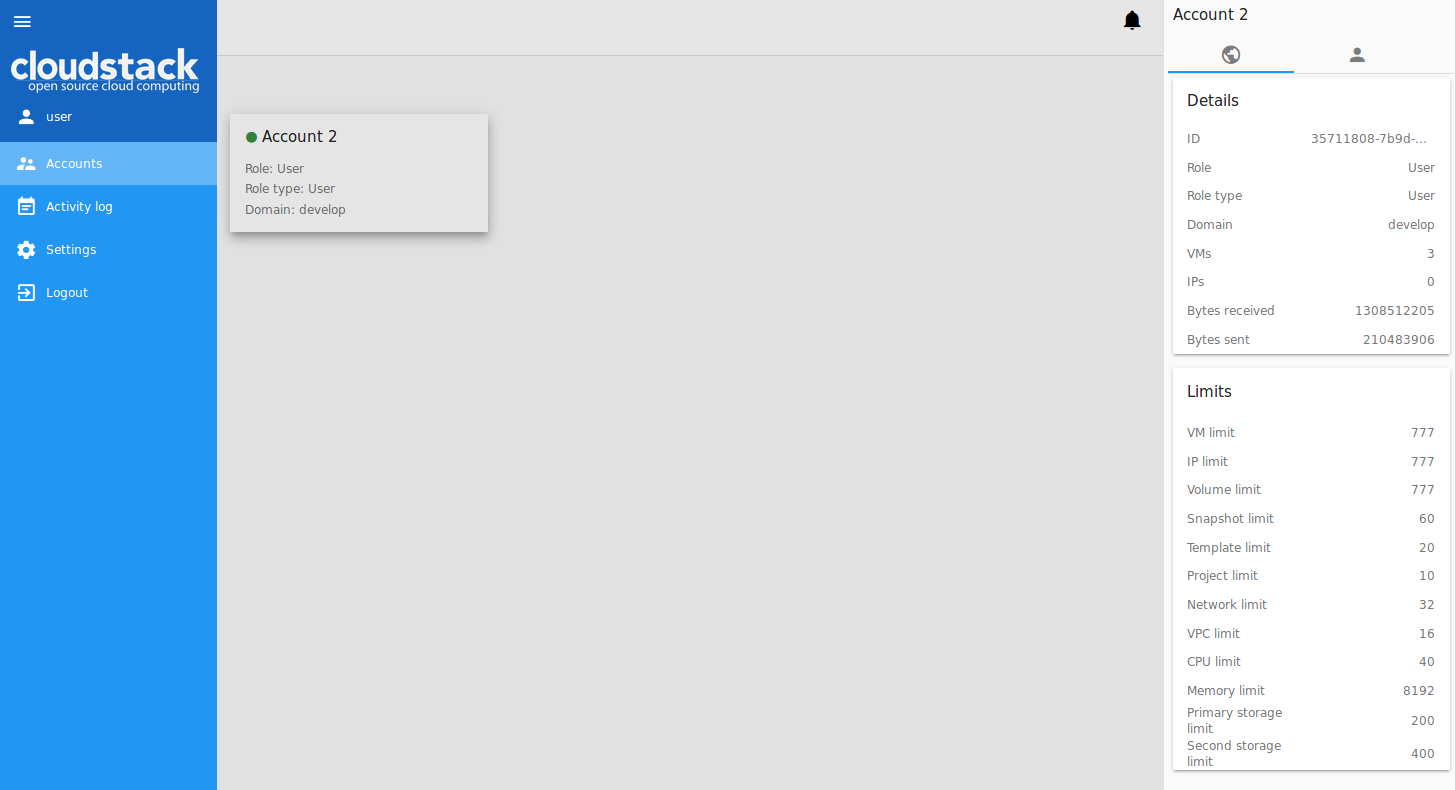
Here domain administrators can manage existing accounts, create new accounts and apply filtering and grouping as in other sections. There is also an access to the details sidebar of each account with a possibility of editing settings and resource restrictions. In addition to this, an administrator can apply filtering by accounts in other sections, thus narrowing a context and working with a data that he needs at the moment.

You can find an official User Guide at https://cloudstackui.readthedocs.io/en/latest/ .
Before you start, please, prepare Node development environment. Install Node.js or update your current node.js to latest stable version.
- Clone the CS-UI project from GitHub.
- Run
npm installcommand. This command installs all dependencies, which are used in the project. Also, you may useyarncommand. - Add your own
proxy-conf.jsfile in the project root folder and set the API endpoint in this file. See proxy-conf-example.
git clone https://github.com/bwsw/cloudstack-ui.git
cd cloudstack-ui
npm install
| command | action |
|---|---|
| npm test | use this command to execute tests via Karma |
| npm run build | use this command to build the project, the build artifacts will be stored in the "dist/cloudstack-ui" directory |
| npm start | use this command to compile the application, it will be available at URL - "localhost:8080". |
To run docker container use:
docker run -d -p 80:80 --name cloudstack-ui \
           -e CLIENT_ENDPOINT=http://cloudstack/client \
           -e BASE_HREF=base_href \
           -v /path/to/config.json:/static/config/config.json \
           bitworks.software:8443/cloudstack-ui:1.411.29
http://cloudstack/client - URL of CloudStack client endpoint (e.g. http://host:8080/client)
base_href - custom base URL (optional, defaults to "/")
/path/to/config.json - path to a custom configuration file named config.json (optional)
Additionally, you can change favicon and CloudStack logo on login screen and in the sidebar:
-v /path/to/favicon.ico:/static/img/favicon.ico \
-v /path/to/cloudstack_logo.png:/static/img/cloudstack_logo.png \
-v /path/to/cloudstack_logo_light.png:/static/img/cloudstack_logo_light.png \
where the favicon.ico is the favicon, cloudstack_logo.png is the logo displayed on the login screen and cloudstack_logo_light.png is the CloudStack logo displayed in the sidebar with the light theme.
+- Major version containing breaking changes.
| +- Minor version synchronized with the CloudStack version (major and minor without a dot).
| | +- Patch version defining the iteration number.
| | |
x.x.x
You can customize the application by providing your own configuration file config.json. See the Config Guide for more information on configuration options.
The project is currently supported by Bitworks Software.

You can contribute to the project development in various ways:
- Share the information about the project with other people, try to install the UI and share your opinion with us and your colleagues.
- Propose useful features. Ideas are always welcome.
- Deploy it somewhere and inform us about your success story, and we will share it in the adopters section.
- Fix bugs and send us the PR.
- Implement a feature from the Roadmap or simply make something new.
- Support and promote the development of specific functions which are important to you and may be shared.
- Provide testing environment for other deployment schemes. Now we interested in testing the app with
- KVM with RBD
- Xen with NFS, Local, RBD
- Oher browsers and operating systems
- Hire us for frontend or backend development of custom software development projects. Take a look at our website to know where we can be useful. Take a look at our presentation to learn more about us.
To contribute, just contact us via e-mail: [email protected]
It’s released under the Apache 2.0 license.


![dependabot[bot] avatar](https://avatars.githubusercontent.com/in/29110?v=4 "dependabot[bot]")


