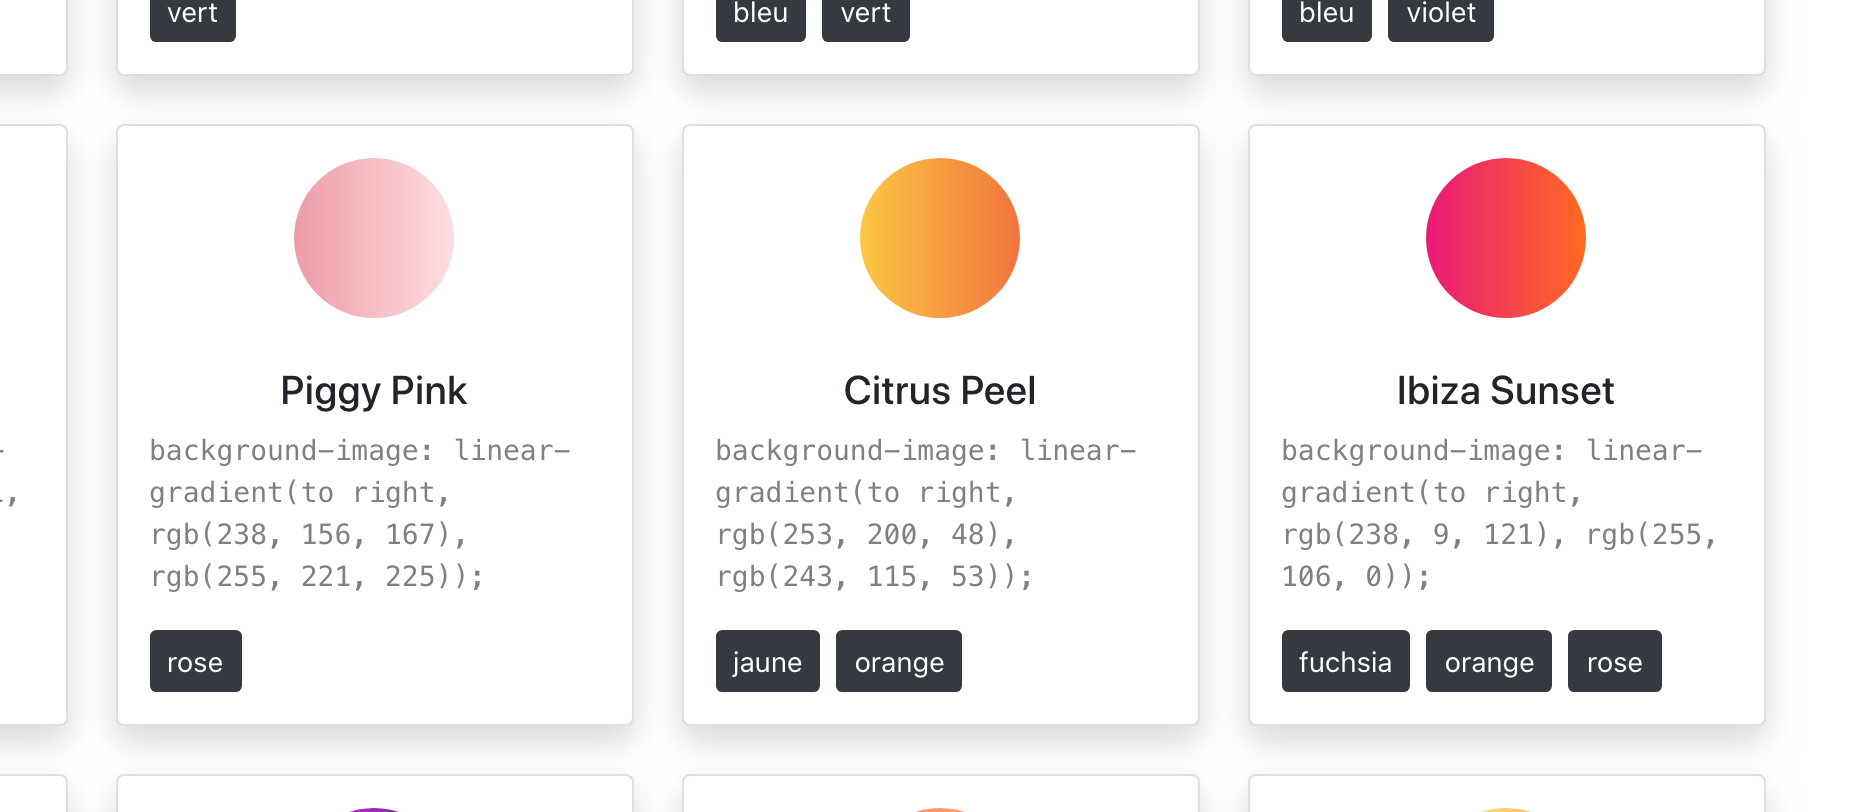
Dans ce challenge vous avez pour but de construire une application web monopage comme celle-ci.
Vous devez utiliser ce repo pour démarrer (fork, clone & yarn). Ci-dessous, vous trouverez quelques indications qui vous aideront à structurer votre projet.
-
Bootstrap est déjà installé et intégré (
./src/index.js) -
La partie "meta" (title, lang, etc.) est déjà mise en place (
./public/index.html) -
Le fichier
./src/gradient.jsexporte deux variablesgradientsetuniqueTags.export const gradients = [ { name: "Grade Grey", start: "rgb(189, 195, 199)", end: "rgb(44, 62, 80)", tags: ["gris"], }, { name: "Harvey", start: "rgb(31, 64, 55)", end: "rgb(153, 242, 200)", tags: ["vert"], }, { name: "Rainbow Blue", start: "rgb(0, 242, 96)", end: "rgb(5, 117, 230)", tags: ["vert", "bleu"], }, ... ]
- Structure initiale de projet
src
├── App.js
├── components
│ ├── Footer.js
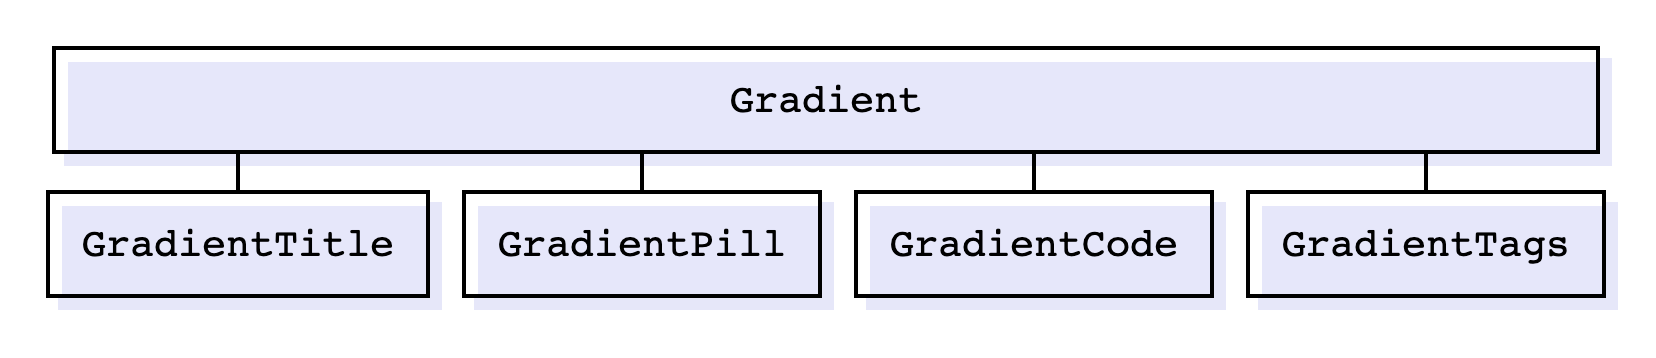
│ ├── Gradient.js
│ ├── GradientCode.js
│ ├── GradientPill.js
│ ├── GradientTitle.js
│ ├── GradientsApp.js
│ ├── GradientsList.js
│ └── GradientsSelect.js
├── gradients.js
...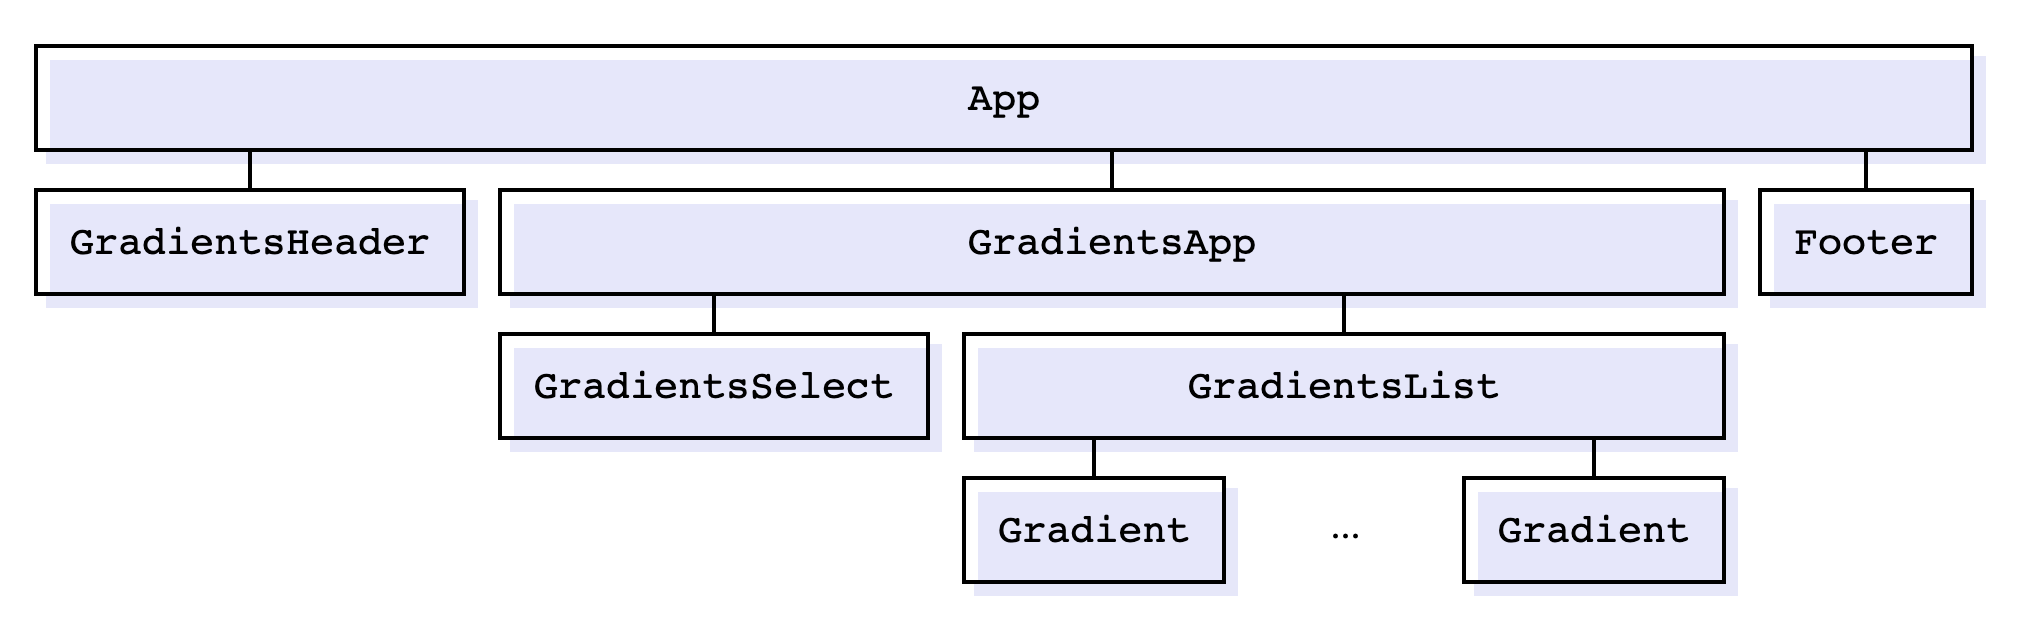
En respectant la structure des components comme ci-dessus, réaliser les étapes suivantes :
- Afficher tous les gradients (25).
Comment ? 🤔 (cliquer ici pour quelques astuces)
✨ Pour ceci il faudrait importer la variable gradient depuis ./src/gradients.js et la parcourir avec la méthode map.
✨ Vous pouvez utiliser la propriété name pour l'attribut key.
- Modifier le component
Gradient. Ajouter les boutons pour les tags de chaque dégradé.
- Ajouter le component
GradientsSelect. Il devrait contenir un élément<select>qui permettera de filtrer les dégradés par tag ("tous", "gris", "vert", ...).
Comment ? 🤔
✨ Vous devez importer la variable uniqueTags depuis ./src/gradients.js
🕵 N'hésitez pas à "inspecter l'élément" pour retrouver le markup de cette partie de la page.
- Ajouter le component
GradientsHeader
🤔
✨ Vous pouvez vous servir de ce pen.
- Mettre en place la fonctionnalité "filtrer par tag".
🤔
✨ Ce qui définit le state de notre application est la valeur de filtre (le tag choisi). Ce pourait être alors
const [filter, useFilter] = React.state("tous")
- rendu sur GitHub et déploiement sur Netlify
- la structure des components est respectée (/1)
- le design est respecté (/1)
- l'ensemble des dégradés sont affichés correctement dans la page (/1)
- le header est fonctionnel (/3)
- le bouton "refresh" est fonctionnel (1/3)
- les boutons "next/prev" sont fonctionnels (2/3)
- le select est fonctionnel et permet de filter des dégradés par tag (/2)
- les boutons sont fonctionnels et permettent de filter des dégradés par tag (/1)
- il n'y a pas de warning depuis la console dans VSCode, ni dans la console du navigateur (/1)
- le html est valide (validator w3c)
This project was bootstrapped with Create React App.
In the project directory, you can run:
Runs the app in the development mode.
Open http://localhost:3000 to view it in the browser.
The page will reload if you make edits.
You will also see any lint errors in the console.
Launches the test runner in the interactive watch mode.
See the section about running tests for more information.
Builds the app for production to the build folder.
It correctly bundles React in production mode and optimizes the build for the best performance.
The build is minified and the filenames include the hashes.
Your app is ready to be deployed!
See the section about deployment for more information.
Note: this is a one-way operation. Once you eject, you can’t go back!
If you aren’t satisfied with the build tool and configuration choices, you can eject at any time. This command will remove the single build dependency from your project.
Instead, it will copy all the configuration files and the transitive dependencies (webpack, Babel, ESLint, etc) right into your project so you have full control over them. All of the commands except eject will still work, but they will point to the copied scripts so you can tweak them. At this point you’re on your own.
You don’t have to ever use eject. The curated feature set is suitable for small and middle deployments, and you shouldn’t feel obligated to use this feature. However we understand that this tool wouldn’t be useful if you couldn’t customize it when you are ready for it.
You can learn more in the Create React App documentation.
To learn React, check out the React documentation.
This section has moved here: https://facebook.github.io/create-react-app/docs/code-splitting
This section has moved here: https://facebook.github.io/create-react-app/docs/analyzing-the-bundle-size
This section has moved here: https://facebook.github.io/create-react-app/docs/making-a-progressive-web-app
This section has moved here: https://facebook.github.io/create-react-app/docs/advanced-configuration
This section has moved here: https://facebook.github.io/create-react-app/docs/deployment
This section has moved here: https://facebook.github.io/create-react-app/docs/troubleshooting#npm-run-build-fails-to-minify


