
In this exercise, the goal is to apply as many as possible of the concepts you've just learned:
- when and how to use different HTML tags,
- how to structure HTML page and add the content to it using block and inline elements,
- how to use flexbox to position elements on the page and
- how to style the page.
Whenever you create a first significant change, you should make your first commit.
- Follow these guidelines to add, commit and push changes.
In the end of this document, you will find guidelines on how to submit the exercise.
Keep in mind that you don't have to wait to fully finish the exercise to make a pull request. You only have to make a pull request once. After that, every time when you make a commit, it will be automatically added and shown in the pull request.
In this exercise, you will clone the landing page of the NPM website. NPM stands for a Node Package Manager, and you will be using it heavily throughout this course. The version you will be cloning is the one in that you see in the following image. If you want, you can visit the official page to pick up some of their styles, but this is not necessary; you’ll see that the NPM page has been updated, but that’s okay. You already have all the assets for this version in the images folder as well as the necessary text in the index.html.
Our goal is to get as close as possible to this:

You can see the larger version of this picture here. If you're struggling to see the details, feel free to zoom in to 200%. Although it doesn't look too complicated, we will have to apply quite a few styles on our web page: set a background color on different elements, set a font weight (bold, normal), and position elements using our newly acquired skills in flexbox.
We will divide our work into two parts:
- part I - create a webpage with no styles, just add HTML and
- part II - add styles and make it perfect. 🎨
So let's get started!
The assets we provided contain the index.html file with all the necessary text, as well as the images folder with all the required images to successfully finish the exercise.
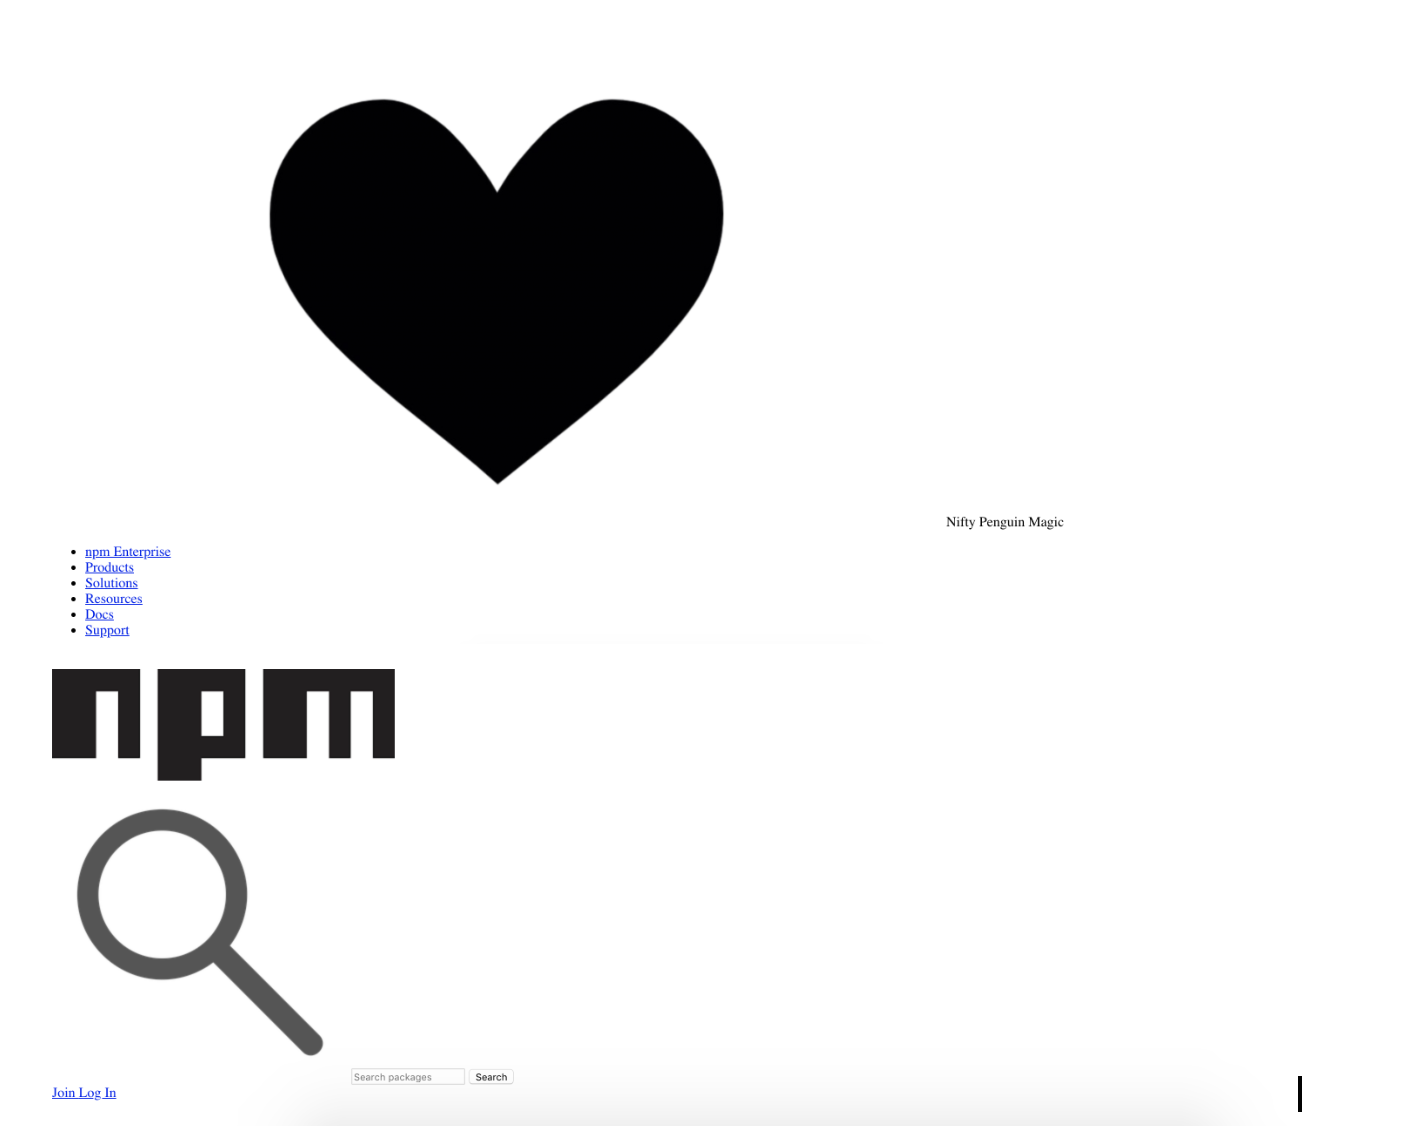
It might seem like a joke, but this is our goal in this iteration:


The very first step is deciding how to structure the page and picking the correct semantic tags. In general, choosing the right tags will make your job easier in the next step when the time comes to do some styling.
Our recommendation is to try to keep it as simple as possible. Try to identify the different sections, and add id's or classes to each <div>, <section>, <ul>, or <header> block elements to identify these elements. Here is suggested guideline but you might have something on your mind that is different from this - bring it up.
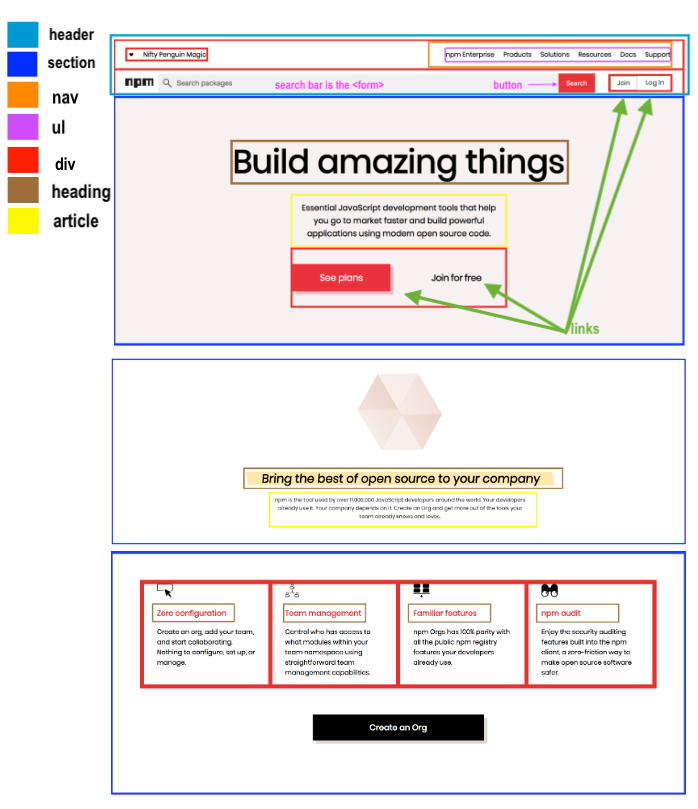
Your task in this iteration will be to create the header and nav, which are the first two elements of the page. As you can see on the image above, the first element inside the body is header and it is composed of two divs:
- the upper div contains another div with image and some text, and besides this, it has nav tag with list displayed horizontally
- the bottom div has the logo, search bar (which is form) and some buttons all the way left.

However, remember, on the image above styles are already applied so our final result won't be quite the same.
We could try to represent this part of the website with the following:
<header>
  <div>
    <div>
      <img class="blackHeart" src="LINK TO IMAGE GOES HERE" alt="black heart" />
      <span> Nifty Penguin Magic </span>
    </div>
    <nav>
      <ul>
        <li><a href="#"> npm Enterprise </a></li>
        <li><a href="#"> Products </a></li>
        <li><a href="#"> Solutions </a></li>
        <li><a href="#"> Resources </a></li>
        <li><a href="#"> Docs </a></li>
        <li><a href="#"> Support </a></li>
      </ul>
    </nav>
  </div>

  <div>
    <!-- add logo, search bar and buttons (or links and style them as buttons later) -->
  </div>
</header>
When done, you should get something similar to this:
You're ready to move to the next iteration. 🙌
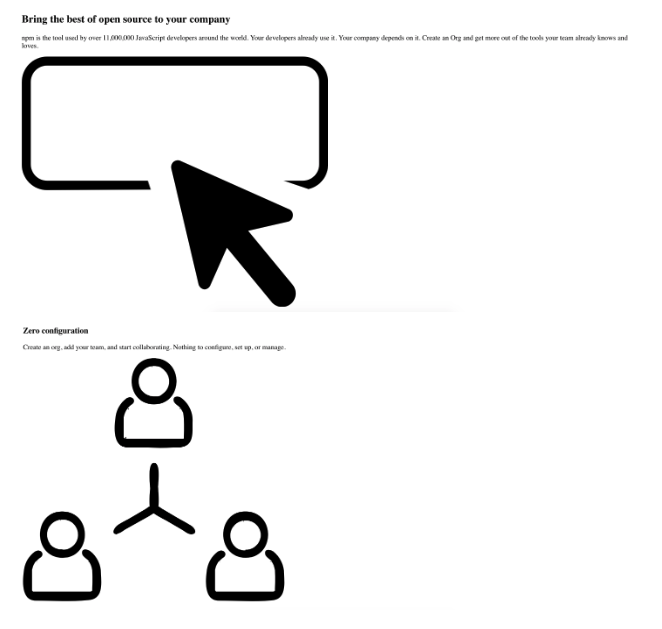
Take a look at the image with market HTML elements on it one more time, and you can see we have three sections below the header. Create section tags and give each of them ids so you can identify them quickly.
The content for each of these sections is already in the index.html but you have to organize it properly making sure there are headings, paragraphs, divs, etc.
All images can be found in your images folder!
You can see the final result on the gif at the beginning of this exercise.
The time has come! Let's add some styles and make it pretty! 💅
As you might recall, the first thing we have to do to add styles to our page is to create a style.css file and link it to our index.html.
So let's begin by creating a new file, in the same folder as our HTML file, and name it style.css. Now, link the file to the index.html.
Hint: In case you need to refresh your memory on how to do this, check Introduction to CSS lesson.
Hint2: You might want to consider adding the following line to your CSS, just to confirm that you have linked it correctly:
body {
  background-color: red;
}
Refresh the page in Chrome, and if your style.css is linked properly, the page should turn red. (You can delete the background-color property we added as a test once you have confirmed it's working.) 😉
:::info Before we move forward, add at the very top of your style.css file the following lines:
@import url('https://fonts.googleapis.com/css?family=Poppins');

body {
  font-family: 'Poppins';
}
:::
This will be the default font you will be using on the entire webpage.
Now we are ready to start adding some styles to our page.
In the first part of this exercise, you created the header and inside it the navbar. Now we have to add some styles to make it more like this:
We'll help you style the part of the code we previously provided for you - the upper div of the header tag.
header > div {
  padding: 0 25px;
  display: flex;
  justify-content: space-between;
  align-items: center;
  border-bottom: 1px solid lightgray;
}

nav {
  width: 600px;
}

nav ul {
  list-style: none;
  display: flex;
  justify-content: space-between;
  align-items: center;
}

nav a {
  text-decoration: none;
  color: black;
}

.blackHeart {
  width: 20px;
  margin-right: 1rem;
}
Useful information:
- form label color: rgba(0,0,0,.05)
- form input color: rgba(0,0,0,.05)
- form button background color: #fb3e44
- form button letters color: white
As you can see, a lot of flexbox is involved - if needed, revise the lesson again or sneak peek into the official docs (use your Google skills) or use this resource as a help.
Make sure to use flexbox at any time where you need to position elements on a specific place - practice as much as possible: the more you understand now, the easier will be later.
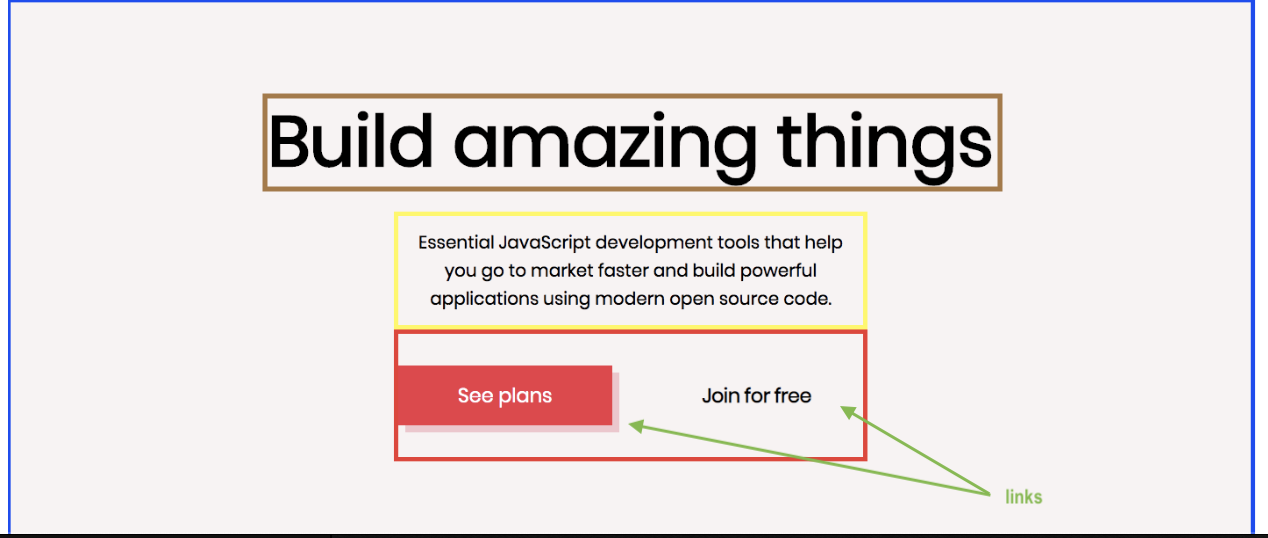
In this section, as you can see everything is centered. You can add some flexbox rules to the id you attached to this section such is display: flex; and justify-content: center;. But this is just the beginning - you still have to set align-items and flex-direction.
Useful information:
- suggested height for this section: 600px
- background color: rgba(232,217,217,.3)
- "See plans" button background color: #FB3B49
- "See plans" button box shadow: 8px 8px 0 rgba(251,59,73,.2)
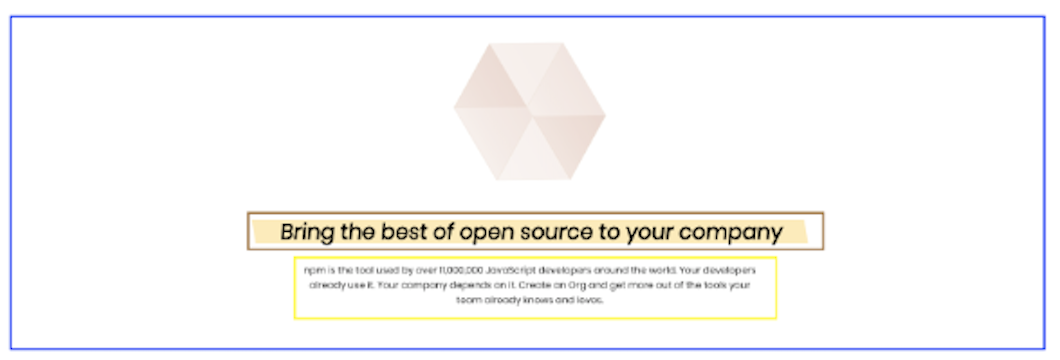
This section has pretty much the same layout as the previous - some code to be reused 😉.
Useful information:
- heading background color: rgba(255,204,53,.4)
- to get the transform of the yellow background in the left-hand direction use: transform: skew(9deg,0deg);
- to get it in the opposite direction of the letters, the way we need it on the page, use: font-style: italic;
- to additionally fine-tune the position of each element, use margin property.
Again use a lot of flexbox to get the right position of elements - direction, justify-content, align-items.
Inspect elements to get the right size of the font for each of them. However, this is not a crucial thing, so don't spend too much time on it - focus on positioning primary.

Useful information:
- color of the letters in each heading in this section: #ED1C24
- "Create an Org" box shadow: 8px 8px 0 rgba(128,83,35,.2)
- "Create an Org" letters color: white
If you didn't add, commit and push the changes you made, this is the last call. 😄
And at the same time, if you didn't create a pull request this is the time for that as well.
Your TAs will check up your work and provide feedback.
Once again, a friendly reminder: You don't have to wait to finish everything in order to follow the steps listed in the guidelines. In a moment when you've made a first significant step in working on this assessment, we advise you to make a pull request. Starting from that moment, every change you make will be automatically added to that pull request and will be visible to your TAs for a checkup.
In this exercise, you've built a clone of a piece of the npm home page. This site is very complex so if you managed to make it look anything like the original, good job! 🏆
This concludes the HTML / CSS module. We are proud of you!
The Ironhack team ❤️

