
VUEG
为vue-router添加转场效果,只需要Vue.use(vueg),即可获得转场效果,并能够根据url深度(/)和历史记录判断是前进和后退。
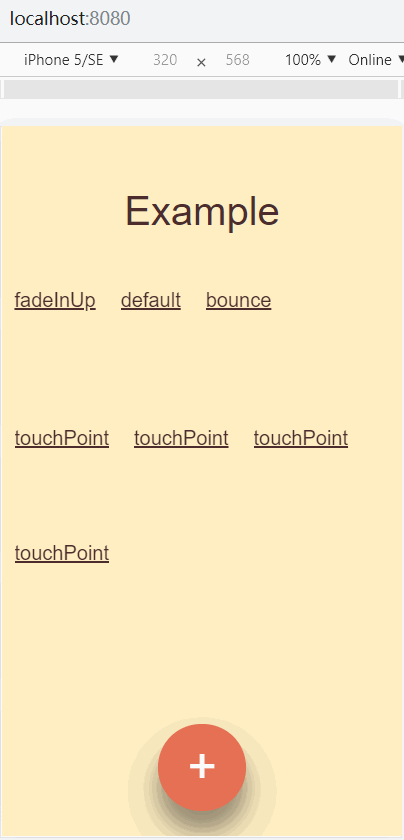
效果图:
项目实战效果:

使用方法
0、安装
npm i vueg -G
1、引入插件
 import Vue from 'vue'
 import App from './App'
 import router from './router'

 //  ↓↓↓↓↓↓↓↓↓↓↓↓
 import vueg from 'vueg'
 import 'vueg/css/transition-min.css'
 Vue.use(vueg, router)     //←注意这一句应该在router实例化(router = new VueRouter()之后
现在,app已经具备默认的转场特效能力了。
2、<router-view>上添加v-transition="false",可以禁用动画,如:
配置项 / Config
    const options={
        duration: '0.3',              //转场动画时长,默认为0.3,单位秒
        firstEntryDisable: false,     //值为true时禁用首次进入应用时的渐现动画,默认为false
        firstEntryDuration: '.6',     //首次进入应用时的渐现动画时长,默认为.6
        forwardAnim: 'fadeInRight',   //前进动画,默认为fadeInRight
        backAnim: 'fadeInLeft',       //后退动画,默认为fedeInLeft
        sameDepthDisable: false,      //url深度相同时禁用动画,默认为false
        tabs: [{
                name:'home'
            },{
                name:'my'
            }],                       //默认为[],'name'对应路由的name,以实现类似app中点击tab页面水平转场效果,如tabs[1]到tabs[0],会使用backAnim动画,tabs[1]到tabs[2],会使用forwardAnim动画
        tabsDisable: false,           //值为true时,tabs间的转场没有动画,默认为false
        shadow:true,                  //值为false,转场时没有阴影的层次效果
        disable: false,               //禁用转场动画,默认为false,嵌套路由默认为true
    }
    Vue.use(vueg, router,options)
forwardAnim 、 backAnim 提供以下值:
`touchPoint` //页面从触摸点放大载入的转场效果

以及animate.css中的值
`bounce`
`flash`
`pulse`
`rubberBand`
`shake`
`headShake`
`swing`
...略略略...
`slideInDown`
`slideInLeft`
`slideOutDown`
`slideOutLeft`
`slideOutRight`
`slideOutUp`
预览效果,以及查看全部可用值,请访问:https://daneden.github.io/animate.css
options还可以在每个组件的data中配置,举例:
    data(){
        return {
            vuegConfig:{
                forwardAnim:'bounceInUp',  //options所有配置可以写在这个对象里,会覆盖全局的配置
                disable:false              //对于嵌套路由,默认为关闭动画,需要在组件的data.vuegConfig中配置disable为false启用
            }
    }
}
其他:
1、基于vue v2.3.4版本和webkit内核浏览器开发、调试;
2、非新项目使用这个插件后,因为css问题,可能造成原本元素在转场动画时有些地方排版错乱,那就需要调整css;
3、每个路由匹配的组件模板高度最好大于等于屏幕高度,否则转场不好看,可以为<router-view> 添加class,设置min-height:100vh;
4、插件20Kb左右大小,其中css 17Kb,如果想减小,可以编辑vueg/css/animate.css ,将不需要的动画样式删除,然后在vueg/下运行npm install-gulp css,即可;
5、如果你想只在个别页面中使用转场效果,可以将全局配置中的disable设为false,个别页面中设置disable为true
6、配置项中forwardAnim 、 backAnim 的值本质上是css类名,所以你也可以自己写css动画,然后给定你自定义的类名作为值;


