blog's People
Stargazers


Watchers


blog's Issues
Vue全家桶实现原理简要梳理
网上Vue源码解读的文章有很多,但涉及到Vuex、vue-router的就比较少了。本文主要对描述了Vue的整体代码结构,用两个例子分别描述Vue实例化及ssr的流程;接着阐述Vue插件的注册方法,Vuex、vue-router大致实现原理。
Vue
如何用例子走一遍Vue代码
1.clone vue代码到本地
2.在example目录中写上任意你想要测试的例子
3.npm run dev && node e2e/test/runner.js
目录结构
- root/
- compiler/--------------------解析template,生成render函数和ast
- parser/-------------------正则遍历template里的字符串,通过栈记录元素关系,生成ast
- codegen/-----------------根据ast生成render函数
- directives/---------------解析ast中的v-bind,v-model指令,生成对应render函数
- index.js
- core/---------------------Vue实例相关,vue源码核心
- components/------------通用组件,keep-alive
- gloabal-api/----------注册Vue构造函数上的静态方法,比如Vue.install、Vue.set...
- instance/-------------注册vue.prototype,以及构造函数
- observer/-------------数据双向绑定相关,主要由watcher、observer、dep组成
- util/-------------工具
- vdom/-------------vnode相关,包含createVnode,patchNode等
- index.js
- platforms------------core基础上扩展
- web-------------将core中的代码包装成web平台所需的方法,比如Vue.prototype.$mount实际包装了core中的$mount
- weex
- server-----------ssr相关,执行Vue代码,生成Vue实例;输出流或字符串,传递给renderNode,renderNode通过Vnode生成各种HTML标签
- shared------------上述公共的工具
- util.js
- compiler/--------------------解析template,生成render函数和ast
vue构造函数
我们使用vue时都会先实例化一个Vue对象,先从Vue的构造函数说起。构造函数及原型相关代码绝大部分都在core/instance下。
至于怎么找到Vue构造函数的位置,运用从后向前的方法,从package.json一点点往会看就好了。
首先看core/instance/index.js文件,该文件主要定义了Vue的构造函数,并且初始化Vue.prototype中的一些方法。
import { initMixin } from './init'
import { stateMixin } from './state'
import { renderMixin } from './render'
import { eventsMixin } from './events'
import { lifecycleMixin } from './lifecycle'
import { warn } from '../util/index'

function Vue (options) {
  if (process.env.NODE_ENV !== 'production' &&
    !(this instanceof Vue)) {
    warn('Vue is a constructor and should be called with the `new` keyword')
  }
  /*初始化*/
  this._init(options)
}

initMixin(Vue)
stateMixin(Vue)
eventsMixin(Vue)
lifecycleMixin(Vue)
renderMixin(Vue)

export default Vue
initMixin就做了一件事情,在Vue的原型上增加_init方法,构造Vue实例的时候会调用这个_init方法来初始化Vue实例,下面常用使用原理中会详细说一下这一块。
stateMixin中主要声明了Vue.prototype.$data、Vue.prototype.$props、Vue.prototype.$set、Vue.prototype.$watch
export function stateMixin (Vue: Class<Component>) {
  // flow somehow has problems with directly declared definition object
  // when using Object.defineProperty, so we have to procedurally build up
  // the object here.
  const dataDef = {}
  dataDef.get = function () { return this._data }
  const propsDef = {}
  propsDef.get = function () { return this._props }
  ......
  Object.defineProperty(Vue.prototype, '$data', dataDef)
  Object.defineProperty(Vue.prototype, '$props', propsDef)

  Vue.prototype.$set = set
  Vue.prototype.$delete = del

  // 数据绑定相关后面会详细解读
  Vue.prototype.$watch = function (
    expOrFn: string | Function,
    cb: Function,
    options?: Object
  ): Function {
    ......
  }
eventsMixin主要定义了Vue.prototype.$on/$off/$once,原理就是利用观察者模型,为每一个event维护一个观察队列,存放在Vue._events中。
lifecycleMixin中定义了我们Vue中经常用到的Vue.prototype._update方法,每当我们定义的组件data发生变化或其他原因需要重新渲染时,Vue会调用该方法,对Vnode做diff和patch操作。
export function lifecycleMixin (Vue: Class<Component>) {
  /*更新节点*/
  Vue.prototype._update = function (vnode: VNode, hydrating?: boolean) {
    const vm: Component = this
    /*如果已经该组件已经挂载过了则代表进入这个步骤是个更新的过程,触发beforeUpdate钩子*/
    if (vm._isMounted) {
      callHook(vm, 'beforeUpdate')
    }
    const prevEl = vm.$el
    const prevVnode = vm._vnode
    const prevActiveInstance = activeInstance
    activeInstance = vm
    vm._vnode = vnode
    // Vue.prototype.__patch__ is injected in entry points
    // based on the rendering backend used.
    /*基于后端渲染Vue.prototype.__patch__被用来作为一个入口*/
    if (!prevVnode) {
      // initial render
      vm.$el = vm.__patch__(
        vm.$el, vnode, hydrating, false /* removeOnly */,
        vm.$options._parentElm,
        vm.$options._refElm
      )
    } else {
      // updates
      vm.$el = vm.__patch__(prevVnode, vnode)
    }
    activeInstance = prevActiveInstance
    // update __vue__ reference
    /*更新新的实例对象的__vue__*/
    if (prevEl) {
      prevEl.__vue__ = null
    }
    if (vm.$el) {
      vm.$el.__vue__ = vm
    }
    // if parent is an HOC, update its $el as well
    if (vm.$vnode && vm.$parent && vm.$vnode === vm.$parent._vnode) {
      vm.$parent.$el = vm.$el
    }
    // updated hook is called by the scheduler to ensure that children are
    // updated in a parent's updated hook.
  }

  Vue.prototype.$forceUpdate = function () {
    const vm: Component = this
    if (vm._watcher) {
      vm._watcher.update()
    }
  }

  Vue.prototype.$destroy = function () {
    const vm: Component = this
    if (vm._isBeingDestroyed) {
      return
    }
    /* 调用beforeDestroy钩子 */
    callHook(vm, 'beforeDestroy')
    /* 标志位 */
    vm._isBeingDestroyed = true
    // remove self from parent
    const parent = vm.$parent
    if (parent && !parent._isBeingDestroyed && !vm.$options.abstract) {
      remove(parent.$children, vm)
    }
    // teardown watchers
    /* 该组件下的所有Watcher从其所在的Dep中释放 */
    if (vm._watcher) {
      vm._watcher.teardown()
    }
    let i = vm._watchers.length
    while (i--) {
      vm._watchers[i].teardown()
    }
    // remove reference from data ob
    // frozen object may not have observer.
    if (vm._data.__ob__) {
      vm._data.__ob__.vmCount--
    }
    // call the last hook...
    vm._isDestroyed = true
    // invoke destroy hooks on current rendered tree
    vm.__patch__(vm._vnode, null)
    // fire destroyed hook
    /* 调用destroyed钩子 */
    callHook(vm, 'destroyed')
    // turn off all instance listeners.
    /* 移除所有事件监听 */
    vm.$off()
    // remove __vue__ reference
    if (vm.$el) {
      vm.$el.__vue__ = null
    }
    // remove reference to DOM nodes (prevents leak)
    vm.$options._parentElm = vm.$options._refElm = null
  }
}
renderMixin中定义了Vue.prototype._render等方法,_render()调用实例化时传入的render方法,生成VNode。经常与Vue.prototype.update一起使用。
// 组件更新时调用
vm._update(vm._render(), hydrating);
常见使用原理解读
创建实例
// boot up the demo
var demo = new Vue({
  el: '#demo',
  data: {
    treeData: data,
    a: 1
  },
  computed: {
    hello() {
      return this.treeData;
    }
  },
  render(createElement) {
    // @returns {VNode}
    return createElement(
      // {String | Object | Function}
      // 一个 HTML 标签字符串,组件选项对象,或者一个返回值类型为 String/Object 的函数,必要参数
      'div',
      // {Object}
      // 一个包含模板相关属性的数据对象
      // 这样,您可以在 template 中使用这些属性。可选参数。
      {
        // (详情见下一节)
      },
      // {String | Array}
      // 子节点 (VNodes),由 `createElement()` 构建而成,
      // 或使用字符串来生成“文本节点”。可选参数。
      [
        // createElement(Profile3),
        '先写一些文字',
        createElement('h1', '一则头条'),
        // createElement(Profile),
        // createElement(Profile4)
      ]
    )
  }
})
new Vue()其实就是调用构造函数中的this._init(),this._init()就是调用上述instance/init中声明的Vue.prototype._init
export function initMixin (Vue: Class<Component>) {
  Vue.prototype._init = function (options?: Object) {
    const vm: Component = this
    ......

    // expose real self
    vm._self = vm
    /*初始化生命周期*/
    initLifecycle(vm)
    /*初始化事件*/
    initEvents(vm)
    /*初始化render*/
    initRender(vm)
    /*调用beforeCreate钩子函数并且触发beforeCreate钩子事件*/
    callHook(vm, 'beforeCreate')
    initInjections(vm) // resolve injections before data/props
    /*初始化props、methods、data、computed与watch*/
    initState(vm)
    initProvide(vm) // resolve provide after data/props
    /*调用created钩子函数并且触发created钩子事件*/
    callHook(vm, 'created')

    /* istanbul ignore if */
    if (process.env.NODE_ENV !== 'production' && config.performance && mark) {
      /*格式化组件名*/
      vm._name = formatComponentName(vm, false)
      mark(endTag)
      measure(`${vm._name} init`, startTag, endTag)
    }

    if (vm.$options.el) {
      /*挂载组件*/
      vm.$mount(vm.$options.el)
    }
  }
}
initLifecycle,主要把自己push到parent.$children中
/*初始化生命周期*/
export function initLifecycle (vm: Component) {
  const options = vm.$options

  // locate first non-abstract parent
  /* 将vm对象存储到parent组件中(保证parent组件是非抽象组件,比如keep-alive) */
  let parent = options.parent
  if (parent && !options.abstract) {
    while (parent.$options.abstract && parent.$parent) {
      parent = parent.$parent
    }
    parent.$children.push(vm)
  }

  ......
}
initEvents,主要初始化了vm._events存放事件。$on()方法就是将事件监听存放在这里。
/*初始化事件*/
export function initEvents (vm: Component) {
  /*在vm上创建一个_events对象,用来存放事件。*/
  vm._events = Object.create(null)
	......
}
initRender,定义了vm.$createElement方法,我们调用render()方法时,传入参数就是vm.$createElement。
/*初始化render*/
export function initRender (vm: Component) {
 ......
  /*将createElement函数绑定到该实例上,该vm存在闭包中,不可修改,vm实例则固定。这样我们就可以得到正确的上下文渲染*/
  vm._c = (a, b, c, d) => createElement(vm, a, b, c, d, false)
  // normalization is always applied for the public version, used in
  // user-written render functions.
  /*常规方法呗用于公共版本,被用来作为用户界面的渲染方法*/
  vm.$createElement = (a, b, c, d) => createElement(vm, a, b, c, d, true)
}
initState,这里主要initProps,initComputed,initData。我们首先介绍initData,并借initData来解读一下Vue的数据响应系统。
initData调用observer/index.js中的observe方法,生成observer对象,observer遍历data中的数据,把每一项数据都变成响应式的。
initData,主要就看最后一行调用observe()。
/*initData*/
function initData (vm: Component) {
  /*得到data数据*/
  let data = vm.$options.data
  data = vm._data = typeof data === 'function'
    ? getData(data, vm)
    : data || {}

  /*对对象类型进行严格检查,只有当对象是纯javascript对象的时候返回true*/
  if (!isPlainObject(data)) {
    data = {}
    process.env.NODE_ENV !== 'production' && warn(
      'data functions should return an object:\n' +
      'https://vuejs.org/v2/guide/components.html#data-Must-Be-a-Function',
      vm
    )
  }
  // proxy data on instance
  /*遍历data对象*/
  const keys = Object.keys(data)
  const props = vm.$options.props
  let i = keys.length

  //遍历data中的数据
  while (i--) {

    /*保证data中的key不与props中的key重复,props优先,如果有冲突会产生warning*/
    if (props && hasOwn(props, keys[i])) {
      process.env.NODE_ENV !== 'production' && warn(
        `The data property "${keys[i]}" is already declared as a prop. ` +
        `Use prop default value instead.`,
        vm
      )
    } else if (!isReserved(keys[i])) {
      /*判断是否是保留字段*/

      /*这里是我们前面讲过的代理,将data上面的属性代理到了vm实例上*/
      proxy(vm, `_data`, keys[i])
    }
  }
  // observe data
  /*从这里开始我们要observe了,开始对数据进行绑定,下面会进行递归observe进行对深层对象的绑定。*/
  observe(data, true /* asRootData */)
}
observe中new Observer(), new Observer()会将data中的所有数据调用defineReactive变成响应式。主要原理就是利用Object.defineProperty,get()时增加依赖,也就是观察者,set时通知观察者。
/*为对象defineProperty上在变化时通知的属性*/
export function defineReactive (
  obj: Object,
  key: string,
  val: any,
  customSetter?: Function
) {
  /*在闭包中定义一个dep对象*/
  const dep = new Dep()

  const property = Object.getOwnPropertyDescriptor(obj, key)
  if (property && property.configurable === false) {
    return
  }

  /*如果之前该对象已经预设了getter以及setter函数则将其取出来,新定义的getter/setter中会将其执行,保证不会覆盖之前已经定义的getter/setter。*/
  // cater for pre-defined getter/setters
  const getter = property && property.get
  const setter = property && property.set

  /*对象的子对象递归进行observe并返回子节点的Observer对象*/
  let childOb = observe(val)
  Object.defineProperty(obj, key, {
    enumerable: true,
    configurable: true,
    get: function reactiveGetter () {
      /*如果原本对象拥有getter方法则执行*/
      const value = getter ? getter.call(obj) : val
      if (Dep.target) {
        /*进行依赖收集*/
        dep.depend()
        if (childOb) {
          /*子对象进行依赖收集,其实就是将同一个watcher观察者实例放进了两个depend中,一个是正在本身闭包中的depend,另一个是子元素的depend*/
          childOb.dep.depend()
        }
        if (Array.isArray(value)) {
          /*是数组则需要对每一个成员都进行依赖收集,如果数组的成员还是数组,则递归。*/
          dependArray(value)
        }
      }
      return value
    },
    set: function reactiveSetter (newVal) {
      /*通过getter方法获取当前值,与新值进行比较,一致则不需要执行下面的操作*/
      const value = getter ? getter.call(obj) : val
      /* eslint-disable no-self-compare */
      if (newVal === value || (newVal !== newVal && value !== value)) {
        return
      }
      /* eslint-enable no-self-compare */
      if (process.env.NODE_ENV !== 'production' && customSetter) {
        customSetter()
      }
      if (setter) {
        /*如果原本对象拥有setter方法则执行setter*/
        setter.call(obj, newVal)
      } else {
        val = newVal
      }
      /*新的值需要重新进行observe,保证数据响应式*/
      childOb = observe(newVal)
      /*dep对象通知所有的观察者*/
      dep.notify()
    }
  })
}
我们在声明组件时,经常使用watch,实际调用了new watcher(a, callback),watcher相当于一个观察者。我们来看watcher里的代码,其实也不难理解,watcher就是一个订阅者。关键在于watcher如何与observer联系在一起,observer中的数据set()时,如何找到对应的watcher呢?dep出现了!注意下面的get()中的pushTarget(),该方法就是将自己放到dep模块中的全局变量上,然后调用this.getter.call(vm, vm),也就是调用了obsever的get(),get()中取得dep中的全局变量,加到了自身的dep中,当set时,会遍历执行dep中存放所有watcher的run()方法,执行callback。
watcher和dep代码如下。
 /*
    一个解析表达式,进行依赖收集的观察者,同时在表达式数据变更时触发回调函数。它被用于$watch api以及指令
 */
export default class Watcher {

  constructor (
    vm: Component,
    expOrFn: string | Function,
    cb: Function,
    options?: Object
  ) {
    this.vm = vm
    /*_watchers存放订阅者实例*/
    vm._watchers.push(this)
    ......
    this.value = this.lazy
      ? undefined
      : this.get()
  }

  /**
   * Evaluate the getter, and re-collect dependencies.
   */
   /*获得getter的值并且重新进行依赖收集*/
  get () {
  	......

  	/*将自身watcher观察者实例设置给Dep.target,用以依赖收集。*/
    pushTarget(this)

    ......

    value = this.getter.call(vm, vm)

    ......
    if (this.deep) {
      /*递归每一个对象或者数组,触发它们的getter,使得对象或数组的每一个成员都被依赖收集,形成一个“深(deep)”依赖关系*/
      traverse(value)
    }

    /*将观察者实例从target栈中取出并设置给Dep.target*/
    popTarget()
    this.cleanupDeps()
    return value
  }


   /*
      调度者工作接口,将被调度者回调。
    */
  run () {
  	......
    this.cb.call(this.vm, value, oldValue)
    ......
  }

  /**
   * Evaluate the value of the watcher.
   * This only gets called for lazy watchers.
   */
   /*获取观察者的值*/
  evaluate () {
    this.value = this.get()
    this.dirty = false
  }
export default class Dep {
  constructor () {
    this.id = uid++
    this.subs = []
  }

  /*添加一个观察者对象*/
  addSub (sub: Watcher) {
    this.subs.push(sub)
  }

  /*移除一个观察者对象*/
  removeSub (sub: Watcher) {
    remove(this.subs, sub)
  }

  /*依赖收集,当存在Dep.target的时候添加观察者对象*/
  depend () {
    if (Dep.target) {
      Dep.target.addDep(this)
    }
  }

  /*通知所有订阅者*/
  notify () {
    // stabilize the subscriber list first
    const subs = this.subs.slice()
    for (let i = 0, l = subs.length; i < l; i++) {
      subs[i].update()
    }
  }
}

/*依赖收集完需要将Dep.target设为null,防止后面重复添加依赖。*/
Dep.target = null
const targetStack = []

/*将watcher观察者实例设置给Dep.target,用以依赖收集。同时将该实例存入target栈中*/
export function pushTarget (_target: Watcher) {
  if (Dep.target) targetStack.push(Dep.target)
  Dep.target = _target
}

/*将观察者实例从target栈中取出并设置给Dep.target*/
export function popTarget () {
  Dep.target = targetStack.pop()
}
总结一下initData及Vue的响应式数据。
1.observe(data) => defineReactive
2.watch(a, callback) => new Watcher() => pushTarget(this) => getter.call()
3.getter()中执行dep.depend,收集pushTarget的watcher
4.当执行a=3时,遍历dep中存储的所有watcher,执行其监听函数。
我们接下来看initComputed,其实就是new了一个watcher,然后执行computed函数时会调用其中所有依赖数据的getter,从而将该watcher加入到其依赖数据的dep中。
/*初始化computed*/
function initComputed (vm: Component, computed: Object) {
  const watchers = vm._computedWatchers = Object.create(null)

  for (const key in computed) {
    const userDef = computed[key]
    /*
      计算属性可能是一个function,也有可能设置了get以及set的对象。
      可以参考 https://cn.vuejs.org/v2/guide/computed.html#计算-setter
    */
    let getter = typeof userDef === 'function' ? userDef : userDef.get
    if (process.env.NODE_ENV !== 'production') {
      /*getter不存在的时候抛出warning并且给getter赋空函数*/
      if (getter === undefined) {
        warn(
          `No getter function has been defined for computed property "${key}".`,
          vm
        )
        getter = noop
      }
    }
    // create internal watcher for the computed property.
    /*
      为计算属性创建一个内部的监视器Watcher,保存在vm实例的_computedWatchers中
      这里的computedWatcherOptions参数传递了一个lazy为true,会使得watch实例的dirty为true
    */
    watchers[key] = new Watcher(vm, getter, noop, computedWatcherOptions)

    // component-defined computed properties are already defined on the
    // component prototype. We only need to define computed properties defined
    // at instantiation here.
    /*组件正在定义的计算属性已经定义在现有组件的原型上则不会进行重复定义*/
    if (!(key in vm)) {
      /*定义计算属性*/
      defineComputed(vm, key, userDef)
    } else if (process.env.NODE_ENV !== 'production') {
      /*如果计算属性与已定义的data或者props中的名称冲突则发出warning*/
      if (key in vm.$data) {
        warn(`The computed property "${key}" is already defined in data.`, vm)
      } else if (vm.$options.props && key in vm.$options.props) {
        warn(`The computed property "${key}" is already defined as a prop.`, vm)
      }
    }
  }
}
声明组件
var Profile3 = Vue.component({
  template: `<div id="demo">
  <button v-on:click="show = !show">
    Toggle
  </button>
  <transition name="fade">
    <p v-if="show">hello</p>
  </transition>
</div>`,
  data: function () {
    return {
      firstName: '',
      lastName: 'White',
      alias: 'Heisenberg',
      show: true
    }
  }
})
这里主要说一下Vue.component方法与Vue.extend方法。
Vue.extend(core/global-api/extend.js), 其实就是寄生组合继承了Vue。
	/*
   使用基础 Vue 构造器,创建一个“子类”。
   其实就是扩展了基础构造器,形成了一个可复用的有指定选项功能的子构造器。
   参数是一个包含组件option的对象。  https://cn.vuejs.org/v2/api/#Vue-extend-options
   */
  Vue.extend = function (extendOptions: Object): Function {
    ......

    /*
      Sub构造函数其实就一个_init方法,这跟Vue的构造方法是一致的,在_init中处理各种数据初始化、生命周期等。
      因为Sub作为一个Vue的扩展构造器,所以基础的功能还是需要保持一致,跟Vue构造器一样在构造函数中初始化_init。
    */
    const Sub = function VueComponent (options) {
      this._init(options)
    }
    /*继承父类*/
    Sub.prototype = Object.create(Super.prototype)
    /*构造函数*/
    Sub.prototype.constructor = Sub
    /*创建一个新的cid*/
    Sub.cid = cid++
    /*将父组件的option与子组件的合并到一起(Vue有一个cid为0的基类,即Vue本身,会将一些默认初始化的option何入)*/
    Sub.options = mergeOptions(
      Super.options,
      extendOptions
    )
    /*利用super标记父类*/
    Sub['super'] = Super

    ......
    return Sub
  }
}
Vue.component与Vue.extend类似,core/global-api/assets.js
if (type === 'component' && isPlainObject(definition)) {
  definition.name = definition.name || id
  definition = this.options._base.extend(definition)// vue.extend
}
组件挂载
在Vue.prototype._init中最后调用了vm.$mount(vm.$options.el)
流程如下:
首先什么事vdom,其实很简单,就是一个组件就是一个vdom对象,维护在Vue中,方便取新老vnode去diff,然后针对性的去渲染。
Vnode:
export default class VNode {

  constructor (
    tag?: string,
    data?: VNodeData,
    children?: ?Array<VNode>,
    text?: string,
    elm?: Node,
    context?: Component,
    componentOptions?: VNodeComponentOptions
  ) {
    /*当前节点的标签名*/
    this.tag = tag
    /*当前节点对应的对象,包含了具体的一些数据信息,是一个VNodeData类型,可以参考VNodeData类型中的数据信息*/
    this.data = data
    /*当前节点的子节点,是一个数组*/
    this.children = children
    /*当前节点的文本*/
    this.text = text
    /*当前虚拟节点对应的真实dom节点*/
    this.elm = elm
    /*当前节点的名字空间*/
    this.ns = undefined
    /*当前节点的编译作用域*/
    this.context = context
    /*函数化组件作用域*/
    this.functionalContext = undefined
    /*节点的key属性,被当作节点的标志,用以优化*/
    this.key = data && data.key
    /*组件的option选项*/
    this.componentOptions = componentOptions
    /*当前节点对应的组件的实例*/
    this.componentInstance = undefined
    /*当前节点的父节点*/
    this.parent = undefined
    /*简而言之就是是否为原生HTML或只是普通文本,innerHTML的时候为true,textContent的时候为false*/
    this.raw = false
    /*是否为静态节点*/
    this.isStatic = false
    /*是否作为跟节点插入*/
    this.isRootInsert = true
    /*是否为注释节点*/
    this.isComment = false
    /*是否为克隆节点*/
    this.isCloned = false
    /*是否有v-once指令*/
    this.isOnce = false
  }

  // DEPRECATED: alias for componentInstance for backwards compat.
  /* istanbul ignore next */
  get child (): Component | void {
    return this.componentInstance
  }
}
渲染(patch)主要逻辑大致如下
patch
  function patch (oldVnode, vnode, hydrating, removeOnly, parentElm, refElm) {
    /*vnode不存在则直接调用销毁钩子*/
    if (isUndef(vnode)) {
      if (isDef(oldVnode)) invokeDestroyHook(oldVnode)
      return
    }

    let isInitialPatch = false
    const insertedVnodeQueue = []

    if (isUndef(oldVnode)) {
      // empty mount (likely as component), create new root element
      /*oldVnode未定义的时候,其实也就是root节点,创建一个新的节点*/
      isInitialPatch = true
      createElm(vnode, insertedVnodeQueue, parentElm, refElm)
    } else {
      /*标记旧的VNode是否有nodeType*/
      const isRealElement = isDef(oldVnode.nodeType)
      if (!isRealElement && sameVnode(oldVnode, vnode)) {
        // patch existing root node
        /*是同一个节点的时候直接修改现有的节点*/
        patchVnode(oldVnode, vnode, insertedVnodeQueue, removeOnly)
      } else {
        createElm(
          vnode,
          insertedVnodeQueue,
          // extremely rare edge case: do not insert if old element is in a
          // leaving transition. Only happens when combining transition +
          // keep-alive + HOCs. (#4590)
          oldElm._leaveCb ? null : parentElm,
          nodeOps.nextSibling(oldElm)
        )
    }

    /*调用insert钩子*/
    invokeInsertHook(vnode, insertedVnodeQueue, isInitialPatch)
    return vnode.elm
  }
patchNode:
/*如果这个VNode节点没有text文本时*/
    if (isUndef(vnode.text)) {
      if (isDef(oldCh) && isDef(ch)) {
        /*新老节点均有children子节点,则对子节点进行diff操作,调用updateChildren*/
        if (oldCh !== ch) updateChildren(elm, oldCh, ch, insertedVnodeQueue, removeOnly)
      } else if (isDef(ch)) {
        /*如果老节点没有子节点而新节点存在子节点,先清空elm的文本内容,然后为当前节点加入子节点*/
        if (isDef(oldVnode.text)) nodeOps.setTextContent(elm, '')
        addVnodes(elm, null, ch, 0, ch.length - 1, insertedVnodeQueue)
      } else if (isDef(oldCh)) {
        /*当新节点没有子节点而老节点有子节点的时候,则移除所有ele的子节点*/
        removeVnodes(elm, oldCh, 0, oldCh.length - 1)
      } else if (isDef(oldVnode.text)) {
        /*当新老节点都无子节点的时候,只是文本的替换,因为这个逻辑中新节点text不存在,所以直接去除ele的文本*/
        nodeOps.setTextContent(elm, '')
      }
    } else if (oldVnode.text !== vnode.text) {
      /*当新老节点text不一样时,直接替换这段文本*/
      nodeOps.setTextContent(elm, vnode.text)
    }
如果两个节点都有children, updateChildren(elm, oldCh, ch, insertedVnodeQueue, removeOnly)
function updateChildren (parentElm, oldCh, newCh, insertedVnodeQueue, removeOnly) {
    let oldStartIdx = 0
    let newStartIdx = 0
    let oldEndIdx = oldCh.length - 1
    let oldStartVnode = oldCh[0]
    let oldEndVnode = oldCh[oldEndIdx]
    let newEndIdx = newCh.length - 1
    let newStartVnode = newCh[0]
    let newEndVnode = newCh[newEndIdx]
    let oldKeyToIdx, idxInOld, elmToMove, refElm

    // removeOnly is a special flag used only by <transition-group>
    // to ensure removed elements stay in correct relative positions
    // during leaving transitions
    const canMove = !removeOnly

    while (oldStartIdx <= oldEndIdx && newStartIdx <= newEndIdx) {
      if (isUndef(oldStartVnode)) {
        oldStartVnode = oldCh[++oldStartIdx] // Vnode has been moved left
      } else if (isUndef(oldEndVnode)) {
        oldEndVnode = oldCh[--oldEndIdx]
      } else if (sameVnode(oldStartVnode, newStartVnode)) {
        /*前四种情况其实是指定key的时候,判定为同一个VNode,则直接patchVnode即可,分别比较oldCh以及newCh的两头节点2*2=4种情况*/
        patchVnode(oldStartVnode, newStartVnode, insertedVnodeQueue)
        oldStartVnode = oldCh[++oldStartIdx]
        newStartVnode = newCh[++newStartIdx]
      } else if (sameVnode(oldEndVnode, newEndVnode)) {
        patchVnode(oldEndVnode, newEndVnode, insertedVnodeQueue)
        oldEndVnode = oldCh[--oldEndIdx]
        newEndVnode = newCh[--newEndIdx]
      } else if (sameVnode(oldStartVnode, newEndVnode)) { // Vnode moved right
        patchVnode(oldStartVnode, newEndVnode, insertedVnodeQueue)
        canMove && nodeOps.insertBefore(parentElm, oldStartVnode.elm, nodeOps.nextSibling(oldEndVnode.elm))
        oldStartVnode = oldCh[++oldStartIdx]
        newEndVnode = newCh[--newEndIdx]
      } else if (sameVnode(oldEndVnode, newStartVnode)) { // Vnode moved left
        patchVnode(oldEndVnode, newStartVnode, insertedVnodeQueue)
        canMove && nodeOps.insertBefore(parentElm, oldEndVnode.elm, oldStartVnode.elm)
        oldEndVnode = oldCh[--oldEndIdx]
        newStartVnode = newCh[++newStartIdx]
      } else {
        /*
          生成一个key与旧VNode的key对应的哈希表(只有第一次进来undefined的时候会生成,也为后面检测重复的key值做铺垫)
          比如childre是这样的 [{xx: xx, key: 'key0'}, {xx: xx, key: 'key1'}, {xx: xx, key: 'key2'}]  beginIdx = 0   endIdx = 2
          结果生成{key0: 0, key1: 1, key2: 2}
        */
        if (isUndef(oldKeyToIdx)) oldKeyToIdx = createKeyToOldIdx(oldCh, oldStartIdx, oldEndIdx)
        /*如果newStartVnode新的VNode节点存在key并且这个key在oldVnode中能找到则返回这个节点的idxInOld(即第几个节点,下标)*/
        idxInOld = isDef(newStartVnode.key) ? oldKeyToIdx[newStartVnode.key] : null
        if (isUndef(idxInOld)) { // New element
          /*newStartVnode没有key或者是该key没有在老节点中找到则创建一个新的节点*/
          createElm(newStartVnode, insertedVnodeQueue, parentElm, oldStartVnode.elm)
          newStartVnode = newCh[++newStartIdx]
        } else {
          /*获取同key的老节点*/
          elmToMove = oldCh[idxInOld]
          /* istanbul ignore if */
          if (process.env.NODE_ENV !== 'production' && !elmToMove) {
            /*如果elmToMove不存在说明之前已经有新节点放入过这个key的Dom中,提示可能存在重复的key,确保v-for的时候item有唯一的key值*/
            warn(
              'It seems there are duplicate keys that is causing an update error. ' +
              'Make sure each v-for item has a unique key.'
            )
          }
          if (sameVnode(elmToMove, newStartVnode)) {
            /*如果新VNode与得到的有相同key的节点是同一个VNode则进行patchVnode*/
            patchVnode(elmToMove, newStartVnode, insertedVnodeQueue)
            /*因为已经patchVnode进去了,所以将这个老节点赋值undefined,之后如果还有新节点与该节点key相同可以检测出来提示已有重复的key*/
            oldCh[idxInOld] = undefined
            /*当有标识位canMove实可以直接插入oldStartVnode对应的真实Dom节点前面*/
            canMove && nodeOps.insertBefore(parentElm, newStartVnode.elm, oldStartVnode.elm)
            newStartVnode = newCh[++newStartIdx]
          } else {
            // same key but different element. treat as new element
            /*当新的VNode与找到的同样key的VNode不是sameVNode的时候(比如说tag不一样或者是有不一样type的input标签),创建一个新的节点*/
            createElm(newStartVnode, insertedVnodeQueue, parentElm, oldStartVnode.elm)
            newStartVnode = newCh[++newStartIdx]
          }
        }
      }
    }
    if (oldStartIdx > oldEndIdx) {
      /*全部比较完成以后,发现oldStartIdx > oldEndIdx的话,说明老节点已经遍历完了,新节点比老节点多,所以这时候多出来的新节点需要一个一个创建出来加入到真实Dom中*/
      refElm = isUndef(newCh[newEndIdx + 1]) ? null : newCh[newEndIdx + 1].elm
      addVnodes(parentElm, refElm, newCh, newStartIdx, newEndIdx, insertedVnodeQueue)
    } else if (newStartIdx > newEndIdx) {
      /*如果全部比较完成以后发现newStartIdx > newEndIdx,则说明新节点已经遍历完了,老节点多余新节点,这个时候需要将多余的老节点从真实Dom中移除*/
      removeVnodes(parentElm, oldCh, oldStartIdx, oldEndIdx)
    }
  }
这块网上有很多讲解,篇幅已经够长了,就不在这啰嗦了。推荐Vue 2.0 的 virtual-dom 实现简析
ssr
const clientBundleFileUrl = '/bundle.client.js';
const clientBundleFilePath = path.join(__dirname, '../dist/bundle.client.js');

// Server-Side Bundle File
const serverBundleFilePath = path.join(__dirname, '../dist/bundle.server.js')


// Server-Side Rendering
app.get('/', function (req, res) {
  // const vm = new App({ url: req.url })
  const serverBundleFileCode = fs.readFileSync(serverBundleFilePath, 'utf8');
  const bundleRenderer = vueServerRenderer.createBundleRenderer(serverBundleFileCode);

  // Client-Side Bundle File


  const stream = bundleRenderer.renderToStream()

  res.write(`<!DOCTYPE html><html><head><title>...</title></head><body>`)

  stream.on('data', chunk => {
    console.log(chunk.toString())
    res.write(chunk)
  })

  stream.on('end', () => {
    res.end('</body></html>')
  })
});
流程如下
const renderer = createRenderer(rendererOptions);返回的renderer主要是使用renderNode()方法,根据Vnode各种拼html。
if (isDef(node.tag)) {
    renderElement(node, isRoot, context)
const run = createBundleRunner(entry, files, basedir, runInNewContext)返回一个Promise,在Promise中执行打包后的代码,resolve(app)=>返回实例。
return (userContext = {}) => new Promise(resolve => {
  userContext._registeredComponents = new Set()
  const res = evaluate(entry, createContext(userContext))
  resolve(typeof res === 'function' ? res(userContext) : res)
})
那么我们打包后的ssr代码,如何执行的呢?在createBundleRunner有这样一段代码。其中NativeModule.wrap()方法也是node中包裹模块时使用的方法。
const code = files[filename]
const wrapper = NativeModule.wrap(code)
const script = new vm.Script(wrapper, {
  filename,
  displayErrors: true
})
下面我们来看renderToStream,其实是调用了renderer.renderToStream,下面我们来看renderer.renderToStream。
renderToStream (
  component: Component,
  context?: Object
): stream$Readable {
  if (context) {
    templateRenderer.bindRenderFns(context)
  }
  const renderStream = new RenderStream((write, done) => {
    render(component, write, context, done)
  })
  if (!template) {
    return renderStream
  } else {
    const templateStream = templateRenderer.createStream(context)
    renderStream.on('error', err => {
      templateStream.emit('error', err)
    })
    renderStream.pipe(templateStream)
    return templateStream
  }
}
其中new RenderStream(),RenderStream代码如下
export default class RenderStream extends stream.Readable {

  constructor (render: Function) {
    super()
    this.buffer = ''
    this.render = render
    this.expectedSize = 0

    this.write = createWriteFunction((text, next) => {
      const n = this.expectedSize
      this.buffer += text
      if (this.buffer.length >= n) {
        this.next = next
        this.pushBySize(n)
        return true // we will decide when to call next
      }
      return false
    }, err => {
      this.emit('error', err)
    })

    this.end = () => {
      // the rendering is finished; we should push out the last of the buffer.
      this.done = true
      this.push(this.buffer)
    }
  }

  pushBySize (n: number) {
    const bufferToPush = this.buffer.substring(0, n)
    this.buffer = this.buffer.substring(n)
    this.push(bufferToPush)
  }

  tryRender () {
    try {
      this.render(this.write, this.end)
    } catch (e) {
      this.emit('error', e)
    }
  }

  tryNext () {
    try {
      this.next()
    } catch (e) {
      this.emit('error', e)
    }
  }

  _read (n: number) {
    this.expectedSize = n
    // it's possible that the last chunk added bumped the buffer up to > 2 * n,
    // which means we will need to go through multiple read calls to drain it
    // down to < n.
    if (isTrue(this.done)) {
      this.push(null)
      return
    }
    if (this.buffer.length >= n) {
      this.pushBySize(n)
      return
    }
    if (isUndef(this.next)) {
      // start the rendering chain.
      this.tryRender()
    } else {
      // continue with the rendering.
      this.tryNext()
    }
  }
}
主要看_read()方法。
``
所有实现可读流的实例必须实现readable._read() 方法去获得底层的数据资源。
当 readable._read() 被调用,如果读取的数据是可用的,应该在最开始的实现的时候使用this.push(dataChunk)方法将该数据推入读取队列。_read() 应该一直读取资源直到推送数据方法readable.push()返回false的时候停止。想再次调用_read()方法,需要再次往可读流里面push数据。
RenderStream继承stream.Readable,声明_read读取底层数据,在数据流缓冲队列超过max_size(node实现的16384),this.pushBySize;当steam done之后,this.tryRender
tryRender:
const context = new RenderContext({
    activeInstance: component,
    userContext,
    write, done, renderNode,
    isUnaryTag, modules, directives,
    cache
})
installSSRHelpers(component)
normalizeRender(component)
renderNode(component._render(), true, context)
值得借鉴的地方
1.代码组织结构。Vue的代码耦合度还是比较低的,比如核心的部分都在Core中,在Platforms的web和weex中很方便的对其进行扩展;代码组织也比较清晰,基本一个模块只做一件事情,比如compile中就是compile template的,大家看起来一目了然
2.缓存也是用的不错的,基本上可能重复用到的地方都用了缓存。
Vue插件
Vue中如何自定义插件
Vue中绝大本分插件都是通过Vue.use()方法,该方法传入一个对象作为参数,执行对象的Install方法。
Vue.use = function (plugin: Function | Object) {
    /* istanbul ignore if */
    /*标识位检测该插件是否已经被安装*/
    if (plugin.installed) {
      return
    }
    // additional parameters
    const args = toArray(arguments, 1)
    /*a*/
    args.unshift(this)
    if (typeof plugin.install === 'function') {
      /*install执行插件安装*/
      plugin.install.apply(plugin, args)
    } else if (typeof plugin === 'function') {
      plugin.apply(null, args)
    }
    plugin.installed = true
    return this
}
那么我们一般使用插件时,以Vuex为例,直接在实例化Vue时加入,在组件中直接使用this.$store,这又是如何做到的呢?
一般会在install中注册beforeCreate的钩子,在钩子函数中将options或父组件中的方法或属性赋给自组件。利用了父组件create先于子组件的关系,从上到下的进行注册。下面以Vuex为例。
export default function (Vue) {
  /*获取Vue版本,鉴别Vue1.0还是Vue2.0*/
  const version = Number(Vue.version.split('.')[0])

  if (version >= 2) {
    /*通过mixin将vuexInit混淆到Vue实例的beforeCreate钩子中*/
    Vue.mixin({ beforeCreate: vuexInit })
  } else {
    // override init and inject vuex init procedure
    // for 1.x backwards compatibility.
    /*将vuexInit放入_init中调用*/
    const _init = Vue.prototype._init
    Vue.prototype._init = function (options = {}) {
      options.init = options.init
        ? [vuexInit].concat(options.init)
        : vuexInit
      _init.call(this, options)
    }
  }

  /**
   * Vuex init hook, injected into each instances init hooks list.
   */
   /*Vuex的init钩子,会存入每一个Vue实例等钩子列表*/
  function vuexInit () {
    const options = this.$options
    // store injection
    if (options.store) {
      /*存在store其实代表的就是Root节点,直接执行store(function时)或者使用store(非function)*/
      this.$store = typeof options.store === 'function'
        ? options.store()
        : options.store
    } else if (options.parent && options.parent.$store) {
      /*子组件直接从父组件中获取$store,这样就保证了所有组件都公用了全局的同一份store*/
      this.$store = options.parent.$store
    }
  }
}
Vuex
从store的构造函数说起
constructor (options = {}) {
   ......
    this._modules = new ModuleCollection(options)
    /* 根据namespace存放module */
    this._modulesNamespaceMap = Object.create(null)
    /* 存放订阅者 */
    this._subscribers = []
    /* 用以实现Watch的Vue实例 */
    this._watcherVM = new Vue()

    // bind commit and dispatch to self
    /*将dispatch与commit调用的this绑定为store对象本身,否则在组件内部this.dispatch时的this会指向组件的vm*/
    const store = this
    const { dispatch, commit } = this
    /* 为dispatch与commit绑定this(Store实例本身) */
    this.dispatch = function boundDispatch (type, payload) {
      return dispatch.call(store, type, payload)
    }
    this.commit = function boundCommit (type, payload, options) {
      return commit.call(store, type, payload, options)
    }

    /*初始化根module,这也同时递归注册了所有子modle,收集所有module的getter到_wrappedGetters中去,this._modules.root代表根module才独有保存的Module对象*/
    installModule(this, state, [], this._modules.root)

    ......
  }
this._modules = new ModuleCollection(options),初始化modules,返回一个Module树,数据结构如下:
- rootModule
- _children(k,v对象)
- _rawModule
- state
- namespace(parent/son/xxx/xxx),用path可以用来寻找父State
installModule(this, state, [], this._modules.root),根据上述module树,递归注册mutation,action。。。
/* 遍历注册mutation */
  module.forEachMutation((mutation, key) => {
    const namespacedType = namespace + key
    registerMutation(store, namespacedType, mutation, local)
  })

  /* 遍历注册action */
  module.forEachAction((action, key) => {
    const namespacedType = namespace + key
    registerAction(store, namespacedType, action, local)
  })

  /* 遍历注册getter */
  module.forEachGetter((getter, key) => {
    const namespacedType = namespace + key
    registerGetter(store, namespacedType, getter, local)
  })

  /* 递归安装mudule */
  module.forEachChild((child, key) => {
    installModule(store, rootState, path.concat(key), child, hot)
  })
最终形成Store的数据结构如下:
- _mutations
- { key(nameSpace+key): [] }
- _actions(在里面会执行commit等,所以特意构建了一个LocalContext。里面的type = namespace + type)
- { key(nameSpace+key): [] }
- _modules
mutation和action实现上又什么区别呢?可以从下面看出action执行handle,然后判断是否是Promise来决定返回。
/* 遍历注册mutation */
function registerMutation (store, type, handler, local) {
  /* 所有的mutation会被push进一个数组中,这样相同的mutation就可以调用不同module中的同名的mutation了 */
  const entry = store._mutations[type] || (store._mutations[type] = [])
  entry.push(function wrappedMutationHandler (payload) {
    handler.call(store, local.state, payload)
  })
}
/* 遍历注册action */
function registerAction (store, type, handler, local) {
  /* 取出type对应的action */
  const entry = store._actions[type] || (store._actions[type] = [])
  entry.push(function wrappedActionHandler (payload, cb) {
    let res = handler.call(store, {
      dispatch: local.dispatch,
      commit: local.commit,
      getters: local.getters,
      state: local.state,
      rootGetters: store.getters,
      rootState: store.state
    }, payload, cb)
    /* 判断是否是Promise */
    if (!isPromise(res)) {
      /* 不是Promise对象的时候转化称Promise对象 */
      res = Promise.resolve(res)
    }
    if (store._devtoolHook) {
      /* 存在devtool捕获的时候触发vuex的error给devtool */
      return res.catch(err => {
        store._devtoolHook.emit('vuex:error', err)
        throw err
      })
    } else {
      return res
    }
  })
}
state中的数据是怎样加入到Vue的响应体系中的呢?使用Vue.暴露出得$set。
store._vm = new Vue({
    data: {
      $$state: state
    },
    computed
  })
Vue-router
挂载方法与上述类似,只不过多做了router._init及注册组件router-view和router-link。
/* 混淆进Vue实例,在boforeCreate与destroyed钩子上混淆 */
  Vue.mixin({
    /* boforeCreate钩子 */
    beforeCreate () {
      if (isDef(this.$options.router)) {
        /* 在option上面存在router则代表是根组件 */
        /* 保存跟组件vm */
        this._routerRoot = this
        /* 保存router */
        this._router = this.$options.router
        /* VueRouter对象的init方法 */
        this._router.init(this)
        /* Vue内部方法,为对象defineProperty上在变化时通知的属性 */
        Vue.util.defineReactive(this, '_route', this._router.history.current)
      } else {
        /* 非根组件则直接从父组件中获取 */
        this._routerRoot = (this.$parent && this.$parent._routerRoot) || this
      }
      /* 通过registerRouteInstance方法注册router实例 */
      registerInstance(this, this)
    },
    destroyed () {
      registerInstance(this)
    }
  })

  /* 在Vue的prototype上面绑定$router,这样可以在任意Vue对象中使用this.$router访问,同时经过Object.defineProperty,访问this.$router即访问this._routerRoot._router */
  Object.defineProperty(Vue.prototype, '$router', {
    get () { return this._routerRoot._router }
  })

  /* 以上同理,访问this.$route即访问this._routerRoot._route */
  Object.defineProperty(Vue.prototype, '$route', {
    get () { return this._routerRoot._route }
  })

  /* 注册touter-view以及router-link组件 */
  Vue.component('RouterView', View)
  Vue.component('RouterLink', Link)
我们接下来看一下router的构造函数
constructor (options: RouterOptions = {}) {
    this.app = null
    /* 保存vm实例 */
    this.apps = []
    this.options = options
    this.beforeHooks = []
    this.resolveHooks = []
    this.afterHooks = []
    this.matcher = createMatcher(options.routes || [], this)

    let mode = options.mode || 'hash'
    this.fallback = mode === 'history' && !supportsPushState && options.fallback !== false
    if (this.fallback) {
      mode = 'hash'
    }
    if (!inBrowser) {
      mode = 'abstract'
    }
    this.mode = mode

    switch (mode) {
      case 'history':
        this.history = new HTML5History(this, options.base)
        break
      case 'hash':
        this.history = new HashHistory(this, options.base, this.fallback)
        break
      case 'abstract':
        this.history = new AbstractHistory(this, options.base)
        break
      default:
        if (process.env.NODE_ENV !== 'production') {
          assert(false, `invalid mode: ${mode}`)
        }
    }
  }
this.matcher = createMatcher(options.routes || [], this)根据pathList, pathMap, nameMap来找出跟路由匹配的route对象。
PathMap结构如下:
this.matcher.match用来查找匹配的路由,返回route对象,主要步骤有标准化路由(normalizeLocation)、从pathMap/pathList/nameMap中取响应记录、返回route对象。
参数
RawLocation,currentRoute, redirectedFrom

1.normalizeLocation(raw, currentRoute, false, router)

步骤:resolvePath, resolveQuery,hadleHash
返回
return {
    _normalized: true,
    path,
    query,
    hash
}

resolvePath
处理相对路径的逻辑
const segments = relative.replace(/^\//, '').split('/')
for (let i = 0; i < segments.length; i++) {
    const segment = segments[i]
    if (segment === '..') {
        stack.pop()
     } else if (segment !== '.') {
        stack.push(segment)
    }
}

2.如果有name,直接从nameMap中取出record就行;如果有path,则从遍历pathList,取matchRoute

matchRoute(record.regex, location.path, location.params),将正则匹配到的值赋给params

3.createRoute
_createRoute(record, location, redirectedFrom)


const route: Route = {
    name: location.name || (record && record.name),
    meta: (record && record.meta) || {},
    path: location.path || '/',
    hash: location.hash || '',
    query,
    params: location.params || {},
    fullPath: getFullPath(location, stringifyQuery),
    matched: record ? formatMatch(record) : []
}
router.history,分history/hash/abstract三种,histoy、hash即咱们理解的history和hash,abstract是Vue router自己利用堆栈实现的一套记录路由的方式。大致操作方法如下。
H5:
pushState/replaceState
Hash
window.addEventListener(supportsPushState ? 'popstate' : 'hashchange’

// 拼一个#hash=>pushState/replaceState
Abstract
this.stack = this.stack.slice(0, this.index + 1).concat(route)
router-view和router-link为vue-router默认的组件
首先看router-view,router-view组件在render中首先向上遍历到根结点,找到当前router-view的深度,也就是定义router是children的深度;找到对应组件;render()。
* router-view组件 */
export default {
  name: 'RouterView',
  /*
    https://cn.vuejs.org/v2/api/#functional
    使组件无状态 (没有 data ) 和无实例 (没有 this 上下文)。他们用一个简单的 render 函数返回虚拟节点使他们更容易渲染。
  */
  functional: true,
  props: {
    name: {
      type: String,
      default: 'default'
    }
  },
  render (_, { props, children, parent, data }) {

  ......

    /* _routerRoot中中存放了根组件的实例,这边循环向上级访问,直到访问到根组件,得到depth深度 */
    while (parent && parent._routerRoot !== parent) {
      if (parent.$vnode && parent.$vnode.data.routerView) {
        depth++
      }
      /* 如果_inactive为true,代表是在keep-alive中且是待用(非alive状态) */
      if (parent._inactive) {
        inactive = true
      }
      parent = parent.$parent
    }
    /* 存放route-view组件的深度 */
    data.routerViewDepth = depth

	......

    /* 注册实例的registration钩子,这个函数将在实例被注入的加入到组件的生命钩子(beforeCreate与destroyed)中被调用 */
    data.registerRouteInstance = (vm, val) => {
      /* 第二个值不存在的时候为注销 */
      // val could be undefined for unregistration
      /* 获取组件实例 */
      const current = matched.instances[name]
      if (
        (val && current !== vm) ||
        (!val && current === vm)
      ) {
        /* 这里有两种情况,一种是val存在,则用val替换当前组件实例,另一种则是val不存在,则直接将val(这个时候其实是一个undefined)赋给instances */
        matched.instances[name] = val
      }
    }

   ......

    return h(component, data, children)
  }
}
那么,routerView是如何得知路由变化,触发其render()的呢?这又回到了View的响应式中,Vue中Vm或数据发生变化时,会调用q前文提到的vue.update(vm.render())方法更新操作。
vue-router在初始化时Vue.util.defineReactive(this, '_route', this._router.history.current)将_route变成了响应式,在路由发生变化时,执行updateRoute()将新的route赋给_route。
history.listen(route => {
  this.apps.forEach((app) => {
    app._route = route
  })
})
router-link比较简单。默认a标签,监听click事件,确定是router.push还是router.replace。
路由和组件时怎么对应的呢,路由变化后,组件如何变化呢?
1.找出matched route
	const route = this.router.match(location, this.current)

2.confirmTransition

	A.找出哪些record要删除、保留、添加
	B.confirmTransition
		分别执行这些record中instance下的钩子
		生命周期:beforeRouteLeave =》beforeRouteUpdate =》beforeRouteEnter

3.最后执行路由切换
	if (typeof to === 'object' && to.replace) {
	    this.replace(to)
	} else {
	    this.push(to)
	}

4.confirmTransition的callback,更新app._route
	updateRoute (route: Route) {
	    ...
	    This.callback() => this._route = matchedRoute
	    ...
	}
	onComplete(history子类中调用handle scroll等钩子)
V8源码-内存管理
本文我们将从源码角度来介绍V8引擎的内存管理部分,主要包括内存分配和垃圾回收。
为了聚焦**,本文采用的V8比较低的版本0.1.5,这个版本实现起来比较简单,大家比较容易的看出实现**。
内存分配
V8将内存空间分为几个区域,分别是NewSpace、OldSpace、LargeObjectSpace、MapSpace、CodeSpace,各个space的关系如下图所示:

各个space的作用:
LargeObjectSpace :为了避免大对象的拷贝,使用该空间专门存储大对象(大小超过Normal Page能容纳的对象范围),包括Code、Sequetial String、FixedArray;

MapSpace :存放对象的Map信息,即hidden_class;最大限制为8MB;每个Map对象固定大小,为了快速定位,所以将该空间单独出来;

NewSpace :存放多种类型对象,最大限制为2MB;

CodeSpace :存放预编译代码(?);最大限制为512MB;

Old_Pointer_Space :存放GC后surviving的指针对象;最大限制为512MB;

Old_Data_Space :存放GC后surviving的数据对象;最大限制为512MB;
初始化
首先是内存的初始化,这部分在V8初始化完OS的一些参数之后进行初始化,入口文件在src/heap.cc中。代码如下:
bool Heap::Setup(bool create_heap_objects) {
  // Initialize heap spaces and initial maps and objects. Whenever something
  // goes wrong, just return false. The caller should check the results and
  // call Heap::TearDown() to release allocated memory.
  //
  // If the heap is not yet configured (eg, through the API), configure it.
  // Configuration is based on the flags new-space-size (really the semispace
  // size) and old-space-size if set or the initial values of semispace_size_
  // and old_generation_size_ otherwise.
  if (!heap_configured) {
    if (!ConfigureHeap(FLAG_new_space_size, FLAG_old_space_size)) return false;
  }

  // Setup memory allocator and allocate an initial chunk of memory.  The
  // initial chunk is double the size of the new space to ensure that we can
  // find a pair of semispaces that are contiguous and aligned to their size.
  // 分配堆内存,新生代 + 老生代
  // setup chunks
  // MemoryAllocator为单例
  if (!MemoryAllocator::Setup(MaxCapacity())) return false;
  // 预留2 * young_generation_size_虚拟内存,MemoryAllocator::initial_chunk_
  void* chunk
      = MemoryAllocator::ReserveInitialChunk(2 * young_generation_size_);
  if (chunk == NULL) return false;

  // Put the initial chunk of the old space at the start of the initial
  // chunk, then the two new space semispaces, then the initial chunk of
  // code space.  Align the pair of semispaces to their size, which must be
  // a power of 2.
  ASSERT(IsPowerOf2(young_generation_size_));
  Address old_space_start = reinterpret_cast<Address>(chunk);
  // 方向沿低地址区域
  Address new_space_start = RoundUp(old_space_start, young_generation_size_);
  Address code_space_start = new_space_start + young_generation_size_;
  int old_space_size = new_space_start - old_space_start;
  int code_space_size = young_generation_size_ - old_space_size;

  // Initialize new space.
  new_space_ = new NewSpace(initial_semispace_size_, semispace_size_);
  if (new_space_ == NULL) return false;
  // mmap申请from_space、to_space
  if (!new_space_->Setup(new_space_start, young_generation_size_)) return false;

  // Initialize old space, set the maximum capacity to the old generation
  // size.
  // pagedSpace.setup
  old_space_ = new OldSpace(old_generation_size_, OLD_SPACE);
  if (old_space_ == NULL) return false;
  if (!old_space_->Setup(old_space_start, old_space_size)) return false;

  // Initialize the code space, set its maximum capacity to the old
  // generation size.
  code_space_ = new OldSpace(old_generation_size_, CODE_SPACE);
  if (code_space_ == NULL) return false;
  if (!code_space_->Setup(code_space_start, code_space_size)) return false;

  // Initialize map space.
  map_space_ = new MapSpace(kMaxMapSpaceSize);
  if (map_space_ == NULL) return false;
  // Setting up a paged space without giving it a virtual memory range big
  // enough to hold at least a page will cause it to allocate.
  if (!map_space_->Setup(NULL, 0)) return false;

  lo_space_ = new LargeObjectSpace();
  if (lo_space_ == NULL) return false;
  if (!lo_space_->Setup()) return false;

  if (create_heap_objects) {
    // Create initial maps.
    if (!CreateInitialMaps()) return false;
    if (!CreateApiObjects()) return false;

    // Create initial objects
    if (!CreateInitialObjects()) return false;
  }

  LOG(IntEvent("heap-capacity", Capacity()));
  LOG(IntEvent("heap-available", Available()));

  return true;
}
这里主要做了如下几件事:
1.配置Heap参数,包括young_generation_size_(2MB)和old_generation_size_(512MB),这里老生代基于页的内存管理,old_generation_size_表示老生代的内存页数(每页8KB);

2.MemoryAllocator::Setup,初始化chunk用于管理页,一个chunk拥有64页;

3.预留2 * young_generation_size_ 虚拟内存,地址保存在变量MemoryAllocator::initial_chunk_。注意这里MemoryAllocator是个单例;

4.从上一步分配的虚拟内存开始分配各个内存区域
虚拟内存被分成了new_space_, old_space_, code_space_, map_space_, lo_space_, 各个空间按照下图进行划分:

下面着重给大家讲一下各个内存区域是如何初始化的,初始化的代码在src/spaces.cc中。
NewSpace
bool NewSpace::Setup(Address start, int size) {
  ASSERT(size == 2 * maximum_capacity_);
  ASSERT(IsAddressAligned(start, size, 0));

  if (to_space_ == NULL
      || !to_space_->Setup(start, maximum_capacity_)) {
    return false;
  }
  if (from_space_ == NULL
      || !from_space_->Setup(start + maximum_capacity_, maximum_capacity_)) {
    return false;
  }

  start_ = start;
  address_mask_ = ~(size - 1);
  object_mask_ = address_mask_ | kHeapObjectTag;
  object_expected_ = reinterpret_cast<uint32_t>(start) | kHeapObjectTag;

  allocation_info_.top = to_space_->low();
  allocation_info_.limit = to_space_->high();
  mc_forwarding_info_.top = NULL;
  mc_forwarding_info_.limit = NULL;

  ASSERT_SEMISPACE_ALLOCATION_INFO(allocation_info_, to_space_);
  return true;
}
这里主要初始化了to_space_和from_space_,to_space_和from_space_的类型是SemiSpace,初始化代码如下:
bool SemiSpace::Setup(Address start, int size) {
  ASSERT(size == maximum_capacity_);
  if (!MemoryAllocator::CommitBlock(start, capacity_)) return false;

  start_ = start;
  address_mask_ = ~(size - 1);
  object_mask_ = address_mask_ | kHeapObjectTag;
  object_expected_ = reinterpret_cast<uint32_t>(start) | kHeapObjectTag;

  age_mark_ = start_;
  return true;
}

bool MemoryAllocator::CommitBlock(Address start, size_t size) {
  ASSERT(start != NULL);
  ASSERT(size > 0);
  ASSERT(initial_chunk_ != NULL);
  ASSERT(initial_chunk_->address() <= start);
  ASSERT(start + size <= reinterpret_cast<Address>(initial_chunk_->address())
                             + initial_chunk_->size());

  // mmap
  if (!initial_chunk_->Commit(start, size)) return false;
  Counters::memory_allocated.Increment(size);
  return true;
}
这里主要通过MemoryAllocator::CommitBlock去申请了预留的虚拟内存中的区域,initial_chunk_->Commit实际调用的是VirtualMemory::Commit,代码如下:
bool VirtualMemory::Commit(void* address, size_t size) {
  if (MAP_FAILED == mmap(address, size, PROT_READ | PROT_WRITE | PROT_EXEC,
                         MAP_PRIVATE | MAP_ANONYMOUS | MAP_FIXED,
                         kMmapFd, kMmapFdOffset)) {
    return false;
  }

  UpdateAllocatedSpaceLimits(address, size);
  return true;
}
起始就是通过mmap开辟了一块虚拟内存,至于mmap和malloc的关系,大家可以参考Linux内存分配小结--malloc、brk、mmap
OldSpace
OldSpace继承自Pagedspace,old_space_->Setup实际调用的是基类Pagedspace的setup方法,代码如下:
bool PagedSpace::Setup(Address start, size_t size) {
  if (HasBeenSetup()) return false;

  int num_pages = 0;
  // Try to use the virtual memory range passed to us.  If it is too small to
  // contain at least one page, ignore it and allocate instead.
  // 如果在预留的虚拟内存里
  if (PagesInChunk(start, size) > 0) {
    first_page_ = MemoryAllocator::CommitPages(start, size, this, &num_pages);
  } else {
    // 申请多少页
    int requested_pages = Min(MemoryAllocator::kPagesPerChunk,
                              max_capacity_ / Page::kObjectAreaSize);
    first_page_ =
        MemoryAllocator::AllocatePages(requested_pages, &num_pages, this);
    if (!first_page_->is_valid()) return false;
  }

  // We are sure that the first page is valid and that we have at least one
  // page.
  ASSERT(first_page_->is_valid());
  ASSERT(num_pages > 0);
  accounting_stats_.ExpandSpace(num_pages * Page::kObjectAreaSize);
  ASSERT(Capacity() <= max_capacity_);

  for (Page* p = first_page_; p->is_valid(); p = p->next_page()) {
    // 用于Mack-compact内存回收
    p->ClearRSet();
  }

  // Use first_page_ for allocation.
  SetAllocationInfo(&allocation_info_, first_page_);

  return true;
}
这里做了如下几件事:
1.判断预留的虚拟内存里是否可以容纳
	a.可以容纳,MemoryAllocator::CommitPages,直接在预留虚拟内存中分配
	b.空间不足,MemoryAllocator::AllocatePages申请虚拟内存
2.遍历所有页,标记,用于后面垃圾回收
下面主要介绍下MemoryAllocator::CommitPages和MemoryAllocator::AllocatePages。
MemoryAllocator::CommitPages在预留的虚拟内存里可以容纳OLD_SPACE时调用,代码如下:
Page* MemoryAllocator::CommitPages(Address start, size_t size,
                                   PagedSpace* owner, int* num_pages) {
  ASSERT(start != NULL);
  *num_pages = PagesInChunk(start, size);
  ASSERT(*num_pages > 0);
  ASSERT(initial_chunk_ != NULL);
  ASSERT(initial_chunk_->address() <= start);
  ASSERT(start + size <= reinterpret_cast<Address>(initial_chunk_->address())
                             + initial_chunk_->size());

  if (!initial_chunk_->Commit(start, size)) {
    return Page::FromAddress(NULL);
  }
  Counters::memory_allocated.Increment(size);

  // So long as we correctly overestimated the number of chunks we should not
  // run out of chunk ids.
  CHECK(!OutOfChunkIds());
  int chunk_id = Pop();
  chunks_[chunk_id].init(start, size, owner);
  return InitializePagesInChunk(chunk_id, *num_pages, owner);
}
这里主要做了两件事:
1.申请预留的虚拟内存,initial_chunk_->Commit,也就是前面介绍过的VirtualMemory::Commit
2.初始化chunks_,这里强调下chunks_是一个chunkinfo类型的数组,里面存储着每个chunk的信息。
MemoryAllocator::AllocatePages在预留的虚拟内存里不足以容纳OLD_SPACE时调用,代码如下:
Page* MemoryAllocator::AllocatePages(int requested_pages, int* allocated_pages,
                                     PagedSpace* owner) {
  if (requested_pages <= 0) return Page::FromAddress(NULL);
  size_t chunk_size = requested_pages * Page::kPageSize;

  // There is not enough space to guarantee the desired number pages can be
  // allocated.
  // 没有足够空间,那就有多大申请多大
  if (size_ + static_cast<int>(chunk_size) > capacity_) {
    // Request as many pages as we can.
    chunk_size = capacity_ - size_;
    requested_pages = chunk_size >> Page::kPageSizeBits;

    if (requested_pages <= 0) return Page::FromAddress(NULL);
  }

  void* chunk = AllocateRawMemory(chunk_size, &chunk_size);
  if (chunk == NULL) return Page::FromAddress(NULL);
  LOG(NewEvent("PagedChunk", chunk, chunk_size));

  *allocated_pages = PagesInChunk(static_cast<Address>(chunk), chunk_size);
  // 不够一页的化,申请无效,释放虚拟内存munmap
  if (*allocated_pages == 0) {
    FreeRawMemory(chunk, chunk_size);
    LOG(DeleteEvent("PagedChunk", chunk));
    return Page::FromAddress(NULL);
  }

  // 初始化新的chunk
  int chunk_id = Pop();
  chunks_[chunk_id].init(static_cast<Address>(chunk), chunk_size, owner);

  return InitializePagesInChunk(chunk_id, *allocated_pages, owner);
}
这里主要做了如下几件事:
1.如果超出了最大的capacity_,算出最多还能申请多少,作为申请的size
2.申请内存MemoryAllocator::AllocateRawMemory
3.判断申请的内存空间是否够一页(8KB),不够一页的化,申请无效,释放虚拟内存munmap
4.初始化新的chunk,这一步与MemoryAllocator::AllocatePages一致
下面我们来看下MemoryAllocator::AllocateRawMemory:
void* MemoryAllocator::AllocateRawMemory(const size_t requested,
                                         size_t* allocated) {
  if (size_ + static_cast<int>(requested) > capacity_) return NULL;

  // mmap & UpdateAllocatedSpaceLimits
  void* mem = OS::Allocate(requested, allocated);
  int alloced = *allocated;
  size_ += alloced;
  Counters::memory_allocated.Increment(alloced);
  return mem;
}
调用的OS::Allocate代码如下:
void* OS::Allocate(const size_t requested, size_t* allocated) {
  const size_t msize = RoundUp(requested, getpagesize());
  void* mbase = mmap(NULL, msize, PROT_READ | PROT_WRITE | PROT_EXEC,
                     MAP_PRIVATE | MAP_ANONYMOUS, -1, 0);
  if (mbase == MAP_FAILED) {
    LOG(StringEvent("OS::Allocate", "mmap failed"));
    return NULL;
  }
  *allocated = msize;
  UpdateAllocatedSpaceLimits(mbase, msize);
  return mbase;
}
这里也是用的mmap,但是第一个参数也就是起始地址为null,这个参数代表要映射到的内存区域的起始地址,这也是跟刚刚使用预留的虚拟内存不同的地方。
这里多说一句,使用预留的虚拟内存有助于增加读写效率,主要因为预留的申请后,不需要修改物理地址和逻辑地址的映射关系,也就是进程的页表。
其他space
其他space与oldspace类似,都是PagedSpace的子类,这里不再赘述。
分配
在具体讲解内存分配之前,我们先讲解几个概念:
1.page,pagedSpace中,内存以page为单位,一个对象不能跨page存储(page的大小与内存页大小一致)
2.扩展堆内存时,以chunk为单位,一个chunk最多包含64个page,这样做可以减少mmap系统调用次数,有利于提高效率;
3.freelist将每一页中的内部碎片收集起来,这里很像操作系统的内存管理
内存分配的入口在src/heap-inl.h中的Heap::AllocateRaw方法,代码如下:
// 内存分配入口
Object* Heap::AllocateRaw(int size_in_bytes, AllocationSpace space) {
  ASSERT(allocation_allowed_ && gc_state_ == NOT_IN_GC);
#ifdef DEBUG
  if (FLAG_gc_interval >= 0 &&
      !disallow_allocation_failure_ &&
      Heap::allocation_timeout_-- <= 0) {
    return Failure::RetryAfterGC(size_in_bytes, space);
  }
  Counters::objs_since_last_full.Increment();
  Counters::objs_since_last_young.Increment();
#endif
  if (NEW_SPACE == space) {
    return new_space_->AllocateRaw(size_in_bytes);
  }

  Object* result;
  if (OLD_SPACE == space) {
    result = old_space_->AllocateRaw(size_in_bytes);
  } else if (CODE_SPACE == space) {
    result = code_space_->AllocateRaw(size_in_bytes);
  } else if (LO_SPACE == space) {
    result = lo_space_->AllocateRaw(size_in_bytes);
  } else {
    ASSERT(MAP_SPACE == space);
    result = map_space_->AllocateRaw(size_in_bytes);
  }
  if (result->IsFailure()) old_gen_exhausted_ = true;
  return result;
}
这里主要根据不同的空间类型,调用其AllocateRaw方法进行内存分配。
OldSpace
这里首先提及一下OldSpace继承与PagedSpace,所以内存管理是基于页的。
AllocateRaw代码如下:
// Allocates requested bytes. May return Failure if the space is full.
  Object* AllocateRaw(int size_in_bytes) {
    ASSERT_OBJECT_SIZE(size_in_bytes);
    return AllocateRawInternal(size_in_bytes, &allocation_info_);
}
AllocateRawInternal代码如下:
Object* OldSpace::AllocateRawInternal(int size_in_bytes,
                                      AllocationInfo* alloc_info) {
  ASSERT(HasBeenSetup());

  if (allocation_mode_ == LINEAR_ONLY || allocation_mode_ == LINEAR) {
    // Try linear allocation in the current page.
    Address cur_top = alloc_info->top;
    Address new_top = cur_top + size_in_bytes;
    if (new_top <= alloc_info->limit) {
      Object* obj = HeapObject::FromAddress(cur_top);
      alloc_info->top = new_top;
      ASSERT_PAGED_ALLOCATION_INFO(*alloc_info);

      accounting_stats_.AllocateBytes(size_in_bytes);
      ASSERT(Size() <= Capacity());
      return obj;
    }
  } else {
    // For now we should not try free list allocation during m-c relocation.
    // 从free_list中申请
    ASSERT(alloc_info == &allocation_info_);
    int wasted_bytes;
    Object* object = free_list_.Allocate(size_in_bytes, &wasted_bytes);
    accounting_stats_.WasteBytes(wasted_bytes);
    if (!object->IsFailure()) {
      accounting_stats_.AllocateBytes(size_in_bytes);
      return object;
    }
  }
  // Fast allocation failed.
  return SlowAllocateRaw(size_in_bytes, alloc_info);
}
这里主要做了如下的事情:
1.判断分配方式是否为线型
	a.如果是,判断当前页剩余空间是否足够分配,
		i.如果空间足够,如果是则划分该区域,将page->top向前移动
		ii.当前页空间不足,跳转至步骤二(进行SlowAllocateRaw)
	b.如果不是,则从free_list_中分配空间,如果分配不成功,跳转至步骤二
2.步骤一的快速分配失败,执行SlowAllocateRaw
SlowAllocateRaw代码如下:
// Slow cases for AllocateRawInternal.  In linear allocation mode, try
// to allocate in the next page in the space.  If there are no more
// pages, switch to free-list allocation if permitted, otherwise try
// to grow the space.  In free-list allocation mode, try to grow the
// space and switch to linear allocation.
Object* OldSpace::SlowAllocateRaw(int size_in_bytes,
                                  AllocationInfo* alloc_info) {
  if (allocation_mode_ == LINEAR_ONLY || allocation_mode_ == LINEAR) {
    // 最后一页,对内存由低地址向高地址
    Page* top_page = TopPageOf(*alloc_info);
    // Until we implement free-list allocation during global gc, we have two
    // cases: one for normal allocation and one for m-c relocation allocation.
    // first_page
    if (alloc_info == &allocation_info_) {  // Normal allocation.
      // 最后一页还剩多少size
      int free_size = top_page->ObjectAreaEnd() - alloc_info->top;
      // Add the extra space at the top of this page to the free list.
      // 直接挪top
      if (free_size > 0) {
        int wasted_bytes = free_list_.Free(alloc_info->top, free_size);
        accounting_stats_.WasteBytes(wasted_bytes);
        alloc_info->top += free_size;
        ASSERT_PAGED_ALLOCATION_INFO(*alloc_info);
      }

      // Move to the next page in this space if there is one; switch
      // to free-list allocation, if we can; try to expand the space otherwise
      // 挪到下一页
      if (top_page->next_page()->is_valid()) {
        SetAllocationInfo(alloc_info, top_page->next_page());
      }
      // allocation_mode_设置成FREE_LIST,从FREE_LIST里分配内存
      else if (allocation_mode_ == LINEAR) {
        allocation_mode_ = FREE_LIST;
      }
      // expand a chunk
      else if (Expand(top_page)) {
        ASSERT(top_page->next_page()->is_valid());
        SetAllocationInfo(alloc_info, top_page->next_page());
      }
      // 回收内存垃圾并重试
      else {
        return Failure::RetryAfterGC(size_in_bytes, identity());
      }
    } else {  // Allocation during m-c relocation.
      // During m-c 'allocation' while computing forwarding addresses, we do
      // not yet add blocks to the free list because they still contain live
      // objects.  We also cache the m-c forwarding allocation pointer in the
      // current page.

      // If there are no more pages try to expand the space.  This can only
      // happen when promoting objects from the new space.
      if (!top_page->next_page()->is_valid()) {
        if (!Expand(top_page)) {
          return Failure::RetryAfterGC(size_in_bytes, identity());
        }
      }

      // Move to the next page.
      ASSERT(top_page->next_page()->is_valid());
      top_page->mc_relocation_top = alloc_info->top;
      SetAllocationInfo(alloc_info, top_page->next_page());
    }
  } else {  // Free-list allocation.
    // We failed to allocate from the free list; try to expand the space and
    // switch back to linear allocation.
    ASSERT(alloc_info == &allocation_info_);
    Page* top_page = TopPageOf(*alloc_info);
    if (!top_page->next_page()->is_valid()) {
      if (!Expand(top_page)) {
        return Failure::RetryAfterGC(size_in_bytes, identity());
      }
    }

    // We surely have more pages, move to the next page and switch to linear
    // allocation.
    ASSERT(top_page->next_page()->is_valid());
    SetAllocationInfo(alloc_info, top_page->next_page());
    ASSERT(allocation_mode_ == FREE_LIST);
    allocation_mode_ = LINEAR;
  }

  // Perform the allocation.
  return AllocateRawInternal(size_in_bytes, alloc_info);
}
这里主要做了如下几件事:
1.利用TopPageOf获取到已分配内存的最后一页top_page
2.拿到最后一页剩余的size
3.如果剩余size大于0,直接将剩余空间给free_list_,同时移动page->top到该页的末尾
4.分配内存空间,这里有四种选择
	a.如果top_page->next_page()有效,也就是当前的top_page下一页有效,那么直接分配,跳转到步骤5,执行AllocateRawInternal
	b.分配方式是线性,则将分配方式变为FREE_LIST,跳转到步骤5,也就是后面会从free_list_中分配内存
	c.重新分配一个chunk(有最大空间限制,在最大空间以内,最多分配64页),跳转到步骤5
	d.上述都没成功,则执行RetryAfterGC,垃圾回收后重试
5.AllocateRawInternal
下面重点讲下Expand,其实调用的是基类PagedSpace的Expand方法,代码如下:
bool PagedSpace::Expand(Page* last_page) {
  ASSERT(max_capacity_ % Page::kObjectAreaSize == 0);
  ASSERT(Capacity() % Page::kObjectAreaSize == 0);

  if (Capacity() == max_capacity_) return false;

  ASSERT(Capacity() < max_capacity_);
  // Last page must be valid and its next page is invalid.
  ASSERT(last_page->is_valid() && !last_page->next_page()->is_valid());

  // 可用的页数
  int available_pages = (max_capacity_ - Capacity()) / Page::kObjectAreaSize;
  if (available_pages <= 0) return false;

  // 最大一个chunk
  int desired_pages = Min(available_pages, MemoryAllocator::kPagesPerChunk);
  Page* p = MemoryAllocator::AllocatePages(desired_pages, &desired_pages, this);
  if (!p->is_valid()) return false;

  accounting_stats_.ExpandSpace(desired_pages * Page::kObjectAreaSize);
  ASSERT(Capacity() <= max_capacity_);

  MemoryAllocator::SetNextPage(last_page, p);

  // Clear remembered set of new pages.
  while (p->is_valid()) {
    p->ClearRSet();
    p = p->next_page();
  }

  return true;
}
这里做了如下几件事:
1.获取还可以分配的最多页数available_pages
2.在available_pages和kPagesPerChunk(64)中取最小值,调用MemoryAllocator::AllocatePages分配,MemoryAllocator::AllocatePages上述已经讲解过,用于分配一个chunk并初始化其中的page
3.整个内存page链表,也就是将新分配的内存接到top_page后面
下面我们总结下oldSpace内存分配的流程图:

NewSpace
NewSpace::AllocateRawInternal代码如下:
Object* NewSpace::AllocateRawInternal(int size_in_bytes,
                                      AllocationInfo* alloc_info) {
  Address new_top = alloc_info->top + size_in_bytes;
  if (new_top > alloc_info->limit) {
    return Failure::RetryAfterGC(size_in_bytes, NEW_SPACE);
  }

  Object* obj = HeapObject::FromAddress(alloc_info->top);
  alloc_info->top = new_top;
#ifdef DEBUG
  SemiSpace* space =
      (alloc_info == &allocation_info_) ? to_space_ : from_space_;
  ASSERT(space->low() <= alloc_info->top
         && alloc_info->top <= space->high()
         && alloc_info->limit == space->high());
#endif
  return obj;
}
这里没有page的概念,直接移动top指针就好,空间不足则直接RetryAfterGC
LargeObjectSpace
LargeObjectSpace::AllocateRawInternal代码如下:
Object* LargeObjectSpace::AllocateRawInternal(int requested_size,
                                              int object_size) {
  ASSERT(0 < object_size && object_size <= requested_size);
  size_t chunk_size;
  LargeObjectChunk* chunk =
      LargeObjectChunk::New(requested_size, &chunk_size);
  if (chunk == NULL) {
    return Failure::RetryAfterGC(requested_size, LO_SPACE);
  }

  size_ += chunk_size;
  page_count_++;
  chunk->set_next(first_chunk_);
  chunk->set_size(chunk_size);
  first_chunk_ = chunk;

  // Set the object address and size in the page header and clear its
  // remembered set.
  Page* page = Page::FromAddress(RoundUp(chunk->address(), Page::kPageSize));
  Address object_address = page->ObjectAreaStart();
  // Clear the low order bit of the second word in the page to flag it as a
  // large object page.  If the chunk_size happened to be written there, its
  // low order bit should already be clear.
  ASSERT((chunk_size & 0x1) == 0);
  page->is_normal_page &= ~0x1;
  page->ClearRSet();
  int extra_bytes = requested_size - object_size;
  if (extra_bytes > 0) {
    // The extra memory for the remembered set should be cleared.
    memset(object_address + object_size, 0, extra_bytes);
  }

  return HeapObject::FromAddress(object_address);
}

LargeObjectChunk* LargeObjectChunk::New(int size_in_bytes,
                                        size_t* chunk_size) {
  size_t requested = ChunkSizeFor(size_in_bytes);
  void* mem = MemoryAllocator::AllocateRawMemory(requested, chunk_size);
  if (mem == NULL) return NULL;
  LOG(NewEvent("LargeObjectChunk", mem, *chunk_size));
  if (*chunk_size < requested) {
    MemoryAllocator::FreeRawMemory(mem, *chunk_size);
    LOG(DeleteEvent("LargeObjectChunk", mem));
    return NULL;
  }
  return reinterpret_cast<LargeObjectChunk*>(mem);
}
由于该空间中每个Page都只会存放一个对象,所以当申请内存块时,直接通过MemoryAllocator::AllocateRawMemory分出一块对象大小的内存,并加入到该空间的内存块管理链表中就可以了。
内存析构
v8实例销毁时会调用V8::TearDown,其中会调用Heap::TearDown,Heap::TearDown代码如下:
oid Heap::TearDown() {
  GlobalHandles::TearDown();

  if (new_space_ != NULL) {
    new_space_->TearDown();
    delete new_space_;
    new_space_ = NULL;
  }

  if (old_space_ != NULL) {
    old_space_->TearDown();
    delete old_space_;
    old_space_ = NULL;
  }

  if (code_space_ != NULL) {
    code_space_->TearDown();
    delete code_space_;
    code_space_ = NULL;
  }

  if (map_space_ != NULL) {
    map_space_->TearDown();
    delete map_space_;
    map_space_ = NULL;
  }

  if (lo_space_ != NULL) {
    lo_space_->TearDown();
    delete lo_space_;
    lo_space_ = NULL;
  }

  MemoryAllocator::TearDown();
}
其实就是把各自空间free掉。
垃圾回收
当对象申请内存空间失败,就会调用Failure::RetryAfterGC,这时会开始进行内存清理。垃圾回收的入口在src/heap-inl.h中,代码如下:
// Do not use the identifier __object__ in a call to this macro.
//
// Call the function FUNCTION_CALL.  If it fails with a RetryAfterGC
// failure, call the garbage collector and retry the function.  If the
// garbage collector cannot reclaim the required space or the second
// call fails with a RetryAfterGC failure, fail with out of memory.
// If there is any other failure, return a null handle.  If either
// call succeeds, return a handle to the functions return value.
//
// Note that this macro always returns or raises a fatal error.
#define CALL_HEAP_FUNCTION(FUNCTION_CALL, TYPE)                              \
  do {                                                                       \
    GC_GREEDY_CHECK();                                                       \
    Object* __object__ = FUNCTION_CALL;                                      \
    if (__object__->IsFailure()) {                                           \
      if (__object__->IsRetryAfterGC()) {                                    \
        if (!Heap::CollectGarbage(                                           \
                Failure::cast(__object__)->requested(),                      \
                Failure::cast(__object__)->allocation_space())) {            \
          /* TODO(1181417): Fix this. */                                     \
          v8::internal::V8::FatalProcessOutOfMemory("CALL_HEAP_FUNCTION");   \
        }                                                                    \
        __object__ = FUNCTION_CALL;                                          \
        if (__object__->IsFailure()) {                                       \
          if (__object__->IsRetryAfterGC()) {                                \
            /* TODO(1181417): Fix this. */                                   \
            v8::internal::V8::FatalProcessOutOfMemory("CALL_HEAP_FUNCTION"); \
          }                                                                  \
          return Handle<TYPE>();                                             \
        }                                                                    \
      } else {                                                               \
        return Handle<TYPE>();                                               \
      }                                                                      \
    }                                                                        \
    return Handle<TYPE>(TYPE::cast(__object__));                             \
  } while (false)
其中调用了Heap::CollectGarbage,代码如下:
bool Heap::CollectGarbage(int requested_size, AllocationSpace space) {
  // The VM is in the GC state until exiting this function.
  VMState state(GC);

#ifdef DEBUG
  // Reset the allocation timeout to the GC interval, but make sure to
  // allow at least a few allocations after a collection. The reason
  // for this is that we have a lot of allocation sequences and we
  // assume that a garbage collection will allow the subsequent
  // allocation attempts to go through.
  allocation_timeout_ = Max(6, FLAG_gc_interval);
#endif

  { GCTracer tracer;
    GarbageCollectionPrologue();

    GarbageCollector collector = SelectGarbageCollector(space);
    tracer.set_collector(collector);

    StatsRate* rate = (collector == SCAVENGER)
        ? &Counters::gc_scavenger
        : &Counters::gc_compactor;
    rate->Start();
    PerformGarbageCollection(space, collector);
    rate->Stop();

    GarbageCollectionEpilogue();
  }


#ifdef ENABLE_LOGGING_AND_PROFILING
  if (FLAG_log_gc) HeapProfiler::WriteSample();
#endif

  switch (space) {
    case NEW_SPACE:
      return new_space_->Available() >= requested_size;
    case OLD_SPACE:
      return old_space_->Available() >= requested_size;
    case CODE_SPACE:
      return code_space_->Available() >= requested_size;
    case MAP_SPACE:
      return map_space_->Available() >= requested_size;
    case LO_SPACE:
      return lo_space_->Available() >= requested_size;
  }
  return false;
}
这里主要做了两件事:
1.SelectGarbageCollector,选择垃圾回收器
2.PerformGarbageCollection,执行垃圾回收
Heap::SelectGarbageCollector选择垃圾回收器的代码如下:
GarbageCollector Heap::SelectGarbageCollector(AllocationSpace space) {
  // Is global GC requested?
  if (space != NEW_SPACE || FLAG_gc_global) {
    Counters::gc_compactor_caused_by_request.Increment();
    return MARK_COMPACTOR;
  }

  // Is enough data promoted to justify a global GC?
  if (PromotedSpaceSize() > promoted_space_limit_) {
    Counters::gc_compactor_caused_by_promoted_data.Increment();
    return MARK_COMPACTOR;
  }

  // Have allocation in OLD and LO failed?
  if (old_gen_exhausted_) {
    Counters::gc_compactor_caused_by_oldspace_exhaustion.Increment();
    return MARK_COMPACTOR;
  }

  // Is there enough space left in OLD to guarantee that a scavenge can
  // succeed?
  //
  // Note that old_space_->MaxAvailable() undercounts the memory available
  // for object promotion. It counts only the bytes that the memory
  // allocator has not yet allocated from the OS and assigned to any space,
  // and does not count available bytes already in the old space or code
  // space.  Undercounting is safe---we may get an unrequested full GC when
  // a scavenge would have succeeded.
  if (old_space_->MaxAvailable() <= new_space_->Size()) {
    Counters::gc_compactor_caused_by_oldspace_exhaustion.Increment();
    return MARK_COMPACTOR;
  }

  // Default
  return SCAVENGER;
}
垃圾回收算法主要有MarkCompact和Scavenge两种,这里有四种情况会返回MARK_COMPACTOR垃圾回收器,其余情况会返回SCAVENGER。四种情况分别是:
1.space不是NEW_SPACE或者是全局GC
2.提升空间(PromotedSpaceSize)的剩余空间大于提升空间的最大限制
3.之前在old_space_或lo_space_中分配失败
4.old_space_剩余空间小于new_space_的空间
Heap::PerformGarbageCollection执行垃圾回收的代码如下:
void Heap::PerformGarbageCollection(AllocationSpace space,
                                    GarbageCollector collector) {
  if (collector == MARK_COMPACTOR && global_gc_prologue_callback_) {
    ASSERT(!allocation_allowed_);
    global_gc_prologue_callback_();
  }

  if (collector == MARK_COMPACTOR) {
    MarkCompact();

    int promoted_space_size = PromotedSpaceSize();
    promoted_space_limit_ =
        promoted_space_size + Max(2 * MB, (promoted_space_size/100) * 35);
    old_gen_exhausted_ = false;

    // If we have used the mark-compact collector to collect the new
    // space, and it has not compacted the new space, we force a
    // separate scavenge collection.  THIS IS A HACK.  It covers the
    // case where (1) a new space collection was requested, (2) the
    // collector selection policy selected the mark-compact collector,
    // and (3) the mark-compact collector policy selected not to
    // compact the new space.  In that case, there is no more (usable)
    // free space in the new space after the collection compared to
    // before.
    if (space == NEW_SPACE && !MarkCompactCollector::HasCompacted()) {
      Scavenge();
    }
  } else {
    Scavenge();
  }
  Counters::objs_since_last_young.Set(0);

  // Process weak handles post gc.
  GlobalHandles::PostGarbageCollectionProcessing();

  if (collector == MARK_COMPACTOR && global_gc_epilogue_callback_) {
    ASSERT(!allocation_allowed_);
    global_gc_epilogue_callback_();
  }
}
这里主要根据选出的collector,在不同的space中执行不同的垃圾回收算法(MarkCompact或Scavenge)。
Scavenge
下面我们来看一下这两种垃圾回收算法:
新生代使用Scavenge算法进行回收。在Scavenge算法的实现中,主要采用了Cheney算法。
Cheney算法算法是一种采用复制的方式实现的垃圾回收算法。它将内存一分为二,每一部分空间称为semispace。在这两个semispace中,一个处于使用状态,另一个处于闲置状态。处于使用状态的semispace空间称为From空间,处于闲置状态的空间称为To空间,当我们分配对象时,先是在From空间中进行分配。当开始进行垃圾回收算法时,会检查From空间中的存活对象,这些存活对象将会被复制到To空间中(复制完成后会进行紧缩),而非活跃对象占用的空间将会被释放。完成复制后,From空间和To空间的角色发生对换。也就是说,在垃圾回收的过程中,就是通过将存活对象在两个semispace之间进行复制。可以很容易看出来,使用Cheney算法时,总有一半的内存是空的。但是由于新生代很小,所以浪费的内存空间并不大。而且由于新生代中的对象绝大部分都是非活跃对象,需要复制的活跃对象比例很小,所以其时间效率十分理想。复制的过程采用的是BFS(广度优先遍历)的**,从根对象出发,广度优先遍历所有能到达的对象
需要注意的是,v8中的from_space_和to_space_与算法中描述的正好相反,对象在to_space_中分配,from_space_作为复制的目标空间。
下面是Heap::Scavenge的代码:
void Heap::Scavenge() {
#ifdef DEBUG
if (FLAG_enable_slow_asserts) {
VerifyCodeSpacePointersVisitor v;
HeapObjectIterator it(code_space_);
while (it.has_next()) {
HeapObject* object = it.next();
if (object->IsCode()) {
Code::cast(object)->ConvertICTargetsFromAddressToObject();
}
object->Iterate(&v);
if (object->IsCode()) {
Code::cast(object)->ConvertICTargetsFromObjectToAddress();
}
}
}
#endif
gc_state_ = SCAVENGE;
// Implements Cheney's copying algorithm
LOG(ResourceEvent("scavenge", "begin"));
// 为了避免newspace由于空间过小儿引起频繁地scavenge,于是在每次scavenge之前检查次数,如果超过限制次数(初始为8)且newspace能满足空间翻倍(初始为256KB,最大为2MB),则double空间以及该次数限制。这里的策略调整可以根据实际优化;
scavenge_count_++;
if (new_space_->Capacity() < new_space_->MaximumCapacity() &&
scavenge_count_ > new_space_growth_limit_) {
// Double the size of the new space, and double the limit. The next
// doubling attempt will occur after the current new_space_growth_limit_
// more collections.
// TODO(1240712): NewSpace::Double has a return value which is
// ignored here.
new_space_->Double();
new_space_growth_limit_ *= 2;
}
// Flip the semispaces. After flipping, to space is empty, from space has
// live objects.
// 交换from_space和to_space
// 两个semispace的信息互换
new_space_->Flip();
// 重置allocation_info_
new_space_->ResetAllocationInfo();
// We need to sweep newly copied objects which can be in either the to space
// or the old space. For to space objects, we use a mark. Newly copied
// objects lie between the mark and the allocation top. For objects
// promoted to old space, we write their addresses downward from the top of
// the new space. Sweeping newly promoted objects requires an allocation
// pointer and a mark. Note that the allocation pointer 'top' actually
// moves downward from the high address in the to space.
//
// There is guaranteed to be enough room at the top of the to space for the
// addresses of promoted objects: every object promoted frees up its size in
// bytes from the top of the new space, and objects are at least one pointer
// in size. Using the new space to record promoted addresses makes the
// scavenge collector agnostic to the allocation strategy (eg, linear or
// free-list) used in old space.
// promoted object的指针在new_space中从后向前记录
// to_space_->low()
Address new_mark = new_space_->ToSpaceLow();
Address promoted_mark = new_space_->ToSpaceHigh();
promoted_top = new_space_->ToSpaceHigh();
CopyVisitor copy_visitor;
// Copy roots.
IterateRoots(©_visitor);
// Copy objects reachable from the old generation. By definition, there
// are no intergenerational pointers in code space.
IterateRSet(old_space_, &CopyObject);
IterateRSet(map_space_, &CopyObject);
lo_space_->IterateRSet(&CopyObject);
bool has_processed_weak_pointers = false;
while (true) {
ASSERT(new_mark <= new_space_->top());
ASSERT(promoted_mark >= promoted_top);
// Copy objects reachable from newly copied objects.
// 广度优先遍历
// 相等的时候停止
// allocation_info_.top
while (new_mark < new_space_->top() || promoted_mark > promoted_top) {
// Sweep newly copied objects in the to space. The allocation pointer
// can change during sweeping.
Address previous_top = new_space_->top();
SemiSpaceIterator new_it(new_space_, new_mark);
while (new_it.has_next()) {
new_it.next()->Iterate(©_visitor);
}
new_mark = previous_top;
// Sweep newly copied objects in the old space. The promotion 'top'
// pointer could change during sweeping.
previous_top = promoted_top;
for (Address current = promoted_mark - kPointerSize;
current >= previous_top;
current -= kPointerSize) {
HeapObject* object = HeapObject::cast(Memory::Object_at(current));
object->Iterate(©_visitor);
UpdateRSet(object);
}
promoted_mark = previous_top;
}
if (has_processed_weak_pointers) break; // We are done.
// Copy objects reachable from weak pointers.
GlobalHandles::IterateWeakRoots(©_visitor);
has_processed_weak_pointers = true;
}
// Set age mark.
new_space_->set_age_mark(new_mark);
LOG(ResourceEvent("scavenge", "end"));
gc_state_ = NOT_IN_GC;
}
这里其实就是依据上述的算法**来执行相应逻辑,主要做了如下几件事:
1.为了避免newspace由于空间过小引起频繁地scavenge,每次scavenge之前检查已经scavenge的次数,如果超过限制次数(初始为8)且newspace能满足空间翻倍(初始为256KB,最大为2MB),则double空间以及该次数限制。
2.交换from_space和to_space,两个semispace的信息互换
3.重置allocation_info_
4.IterateRoots,拷贝from_space(交换前的to_space)中的root对象(包括strong_root_list、struct_map、symbol、bootstrapper、top、debug、compilation cache、handlescope、builtins、globalhandles、threadmanager等)到to_space
5.在to_space中广度优先遍历各个节点,对to_space中引用的其他对象执行复制操作
6.最后再对global handle list中处于weak或pengding状态的对象进行拷贝
下面我们挑几个重要的点详细讲解一下。
IterateRoots
IterateRoots(©_visitor)用来将根对象拷贝到to_space_,具体代码如下:
void Heap::IterateRoots(ObjectVisitor* v) {
  IterateStrongRoots(v);
  // copy object
  v->VisitPointer(reinterpret_cast<Object**>(&symbol_table_));
  SYNCHRONIZE_TAG("symbol_table");
}

void Heap::IterateStrongRoots(ObjectVisitor* v) {
#define ROOT_ITERATE(type, name) \
  v->VisitPointer(reinterpret_cast<Object**>(&name##_));
  STRONG_ROOT_LIST(ROOT_ITERATE);
#undef ROOT_ITERATE
  SYNCHRONIZE_TAG("strong_root_list");

#define STRUCT_MAP_ITERATE(NAME, Name, name) \
  v->VisitPointer(reinterpret_cast<Object**>(&name##_map_));
  STRUCT_LIST(STRUCT_MAP_ITERATE);
#undef STRUCT_MAP_ITERATE
  SYNCHRONIZE_TAG("struct_map");

#define SYMBOL_ITERATE(name, string) \
  v->VisitPointer(reinterpret_cast<Object**>(&name##_));
  SYMBOL_LIST(SYMBOL_ITERATE)
#undef SYMBOL_ITERATE
  SYNCHRONIZE_TAG("symbol");

  Bootstrapper::Iterate(v);
  SYNCHRONIZE_TAG("bootstrapper");
  Top::Iterate(v);
  SYNCHRONIZE_TAG("top");
  Debug::Iterate(v);
  SYNCHRONIZE_TAG("debug");

  // Iterate over local handles in handle scopes.
  HandleScopeImplementer::Iterate(v);
  SYNCHRONIZE_TAG("handlescope");

  // Iterate over the builtin code objects and code stubs in the heap. Note
  // that it is not strictly necessary to iterate over code objects on
  // scavenge collections.  We still do it here because this same function
  // is used by the mark-sweep collector and the deserializer.
  Builtins::IterateBuiltins(v);
  SYNCHRONIZE_TAG("builtins");

  // Iterate over global handles.
  GlobalHandles::IterateRoots(v);
  SYNCHRONIZE_TAG("globalhandles");

  // Iterate over pointers being held by inactive threads.
  ThreadManager::Iterate(v);
  SYNCHRONIZE_TAG("threadmanager");
}
这里拷贝了strong_root_list等根对象,拷贝的关键在于v->VisitPointer(reinterpret_cast<Object**>(&name##_));这段逻辑,这段逻辑实际调用的是CopyVisitor::VisitPointer,具体代码如下:
// Helper class for copying HeapObjects
class CopyVisitor: public ObjectVisitor {
 public:

  void VisitPointer(Object** p) {
    CopyObject(p);
  }

  void VisitPointers(Object** start, Object** end) {
    // Copy all HeapObject pointers in [start, end)
    for (Object** p = start; p < end; p++) CopyObject(p);
  }

 private:
  void CopyObject(Object** p) {
    if (!Heap::InFromSpace(*p)) return;
    Heap::CopyObject(reinterpret_cast<HeapObject**>(p));
  }
};
我们可以看到,实际调用的是Heap::CopyObject,代码如下:
void Heap::CopyObject(HeapObject** p) {
  ASSERT(InFromSpace(*p));

  HeapObject* object = *p;

  // We use the first word (where the map pointer usually is) of a
  // HeapObject to record the forwarding pointer.  A forwarding pointer can
  // point to the old space, the code space, or the to space of the new
  // generation.
  // 获取类型
  // (reinterpret_cast<byte*>(p) + offset - kHeapObjectTag)
  HeapObject* first_word = object->map();

  // If the first word (where the map pointer is) is not a map pointer, the
  // object has already been copied.  We do not use first_word->IsMap()
  // because we know that first_word always has the heap object tag.
  // 如果被引用的对象(live objects)已经被拷贝到to_space_,则简单地更新引用,通过forwarding pointer指向新的to_space_中的新对象
  if (first_word->map()->instance_type() != MAP_TYPE) {
    *p = first_word;
    return;
  }

  // Optimization: Bypass ConsString objects where the right-hand side is
  // Heap::empty_string().  We do not use object->IsConsString because we
  // already know that object has the heap object tag.
  InstanceType type = Map::cast(first_word)->instance_type();
  if (type < FIRST_NONSTRING_TYPE &&
      String::cast(object)->representation_tag() == kConsStringTag &&
      ConsString::cast(object)->second() == Heap::empty_string()) {
    object = HeapObject::cast(ConsString::cast(object)->first());
    *p = object;
    // After patching *p we have to repeat the checks that object is in the
    // active semispace of the young generation and not already copied.
    if (!InFromSpace(object)) return;
    first_word = object->map();
    if (first_word->map()->instance_type() != MAP_TYPE) {
      *p = first_word;
      return;
    }
    type = Map::cast(first_word)->instance_type();
  }

  int object_size = object->SizeFromMap(Map::cast(first_word));
  Object* result;
  // If the object should be promoted, we try to copy it to old space.
  // 上一次scavenge中survive(两次scavenge都survivi) 或 to_space可用空间少于75%时
  if (ShouldBePromoted(object->address(), object_size)) {
    // Heap numbers and sequential strings are promoted to code space, all
    // other object types are promoted to old space.  We do not use
    // object->IsHeapNumber() and object->IsSeqString() because we already
    // know that object has the heap object tag.
    bool has_pointers =
        type != HEAP_NUMBER_TYPE &&
        (type >= FIRST_NONSTRING_TYPE ||
         String::cast(object)->representation_tag() != kSeqStringTag);
    if (has_pointers) {
      result = old_space_->AllocateRaw(object_size);
    } else {
      result = code_space_->AllocateRaw(object_size);
    }

    if (!result->IsFailure()) {
      // object->set_map()
      // set forwarding pointer
      *p = MigrateObject(p, HeapObject::cast(result), object_size);
      if (has_pointers) {
        // Record the object's address at the top of the to space, to allow
        // it to be swept by the scavenger.
        promoted_top -= kPointerSize;
        Memory::Object_at(promoted_top) = *p;
      } else {
#ifdef DEBUG
        // Objects promoted to the code space should not have pointers to
        // new space.
        VerifyCodeSpacePointersVisitor v;
        (*p)->Iterate(&v);
#endif
      }
      return;
    }
  }

  // The object should remain in new space or the old space allocation failed.
  result = new_space_->AllocateRaw(object_size);
  // Failed allocation at this point is utterly unexpected.
  ASSERT(!result->IsFailure());
  *p = MigrateObject(p, HeapObject::cast(result), object_size);
}
这里主要做了如下几件事:
1.如果被引用的对象(live objects)已经被拷贝到to_space_,则简单地更新引用,通过forwarding pointer指向新的to_space_中的新对象。这里需要注意的是from_space中的对象map pointer指向拷贝到to_space_或old_space中的新对象,这里也是通过这个map pointer来判断是否已经被拷贝
2.判断是对象否需要提升至old_space_或code_space_,如果是,则在相应空间上分配空间并设置promoted_top。这里需要注意的是为了后面的广度优先遍历,需要记录已经提升的对象地址,所以,在to_space_中,会在to_space中从空间末尾开始,从后向前记录提升的对象地址,promoted_top代表提升变量地址的最顶端(反向)
3.最后,如果对象需要在new_space中分配或者old_space空间分配失败,则调用new_space_->AllocateRaw,并设置from_space中原有对象forwarding pointer指向新的to_space_中的新对象
这里需要注意下ShouldBePromoted方法,也就是对象晋升的条件,代码如下:
bool Heap::ShouldBePromoted(Address old_address, int object_size) {
  // An object should be promoted if:
  // - the object has survived a scavenge operation or
  // - to space is already 25% full.
  return old_address < new_space_->age_mark()
      || (new_space_->Size() + object_size) >= (new_space_->Capacity() >> 2);
}
从上述代码中可以看出,有两个条件可以触发变量提升:
1.To空间已经被使用了超过25%
2.对象在上一次scavenge中survive(两次scavenge都survive)
这里new_space_->age_mark()实际记录的是new_mark,记录的是to_space中以分配空间的最顶端,这里表示copy过去的对象的最顶端,后面介绍广度优先遍历to_space_大家会看到。
广度优先遍历to_space_
广度优先遍历to_space中已有的对象指针,其中包含新拷贝到to_space_中的对象和新拷贝到old_space_中的对象。其在to_space里遍历新拷贝到to_space_中的对象和新拷贝到old_space_中的对象时,各用到两个指针(mark、top)来表示遍历的位置,当四个指针两两重合时,遍历结束。
具体代码如下:
// Copy objects reachable from newly copied objects.
// 广度优先遍历
// 相等的时候停止
// allocation_info_.top
while (new_mark < new_space_->top() || promoted_mark > promoted_top) {
// Sweep newly copied objects in the to space. The allocation pointer
// can change during sweeping.
Address previous_top = new_space_->top();
SemiSpaceIterator new_it(new_space_, new_mark);
while (new_it.has_next()) {
new_it.next()->Iterate(©_visitor);
}
new_mark = previous_top;
// Sweep newly copied objects in the old space. The promotion 'top'
// pointer could change during sweeping.
previous_top = promoted_top;
for (Address current = promoted_mark - kPointerSize;
current >= previous_top;
current -= kPointerSize) {
HeapObject* object = HeapObject::cast(Memory::Object_at(current));
object->Iterate(©_visitor);
UpdateRSet(object);
}
promoted_mark = previous_top;
}
为了解释几个指针的作用,看如下场景:

看了上面的一堆东西,大家可能会看的云里雾里,可以看下浅谈V8引擎中的垃圾回收机制里面的例子,写的比较清楚。
Mark-Compact
Mark-Compact算法主要包含两个阶段:
1.标记阶段,找到并标记所有live objects
2.整理/清除阶段,在此阶段会通过将live objects复制到一个新的连续空间的方式对堆内存进行整理
Mark-Compact代码如下:
void Heap::MarkCompact() {
  gc_state_ = MARK_COMPACT;
#ifdef DEBUG
  mc_count_++;
#endif
  LOG(ResourceEvent("markcompact", "begin"));

  MarkCompactPrologue();

  MarkCompactCollector::CollectGarbage();

  MarkCompactEpilogue();

  LOG(ResourceEvent("markcompact", "end"));

  gc_state_ = NOT_IN_GC;

  Shrink();

  Counters::objs_since_last_full.Set(0);
}
这里主要做了垃圾回收的序幕(设置标记位等)、垃圾回收、垃圾回收的收尾(与序幕对应)、空间压缩这几件事,下面将对其进行详细介绍。
MarkCompactPrologue
MarkCompactPrologue代码如下:
void Heap::MarkCompactPrologue() {
  // 清除缓存的编译代码
  RegExpImpl::OldSpaceCollectionPrologue();
  // 对当前线程中所有栈帧中的所有stackhandler进行操作,将其程序计数器(PC)设置为偏移量,代替原来的绝对地址
  Top::MarkCompactPrologue();
  // 对所有线程执行上述操作
  ThreadManager::MarkCompactPrologue();
}
这里主要做了两件事:
1.清除缓存的编译代码
2.对所有线程的栈帧中的所有stack handle重新设置其pc_address(绝对值改成偏移量)
Top::MarkCompactPrologue();调用的代码如下:
void Top::MarkCompactPrologue(ThreadLocalTop* thread) {
  StackFrame::CookFramesForThread(thread);
}

void StackFrame::CookFramesForThread(ThreadLocalTop* thread) {
  ASSERT(!thread->stack_is_cooked());
  for (StackFrameIterator it(thread); !it.done(); it.Advance()) {
    it.frame()->Cook();
  }
  thread->set_stack_is_cooked(true);
}

void StackFrame::Cook() {
  Code* code = FindCode();
  for (StackHandlerIterator it(this, top_handler()); !it.done(); it.Advance()) {
    it.handler()->Cook(code);
  }
  ASSERT(code->contains(pc()));
  set_pc(AddressFrom<Address>(pc() - code->instruction_start()));
}

void StackHandler::Cook(Code* code) {
  ASSERT(code->contains(pc()));
  set_pc(AddressFrom<Address>(pc() - code->instruction_start()));
}
我们从上述代码可以看到,最终调用了StackHandler::set_pc来设置其pc_address。
MarkCompactCollector::CollectGarbage
这里进入到了MarkCompact的垃圾回收阶段,代码如下:
void MarkCompactCollector::CollectGarbage() {
  // 一些准备工作
  Prepare();

  // 从root object开始深度优先遍历,标记live objects
  MarkLiveObjects();

  // 清理LargeObjectSpace,释放un_marked的LargeObject
  SweepLargeObjectSpace();

  if (compacting_collection_) {
    // 分配空间、在old_object的map指针或from_space的对应位置记录new_object地址
    EncodeForwardingAddresses();

    // 更新所有指向live_objects的pointer,使其指向新对象地址
    UpdatePointers();

    // 把原对象内存拷贝至新的对象内存
    // 利用memmove
    RelocateObjects();

    // 重制remember_set
    // remember_set are sparse, faster (eg, binary) search for set bits
    RebuildRSets();

  } else {
    // 回收没有被标记的内存
    SweepSpaces();
  }

  Finish();
}
这里主要做了如下几件事:
1.获取compacting_collection_,决定后面的过程是否需要内存整理
2.从root object开始深度优先遍历,标记live objects
3.清理LargeObjectSpace,释放un_marked的LargeObject
4.判断需要整理,也就是`compacting_collection_`是否为`true`
	a.需要整理
		i.分配空间、在old_object的map指针或from_space的对应位置记录new_object地址
		ii.更新所有指向live_objects的pointer,使其指向新对象地址
		iii.用memmove方法把原对象内存拷贝至新的对象内存
		iv.重制remember_set(remember_set用来快速搜索bit)
	b.不需要整理,只是清除即可
		i.回收没有被标记的内存
5.Finish,清空StubCache。
这里分阶段详细讲解下:
Prepare
Prepare用来获取现有状态是否需要进行内存整理,还是只回收就好。代码如下:
void MarkCompactCollector::Prepare() {
  static const int kFragmentationLimit = 50;  // Percent.
#ifdef DEBUG
  ASSERT(state_ == IDLE);
  state_ = PREPARE_GC;
#endif
  ASSERT(!FLAG_always_compact || !FLAG_never_compact);

  compacting_collection_ = FLAG_always_compact;

  // We compact the old generation if it gets too fragmented (ie, we could
  // recover an expected amount of space by reclaiming the waste and free
  // list blocks).  We always compact when the flag --gc-global is true
  // because objects do not get promoted out of new space on non-compacting
  // GCs.
  // 碎片化严重时进行compact
  // 当--gc-global为true时,进行compact
  if (!compacting_collection_) {
    // 可恢复的空间
    // 整个空间有 Size(已用) + Waste(浪费) + AvailableFree(剩余) 组成
    int old_gen_recoverable = Heap::old_space()->Waste()
                            + Heap::old_space()->AvailableFree()
                            + Heap::code_space()->Waste()
                            + Heap::code_space()->AvailableFree();
    int old_gen_used = old_gen_recoverable
                     + Heap::old_space()->Size()
                     + Heap::code_space()->Size();
    int old_gen_fragmentation = (old_gen_recoverable * 100) / old_gen_used;
    // old_gen_fragmentation > 50
    if (old_gen_fragmentation > kFragmentationLimit) {
      compacting_collection_ = true;
    }
  }

  if (FLAG_never_compact) compacting_collection_ = false;

#ifdef DEBUG
  if (compacting_collection_) {
    // We will write bookkeeping information to the remembered set area
    // starting now.
    // page设置成NOT_IN_USE
    Page::set_rset_state(Page::NOT_IN_USE);
  }
#endif

  Heap::map_space()->PrepareForMarkCompact(compacting_collection_);
  Heap::old_space()->PrepareForMarkCompact(compacting_collection_);
  Heap::code_space()->PrepareForMarkCompact(compacting_collection_);

  Counters::global_objects.Set(0);

#ifdef DEBUG
  live_bytes_ = 0;
  live_young_objects_ = 0;
  live_old_objects_ = 0;
  live_immutable_objects_ = 0;
  live_map_objects_ = 0;
  live_lo_objects_ = 0;
#endif
}
这里碎片化严重时进行compact,具体的计算使用 可回收的空间/总空间,当大于50%时,使用compact。
MarkLiveObjects
MarkLiveObjects用来标记所有的live object,从root object开始深度优先遍历,代码如下:
// 遍历,为live object标记mark
void MarkCompactCollector::MarkLiveObjects() {
#ifdef DEBUG
  ASSERT(state_ == PREPARE_GC);
  state_ = MARK_LIVE_OBJECTS;
#endif
  // The to space contains live objects, the from space is used as a marking
  // stack.
  marking_stack.Initialize(Heap::new_space()->FromSpaceLow(),
                           Heap::new_space()->FromSpaceHigh());

  // 返回marking_stack.is_overflow
  ASSERT(!marking_stack.overflowed());

  // Mark the heap roots, including global variables, stack variables, etc.
  // 遍历根对象,set_mark & push stack
  MarkingVisitor marking_visitor;
  Heap::IterateStrongRoots(&marking_visitor);

  // Take care of the symbol table specially.
  SymbolTable* symbol_table = SymbolTable::cast(Heap::symbol_table());
#ifdef DEBUG
  UpdateLiveObjectCount(symbol_table);
#endif

  // 1. mark the prefix of the symbol table and push the objects on
  // the stack.
  symbol_table->IteratePrefix(&marking_visitor);
  // 2. mark the symbol table without pushing it on the stack.
  set_mark(symbol_table);  // map word is changed.

  bool has_processed_weak_pointers = false;

  // Mark objects reachable from the roots.
  while (true) {
    // 深度优先遍历,标记、入栈
    MarkObjectsReachableFromTopFrame();

    if (!marking_stack.overflowed()) {
      if (has_processed_weak_pointers) break;
      // First we mark weak pointers not yet reachable.
      GlobalHandles::MarkWeakRoots(&MustBeMarked);
      // Then we process weak pointers and process the transitive closure.
      GlobalHandles::IterateWeakRoots(&marking_visitor);
      has_processed_weak_pointers = true;
      continue;
    }

    // The marking stack overflowed, we need to rebuild it by scanning the
    // whole heap.
    marking_stack.clear_overflowed();

    // We have early stops if the stack overflowed again while scanning
    // overflowed objects in a space.
    SemiSpaceIterator new_it(Heap::new_space(), &OverflowObjectSize);
    ScanOverflowedObjects(&new_it);
    if (marking_stack.overflowed()) continue;

    HeapObjectIterator old_it(Heap::old_space(), &OverflowObjectSize);
    ScanOverflowedObjects(&old_it);
    if (marking_stack.overflowed()) continue;

    HeapObjectIterator code_it(Heap::code_space(), &OverflowObjectSize);
    ScanOverflowedObjects(&code_it);
    if (marking_stack.overflowed()) continue;

    HeapObjectIterator map_it(Heap::map_space(), &OverflowObjectSize);
    ScanOverflowedObjects(&map_it);
    if (marking_stack.overflowed()) continue;

    LargeObjectIterator lo_it(Heap::lo_space(), &OverflowObjectSize);
    ScanOverflowedObjects(&lo_it);
  }

  // Prune the symbol table removing all symbols only pointed to by
  // the symbol table.
  SymbolTableCleaner v;
  symbol_table->IterateElements(&v);
  symbol_table->ElementsRemoved(v.PointersRemoved());

#ifdef DEBUG
  if (FLAG_verify_global_gc) VerifyHeapAfterMarkingPhase();
#endif

  // Remove object groups after marking phase.
  GlobalHandles::RemoveObjectGroups();

  // Objects in the active semispace of the young generation will be relocated
  // to the inactive semispace.  Set the relocation info to the beginning of
  // the inactive semispace.
  Heap::new_space()->MCResetRelocationInfo();
}

void MarkCompactCollector::MarkObjectsReachableFromTopFrame() {
  MarkingVisitor marking_visitor;
  do {
    while (!marking_stack.is_empty()) {
      // marking_stack出栈
      HeapObject* obj = marking_stack.Pop();
      ASSERT(Heap::Contains(obj));
      ASSERT(is_marked(obj) && !is_overflowed(obj));

      // Because the object is marked, the map pointer is not tagged as a
      // normal HeapObject pointer, we need to recover the map pointer,
      // then use the map pointer to mark the object body.
      intptr_t map_word = reinterpret_cast<intptr_t>(obj->map());
      Map* map = reinterpret_cast<Map*>(clear_mark_bit(map_word));
      MarkObject(map);
      // 遍历其子节点
      obj->IterateBody(map->instance_type(), obj->SizeFromMap(map),
                       &marking_visitor);
    };
    // Check objects in object groups.
    MarkObjectGroups(&marking_visitor);
  } while (!marking_stack.is_empty());
}
这里主要做了两件事:
1.初始化栈(深度优先遍历使用),这里直接使用new_space的from_space作为标记所用的栈
2.遍历根节点相连对象,标记、入栈
3.将栈中对象一个个pop出来,进行深度优先遍历标记
标记的具体代码如下:
// Mark object pointed to by p.
  void MarkObjectByPointer(Object** p) {
    Object* obj = *p;
    if (!obj->IsHeapObject()) return;

    // Optimization: Bypass ConsString object where right size is
    // Heap::empty_string().
    // Please note this checks performed equals:
    //   object->IsConsString() &&
    //   (ConsString::cast(object)->second() == Heap::empty_string())
    // except the map for the object might be marked.
    intptr_t map_word =
        reinterpret_cast<intptr_t>(HeapObject::cast(obj)->map());
    uint32_t tag =
        (reinterpret_cast<Map*>(clear_mark_bit(map_word)))->instance_type();
    if ((tag < FIRST_NONSTRING_TYPE) &&
        (kConsStringTag ==
         static_cast<StringRepresentationTag>(tag &
                                              kStringRepresentationMask)) &&
        (Heap::empty_string() ==
         reinterpret_cast<String*>(
             reinterpret_cast<ConsString*>(obj)->second()))) {
      // Since we don't have the object start it is impossible to update the
      // remeber set quickly.  Therefore this optimization only is taking
      // place when we can avoid changing.
      Object* first = reinterpret_cast<ConsString*>(obj)->first();
      if (Heap::InNewSpace(obj) || !Heap::InNewSpace(first)) {
        obj = first;
        *p = obj;
      }
    }
    MarkCompactCollector::MarkObject(HeapObject::cast(obj));
  }
主要是通过对象的size是否与Heap::empty_string()相同来判断对象是否是活着的,标记过程中通过obj的map pointer记录标记,然后入栈。
compact
当需要进行整理时,主要进行如下几个步骤:
EncodeForwardingAddresses
EncodeForwardingAddresses用来分配空间并在old_object的map指针或from_space的对应位置记录new_object地址。代码如下
void MarkCompactCollector::EncodeForwardingAddresses() {
  ASSERT(state_ == ENCODE_FORWARDING_ADDRESSES);
  // Compute the forwarding pointers in each space.
  // 分配新空间、在old_object的map指针上记录new_object的地址
  // &mc_allocation_info记录分配信息(top等)
  EncodeForwardingAddressesInPagedSpace<MCAllocateFromOldSpace,
                                        IgnoreNonLiveObject>(
      Heap::old_space());

  EncodeForwardingAddressesInPagedSpace<MCAllocateFromCodeSpace,
                                        LogNonLiveCodeObject>(
      Heap::code_space());

  // Compute new space next to last after the old and code spaces have been
  // compacted.  Objects in new space can be promoted to old or code space.
  // 这里新生代对象有可能提升到老生代
  // 需要注意的是,new space使用from_space来帮助记录新对象地址,因为to_space和from_space空间大小相同,所以用from_space相同offset的位置记录相应的new_object地址的
  EncodeForwardingAddressesInNewSpace();

  // Compute map space last because computing forwarding addresses
  // overwrites non-live objects.  Objects in the other spaces rely on
  // non-live map pointers to get the sizes of non-live objects.
  EncodeForwardingAddressesInPagedSpace<MCAllocateFromMapSpace,
                                        IgnoreNonLiveObject>(
      Heap::map_space());

  // Write relocation info to the top page, so we can use it later.  This is
  // done after promoting objects from the new space so we get the correct
  // allocation top.
  Heap::old_space()->MCWriteRelocationInfoToPage();
  Heap::code_space()->MCWriteRelocationInfoToPage();
  Heap::map_space()->MCWriteRelocationInfoToPage();
}


void MarkCompactCollector::SweepSpaces() {
  ASSERT(state_ == SWEEP_SPACES);
  ASSERT(!IsCompacting());
  // Noncompacting collections simply sweep the spaces to clear the mark
  // bits and free the nonlive blocks (for old and map spaces).  We sweep
  // the map space last because freeing non-live maps overwrites them and
  // the other spaces rely on possibly non-live maps to get the sizes for
  // non-live objects.
  SweepSpace(Heap::old_space(), &DeallocateOldBlock);
  SweepSpace(Heap::code_space(), &DeallocateCodeBlock);
  SweepSpace(Heap::new_space());
  SweepSpace(Heap::map_space(), &DeallocateMapBlock);
}
这里分别对所有内存space进行操作。下面主要介绍对old_space和new_space的操作。
对old_space的分配、标记的代码如下:
template<MarkCompactCollector::AllocationFunction Alloc,
         MarkCompactCollector::ProcessNonLiveFunction ProcessNonLive>
void MarkCompactCollector::EncodeForwardingAddressesInPagedSpace(
    PagedSpace* space) {
  PageIterator it(space, PageIterator::PAGES_IN_USE);
  while (it.has_next()) {
    Page* p = it.next();
    // The offset of each live object in the page from the first live object
    // in the page.
    int offset = 0;
    // 为marked Object分配新内存,在老对象中存储新对象偏移量
    // 以Page(内存页)为单位进行处理
    EncodeForwardingAddressesInRange<Alloc,
                                     EncodeForwardingAddressInPagedSpace,
                                     ProcessNonLive>(
        p->ObjectAreaStart(),
        p->AllocationTop(),
        &offset);
  }
}
这里循环遍历每一页,对其执行EncodeForwardingAddressesInRange方法。具体代码如下:
// Function template that, given a range of addresses (eg, a semispace or a
// paged space page), iterates through the objects in the range to clear
// mark bits and compute and encode forwarding addresses.  As a side effect,
// maximal free chunks are marked so that they can be skipped on subsequent
// sweeps.
//
// The template parameters are an allocation function, a forwarding address
// encoding function, and a function to process non-live objects.
template<MarkCompactCollector::AllocationFunction Alloc,
         MarkCompactCollector::EncodingFunction Encode,
         MarkCompactCollector::ProcessNonLiveFunction ProcessNonLive>
inline void EncodeForwardingAddressesInRange(Address start,
                                             Address end,
                                             int* offset) {
  // The start address of the current free region while sweeping the space.
  // This address is set when a transition from live to non-live objects is
  // encountered.  A value (an encoding of the 'next free region' pointer)
  // is written to memory at this address when a transition from non-live to
  // live objects is encountered.
  Address free_start = NULL;

  // A flag giving the state of the previously swept object.  Initially true
  // to ensure that free_start is initialized to a proper address before
  // trying to write to it.
  bool is_prev_alive = true;

  int object_size;  // Will be set on each iteration of the loop.
  for (Address current = start; current < end; current += object_size) {
    HeapObject* object = HeapObject::FromAddress(current);
    if (is_marked(object)) {
      clear_mark(object);
      object_size = object->Size();

      Object* forwarded = Alloc(object, object_size);
      // Allocation cannot fail, because we are compacting the space.
      ASSERT(!forwarded->IsFailure());
      Encode(object, object_size, forwarded, offset);

#ifdef DEBUG
      if (FLAG_gc_verbose) {
        PrintF("forward %p -> %p.\n", object->address(),
               HeapObject::cast(forwarded)->address());
      }
#endif
      if (!is_prev_alive) {  // Transition from non-live to live.
        EncodeFreeRegion(free_start, current - free_start);
        is_prev_alive = true;
      }
    } else {  // Non-live object.
      object_size = object->Size();
      ProcessNonLive(object);
      if (is_prev_alive) {  // Transition from live to non-live.
        free_start = current;
        is_prev_alive = false;
      }
    }
  }

  // If we ended on a free region, mark it.
  if (!is_prev_alive) EncodeFreeRegion(free_start, end - free_start);
}
EncodeForwardingAddressesInRange中主要做了两件事:
1.分配新内存 Alloc
2.记录新对象地址,Encode
其中Encode调用了传入模版的EncodeForwardingAddressInPagedSpace方法在old_object中标记new_object的地址,代码如下:
// The forwarding address is encoded in the map pointer of the object as an
// offset (in terms of live bytes) from the address of the first live object
// in the page.
// forwarding addres用距离当前页第一个live object的距离来表示
// 存储在对象的map pointer中
inline void EncodeForwardingAddressInPagedSpace(HeapObject* old_object,
                                                int object_size,
                                                Object* new_object,
                                                int* offset) {
  // Record the forwarding address of the first live object if necessary.
  if (*offset == 0) {
    Page::FromAddress(old_object->address())->mc_first_forwarded =
        HeapObject::cast(new_object)->address();
  }

  uint32_t encoded = EncodePointers(old_object->map()->address(), *offset);
  old_object->set_map(reinterpret_cast<Map*>(encoded));
  *offset += object_size;
  ASSERT(*offset <= Page::kObjectAreaSize);
}
这里需要注意的是在old_object所在页的mc_first_forwarded属性上记录了给第一个live object分配的新对象地址,在old_object中的map指针上只记录new_object距离第一个live object的new_object的距离(forwarding address),同时forwarding address还包含当前页的一些信息(page_index等)。
对新生代分配、标记的代码如下:
// Functions to encode the forwarding pointers in each compactable space.
void MarkCompactCollector::EncodeForwardingAddressesInNewSpace() {
  int ignored;
  EncodeForwardingAddressesInRange<MCAllocateFromNewSpace,
                                   EncodeForwardingAddressInNewSpace,
                                   IgnoreNonLiveObject>(
      Heap::new_space()->bottom(),
      Heap::new_space()->top(),
      &ignored);
}
EncodeForwardingAddressesInRange与old_space中的操作一样,分配和记录两项工作,只不过对应函数不同。
新生代内存分配之前讲过,这里与老生代有一点不同的是会优先通过对象晋升来分配新内存,代码如下:
// Try to promote all objects in new space.  Heap numbers and sequential
// strings are promoted to the code space, all others to the old space.
inline Object* MCAllocateFromNewSpace(HeapObject* object, int object_size) {
  bool has_pointers = !object->IsHeapNumber() && !object->IsSeqString();
  Object* forwarded = has_pointers ?
      Heap::old_space()->MCAllocateRaw(object_size) :
      Heap::code_space()->MCAllocateRaw(object_size);

  if (forwarded->IsFailure()) {
    forwarded = Heap::new_space()->MCAllocateRaw(object_size);
  }
  return forwarded;
}
这里可以看到,先在old_space分配,分配失败才会在new_space上分配。
新生代old_object记录new_object地址的方式也跟old_space不同,主要看如下代码:
// The forwarding address is encoded at the same offset as the current
// to-space object, but in from space.
// 再from_space的相同offset的位置记录new_object的地址
// new_object可能提升到老生代,也可能还在新生代
inline void EncodeForwardingAddressInNewSpace(HeapObject* old_object,
                                              int object_size,
                                              Object* new_object,
                                              int* ignored) {
  int offset =
      Heap::new_space()->ToSpaceOffsetForAddress(old_object->address());
  Memory::Address_at(Heap::new_space()->FromSpaceLow() + offset) =
      HeapObject::cast(new_object)->address();
}
这里可以看到,使用的是from_space的相同offset的位置记录new_object的地址。这里利用new space使用from_space来帮助记录新对象地址,因为to_space和from_space空间大小相同,所以用from_space相同offset的位置记录相应的new_object地址的。
UpdatePointers
UpdatePointers代码如下:
void MarkCompactCollector::UpdatePointers() {
#ifdef DEBUG
  ASSERT(state_ == ENCODE_FORWARDING_ADDRESSES);
  state_ = UPDATE_POINTERS;
#endif
  UpdatingVisitor updating_visitor;
  Heap::IterateRoots(&updating_visitor);
  GlobalHandles::IterateWeakRoots(&updating_visitor);

  int live_maps = IterateLiveObjects(Heap::map_space(),
                                     &UpdatePointersInOldObject);
  int live_olds = IterateLiveObjects(Heap::old_space(),
                                     &UpdatePointersInOldObject);
  int live_immutables = IterateLiveObjects(Heap::code_space(),
                                           &UpdatePointersInOldObject);
  int live_news = IterateLiveObjects(Heap::new_space(),
                                     &UpdatePointersInNewObject);

  // Large objects do not move, the map word can be updated directly.
  LargeObjectIterator it(Heap::lo_space());
  while (it.has_next()) UpdatePointersInNewObject(it.next());

  USE(live_maps);
  USE(live_olds);
  USE(live_immutables);
  USE(live_news);

#ifdef DEBUG
  ASSERT(live_maps == live_map_objects_);
  ASSERT(live_olds == live_old_objects_);
  ASSERT(live_immutables == live_immutable_objects_);
  ASSERT(live_news == live_young_objects_);

  if (FLAG_verify_global_gc) VerifyHeapAfterUpdatingPointers();
#endif
}
这里其实是更新所有指向live_object的pointer,使其指向新地址:
1.遍历root object,更新其指针指向新分配的对象
2.遍历所有space,更新其指针
这里挑一些重要的点给大家讲解一下:
获取新地址并更新的操作在MarkCompactCollector::UpdatePointer中,代码如下:
// 获取新地址并更新
void MarkCompactCollector::UpdatePointer(Object** p) {
  // We need to check if p is in to_space.
  if (!(*p)->IsHeapObject()) return;

  HeapObject* obj = HeapObject::cast(*p);
  Address old_addr = obj->address();
  Address new_addr;

  ASSERT(!Heap::InFromSpace(obj));

  if (Heap::new_space()->Contains(obj)) {
    Address f_addr = Heap::new_space()->FromSpaceLow() +
                     Heap::new_space()->ToSpaceOffsetForAddress(old_addr);
    new_addr = Memory::Address_at(f_addr);

#ifdef DEBUG
    ASSERT(Heap::old_space()->Contains(new_addr) ||
           Heap::code_space()->Contains(new_addr) ||
           Heap::new_space()->FromSpaceContains(new_addr));

    if (Heap::new_space()->FromSpaceContains(new_addr)) {
      ASSERT(Heap::new_space()->FromSpaceOffsetForAddress(new_addr) <=
             Heap::new_space()->ToSpaceOffsetForAddress(old_addr));
    }
#endif

  } else if (Heap::lo_space()->Contains(obj)) {
    // Don't move objects in the large object space.
    new_addr = obj->address();

  } else {
    ASSERT(Heap::old_space()->Contains(obj) ||
           Heap::code_space()->Contains(obj) ||
           Heap::map_space()->Contains(obj));

    new_addr = GetForwardingAddressInOldSpace(obj);
    ASSERT(Heap::old_space()->Contains(new_addr) ||
           Heap::code_space()->Contains(new_addr) ||
           Heap::map_space()->Contains(new_addr));

#ifdef DEBUG
    if (Heap::old_space()->Contains(obj)) {
      ASSERT(Heap::old_space()->MCSpaceOffsetForAddress(new_addr) <=
             Heap::old_space()->MCSpaceOffsetForAddress(old_addr));
    } else if (Heap::code_space()->Contains(obj)) {
      ASSERT(Heap::code_space()->MCSpaceOffsetForAddress(new_addr) <=
             Heap::code_space()->MCSpaceOffsetForAddress(old_addr));
    } else {
      ASSERT(Heap::map_space()->MCSpaceOffsetForAddress(new_addr) <=
             Heap::map_space()->MCSpaceOffsetForAddress(old_addr));
    }
#endif
  }

  *p = HeapObject::FromAddress(new_addr);

#ifdef DEBUG
  if (FLAG_gc_verbose) {
    PrintF("update %p : %p -> %p\n",
           reinterpret_cast<Address>(p), old_addr, new_addr);
  }
#endif
}
这里更新指针操作直接赋值就好,主要是是获取地址,其过程如下:
1.如果是新生代对象,直接从from_space中相同offset的地方获取就好
2.老生代通过GetForwardingAddressInOldSpace方法获取
GetForwardingAddressInOldSpace代码如下:
Address MarkCompactCollector::GetForwardingAddressInOldSpace(HeapObject* obj) {
  // Object should either in old or map space.
  uint32_t encoded = reinterpret_cast<uint32_t>(obj->map());

  // Offset to the first live object's forwarding address.
  int offset = DecodeOffset(encoded);
  Address obj_addr = obj->address();

  // Find the first live object's forwarding address.
  Page* p = Page::FromAddress(obj_addr);
  Address first_forwarded = p->mc_first_forwarded;

  // Page start address of forwarded address.
  Page* forwarded_page = Page::FromAddress(first_forwarded);
  int forwarded_offset = forwarded_page->Offset(first_forwarded);

  // Find end of allocation of in the page of first_forwarded.
  Address mc_top = forwarded_page->mc_relocation_top;
  int mc_top_offset = forwarded_page->Offset(mc_top);

  // Check if current object's forward pointer is in the same page
  // as the first live object's forwarding pointer
  // 在当前页
  if (forwarded_offset + offset < mc_top_offset) {
    // In the same page.
    return first_forwarded + offset;
  }

  // 不在当前页属时,顺延至下一页
  // Must be in the next page, NOTE: this may cross chunks.
  Page* next_page = forwarded_page->next_page();
  ASSERT(next_page->is_valid());

  offset -= (mc_top_offset - forwarded_offset);
  offset += Page::kObjectStartOffset;

  ASSERT_PAGE_OFFSET(offset);
  ASSERT(next_page->OffsetToAddress(offset) < next_page->mc_relocation_top);

  return next_page->OffsetToAddress(offset);
}
这里做了如下几件事:
1.获取当前page的mc_first_forwarded,也就是新分配的第一个对象地址
2.取出对应offset
3.判断是否在一页当中
	a.在一页中,直接返回first_forwarded + offset就好
	b.不在一页中(forwarded_offset + offset大于一页),在下一页中分配,这里需要重新更新下offset,然后使用next_page->OffsetToAddress(offset)获取地址
RelocateObjects
RelocateObjects将原对象的拷贝到新对象的内存中,代码如下:
void MarkCompactCollector::RelocateObjects() {
#ifdef DEBUG
  ASSERT(state_ == UPDATE_POINTERS);
  state_ = RELOCATE_OBJECTS;
#endif
  // Relocates objects, always relocate map objects first. Relocating
  // objects in other space relies on map objects to get object size.
  int live_maps = IterateLiveObjects(Heap::map_space(), &RelocateMapObject);
  int live_olds = IterateLiveObjects(Heap::old_space(), &RelocateOldObject);
  int live_immutables =
      IterateLiveObjects(Heap::code_space(), &RelocateCodeObject);
  int live_news = IterateLiveObjects(Heap::new_space(), &RelocateNewObject);

  USE(live_maps);
  USE(live_olds);
  USE(live_immutables);
  USE(live_news);
#ifdef DEBUG
  ASSERT(live_maps == live_map_objects_);
  ASSERT(live_olds == live_old_objects_);
  ASSERT(live_immutables == live_immutable_objects_);
  ASSERT(live_news == live_young_objects_);
#endif

  // Notify code object in LO to convert IC target to address
  // This must happen after lo_space_->Compact
  LargeObjectIterator it(Heap::lo_space());
  while (it.has_next()) { ConvertCodeICTargetToAddress(it.next()); }

  // Flips from and to spaces
  Heap::new_space()->Flip();

  // Sets age_mark to bottom in to space
  Address mark = Heap::new_space()->bottom();
  Heap::new_space()->set_age_mark(mark);

  Heap::new_space()->MCCommitRelocationInfo();
#ifdef DEBUG
  // It is safe to write to the remembered sets as remembered sets on a
  // page-by-page basis after committing the m-c forwarding pointer.
  Page::set_rset_state(Page::IN_USE);
#endif
  Heap::map_space()->MCCommitRelocationInfo();
  Heap::old_space()->MCCommitRelocationInfo();
  Heap::code_space()->MCCommitRelocationInfo();

#ifdef DEBUG
  if (FLAG_verify_global_gc) VerifyHeapAfterRelocatingObjects();
#endif
}
这里对所有空间的对象进行遍历,然后进行复制,复制的代码如下:
int MarkCompactCollector::RelocateMapObject(HeapObject* obj) {
  // decode map pointer (forwarded address)
  uint32_t encoded = reinterpret_cast<uint32_t>(obj->map());
  Address map_addr = DecodeMapPointer(encoded, Heap::map_space());
  ASSERT(Heap::map_space()->Contains(HeapObject::FromAddress(map_addr)));

  // Get forwarding address before resetting map pointer
  Address new_addr = GetForwardingAddressInOldSpace(obj);

  // recover map pointer
  obj->set_map(reinterpret_cast<Map*>(HeapObject::FromAddress(map_addr)));

  // The meta map object may not be copied yet.
  Address old_addr = obj->address();

  if (new_addr != old_addr) {
    memmove(new_addr, old_addr, Map::kSize);  // copy contents
  }

#ifdef DEBUG
  if (FLAG_gc_verbose) {
    PrintF("relocate %p -> %p\n", old_addr, new_addr);
  }
#endif

  return Map::kSize;
}
主要做了两件事:
1.获取新地址(与上面讲解的获取新地址逻辑相同)
2.利用memmove方法对内存空间进行复制
RebuildRSets
void MarkCompactCollector::RebuildRSets() {
#ifdef DEBUG
  ASSERT(state_ == RELOCATE_OBJECTS);
  state_ = REBUILD_RSETS;
#endif
  Heap::RebuildRSets();
}
这里主要对remember_set进行充值,remember_set用于快速(例如,二进制)搜索标记位
SweepSpaces
SweepSpaces用于清理内存空间而不会像compact去重新整理,当然这里的工作的也是在标记的基础上去做的,SweepSpaces入口代码如下:
void MarkCompactCollector::SweepSpaces() {
  ASSERT(state_ == SWEEP_SPACES);
  ASSERT(!IsCompacting());
  // Noncompacting collections simply sweep the spaces to clear the mark
  // bits and free the nonlive blocks (for old and map spaces).  We sweep
  // the map space last because freeing non-live maps overwrites them and
  // the other spaces rely on possibly non-live maps to get the sizes for
  // non-live objects.
  SweepSpace(Heap::old_space(), &DeallocateOldBlock);
  SweepSpace(Heap::code_space(), &DeallocateCodeBlock);
  SweepSpace(Heap::new_space());
  SweepSpace(Heap::map_space(), &DeallocateMapBlock);
}
这里主要对各个空间进行SweepSpace操作,这里同样对pagedSpace和newSpace的操作不同(函数冲载)。
对于pagedSpace,SweepSpace代码如下:
static void SweepSpace(PagedSpace* space, DeallocateFunction dealloc) {
  PageIterator it(space, PageIterator::PAGES_IN_USE);
  // 遍历每一页
  while (it.has_next()) {
    Page* p = it.next();

    bool is_previous_alive = true;
    Address free_start = NULL;
    HeapObject* object;

    for (Address current = p->ObjectAreaStart();
         current < p->AllocationTop();
         current += object->Size()) {
      object = HeapObject::FromAddress(current);
      if (is_marked(object)) {
        clear_mark(object);
        if (MarkCompactCollector::IsCompacting() && object->IsCode()) {
          // If this is compacting collection marked code objects have had
          // their IC targets converted to objects.
          // They need to be converted back to addresses.
          Code::cast(object)->ConvertICTargetsFromObjectToAddress();
        }
        if (!is_previous_alive) {  // Transition from free to live.
          dealloc(free_start, current - free_start);
          is_previous_alive = true;
        }
      } else {
        if (object->IsCode()) {
          LOG(CodeDeleteEvent(Code::cast(object)->address()));
        }
        if (is_previous_alive) {  // Transition from live to free.
          free_start = current;
          is_previous_alive = false;
        }
      }
      // The object is now unmarked for the call to Size() at the top of the
      // loop.
    }

    // If the last region was not live we need to from free_start to the
    // allocation top in the page.
    if (!is_previous_alive) {
      int free_size = p->AllocationTop() - free_start;
      if (free_size > 0) {
        dealloc(free_start, free_size);
      }
    }
  }
}
这里遍历每一页中每一个object,如果没有标记,说明需要清除,调用传入的DeallocateFunction,old_space传入的DeallocateOldBlock方法如下:
void MarkCompactCollector::DeallocateOldBlock(Address start,
                                              int size_in_bytes) {
  Heap::ClearRSetRange(start, size_in_bytes);
  Heap::old_space()->Free(start, size_in_bytes);
}
也就是清空空间,加入到free_list中。
新生代的SweepSpace代码如下:
static void SweepSpace(NewSpace* space) {
  HeapObject* object;
  for (Address current = space->bottom();
       current < space->top();
       current += object->Size()) {
    object = HeapObject::FromAddress(current);
    if (is_marked(object)) {
      clear_mark(object);
    } else {
      // We give non-live objects a map that will correctly give their size,
      // since their existing map might not be live after the collection.
      // 更新对象map,因为其对应的map将再下面的sweepSpace中被释放
      int size = object->Size();
      if (size >= Array::kHeaderSize) {
        object->set_map(Heap::byte_array_map());
        ByteArray::cast(object)->set_length(ByteArray::LengthFor(size));
      } else {
        ASSERT(size == kPointerSize);
        object->set_map(Heap::one_word_filler_map());
      }
      ASSERT(object->Size() == size);
    }
    // The object is now unmarked for the call to Size() at the top of the
    // loop.
  }
}
这里直接更新对象对应的map指针,因为其对应的map将再下面的sweepSpace中被释放。
Finish
Finish用来清空StubCache。代码如下:
void MarkCompactCollector::Finish() {
#ifdef DEBUG
  ASSERT(state_ == SWEEP_SPACES || state_ == REBUILD_RSETS);
  state_ = IDLE;
#endi
  // The stub cache is not traversed during GC; clear the cache to
  // force lazy re-initialization of it. This must be done after the
  // GC, because it relies on the new address of certain old space
  // objects (empty string, illegal builtin).
  StubCache::Clear();
}
Stub一般会含有已优化的代码,来处理某个IC(内联缓存)之前所碰到的特定类型的操作。一旦Stub碰到了优化代码无法解决的操作,它会调用C++运行时代码来进行处理。运行时代码处理了这个操作之后,会生成一个新的Stub,包含解决这个操作的方案(当然也包括之前的其他方案)。
Shrink
Shrink用于空间的收缩,分别对map_space_、old_space_、code_space_进行操作,代码如下:
void Heap::Shrink() {
  // Try to shrink map, old, and code spaces.
  map_space_->Shrink();
  old_space_->Shrink();
  code_space_->Shrink();
}
最终都会调用PagedSpace::Shrink方法,代码如下:
void PagedSpace::Shrink() {
  // Release half of free pages.
  // 释放后一般
  Page* top_page = AllocationTopPage();
  ASSERT(top_page->is_valid());

  // Loop over the pages from the top page to the end of the space to count
  // the number of pages to keep and find the last page to keep.
  int free_pages = 0;
  int pages_to_keep = 0;  // Of the free pages.
  Page* last_page_to_keep = top_page;
  Page* current_page = top_page->next_page();
  // Loop over the pages to the end of the space.
  while (current_page->is_valid()) {
    // Keep every odd-numbered page, one page for every two in the space.
    if ((free_pages & 0x1) == 1) {
      pages_to_keep++;
      last_page_to_keep = last_page_to_keep->next_page();
    }
    free_pages++;
    current_page = current_page->next_page();
  }

  // Free pages after last_page_to_keep, and adjust the next_page link.
  Page* p = MemoryAllocator::FreePages(last_page_to_keep->next_page());
  MemoryAllocator::SetNextPage(last_page_to_keep, p);

  // Since pages are only freed in whole chunks, we may have kept more than
  // pages_to_keep.
  while (p->is_valid()) {
    pages_to_keep++;
    p = p->next_page();
  }

  // The difference between free_pages and pages_to_keep is the number of
  // pages actually freed.
  ASSERT(pages_to_keep <= free_pages);
  int bytes_freed = (free_pages - pages_to_keep) * Page::kObjectAreaSize;
  accounting_stats_.ShrinkSpace(bytes_freed);

  ASSERT(Capacity() == CountTotalPages() * Page::kObjectAreaSize);
}
这里其实是释放掉了pagedSpace的后一半,如下图:

总结
本文从源码的角度介绍了V8的内存管理,可能大家会说对日常工作毫无作用,但读下来感觉还是很有意思,拓展了很多知识。
参考文献
Node.js源码-node_javascript.cc
上一篇讲node运行的文章中,我们提到了LoadEnvironment的LoadersBootstrapperSource方法,其从node_javascript.cc中获取loader文件内容的ascII码,node_javascript.cc在out/Debug/gen中,它是如何产生的呢?
本篇文章就是来介绍node_javascript.cc是如何产生的以及其中的内容。
node_js2c
下面是node.gyp定义的node_js2c目标:
{
      'target_name': 'node_js2c',
      'type': 'none',
      'toolsets': ['host'],
      'actions': [
        {
          'action_name': 'node_js2c',
          'process_outputs_as_sources': 1,
          'inputs': [
            '<@(library_files)',
            './config.gypi',
            'tools/check_macros.py'
          ],
          'outputs': [
            '<(SHARED_INTERMEDIATE_DIR)/node_javascript.cc',
          ],
          'conditions': [
            [ 'node_use_dtrace=="false" and node_use_etw=="false"', {
              'inputs': [ 'src/notrace_macros.py' ]
            }],
            [ 'node_use_perfctr=="false"', {
              'inputs': [ 'src/noperfctr_macros.py' ]
            }],
            [ 'node_debug_lib=="false"', {
              'inputs': [ 'tools/nodcheck_macros.py' ]
            }],
            [ 'node_debug_lib=="true"', {
              'inputs': [ 'tools/dcheck_macros.py' ]
            }]
          ],
          'action': [
            'python',
            'tools/js2c.py',
            '<@(_outputs)',
            '<@(_inputs)',
          ],
        },
      ],
    }
inputs
我们可以看到inputs中主要有三个输入,library_files、./config.gypi、tools/check_macros.py。
library_files
其中library_files包含如下文件:
'library_files': [
      'lib/internal/bootstrap/loaders.js',
      'lib/internal/bootstrap/node.js',
      'lib/async_hooks.js',
      'lib/assert.js',
      'lib/buffer.js',

      ......

      'deps/node-inspect/lib/internal/inspect_client.js',
      'deps/node-inspect/lib/internal/inspect_repl.js',
      'deps/acorn/dist/acorn.js',
      'deps/acorn/dist/walk.js',
    ],
基本上是lib和dep中的一些.js文件。
./config.gypi
./config.gypi主要定义了一些target_defaults(作用域.gyp文件中所有的targets)和一些变量。
tools/check_macros.py
宏定义:
macro CHECK(x) = do { if (!(x)) (process._rawDebug("CHECK: x == true"), process.abort()) } while (0);
macro CHECK_EQ(a, b) = CHECK((a) === (b));
macro CHECK_GE(a, b) = CHECK((a) >= (b));
macro CHECK_GT(a, b) = CHECK((a) > (b));
macro CHECK_LE(a, b) = CHECK((a) <= (b));
macro CHECK_LT(a, b) = CHECK((a) < (b));
macro CHECK_NE(a, b) = CHECK((a) !== (b));
outputs
outputs很简单,在debug模式下就是out/Debug/node_javascript.cc。
action
'action': [
            'python',
            'tools/js2c.py',
            '<@(_outputs)',
            '<@(_inputs)',
          ]
翻译成指令就是:
python tools/js2c.py $(outputs) $(inputs)
js2c.py
下面我们来看下js2c.py里做了什么?
def main():
  natives = sys.argv[1]
  source_files = sys.argv[2:]
  JS2C(source_files, [natives])
调用了JS2C,并将inputs中的所有文件路径作为参数传进去。
我们来看下JS2C:
def JS2C(source, target):
  modules = []
  consts = {}
  macros = {}
  macro_lines = []

  for s in source:
    if (os.path.split(str(s))[1]).endswith('macros.py'):
      macro_lines.extend(ReadLines(str(s)))
    else:
      modules.append(s)

  # Process input from all *macro.py files
  // 拿到宏定义
  (consts, macros) = ReadMacros(macro_lines)

  # Build source code lines
  definitions = []
  initializers = []

  for name in modules:
    lines = ReadFile(str(name))
    // 替换宏定义
    lines = ExpandConstants(lines, consts)
    lines = ExpandMacros(lines, macros)

    deprecated_deps = None

    # On Windows, "./foo.bar" in the .gyp file is passed as "foo.bar"
    # so don't assume there is always a slash in the file path.
    if '/' in name or '\\' in name:
      split = re.split('/|\\\\', name)
      if split[0] == 'deps':
        if split[1] == 'node-inspect' or split[1] == 'v8':
          deprecated_deps = split[1:]
        split = ['internal'] + split
      else:
        split = split[1:]
      name = '/'.join(split)

    # if its a gypi file we're going to want it as json
    # later on anyway, so get it out of the way now
    if name.endswith(".gypi"):
      lines = re.sub(r'#.*?\n', '', lines)
      lines = re.sub(r'\'', '"', lines)
    name = name.split('.', 1)[0]
    var = name.replace('-', '_').replace('/', '_')
    key = '%s_key' % var
    value = '%s_value' % var

    definitions.append(Render(key, name))
    definitions.append(Render(value, lines))
    initializers.append(INITIALIZER.format(key=key, value=value))

    if deprecated_deps is not None:
      name = '/'.join(deprecated_deps)
      name = name.split('.', 1)[0]
      var = name.replace('-', '_').replace('/', '_')
      key = '%s_key' % var
      value = '%s_value' % var

      definitions.append(Render(key, name))
      definitions.append(Render(value, DEPRECATED_DEPS.format(module=name)))
      initializers.append(INITIALIZER.format(key=key, value=value))

  # Emit result
  output = open(str(target[0]), "w")
  output.write(TEMPLATE.format(definitions=''.join(definitions),
                               initializers=''.join(initializers)))
  output.close()
这里一共做了如下几件事:
1.拿到宏定义
2.循环遍历文件
	·宏替换
	·获得所有定义的字符串代码
	·获得所有初始化的字符串代码
	·字符串替换
render
def Render(var, data):
  # Treat non-ASCII as UTF-8 and convert it to UTF-16.
  if any(ord(c) > 127 for c in data):
    template = TWO_BYTE_STRING
    data = map(ord, data.decode('utf-8').encode('utf-16be'))
    data = [data[i] * 256 + data[i+1] for i in xrange(0, len(data), 2)]
    data = ToCArray(data)
  else:
    template = ONE_BYTE_STRING
    data = ToCString(data)
  return template.format(var=var, data=data)
判断文件中字符的ascII码是否超过127,超过的字符被转成UTF-16。
node_javascript.cc
node_javascript.cc主要有以下几部分组成:
1.各个模块key、value对应的结构体的定义
static const uint8_t raw_internal_bootstrap_loaders_key[] = { 105,110,116,101,114,110,97,108,47,98,111,111,116,115,116,114,97,112,47,108,
111,97,100,101,114,115 };
static struct : public v8::String::ExternalOneByteStringResource {
  const char* data() const override {
    return reinterpret_cast<const char*>(raw_internal_bootstrap_loaders_key);
  }
  size_t length() const override { return arraysize(raw_internal_bootstrap_loaders_key); }
  void Dispose() override { /* Default calls `delete this`. */ }
  v8::Local<v8::String> ToStringChecked(v8::Isolate* isolate) {
    return v8::String::NewExternalOneByte(isolate, this).ToLocalChecked();
  }
} internal_bootstrap_loaders_key;

static const uint8_t raw_internal_bootstrap_loaders_value[] = { 47,47,32,84,104,105,115,32,102,105,108,101,32,99,114,101,97,116,101,115,
32,116,104,101,32,105,110,116,101,114,110,97,108,32,109,111,100,117,108,101,
32,38,32,98,105,110,100,105,110,103,32,108,111,97,100,101,114,115,32,117,
 };
static struct : public v8::String::ExternalOneByteStringResource {
  const char* data() const override {
    return reinterpret_cast<const char*>(raw_internal_bootstrap_loaders_value);
  }
  size_t length() const override { return arraysize(raw_internal_bootstrap_loaders_value); }
  void Dispose() override { /* Default calls `delete this`. */ }
  v8::Local<v8::String> ToStringChecked(v8::Isolate* isolate) {
    return v8::String::NewExternalOneByte(isolate, this).ToLocalChecked();
  }
} internal_bootstrap_loaders_value;
我们可以看到数组和两个struct,其中raw_internal_bootstrap_loaders_key和raw_internal_bootstrap_loaders_value分别记录bootstrap_loaders的key和value(文件内容),两个结构体internal_bootstrap_loaders_key和internal_bootstrap_loaders_value均有方法ToStringChecked,而ToStringChecked其实会去找data()方法,也就是说internal_bootstrap_loaders_value.ToStringChecked()便会返回对应的ascII码。
2.初始化函数定义(initializers)
void DefineJavaScript(Environment* env, v8::Local<v8::Object> target) {
  CHECK(target->Set(env->context(),
                  internal_bootstrap_loaders_key.ToStringChecked(env->isolate()),
                  internal_bootstrap_loaders_value.ToStringChecked(env->isolate())).FromJust());
这里主要是将各个模块的key、value挂载在exports对象中,可以在.cpp或者.js中取得文件内容进行执行等操作。
总结
本文主要介绍node_javascript.cc的产生和内容,这其实也是node中获取native模块最关键的地方。到此为止,已经介绍了node中builtin和native模块的由来,大家也可以和上一篇文章的中所提到的getBinding串起来了。
Koa实现原理简要分析
运行流程
1.new app()
首先koa中主要有app,context,response,request四个基类,我们在实例化app的时候,实际上就是初始化了一些app中的属性。
this.proxy = false;
this.middleware = [];
this.subdomainOffset = 2;
this.env = process.env.NODE_ENV || 'development';
this.context = Object.create(context);
this.request = Object.create(request);
this.response = Object.create(response);
2.app.listen()
在我们执行app.listen()时,主要做了createServer,中间件用compose串起来。
这里面的compose是Koa洋葱圈模型的实现关键,后面会详细介绍
3.handle request
当请求来临时,koa首先 Object.create(this.context),创建一个我们常用ctx对象,然后执行中间件,最后respond(res.end(body))
洋葱圈的实现
我们知道,koa中的比较重要的部分在于其中间件的挂载和执行,当请求到来时,中间件先顺序执行,再逆序执行,那么这在koa2.x中是如何实现的呢?
1.app.use()
首先当我们执行app.use时,将该中间件push到middleware队列中。
use(fn) {
    ......
    this.middleware.push(fn);
    return this;
 }
2.app.listen()
当执行listen时,执行const fn = compose(this.middleware);,compose执行返回一个函数fn,fn执行时,按队列中的顺序依次执行,传入参数ctx及next方法。
function compose (middleware) {
  if (!Array.isArray(middleware)) throw new TypeError('Middleware stack must be an array!')
  for (const fn of middleware) {
    if (typeof fn !== 'function') throw new TypeError('Middleware must be composed of functions!')
  }

  /**
   * @param {Object} context
   * @return {Promise}
   * @api public
   */

  return function (context, next) {
    // last called middleware #
    let index = -1
    return dispatch(0)
    function dispatch (i) {
      if (i <= index) return Promise.reject(new Error('next() called multiple times'))
      index = i
      let fn = middleware[i]
      if (i === middleware.length) fn = next
      if (!fn) return Promise.resolve()
      try {
        return Promise.resolve(fn(context, function next () {
          return dispatch(i + 1)
        }))
      } catch (err) {
        return Promise.reject(err)
      }
    }
  }
}
那么中间件为什么会从前向后执行,然后再从后向前执行呢?
首先,我们在写中间时会有await next()的用法(注意,await会等到后面的Promise resolve或reject后才厚向下继续执行),那么执行await next()就会转而执行dispatch(i + 1),直到最后一个中间件;当执行到最后一个再执行dispatch(i + 1)时,会触发if (!fn) return Promise.resolve(),最后一个中间件开始执行await next()后面的逻辑,完成后,执行倒数第二个,依次执行到第一个中间件。
注意,当中间件中有两处await next()时,会触发if (i <= index) return Promise.reject(new Error('next() called multiple times')),抛出错误。
context/request/response
三者的关系引用深入浅出koa中的一张图。
其中,我们在使用ctx.body等属性或方法时,实际上调用的this.request.body等属性或方法,实际实现就是调用了delegate库,将request和response中一些常用属性和方法挂载到context对象上。
delegate(proto, 'response')
  .method('attachment')
  .method('redirect')
  .method('remove')
  .method('vary')
  .method('set')
  .method('append')
  .method('flushHeaders')
  .access('status')
  .access('message')
  .access('body')
  .access('length')
  .access('type')
  .access('lastModified')
  .access('etag')
  .getter('headerSent')
  .getter('writable');

/**
 * Request delegation.
 */

delegate(proto, 'request')
  .method('acceptsLanguages')
  .method('acceptsEncodings')
  .method('acceptsCharsets')
  .method('accepts')
  .method('get')
  .method('is')
  .access('querystring')
  .access('idempotent')
  .access('socket')
  .access('search')
  .access('method')
  .access('query')
  .access('path')
  .access('url')
  .getter('origin')
  .getter('href')
  .getter('subdomains')
  .getter('protocol')
  .getter('host')
  .getter('hostname')
  .getter('URL')
  .getter('header')
  .getter('headers')
  .getter('secure')
  .getter('stale')
  .getter('fresh')
  .getter('ips')
  .getter('ip');
中间件的书写
koa中间件实现起来比较简单,只要实现一个带有ctx和next参数的一个函数即可。以koa-body为例。随便看一个中间件就好了
Koa1.0中的洋葱圈实现
Koa1.0中的中间还没有await和async,而是用的yield来实现,yeild next如何做到上述的顺序执行然后逆序呢?我们下面简单回顾一下。
1.compose middleware
var fn = this.experimental
    ? compose_es7(this.middleware)
    : co.wrap(compose(this.middleware));//这里就是我们上面讲的compose()函数
2.co.wrap()
co.wrap = function (fn) {
  createPromise.__generatorFunction__ = fn;
  return createPromise;
  function createPromise() {
    return co.call(this, fn.apply(this, arguments));
  }
};
这里相当于调用了co()方法,把我们之前的compose()函数返回的结果函数作为参数传给了它。
3.co()——逆向执行关键
/**
 * slice() reference.
 */

var slice = Array.prototype.slice;

/**
 * Expose `co`.
 */

module.exports = co['default'] = co.co = co;

/**
 * Wrap the given generator `fn` into a
 * function that returns a promise.
 * This is a separate function so that
 * every `co()` call doesn't create a new,
 * unnecessary closure.
 *
 * @param {GeneratorFunction} fn
 * @return {Function}
 * @api public
 */

co.wrap = function (fn) {
  createPromise.__generatorFunction__ = fn;
  return createPromise;
  function createPromise() {
    return co.call(this, fn.apply(this, arguments));
  }
};

/**
 * Execute the generator function or a generator
 * and return a promise.
 *
 * @param {Function} fn
 * @return {Promise}
 * @api public
 */

function co(gen) {
  var ctx = this;
  var args = slice.call(arguments, 1);

  // we wrap everything in a promise to avoid promise chaining,
  // which leads to memory leak errors.
  // see https://github.com/tj/co/issues/180
  //返回promise
  return new Promise(function(resolve, reject) {
    if (typeof gen === 'function') gen = gen.apply(ctx, args);
    if (!gen || typeof gen.next !== 'function') return resolve(gen);

    onFulfilled();

    /**
     * @param {Mixed} res
     * @return {Promise}
     * @api private
     */

    // promise成功时调用
    // 调用resolve()时执行
    function onFulfilled(res) {
      var ret;
      try {
        // 调用gen.next,到达一个yield
        ret = gen.next(res);
      } catch (e) {
        return reject(e);
      }
      // 将gen.next()返回值传入next()函数
      next(ret);
      return null;
    }

    /**
     * @param {Error} err
     * @return {Promise}
     * @api private
     */

    function onRejected(err) {
      var ret;
      try {
        ret = gen.throw(err);
      } catch (e) {
        return reject(e);
      }
      next(ret);
    }

    /**
     * Get the next value in the generator,
     * return a promise.
     *
     * @param {Object} ret
     * @return {Promise}
     * @api private
     */

    function next(ret) {
      // 如果generator函数执行完毕,调用resolve,执行上述fullfilled函数
      // 并将ret.value传入
      if (ret.done) return resolve(ret.value);
      // 将ret.value转换成promise
      // 转换函数在下面
      var value = toPromise.call(ctx, ret.value);
      // 监听promise的成功/失败
      if (value && isPromise(value)) return value.then(onFulfilled, onRejected);
      return onRejected(new TypeError('You may only yield a function, promise, generator, array, or object, '
        + 'but the following object was passed: "' + String(ret.value) + '"'));
    }
  });
}

/**
 * Convert a `yield`ed value into a promise.
 *
 * @param {Mixed} obj
 * @return {Promise}
 * @api private
 */

function toPromise(obj) {
  if (!obj) return obj;
  if (isPromise(obj)) return obj;
  if (isGeneratorFunction(obj) || isGenerator(obj)) return co.call(this, obj);
  if ('function' == typeof obj) return thunkToPromise.call(this, obj);
  if (Array.isArray(obj)) return arrayToPromise.call(this, obj);
  if (isObject(obj)) return objectToPromise.call(this, obj);
  return obj;
}

/**
 * Convert a thunk to a promise.
 *
 * @param {Function}
 * @return {Promise}
 * @api private
 */

function thunkToPromise(fn) {
  var ctx = this;
  return new Promise(function (resolve, reject) {
    fn.call(ctx, function (err, res) {
      if (err) return reject(err);
      if (arguments.length > 2) res = slice.call(arguments, 1);
      resolve(res);
    });
  });
}

/**
 * Convert an array of "yieldables" to a promise.
 * Uses `Promise.all()` internally.
 *
 * @param {Array} obj
 * @return {Promise}
 * @api private
 */

function arrayToPromise(obj) {
  return Promise.all(obj.map(toPromise, this));
}

/**
 * Convert an object of "yieldables" to a promise.
 * Uses `Promise.all()` internally.
 *
 * @param {Object} obj
 * @return {Promise}
 * @api private
 */

function objectToPromise(obj){
  var results = new obj.constructor();
  var keys = Object.keys(obj);
  var promises = [];
  for (var i = 0; i < keys.length; i++) {
    var key = keys[i];
    var promise = toPromise.call(this, obj[key]);
    if (promise && isPromise(promise)) defer(promise, key);
    else results[key] = obj[key];
  }
  return Promise.all(promises).then(function () {
    return results;
  });

  function defer(promise, key) {
    // predefine the key in the result
    results[key] = undefined;
    promises.push(promise.then(function (res) {
      results[key] = res;
    }));
  }
}

/**
 * Check if `obj` is a promise.
 *
 * @param {Object} obj
 * @return {Boolean}
 * @api private
 */

function isPromise(obj) {
  return 'function' == typeof obj.then;
}

/**
 * Check if `obj` is a generator.
 *
 * @param {Mixed} obj
 * @return {Boolean}
 * @api private
 */

function isGenerator(obj) {
  return 'function' == typeof obj.next && 'function' == typeof obj.throw;
}

/**
 * Check if `obj` is a generator function.
 *
 * @param {Mixed} obj
 * @return {Boolean}
 * @api private
 */

function isGeneratorFunction(obj) {
  var constructor = obj.constructor;
  if (!constructor) return false;
  if ('GeneratorFunction' === constructor.name || 'GeneratorFunction' === constructor.displayName) return true;
  return isGenerator(constructor.prototype);
}

/**
 * Check for plain object.
 *
 * @param {Mixed} val
 * @return {Boolean}
 * @api private
 */

function isObject(val) {
  return Object == val.constructor;
}
注意,我们在写每个中间件时,实际都有yield next;onFulfilled这个函数只在两种情况下被调用,一种是调用co的时候执行,还有一种是当前promise中的所有逻辑都执行完毕后执行
这里我们传入的fn是一个generator对象,根据上述转换函数,将会继续调用co()函数,执行next()时,我们传入的参数ret.val是下一个中间件的generator对象,所以继续调用co()函数,如此递归的执行下去;当到最后一个中间件时,执行完成后,ret.done==true,会再次调用resolve,返回到上一层中间件。
这个过程其实就是递归调用的过程。
编译原理扫盲帖
最近复习了一下编译原理,编译原理主要有以下几个阶段:
1.词法分析,将原文件中的字符分解为一个个独立的单词符号——TOKEN。词法分析的输入是字符流,输出的一个个词法单元(<类型, 值>)。
2.语法分析,分析程序的短语结构。语法分析从语法分析器输出的token中识别各类短语,并构造语法分析树。
3.语义分析,推算程序的含义。语义分析负责收集标志符的属性信息并存在符号表中;负责语义检查
4.中间代码生成
5.代码优化
6.目标代码生成
其中,语法分析、语义分析、中间代码生成三个阶段可以合为语法制导翻译。
本文将针对上述几个阶段进行简要介绍。
词法分析
语法分析器从左到右的扫描程序中的字符,识别出各个单词,并确定单词类型,输出统一的词法单元token。
我们在做词法分析器时,主要遵循以下几个步骤:
1.确定Token的分类,比如关键字、常量、运算符、标志符、空格、注释等
2.为每一类token确定相应的正则及匹配函数
3.在主流程中逐一匹配正则并削减剩余字符串
我们以sql-parser中的词法分析部分为例:
正则及匹配函数
WHITESPACE = /^[ \n\r]+/;

Lexer.prototype.whitespaceToken = function() {
      var match, newlines, partMatch;
      if (match = WHITESPACE.exec(this.chunk)) {
        partMatch = match[0];
        newlines = partMatch.replace(/[^\n]/, '').length;
        this.currentLine += newlines;
        if (this.preserveWhitespace) {
          return { name, value: partMatch }
        }
      }
};
主流程
while (this.chunk = sql.slice(i)) {
        token = this.keywordToken() || this.starToken() || this.booleanToken() || this.functionToken() || this.windowExtension() || this.sortOrderToken() || this.seperatorToken() || this.operatorToken() || this.mathToken() || this.dotToken() || this.conditionalToken() || this.betweenToken() || this.subSelectOpToken() || this.subSelectUnaryOpToken() || this.numberToken() || this.stringToken() || this.parameterToken() || this.parensToken() || this.whitespaceToken() || this.literalToken();
        if (token.length < 1) {
          throw new Error("NOTHING CONSUMED: Stopped at - '" + (this.chunk.slice(0, 30)) + "'");
        }

        this.tokens.push(token)
        i += token.value.length;
}
文法
文法用来描述语言的规则,文法G定义为一个四元组(VN,VT,P,S),其中,VN为非终结符集合,VT终结符集合;P是产生式结合;S称为识别符或开始符号,也是一个非终结符,至少要在一条产生式的左边出现。
产生式的形式是α → β,α称为产生式左部,β称为产生式右部,α属于VN,β∈(VN∪VT)*,α∉ε
上下文无关文法
文法分为上下文有关文法和上下文无关文法,故名思义,上下文无关文法就是匹配产生式时,与上下文(前后已经推倒出的结果)无关,上下文无关文法的产生式左侧只有非终结符。只要文法的定义里有某个产生式,不管一个非终结符前后的串是什么,就可以应用相应的产生式进行推导。
消除左递归
一个文法含有下列形式的产生式之一时:
1.A→Aβ,A∈VN,β∈V*
2.A→Bβ,B→Aα,A、B∈VN,α、β∈V*
则称该文法是左递归的。
左递归的产生式是无法做自顶向下分析语法分析的,所以需要我们消除左递归。消除直接左递归的方式是将其转换成右递归。比如产生式:
P -> Pa|b
P表示的是ba{1,},那么我们可以将其转换成如下右递归,
P -> bP'
P' -> aP'|ε
消除左递归有一套通用的算法,算法如下:
从 i = 1 到 n {
    从 j = 1 到 i - 1 {
        设Aj -> d1 | d2 | ... | dk
        将所有规则 Ai -> Aj y换成
        Ai -> d1 y | d2 y | ... | dk y
        移除Ai规则中的直接左递归
    }
}
简单用Javascript实现了一个消除直接递归的函数:
function removeDirectLeftRecursion(grammar) {
    for (let i = 0; i < grammar.length; i++) {
        let left  = grammar[i].getLeft(),
            right = grammar[i].getRight();

        let continueFlag = true;
        for (let j = 0; j < right.length; j++) {
            if (left === right[j].charAt(0)) {
                continueFlag = false;
                break;
            }
        }

        if (continueFlag) continue;

        let newLeft  = `${left}'`;
        grammar.add(new Rule(newLeft));
        grammar.get(grammar.size()-1).add("~");

        let generated = [];
        for (let j = 0; j < right.length; j++) {
            if (left === right[j].charAt(0)) {
                grammar.get(grammar.size()-1).add(ss.substring(1) + newLeft);
            } else {
                generated.push(right[j] + newLeft)
            }
        }

        right.set(generated);
    }
}
语法分析
语法分析的目的是构造分析树,按照分析树的构造方向,可以将语法分析分成自顶向下和自底向上分析法两种,下面来分别介绍。
自顶向下
自顶向上是从分析树的顶部(根节点)向底部(叶)节点方向构造分析树。
每一步推导中,都需要做两个选择:
1.替换当前句型中的哪个非终结符
2.用该非终结符的哪个候选式进行替换。
针对第一个选择,有最左推导和最右推到,由于我们通常都是从左到右的遍历,所以通常使用最左推导。针对第二个选择,将在下面分析法中介绍。
自顶向下的分析法,对文法有一定的要求,可能需要做文法转换,比如消除左递归,这里不再赘述。
递归下降分析
递归下降由一组过程组成,每个非终结符都对应一个分析过程。该方法从起始非终结符S开始,递归的调用其他的非终结符的对应过程。如果S对应的过程恰好扫描了整个输入串,则成功的完成了递归分析。
这里针对第二个选择,当同一个非终结符对应多个产生式时,可以使用错误回溯或预测分析的方法。回溯的方法会挨个尝试非终结符的产生式,如果后面的解析发生错误,则尝试下一个,这种方法称之为回溯;预测分析通过向前看输入流的k个字符,决定应用的产生式,也就是LL(k)分析法。
预测分析法在每一步推导中根据当前句型的最左非终结符A和当前输入符号a,选择一个正确的A的产生式。对于预测分析法,需要计算非终结符的First集和Follow集,通过这两个集合,可以计算产生式的Select集(eg.SELECT(A -> aB))来帮助预测分析,通过每个产生式的SELECT集就可以构造预测分析表,预测最细最终就是通过预测分析表来决定选用哪个产生式的。预测分析表的例子如下:
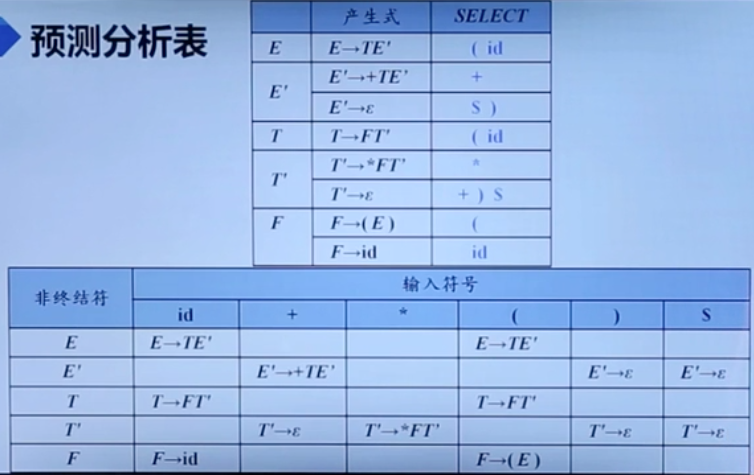
基于回溯的递归下降分析法,每一个非终结符的助理过程大致如下:
function A(scanner) {
	// 选择A的某个产生式,A -> X1X2...XK
	for (i to k) {
		if (Xi为非终结符) {
			X1(scanner)
		} else if (Xi为终结符 && Xi == scanner.read()) {
			scanner.next()
		} else {
			//	发生错误
		}
	}
}
递归的预测分析法通过预测分析表,决定调用哪个过程。我们在这里假设非终结符A对应两个表达式,分别的SELECT集为{:}、{,}大致过程如下:
function A(scanner) {
	// 选择A的某个产生式,A -> X1X2...XK
	for (i to k) {
		if (Xi为非终结符) {
			if (scanner.read() == ':') {
				// 第一个产生式
			} else if (scanner.read() == ';') {
				//第二个产生式
			}

		} else if (Xi为终结符 && Xi == scanner.read()) {
			scanner.next()
		} else {
			//	发生错误
		}
	}
}
非递归预测分析
非递归的预测分析又叫做表驱动的预测分析,结构如下:

主要由预测分析表、扫描器和一个栈组成。原理与树的深度优先遍历类似,将匹配的产生式入栈,当栈顶与当前的输入符号相同时,栈顶出栈,输入符号向后移一位。
算法的大致流程如下:
X = 栈顶符号

// 栈顶不为空
while (X == '$') {
	if (X为终结符) {
		if (X == scanner.read()) {
			stack.pop();
			scanner.next()
		} else {
			throw Error;
		}
	}

	// 需查预测分析表M
	if (X为非终结符) {
		if (!M[X, a]) {
			throw Error
		} else {
			// 有对应产生式
			stact.pop();
			// 将产生式中的符号从右向左一次入栈
		}
	}
}
自底向上
自顶向上是从分析树的底部(叶节点)向顶部(根节点)方向构造分析树。
移入-归约分析
自底向上的分析通用框架是移入-归约分析。
移入-归约分析的过程如下:
1.移入,对输入串从左到右扫描,将若干个字符入栈,直到可以对符号串进行归约为止
2.归约,栈顶字符归约成某个产生式的左部
3.语法分析器不断循环上述部分,直到栈顶包含了文法开始符号并且输入串为空;当然还有一种情况是检测到了语法错误
这里有个选择是当可以归约时,是继续移入还是直接归约,确定移入还是归约需要向前查看k个输入符号来决定,这就是LR(k)分析。
由于合适的产生式(句柄)是逐步形成的,所以句柄识别情况是有“状态“的,LR分析法用以下方式描述状态:
S -> bBB
S -> .bBB
S -> b.BB
S -> bB.B
S -> bBB.
LR分析器的结构如下图所示:
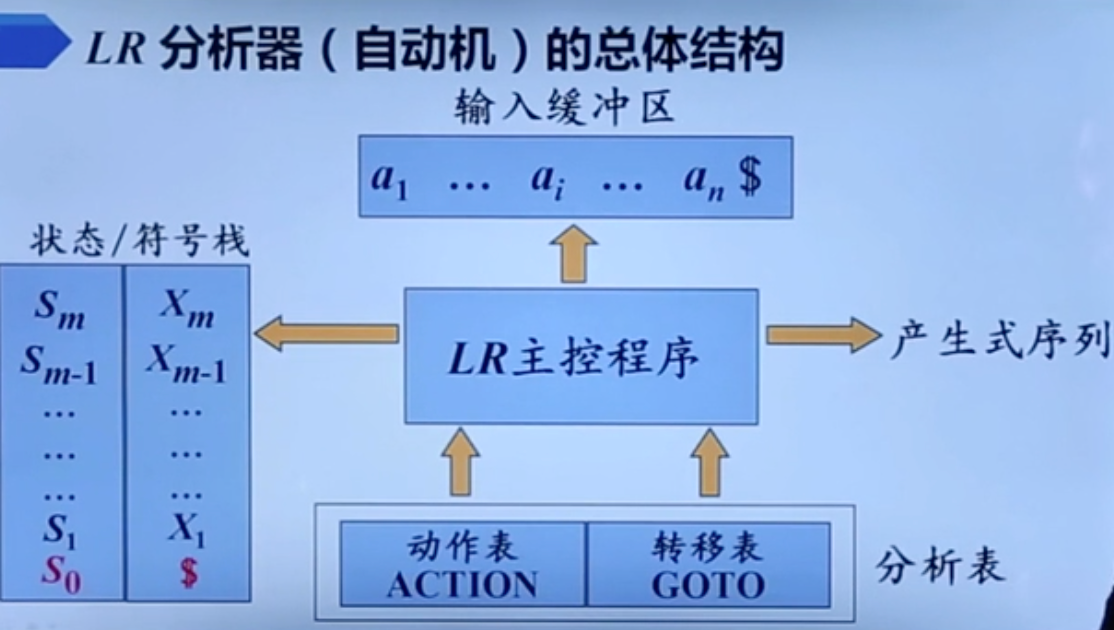
与LR分析器结构不同在于多了一个状态栈,用来描述当前的句柄状态;同时有动作转移表用来描述在某一状态下,遇到某一终结符或非终结符时的动作,该动作有可能是移入、归约、状态变化或成功。
LR分析表的结构如下图所示:

LR分析算法大致流程如下:
while(1) {
	if (ACTION[s, a] == st) {
		// 状态t入状态栈
		// a入符号栈
	} else if (ACTION[s, a] == 归约 A -> X1X2...Xk) {
		// 弹出栈顶k个符号
		// A入符号栈
		// GOTO[t, A]入状态栈
	} else if (ACTION[s, a] == success) break
	else { threo Error }
}
LR(0)分析法是就是不参考后续的输入字符,直接归约的分析法,LR(0)分析法使用的条件是不出现移进-归约和归约-归约冲突,也就是同一状态遇到相同输入时只有一种可选动作,没有歧义。虽然应用面比较小,但我们可以通过它来看LR分析表是如何构造的。
讲解LR分析表构造之前,先讲两个概念增广文法和项目集闭包。
增广文法就是在G中加上新开始符号S'和产生式 S' -> S 而得到的文法,该文法是为了保证接收器只有一个起点。
项目集闭包用来表示句柄分析的状态,是相同的句柄分析状态的集合。举例如下:

有了项目集闭包后,我们就可以以初始状态为起点,构造LR分析表。结果如下:

构造项目集闭包的大致过程如下:
// I 为某一项目集(状态)
// 返回项目集闭包
function clousure(I) {
	J = I

	for (J中每一项 A -> a.Bb) {
		for (文法中每个产生式 B -> xxx) {
			if (b -> xxx 不在J中) {
				// 将 b -> xxx 加入J中
			}
		}
	}

	return J;
}
构造后继项目集闭包(扩展整个项目集)的大致过程如下:
// I 为某一项目集(状态),X 为某一非终结符
function goto(I, X) {
	// 初始化J为空集
	for (I中每一项 A -> a.Xb) {
		// 将 A -> aX.b 加入J
	}

	return clousure(J)
}
以上clousure和goto方法我们可以得到文法的所有状态的集合(项目集),方法是从clousure({ S‘ -> S })开始,循环检查项目集中所有集合goto(I, X)是否在集合中,不在则加入,直到没有新的项目集加入到集合中为止。
有了上述的项目集闭包,构建LR(0)分析表的过程是循环遍历所有项目集中的所有项目,做如下判断:
1.移入,如果项目集i中有 A -> .aB && goto(Ii, a) == Ij, ACTION[i, a] = sj
2.状态变换,如果项目集i中有 A -> .B && goto(Ii, B) == Ij, GOTO[i, a] = j
3.归约,如果项目集i中有 A -> aB.,ACTION[i, a] = rj
4.成功,如果项目集i中有 S' -> S.,ACTION[i, $] = rj
LR(0)没有考虑分析的上下文环境,有时会出现冲突(移进-归约和归约-归约冲突),简单来说就是选择用哪个产生式归约,是移入还是归约。解决这个问题需要知道句柄归约的条件,需要向前看输入字符了,那么就引出了SLR、LR(1)分析法。
SLR分析法借助FOLLOW集来解决冲突,当然这就决定了冲突相关的非终结符的FOLLOW集不能存在交集,器对上述第三个过程进行了改造,设下一个许茹字符为x, 将归约,如果项目集i中有 A -> aB.,ACTION[i, a] = rj改为归约,如果项目集i中有 A -> aB. && x属于FOLLOW(A),ACTION[i, a] = rj。
在某些情况下,仅仅根据FOLLOW集来解决冲突是不够的,在特定位置,A的后继字符应该是A的FOLLOW集的子集,FOLLOW集可以帮助我们排出错误选项,但无法具体得知真正遇到哪个后继符号时执行归约,这就引出了LR(1)。
LR(1)分析法的关键是得到项目集中每个项目的展望符,也就是后继终结符,当下一个输入字符正好与展望符相同时,说明可是对该项目执行归约操作。展望符是该项目的后继符号,如果存在项目<A -> a.BX, a> , 其中a是A -> a.Bx的展望符,还有项目B -> .b,那么项目B -> .b的展望符等于first(Xa)。
语法制导翻译
语义分析不设计什么算法,只是分析文法对应的动作,完全可以嵌入在语法分析的算法中,其中语法分析、语义分析、中间代码生成可以合为语法制导翻译。
语法制导翻译为文法中每个定义一个属性,属性分为综合属性和继承属性,综合属性依赖于子节点,继承属性依赖于父节点或兄弟节点。SDT(语法制导方案)的文法如下:

语法分析过程中,计算综合属性可以在归约时计算,继承属性则在继承符号出现前执行,同时,在计算属性过程中还可以执行附加动作(比如注册符号表)。
语法制导翻译简单来说就是在语法分析过程中计算非终结符的属性、执行附加动作。
其中自顶向下的分析中,递归的方法比较简单,即每个非终结符处理函数多加一个继承属性的参数,在函数里面依照制导方案执行相应动作即可;非递归的方式则需要对符号栈进行扩展,加入属性栈,并且非终结符应在栈中具有两项(比如F和F.sync),其中F.sync代表F的综合属性,需要其子节点都计算完成后才能计算,F出栈时,F.sync会暂时留在栈中,知道计算完成后出栈。
要想在自底向上的语法分析中加入动作,首先需要替换表达式中间的语义动作,使所有语义动作位于产生式末尾。如下所示:
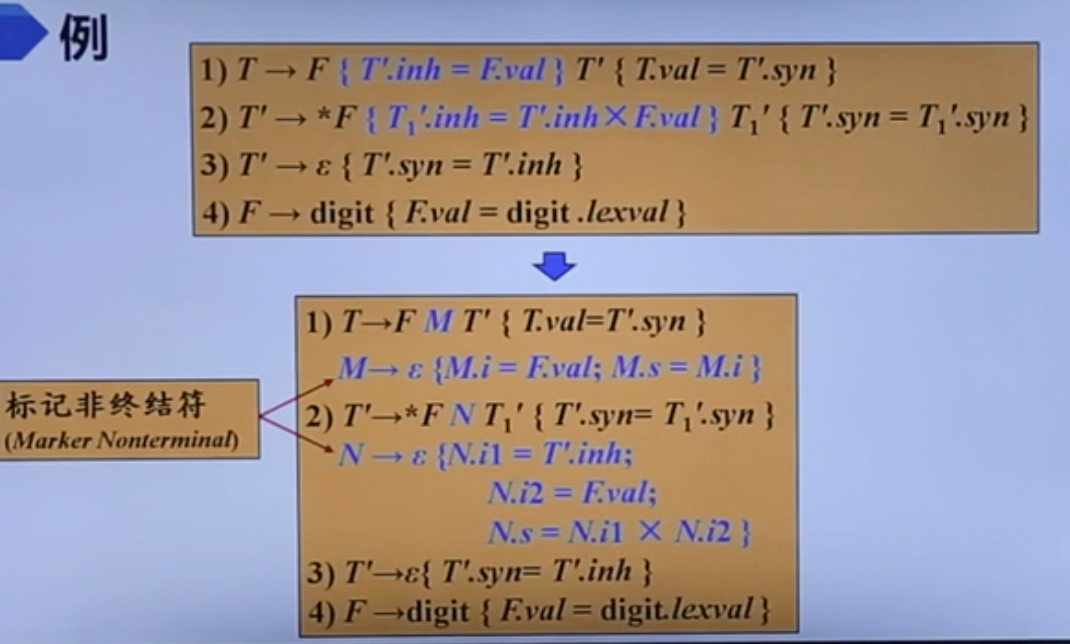
同时自底向上的语法分析中加入动作也需要扩展符号栈,加入属性栈。
总结
本文简要梳理了词法分析、语法分析、语法制导翻译的过程,可以看出其中关键的就在于自顶向下、自底向上的语法分析,而非递归的语法分析都是借助栈来完成的。
Parcel 源码解读
Version
parcel-bundler: 1.11.0
类

Parcel中主要包含上述类:
- Bundler,打包逻辑的入口
- Parser,Asset的注册表,根据文件后缀查找并创建对应的Asset类
- Asset,文件资源类,负责自身资源处理、依赖收集等操作,同时记录着原始资源、打包结果等信息;HTMLAsset、JSAsset等资源的Asset继承自此基类
- Bundle,打包输出文件类,它由多个资源(Asset)组成,会根据当前Bundle类的类型查找对应的打包器(从PackagerRegistry中获取),调用打包器的package方法将自身包含的Asset打包进目的文件;bundle可以有子bundle,当动态从该bundle导入文件的时候,或者导入一个其他类型资源的文件的时候会产生childBundles
- PackagerRegistry,Packager注册表,根据资源类型(基本上是Bundle在调用,所以基本上是Bundle的类型,也可以说是对应Asset的类型)注册、获取打包器(Packager)
- Packager,打包组合类,用于将各个Asset产生的结果打包进目标文件,比如JSPackager将类型为JS的Asset产生的内容,打包以Bundle.name为名字的文件中
- HMRServer,热更服务,其中包含启动ws服务,触发update等方法
- FSCache,缓存
- Resolver,资源路径解析类,如何对代码中引入的各种相对路径的资源路径进行解析,从而找到该模块的绝对路径
它们直接的调用及继承关系如下:
- Bundler作为打包的入口,其中包含有Parser、Bundle、HMRServer、FSCache、Resolver等类
- 构建的第一阶段,Bundler类调用Parser类获取文件对应的Asset,然后调用对应Asset的process等方法,取得Asset树
- 构建的第二阶段,Bundler类中实例化根Bundle(初始空bundle),根据第一阶段中Asset的依赖信息,构建Bundle树
- 构建的第三阶段,调用根Bundle类中的package方法,根据Bundle树进行文件写入等操作
- Asset和Packager为基类,对应类型的(HTML、JS等)类继承自此基类
打包流程
打包的整体过程就在Bundler.bundle()方法中,代码如下:
async bundle() {
    // If another bundle is already pending, wait for that one to finish and retry.
    if (this.pending) {
      return new Promise((resolve, reject) => {
        this.once('buildEnd', () => {
          this.bundle().then(resolve, reject);
        });
      });
    }

    ......

    logger.clear();
    logger.progress('Building...');

    try {
      // Start worker farm, watcher, etc. if needed
      await this.start();

      // Emit start event, after bundler is initialised
      this.emit('buildStart', this.entryFiles);

      // If this is the initial bundle, ensure the output directory exists, and resolve the main asset.
      if (isInitialBundle) {
        await fs.mkdirp(this.options.outDir);

        this.entryAssets = new Set();
        for (let entry of this.entryFiles) {
          try {
            let asset = await this.resolveAsset(entry);
            this.buildQueue.add(asset);
            this.entryAssets.add(asset);
          } catch (err) {
            throw new Error(
              `Cannot resolve entry "${entry}" from "${this.options.rootDir}"`
            );
          }
        }

        if (this.entryAssets.size === 0) {
          throw new Error('No entries found.');
        }

        initialised = true;
      }

      // Build the queued assets.
      let loadedAssets = await this.buildQueue.run();

      // The changed assets are any that don't have a parent bundle yet
      // plus the ones that were in the build queue.
      let changedAssets = [...this.findOrphanAssets(), ...loadedAssets];

      // Invalidate bundles
      for (let asset of this.loadedAssets.values()) {
        asset.invalidateBundle();
      }

      logger.progress(`Producing bundles...`);

      // Create a root bundle to hold all of the entry assets, and add them to the tree.
      this.mainBundle = new Bundle();
      for (let asset of this.entryAssets) {
        this.createBundleTree(asset, this.mainBundle);
      }

      // If there is only one child bundle, replace the root with that bundle.
      if (this.mainBundle.childBundles.size === 1) {
        this.mainBundle = Array.from(this.mainBundle.childBundles)[0];
      }

      // Generate the final bundle names, and replace references in the built assets.
      this.bundleNameMap = this.mainBundle.getBundleNameMap(
        this.options.contentHash
      );

      for (let asset of changedAssets) {
        asset.replaceBundleNames(this.bundleNameMap);
      }

      // Emit an HMR update if this is not the initial bundle.
      if (this.hmr && !isInitialBundle) {
        this.hmr.emitUpdate(changedAssets);
      }

      logger.progress(`Packaging...`);

      // Package everything up
      this.bundleHashes = await this.mainBundle.package(
        this,
        this.bundleHashes
      );

      ......

      return this.mainBundle;
    } catch (err) {

      ......

    } finally {
      this.pending = false;
      this.emit('buildEnd');

      // If not in watch mode, stop the worker farm so we don't keep the process running.
      if (!this.watcher && this.options.killWorkers) {
        await this.stop();
      }
    }
  }
这里主要做了如下几件事:
- 准备工作,加载插件等
- 根据入口文件及其依赖构建Asset Tree
- 根据Asset Tree构建Bundle Tree
- 根据Bundle Tree进行Package操作
下面我们一步一步的讲解:
准备工作
准备工作主要在Bundler.start()中,代码如下:
async start() {
    if (this.farm) {
      return;
    }

    await this.loadPlugins();

    if (!this.options.env) {
      await loadEnv(Path.join(this.options.rootDir, 'index'));
      this.options.env = process.env;
    }

    this.options.extensions = Object.assign({}, this.parser.extensions);
    this.options.bundleLoaders = this.bundleLoaders;

    if (this.options.watch) {
      this.watcher = new Watcher();
      // Wait for ready event for reliable testing on watcher
      if (process.env.NODE_ENV === 'test' && !this.watcher.ready) {
        await new Promise(resolve => this.watcher.once('ready', resolve));
      }
      this.watcher.on('change', this.onChange.bind(this));
    }

    if (this.options.hmr) {
      this.hmr = new HMRServer();
      this.options.hmrPort = await this.hmr.start(this.options);
    }

    this.farm = await WorkerFarm.getShared(this.options, {
      workerPath: require.resolve('./worker.js')
    });
  }
这里主要做了如下几件事
- 加载Parcel插件
- 监听文件变化(可选)
- 启动HMR服务(可选)
加载Parcel插件
加载Parcel插件的代码如下:
async loadPlugins() {
    let relative = Path.join(this.options.rootDir, 'index');
    let pkg = await config.load(relative, ['package.json']);
    if (!pkg) {
      return;
    }

    try {
      let deps = Object.assign({}, pkg.dependencies, pkg.devDependencies);
      for (let dep in deps) {
        const pattern = /^(@.*\/)?parcel-plugin-.+/;
        if (pattern.test(dep)) {
          let plugin = await localRequire(dep, relative);
          await plugin(this);
        }
      }
    } catch (err) {
      logger.warn(err);
    }
  }
加载插件步骤如下:
- 读取根目录上的package.json
- 循环遍历dependencies和devDependencies
- 查找其中满足
parcel-plugin-格式的依赖 - 调用
localRequire方法进行加载,localRequire获取到文件路径并缓存,然后做require操作(如果没有安装该npm包,则会调用npm / yarm install进行安装)。localRequire可以说是一个代理模式,代理了对文件的访问 - 执行插件
- 查找其中满足
注意,这里的localRequire就是一个代理模式,中间加入了缓存机制,控制了模块的访问。
监听文件变化和HMR后面会进行介绍。
构建Asset Tree
构建Asset Tree的主要逻辑在Bundler.Bundle()方法中,代码如下:
// If this is the initial bundle, ensure the output directory exists, and resolve the main asset.
      if (isInitialBundle) {
        await fs.mkdirp(this.options.outDir);

        this.entryAssets = new Set();
        for (let entry of this.entryFiles) {
          try {
            let asset = await this.resolveAsset(entry);
            this.buildQueue.add(asset);
            this.entryAssets.add(asset);
          } catch (err) {
            throw new Error(
              `Cannot resolve entry "${entry}" from "${this.options.rootDir}"`
            );
          }
        }

        if (this.entryAssets.size === 0) {
          throw new Error('No entries found.');
        }

        initialised = true;
      }

      // Build the queued assets.
      let loadedAssets = await this.buildQueue.run();
这里主要做了如下几件事:
- 遍历入口文件
- 根据文件后缀获取到入口文件对应的Asset实例
- 将Asset实例加入到buildQueue中
- 执行
buildQueue.run()
Asset类
首先说明下Asset,Asset是文件资源类,与文件保持一对一的关系,Asset基类代码如下:
class Asset {
  constructor(name, options) {
    this.id = null;
    this.name = name;
    this.basename = path.basename(this.name);
    this.relativeName = path
      .relative(options.rootDir, this.name)
      .replace(/\\/g, '/');

   	......

    this.contents = options.rendition ? options.rendition.value : null;
    this.ast = null;
    this.generated = null;

    ......
  }

  shouldInvalidate() {
    return false;
  }

  async loadIfNeeded() {
    if (this.contents == null) {
      this.contents = await this.load();
    }
  }

  async parseIfNeeded() {
    await this.loadIfNeeded();
    if (!this.ast) {
      this.ast = await this.parse(this.contents);
    }
  }

  async getDependencies() {
    if (
      this.options.rendition &&
      this.options.rendition.hasDependencies === false
    ) {
      return;
    }

    await this.loadIfNeeded();

    if (this.contents && this.mightHaveDependencies()) {
      await this.parseIfNeeded();
      await this.collectDependencies();
    }
  }

  addDependency(name, opts) {
    this.dependencies.set(name, Object.assign({name}, opts));
  }

  addURLDependency(url, from = this.name, opts) {
    if (!url || isURL(url)) {
      return url;
    }

    if (typeof from === 'object') {
      opts = from;
      from = this.name;
    }

    const parsed = URL.parse(url);
    let depName;
    let resolved;
    let dir = path.dirname(from);
    const filename = decodeURIComponent(parsed.pathname);

    if (filename[0] === '~' || filename[0] === '/') {
      if (dir === '.') {
        dir = this.options.rootDir;
      }
      depName = resolved = this.resolver.resolveFilename(filename, dir);
    } else {
      resolved = path.resolve(dir, filename);
      depName = './' + path.relative(path.dirname(this.name), resolved);
    }

    this.addDependency(depName, Object.assign({dynamic: true, resolved}, opts));

    parsed.pathname = this.options.parser
      .getAsset(resolved, this.options)
      .generateBundleName();

    return URL.format(parsed);
  }

  ......

  parse() {
    // do nothing by default
  }

  collectDependencies() {
    // do nothing by default
  }

  async pretransform() {
    // do nothing by default
  }

  async transform() {
    // do nothing by default
  }

  async generate() {
    return {
      [this.type]: this.contents
    };
  }

  async process() {
    // Generate the id for this asset, unless it has already been set.
    // We do this here rather than in the constructor to avoid unnecessary work in the main process.
    // In development, the id is just the relative path to the file, for easy debugging and performance.
    // In production, we use a short hash of the relative path.
    if (!this.id) {
      this.id =
        this.options.production || this.options.scopeHoist
          ? md5(this.relativeName, 'base64').slice(0, 4)
          : this.relativeName;
    }

    if (!this.generated) {
      await this.loadIfNeeded();
      await this.pretransform();
      await this.getDependencies();
      await this.transform();
      this.generated = await this.generate();
    }

    return this.generated;
  }

  ......
}
这里主要关注下process方法,也就是文件的文件资源的处理过程:
- loadIfNeeded,加载文件内容
- pretransform,预处理,比如js资源会用babel()进行转换
- getDependencies, 这里主要对资源字符串进行解析,例如html字符串用posthtml-parser, js资源用babylon.parse来解析。然后收集依赖collectDependencies,具体操作稍后分析。
- transform, 资源转换步骤接收 AST并对其进行遍历,在此过程中对节点进行添加、更新及移除等操作。
- generate,产出一份处理后的文件内容,基本返回的数据格式是
[this.type]: this.contents - generateHash,根据处理后的文件内容,产出对应hash值
注意,这里不同的子类会继承自此基类,实现基类暴露的接口,这其实就是针对接口编程的设计原则。
收集依赖的过程会在下面进行详细介绍。
Bundler.resolveAsset
根据文件后缀获取到入口文件对应的Asset实例的逻辑Bundler.resolveAsset中,代码如下:
  async resolveAsset(name, parent) {
    let {path} = await this.resolver.resolve(name, parent);
    return this.getLoadedAsset(path);
  }

  getLoadedAsset(path) {
    if (this.loadedAssets.has(path)) {
      return this.loadedAssets.get(path);
    }

    let asset = this.parser.getAsset(path, this.options);
    this.loadedAssets.set(path, asset);

    this.watch(path, asset);
    return asset;
  }
主要做了如下两件事:
- 利用Resolver类,获取到文件的绝对路径
- 利用Parser类,根据文件的后缀获取到Asset实例
这里简单说下Parser,Parser可以说是Asset的注册表,根据类型存储对应的Asset实例,parser.getAsset方法根据文件路径获取对应的Asset实例。
buildQueue.run
buildQueue是PromiseQueue的实例,PromiseQueue.run方法将对列中的内容一次通过process函数处理。PromiseQueue有兴趣大家可以去看下代码,这里不在赘述。
buildQueue的初始化代码在Bundler的constructor中,代码如下:
this.buildQueue = new PromiseQueue(this.processAsset.bind(this));
在我们上述的场景中,执行逻辑就是对所有的入口文件对应的Asset,执行Bundler.processAsset(Asset)。
Bundler.processAsset()最终调用的是Bundler.loadAsset()方法,代码如下:
async loadAsset(asset) {
    ......

    if (!processed || asset.shouldInvalidate(processed.cacheData)) {
      processed = await this.farm.run(asset.name);
      cacheMiss = true;
    }

    ......

    // Call the delegate to get implicit dependencies
    let dependencies = processed.dependencies;
    if (this.delegate.getImplicitDependencies) {
      let implicitDeps = await this.delegate.getImplicitDependencies(asset);
      if (implicitDeps) {
        dependencies = dependencies.concat(implicitDeps);
      }
    }

    // Resolve and load asset dependencies
    let assetDeps = await Promise.all(
      dependencies.map(async dep => {
        if (dep.includedInParent) {
          // This dependency is already included in the parent's generated output,
          // so no need to load it. We map the name back to the parent asset so
          // that changing it triggers a recompile of the parent.
          this.watch(dep.name, asset);
        } else {
          dep.parent = asset.name;
          let assetDep = await this.resolveDep(asset, dep);
          if (assetDep) {
            await this.loadAsset(assetDep);
          }

          return assetDep;
        }
      })
    );

    // Store resolved assets in their original order
    dependencies.forEach((dep, i) => {
      asset.dependencies.set(dep.name, dep);
      let assetDep = assetDeps[i];
      if (assetDep) {
        asset.depAssets.set(dep, assetDep);
        dep.resolved = assetDep.name;
      }
    });

    logger.verbose(`Built ${asset.relativeName}...`);

    if (this.cache && cacheMiss) {
      this.cache.write(asset.name, processed);
    }
  }
这里主要做了如下几件事:
this.farm.run(asset.name),其实就是调用了/src/pipeline.js中Pipeline类的processAsset方法,执行asset.process()对asset进行处理- 对该Asset的依赖执行
resolveDep和this.loadAsset(assetDep),获取依赖的asset - 将所有依赖的asset放在asset.depAssets中进行记录
到此为止,Asset的树结构已经构建完成,构建的过程就是一个递归的操作,对本身进行process,然后递归的对其依赖进行process,最终形成asset tree。
注意,有一些细节点后面会进行详细介绍,比如上述this.farm是子进程管理的实例,可以利用多进程加快构建的速度;收集依赖的过程会根据文件类型的不同而不同。
this.farm也是一个代理模式的应用。
构建Bundle Tree
构建Bundle Tree的主要逻辑也在Bundler.Bundle()中,代码如下:
// Create a root bundle to hold all of the entry assets, and add them to the tree.
this.mainBundle = new Bundle();
for (let asset of this.entryAssets) {
this.createBundleTree(asset, this.mainBundle);
}
这里主要做了如下几件事:
- 创建一个根bundle
- 利用
this.createBundleTree方法将所有的入口asset加入到根bundle中
Bundle类
Bundle类是文件束的类,每个Bundle表示一个大包后的文件,其中包含子assets、childBundle等属性,代码如下:
class Bundle {
  constructor(type, name, parent, options = {}) {
    this.type = type;
    this.name = name;
    this.parentBundle = parent;
    this.entryAsset = null;
    this.assets = new Set();
    this.childBundles = new Set();
    this.siblingBundles = new Set();
    this.siblingBundlesMap = new Map();

    ......

  }

  static createWithAsset(asset, parentBundle, options) {
    let bundle = new Bundle(
      asset.type,
      Path.join(asset.options.outDir, asset.generateBundleName()),
      parentBundle,
      options
    );

    bundle.entryAsset = asset;
    bundle.addAsset(asset);
    return bundle;
  }

  addAsset(asset) {
    asset.bundles.add(this);
    this.assets.add(asset);
  }

  ......

  getSiblingBundle(type) {
    if (!type || type === this.type) {
      return this;
    }

    if (!this.siblingBundlesMap.has(type)) {
      let bundle = new Bundle(
        type,
        Path.join(
          Path.dirname(this.name),
          // keep the original extension for source map files, so we have
          // .js.map instead of just .map
          type === 'map'
            ? Path.basename(this.name) + '.' + type
            : Path.basename(this.name, Path.extname(this.name)) + '.' + type
        ),
        this
      );

      this.childBundles.add(bundle);
      this.siblingBundles.add(bundle);
      this.siblingBundlesMap.set(type, bundle);
    }

    return this.siblingBundlesMap.get(type);
  }

  createChildBundle(entryAsset, options = {}) {
    let bundle = Bundle.createWithAsset(entryAsset, this, options);
    this.childBundles.add(bundle);
    return bundle;
  }

  createSiblingBundle(entryAsset, options = {}) {
    let bundle = this.createChildBundle(entryAsset, options);
    this.siblingBundles.add(bundle);
    return bundle;
  }

  ......

  async package(bundler, oldHashes, newHashes = new Map()) {
    let promises = [];
    let mappings = [];

    if (!this.isEmpty) {
      let hash = this.getHash();
      newHashes.set(this.name, hash);

      if (!oldHashes || oldHashes.get(this.name) !== hash) {
        promises.push(this._package(bundler));
      }
    }

    for (let bundle of this.childBundles.values()) {
      if (bundle.type === 'map') {
        mappings.push(bundle);
      } else {
        promises.push(bundle.package(bundler, oldHashes, newHashes));
      }
    }

    await Promise.all(promises);
    for (let bundle of mappings) {
      await bundle.package(bundler, oldHashes, newHashes);
    }
    return newHashes;
  }

  async _package(bundler) {
    let Packager = bundler.packagers.get(this.type);
    let packager = new Packager(this, bundler);

    let startTime = Date.now();
    await packager.setup();
    await packager.start();

    let included = new Set();
    for (let asset of this.assets) {
      await this._addDeps(asset, packager, included);
    }

    await packager.end();

    this.totalSize = packager.getSize();

    let assetArray = Array.from(this.assets);
    let assetStartTime =
      this.type === 'map'
        ? 0
        : assetArray.sort((a, b) => a.startTime - b.startTime)[0].startTime;
    let assetEndTime =
      this.type === 'map'
        ? 0
        : assetArray.sort((a, b) => b.endTime - a.endTime)[0].endTime;
    let packagingTime = Date.now() - startTime;
    this.bundleTime = assetEndTime - assetStartTime + packagingTime;
  }

  async _addDeps(asset, packager, included) {
    if (!this.assets.has(asset) || included.has(asset)) {
      return;
    }

    included.add(asset);

    for (let depAsset of asset.depAssets.values()) {
      await this._addDeps(depAsset, packager, included);
    }

    await packager.addAsset(asset);

    const assetSize = packager.getSize() - this.totalSize;
    if (assetSize > 0) {
      this.addAssetSize(asset, assetSize);
    }
  }

  ......
}
- Bundle具有assets、childBundle等属性,同时拥有addAsset方法来注册asset,createChildBundle方法用来创建子bundle来构建bundle tree。
- Bundle出了具有构建bundle tree能力外,还有package方法,可以递归的调用bundle tree中各个bundle的package方法,进行打包操作
Bundler.createBundleTree
Bundler.createBundleTree()是创建Bundle tree的主要方法,其目的是将入口的asset加入到根bundle中,代码如下:
createBundleTree(asset, bundle, dep, parentBundles = new Set()) {
    if (dep) {
      asset.parentDeps.add(dep);
    }

    if (asset.parentBundle && !bundle.isolated) {
      // If the asset is already in a bundle, it is shared. Move it to the lowest common ancestor.
      if (asset.parentBundle !== bundle) {
        let commonBundle = bundle.findCommonAncestor(asset.parentBundle);

        // If the common bundle's type matches the asset's, move the asset to the common bundle.
        // Otherwise, proceed with adding the asset to the new bundle below.
        if (asset.parentBundle.type === commonBundle.type) {
          this.moveAssetToBundle(asset, commonBundle);
          return;
        }
      } else {
        return;
      }

      // Detect circular bundles
      if (parentBundles.has(asset.parentBundle)) {
        return;
      }
    }

    ......

    // If the asset generated a representation for the parent bundle type, and this
    // is not an async import, add it to the current bundle
    if (bundle.type && asset.generated[bundle.type] != null && !dep.dynamic) {
      bundle.addAsset(asset);
    }

    if ((dep && dep.dynamic) || !bundle.type) {
      // If the asset is already the entry asset of a bundle, don't create a duplicate.
      if (isEntryAsset) {
        return;
      }

      // Create a new bundle for dynamic imports
      bundle = bundle.createChildBundle(asset, dep);
    } else if (
      asset.type &&
      !this.packagers.get(asset.type).shouldAddAsset(bundle, asset)
    ) {
      // If the asset is already the entry asset of a bundle, don't create a duplicate.
      if (isEntryAsset) {
        return;
      }

      // No packager is available for this asset type, or the packager doesn't support
      // combining this asset into the bundle. Create a new bundle with only this asset.
      bundle = bundle.createSiblingBundle(asset, dep);
    } else {
      // Add the asset to the common bundle of the asset's type
      bundle.getSiblingBundle(asset.type).addAsset(asset);
    }

    // Add the asset to sibling bundles for each generated type
    if (asset.type && asset.generated[asset.type]) {
      for (let t in asset.generated) {
        if (asset.generated[t]) {
          bundle.getSiblingBundle(t).addAsset(asset);
        }
      }
    }

    asset.parentBundle = bundle;
    parentBundles.add(bundle);

    for (let [dep, assetDep] of asset.depAssets) {
      this.createBundleTree(assetDep, bundle, dep, parentBundles);
    }

    parentBundles.delete(bundle);
    return bundle;
  }
这里主要做了如下几件事:
- 处理重复打包,如果重复则走另外一块逻辑,下面详细介绍
- 如果bundle的类型在asset.generated中有对应项并且文件不是动态引入的,将asset加入到bundle的assets属性中
- 如果文件是动态引入的或者是初始的根bundle(没有type),创建一个子bundle来容纳该asset,同时将当前bundle赋值为新创建的子bundle
- 将asset.generated其他类型的产出加入到该bundle的兄弟bundle中
- 遍历asset的依赖depAsset,递归的创建bundle tree,同时将当前bundle作为根bundle传入到
Bundler.createBundleTree中
这里需要注意的是如何判断是否重复打包呢?
 if (asset.parentBundle) {
   // If the asset is already in a bundle, it is shared. Move it to the lowest common ancestor.
   if (asset.parentBundle !== bundle) {
     let commonBundle = bundle.findCommonAncestor(asset.parentBundle);
     if (
       asset.parentBundle !== commonBundle &&
       asset.parentBundle.type === commonBundle.type
     ) {
       this.moveAssetToBundle(asset, commonBundle);
       return;
     }
   } else return;
 }
- 如果一个资源的parentBundle已经存在但是不等于此次正在对它进行打包的bundle,那么将其转移到最近的公共父bundle中,避免一份代码重复的打包到了两份bundle中
- 如果一个资源的parentBundle已经存在并且等于此次正在对它进行打包的bundle,说明他已经被打包过了,则直接跳过接下来的打包程序。
Package
打包(package)的入口逻辑Bundler.Bundle()中,代码如下:
// Package everything up
this.bundleHashes = await this.mainBundle.package(
	this,
	this.bundleHashes
);
这段代码就是调用了mainBundle.package方法,从根bundle开始进行打包
bundle.package
构建好bundle tree之后,从根bundle开始,递归的调用每个bundle的package方法,进行打包操作,Bundle.package()的代码如下:
async package(bundler, oldHashes, newHashes = new Map()) {
    let promises = [];
    let mappings = [];

    if (!this.isEmpty) {
      let hash = this.getHash();
      newHashes.set(this.name, hash);

      if (!oldHashes || oldHashes.get(this.name) !== hash) {
        promises.push(this._package(bundler));
      }
    }

    for (let bundle of this.childBundles.values()) {
      if (bundle.type === 'map') {
        mappings.push(bundle);
      } else {
        promises.push(bundle.package(bundler, oldHashes, newHashes));
      }
    }

    await Promise.all(promises);
    for (let bundle of mappings) {
      await bundle.package(bundler, oldHashes, newHashes);
    }
    return newHashes;
  }
这里主要做了如下几件事:
- 获取bundle的hash值(利用bundle中包含的asset的hash值来获取),只有在旧的hash值不存在或者新的hash值不等于旧的hash值的时候,才进行package操作
- 从根节点开始,递归的调用每个bundle的package方法进行打包操作
- 根据bundle类型(打包文件类型)找到对应的打包资源处理类(Packager),然后调用
Packager.addAsset(asset)方法将asset generate出的内容写入目标文件流 - 每个bundle实例都会生成一个最终的打包文件
- 根据bundle类型(打包文件类型)找到对应的打包资源处理类(Packager),然后调用
Packager
Packager根据bundle类型不同而有不同的Packager子类,使用者通过PackagerRegistry进行注册和获取某个类型的Packager。
基类代码如下:
class Packager {
  constructor(bundle, bundler) {
    this.bundle = bundle;
    this.bundler = bundler;
    this.options = bundler.options;
  }

  static shouldAddAsset() {
    return true;
  }

  async setup() {
    // Create sub-directories if needed
    if (this.bundle.name.includes(path.sep)) {
      await mkdirp(path.dirname(this.bundle.name));
    }

    this.dest = fs.createWriteStream(this.bundle.name);
    this.dest.write = promisify(this.dest.write.bind(this.dest));
    this.dest.end = promisify(this.dest.end.bind(this.dest));
  }

  async write(string) {
    await this.dest.write(string);
  }

  ......
}
我们主要关注其setup和write方法即可,两个方法分别是创建文件写流、向文件中写入字符串。
子类的话我们以JSPackager为例,代码如下:
class JSPackager extends Packager {
  async start() {
    this.first = true;
    this.dedupe = new Map();
    this.bundleLoaders = new Set();
    this.externalModules = new Set();

    let preludeCode = this.options.minify ? prelude.minified : prelude.source;
    if (this.options.target === 'electron') {
      preludeCode =
        `process.env.HMR_PORT=${
          this.options.hmrPort
        };process.env.HMR_HOSTNAME=${JSON.stringify(
          this.options.hmrHostname
        )};` + preludeCode;
    }
    await this.write(preludeCode + '({');
    this.lineOffset = lineCounter(preludeCode);
  }

  async addAsset(asset) {
    // If this module is referenced by another JS bundle, it needs to be exposed externally.
    // In that case, don't dedupe the asset as it would affect the module ids that are referenced by other bundles.
    let isExposed = !Array.from(asset.parentDeps).every(dep => {
      let depAsset = this.bundler.loadedAssets.get(dep.parent);
      return this.bundle.assets.has(depAsset) || depAsset.type !== 'js';
    });

    if (!isExposed) {
      let key = this.dedupeKey(asset);
      if (this.dedupe.has(key)) {
        return;
      }

      // Don't dedupe when HMR is turned on since it messes with the asset ids
      if (!this.options.hmr) {
        this.dedupe.set(key, asset.id);
      }
    }

    ......

    this.bundle.addOffset(asset, this.lineOffset);
    await this.writeModule(
      asset.id,
      asset.generated.js,
      deps,
      asset.generated.map
    );
  }

  ......

  async end() {
    let entry = [];

    // Add the HMR runtime if needed.
    if (this.options.hmr) {
      let asset = await this.bundler.getAsset(
        require.resolve('../builtins/hmr-runtime')
      );
      await this.addAssetToBundle(asset);
      entry.push(asset.id);
    }

    if (await this.writeBundleLoaders()) {
      entry.push(0);
    }

    if (this.bundle.entryAsset && this.externalModules.size === 0) {
      entry.push(this.bundle.entryAsset.id);
    }

    await this.write(
      '},{},' +
        JSON.stringify(entry) +
        ', ' +
        JSON.stringify(this.options.global || null) +
        ')'
    );
    if (this.options.sourceMaps) {
      // Add source map url if a map bundle exists
      let mapBundle = this.bundle.siblingBundlesMap.get('map');
      if (mapBundle) {
        let mapUrl = urlJoin(
          this.options.publicURL,
          path.basename(mapBundle.name)
        );
        await this.write(`\n//# sourceMappingURL=${mapUrl}`);
      }
    }
    await super.end();
  }
}
这里主要关注上述几个方法:
start,将预设的前端模块加载器(后面会详述)代码写入目标文件addAsset,将asset.generated.js及其依赖模块的id按模块加载器所需格式写入目标文件end,将hmr所需的客户端代码和sourceMaps url写入目标文件,对于动态引入的模块,需要把响应的loader注册代码写入文件。
周边技术点
如何收集依赖
我们在上述的Asset处理时,有一个步骤是收集依赖(collectDependencies),这个步骤根据不同的文件类型处理方式会有不同,我们下面以JSAsset为例讲解一下。
- 首先在pretransform阶段中,JSAsset利用
@babel/core生成ast,代码在/transforms/babel/babel7.js中,
  let res;
  if (asset.ast) {
    res = babel.transformFromAst(asset.ast, asset.contents, config);
  } else {
    res = babel.transformSync(asset.contents, config);
  }

  if (res.ast) {
    asset.ast = res.ast;
    asset.isAstDirty = true;
  }
- 遍历AST中的每个节点,收集依赖
遍历AST的过程由babylon-walk进行控制,代码如下:
const walk = require('babylon-walk');

collectDependencies() {
    walk.ancestor(this.ast, collectDependencies, this);
}
其中collectDependencies对应的是babel visitors,简单来说,在遇到某类型的节点时,就会触发某类型的visitors,我们可以控制进入节点或退出节点的处理逻辑。
在看用于收集依赖的visitor之前,先了解下ES6 module和nodejs的模块系统的几种导入导出方式以及对应在抽象语法树中代表的declaration类型:
// ImportDeclaration
import { stat, exists, readFile } from 'fs';

// ExportNamedDeclaration with node.source = null;
export var year = 1958;

// ExportNamedDeclaration with node.source = null;
export default function () {
  console.log('foo');
}

// ExportNamedDeclaration with node.source.value = 'my_module';
export { foo, bar } from 'my_module';

// CallExpression with node.Callee.name is require;
// CallExpression with node.Callee.arguments[0] is the 'react';
import('react').then(...)

// CallExpression with node.Callee.name is require;
// CallExpression with node.Callee.arguments[0] is the 'react';
var react = require('react');
除了上述这些依赖引入方式之外,还有两种比较特殊的方式:
// web Worker
new Worker('sw.js')

// service worker
if ('serviceWorker' in navigator) {
  navigator.serviceWorker.register('/sw-test/sw.js', { scope: '/sw-test/' }).then(function(reg) {
    // registration worked
    console.log('Registration succeeded. Scope is ' + reg.scope);
  }).catch(function(error) {
    // registration failed
    console.log('Registration failed with ' + error);
  });
}
下面我们正式来看collectDependencies对应的viditors,代码如下:
module.exports = {
  ImportDeclaration(node, asset) {
    asset.isES6Module = true;
    addDependency(asset, node.source);
  },

  ExportNamedDeclaration(node, asset) {
    asset.isES6Module = true;
    if (node.source) {
      addDependency(asset, node.source);
    }
  },

  ExportAllDeclaration(node, asset) {
    asset.isES6Module = true;
    addDependency(asset, node.source);
  },

  ExportDefaultDeclaration(node, asset) {
    asset.isES6Module = true;
  },

  CallExpression(node, asset) {
    let {callee, arguments: args} = node;

    let isRequire =
      types.isIdentifier(callee) &&
      callee.name === 'require' &&
      args.length === 1 &&
      types.isStringLiteral(args[0]);

    if (isRequire) {
      addDependency(asset, args[0]);
      return;
    }

    let isDynamicImport =
      callee.type === 'Import' &&
      args.length === 1 &&
      types.isStringLiteral(args[0]);

    if (isDynamicImport) {
      asset.addDependency('_bundle_loader');
      addDependency(asset, args[0], {dynamic: true});

      node.callee = requireTemplate().expression;
      node.arguments[0] = argTemplate({MODULE: args[0]}).expression;
      asset.isAstDirty = true;
      return;
    }

    const isRegisterServiceWorker =
      types.isStringLiteral(args[0]) &&
      matchesPattern(callee, serviceWorkerPattern);

    if (isRegisterServiceWorker) {
      addURLDependency(asset, args[0]);
      return;
    }
  },

  NewExpression(node, asset) {
    const {callee, arguments: args} = node;

    const isWebWorker =
      callee.type === 'Identifier' &&
      callee.name === 'Worker' &&
      args.length === 1 &&
      types.isStringLiteral(args[0]);

    if (isWebWorker) {
      addURLDependency(asset, args[0]);
      return;
    }
  }
};
我们可以看到,每次遇到引入模块,就会调用addDependency,这里对动态引入(import())的处理稍微特殊一点,我们下面会详细介绍。
前端模块加载器
我们先来看一下构建好的js bundle的内容:
// modules are defined as an array
// [ module function, map of requires ]
//
// map of requires is short require name -> numeric require
//
// anything defined in a previous bundle is accessed via the
// orig method which is the require for previous bundles

// eslint-disable-next-line no-global-assign
parcelRequire = (function (modules, cache, entry, globalName) {
  // Save the require from previous bundle to this closure if any
  var previousRequire = typeof parcelRequire === 'function' && parcelRequire;
  var nodeRequire = typeof require === 'function' && require;

  function newRequire(name, jumped) {
    if (!cache[name]) {
      if (!modules[name]) {
        // if we cannot find the module within our internal map or
        // cache jump to the current global require ie. the last bundle
        // that was added to the page.
        var currentRequire = typeof parcelRequire === 'function' && parcelRequire;
        if (!jumped && currentRequire) {
          return currentRequire(name, true);
        }

        // If there are other bundles on this page the require from the
        // previous one is saved to 'previousRequire'. Repeat this as
        // many times as there are bundles until the module is found or
        // we exhaust the require chain.
        if (previousRequire) {
          return previousRequire(name, true);
        }

        // Try the node require function if it exists.
        if (nodeRequire && typeof name === 'string') {
          return nodeRequire(name);
        }

        var err = new Error('Cannot find module \'' + name + '\'');
        err.code = 'MODULE_NOT_FOUND';
        throw err;
      }

      localRequire.resolve = resolve;
      localRequire.cache = {};

      var module = cache[name] = new newRequire.Module(name);

      modules[name][0].call(module.exports, localRequire, module, module.exports, this);
    }

    return cache[name].exports;

    function localRequire(x){
      return newRequire(localRequire.resolve(x));
    }

    function resolve(x){
      return modules[name][1][x] || x;
    }
  }

  function Module(moduleName) {
    this.id = moduleName;
    this.bundle = newRequire;
    this.exports = {};
  }

  newRequire.isParcelRequire = true;
  newRequire.Module = Module;
  newRequire.modules = modules;
  newRequire.cache = cache;
  newRequire.parent = previousRequire;
  newRequire.register = function (id, exports) {
    modules[id] = [function (require, module) {
      module.exports = exports;
    }, {}];
  };

  for (var i = 0; i < entry.length; i++) {
    newRequire(entry[i]);
  }

  if (entry.length) {
    // Expose entry point to Node, AMD or browser globals
    // Based on https://github.com/ForbesLindesay/umd/blob/master/template.js
    var mainExports = newRequire(entry[entry.length - 1]);

    // CommonJS
    if (typeof exports === "object" && typeof module !== "undefined") {
      module.exports = mainExports;

    // RequireJS
    } else if (typeof define === "function" && define.amd) {
     define(function () {
       return mainExports;
     });

    // <script>
    } else if (globalName) {
      this[globalName] = mainExports;
    }
  }

  // Override the current require with this new one
  return newRequire;
})({"a.js":[function(require,module,exports) {
var name = 'tsy'; // console.log(Buffer);

module.exports = name;
},{}],"index.js":[function(require,module,exports) {
var a = require('./a.js');

console.log(a);
},{"./a.js":"a.js"}]},{},["index.js"], null)
//# sourceMappingURL=/parcel-demo.e31bb0bc.js.map
我们可以看到这是一个立即执行的函数,参数有modules、cache、entry、globalName
modules为当前bandle中包含的所有模块,也就是上面提到的Bundle类中的assets,modules的类型为一个对象,key是模块名称,value是一个数组,数组第一项为包装过的模块内容,第二项是依赖的模块信息。比如如下内容
{"a.js":[function(require,module,exports) {
var name = 'tsy'; // console.log(Buffer);

module.exports = name;
},{}],"index.js":[function(require,module,exports) {
var a = require('./a.js');

console.log(a);
},{"./a.js":"a.js"}]}
entry为该bundle的入口文件
下面我们来看下该立即执行函数的主要逻辑是便利入口文件,调用newRequire方法:
function newRequire(name, jumped) {
    if (!cache[name]) {
      if (!modules[name]) {
        // if we cannot find the module within our internal map or
        // cache jump to the current global require ie. the last bundle
        // that was added to the page.
        var currentRequire = typeof parcelRequire === 'function' && parcelRequire;
        if (!jumped && currentRequire) {
          return currentRequire(name, true);
        }

        // If there are other bundles on this page the require from the
        // previous one is saved to 'previousRequire'. Repeat this as
        // many times as there are bundles until the module is found or
        // we exhaust the require chain.
        if (previousRequire) {
          return previousRequire(name, true);
        }

        // Try the node require function if it exists.
        if (nodeRequire && typeof name === 'string') {
          return nodeRequire(name);
        }

        var err = new Error('Cannot find module \'' + name + '\'');
        err.code = 'MODULE_NOT_FOUND';
        throw err;
      }

      localRequire.resolve = resolve;
      localRequire.cache = {};

      var module = cache[name] = new newRequire.Module(name);

      modules[name][0].call(module.exports, localRequire, module, module.exports, this);
    }

    return cache[name].exports;

    function localRequire(x){
      return newRequire(localRequire.resolve(x));
    }

    function resolve(x){
      return modules[name][1][x] || x;
    }
}

function Module(moduleName) {
    this.id = moduleName;
    this.bundle = newRequire;
    this.exports = {};
}
每一个文件就是一个模块,在每个模块中,都会有一个module对象,这个对象就指向当前的模块。Parcel中的module对象具有以下属性:
- id:当前模块的名称
- bundle:newRequire方法
- exports:当前模块暴露给外部的值
newRequire方法的逻辑如下:
- 判断模块对象是否已被缓存
- 如果是,直接
return cache[name].exports - 如果没有,判断modules[name]是否存在
- 如果存在,调用
var module = cache[name] = new newRequire.Module(name); modules[name][0].call(module.exports, localRequire, module, module.exports, this);,缓存模块对象,并执行该模块 - 如果不存在,则一次尝试调用其他bundle的parcelRequire(previousRequire)、node的require
- 如果存在,调用
- 如果是,直接
在执行模块时,会将localRequire, module, module.exports作为形参,我们在模块中可以直接使用的require、module、exports即为执行该模块时传入的对应参数。
总结一下,我们利用函数把一个个模块封装起来,并给其提供 require和exports 的接口和一套模块规范,这样在不支持模块机制的浏览器环境中,我们也能够不去污染全局变量,体验到模块化带来的优势。
动态引入
我们接着来看动态引入,在上面JSAsset的collectDependencies中,已经有所提及。
我们首先看下在js遍历节点的过程中,遇到动态引入的情况如何处理:
if (isDynamicImport) {
  asset.addDependency('_bundle_loader');

  addDependency(asset, args[0], {dynamic: true});

  node.callee = requireTemplate().expression;
  node.arguments[0] = argTemplate({MODULE: args[0]}).expression;
  asset.isAstDirty = true;
  return;
}
这里我们可以看出,如果碰到Import()导入的资源, 直接将_bundle_loader加入其依赖列表,同时对表达式进行处理。根据上面代码,在ast中如果遇到import('./a.js')这段动态引入的代码, 会被直接替换为require('_bundle_loader')(require.resolve('./a.js'))。
这里插一段背景,这种动态资源由于设置了dynamic: true,在后见bundle tree的时候,会单独生成一个bundle作为当前bundle的child bundle,同时在当前bundle中记录动态资源的信息。最后在当前的bundle中得到的打包资源数组,比如[md5(dynamicAsset).js, md5(cssWithDynamicAsset).css, ..., assetId], 由打包之后的文件名和该模块的id所组成.
根据上述前端模块加载器部分的介绍,require.resolve('./a.js')实际上获取的是./a.js模块的id,代码如下:
function resolve(x){
   return modules[name][1][x] || x;
}
_bundle_loader是Parcel-bundler的内置模块,位于/src/builtins/bundle-loader.js中,代码如下:
var getBundleURL = require('./bundle-url').getBundleURL;

function loadBundlesLazy(bundles) {
  if (!Array.isArray(bundles)) {
    bundles = [bundles]
  }

  var id = bundles[bundles.length - 1];

  try {
    return Promise.resolve(require(id));
  } catch (err) {
    if (err.code === 'MODULE_NOT_FOUND') {
      return new LazyPromise(function (resolve, reject) {
        loadBundles(bundles.slice(0, -1))
          .then(function () {
            return require(id);
          })
          .then(resolve, reject);
      });
    }

    throw err;
  }
}

function loadBundles(bundles) {
  return Promise.all(bundles.map(loadBundle));
}

var bundleLoaders = {};
function registerBundleLoader(type, loader) {
  bundleLoaders[type] = loader;
}

module.exports = exports = loadBundlesLazy;
exports.load = loadBundles;
exports.register = registerBundleLoader;

var bundles = {};
function loadBundle(bundle) {
  var id;
  if (Array.isArray(bundle)) {
    id = bundle[1];
    bundle = bundle[0];
  }

  if (bundles[bundle]) {
    return bundles[bundle];
  }

  var type = (bundle.substring(bundle.lastIndexOf('.') + 1, bundle.length) || bundle).toLowerCase();
  var bundleLoader = bundleLoaders[type];
  if (bundleLoader) {
    return bundles[bundle] = bundleLoader(getBundleURL() + bundle)
      .then(function (resolved) {
        if (resolved) {
          module.bundle.register(id, resolved);
        }

        return resolved;
      }).catch(function(e) {
        delete bundles[bundle];

        throw e;
      });
  }
}

function LazyPromise(executor) {
  this.executor = executor;
  this.promise = null;
}

LazyPromise.prototype.then = function (onSuccess, onError) {
  if (this.promise === null) this.promise = new Promise(this.executor)
  return this.promise.then(onSuccess, onError)
};

LazyPromise.prototype.catch = function (onError) {
  if (this.promise === null) this.promise = new Promise(this.executor)
  return this.promise.catch(onError)
};
其中loadBundlesLazy方法首先直接去require模块,如果没有的话,调用loadBundles加载后再去require。
loadBundles方法对每个模块调用loadBundle方法,loadBundle根据bundle类型获取相应的loader动态加载对应的bundle(被动态引入的模块会作为一个新的bundle),加载完成后注册到该bundle的modules中,这样后面的require就可以利用modules[name]获取到该模块了。
bundler loader在上述bundle的package.end()中将注册bundler loader的逻辑写入bundle,代码如下(JSPackager为例):
// Generate a module to register the bundle loaders that are needed
    let loads = 'var b=require(' + JSON.stringify(bundleLoader.id) + ');';
    for (let bundleType of this.bundleLoaders) {
      let loader = this.options.bundleLoaders[bundleType];
      if (loader) {
        let target = this.options.target === 'node' ? 'node' : 'browser';
        let asset = await this.bundler.getAsset(loader[target]);
        await this.addAssetToBundle(asset);
        loads +=
          'b.register(' +
          JSON.stringify(bundleType) +
          ',require(' +
          JSON.stringify(asset.id) +
          '));';
      }
    }
这段代码最终会在在modules中加入:
0:[function(require,module,exports) {
var b=require("../parcel/packages/core/parcel-bundler/src/builtins/bundle-loader.js");b.register("js",require("../parcel/packages/core/parcel-bundler/src/builtins/loaders/browser/js-loader.js"));
},{}]
同时将0这个模块加入到bundle的入口中(开始就会执行),这样在loadBundle就可以获取到对应的loader用于动态加载模块,以js-loader为例:
module.exports = function loadJSBundle(bundle) {
  return new Promise(function (resolve, reject) {
    var script = document.createElement('script');
    script.async = true;
    script.type = 'text/javascript';
    script.charset = 'utf-8';
    script.src = bundle;
    script.onerror = function (e) {
      script.onerror = script.onload = null;
      reject(e);
    };

    script.onload = function () {
      script.onerror = script.onload = null;
      resolve();
    };

    document.getElementsByTagName('head')[0].appendChild(script);
  });
};
在加载完资源后,我们又利用了module.bundle.register(id, resolved);注册到当前bundle的modules中,注册的代码在前端模块加载那里已经提及,代码如下:
newRequire.register = function (id, exports) {
    modules[id] = [function (require, module) {
      module.exports = exports;
    }, {}];
};
这样,我们利用require就可以直接获取到动态加载的资源了。
Worker
Parcel利用子进程来加快构建Asset Tree的速度,特别是编译生成AST的阶段。其最终调用的是node的child_process,但前面还有一些进程管理的工作,我们下面来探究一下。
worker在/src/bundler.js中load asset(this.farm.run())时使用,在start中被定义,我们来看下如何定义:
this.farm = await WorkerFarm.getShared(this.options, {
      workerPath: require.resolve('./worker.js')
});
这里传入了一些配置参数和workerPath,workerPath对应的模块中实现了init和run接口,后面在worker中会被使用,这也是面向接口编程的体现。
worker主要的代码在@parcel/workers中,worker中重要有三个类,WorkerFarm、Worker、Child。
WorkerFarm是worker的入口,用来管理所有的子进程Worker类用来管理单个子进程,具有fork、回调处理等能力Child为子进程中执行的模块,在其中通过IPC 通信信道来接受父进程发送的命令,执行对应对应模块的方法,我们这里就是执行./worker.js中的对应方法,执行后通过信道将结果传递给父进程Worker。
这里的父进程向子进程发送命令,应用了设计模式中的命令模式。
监听文件变化
监听文件变化同样是根据子进程对文件进行监听,但这里的子进程管理就比较简单了,创建一个子进程,然后发动命令就可以了,子进程中通过chokidar对文件进行监听,如果发现文件变化,发送消息给父进程,父进程出发相应的事件。
handleEmit(event, data) {
    if (event === 'watcherError') {
      data = errorUtils.jsonToError(data);
    }

    this.emit(event, data);
}
HMR
HMR通过WebSocket来实现,具有服务端和客户端两部分逻辑。
服务端逻辑(/src/HMRServer.js):
class HMRServer {
  async start(options = {}) {
    await new Promise(async resolve => {
      if (!options.https) {
        this.server = http.createServer();
      } else if (typeof options.https === 'boolean') {
        this.server = https.createServer(generateCertificate(options));
      } else {
        this.server = https.createServer(await getCertificate(options.https));
      }

      let websocketOptions = {
        server: this.server
      };

      if (options.hmrHostname) {
        websocketOptions.origin = `${options.https ? 'https' : 'http'}://${
          options.hmrHostname
        }`;
      }

      this.wss = new WebSocket.Server(websocketOptions);
      this.server.listen(options.hmrPort, resolve);
    });

    this.wss.on('connection', ws => {
      ws.onerror = this.handleSocketError;
      if (this.unresolvedError) {
        ws.send(JSON.stringify(this.unresolvedError));
      }
    });

    this.wss.on('error', this.handleSocketError);

    return this.wss._server.address().port;
  }

  ......

  emitUpdate(assets) {
    if (this.unresolvedError) {
      this.unresolvedError = null;
      this.broadcast({
        type: 'error-resolved'
      });
    }

    const shouldReload = assets.some(asset => asset.hmrPageReload);
    if (shouldReload) {
      this.broadcast({
        type: 'reload'
      });
    } else {
      this.broadcast({
        type: 'update',
        assets: assets.map(asset => {
          let deps = {};
          for (let [dep, depAsset] of asset.depAssets) {
            deps[dep.name] = depAsset.id;
          }

          return {
            id: asset.id,
            generated: asset.generated,
            deps: deps
          };
        })
      });
    }
  }

  ......

  broadcast(msg) {
    const json = JSON.stringify(msg);
    for (let ws of this.wss.clients) {
      ws.send(json);
    }
  }
}
这里的start方法用来创建WebSocket server,当有asset更新时,触发emitUpdate将asset id、asset 内容发送给客户端。
客户端逻辑:
var OVERLAY_ID = '__parcel__error__overlay__';

var OldModule = module.bundle.Module;

function Module(moduleName) {
  OldModule.call(this, moduleName);
  this.hot = {
    data: module.bundle.hotData,
    _acceptCallbacks: [],
    _disposeCallbacks: [],
    accept: function (fn) {
      this._acceptCallbacks.push(fn || function () {});
    },
    dispose: function (fn) {
      this._disposeCallbacks.push(fn);
    }
  };

  module.bundle.hotData = null;
}

module.bundle.Module = Module;

var parent = module.bundle.parent;
if ((!parent || !parent.isParcelRequire) && typeof WebSocket !== 'undefined') {
  var hostname = process.env.HMR_HOSTNAME || location.hostname;
  var protocol = location.protocol === 'https:' ? 'wss' : 'ws';
  var ws = new WebSocket(protocol + '://' + hostname + ':' + process.env.HMR_PORT + '/');
  ws.onmessage = function(event) {
    var data = JSON.parse(event.data);

    if (data.type === 'update') {
      console.clear();

      data.assets.forEach(function (asset) {
        hmrApply(global.parcelRequire, asset);
      });

      data.assets.forEach(function (asset) {
        if (!asset.isNew) {
          hmrAccept(global.parcelRequire, asset.id);
        }
      });
    }

    if (data.type === 'reload') {
      ws.close();
      ws.onclose = function () {
        location.reload();
      }
    }

    if (data.type === 'error-resolved') {
      console.log('[parcel] ✨ Error resolved');

      removeErrorOverlay();
    }

    if (data.type === 'error') {
      console.error('[parcel] 🚨  ' + data.error.message + '\n' + data.error.stack);

      removeErrorOverlay();

      var overlay = createErrorOverlay(data);
      document.body.appendChild(overlay);
    }
  };
}

......

function hmrApply(bundle, asset) {
  var modules = bundle.modules;
  if (!modules) {
    return;
  }

  if (modules[asset.id] || !bundle.parent) {
    var fn = new Function('require', 'module', 'exports', asset.generated.js);
    asset.isNew = !modules[asset.id];
    modules[asset.id] = [fn, asset.deps];
  } else if (bundle.parent) {
    hmrApply(bundle.parent, asset);
  }
}

function hmrAccept(bundle, id) {
  var modules = bundle.modules;
  if (!modules) {
    return;
  }

  if (!modules[id] && bundle.parent) {
    return hmrAccept(bundle.parent, id);
  }

  var cached = bundle.cache[id];
  bundle.hotData = {};
  if (cached) {
    cached.hot.data = bundle.hotData;
  }

  if (cached && cached.hot && cached.hot._disposeCallbacks.length) {
    cached.hot._disposeCallbacks.forEach(function (cb) {
      cb(bundle.hotData);
    });
  }

  delete bundle.cache[id];
  bundle(id);

  cached = bundle.cache[id];
  if (cached && cached.hot && cached.hot._acceptCallbacks.length) {
    cached.hot._acceptCallbacks.forEach(function (cb) {
      cb();
    });
    return true;
  }

  return getParents(global.parcelRequire, id).some(function (id) {
    return hmrAccept(global.parcelRequire, id)
  });
}
这里主要创建了Websocket Client,监听update消息,如果有,则替换modules中的对应内容,同时利用global.parcelRequire重新执行模块。
Node.js源码-net.createServer & net.createConnection & 'data' 事件
有了前面介绍的事件循环等章节,相信大家再看Node.js中其他模块的实现就会轻松许多。本章将带着大家过一遍net有关的实现。主要包括net.createServer、net.createConnection、 connect事件、 data事件。
net.createServer
我们在使用过程中,通常情况下以如下方式使用:
const net = require('net');
const server = net.createServer((c) => {
  // 'connection' listener
  console.log('client connected');
  c.on('end', () => {
    console.log('client disconnected');
  });
  c.write('hello\r\n');
  c.pipe(c);
});
server.listen(8124, () => {
  console.log('server bound');
});
这里net.createServer之后调用server.listen,这面我们就重点讲解这两个函数。
net.createServer
net.createServer([options][, connectionListener])用来创建一个新的TCP或IPC服务,其入口地址在./lib/net.js,代码如下:
function createServer(options, connectionListener) {
  return new Server(options, connectionListener);
}
我们下面来关注Server的构造函数:
function Server(options, connectionListener) {
  if (!(this instanceof Server))
    return new Server(options, connectionListener);

  EventEmitter.call(this);

  if (typeof options === 'function') {
    connectionListener = options;
    options = {};
    this.on('connection', connectionListener);
  } else if (options == null || typeof options === 'object') {
    options = options || {};

    if (typeof connectionListener === 'function') {
      this.on('connection', connectionListener);
    }
  } else {
    throw new ERR_INVALID_ARG_TYPE('options', 'Object', options);
  }

  this._connections = 0;

  Object.defineProperty(this, 'connections', {
    get: internalUtil.deprecate(() => {

      if (this._usingWorkers) {
        return null;
      }
      return this._connections;
    }, 'Server.connections property is deprecated. ' +
       'Use Server.getConnections method instead.', 'DEP0020'),
    set: internalUtil.deprecate((val) => (this._connections = val),
                                'Server.connections property is deprecated.',
                                'DEP0020'),
    configurable: true, enumerable: false
  });

  this[async_id_symbol] = -1;
  this._handle = null;
  this._usingWorkers = false;
  this._workers = [];
  this._unref = false;

  this.allowHalfOpen = options.allowHalfOpen || false;
  this.pauseOnConnect = !!options.pauseOnConnect;
}
util.inherits(Server, EventEmitter);
这里我们看到其实是监听了connection事件。
server.listen
server.listen方法代码如下:
Server.prototype.listen = function(...args) {
  var normalized = normalizeArgs(args);
  var options = normalized[0];
  var cb = normalized[1];

  if (this._handle) {
    throw new ERR_SERVER_ALREADY_LISTEN();
  }

  var hasCallback = (cb !== null);
  if (hasCallback) {
    this.once('listening', cb);
  }
  var backlogFromArgs =
    // (handle, backlog) or (path, backlog) or (port, backlog)
    toNumber(args.length > 1 && args[1]) ||
    toNumber(args.length > 2 && args[2]);  // (port, host, backlog)

  options = options._handle || options.handle || options;
  // (handle[, backlog][, cb]) where handle is an object with a handle
  if (options instanceof TCP) {
    this._handle = options;
    this[async_id_symbol] = this._handle.getAsyncId();
    listenInCluster(this, null, -1, -1, backlogFromArgs);
    return this;
  }
  // (handle[, backlog][, cb]) where handle is an object with a fd
  if (typeof options.fd === 'number' && options.fd >= 0) {
    listenInCluster(this, null, null, null, backlogFromArgs, options.fd);
    return this;
  }

  // ([port][, host][, backlog][, cb]) where port is omitted,
  // that is, listen(), listen(null), listen(cb), or listen(null, cb)
  // or (options[, cb]) where options.port is explicitly set as undefined or
  // null, bind to an arbitrary unused port
  if (args.length === 0 || typeof args[0] === 'function' ||
      (typeof options.port === 'undefined' && 'port' in options) ||
      options.port === null) {
    options.port = 0;
  }
  // ([port][, host][, backlog][, cb]) where port is specified
  // or (options[, cb]) where options.port is specified
  // or if options.port is normalized as 0 before
  var backlog;
  if (typeof options.port === 'number' || typeof options.port === 'string') {
    if (!isLegalPort(options.port)) {
      throw new ERR_SOCKET_BAD_PORT(options.port);
    }
    backlog = options.backlog || backlogFromArgs;
    // start TCP server listening on host:port
    if (options.host) {
      lookupAndListen(this, options.port | 0, options.host, backlog,
                      options.exclusive);
    } else { // Undefined host, listens on unspecified address
      // Default addressType 4 will be used to search for master server
      listenInCluster(this, null, options.port | 0, 4,
                      backlog, undefined, options.exclusive);
    }
    return this;
  }

  // (path[, backlog][, cb]) or (options[, cb])
  // where path or options.path is a UNIX domain socket or Windows pipe
  if (options.path && isPipeName(options.path)) {
    var pipeName = this._pipeName = options.path;
    backlog = options.backlog || backlogFromArgs;
    listenInCluster(this, pipeName, -1, -1,
                    backlog, undefined, options.exclusive);
    return this;
  }

  throw new ERR_INVALID_OPT_VALUE('options', util.inspect(options));
};
这里使用listenInCluster方法用来监听connection并触发connection事件,我们省略掉几个调用链,发现最终其实调用的是setupListenHandle方法,其代码如下:
function setupListenHandle(address, port, addressType, backlog, fd) {
  debug('setupListenHandle', address, port, addressType, backlog, fd);

  // If there is not yet a handle, we need to create one and bind.
  // In the case of a server sent via IPC, we don't need to do this.
  if (this._handle) {
    debug('setupListenHandle: have a handle already');
  } else {
    debug('setupListenHandle: create a handle');

    var rval = null;

    // Try to bind to the unspecified IPv6 address, see if IPv6 is available
    if (!address && typeof fd !== 'number') {
      rval = createServerHandle('::', port, 6, fd);

      if (typeof rval === 'number') {
        rval = null;
        address = '0.0.0.0';
        addressType = 4;
      } else {
        address = '::';
        addressType = 6;
      }
    }

    if (rval === null)
      rval = createServerHandle(address, port, addressType, fd);

    if (typeof rval === 'number') {
      var error = exceptionWithHostPort(rval, 'listen', address, port);
      process.nextTick(emitErrorNT, this, error);
      return;
    }
    this._handle = rval;
  }

  this[async_id_symbol] = getNewAsyncId(this._handle);
  this._handle.onconnection = onconnection;
  this._handle.owner = this;

   // Use a backlog of 512 entries. We pass 511 to the listen() call because
  // the kernel does: backlogsize = roundup_pow_of_two(backlogsize + 1);
  // which will thus give us a backlog of 512 entries.
  var err = this._handle.listen(backlog || 511);
}
这里我们截取了关键代码,其中主要做了两件事(以TCP为例):
1.createServerHandle,创建了一个server handle(TCP_wrap对象)
2.给server handle的onconnection属性赋值,指为onconnection方法
3.调用上述创建的server handle的listen方法进行监听
在createServerHandle方法中实例化了TCP对象,TCP定义在./src/tcp_wrap.cc中,我们直接进去看下:
TCPWrap::TCPWrap(Environment* env, Local<Object> object, ProviderType provider)
    : ConnectionWrap(env, object, provider) {
  int r = uv_tcp_init(env->event_loop(), &handle_);
  CHECK_EQ(r, 0);  // How do we proxy this error up to javascript?
                   // Suggestion: uv_tcp_init() returns void.
}
这里调用了uv_tcp_init方法这里不仔细介绍了,其实就是创建了socket并bind。
server handle的listen方法,也就是上述创建的TCP对象的listen方法,其代码如下:
void TCPWrap::Listen(const FunctionCallbackInfo<Value>& args) {
  TCPWrap* wrap;
  ASSIGN_OR_RETURN_UNWRAP(&wrap,
                          args.Holder(),
                          args.GetReturnValue().Set(UV_EBADF));
  int backlog = args[0]->Int32Value();
  int err = uv_listen(reinterpret_cast<uv_stream_t*>(&wrap->handle_),
                      backlog,
                      OnConnection);
  args.GetReturnValue().Set(err);
}
最终调用了uv_listen进行监听,uv_listen其实见识调用了uv__io_start,是的i/o在event loop的poll阶段进行处理。
当接收到连接后,调用TCP对象的onconnection属性对应的方法,也就是net.js中的onconnection方法,代码如下:
function onconnection(err, clientHandle) {
  var handle = this;
  var self = handle.owner;

  debug('onconnection');

  if (err) {
    self.emit('error', errnoException(err, 'accept'));
    return;
  }

  if (self.maxConnections && self._connections >= self.maxConnections) {
    clientHandle.close();
    return;
  }

  var socket = new Socket({
    handle: clientHandle,
    allowHalfOpen: self.allowHalfOpen,
    pauseOnCreate: self.pauseOnConnect,
    readable: true,
    writable: true
  });

  self._connections++;
  socket.server = self;
  socket._server = self;

  DTRACE_NET_SERVER_CONNECTION(socket);
  COUNTER_NET_SERVER_CONNECTION(socket);
  self.emit('connection', socket);
}
上述代码其实就是触发了connection事件。
net.createConnection
net.createConnection用于创建 net.Socket 的工厂函数,立即使用 socket.connect() 初始化链接,然后返回启动连接的 net.Socket。
我们直奔./lib/net.js中net.createConnection的代码,其实是connect方法:
function connect(...args) {
  var normalized = normalizeArgs(args);
  var options = normalized[0];
  debug('createConnection', normalized);
  var socket = new Socket(options);

  if (options.timeout) {
    socket.setTimeout(options.timeout);
  }

  return Socket.prototype.connect.call(socket, normalized);
}
这里实例化了一个Socket,并调用了原型connect方法。
我们接下来看一下Socket的构造函数和connect方法:
function Socket(options) {
if (!(this instanceof Socket)) return new Socket(options);
this.connecting = false;
// Problem with this is that users can supply their own handle, that may not
// have _handle.getAsyncId(). In this case an[async_id_symbol] should
// probably be supplied by async_hooks.
this[async_id_symbol] = -1;
this._hadError = false;
this._handle = null;
this._parent = null;
this._host = null;
this[kLastWriteQueueSize] = 0;
this[kTimeout] = null;
if (typeof options === 'number')
options = { fd: options }; // Legacy interface.
else
options = util._extend({}, options);
options.readable = options.readable || false;
options.writable = options.writable || false;
const allowHalfOpen = options.allowHalfOpen;
// Prevent the "no-half-open enforcer" from being inherited from `Duplex`.
options.allowHalfOpen = true;
// For backwards compat do not emit close on destroy.
options.emitClose = false;
stream.Duplex.call(this, options);
// Default to *not* allowing half open sockets.
this.allowHalfOpen = Boolean(allowHalfOpen);
if (options.handle) {
this._handle = options.handle; // private
this[async_id_symbol] = getNewAsyncId(this._handle);
} else if (options.fd !== undefined) {
const fd = options.fd;
this._handle = createHandle(fd, false);
this._handle.open(fd);
this[async_id_symbol] = this._handle.getAsyncId();
// options.fd can be string (since it is user-defined),
// so changing this to === would be semver-major
// See: https://github.com/nodejs/node/pull/11513
// eslint-disable-next-line eqeqeq
if ((fd == 1 || fd == 2) &&
(this._handle instanceof Pipe) &&
process.platform === 'win32') {
// Make stdout and stderr blocking on Windows
var err = this._handle.setBlocking(true);
if (err)
throw errnoException(err, 'setBlocking');
this._writev = null;
this._write = makeSyncWrite(fd);
// makeSyncWrite adjusts this value like the original handle would, so
// we need to let it do that by turning it into a writable, own property.
Object.defineProperty(this._handle, 'bytesWritten', {
value: 0, writable: true
});
}
}
// shut down the socket when we're finished with it.
this.on('end', onReadableStreamEnd);
initSocketHandle(this);
this._pendingData = null;
this._pendingEncoding = '';
// handle strings directly
this._writableState.decodeStrings = false;
// if we have a handle, then start the flow of data into the
// buffer. if not, then this will happen when we connect
if (this._handle && options.readable !== false) {
if (options.pauseOnCreate) {
// stop the handle from reading and pause the stream
this._handle.reading = false;
this._handle.readStop();
this.readableFlowing = false;
} else if (!options.manualStart) {
this.read(0);
}
}
// Reserve properties
this.server = null;
this._server = null;
// Used after `.destroy()`
this[kBytesRead] = 0;
this[kBytesWritten] = 0;
}
util.inherits(Socket, stream.Duplex);
这里我们看到Socket寄生组合继承了stream.Duplex,同时给_handle属性赋值为TCP实例(createHandle上述介绍过,创建并返回TCP实例),最后initSocketHandle初始化了TCP实例。
看完了Socket的构造函数,我们再来看connect方法,connect方法最终调用的是internalConnect方法,代码如下:
function internalConnect(
self, address, port, addressType, localAddress, localPort) {
// TODO return promise from Socket.prototype.connect which
// wraps _connectReq.
// ...
if (addressType === 6 || addressType === 4) {
const req = new TCPConnectWrap();
req.oncomplete = afterConnect;
req.address = address;
req.port = port;
req.localAddress = localAddress;
req.localPort = localPort;
if (addressType === 4)
err = self._handle.connect(req, address, port);
else
err = self._handle.connect6(req, address, port);
} else {
const req = new PipeConnectWrap();
req.address = address;
req.oncomplete = afterConnect;
err = self._handle.connect(req, address, afterConnect);
}
// ...
}
这里我们看到其调用了self._handle.connect(),也就是TCP对象的connect方法(TCPWrap::Connect), 我们到tcp_wrap.cc中看一下:
void TCPWrap::Connect(const FunctionCallbackInfo<Value>& args) {
Environment* env = Environment::GetCurrent(args);
// ...
if (err == 0) {
AsyncHooks::DefaultTriggerAsyncIdScope trigger_scope(wrap);
ConnectWrap* req_wrap =
new ConnectWrap(env, req_wrap_obj, AsyncWrap::PROVIDER_TCPCONNECTWRAP);
err = uv_tcp_connect(req_wrap->req(),
&wrap->handle_,
reinterpret_cast<const sockaddr*>(&addr),
AfterConnect);
req_wrap->Dispatched();
if (err)
delete req_wrap;
}
args.GetReturnValue().Set(err);
}
这里主要做了两件事:
1.实例化ConnectWrap类
2.uv_tcp_connect连接,AfterConnect作为监听的回调
这里简单看下uv_tcp_connect,uv_tcp_connect是libuv中的方法,其最终调用的是uv__tcp_connect方法,代码如下:
int uv__tcp_connect(uv_connect_t* req,
uv_tcp_t* handle,
const struct sockaddr* addr,
unsigned int addrlen,
uv_connect_cb cb) {
int err;
int r;
assert(handle->type == UV_TCP);
if (handle->connect_req != NULL)
return UV_EALREADY; /* FIXME(bnoordhuis) UV_EINVAL or maybe UV_EBUSY. */
err = maybe_new_socket(handle,
addr->sa_family,
UV_STREAM_READABLE | UV_STREAM_WRITABLE);
if (err)
return err;
handle->delayed_error = 0;
do {
errno = 0;
r = connect(uv__stream_fd(handle), addr, addrlen);
} while (r == -1 && errno == EINTR);
/* We not only check the return value, but also check the errno != 0.
* Because in rare cases connect() will return -1 but the errno
* is 0 (for example, on Android 4.3, OnePlus phone A0001_12_150227)
* and actually the tcp three-way handshake is completed.
*/
if (r == -1 && errno != 0) {
if (errno == EINPROGRESS)
; /* not an error */
else if (errno == ECONNREFUSED)
/* If we get a ECONNREFUSED wait until the next tick to report the
* error. Solaris wants to report immediately--other unixes want to
* wait.
*/
handle->delayed_error = UV__ERR(errno);
else
return UV__ERR(errno);
}
uv__req_init(handle->loop, req, UV_CONNECT);
req->cb = cb;
req->handle = (uv_stream_t*) handle;
QUEUE_INIT(&req->queue);
handle->connect_req = req;
uv__io_start(handle->loop, &handle->io_watcher, POLLOUT);
if (handle->delayed_error)
uv__io_feed(handle->loop, &handle->io_watcher);
return 0;
}
这里主要做了两件事:
1.connect方法建立连接
2.uv__io_start,&handle->io_watcher信息加入loop->watcher_queue和loop->watchers[w->fd]中,poll阶段监听
AfterConnect中做了什么呢?也就是连接建立之后做了什么?我们一起看下AfterConnect的代码:
template <typename WrapType, typename UVType>
void ConnectionWrap<WrapType, UVType>::AfterConnect(uv_connect_t* req,
int status) {
// ...
req_wrap->MakeCallback(env->oncomplete_string(), arraysize(argv), argv);
delete req_wrap;
}
这里主要执行了req_wrap的oncomplete属性对用的函数,最终落在了net.js中的afterConnect方法,代码如下:
function afterConnect(status, handle, req, readable, writable) {
var self = handle.owner;
// callback may come after call to destroy
if (self.destroyed) {
return;
}
// Update handle if it was wrapped
// TODO(indutny): assert that the handle is actually an ancestor of old one
handle = self._handle;
debug('afterConnect');
assert(self.connecting);
self.connecting = false;
self._sockname = null;
if (status === 0) {
self.readable = readable;
self.writable = writable;
self._unrefTimer();
self.emit('connect');
self.emit('ready');
// start the first read, or get an immediate EOF.
// this doesn't actually consume any bytes, because len=0.
if (readable && !self.isPaused())
self.read(0);
} else {
self.connecting = false;
var details;
if (req.localAddress && req.localPort) {
details = req.localAddress + ':' + req.localPort;
}
var ex = exceptionWithHostPort(status,
'connect',
req.address,
req.port,
details);
if (details) {
ex.localAddress = req.localAddress;
ex.localPort = req.localPort;
}
self.destroy(ex);
}
}
其中emit了connect和ready事件。
'data' 事件
当接收到数据的时候会触发'data'事件。
当Stream中有数据时,调用链如下:
StreamBase::ReadStartJS -> LibuvStreamWrap::ReadStart -> LibuvStreamWrap::OnUvRead -> StreamResource::EmitRead -> EmitToJSStreamListener::OnStreamRead -> CallJSOnreadMethod -> onRead(net.js)
其中StreamBase::ReadStartJS在TCPWrap::Initialize方法中通过LibuvStreamWrap::AddMethods(env, t, StreamBase::kFlagHasWritev);将其放在了JS对象的readStart属性上。
我们下面直接来看net.js中的onRead方法,其代码如下:
// This function is called whenever the handle gets a
// buffer, or when there's an error reading.
function onread(nread, buffer) {
var handle = this;
var self = handle.owner;
assert(handle === self._handle, 'handle != self._handle');
self._unrefTimer();
debug('onread', nread);
if (nread > 0) {
debug('got data');
// read success.
// In theory (and in practice) calling readStop right now
// will prevent this from being called again until _read() gets
// called again.
// Optimization: emit the original buffer with end points
var ret = self.push(buffer);
if (handle.reading && !ret) {
handle.reading = false;
debug('readStop');
var err = handle.readStop();
if (err)
self.destroy(errnoException(err, 'read'));
}
return;
}
// if we didn't get any bytes, that doesn't necessarily mean EOF.
// wait for the next one.
if (nread === 0) {
debug('not any data, keep waiting');
return;
}
// Error, possibly EOF.
if (nread !== UV_EOF) {
return self.destroy(errnoException(nread, 'read'));
}
debug('EOF');
// push a null to signal the end of data.
// Do it before `maybeDestroy` for correct order of events:
// `end` -> `close`
self.push(null);
self.read(0);
}
这里的self.push(buffer),实际调用的是Readable.prototype.push,这是因为net.js中的TCP类继承自stream.Duplex,而stream.Duplex又继承自Readable。Readable.prototype.push代码如下:
// Manually shove something into the read() buffer.
// This returns true if the highWaterMark has not been hit yet,
// similar to how Writable.write() returns true if you should
// write() some more.
Readable.prototype.push = function(chunk, encoding) {
var state = this._readableState;
var skipChunkCheck;
if (!state.objectMode) {
if (typeof chunk === 'string') {
encoding = encoding || state.defaultEncoding;
if (encoding !== state.encoding) {
chunk = Buffer.from(chunk, encoding);
encoding = '';
}
skipChunkCheck = true;
}
} else {
skipChunkCheck = true;
}
return readableAddChunk(this, chunk, encoding, false, skipChunkCheck);
};
这里主要调用了readableAddChunk方法,代码如下:
function readableAddChunk(stream, chunk, encoding, addToFront, skipChunkCheck) {
debug('readableAddChunk', chunk);
var state = stream._readableState;
if (chunk === null) {
state.reading = false;
onEofChunk(stream, state);
} else {
var er;
if (!skipChunkCheck)
er = chunkInvalid(state, chunk);
if (er) {
stream.emit('error', er);
} else if (state.objectMode || chunk && chunk.length > 0) {
if (typeof chunk !== 'string' &&
!state.objectMode &&
Object.getPrototypeOf(chunk) !== Buffer.prototype) {
chunk = Stream._uint8ArrayToBuffer(chunk);
}
if (addToFront) {
if (state.endEmitted)
stream.emit('error', new ERR_STREAM_UNSHIFT_AFTER_END_EVENT());
else
addChunk(stream, state, chunk, true);
} else if (state.ended) {
stream.emit('error', new ERR_STREAM_PUSH_AFTER_EOF());
} else if (state.destroyed) {
return false;
} else {
state.reading = false;
if (state.decoder && !encoding) {
chunk = state.decoder.write(chunk);
if (state.objectMode || chunk.length !== 0)
addChunk(stream, state, chunk, false);
else
maybeReadMore(stream, state);
} else {
addChunk(stream, state, chunk, false);
}
}
} else if (!addToFront) {
state.reading = false;
maybeReadMore(stream, state);
}
}
return needMoreData(state);
}
function addChunk(stream, state, chunk, addToFront) {
if (state.flowing && state.length === 0 && !state.sync) {
state.awaitDrain = 0;
stream.emit('data', chunk);
} else {
// update the buffer info.
state.length += state.objectMode ? 1 : chunk.length;
if (addToFront)
state.buffer.unshift(chunk);
else
state.buffer.push(chunk);
if (state.needReadable)
emitReadable(stream);
}
maybeReadMore(stream, state);
}
这里readableAddChunk调用了addChunk方法,addChunk中调用stream.emit('data', chunk);触发了'data'事件。
总结
本文主要带着大家简要过了一遍net相关的实现,大家也许会发现,有了前面章节的铺垫,再看这些具体模块实现时就会轻松很多。
libuv源码-Event Loop
本文将主要介绍libuv的事件循环,包括了事件循环的流程,而我们也知道libuv是使用poll机制来实现网络I/O,通过线程池来实现文件I/O,当然线程间也是通过poll机制来实现通信的,后面就将介绍线程池与事件循环是如何结合的。
event loop流程
事件循环的流程大致如下图所示:

代码如下所示:
int uv_run(uv_loop_t* loop, uv_run_mode mode) {
int timeout;
int r;
int ran_pending;
// 有活跃的handle或req
r = uv__loop_alive(loop);
if (!r)
uv__update_time(loop);
while (r != 0 && loop->stop_flag == 0) {
uv__update_time(loop);
uv__run_timers(loop);
// run pending queue
ran_pending = uv__run_pending(loop);
// UV_LOOP_WATCHER_DEFINE,执行队列
uv__run_idle(loop);
uv__run_prepare(loop);
timeout = 0;
if ((mode == UV_RUN_ONCE && !ran_pending) || mode == UV_RUN_DEFAULT)
// 检查下还有没有active handle,返回下次timer发生剩余时间
timeout = uv_backend_timeout(loop);
uv__io_poll(loop, timeout);
uv__run_check(loop);
uv__run_closing_handles(loop);
if (mode == UV_RUN_ONCE) {
/* UV_RUN_ONCE implies forward progress: at least one callback must have
* been invoked when it returns. uv__io_poll() can return without doing
* I/O (meaning: no callbacks) when its timeout expires - which means we
* have pending timers that satisfy the forward progress constraint.
*
* UV_RUN_NOWAIT makes no guarantees about progress so it's omitted from
* the check.
*/
uv__update_time(loop);
uv__run_timers(loop);
}
r = uv__loop_alive(loop);
if (mode == UV_RUN_ONCE || mode == UV_RUN_NOWAIT)
break;
}
/* The if statement lets gcc compile it to a conditional store. Avoids
* dirtying a cache line.
*/
if (loop->stop_flag != 0)
loop->stop_flag = 0;
return r;
}
时间循环可以分为以下几个步骤:
1.缓存当前时间
2.执行定时器队列(最小堆)中的callback
3.执行上一轮循环pending的I/O callback
4.执行idle队列中的callback
5.执行prepare队列中的callback
6.计算离下一个timer到来的时间间隔 poll timeout
7.阻塞处理poll I/O, 超时时间为上一步计算的timeout
8.执行check队列中的callback
9.执行close队列中的callback
时间循环结束的条件有如下几种:
1.loop不是alive,也就是说没有活跃的handle或req
2.mode模式为UV_RUN_ONCE或UV_RUN_NOWAIT
下面挑选重要的几点进行讲解:
判断loop是不是alive
决定loop是否是alive取决于是否有活跃的handle或者req,或者被直接stop掉,代码如下:
static int uv__loop_alive(const uv_loop_t* loop) {
return uv__has_active_handles(loop) ||
uv__has_active_reqs(loop) ||
loop->closing_handles != NULL;
}
uv__run_timers
uv__run_timers代码如下:
void uv__run_timers(uv_loop_t* loop) {
struct heap_node* heap_node;
uv_timer_t* handle;
for (;;) {
// 从timer堆中找出节点
heap_node = heap_min((struct heap*) &loop->timer_heap);
if (heap_node == NULL)
break;
// 通过heap_node找到结构体起始为止,从而找到handle
handle = container_of(heap_node, uv_timer_t, heap_node);
// 还没到时间
if (handle->timeout > loop->time)
break;
// uv__active_handle_rm
uv_timer_stop(handle);
uv_timer_again(handle);
handle->timer_cb(handle);
}
}
我们注意到,存储timer节点的数据结构是一个以handle->timeout为基准的最小堆,函数循环过程中主要做了如下几件事:
1.从最小堆中取出当前timeout最小的节点,也就是说最先执行的阶段
2.如果最小的节点还没到时间去执行,break退出
3.如果到了该执行的时间,调用heap_remove从堆中删除节点,调用uv__active_handle_rm将loop->active_handles减1
uv__run_pending
uv__run_pending主要是将loop->pending_queue中的callback取出执行,代码如下:
static int uv__run_pending(uv_loop_t* loop) {
QUEUE* q;
QUEUE pq;
uv__io_t* w;
if (QUEUE_EMPTY(&loop->pending_queue))
return 0;
QUEUE_MOVE(&loop->pending_queue, &pq);
while (!QUEUE_EMPTY(&pq)) {
q = QUEUE_HEAD(&pq);
QUEUE_REMOVE(q);
QUEUE_INIT(q);
w = QUEUE_DATA(q, uv__io_t, pending_queue);
w->cb(loop, w, POLLOUT);
}
return 1;
}
后面的uv__run_idle和uv__run_prepare与之类似。
poll I/O
poll I/O是事件循环的重点,它基于IO多路复用的机制,所有网络操作都使用 non-blocking 套接字,并使用各个平台上性能最好的 poll 机制例如 linux 上的 epoll,OSX 的 kqueue 等等;而所有文件I/O基于线程池实现,但线程间通信同样基于相应的poll机制。
下面的uv__io_poll是基于linux伤的epoll来实现,其他平台的实现也类似,具体代码如下:
void uv__io_poll(uv_loop_t* loop, int timeout) {
/* A bug in kernels < 2.6.37 makes timeouts larger than ~30 minutes
* effectively infinite on 32 bits architectures. To avoid blocking
* indefinitely, we cap the timeout and poll again if necessary.
*
* Note that "30 minutes" is a simplification because it depends on
* the value of CONFIG_HZ. The magic constant assumes CONFIG_HZ=1200,
* that being the largest value I have seen in the wild (and only once.)
*/
static const int max_safe_timeout = 1789569;
static int no_epoll_pwait;
static int no_epoll_wait;
struct uv__epoll_event events[1024];
struct uv__epoll_event* pe;
struct uv__epoll_event e;
int real_timeout;
QUEUE* q;
uv__io_t* w;
sigset_t sigset;
uint64_t sigmask;
uint64_t base;
int have_signals;
int nevents;
int count;
int nfds;
int fd;
int op;
int i;
// loop->watchers[w->fd] = w in uv__io_start func
if (loop->nfds == 0) {
assert(QUEUE_EMPTY(&loop->watcher_queue));
return;
}
// 取出观察者队列中的fd, 调用uv__epoll_ctl监听
while (!QUEUE_EMPTY(&loop->watcher_queue)) {
q = QUEUE_HEAD(&loop->watcher_queue);
QUEUE_REMOVE(q);
QUEUE_INIT(q);
// QUEUE_DATA类似container
w = QUEUE_DATA(q, uv__io_t, watcher_queue);
assert(w->pevents != 0);
assert(w->fd >= 0);
assert(w->fd < (int) loop->nwatchers);
e.events = w->pevents;
e.data = w->fd;
if (w->events == 0)
op = UV__EPOLL_CTL_ADD;
else
op = UV__EPOLL_CTL_MOD;
/* XXX Future optimization: do EPOLL_CTL_MOD lazily if we stop watching
* events, skip the syscall and squelch the events after epoll_wait().
*/
// fd = uv__epoll_create1(UV__EPOLL_CLOEXEC); loop->backend_fd = fd;
if (uv__epoll_ctl(loop->backend_fd, op, w->fd, &e)) {
if (errno != EEXIST)
abort();
assert(op == UV__EPOLL_CTL_ADD);
/* We've reactivated a file descriptor that's been watched before. */
if (uv__epoll_ctl(loop->backend_fd, UV__EPOLL_CTL_MOD, w->fd, &e))
abort();
}
w->events = w->pevents;
}
sigmask = 0;
if (loop->flags & UV_LOOP_BLOCK_SIGPROF) {
sigemptyset(&sigset);
sigaddset(&sigset, SIGPROF);
sigmask |= 1 << (SIGPROF - 1);
}
assert(timeout >= -1);
base = loop->time;
count = 48; /* Benchmarks suggest this gives the best throughput. */
real_timeout = timeout;
for (;;) {
/* See the comment for max_safe_timeout for an explanation of why
* this is necessary. Executive summary: kernel bug workaround.
*/
if (sizeof(int32_t) == sizeof(long) && timeout >= max_safe_timeout)
timeout = max_safe_timeout;
if (sigmask != 0 && no_epoll_pwait != 0)
if (pthread_sigmask(SIG_BLOCK, &sigset, NULL))
abort();
if (no_epoll_wait != 0 || (sigmask != 0 && no_epoll_pwait == 0)) {
// 返回需要处理的事件数目
nfds = uv__epoll_pwait(loop->backend_fd,
events,
ARRAY_SIZE(events),
timeout,
sigmask);
if (nfds == -1 && errno == ENOSYS)
no_epoll_pwait = 1;
} else {
nfds = uv__epoll_wait(loop->backend_fd,
events,
ARRAY_SIZE(events),
timeout);
if (nfds == -1 && errno == ENOSYS)
no_epoll_wait = 1;
}
if (sigmask != 0 && no_epoll_pwait != 0)
if (pthread_sigmask(SIG_UNBLOCK, &sigset, NULL))
abort();
/* Update loop->time unconditionally. It's tempting to skip the update when
* timeout == 0 (i.e. non-blocking poll) but there is no guarantee that the
* operating system didn't reschedule our process while in the syscall.
*/
SAVE_ERRNO(uv__update_time(loop));
if (nfds == 0) {
assert(timeout != -1);
if (timeout == 0)
return;
/* We may have been inside the system call for longer than |timeout|
* milliseconds so we need to update the timestamp to avoid drift.
*/
// 没有需要处理的事件
goto update_timeout;
}
if (nfds == -1) {
if (errno == ENOSYS) {
/* epoll_wait() or epoll_pwait() failed, try the other system call. */
assert(no_epoll_wait == 0 || no_epoll_pwait == 0);
continue;
}
if (errno != EINTR)
abort();
if (timeout == -1)
continue;
if (timeout == 0)
return;
/* Interrupted by a signal. Update timeout and poll again. */
goto update_timeout;
}
have_signals = 0;
nevents = 0;
assert(loop->watchers != NULL);
loop->watchers[loop->nwatchers] = (void*) events;
loop->watchers[loop->nwatchers + 1] = (void*) (uintptr_t) nfds;
for (i = 0; i < nfds; i++) {
pe = events + i;
// (*pe).data
fd = pe->data;
/* Skip invalidated events, see uv__platform_invalidate_fd */
if (fd == -1)
continue;
assert(fd >= 0);
assert((unsigned) fd < loop->nwatchers);
w = loop->watchers[fd];
if (w == NULL) {
/* File descriptor that we've stopped watching, disarm it.
*
* Ignore all errors because we may be racing with another thread
* when the file descriptor is closed.
*/
// 从红黑树中删除fd
uv__epoll_ctl(loop->backend_fd, UV__EPOLL_CTL_DEL, fd, pe);
continue;
}
/* Give users only events they're interested in. Prevents spurious
* callbacks when previous callback invocation in this loop has stopped
* the current watcher. Also, filters out events that users has not
* requested us to watch.
*/
pe->events &= w->pevents | POLLERR | POLLHUP;
/* Work around an epoll quirk where it sometimes reports just the
* EPOLLERR or EPOLLHUP event. In order to force the event loop to
* move forward, we merge in the read/write events that the watcher
* is interested in; uv__read() and uv__write() will then deal with
* the error or hangup in the usual fashion.
*
* Note to self: happens when epoll reports EPOLLIN|EPOLLHUP, the user
* reads the available data, calls uv_read_stop(), then sometime later
* calls uv_read_start() again. By then, libuv has forgotten about the
* hangup and the kernel won't report EPOLLIN again because there's
* nothing left to read. If anything, libuv is to blame here. The
* current hack is just a quick bandaid; to properly fix it, libuv
* needs to remember the error/hangup event. We should get that for
* free when we switch over to edge-triggered I/O.
*/
if (pe->events == POLLERR || pe->events == POLLHUP)
pe->events |= w->pevents & (POLLIN | POLLOUT | UV__POLLPRI);
if (pe->events != 0) {
/* Run signal watchers last. This also affects child process watchers
* because those are implemented in terms of signal watchers.
*/
if (w == &loop->signal_io_watcher)
have_signals = 1;
else
// uv__async_io, uv__async_start中的uv__io_init注册
w->cb(loop, w, pe->events);
nevents++;
}
}
if (have_signals != 0)
loop->signal_io_watcher.cb(loop, &loop->signal_io_watcher, POLLIN);
loop->watchers[loop->nwatchers] = NULL;
loop->watchers[loop->nwatchers + 1] = NULL;
if (have_signals != 0)
return; /* Event loop should cycle now so don't poll again. */
if (nevents != 0) {
if (nfds == ARRAY_SIZE(events) && --count != 0) {
/* Poll for more events but don't block this time. */
timeout = 0;
continue;
}
return;
}
if (timeout == 0)
return;
if (timeout == -1)
continue;
update_timeout:
assert(timeout > 0);
real_timeout -= (loop->time - base);
if (real_timeout <= 0)
return;
timeout = real_timeout;
}
}
这里主要做了如下几件事:
1.取出loop->watcher_queue中所有对象的uv__io_t handle(w),调用调用uv__epoll_ctl来监听w.fd
2.循环阻塞调用uv__epoll_pwait,其返回当时需要处理的事件数目
3.如果当前没有要处理的事件,检查是否超时
4.如果有需要处理的事件,那么从loop->watchers根据相应的fd取出uv__io_t handle w,调用w.cb()执行其对应的回调
这里需要注意的有以下几点:
loop->backend_fd
uv__epoll_ctl(loop->backend_fd, op, w->fd, &e),了解epoll的同学都会知道这里loop->backend_fd在内核高速缓冲区,用来表示当前这个epoll在所在红黑树的起点。
其在uv__platform_loop_init中被赋值,代码如下:
fd = uv__epoll_create1(UV__EPOLL_CLOEXEC);
loop->watchers
epoll通过调用uv__epoll_pwait来获取需要处理事件的数据,参数events用来从内核得到事件的集合,这也是epoll的优势之一(共享内存的方式)。我们从events中取出相应的fd,然后根据fd从loop->watchers中取出handle并执行起callback,那么loop->watchers是如何初始化的呢?
void uv__io_start(uv_loop_t* loop, uv__io_t* w, unsigned int events) {
assert(0 == (events & ~(POLLIN | POLLOUT | UV__POLLRDHUP | UV__POLLPRI)));
assert(0 != events);
assert(w->fd >= 0);
assert(w->fd < INT_MAX);
w->pevents |= events;
maybe_resize(loop, w->fd + 1);
#if !defined(__sun)
/* The event ports backend needs to rearm all file descriptors on each and
* every tick of the event loop but the other backends allow us to
* short-circuit here if the event mask is unchanged.
*/
if (w->events == w->pevents)
return;
#endif
if (QUEUE_EMPTY(&w->watcher_queue))
QUEUE_INSERT_TAIL(&loop->watcher_queue, &w->watcher_queue);
if (loop->watchers[w->fd] == NULL) {
loop->watchers[w->fd] = w;
loop->nfds++;
}
}
其在uv__io_start中被初始化,loop->watchers是一个数组类型,其index用来表示uv__io_t handle中的fd,这样我们根据fd可以轻松的找出其uv__io_t handle。
uv__io_start在多处被用到,包括uv__async_start中调用uv__io_start来监听线程间通信用到的fd,还有在tcp、udp模块中都有用其监听fd。
我们可以看出,IO事件都会调用 uv__io_start 函数,该函数将需要监听的事件保存到 event loop的watcher_queue队列中
超时
我们发现uv__io_poll其实是阻塞的,为了解决阻塞的问题,在调用的时候加入了timeout参数,timeout参数表示距离下一个timer需要执行(超过了timer的timeout)的时间,当没有要处理的事件时,会根据进入uv__io_poll时的事件来计算是否需要break。update_timeout的代码如下:
assert(timeout > 0);
real_timeout -= (loop->time - base);
if (real_timeout <= 0)
return;
timeout = real_timeout;
线程池实现文件异步I/O
Libuv的文件I/O是基于线程池来实现的,大致原理是主线程提交任务到任务队列,发送信号给线程池,线程池中的worker收到信号,从任务队列中取出任务并执行,工作线程执行完任务后,将任务对应uv_async_t handle的pending状态置0,通过fd通知主线程(该 fd 同样由epoll管理),主线程监听该fd,当有epoll事件时,执行非pending的uv_async_t handle对应的回调,然后根据层层回调,最终会调用到用户注册的回调函数
说到线程池,几乎所有线程池的实现都遵循如下模型,也就是任务队列+线程池的模型,libuv的实现也是基于此。

libuv中任务队列基于一个双向链表,其中的任务的struct声明如下:
struct uv__work {
void (*work)(struct uv__work *w);
void (*done)(struct uv__work *w, int status);
struct uv_loop_s* loop;
void* wq[2];
};
我们可以看到,其中work代表线程池实际要做的工作,done代表任务执行后的callback,wq数组为两个指针,分别指向任务队列中的前后节点。
下面我们首先看一下主线程如何提交任务到任务队列:
首先在fs.c中有这样一段逻辑,其中所有的文件操作都会调用POST,代码如下:
#define POST \
do { \
if (cb != NULL) { \
uv__work_submit(loop, &req->work_req, uv__fs_work, uv__fs_done); \
return 0; \
} \
else { \
// 回调为 null 是同步调用 \
uv__fs_work(&req->work_req); \
return req->result; \
} \
} \
while (0)
// 操作完成后的回调函数
static void uv__fs_done(struct uv__work* w, int status) {
uv_fs_t* req;
req = container_of(w, uv_fs_t, work_req);
uv__req_unregister(req->loop, req);
if (status == -ECANCELED) {
assert(req->result == 0);
req->result = -ECANCELED;
}
req->cb(req); // 调用用户注册的回调
}
POST宏中调用了uv__work_submit将任务提交到队列,下面我们看下uv__work_submit的代码:
void uv__work_submit(uv_loop_t* loop,
struct uv__work* w,
void (*work)(struct uv__work* w),
void (*done)(struct uv__work* w, int status)) {
uv_once(&once, init_once);
w->loop = loop;
w->work = work;
w->done = done;
post(&w->wq);
}
这里主要做了两件事:
1.初始化线程池,这里利用了&once,来保证只执行一次,在这里我们也可以看出,libuv中的线程池是在第一次使用时被初始化
2.post提交
uv__work_submit这块涉及的逻辑如下:
static void init_once(void) {
unsigned int i;
const char* val;
uv_sem_t sem;
// UV_THREADPOOL_SIZE决定线程池中线程的数量
nthreads = ARRAY_SIZE(default_threads);
val = getenv("UV_THREADPOOL_SIZE");
if (val != NULL)
nthreads = atoi(val);
if (nthreads == 0)
nthreads = 1;
if (nthreads > MAX_THREADPOOL_SIZE)
nthreads = MAX_THREADPOOL_SIZE;
threads = default_threads;
if (nthreads > ARRAY_SIZE(default_threads)) {
threads = uv__malloc(nthreads * sizeof(threads[0]));
if (threads == NULL) {
nthreads = ARRAY_SIZE(default_threads);
threads = default_threads;
}
}
if (uv_cond_init(&cond))
abort();
if (uv_mutex_init(&mutex))
abort();
QUEUE_INIT(&wq);
if (uv_sem_init(&sem, 0))
abort();
for (i = 0; i < nthreads; i++)
if (uv_thread_create(threads + i, worker, &sem))
abort();
for (i = 0; i < nthreads; i++)
uv_sem_wait(&sem);
uv_sem_destroy(&sem);
}
/* To avoid deadlock with uv_cancel() it's crucial that the worker
* never holds the global mutex and the loop-local mutex at the same time.
*/
static void worker(void* arg) {
struct uv__work* w;
QUEUE* q;
uv_sem_post((uv_sem_t*) arg);
arg = NULL;
for (;;) {
uv_mutex_lock(&mutex);
while (QUEUE_EMPTY(&wq)) {
idle_threads += 1;
uv_cond_wait(&cond, &mutex);
idle_threads -= 1;
}
q = QUEUE_HEAD(&wq);
if (q == &exit_message)
uv_cond_signal(&cond);
else {
QUEUE_REMOVE(q);
QUEUE_INIT(q); /* Signal uv_cancel() that the work req is
executing. */
}
uv_mutex_unlock(&mutex);
if (q == &exit_message)
break;
w = QUEUE_DATA(q, struct uv__work, wq);
w->work(w);
uv_mutex_lock(&w->loop->wq_mutex);
w->work = NULL; /* Signal uv_cancel() that the work req is done
executing. */
QUEUE_INSERT_TAIL(&w->loop->wq, &w->wq);
uv_async_send(&w->loop->wq_async);
uv_mutex_unlock(&w->loop->wq_mutex);
}
}
static void post(QUEUE* q) {
uv_mutex_lock(&mutex);
QUEUE_INSERT_TAIL(&wq, q);
if (idle_threads > 0)
uv_cond_signal(&cond);
uv_mutex_unlock(&mutex);
}
这里需要关注的有以下几点:
1.init_once关键代码其实就是获取线程池中线程的数量并创建对应数量的线程,每个线程中执行worker函数,
2.线程池中线程数量从UV_THREADPOOL_SIZE环境变量中获取,默认是4
3.在worker中,工作线程等待cond信号,如果有,则取任务队列中的任务来执行,执行后调用uv_async_send通知主线程,后面会详细介绍uv\_async\_send
4.post方法用来将wq插入到任务队列,并发出信号
我们再来看下工作线程执行完任务后是如何通知主线程的,也就是上述的uv_async_send方法:
int uv_async_send(uv_async_t* handle) {
/* Do a cheap read first. */
if (ACCESS_ONCE(int, handle->pending) != 0)
return 0;
if (cmpxchgi(&handle->pending, 0, 1) == 0)
uv__async_send(&handle->loop->async_watcher);
return 0;
}
void uv__async_send(struct uv__async* wa) {
const void* buf;
ssize_t len;
int fd;
int r;
buf = "";
len = 1;
fd = wa->wfd;
#if defined(__linux__)
if (fd == -1) {
static const uint64_t val = 1;
buf = &val;
len = sizeof(val);
fd = wa->io_watcher.fd; /* eventfd */
}
#endif
do
r = write(fd, buf, len);
while (r == -1 && errno == EINTR);
if (r == len)
return;
if (r == -1)
if (errno == EAGAIN || errno == EWOULDBLOCK)
return;
abort();
}
这里主要做了如下几件事:
1.将uv_async_t handle(也就是&w->loop->wq_async)的pending状态码置0,代表执行完毕
2.调用uv__async_send方法,向handle->loop->async_watcher->io_watcher.fd写入一个空字节(主线程epoll会监听到)
当主线程监听到async_watcher->io_watcher.fd的变化后,通过层层回调,最终调用uv__work的done函数,也就是用户注册的回调。这部分我们首先从前向后看下回调的注册:
// async.c
int uv_async_init(uv_loop_t* loop, uv_async_t* handle, uv_async_cb async_cb) {
int err;
err = uv__async_start(loop);
if (err)
return err;
uv__handle_init(loop, (uv_handle_t*)handle, UV_ASYNC);
handle->async_cb = async_cb;
handle->pending = 0;
// 加入到async_handles上
QUEUE_INSERT_TAIL(&loop->async_handles, &handle->queue);
uv__handle_start(handle);
return 0;
}
// async.c
// 将loop->async_io_watcher.fd加入loop->watcher_queue监听
static int uv__async_start(uv_loop_t* loop) {
int pipefd[2];
int err;
if (loop->async_io_watcher.fd != -1)
return 0;
err = uv__async_eventfd();
if (err >= 0) {
pipefd[0] = err;
pipefd[1] = -1;
}
else if (err == UV_ENOSYS) {
err = uv__make_pipe(pipefd, UV__F_NONBLOCK);
#if defined(__linux__)
/* Save a file descriptor by opening one of the pipe descriptors as
* read/write through the procfs. That file descriptor can then
* function as both ends of the pipe.
*/
if (err == 0) {
char buf[32];
int fd;
snprintf(buf, sizeof(buf), "/proc/self/fd/%d", pipefd[0]);
fd = uv__open_cloexec(buf, O_RDWR);
if (fd >= 0) {
uv__close(pipefd[0]);
uv__close(pipefd[1]);
pipefd[0] = fd;
pipefd[1] = fd;
}
}
#endif
}
if (err < 0)
return err;
// 注册 async io 事件的 callback 为 uv__async_io
// loop->async_io_watcher注册fd等
uv__io_init(&loop->async_io_watcher, uv__async_io, pipefd[0]);
// 将该 io_watcher 添加到 loop->watcher_queue, epoll会取出
uv__io_start(loop, &loop->async_io_watcher, POLLIN);
loop->async_wfd = pipefd[1];
return 0;
}
// core.c
void uv__io_init(uv__io_t* w, uv__io_cb cb, int fd) {
assert(cb != NULL);
assert(fd >= -1);
QUEUE_INIT(&w->pending_queue);
QUEUE_INIT(&w->watcher_queue);
w->cb = cb;
w->fd = fd;
w->events = 0;
w->pevents = 0;
#if defined(UV_HAVE_KQUEUE)
w->rcount = 0;
w->wcount = 0;
#endif /* defined(UV_HAVE_KQUEUE) */
}
// core.c
void uv__io_start(uv_loop_t* loop, uv__io_t* w, unsigned int events) {
assert(0 == (events & ~(POLLIN | POLLOUT | UV__POLLRDHUP | UV__POLLPRI)));
assert(0 != events);
assert(w->fd >= 0);
assert(w->fd < INT_MAX);
w->pevents |= events;
maybe_resize(loop, w->fd + 1);
#if !defined(__sun)
/* The event ports backend needs to rearm all file descriptors on each and
* every tick of the event loop but the other backends allow us to
* short-circuit here if the event mask is unchanged.
*/
if (w->events == w->pevents)
return;
#endif
if (QUEUE_EMPTY(&w->watcher_queue))
QUEUE_INSERT_TAIL(&loop->watcher_queue, &w->watcher_queue);
if (loop->watchers[w->fd] == NULL) {
loop->watchers[w->fd] = w;
loop->nfds++;
}
}
这块按照执行顺序做了如下几件事:
1.uv_loop_init中调用uv_async_init初始化loop->async_io_watcher.fd, 同时将loop->async_io_watcher加入到loop->async_handles中
2.uv__async_start调用uv__io_init和uv__io_start
3.uv__io_init注册 async io 事件的 callback 为 uv__async_io,并在loop->async_io_watcher上注册fd
4.uv__io_start将loop->async_io_watcher.fd加入loop->watcher_queue供epoll监听,同时在loop->watchers中通过fd注册loop->async_io_watcher
现在我们来梳理下当主线程接收到事件后,如何层层回调,最终执行uv__work的done即用户提交的回调函数。
在uv__io_poll方法中,通过uv__epoll_pwait监听到时间后,会执行loop->watchers取出uv__io_start中注册的uv__io_t(也就是上面注册的loop->async_io_watcher),然后执行其注册的回调(uv__async_io)。
uv__async_io代码如下:
static void uv__async_io(uv_loop_t* loop, uv__io_t* w, unsigned int events) {
char buf[1024];
ssize_t r;
QUEUE queue;
QUEUE* q;
uv_async_t* h;
assert(w == &loop->async_io_watcher);
// 将在uv__async_send()中向fd中写入的数据取干净
for (;;) {
r = read(w->fd, buf, sizeof(buf));
if (r == sizeof(buf))
continue;
if (r != -1)
break;
if (errno == EAGAIN || errno == EWOULDBLOCK)
break;
if (errno == EINTR)
continue;
abort();
}
// 执行loop->async_handles里的回调函数
QUEUE_MOVE(&loop->async_handles, &queue);
while (!QUEUE_EMPTY(&queue)) {
q = QUEUE_HEAD(&queue);
h = QUEUE_DATA(q, uv_async_t, queue);
QUEUE_REMOVE(q);
QUEUE_INSERT_TAIL(&loop->async_handles, q);
// h->pending == 0
if (cmpxchgi(&h->pending, 1, 0) == 0)
continue;
if (h->async_cb == NULL)
continue;
h->async_cb(h);
}
}
这里主要做了两件事:
1.将在uv__async_send()中向fd中写入的数据取干净
2.执行loop->async_handles中,pending状态码为0的handle的回调函数(async_cb),其async_cb就是我们再uv_loop_init中调用uv_async_init注册的uv__work_done方法,在其中最终调用了用户注册的回调。
总结
由于Node.js异步I/O依赖libuv,libuv的核心又是event loop,本文主要介绍了event loop的流程以及线程池的实现。
Node.js源码-编译
os:macOS 10.13.4,ide:cLion,node版本:v8.2.1
前言
编译node源码主要有三个步骤
$ ./configure
$ make
$ make install
./configue主要用来生成与操作平台相关的编译配置,比如软件装到哪里、什么参数等信息,执行过后在./out目录生成如下文件:

make指令根据Makefile的配置对node源码进行编译(包括预编译、编译、链接)生成可执行文件,感兴趣的可以参考刨根问底之node-gyp
make install根据配置将其安装到系统路径下,我们一般自己看源码调试是用不上的
编译过程详解
./configue
收集命令行参数
# Options should be in alphabetical order but keep --prefix at the top,
# that's arguably the one people will be looking for most.
parser.add_option('--prefix',
action='store',
dest='prefix',
default='/usr/local',
help='select the install prefix [default: %default]')
parser.add_option('--coverage',
action='store_true',
dest='coverage',
help='Build node with code coverage enabled')
parser.add_option('--debug',
action='store_true',
dest='debug',
help='also build debug build')
......
(options, args) = parser.parse_args()
收集到的参数是一个map,如下所示: